1
Technical Specification
Power Input .................…………………………..…...100-240VAC 50/60Hz
Fuse.................……………………………………..….T1A 250V
5x20mm
DMX Output .........................................……………..3 pin female XLR
Stand Alone……………………………………………...5 pin male XLR
MIDI Signal ................................……….….…….......5 din pin standard interface
Audio Input .....................……………….....………….By built-in microphone or line in
IL-2420
Dimensions.....................……………….........……… 483x263x100mm
Weight......... ...................……............ ..................... 5.8 kg
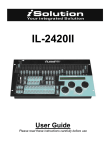
User Guide
Please read these instructions carefully before use
Innovation, Quality, Performance
69-
CONTENTS
EC Declaration of Conformity
We declare that our products (lighting equipments) comply with the following
specification and bears CE mark in accordance with the provision of the
Electromagnetic Compatibility (EMC) Directive 89/336/EEC.
EN55103-1:199601-2; EN55103-2:1996;
EN61000-3-2:2000+A2:2005;
EN61000-3-3:1995+A1:2001+A2:2005.
&
Harmonized Standard
EN 60598-1: 2004
IEC 60598-1:2003+ corrigendum 2004
Part 1:General requirements and test
Following the provisions of the low voltage directive 73/23/EEC and 93/68/EEC
68-
1. Features ................................................................................................................... 3 2. General Instructions ............................................................................................... 4 3. Overview .................................................................................................................. 5 3.1. Front View .................................................................................................... 5 3.2 Rear View ...................................................................................................... 8 4. Operation Guide ..................................................................................................... 8 4.1 Programming Mode ..................................................................................... 8 4.2 Setting a scene ............................................................................................. 9 4.3 Program a Scene with Movement ........................................................... 10 4.4 Program a Scene ....................................................................................... 11 4.5 Copy a Scene ............................................................................................. 12 4.6 Delete a Scene ........................................................................................... 13 4.7 Bank copying .............................................................................................. 14 4.8 Program a Chase ....................................................................................... 15 4.9 Program all the Scenes in a Bank ........................................................... 17 4.10 Program a step ......................................................................................... 18 4.11 Insert Steps into a Chase ........................................................................ 19 4.12 Delete Steps from Program .................................................................... 21 4.13 Delete a CHASE ...................................................................................... 22 4.14 Program a Preset ..................................................................................... 23 4.15 Preset Editing ........................................................................................... 24 4.16 Program a Fixture Group ........................................................................ 26 4.17 FIXTURE GROUP Editing ...................................................................... 27 4.18 Program a Center .................................................................................... 28 4.19 Center Editing ........................................................................................... 29 4.20 Program an Override ............................................................................... 31 4.21 Override Editing ....................................................................................... 32 4.22 Program a CUE ........................................................................................ 34 4.23 CUE Editing .............................................................................................. 35 4.24 Delete a CUE ............................................................................................ 36 4.25 Store a Blackout Scene........................................................................... 36 5. Setting Menu ......................................................................................................... 37 1-
5.1 Create a new Fixture Profile ..................................................................... 39 5.2 Modify a Fixture Profile.............................................................................. 40 5.3 Delete a Fixture Profile .............................................................................. 41 5.4 Patch a Fixture ........................................................................................... 42 5.5 Reverse channel setup.............................................................................. 43 5.6 Fade mode setup ....................................................................................... 44 5.7 Blackout mode select ................................................................................ 45 5.8 Midi channel select .................................................................................... 45 5.9 Chase run by inside/outside time............................................................. 46 5.10 Auto remote address ............................................................................... 46 5.11 Read CF card............................................................................................ 47 5.12 Write CF card............................................................................................ 49 5.13 Modify Password ...................................................................................... 50 5.14 Enable Password ..................................................................................... 51 5.15 Erase all memory ..................................................................................... 52 5.16 Audio input range adjust ......................................................................... 52 5.17 Channel value display mode .................................................................. 53 6. Function Mode ...................................................................................................... 53 6.1 Running scene ............................................................................................ 53 6.2 Run Program............................................................................................... 56 6.3 Running CUE .............................................................................................. 58 6.4 Over control................................................................................................. 58 7. Fog Machine operation ........................................................................................ 59 8. Strobe light operation........................................................................................... 59 9. Update the software with CF card ..................................................................... 62 10. PROFILE Create notice .................................................................................... 62 2-
;3. Don’t change the group which contain”;********”.
;4. Display information should be no more than 4 character and without blank.
67-
;
C
"CYMM";
"CMY MACRO"
1. Features
;
N
"FROS";
"FROST"
z
2 x DMX Outputs
;
N
"PRSM";
"PRISM"
z
484 DMX Channels in total, including 481Ch. for DMX fog, 482Ch. for future use,
;
N
"RPRS";
"PRISM ROT"
;
N
"FCUS";
"FOCUS"
;
N
"IRIS";
;
N
"BANG";
;
N
"CTC";
;
N
"REFT";
"EFFECT ROT"
z
60 Programmable Chases, each chase can have 200 scenes max.
;
N
"EFFT";
"EFFECT"
z
1200 Programmable Scenes ( 60 banks x 20 scenes )
400 Programmable Presets ( 20 presets, each preset has 10 colors and 10 gobos )
483-484Ch. for DMX strobe
z
Fixture Library ( for built-in ACME lighting fixtures; Other brand fixtures can be set
manually but Max. with 50 fixtures)
"IRIS"
z
"BEAM ANGLE"
Built-in 10 MOVEMENTS - Can adjust PAN/TILT Position、PAN/TILT Range、Fade
time or Wait time、LOOP
"CTC"
;
N
"FRAM";
"FRAME1"
z
;
N
"F_AG";
"FRAME1ANGLE
z
Control 20 DMX light fixtures, and each fixture up to 24 Channels
;
PT "PT_M";
"PT_MACRO"
z
Operate 20 Fixture groups simultaneously
;
N
"ZOOM";
"ZOOM"
z
24 faders for controlling 24 DMX channels
;
N
"SPED";
"SPEED"
z
60 x CUEs (Combined many chases together and operate the chases at the same
;
N
"CONT";
"CONTROL"
;
N
"MACO";
"MACRO"
;
N
"F_A";
"FUNCTION A"
;
N
"F_B";
"FUNCTION B"
;
N
"F_C";
"FUNCTION C"
tine)
z
20 x override – Can assign one (or more than one) of the fixtures to perform special
function, like follow spot, during the operation. 20 overrides can be set in the controller
z
20 x Center - Can set each fixture’s central position of the movement; you can set up
to 20 centre positions.
;
N
"F_D";
"FUNCTION D"
z
;
N
"F_E";
"FUNCTION E"
z
Blackout mode - 1. Standby 2. PAN/TILT Center Position 3.Blackout Scene.
;
N
"F_F";
"FUNCTION F"
z
Can use jog wheel to adjust the audio sensitivity (LCD display will indicate the value )
;
N
"F_G";
"FUNCTION G"
z
Can set Password to boot the controller
;
N
"F_H";
"FUNCTION H"
z
Lock/Unlock memory/Need password to clear all memory
;
N
"F_I";
"FUNCTION I"
z
Standard MIDI facility
;
N
"F_J";
"FUNCTION J"
z
Lighting Library and software downloaded available
;
N
"F_K";
"FUNCTION K"
z
DMX fog machine control (481 Ch.)
;
N
"F_L";
"FUNCTION L"
z
Both DMX ( 483 & 484 ) and analog strobe control available ( Via LCD display, people
Remote DMX Addressing only for ACME lights.
can adjust the speed of analog strobe )
;Note:
;1. All the character must be capitalization except commentary which after”;”.
z
2 remote Easy Controller ( CA-8 )
z
Gooseneck USB LAMP
;2. The finished file should use a short name below 8 characters, all use capital letters and
suffix with CIF transitorily, or the controller can’t read up the profile information.
66-
NOTE: Some basic knowledge of MIDI and DMX is required to fully utilize this unit.
3-
2. General Instructions
Please read the user manual carefully, as it includes important information regarding details
; ARRT CODE
of operation, maintenance, and technical data. Keep this manual with the unit for future
;
D
consult.
;
P = PAN
= DIMMER
; PF = PAN FINE
WARNINGS!
;
T = TILT
; TF = TILT FINE
♦
DO NOT make any inflammable liquids, water or metal objects enter the unit.
; PT = OTHER PAN/TILE CORRELATION CHANNLES
♦
Should any liquid be spilled on the unit, DISCONNECT the power supply to the unit
;
immediately.
; C = ALL COLOR CORRELATION CHANNLES
♦
G
= ALL GOBO CORRELATION CHANNLES
STOP using the unit immediately In the event of serious operation problems and either
; N = ETCAETERAS CHANNELS
contact your local dealer for a check or contact us directly.
;
♦
DO NOT open the unit--there are no user serviceable parts inside.
;
ARRT CODE
MAX 2 CHARACTER
♦
NEVER try to repair the unit yourself. Repairs by unqualified people could cause
;
|
DISPLAY INFORMATION
MAX 4 CHARACTER DON'T HAVE BLANK
damage or faulty operation. Contact your nearest dealer.
;
|
|
CHANNEL FUNCTION
;
|
|
|
;
D
"DIM";
CAUTIONS!
"DIMMER"
;
N
"SHUT";
♦
This unit is NOT intended for home use.
;
P
"PAN";
♦
After having removed the packaging check that the unit is NOT damaged in any way. If
;
PF
"P_F";
in doubt, DON'T use it and contact an authorized dealer.
;
T
"TILT";
Packaging material (plastic bags, polystyrene foam, nails, etc.) MUST NOT be left
;
TF
"T_F";
within children's reach, as it can be dangerous.
;
PT "PT_S";
"P/T SPEED"
This unit must only be operated by adults. DO NOT allow children to tamper or play
;
G
"GB1";
"GOBO 1"
with it.
;
G
"RGB1";
"GOBO 1 ROT"
NEVER use the unit under the following conditions:
♦
♦
♦
"PAN"
"PAN FINE"
"TILT"
"TILT FINE"
;
G
"GB2";
"GOBO 2"
In places subject to excessive humidity.
;
G
"RGB2";
"GOBO 2 ROT"
In places subject to vibrations or bumps.
;
G
"GB3";
"GOBO 3"
In places with a temperature of over 45 C/113 F or less than 2 C/35.6 F.
;
G
"ROB3";
"GOBO 3 ROT"
;
C
"COL1";
"COLOUR 1"
;
C
"COL2";
"COLOUR 2"
;
C
"CYAN";
"CYAN"
;
C
"YELO";
"YELLOW"
;
C
"MAGT";
"MAGENTA"
Protect the unit from excessive dryness or humidity (ideal conditions are between35%
and 80%).
♦
"SHUTTER"
DO NOT dismantle or modify the unit.
4-
65-
3. Overview
; DMX CHANNELS LIST
; CHANNEL MAX 24 DON'T REPEAT
MAX 2 CHARACTER
;|
ARRT CODE
MAX 2 CHARACTER
;|
|
DISPLAY INFORMATION
MAX 4 CHARACTER DON'T HAVE BLANK
;|
|
|
CHANNEL FUNCTION
;|
|
|
|
1
N
"SHUT";
2
D
"DIM";
"DIMMER"
3
C
"C_C";
"CYAN"
4
C
"C_M";
"MAGENTA"
5
C
"C_Y";
"YELLOW"
6
C
"CTC";
"CTC"
7
C
"COLR";
"COLOUR"
8
G
"GOB1";
"GOBO1"
9
G
"R_G1";
"GOBO 1 ROT"
10
G
"RG1L";
"GOBO 1 ROT LOW"
11 G
"GOB2";
"GOBO2"
12
G
"R_G2";
"GOBO 2 ROT"
13
"SHUTTER"
G
"RG2L";
"GOBO 2 ROT LOW"
14 N
"EFFT";
"EFFECT"
15 N
"R_EF";
"ROT EFFECT"
16 N
"IRIS";
17 N
"FCUS";
18 N
"ZOOM";
19 P
"PAN";
20 PF
"P_F";
21 T
"TILT";
22 TF
"T_F";
1.
Fog Machine Button
Activates Fog Machine.
2.
STROBE Button
Trigger strobe.
"FOCUS"
3.
Fixture Group Button
Select /set one or more fixtures group
"ZOOM"
4.
Fixture Button
Select one or more fixtures
"PAN"
5.
Preset Button
Select/set the color & gobo preset.
"PAN FINE"
6.
movement Button
Select/set the pan & tilt movement
7.
Chase Button
Run Chase and save Scene to Chase
8.
Cue Button
Save several Chases together and make them
"IRIS"
"TILT"
"TILT FINE"
23 PT "PT_S";
"SPEED P/T"
24 N
"SPEED"
"SPED";
3.1. Front View
run at the same time
9.
Bank Button
Press the Bank buttons to load or stored your
scenes. There are a maximum of 1200
DMXEND
programmable scenes.
;********
10. Override Button
END
Override the fixture/ fixtures when the show is
running.
;********
64-
5-
11. Center Button
Select/set the pan & tilt center.
12. Manual/Rec Button
Used to control manual operation or to record
programs.
13. Program Button
Activates Program mode.
14. Music/Bank Copy Button
Activates Music mode or to copy a bank of
15. Tap/Insert Button
16. Auto/Del Button
; C = ALL COLOR CORRELATION CHANNLES
transfer all color correlation channel
to preset gobo
; N = ETCAETERAS CHANNELS
else channels should be signed N
10.4 The channel display message should be no more than 4 capital letters or
scenes.
underline or number, and must be bracket with double quotation marks. Don’t
Used to create a standard beat or insert a scene to
replace by blank if shorter 4 character.
chase.
You’d better input in English mode, ensure all the input characters are DBC but not SBC
Activates Auto mode or to delete scenes or
case
chases.
① "DIM"
;right
17. Blackout/ Stand Alone Button
Select Blackout/Stand Alone two modes.
② "DIM "
;wrong for the blank
18. USB Light
Connect to USB Light
③ "dim" "DIm"
;wrong for the lowercase
19. Faders
These faders are used to control the intensity.
④ “DIM”
20. CF card
CF card port can be used to upgrade software,
10.5 Don’t change the group which contain”;********”
copy data and introduce to light bank
10.6 Store the profile that you want to input to the controller under the root directory
21. Stand alone
Extra easy controllers Incorporated for
;wrong for the SBC double quotation marks
of CF card.
Master/Slave immediate. pre-programmed light
EXP: If CF card is disk F, then the file input route should be “F:\DIR2402\IM-1200S”
shows.
10.7 The format of CF card should be FAT16 but not FAT32.
22. Multi function number buttons (1-20)
IL-2420 PROFILE ;********
1
Function buttons
The descriptions of the Function buttons
Fixture
Select 20 units of Fixtures Pls refer to the following table for
VER1.0
;********
Fixture addresses
2
Fixture Group
Set or select 20 Fixture Groups
;
ADD ACME AND OTHER LIGHT LIBBER SELECT
3
Movement
(only 1-10) Select or operate 10 Movements
DEFAULT
4
Preset
20 groups of fixtures can be set or selected by Jog wheel
ACME; ACME AND OTHER
PAN .10 color Preset(1-10) and 10 GOBO Preset(11-20)
;
FACTORY / MODEL
each group
NAME "AMCE"
5
Cue
Set, select or operate 60 Cues
6
Chase
Set, select or operate 60 Chases
;
7
Override
Set and select 20 Overrides
CHANNEL 24
8
Bank
60 banks( each bank with 20scenes) can be set and selected
by Jog wheel #1
9
center
DMX
MODEL = MAX 16 CHARACTER
"IM-1200SZ-24"
LIGHT CHANNEL NUMBER MAX
24
;********
Set, select and operate 20 Centers
6-
63-
9. Update the software with CF card
10
Format the program of the controller , then download the last
Number 1-20
1.
button
1-10(10 stand for 0)Number for setting and inputting
password
software and copy to CF:\SUP2420\APP2420.SUP,inset the CF
2.
1-10
card to the seat, press FIXTURE and OVERRIDE and number
3.
1-10 can be used to select 10 groups of COLOR
10 MOVEMENT can be selected.
button 15 then Power on afresh until the information show on the
PRESET; 11-20 can be used to select another 10 groups
LCD display, the controller will test if the CF card stick well and
of GOBO PRESET.
then update the new software, it will cost about 20 seconds,
4.
1-20 can be used to select 20 CUE/PAGE、
please don’t move the CF card or cut the power in order to avoid update frustrated and
CHASE/PAGE、SCENE/BANK、OVERRIDE、CENTER、
damage the CF card.
FIXTURE.
Save the program first, or updating the software may lead the memory program useless.
Please refer to “Write CF card” and “Read CF card” to operate.
Fixture number channel list
NOTICE:The format of the CF card should be FAD12 or FAD16, but not FAD32 and
Fixtures
Fixture DMX
Fixtures number
Fixture DMX
number buttons
channels
buttons
channels
1
1-24
11
241-264
2
25-48
12
265-288
3
49-72
13
289-312
4
73-96
14
313-336
5
97-120
15
337-360
6
121-144
16
361-384
and suffix with CIF transitorily. (IL-2420 controller nonsupport long file name) or the
7
145-168
17
385-408
controller can’t read up the profile information.
8
169-192
18
409-432
9
193-216
19
432-456
10
217-240
20
457-480
NTFS, be sure there is no long-name files under the root directory (the amount of the
name below 8), the character must be start with letters, and compose with letters or
number or underline.
10. PROFILE Create notice
10.1 PROFILE.CIF(as the profile cyclostyle)
The finished file should use a short name below 8 characters, All use capital letters
10.2 IM-1200S.CIF is the profile of ACME IM-1200S
10.3 Enactment special code, so the controller should distill some channel
characteristic to manage.
23. ESC/CLEAR Button
Back to last menu/delete all the output when
Confirm or enter next menu or enter main menu
program
; ARRT CODE
; D = DIMMER
DIMMER
24. Enter/main menu Button
; P = PAN
PAN
25. LCD Display
Show the current activity or programming state.
; PF = PAN FINE
PAN FINE in 16 channel mode
26. Jog wheel
Used to adjust the chase speed within the range
; T = TILT
TILT
; TF = TILT FINE
TILT FINE in 1 6 channel mode
; G = ALL GOBO CORRELATION CHANNLES
transfer all gobo correlation channel
of 0.1 second to 5 minutes.
to preset gobo
62-
7-
MIDI Channel = 0
3.2 Rear View
MIDI
note
Channe
number
command
l
Bank 1 - Bank 4
MIDI 1
00 ~ 79
Turn on or turn off scenes from Bank 1 ~ 4
MIDI 1
80-99
Turn on or off Chase 1 ~ 20
1.
Power in
AC100-240V 50/60Hz.
MIDI 1
100-119
Turn on or off CUE 1~20
2.
Power Switch
This switch turns On/Off the power.
MIDI 1
120~125
No function
3.
STROBE
Trigger non-DMX strobe. Signal +12V DC.
MIDI 1
126
Blackout
4.
AUDIO
0.1V~1Vp-p.
MIDI 2
00 ~ 79
Turn on or turn off scenes from Bank 5 ~ 8
5.
MIDI IN or MIDI THRU
Receives MIDI data.
MIDI 1
80-99
Turn on or off Chase 21 ~ 40
6.
DMX Out
Two connectors sends DMX signals to DMX
MIDI 1
100-119
Turn on or off CUE 21~40
MIDI 1
120~127
No function
MIDI 3
00 ~ 79
Turn on or turn off scenes from Bank 9 ~ 12
MIDI 1
80-99
Turn on or off Chase 41 ~ 60
MIDI 1
100-119
Turn on or off CUE4 1~60
MIDI 1
120~127
No function
Bank 13 - Bank 16
MIDI 4
00 ~ 79
Turn on or turn off scenes from Bank 13 ~ 16
Bank 17 - Bank 20
MIDI 5
00 ~ 79
Turn on or turn off scenes from Bank 17 ~ 20
Bank 21 - Bank 24
MIDI 6
00 ~ 79
Turn on or turn off scenes from Bank 21 ~ 24
Bank 25 - Bank 28
MIDI 7
00 ~ 79
Turn on or turn off scenes from Bank 15 ~ 28
IL2420 Operating Steps Instructions
Bank 29 - Bank 32
MIDI 8
00 ~ 79
Turn on or turn off scenes from Bank 19 ~ 32
When power is turned on, the controller starts self testing automatically, the LCD Display
Bank 33 - Bank 36
MIDI 9
00 ~ 79
Turn on or turn off scenes from Bank 33 ~ 36
indicating the self testing progress. After it is finished, the fixture pilot on the rear board is
Bank 37 - Bank 40
MIDI 10
00 ~ 79
Turn on or turn off scenes from Bank 37 ~ 40
on, which means that you can start to operate the controller.
Bank 41 - Bank 44
MIDI 11
00 ~ 79
Turn on or turn off scenes from Bank 41 ~ 44
Bank 45 - Bank 48
MIDI 12
00 ~ 79
Turn on or turn off scenes from Bank 45 ~ 48
Bank 49 - Bank 52
MIDI 13
00 ~ 79
Turn on or turn off scenes from Bank 49 ~ 52
Bank 53 - Bank 56
MIDI 14
00 ~ 79
Turn on or turn off scenes from Bank 53 ~ 56
Bank 57 - Bank 60
MIDI 15
00 ~ 79
Turn on or turn off scenes from Bank 57 ~ 60
Bank 5 - Bank 8
fixtures, use 3 pin XLR plug cable to link the
fixture together.
7.
STAND ALONE
Bank 9 - Bank 12
The connectors are used only in master/slave
mode, using 5 pin XLR cable microphone jack of
the first fixture, you will find that the remote
control on the first unit will control all the other
units for Stand by, Function and Mode.
4. Operation Guide
4.1 Programming Mode
Press PROGRAM button for 3 seconds, the LED above this button
lights blinking indicating Program in active.
8-
61-
4.2 Setting a scene
Use jog wheel #3 or #4 to set the value of DIMMER (0-255) or
1. Enter Program mode.
SPEED (0-255) that out of the strobe light.
2. Press the button 1-20 to select Fixture,you can select several
fixtures at a time by tapping of these buttons.
Press ENTER/MAIN MENU button to store, press PROGRAM
button to exit.
3. Slide Faders 1-24 or use the CENTER or PRESET or
SCENE have saved to change the output of each channel。You
can also use the jog wheel #1 、#2 to control the PAN、PAN FINE
or use the jog wheel #3 ,#4 to control TILT、TILT FINE.
3. Control: Press STROBE button then the controller will control the
DMX strobe light with the value of the DMX be set, and the light
4. Once the scene is satisfactory, press MANUAL/REC button to
strobe in the speed that be set to the simulate strobe light.
program this scene into memory. At this moment, the LEDs on
CUE、OVERRIDE、CENTER、FIXTURE GROUP、PRESET 、
CHASE、BANK、BLACKOUT button blink at the same time.
MIDI function list:
MIDI Channel = 1~15
5. Press BANK use the Jog wheel #1 to select the BANK number to
note number
function
Bank1
00-19
Turn on or off the scene 1 ~ 20 of Bank 1
Bank2
20-39
Turn on or off the scene 1 ~ 20 of Bank 2
Bank3
40-59
Turn on or off the scene 1 ~ 20 of Bank 3
Bank4
60-79
Turn on or off the scene 1 ~ 20 of Bank 4
6. Press the number button 1-20 to select the Scene number going
Chase
80-99
Turn on or off Chase 1 ~ 20
to be saved,all LEDs and the Segment Display will blink three times
100-119
Turn on or off CUE 1~20
briefly indicating this operation, then the LCD will show the bank
120~125
No function
and the scene number of the programmed scene.
126
Blackout
CUE
save the scene.
7. Repeat steps 2-6 to program other scenes.
8. Press PROGRAM button for 3 seconds to exit Program mode,
the LED goes out indicating this selection。
60-
9-
7. Fog Machine operation
4.3 Program a Scene with Movement
1. Enter Program mode.
7.1 Set up another 481CH DMX signal to control the fog machine(keep out the 482CH).
2. Press the button 1-20 to select Fixture,you can select several
7.2 Fog Machine operation:
fixtures at a time by tapping of these buttons.
1. Connection: connect the fog machine with the DMX information.
2. Setting: Keep the power on , hold the FOG MACHINE button the
press PROGRAM button to enter the output menu,
3. Move Faders 1-24 or use the CENTER、PRESET、SCENE
have saved to change the output of each channel , press
MOVEMENT button.
Use #2 or #3 or #4 to setup duration set (1-100S) or interval
set(0-200S) or volume out(0-255).
4. Press the button 1-10 to select one MOVEMENT in ten,the
selected FIXTURE will run the MOVEMENT.
Press ENTER/MAIN MENU button to store Press PROGRAM
button to exit
5. If it is necessary to adjust MOVEMENT parameter,use Jog wheel
#2 to select the adjusting MOVEMENT parameter options(position
& range & fade time or wait time & loop),use Jog wheel #3、#4 to
adjust parameter values.
3. Control: The fog machine work as it’s set in normal. Press FOG
MACHINE button to output maximal fog (set 481CH output to be
255).
6. Repeat Steps 2 – 5to select MOVEMENT for other FIXTURE.
7. Press
MANUAL/REC to store into memory,all the LEDs on
CUE、OVERRIDE、CENTER、FIXTURE GROUP、PRESET 、
CHASE、BANK、BLACKOUT blink to indicate this operation.
8. Strobe light operation
8.1 Set up 483~484CH address in the DMX signal to control the strobe light channel
8.2 Operation
1. Connection : connect the strobe light with the DMX information
2. Setting: keep the power on, hold the STROBE button press
8. Press BANK use Jog wheel #1 to select the BANK number to
store the scene.
PROGRAM button to enter setting menu, Use jog wheel #2 to set
the strobe speed of the simulate strobe light.
10-
59-
NOTE:When you press TAP/INSERT to adjust the speed, adjusting the running speed of
9. Press the number button 1-20 to select the Scene number going
the scene is based on the interval of pressing the Press TAP /INSERT Button twice which
to be saved,all LEDs and the Segment Display will blink for three
no more than 10 minutes.
times briefly indicating this operation, then the LCD will show the
bank and the scene number of the programmed scene.
6.3 Running CUE
CUE can only run in manual mode.
10. Repeat steps 2-9 to program other SCENEs with MOVEMENT
1. Press CUE Button, use jog wheel #1 to select chase page.
11. If you don't intend to continue your programming, press and
hold down the PROGRAM button for three seconds to exit Program
mode, the LED goes out indicating this selection.
2. Press number Button 1-20 to select the CUE you anticipant. You
4.4 Program a Scene
can choose much more than one CUE and they will run on the train
1. Enter Program mode.
that you select them.
2. Press the button BANK,to turn on its fader control, which is
indicated by the lit LED, use Jog wheel #1 to select the bank
number to edit the scene.
NOTE: If a CUE includes several chases with different run time, we regard the run time of
the chase with the longest run time as the CUE's longest run time and the chase with short
run time will repeat automatically.
3. Press the number button 1-20 to open the scene you are going
6.4 Over control
to edit.
Using over control to change the effect specially, you can operate some units solely when
the CUE or CHASE or BANK running. There are two ways to operate:
4. Move Faders 1-24 or use the CENTER、PRESET、SCENE
have saved to change the output of each channel, you can also use
A. When CUE or CHASE or BANK running, press OVERRIDE
the Jog wheel #1 、#2 to adjust PAN、PAN FINE,or use Jog wheel
button, Then press FIXTURE button, and use number button 1-20
#3 , #4to adjust TILT、TILT FINE or press MOVEMENT to add
to choose light, so you can push the handspike to change the
MOVEMENT function.
effect.
5. Press MANUAL/REC to store,LEDs on CUE、OVERRIDE、
B. When CUE or CHASE or BANK running, press OVERRIDE
button, then use 1-20 button to open the effect that be
CENTER 、 FIXTURE GROUP 、 PRESET 、 CHASE 、 BANK 、
BLACKOUT blink at the same time.
programmed.
58-
11-
6. Press the button BANK.
2. Press MUSIC/BANK COPY Button to enter sound mode, the
LED of MUSIC/BANK COPY will be on.
7. Press the number button 1-20 to store the edited scene which will
3. Press number Button 1-20 to select the program you anticipant,
cover the former scenes, all LEDs and the Segment Display will
you can choose much more than one CHASE, and they will run with
blink for three times briefly indicating this operation, then the LCD
the music on the train that you select them. When it is running the
will show the bank and the scene number of the programmed
scene with Movements in sound activation mode , it will
scene.
repeatedly as per the built in movement Loop time then enter next
process
step.
8. Press the button PROGRAM for three second, to exit Program
mode, the LED goes out indicating this selection.
3.
Auto Mode
1. Press CHASE Button, use jog wheel #1 to select chase page.
Hints: If you select different scenes at step 3 and 6, the editing scene would cover the
scene at step 6.
2. Press AUTO/DEL Button to enter auto mode, the LED of
4.5 Copy a Scene
AUTO/DEL will be on.
1. Enter Program mode.
2. Press the button BANK, to turn on its fader control, which is
indicated by the lit LED.,use Jog wheel #1 to select the bank
3. Press number Button 1-20 to select the program you anticipant.
number to edit the scene.
You can choose much more than one CHASE, and they will run on
the train that you select them.
4. Setting to CHASE RUN BY INSIDE TIME, then it will run as the
3. Press the number button 1-20 to open the scene you are going to
copy.
FADE TIME or FADE TIME of the step that you set when store the
chase. Setting to CHASE RUN BY OUTSIDE TIME , then it will run
as the FADE TIME or FADE TIME you set last time, you can also
adjust by turn the joy wheel #3 or #4, or use TAP/INSERT Button to
adjust the speed.
12-
57-
6.2 Run Program
Please finish the program and scene before running the program.
4. Press MANUAL/REC to store,LEDs on CUE、OVERRIDE、
1. Auto Mode
CENTER 、 FIXTURE GROUP 、 PRESET 、 CHASE 、 BANK 、
BLACKOUT blink at the same time.
1. Press CHASE Button, use jog wheel #1 to select chase page.
5. Press BANK Then use the Jog wheel #1 to select the BANK
number to copy the scene.
2. Press MANUAL/REC to enter manual mode, the LED of
MANUAL/REC will be on.
6. Press the number button1-20,then copy the Scene to the right
position. All LEDs and the Segment Display will blink for three times
briefly indicating this operation, then the LCD will show the bank
and the scene number of the programmed scene.
3. Press number Button 1-20 to select the program you anticipant..
7. If you don't intend to continue your programming, press and hold
down the PROGRAM button for three seconds to exit Program
mode, the LED goes out indicating this selection.
4. Use Jog wheel #2 to run the last or next step.
4.6 Delete a Scene
2.
1. Enter Program mode.
Sound Mode
2. Use the Jog wheel #1 to select the Bank number of the being
deleted scene.
1. Press CHASE Button, use jog wheel #1 to select chase page.
56-
13-
3.Press the number button 1-20 to select the scene you are going to
3. Use Jog wheel #1 to select the bank you need, then the scene in
delete.
the bank will run with music. When it is running the scene with
Movements in sound activation mode , it will
process repeatedly
as per the built in movement Loop time then enter next step.
4. Press the button AUTO/DEL
3.
Auto Mode
1. Press BANK Button。
5. Press the button BANK
2. Press AUTO/DEL Button to enter auto mode, the LED of
AUTO/DEL will on.
6. Then press the number button 1-20,the scene will be deleted, all
LEDs and the Segment Display will blink for three times briefly
indicating this operation, then the LCD will show the bank and the
scene number of the deleted scene.
3. Use Jog wheel #1 to select the bank you anticipant.
7. If you don't intend to continue your programming, press and hold
down the PROGRAM button for three seconds to exit Program
mode, the LED goes out indicating this selection
4. Use Jog wheel #3 or #4 to adjust current FADE TIME or WAIT
TIME, or use TAP/INSERT
Button to adjust the speed of the
scene.
4.7 Bank copying
1. Enter Program mode.
2. Press BANK button
NOTE:When you press TAP/INSERT to adjust the speed, adjusting the running speed of
the scene is based on the interval of pressing the Press TAP /INSERT Button twice which
no more than 10 minutes.
14-
55-
1. Manual Mode
3. Use the Jog wheel #1 to select the Bank number of the being
copied scene.
1. Press BANK Button。
4. Press the button MANUAL/REC,LEDs on CUE、OVERRIDE、
2. Press MANUAL/REC to into manual mode. The LED of
CENTER 、 FIXTURE GROUP 、 PRESET 、 CHASE 、 BANK 、
MANUAL/REC will be on.
BLACKOUT blink at the same time.
5. Then turn the Jog wheel #1 to select the bank number to copy to.
3. Use Jog wheel #1 to select the bank you anticipant.
4. Press number Button to open the scene.
6. Press the button MUSIC/BANK COPY, all LEDs and the
Segment Display will blink for three times briefly indicating this
2.
Sound Mode
operation, then the LCD will show the number of the being copied
bank and the bank is being copied to and the scene number of the
programmed scene.
1. Press BANK Button。
7. Press the button PROGRAM for three seconds to exit Program
mode, the LED goes out indicating this selection
2. Press MUSIC/BANK COPY Button to into sound mode, the LED
of MUSIC/BANK COPY will be on
4.8 Program a Chase
Note: The chase should be programmed after the scene is set. Each chase can have 200
scenes max.
54-
15-
5.17 Channel value display mode
1. Enter Program mode.
2. Press the button CHASE, LEDs on CHASE will be all lit. Use jog
1. Enter Menu Mode.
wheel #1 to select the page number of the chase.
2. Turn Jog wheel #1 up to when 17.Channel value display mode
shown on the monitor press ENTER/MAIN MENU Button to enter.
3. Press the number button 1-20 to select the chase number, the
3. Use Jog wheel #2 to select 0-255 or 0-100
LEDs on BANK button will be all lit, the LCD will show the number
and parameter of CHASE、BANK、SCENE、STEP、FADE、WAIT.
4. Use the Jog wheel #1 to transfer to other Banks, then press the
4. Press ENTER/MAIN MENU Button to store and back to the main
number button 1-20 to select the scene to store the Chase.
menu back to the main menu without any change Press
ESC/CLEAR Button.
5. Use the Jog wheel #3 to adjust the FADE TIME of present
chase, the Jog wheel #4 to adjust the WAIT TIME of the present
6. Function Mode
chase. If you do not make any adjustments, the system will
remember the last FADE TIME or WAIT TIME.
Press MANUAL/REC、MUSIC/BANK COPY、AUTO/DEL Button to
enter into manual mode or sound mode or auto mode.
6. Press the button MANUAL/REC, all the LEDs will blink for three
times briefly indicating the store succeed.
7. Repeat Step 4-6, each chase can have 200 scenes max.
6.1 Running scene
Scene can be open solely in the manual mode, but in the sound or auto mode it should
8. Press the button PROGRAM for three seconds to exit Program
circulate with some BANK.
mode, the LED goes out indicating this selection.
16-
53-
5.15 Erase all memory
4.9 Program all the Scenes in a Bank
1. Enter Program mode.
1. Enter Menu Mode.
2. Press the button CHASE use jog wheel #1 to select the page
2. Turn Jog wheel #1 up to when the 15. Erase all memory shown
number, choose the programming chase.
on the monitor press ENTER/MAIN MENU button to enter.
3. The LCD hint to input 6 digit memory protect password. Input the
3. Press the number button 1-20 to select the Chase number, LEDs
exact password, and Press ENTER/MAIN MENU Button to delete
on the BANK button will be all lit, the LCD will show the number
the memory information. You have to input the password again
and parameter of the CHASE、BANK、SCENE、STEP、FADE、
when it’s wrong.
WAIT.
4. Use Jog wheel #2 to select Yes (delete and back to the last menu)
4. Use the Jog wheel #1 to select the Bank number of the
or No (back to the last menu).
programmed Chase.
5.16 Audio input range adjust
5. Use the Jog wheel #3、#4 to adjust the FADE TIME and WAIT
1. Enter Menu Mode.
2. Turn Jog wheel #1 up to when 16. Audio input range adjust
shown on the monitor Press ENTER/MAIN MENU Button top enter.
TIME which are going to be added to the single Chase. If you do not
make any adjustments, the system will remember the last FADE
TIME or WAIT TIME.
6. Press the button MUSIC/BANKCOPY
3. Use jog wheel #2 to choose the sensitivity of the sound (0-100).
The bigger the number the higher the sensibility. Then you can test
the sensibility.
7. Press the button MANUAL/REC, all LEDs blink for 3 times, all the
4. Press ENTER/MAIN MENU Button to store and back to the main
programmed scenes in the Bank will join the Chase.
menu, back to the main menu without any change Press
ESC/CLEAR Button.
52-
8. Repeat Step 3-7 can join 200 scenes max to the chase.
17-
5.14 Enable Password
9. Finally press the button CHASE to store the chase then exit the
1. Enter Menu Mode.
programming state.
2. Turn Jog wheel #1 up to when the 14. Enable password shown
on the monitor press ENTER/MAINMENU button to enter.
3. Use Jog wheel #1 to select use power password or use memory
protect password, press ENTER/MAIN MENU button to enter.
10. Press the button PROGRAM for three seconds to exit Program
mode, the LED goes out indicating this selection.
4. The LCD hint to input password, use number button 1-10 to input
6 digit password.
4.10 Program a step
5. Use Jog wheel #2 to select Enable or Disable.
1. Enter Program mode.
2. Press the button CHASE use jog wheel #1 to select the page
number of the chase to select the program.
6. Press ENTER/MAIN MENU Button to enter, all the LEDs blink for
3 times indicate that you have set successfully.
3. Press the number button 1-20 to select the Chase number, LEDs
on the BANK button will be all lit, the LCD will show the number and
parameter of the CHASE、BANK、SCENE、STEP、FADE、WAIT.
4. Use Jog wheel #2 to view the steps, the strobe display [002]
7. Press ESC/CLEAR Button to back to the last menu.
indicate programmable step number
5. Use jog wheel #1 to select the bank number of the scene, press
number button 1-20 to open.
18-
51-
6. Press ENTER/MAIN MENU Button to store, it will be finish after
6. Use the Jog wheel #3、#4 to adjust the FADE TIME and WAIT
about 2 minutes.
TIME which are going to be added to the single Chase. If you do not
make any adjustments, the system will remember the last FADE
TIME or WAIT TIME.
7. Press ESC/CLEAR Button to back to the last menu, 2 times to
7. Press the button MANUAL/REC all LEDs blink for 3 times to
back to the main menu.
indicate that you have successfully programmed a step.
8. Repeat steps 2-3 to select other steps.
9. Press the button CHASE to store and exit the programming state.
5.13 Modify Password
1. Enter Menu Mode.
2. Turn Jog wheel #1 up to when the 13. Modify Passwords shown
on the monitor press ENTER/MAIN MENU button to enter.
3. Use Jog wheel #1 to select power on password or memory
protect password, Press ENTER/MAIN MENU Button to enter.
10. Press the button PROGRAM for 3 seconds to exit Program
mode, the LED goes out indicating this operation.
4. Use number Button 1-10 to input 6 digit old password(10 equal
to number 0) ,if the password is wrong , it will hint to input
continually.
4.11 Insert Steps into a Chase
1. Enter Program mode.
5. It will hint to input new 6 digit password after get exact password.
2. Press the button CHASE use jog wheel #1 to select the page
You have to input the same password twice, it will back to the last
number, choose the programming chase.
menu automatically after change the password successfully.
6. Use Jog wheel #2 to select Power on password or memory
protect password.
3. Press the button 1-20 to select the chase number.
7. Press ESC/CLEAR Button to back to the last menu, and again to
the main menu.
50-
19-
NOTE: Please backup the programs before you load program file, or the program file you
4. Use the Jog wheel #2 to select the position of inserted steps.
load will replace all the program in the controller. The controller should store finite bank files,
except the current bank files, you can store 50 include create by the controller immediacy
more at best. So please store the files in the CF card or computer, and read up the files
which you have to use only.
5. Press the button TAP/INSERT to insert a step following the
5.12 Write CF card
present position.
You can store the finished program to the directory of DIR2420 which under the root
directory of CF card. Every time read the CF card, please don’t move it, or the card or the
files will be damaged. The format of the CF card should be FAT, else you have to convert it
to FAT by PC, and copy it to CF card.
6. Use the Jog wheel #1 to select the Bank number of the inserted
scene.
1. Enter Menu Mode.
2. Turn Jog wheel #1 up to when the 12. Write cf card is shown on
the monitor Press ENTER/MAIN MENU Button to enter.
7. Press the number button 1-20 to select the scene to be inserted.
3. LCD will show 01.Save program file, Press ENTER/MAINMENU
Button to enter.
8. Use the Jog wheel #3、#4 to adjust the CHASE FADE TIME and
WAIT TIME. If you do not make any adjustments, the system will
remember the last FADE TIME or WAIT TIME.
4. Use Jog wheel #2 to select Yes/no Press ENTER/MAINMENU
Button to enter, Yes to save, No to exit.
9. Press the button MANUAL/REC all LEDs blink for 3 times to
indicate that you have successfully inserted a step into a chase.
5. Select Yes, then LCD will hint to input file name. Use Jog wheel
#4 to select the file name and move the cursor, you can input as
10. Repeat steps 5-9, you can insert 200 scenes to each chase.
20-
munch as 8 characters.
49-
1. Enter Menu Mode.
11. Press the button CHASE to store the chase and exit the chase
2. Turn Jog wheel #1 up to when the 11. Read cf card is shown on
programming state.
the monitor Press ENTER/MAIN MENU Button to enter.
3. Use Jog wheel #1 to read the program file 01. Load program file
12. Press the button PROGRAM for 3 seconds to exit Program
or profile file 02. Load a fixture profile. Press ENTER/MAIN MENU
mode, the LED goes out indicating this operation.
Button to enter.
4. The list of the program/profile files will show on the LCD, turn jog
wheel #1 to select the file name. The amount of the files consider to
4.12 Delete Steps from Program
the amount of the program or profile files which you saved under the
directory of DIR2420 in the CF card.
1. Enter Program mode.
2. Press the button CHASE use jog wheel #1 to select the page
number, choose the programming chase.
5. Use Jog wheel #2 to select Yes/no。
3. Press the number button 1-20 to select the chase number to
delete from.
6. Press ENTER/MAIN MENU Button to enter.
7. After read up the file, the LCD will hint to complete. Repeat 3-7 to
4. Use Jog wheel #2 to select the scene location you want
read up other files.
to delete.
8. Back to the last menu, please press ESC/CLEAR Button.
5. Press AUTO/DEL all LEDs blink for 3 times to indicate that you
9. Press ESC/CLEAR Button 2 times to back to the main menu or 3
have successfully deleted the scene.
times to exit the menu.
6. Repeat steps 4-5to delete more scenes from the chase.
48-
21-
7. Press the button CHASE to store the operation and exit from the
4. Press ENTER/MAIN MENU Button to set the address of the
present programming state.
fixture, wait for 3 seconds, so
the fixture can receive the signal of
the controller and move all the motors to their “home” position.
5. After 3 seconds, use jog wheel #2 to select the fixtures of the
8. Press the button PROGRAM for 3 seconds to exit Program mode,
first group, and jog wheel #4
the LED goes out indicating this operation.
group. When you turn the jog wheel #2 or #4, the cursor will switch
to select the fixtures of the second
between the first and second group. The fixtures of this two group
will be selected in turn, and the unit will act differently when it be
selected.
4.13 Delete a CHASE
6. Press number Button 1-20,all the LEDs will blink for 3 times, the
address of the corresponding fixture will show on the LCD display,
1. Enter Program mode.
it means the fixture’s amount of the channel is as same as the
2. Press the button CHASE, use jog wheel #1 to select the page
corresponding number button’s.
number, choose the programming chase.
7. Repeat 5-6 to set the address of other fixtures.
8. Back to the last menu, please press ESC/CLEAR Button.
3. Press the button AUTO/DEL.
5.11 Read CF card
4. Press the number button 1-20 to select the chase to be deleted,
all LEDs blink for 3 times to indicate that you have successfully
If you have stored program files (???????.PRO)or bank files (????????.CIF) in the
directory of DIR2420 which under the root directory of CF card, then you can read them out
by this function. And you have to patch the profile in order to use it normally. Every time read
delete the chase.
the CF card, please don’t move it, or the card or the files will be damaged. The format of
the CF card should be FAT, else you
5. Repeat the steps 2-4 to delete more chases.
have to convert it to FAT by PC, and copy it to CF
card.
6. Press the button PROGRAM for 3 seconds to exit Program mode,
the LED goes out indicating this operation.
22-
47-
5.9 Chase run by inside/outside time
4.14 Program a Preset
1. Enter Menu Mode.
1. Enter Program mode.
2. Turn jog wheel #1 up to when the 09.Chase run by inside/outside
2. Press the button FIXTURE
time is shown on the monitor, Press ENTER/MAINMENU Button to
enter
3. Press the button 1-20 to select the concerned fixture of preset
3. Use Jog wheel #2 to chose Chase run by inside time or Chase
programming.
run by outside time
4. Press ENTER/MAIN MENU Button to enter, all the LEDs will
4. Move the FADERS1-24 to change COLOR/GOBO channel
blink for 3 times, then back to the last menu.
values (The codes of the channel feature of ARRT CODE are “C”
and “G” in the fixtures bank)output for the convenience to check
other channels but the channel output will not be stored in the
preset.
5. Press the button MANUAL/REC at this moment all LEDs on
5.10 Auto remote address
buttons CUE 、 OVERRIDE 、 CENTER 、 FIXTURE GROUP 、
This function is used only for the fixtures which can be addressed long-distance, ensure the
PRESET、CHASE、BANK、BLACKOUT blink at the same time.
unit match this requirements before operation, or it will be of no effect .
1. Enter Menu Mode.
2. Turn Jog wheel #1 up to when the 10. Auto remote address is
6. Press the button PRESET
shown on the monitor Press ENTER/MAIN MENU Button to enter
3. Use Jog wheel #2
to select Yes (enter) or NO (quit to the main
7. Use Jog wheel #1 to select the preset group number 1-20.
menu) .
46-
23-
8. Press one of the number button 1-10
to store a COLOR preset
5.7 Blackout mode select
or Pres one of the number button 11-20 to store a GOBO preset, all
LEDs blink for 3 times to indicate that you have successfully store a
1. Enter Menu Mode.
Preset.
2. Turn Jog wheel #1 up to when the 07. Blackout mode select is
shown on the monitor press ENTER/MAIN MENU button to enter.
9. Repeat Steps 2-8 to program more Presets.
10. Press the button PROGRAM for 3 seconds to exit Program
3. Turn Jog wheel #2 to chose Stand by or Pan/tilt center or
mode, the LED goes out indicating this operation.
Blackout scene.
4.15 Preset Editing
4. Press ENTER/MAIN MENU Button to enter, all the LEDs will blink
for 3 times, then back to the last menu.
1. Enter Program mode.
2. Press PRESET Button to select programming Preset state.
5.8 Midi channel select
3. Roll the Jog wheel #1 to select Preset groups 1-20.
1. Enter Menu Mode.
2. Use Jog wheel #1 up to when the 08.Midi channel select is
shown on the monitor Press ENTER/MAINMENU Button to enter.
4. Press the number button 1-20 to open the to be edited Preset.
3. Use Jog wheel #2 to chose the channel of MIDI(0-16), it’s
enlarge mode when the value of the MIDI channel is 0, so MIDI can
receive the information of 1-16 channels.
5. Press FIXTURE button.
4. Press ENTER/MAIN MENU Button to enter, all the LEDs will blink
for 3 times, then back to the last menu.
24-
45-
6. Press ENTER/MAIN MENU Button to enter, all the LEDs will
6. Press the number button1-20 to select the concerned fixtures to
blink for 3 times.
program Preset.
7. Repeat 3-6 to reverse other channels.
7. Move FADER 1-24 to change COLOR/GOBO channel values
(The codes of the channel feature of ARRT CODE are “C” and “G”
8. Back to the last menu please press ESC/CLEAR button.
in the fixtures bank)output for the convenience to check other
channels but the channel output will not be stored in the preset.
8. Press MANUAL/REC button , at this moment, all LEDs on CUE、
5.6 Fade mode setup
OVERRIDE、CENTER、FIXTURE GROUP、PRESET、CHASE、
BANK、BLACKOUT blink at the same time.
1. Enter Menu Mode.
2. Turn Jog wheel #1 up to when the 06. Fade mode setup is shown
on the monitor, press ENTER/MAIN MENU button to enter.
9. Press PRESET Button。
3. Turn Jog wheel #2 to select only pan/tilt or all channel.
10. Press number button 1-20 to select the opened Preset,all LEDs
blink for 3 times to indicate that you have successfully edited the
Preset.
4. Press ENTER/MAIN MENU Button to enter, all the LEDs will blink
for 3 times, then back to the last menu.
11. Press PROGRAM button for 3 seconds to exit Program mode,
the LED goes out indicating this operation.
NOTE: If you press different buttons in step 4 and 10, the preset in step 4 will cover the one
in step 10.
44-
25-
4.16 Program a Fixture Group
5. Press ENTER/MAIN MENU Button to enter, all the LEDs strobe
1. Enter Program mode.
for 3 times.
2. Press FIXTURE button.
6. Repeat 3-5 to patch all the fixtures.
3. Press the number button1-20 to select one or more fixtures to
7. Back to the last menu please press ESC/CLEAR button.
make the fixture group.
4. Press MANUAL/REC button,at this moment, all LEDs on CUE、
5.5 Reverse channel setup
OVERRIDE、CENTER、FIXTURE GROUP、PRESET、CHASE、
BANK、BLACKOUT blink at the same time.
1. Enter Menu Mode.
2. Turn Jog wheel #1 up to when the 05. Reverse channel setup is
shown on the monitor press ENTER/MAIN MENU Button to enter.
5. Press FIXTURE GROUP button.
3. Press number Button 1-20 to chose the fixture which needs to
reverse.
6. Press the number button 1-20 to select the number of the fixture
group for store, all LEDs blink for 3 times
4. Turn Jog wheel #2 to change the position of the cursor, and Jog
7. Repeat steps 2-6 to edit more fixture groups.
wheel #4 used to reverse the channel.
8. Press PROGRAM button 3 seconds to exit Program mode, the
LED goes out indicating this operation.
5. Turn Jog wheel #3 to chose the channel, Jog wheel #4 to
reverse.
26-
43-
4.17 FIXTURE GROUP Editing
5. Turn Jog wheel #1 to chose “Yes”.
1. Enter Program mode.
2. Press FIXTURE GROUP button.
6. Press ENTER/MAIN MENU Button, all LEDs shaking for 3 times
means success.
3. Press the number button 1-20 to select the fixture group number
to be edited.
7. Repeat 3-6 to delete other FIXTURE PROFILE.
8. Back to the last menu please press ESC/CLEAR button.
4. Press FIXTURE button.
5.4 Patch a Fixture
5. Press the number button 1-20 to select one or more fixtures to
1. Enter Menu Mode.
make the fixture group.
2. Turn Jog wheel #1 up to when the 04. Patch a Fixture is shown
on the monitor Press ENTER/MAIN MENU Button to enter.
6. Press MANUAL/REC button,at this moment, all LEDs on CUE、
3. Press number Button 1-20 to chose the fixture which needs to
OVERRIDE、CENTER、FIXTURE GROUP、PRESET、CHASE、
patch.
BANK、BLACKOUT blink at the same time.
4. Turn Jog wheel #3 to chose the profile of other manufacturers
7. Press FIXTURE GROUP button.
and Jog wheel #4 to chose ACME’s.
42-
27-
6. Press ENTER/MAIN MENU Button to change the trait of the
8. Press the number button 1-20 to select the fixture group number
channel.
you selected in step 2, all LEDs blink for 3 times
7. Use Jog wheel #2 and #4 to change the name of the FIXTURE.
9. Press PROGRAM button for 3 seconds to exit Program mode,
Turn Jog wheel #2 to change the position of the cursor, and Jog
the LED goes out indicating this operation.
wheel #4 should change the trait of the channel
8. Repeat 3-7 to change other FIXTURE PROFILE.
NOTE: If you press different buttons in step 3 and 7, the fixture group you selected in step 4
will cover the one in step 7.
9. Back to the last menu please press ESC/CLEAR button.
4.18 Program a Center
1. Enter Program mode.
2. Press FIXTURE button.
5.3 Delete a Fixture Profile
1. Enter Menu Mode.
2. Turn jog wheel #1 up to when the 03.Delete a Fixture is shown
3. Press the number button 1-20 to select the concerned fixtures to
on the monitor press ENTER/MAIN MENU Button to enter.
be programmed.
3. Use Jog wheel #3 to delete the profile of other manufacturers,
4. Move FADERS1-24 and use Jog wheel #3,#4 to change the
and Jog wheel #4 to delete the ACME’s.
center position of PAN、TILT where you desired. (The codes of the
channel feature of ARRT CODE are “P”、“PF”、“T”、“TF” in the
fixtures bank)for the convenience to check other channels, there
would be some output of the channels, but the channel output will
not be stored in the center.
28-
4. Press ENTER/MAIN MENU Button to enter and LCD will show
“NO”.
41-
8. Press ENTER/MAIN MENU button, all LEDs blink for 3 times to
5. Press MANUAL/REC button, at this moment, all LEDs on CUE、
indicate that you have successfully edited a FIXTURE PROFILE.
OVERRIDE、CENTER、FIXTURE GROUP、PRESET、CHASE、
BANK、BLACKOUT blink at the same time.
9. Repeat steps 3-4 to build 50 FIXTURE PROFILE mas.
10. Back to the last menu please press ESC/CLEAR button.
6. Press CENTER button.
5.2 Modify a Fixture Profile
7. Press the number button 1-20 to select the location to store the
Center all LEDs blink for 3 times to indicate that you have
1. Enter Menu Mode.
successfully stored a Center position.
2. Turn jog wheel #1 up to when the 02.Modif a Fixture is shown on
the monitor,press ENTER/MAIN MENU Button to enter.
8. Repeat steps 2-7to program more Center positions.
9. Press PROGRAM button for 3 seconds to exit Program mode,
the LED goes out indicating this operation.
3. Use Jog wheel #3 to chose the bank of other manufacturers, and
Jog wheel #4 to chose the ACME’s.
4.19 Center Editing
4. Press ENTER/MAIN MENU
button to enter.
1. Enter Program mode.
2. Press CENTER button.
5. Use Jog wheel #2 and #4 to change the name of the FIXTURE.
Turn Jog wheel #2 to change the position of the cursor, and Jog
wheel #4 should change the trait of the channel. The amount of the
3. Press the number button1-20 to select the edited Center position
letters must be below 26, it can be include ten numbers,one “—”,
number.
the length of the Fixture name should be below 16, and it must be
begin with letters.
40-
29-
5.1 Create a new Fixture Profile
4. Press FIXTURE button.
1. Enter Menu Mode.
2. Turn jog wheel #1 up to when the 01.Create a new Fixture is
shown on the monitor, press ENTER/MAIN MENU Button to enter.
5. Press the number button 1-20 to select the concerned fixtures to
be programmed.
3. Use Jog wheel #2 and #4 to change the name of the FIXTURE.
Turn Jog wheel #2 to change the position of the cursor, and Jog
wheel #4 should be used to change the trait of the channel or
character. The amount of the letters must be below 26, it can be
6. Move FADERS1-24 and use Jog wheel #3,#4 to change the
center position of PAN、TILT where you desired. (The codes of the
include ten numbers,one “—”, the length of the Fixture name should
be below 16, and it must be begin with letter.
channel feature of ARRT CODE are “P”、“PF”、“T”、“TF” in the
fixtures bank)for the convenience to check other channels, there
4. Press ENTER/MAIN MENU button to change the trait of the
would be some output of the channels, but the channel output will
channel.
not be stored in the center.
7. Press MANUAL/REC button, at this moment, all LEDs on CUE、
OVERRIDE、CENTER、FIXTURE GROUP、PRESET、CHASE、
5. Use Jog wheel #2 and #4 to change the trait. Turn Jog wheel #2
BANK、BLACKOUT blink at the same time.
to change the position of the cursor, and Jog wheel #4 to change
the trait of the channel or characters.
8. Press CENTER button.
6. Press ENTER/MAIN MENU to enter
9. Press the number button 1-20 to select the location to store the
Center, all LEDs blink for 3 times to indicate that you have
successfully edited a Center position.
7. Use jog wheel #2 to select profile (ACME
LIBRARY) you want to store the fixture profile.
30-
39-
LIBRARY or OTHER
Exiting from the Menu
10. Press PROGRAM button for 3 seconds to exit Program mode,
Press ESC/CLEAR button to exit from the last menu until exit from
the LED goes out indicating this operation.
the Menu totally.
NOTE: If you press different buttons in step 3 and 9, the center position you set in step 3 will
cover the one in step 9.
The main Menu including the following 17 settings:
1.
Create a new Fixture Profile
2.
Modify a Fixture Profile
3.
Delete a Fixture Profile
1. Enter Program mode.
4.
Patch a Fixture
2. Press FIXTURE button.
5.
Reverse channel setup
6.
Fade mode setup
7.
Blackout mode select
8.
.Midi channel select
9.
Chase run by inside/outside time
4.20 Program an Override
3. Press the number button 1-20 to select the concerned fixtures to
be programmed.
10. Auto remote address
11. Read cf card
12. Write cf card
13. Modify Password
14. Enable Password
4. Use FADERS1-24 and 4 Jog wheels to adjust the selected fixture
15. Erase all memory
to your desired effect.
16. audio input range adjust
17. Channel value display mode
You can select the Menu by Jog wheels and press ENTER/MAIN
5. Press MANUAL/REC Button,at this moment, all LEDs on CUE、
MENU to enter sub Menus for editing.
OVERRIDE、CENTER、FIXTURE GROUP、PRESET、CHASE、
BANK、BLACKOUT blink at the same time.
38-
31-
3. Move FADERS1-24 to vary the channel outputs or use Jog
wheel #1 、#2 to adjust PAN and PAN FINE or use Jog wheel #3 ,
6. Press OVERRIDE button.
#4 to adjust TILT、TILT FINE.
7. Press the number button 1-20 to select the to be stored Override
4. Once the effect is adjusted, press MANUAL/REC button to store,
number, all LEDs blink for 3 times to indicate that you have
at this moment, all LEDs on
successfully preset an Override effect.
FIXTURE GROUP、PRESET、CHASE、BANK、BLACKOUT blink
CUE、 OVERRIDE 、CENTER 、
at the same time.
8. Repeat steps 2-7 to program other Override effects.
9. Press PROGRAM button for 3 seconds to exit Program mode,
5. Press BLACK OUT/STAND ALONE button, all LEDs blink for 3
the LED goes out indicating this operation.
times to indicate that you have successfully stored a Black Scene.
6. Press PROGRAM button for 3 seconds to exit Program mode,
4.21 Override Editing
the LED goes out indicating this operation.
1. Enter Program mode.
2. Press OVERRIDE button.
5. Setting Menu
3. Press number Button 1-20 to select the Override number to be
Entering the Menu
edited.
1. Enter Program mode.
2. Press ENTER/MAIN MENU Button,to enter LCD screen main
menu.
4. Press FIXTURE button.
32-
37-
4.24 Delete a CUE
5. Press the number button 1-20 to select the concerned fixtures to
1. Enter Program mode.
be edited with Override.
2. Press and hold AUTO/DEL button.
6. Use FADERS1-24 and 4 Jog wheels to adjust the selected fixture
to your desired effect.
3. Press CUE use jog wheel #1 to select the page number.
7. Press MANUAL/REC button, at this moment, all LEDs on CUE、
4. Then press the number button 1-20, all LEDs blink for 3 times to
OVERRIDE、CENTER、FIXTURE GROUP、PRESET、CHASE、
indicate that you have successfully deleted a CUE.
BANK、BLACKOUT blink at the same time.
8. Press OVERRIDE button.
5. Press PROGRAM button for 3 seconds to exit Program mode,
the LED goes out indicating this operation.
9. Press the number button 1-20 to select the Override number you
chose in step 2, all LEDs blink for 3 times to indicate that you have
successfully edited an Override effect.
4.25 Store a Blackout Scene.
Blackout Scene is a special scene of Blackout mode set in By Black Scene.
1. Enter Program mode.
10. Press PROGRAM button for 3 seconds to exit Program mode,
2. Press the number button1-20 to select one or more fixtures.
the LED goes out indicating this operation.
Note: If you press different buttons in step 3 and 9, the Override you set in step 3 will cover
the one in step 9.
36-
33-
4.22 Program a CUE
4.23 CUE Editing
1. Enter Program mode.
1. Enter Program mode.
2. Press CUE button use jog wheel #1 to select the page number.
2. Press CUE button, use jog wheel #1 to select the page number.
3. Press the number button 1-20 to select the to be stored CUE
3. Press the number button 1-20,to select the to be edited CUE
number, at this moment, all LEDs on CHASE are lit and all LEDs on
number, at this moment, all LEDs on CHASE are lit and all LEDs on
the number button which have saved CHASE will blink. Turn jog
the number button which have saved CHASE will blink. Turn jog
wheel #1 should change the page number.
wheel #1 should change the page number.
4. Press the number button 1-20 to select the Chase number which
4. Press the number button to edit the Chase in CUE.
is to be stored to CUE, the LEDs on the chosen number buttons will
be lit.
5. Press MANUAL/REC button, all LEDs blink for 3 times to indicate
that you have successfully stored a CUE.
5. Press MANUAL/REC button, all LEDs blink for 3 times to indicate
that you have successfully edited a CUE.
6. Repeat steps 4-6 to store more CUEs.
7. Press PROGRAM button for 3 seconds to exit Program mode,
6. Press PROGRAM button for 3 seconds to exit Program mode,
the LED goes out indicating this operation.
the LED goes out indicating this operation.
34-
35-