1
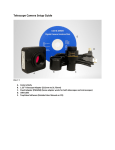
User Manual
EM Series
Microscope Digital Cameras
QUICK GUIDE
INSTALLATION MANUAL
Version 3.5
User Manual
WARNING!
TO AVO ID TH E RISK OF FIRE OR ELECT RICAL SHOCK. N EVER EXPOSE THIS PRO DUC T TO WATER OR
OPER ATE IN A H IGH HU MID IT Y EN VIRONME NT.
Keep camera away from the following:
High temperatures and excessive humidity
Direct sunlight or other heat sources
Dust
Extreme vibration
If the camera lens becomes dirty, first try blowing dust particles from it.
Next use a lint free cloth or proper lens cleaning cloth to wipe the lens gently.
Only use approved lens cleaning fluids. Never touch the lens with your
fingers! Do not allow the camera to come into contact with water or any
other liquid. If water or a foreign substance should get in the camera,
unplug the camera immediately and do not attempt to plug in until after a
long period of time to allow for drying. This does not necessarily mean it will
work again! Do not open the camera case or attempt your own repairs.
Internal components may create risk of electrical shock or fire. There are no
user serviceable components inside. Clean the outside of the camera by
wiping with a clean, dry cloth. Never use harsh or abrasive cleaners or
organic solvents on the camera or any of its parts. If you notice smoke or a
strange smell coming from the camera, immediately unplug the camera and
consult an authorized dealer.
User Manual
Trademark and Copyright information
© COPYRIGHT 2012, TOUPTEK PHOTONICS
All rights are reserved. No part of this document may be photocopied,
reproduced, or translated to another language without the prior written
consent of TOUPTEK PHOTONICS. The information contained in this
document is subject to change without notice. TOUPTEK PHOTONICS shall
not be liable for errors contained herein or for consequential damages in
connection with the furnishing, performance or use of this material.
Microsoft
®
and Windows
®
are U.S. registered trademarks of Microsoft
Corporation.
Welcome
Thank you for buying EM Series
®
high quality digital camera s. We suggest you spend
a few minutes carefully reading this user manual before installing and using your
camera. Please keep this user manual in a safe place for future reference.
User Manual
Warnings and Precautions
Precautions when using your EM Series Microscope Camera
Keep camera away from the following:
· High temperatures and excessive humidity
· Direct sunlight or other heat sources
· Dust
· Extreme vibration
If the imaging sensor lens becomes dirty, first try blowing dust particles from it.
Next use a lint free cloth or proper lens cleaning cloth to wipe the lens gently.
Only use approved lens cleaning fluids. Never touch the lens with your fingers!
Do not allow the camera to come into contact with water or any other liquid. If
water or a foreign substance should get in the camera, unplug the camera
immediately and do not attempt to plug in until after a long period of time to
allow for drying. This does not necessarily mean it will work again! Do not open
the camera case or attempt your own repairs. Internal components may create risk
of electrical shock or fire. There are no user serviceable components inside.
Clean the outside of the camera by wiping with a clean, dry cloth. Never use harsh
or abrasive cleaners or organic solvents on the camera or any of its parts.
If you notice smoke or a strange smell coming from the camera, immediately
unplug the camera and consult an authorized dealer.
User Manual
System Requirements
PC running either Windows ® (32-bit & 64-bit) XP , Vista , 2008 and 7 ; Mac OSX
and Linux
Performance is not guaranteed if the following specification cannot be reached.
♦
DirectX 9.0 or later installed
♦
2.0 GHz minimum processor(Recommend dual core 2.8GHz or more)
♦
USB 2.0 Port
♦
CD-ROM drive
♦
2GB RAM(Recommend 2GB or more)
♦
200 MB Free HDD
Performance is dependent on the PC's graphics card.
USB 2.0 is supported on Windows
®
XP, 2003, Vista, 2008 and 7. also Mac OSX,
Linux(Kernel 2.6 or Above).
Windows XP Pro must have Service Pack 2 (or later) installed in order for the
camera to function correctly. To check if you have USB2.0 installed on your
computer goes to:
Start > Settings > Control Panel > System⋯ or 'right-click' on “My Computer” and
select “properties” from the context menu...
Click on the “Hardware” tab and then onto the button “Device Manager”;
Within Universal Serial Bus controllers (USB controllers) you will see a list of USB
devices installed on your machine. In this example the red arrow is indicating the
USB2.0 device. USB2.0 controllers may be labeled as USB2.0 controllers, however
they may also be labeled as “Enhanced” or “Standard Enhanced” controllers. The
so-called “ Standard” or “Standard Universal” controllers are for the slower
USB1.x system.
User Manual
Package Contents
If you find any contents missing or damaged, contact the place of purchase.
Camera
Software CD
USB Cable
Manual
Calibration slide*
Fixed
lens adaptor*
Focusable
Lens adaptor*
CS-Mount Ring*
Lens adaptor for
eyepiece tube*
USB Cable*
(90˚ connector)
“*” marked parts are optional accessories
ToupSee is a free basic software, supporting DirectShow and Twain interface, which can facilitate the video preview preservation, video
record and picture management operation.
ToupView (Advanced measurement and analysis) is available for option at extra cost. Not in the standard package.
ToupSee
ToupView
Product safety information:
This product is in compliance with the low-voltage, EMC, Health and Safety Regulation:
26/95/EC, EN62471:2008
2004/108/EC, EN61326-1:2006,
EN 61000-3-2:2006+A2:2009、EN 61000-3-3:2008
Installing the Driver and Software
1. Insert CD into CD-ROM drive, the CD Autorun will pop up the start interface.
User Manual
2. Select “Install Camera Driver”.
3. Select “Next”.
4. Select “I Agree”.
User Manual
5. Select the driver consistent with model of your products, and then click “Next”.
6. Select the installation path. If the installation path in the default one, just click the “Install”.
The progress of installation……
User Manual
7. Click “Finish”, the end of the installation. (If using Vista, please plug the digital eyepiece into the
USB slot before installing camera driver and skip step 3)
8. Click to select the “Install Image Software” (the installation image software-ToupView for example)
9. Click the “Next”
User Manual
10. Click the “I Agree”
11. Select the installation path. If the installation path in the default one, just click the “Install”.
The progress of installation……
User Manual
12. Click the “Finish”, end of the installation (after the success of installation, the shortcut icon “
”
ToupView will appear on the desktop)
Connect the camera to a Microscope
The left hand holds the camera and makes the dust cover down, the right hand rotate the dust cover
clockwise. Keep the interface vertically downward in the process. Connect the camera with the optical
adaptor of microscope photography channel, note: try to keep the camera and adaptor in a horizontal
position during the installation, to prevent tiny dust due to friction to pollute camera sensor surface
and optical center of lens of internal interface.
To Connect Camera
Connect the USB cable into a free USB slot on the computer (Requires USB 2.0 interface).
“New Hardware Found” or “Installing device driver software” displays at the bottom right of your PC
screen. The camera is recognized.
-->The found new hardware wizard would start, Select “Install the software automatically”
-->Finish (If unidentified publisher/ Windows Logo Testing appear, select continue anyway)
NOTE:
1. Plug the USB connector to board USB2.0 port directly on the back of the PC is recommend,
2. Do NOT use anything to extend the USB cable.
User Manual
Using the camera
1. Double click on the desktop icon “
”, and start ToupView.
2. If the camera is connected with the computer correctly, click the device on the camera list of left
sidebar, and then preview window will be open.
Camera Initialization Settings
On the first use of camera for video preview, the following settings are available for adjustment to make the
camera work in the preset condition.
1. Buttons and Icons
1
3
2
5
4
7
6
9
8
11
10
13
12
15
14
17
16
19
18
21
20
23
22
25
24
27
26
29
28
1: Open (Ctrl + O)
7: Zoom
13: Track
19: Two Parallel
26: Two Circles
2: Save (Ctrl + S)
8: Video Source Properties
14: Object Select
20: Vertical
27: Arc
3: Browse (Ctrl + B)
9: Video Stream Format
15: Angle
21: Rectangle
28: Text
4: Camera List
10: Capture Image
16: Point
23: Ellipse
29: Polygon
5: Unit
11: Calibrate
17: Line
24: Circle
30: Manual Fusion
6: Magnification
12:Image Select
18: Parallel
25:Annulus
31:Gray Calibration
31
30
User Manual
Snap: Capture single image
Record: Capture video stream
Resolution settings: Choose suitable resolutions will get both smooth video and high
resolution still images.
1, Advanced users unselected automatic exposure button, enter the manual exposure mode.
2,Tune the microscope light source to a bright state, and then pull exposure time block left
and right until the brightness of the image is in the best visual effects. If and only if the
microscope light source brightness can not meet the demand of imaging, increase the
analog gain value appropriately, in order to meet the requirements for increasing the
brightness.
3,You can also input precise exposure time in the pop-up dialog box.
Region of interest property:
1, Click the White Balance bar to open the property sheet and the view finder appears in
the preview window(marked with White Balance). You can drag the mouse to move the
viewfinder image to find the region of concern. If the viewfinder is placed in the blank
background, click on “White Balance” button, the software regard background area
selected as white reference for calibration of image color parameters. If the automatic
setting and actual result still has deviation, turn to color adjustment manually to correct.
2, The viewfinder should be placed in blank background in regulating white balance.
3, In automatic exposure mode, when the Exposure & Gain property sheet is open. The
viewfinder marked with “Exposure “ appear. The area of viewfinder will be regarded as the
reference region of judging brightness target values of the image. Move it to the dark
position, image will be the overall light. Conversely, move it to lighter area, image will be
the overall dark.
viewfinder
1, Set hue, saturation, brightness parameters according to the requirement.
2, Adjust the contrast and gamma values according to the user preference and output
device.
User Manual
Different frame rates are available. You can select proper frame rate according to your
computer performance. Select the fastest frame rate if your computer is good enough.
If you need to observe color image, select “Color”
If you need to observe black and white image, select “Gray”
If the image on the screen appears in different direction from what is viewed under the
microscope, check the “level” and “vertical” option to correct screen square.
Choose the right light source power frequency.
Optional sampling mode in low resolution: Bin or Skip
“Bin” will allow more sensor sensitivity and “Skip” will give faster video frame rate
Histogram property:
1, By dragging the pink line on both sides of the histogram to the proper position, the
histogram distribution of image is changed make the contrast and brightness curve of
image improved.
2, You can also input directly the accurate value in the number box of chart, and make
extension of histogram.
3, Click “Refresh” button to update the histogram information, if the vision is moved or
the scene is changed.
2. Calibrate the magnification
Put the TS-M1 stage micrometer in the view field and find the scale, set the live resolution Max. and zoom to
100% display. Click on the Calibrate button “
”, and a red line calibrate tool appeared. Put the 2 ends of the
red line on the scale, measuring the scale corresponding to the pixel value. Select or input the magnification of
current objective and input the actual length of the selected scale in the pop-up dialog box. Click the “OK”
button to finish the magnification calibration.
User Manual
Before definition:
After definition:
3. Calibrate the gray values of image
This function can make image brightness stable and uniform results with a lot of shooting or in differe
nt time shooting, achieve the requirement of the continuity of the shooting.
Method of use: use the “Image Select” tool to select a reference region as the brightness setting in the
video window background, click on the menu bar “input” menu “gray scale”, then pop-up dialog box,
scroll and display current mean value of brightness and gray, then adjust the brightness of microscope light
source, until close to the preset value, click “OK” and finish. The recommended value is 200.
Special Function and tools of ToupView
1. Video Overlay (Setup --> Video Overlay --> Overlay)
User Manual
2. Video Marker (Setup --> Video Overlay --> Marker)
3. Video / Image Measurement
Capture and save
ToupView provides a variety of image or video recording mode and can easily achieve a single picture,
sequence images, video capture and preservation.
1、Taking single picture and video
During the video showing, you can always use the “Snap” button
“F8” to freeze a picture, can also use the “Record” button
, or use the shortcut key
or use the shortcut key “F9” to
record movies. The pictures can be saved to the specified directory by the menu bar “File” menu “Save
as” leaflet, and can also be saved one-time through the “Batch Save”.
Note: during the video, it may lose frames seriously by setting resolution, depending on the transmission and
recording performance of computer.
User Manual
2、Capture a sequence of pictures (Time-Lapse)
This function can capture a sequence of pictures with the same interval of time after setting time
interval; you can precisely set the time interval (2 to 3600 seconds) and the total number of shots.
Open path: the menu bar “Capture” menu “Time-lapse”
The file name saved automatically can be a serial number or the date and time, and can be coupled
with the prefix. There are a variety of file storage format available. For example, when choosing JPG
format, you can set the parameters of “Options” and adjust compression quality of pictures saved.
Trouble Shooting
WARNING:
Please do not attempt to open the camera case. There are no user serviceable parts inside.
USB Device Conflicts
When there are a number of USB devices installed at the same time, unexpected errors can arise. The
cause can be insufficient available USB bandwidth, or possibly too much combined current being drawn
by USB devices. To test for these conditions you should uninstall and unplug as many other USB devices
as possible. This should help to rule out the above, and eliminate possible conflicts with other cameras.
If you are using an extended USB cable, please make sure the cable’s bandwidth is good enough to
support High-Speed USB 2.0 standard. Once the camera is not working well, please remove it.
Image Preview Is Black Screen / Capture Problems
If communication fault of the camera and computer occurs the error message:
User Manual
Fault reason:
Solution:
1
The light source of the microscope is closed
Open light source and adjust the brightness
2
The position of the splitter lever of the microscope is in the
Switch the splitter lever to open to photography channel
3
The preset exposure time is too short
Reset the exposure time
4
USB cable disconnects accidentally
Reconnect and open video
5
USB cable connection is bad or lack of power supply
Change to another USB interface or USB cable
6
The driver is not installed properly
Reinstall the driver
wrong position to make the photography channel closed
Image motion lag, slow-moving
Fault reason:
Solution:
1
Preview resolution is set too high
Set the smaller size for video preview resolution
2
Light source is closed or lighting level is inadequate (automatic
Cancel auto exposure, open or increase the brightness of
exposure mode)
light and shorten the exposure time
3
The preset exposure time is too long (manual exposure)
Shorten the exposure , and increase the brightness of light
4
The preset frame rate is “low”
Adjust the frame rate in the “Frame Rate” property
5
Computer performance does not meet the requirements
Use computer with high performance
Color noise on the screen
Fault reason:
Solution:
1
Analog gain value is too large and lighting is poor
Reduce the gain and increase the brightness of the light
2
The exposure time setting is too long, use continuously long
source(set gain to the minimum, if the brightness Is sufficient)
exposure for a long time
3
The brightness of light is too low, beyond the camera ability
Long exposure function will lead to thermal noise of the
photosensitive chip, if the camera without refrigeration device,
it is recommended to shortens working time
Switch to a more sensitive camera, such as the EXCCD
series.
If you have any other problems, please visit our website to get help information
http://www.touptek.com/
User Manual
Warranty
TOUPTEK PHOTONICS Three Year Limited Warranty
TOUPTEK PHOTONICS warrants its products to be free from the date of purchase
this product for three years. TOUPTEK PHOTONICS will repair or replace such
product or part thereof which, upon inspection by TOUPTEK PHOTONICS, is found
to be defective in materials or workmanship. As a condition to the obligation of
TOUPTEK PHOTONICS to repair or replace such product, the product must be
returned to TOUPTEK PHOTONICS together with proof-of-purchase satisfactory to TOUPTEK PHOTONICS.
All returns must be accompanied by a written statement setting forth the name, address and daytime
telephone number of the owner, together with a brief description of any claimed defects. Parts or
product for which replacement is made shall become the property of TOUPTEK PHOTONICS.
The customer shall be responsible for all costs of transportation and insurance, both to and from the
factory of TOUPTEK PHOTONICS, and shall be required to prepay such costs.
TOUPTEK PHOTONICS shall use reasonable effort to repair or replace any accessory covered by this
warranty within thirty days of receipt. In the event repair or replacement shall require more than thirty
days, TOUPTEK PHOTONICS shall notify the customer accordingly. TOUPTEK PHOTONICS reserves the
right to replace any product which has been discontinued from its product line with a new product of
comparable value and function.
License Agreement
The software and accompanying documentation are protected by the International copyright laws. Any
use of this software in violation of copyright laws or the terms of this agreement will be prosecuted to
the best of our ability.
TOUPTEK PHOTONICS authorizes you to make archival copies of this software for the sole purpose of
back-up and protecting your investment from loss. Under no circumstances may you copy this software
or documentation for the purposes of distribution to others. You may not distribute, modify, adapt,
translate, reverse engineer, recompile, disassemble or otherwise attempt to discover the source code
of the Software. Any information supplied by TOUPTEK PHOTONICS or obtained by you, as permitted
hereunder, may only be used by and may not be disclosed to any third party or used to create any
software which is substantially similar to the Software.