1
Simtk.org Website
User’s Manual
Release 1.0
August 12, 2010
Website: simtk.org
ii
Copyright and Permission Notice
Portions copyright (c) 2010 Stanford University
Based on the original GForge user guide by Ken McCullagh, Guillaume Smet, Reinhard Spisser. Modifications
made by Joy P. Ku and Jeanette Schmidt for Simtk.org, with contributions from Ahmet Erdemir on using Simtk’s
Wiki and Subversion repository features.
Permission is hereby granted, free of charge, to any person obtaining a copy of this document (the "Document"),
to deal in the Document without restriction, including without limitation the rights to use, copy, modify, merge,
publish, distribute, sublicense, and/or sell copies of the Document, and to permit persons to whom the Document
is furnished to do so, subject to the following conditions:
This copyright and permission notice shall be included in all copies or substantial portions of the Document.
THE DOCUMENT IS PROVIDED "AS IS", WITHOUT WARRANTY OF ANY KIND, EXPRESS OR IMPLIED,
INCLUDING BUT NOT LIMITED TO THE WARRANTIES OF MERCHANTABILITY, FITNESS FOR A
PARTICULAR PURPOSE AND NONINFRINGEMENT.
IN NO EVENT SHALL THE AUTHORS,
CONTRIBUTORS OR COPYRIGHT HOLDERS BE LIABLE FOR ANY CLAIM, DAMAGES OR OTHER
LIABILITY, WHETHER IN AN ACTION OF CONTRACT, TORT OR OTHERWISE, ARISING FROM, OUT OF OR
IN CONNECTION WITH THE DOCUMENT OR THE USE OR OTHER DEALINGS IN THE DOCUMENT.
iii
Acknowledgments
Simtk.org is funded by the Simbios National Center for Biomedical Computing through the National
Institutes of Health Roadmap for Medical Research, Grant U54 GM072970.
National Centers can be found at http://nihroadmap.nih.gov/bioinformatics.
Information on the
Table of Contents
1
INTRODUCTION ................................................................................................................................... 6
2
GETTING STARTED ............................................................................................................................. 9
3
4
5
2.1
SIMTK.ORG HOME PAGE ..................................................................................................................... 9
2.2
REGISTERING AS A NEW USER ............................................................................................................ 9
2.3
REGISTERING A NEW PROJECT ........................................................................................................ 10
2.4
SEARCHING FOR CONTENT ON SIMTK.ORG........................................................................................ 12
2.5
LOGGING IN .................................................................................................................................... 15
2.6
LOGGING OUT................................................................................................................................. 15
USER-SPECIFIC FUNCTIONS ........................................................................................................... 16
3.1
USER HOME PAGE .......................................................................................................................... 16
3.2
MODIFYING USER SETTINGS ............................................................................................................ 16
3.3
BLOG ............................................................................................................................................. 16
PROJECT FUNCTIONS ...................................................................................................................... 17
4.1
PROJECT OVERVIEW ....................................................................................................................... 17
4.2
PROJECT ADMINISTRATION .............................................................................................................. 20
4.3
PROJECT STATISTICS ...................................................................................................................... 21
4.4
TEAM ............................................................................................................................................. 23
4.5
DOWNLOADS AREA ......................................................................................................................... 25
4.6
DOCUMENTS MANAGER ................................................................................................................... 32
4.7
PUBLICATIONS ................................................................................................................................ 34
4.8
NEWS ............................................................................................................................................. 35
4.9
W IKI ............................................................................................................................................... 37
4.10
FORUMS ......................................................................................................................................... 46
4.11
TRACKER ....................................................................................................................................... 47
4.12
MAILING LISTS ................................................................................................................................ 51
4.13
TASK MANAGER .............................................................................................................................. 52
4.14
SURVEYS ....................................................................................................................................... 54
4.15
DASHBOARDS ................................................................................................................................. 56
4.16
REPOSITORY .................................................................................................................................. 57
SITE-WIDE FUNCTIONS .................................................................................................................... 60
5.1
SITE-WIDE NEWS ............................................................................................................................ 60
5
5.2
SITE STATISTICS ............................................................................................................................. 60
6
1 Introduction
Simtk.org is an Internet-based repository for developing, sharing, and disseminating research software
and data, especially that related to physics-based simulation of biological structures. Examples of how
Simtk.org has been used include:
Educators and clinicians searching for biomedical software and/or data:
By entering desired
keywords (e.g., musculoskeletal modeling) in the Simtk.org search box, a list of projects related to those
keywords appears. Those projects with easily accessible publicly available material, such as software
packages, data, or tutorials, are indicated by the download icon
.
Individuals collaborating on a project who want an easy-to-use, readily accessible, robust means
of sharing and managing files: It has a number of features that make it especially useful for software
development projects: Simtk.org allows members to easily create projects through which they can share
files using a Web interface that is available 24 hours a day, 7 days a week. Features include:
•
A version control system, enabling multiple individuals to work on files simultaneously
•
Automated daily backups of files
7
•
Individual control over who can access files
•
Automated nightly build, test, and report system for software development on multiple platforms
•
Mechanisms for bug tracking and feature requests
Simtk.org
has
been
used
by
researchers
collaborating
on
software
projects
(see
http://simtk.org/home/opensim), grants (https://simtk.org/home/multidomain), and publications.
Individuals who wish to publicize their work, especially to the biomedical community: Simtk.org is
ideal for disseminating research and educational materials, such as (but not limited to!) research
software, large data sets associated with a publication, and tutorials. When you create a Simtk.org
project to share your work, you automatically have access to the following:
•
A professional-looking set of web pages, including Wiki pages
•
Statistics for your web pages, including user downloads, page hits, and number of unique visitors
•
Mailing lists to contact your users
•
Discussion forums for your project, plus much more
8
While other sites, such as SourceForge.net, provide similar services, Simtk.org is dedicated to a very
specific market – the biomedical research community – and, as of June 2010, has built up a membership
of over 10,000 individuals.
This manual explains how to use the Simtk.org website. The manual is divided into 4 parts:
• Getting Started: This section explains how to register as a new user, how to register a new
project, how to log in and how to log out.
• User-specific Functions: This section describes the functions of Simtk.org related to a specific
user: the user’s home page, how to modify user settings (including your profile information)
• Project-specific Functions: This section explains the functions available for each Simtk.org
project.
• Project Overview - This section describes the Overview page for your project.
• Project Administration - This section describes how to administer the project, including
activities such as adding members to your project, updating the overview page, and modifying
what menu items appear. These functions are accessible only to a project’s administrators.
• Project Statistics - This section describes how to access the statistics for the project. Some of
this data is only available to project administrators.
• Team - This section describes how to add members to your project and set permissions for
them.
• File releases (Downloads) - This section describes how to publish new releases of the
software or data associated with your project.
• Documents - This section describes the Documents section of a project. It offers an alternative
to the Downloads section for sharing files.
• Publications - This section describes how to provide a list of related publications for the
project.
• News - This section describes how to add and display News for your project.
• Wiki - This section describes how to set up and edit Wiki content for your project
• Discussion Forums - This section describes the use and administration of the Discussion
Forums.
• Feature & Bug Tracker - This section describes how to use the Tracker to track bugs, features,
patches, support requests, and anything else the project may want to track.
• Mailing Lists - This section describes the creation and maintenance of mailing lists for your
project.
• Repository - This section describes how to manage repositories for your project. Version
control repositories are useful for collaborating on and managing files.
• Dashboards - This section describes the display of results from the Simtk.org nightly build
system, which is used to compile and test software on a daily basis.
9
• Task Manager - This section describes how to use the Task Manager to track activities.*
• Surveys - This section describes how to set up surveys for your project.*
*We do not recommend using the Task Manager and Survey functionality as they are not
using the newest technology
• Site-wide Functions: This section discusses the summary pages available for Simtk.org, including
news and statistics across the entire site.
2 Getting Started
2.1
Simtk.org home page
Use your web browser to go to Simtk.org (https://simtk.org). At the top of the home page is a navigation
bar to go to some of the more commonly accessed web pages, including:
•
A search box for locating projects that are hosted on Simtk.org (see Section 2.4 on how to
conduct effective searches)
•
The new user registration page (see Section 2.2)
•
The log-in page for existing users (see Section 2.5)
•
The new project registration page (see Section 2.3)
2.2
Registering as a new user
To register a new user, click on the “Register” link on the top-right side of the browser window. Fill out the
form that appears with the following data AND then confirm the registration via the link you will receive by
e-mail:
• Login Name - Select a unique user name to access the system.
• Restrictions: No upper-case letters, punctuation, or spaces
• The user name cannot match that of an existing system user account, e.g., you can’t have a
Simtk.org user named ’root’ since that user name already exists
• A typical user name is some combination of your first name and your surname, e.g., jdoe for
John Doe
• Password – Enter a password. Below are some guidelines for choosing a password:
10
• It must be at least 6 characters long.
• You shouldn’t use names that are too obvious for the password. It should be easy for you to
remember but hard for others to guess, so don’t use the name of your dog or the name of your
birth city. You should instead use a combination of letters, numbers, and punctuation.
• See the document at http://www.cs.umd.edu/faq/Passwords.shtml for good password-choosing
advice if you need some additional hints.
• Email Address – Provide a valid email address here. Simtk.org will send you a confirmation email
for your subscription. If the email address you enter here is wrong, you’ll never receive the
confirmation email and the account you’re registering will never be activated. When you receive the
confirmation email, you must connect to Simtk.org using the URL provided in the email. This is the
only way to become a registered user.
• First and Last Name - Enter your legal full name here. This information is used to demonstrate that
real individuals are members of the site, which is important for grant funding purposes. Simtk.org
periodically inactivates user accounts with invalid names, so it’s vital that you provide us with a legal
full name.
• University/Institution - Provide the institution for which you’re doing research or enter
“Independent” if you’re not affiliated with an institution. This is important so others can identify you.
• Picture – You can provide a picture so that others can identify you. While this is not required, we do
highly encourage you to upload a recent photo of yourself, especially if you intend to register a
project.
• Time Zone - Select your time zone. Note that Pacific Time is preselected. All dates will be shown
relative to your time zone.
2.3
Registering a New Project
To register and add content for a new project, connect to Simtk.org and log in. At the top of the screen,
beneath your name and the “News” link is a “Create Project” link. Click that link and provide the following
information to register a project:
• Short Project Identifier - Insert an identifying name for your project here. This name is UNIXbased and is used behind-the-scenes by Simtk.org. It is also used in the URL for the project web
pages and source control repository. As such, it must respect the following rules:
• It cannot match the identifying name of any other project
• Its length must be between 3 and 15 characters
• It must contain only lower-case characters, numbers and underscores ( _ )
NOTE: The identifying name will never change. Once a project is set up with a given identifying name, the
name cannot be altered.
11
• Project Type - If your project is related to a publication, select “Publication Project.” Otherwise,
select “Standard Project.”
• Project Title – A descriptive name of the project, e.g., “MAT-OSim: a MATLAB interface for forward
simulation in OpenSim.” This title appears at the top of your project page, as well as in the search
results.
• Primary Citation - Add the primary publication related to your project here. This is required for
publication projects. Additional related publications can be added to the project after it has been
created.
• Audience - Describe the target audience of your project here. Who would be most interested in it?
• Project Description - This description will appear on the Project Overview page, so please
describe your project accurately.
• Project Downloads - Enter any downloads your project will make available (e.g., software,
datasets, tutorials), and potential uses for them. This field is required for publication projects, but
optional for standard projects.
• Project Classification - Assign at least one keyword to describe your project. Optionally, you can
also classify your project according to terms found in the Biomedical Resource Ontology.
• Project Purpose/Synopsis – Provide a brief summary of your project. This is limited to 255
characters and should be a more succinct version of the description you’ve already entered. The
text provided in this field will be displayed in project search results.
• Long-Term Goal - Describe what the long-term goal of your project is. What do you hope to
achieve with the contents of this project?
• Primary Content - Select whichever of the available options apply to your project. You must
choose at least one Primary Content category.
• Driving Biological Problems – If your project is related to any of the main biological areas listed,
check the appropriate box(es). These driving biological problems are the primary focus areas of
Simbios, the NIH-funded research center that created the Simtk.org website.
• Privacy – You are able to control the privacy of individual sections of your project independently
(e.g., you can make some documents private but make others publicly available). This is the
default behavior. If you wish to prevent access to all subsections, thus hiding the entire left-hand
menu, check the “Keep project private” box. We recommend that you do not check this box, but
instead control privacy on an individual file/package level.
• Primary Image - Here you can upload an image to represent your project on its
home page and in search results. Images must be at most two megabytes large,
and must be formatted as a PNG, GIF, or JPEG file.
Click on the “Submit Project” button when you’re finished. Your project will now be sent for approval by
the site administrators. Once the project is approved, you’ll receive an email from Simtk.org confirming
12
that the project is active.
Simtk.org also has a few projects designated “Umbrella Projects,“ for example, “OpenMM Software
Suite,” “SimTK, the Simbios biosimulation ToolKit,” ”Neuromuscular Models Library,” and a few others.
These projects are extremely useful as they encompass information about a set of related projects and
allow users to easily find all the “child projects.” Another useful feature is that they aggregate statistics on
the child projects. We have established umbrella projects for key Simbios software such as the ones listed
above. Because of the potential for abuse, users cannot establish umbrella projects. If you feel you have
a legitimate need for an umbrella project, please contact the webmaster.
2.4
Searching for content on Simtk.org
Basic keyword search for Simtk.org projects: To locate Simtk.org projects, enter keyword(s) into the
“Search Simtk.org” search box located at the top of the web page and hit the “Go” button. This will search
a number of fields for the desired keywords: project names, descriptions, terms and keywords, audience,
etc.
Results of your search will be displayed by relevance; projects with keyword matches in their titles
or descriptions and which have large numbers of public downloads will be listed first.
If multiple keywords are entered, any projects with key fields that contain any of the keywords are
returned (an OR search). For example, entering the keywords
molecular dynamics
would return projects containing the keyword “molecular” as well as projects containing the keyword
“dynamics.” The projects would not necessarily contain both keywords.
Hitting the “Go” button without any keywords returns a list of all Simtk.org projects.
Narrow your search results: Use the links on the left-hand side of the search results page to narrow the
search.
13
1. Search Categories
You can refine your search results according to the following categories:
•
DBP (Driving biological problem) – Narrow your results based on the biological field
associated with the project
•
Classification – Narrow your results based on how the project has been categorized
•
“Ontology terms only” returns those projects that have been labeled with an ontology term
from the Biomedical Resource Ontology
•
Publication projects returns those projects that are associated with a publication
•
Download Content – Narrow your results based on the types of files the project provides.
These files could be private or public. To view only those projects that allow everyone access
to files, select the “Publicly Available Downloads” filter.
Note that many of the categories are identified with little icons, for example
indicates the project
14
has code stored in the subversion repository and
indicates that it has an application for download.
These icons are useful for quickly looking at the search results.
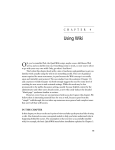
2. Using Multiple Search Categories
You can restrict your search using multiple categories. For instance, to view only those projects
that provide cardiovascular models, you might click on “Cardiovascular Dynamics” and “Models.”
Both of these categories will appear in the top-left under the “You searched” label. Notice that the
search returns projects that satisfy both categories (an AND type of search), rather than those
that satisfy either category (an OR type of search). You can
broaden your search by clicking on a restriction under the “You
searched” label. All restrictions below the one you clicked on
will be removed.
In the example (right), if you click on
“Cardiovascular Dynamics,” the restriction “Models” will be
removed
and
all
projects
labeled
with
“Cardiovascular
Dynamics” will be displayed.
Other search mechanisms available: The “Advanced Search” link
just under the search box provides alternate ways to search the Simtk.org site.
1. Ontology classification search: All Simtk.org projects can optionally tag their projects using
terms from the Biological Resource Ontology. To find projects tagged with a specific term, fill in
the field for “Search Ontology:” This text box provides auto-completion functionality; enter the
first three characters of a term and a drop-down list of all matching ontology terms will appear. If
you type in a set of characters that does not match any terms, the character string will be
shortened to two characters to be used in the search. For example, typing in ‘abc’ yields no
matches, so Simtk.org shortens your search term to ‘ab’ which produces many matches in the
ontology. Select the ontology term from the drop-down list that appears.
15
2. People search: You can also search for Simtk.org members via the “Advanced Search” link.
Enter a search term in the “Search for People:” text box. This returns a list of individuals whose
name or login matches your search term.
3. Google search:
Perform a Google search on the Simtk.org website by entering your search
term(s) in the text box labeled “Google Simtk.org.” This is useful for locating web pages other
than project overview pages or people profiles. For instance, you may want to find a specific
tutorial for a project or a non-project-related Simtk.org web page (e.g., the Simtk.org user guide or
information about contributing projects).
2.5
Logging In
You can log in by clicking the “Log In” link at the top-right of the browser window. The form requires that
you enter your username and your password to access the site.
2.6
Logging Out
To log out from Simtk.org, click on the “Log Out” link at the top-right of your browser window.
16
3 User-specific functions
3.1
User Home Page
The user home page appears after the user clicks the “My Page” tab. This tab only shows up in the menu
bar after you log in. The user home page contains a list of all open activities/tracker items:
• My Projects - This list shows the active projects in which you are participating. When you click on a
project, you will go to that project’s summary.
The other items below are less frequently used:
• My Assigned Items - This list shows the Tracker items (see Section 4.11) assigned to you. Only
items in the open state will be listed here. Click on an item for the details. The items are ordered by
age, newest first.
• My Submitted Items - This list shows the Tracker items (see Section 4.11) submitted by you. Only
items in the open state will be listed here. Click an item for the details. The items are ordered by
age, newest first.
• Monitored Forums - This list shows the discussion forums you are monitoring. See Section 4.10
on Forums for more details on how monitoring works.
• Monitored Files - This list shows the Download packages you are monitoring. See Section 4.5
about the Downloads section for more information on how monitoring works.
• My Tasks - If you have any tasks assigned to you in the Task Manager, they will be displayed here.
For more details, see Section 4.13 on the Task Manager.
3.2
Modifying User Settings
To change any information for your user profile, e.g., your password, university name, research interests,
your photo, click on “Update My Profile” from your user home page or profile page. All fields except your
registration date and login name can be changed.
3.3
Blog
Each Simtk.org member has a basic blog that appears on their profile page. To add entries to your blog,
click on “Update Blog” at the top of your user home page. You can provide a subject and a description of
the item and select if the item is public or private. If the item is public, every user of Simtk.org can view
and monitor this item.
17
4 Project functions
4.1
Project Overview
4.1.1 Introduction
The project overview provides a summary of the selected project. The following information is displayed
on the project overview page:
• Project description – The overview page primarily provides a detailed text description of the
project, plus other information such as available downloads, goals, and audience. This, along with
an optional graphical icon, forms the main content of the page. Project administrators can modify
these descriptions and the graphics via the Overview->Update link (see Section 4.1.2).
.
• Ontology classification and keywords – The Biological Resource Ontology (BRO) terms and
keywords that the project administrator has chosen to represent the project are listed. Clicking on a
given term will search for other projects using that BRO term (in the case of ontology
classifications) or which have the chosen keyword anywhere in the project overview (in the case of
keywords). These terms can be updated by project administrators via the Overview -> Update
page (see Section 4.1.2).
• Navigational links for a project – Links for each section of a project (e.g., Team, Downloads,
18
Publications) appear in the left-hand column. Project administrators can modify which menu items
appear on the project pages via Overview -> Update -> Edit Menu Items (see Section Error!
Reference source not found.).
• Downloads and source code – Packages that appear on the Downloads page with publicly
available files are automatically listed in the left-hand column. This section also indicates whether
or not the project uses the subversion code repository.
• News headlines – The latest news for the project appears in the left-hand column. Project
administrators can add, modify, and delete news items via the News -> Administration and the
News -> Add News Item links (see Section 4.8). A maximum of three news headlines are
displayed.
• Project leads – A list of the project team members that have been designated as project leads
appears in the right-hand column. This list can be updated by administrators using the Team ->
Administration link (see Section 4.4.1).
• Driving biological problems – A list of the biological problems related to this project appears in
the right-hand column. This list can be updated by administrators using the Overview -> Update
link (see Section 4.1.2).
• Child projects – If the project is an umbrella project (see Section 2.3), a list of its child projects will
be shown in the right-hand column.
• Related projects – Simtk.org projects that the administrator has designated as being related to the
current project will be shown in the right side bar. This list can be modified using the Overview ->
Update -> Edit Related Projects link (see Section Error! Reference source not found.).
• Related links – The right-hand column lists any URLs that the administrator has designated as
being related to the current project. Project administrators can edit this list using the Overview ->
Update -> Edit Related Projects link (see Section Error! Reference source not found.).
4.1.2 Administration
To make changes:
Log in to Simtk.org as a project administrator.
Most fields can be changed by going to Overview -> Update. This will give you access to most of the
information you entered when you registered your project, including:
•
Project type (publication vs. standard)
•
Keywords
•
Project title
•
Driving biological problems
•
Audience
•
Content categories
•
Project description
•
Privacy setting
•
Available downloads
•
Graphics/icon
•
Ontology terms
You can change everything except the Short Name of the project (also called the Unix name). If your
project has been turned into an umbrella project by the Simtk.org site administrator, you will also see a list
of projects which can be added as children of your project.
Be sure to click the “Save Project Info” button at the bottom of the page in order to register your
changes.
To edit related projects and links: Click Overview -> Update -> Edit Related Projects in the left
navigation menu. There you can add a list of Simtk.org projects and other URLs, such as a lab home
page, which are related to your project.
•
Add a link to a Simtk.org project – A list of all Simtk.org projects appears on the page. You can
filter this project list by entering keywords or parts of a word in the textbox for Related Projects.
As you enter characters in the textbox, only projects with titles matching your search term will
appear in the box below it. You can select a specific project by either double-clicking the project
20
name from within the box OR clicking the blue plus sign
to enter the text provided in the
textbox. Only valid project titles will be added.
•
Add a related external link – Provide the URL and the title to be displayed for the URL in the
textboxes in the section for Related External Links. If no title is provided, the URL itself will be
displayed. Click the blue plus sign
•
to obtain textboxes for entering additional URLs.
Reorder lists – Reorder lists by clicking on and dragging the grey triple bars
to the left of
each item.
•
4.2
Delete item – Delete an item from a list by clicking the blue minus sign
next to it.
Project Administration
Project administrators can perform a number of tasks related to the content and accessibility of the project
web pages. To have administrative privileges, you must be assigned the “Admin” role (see Section 4.4.1
on Team -> Administration functions).
Administrators can modify the project web pages by logging into Simtk.org
and navigating to the project, either from their personal page (the “My Page”
link) or via a search. Most menu items will have an “Administration” sub-link
which the administrator can use to make changes to a particular section of a
project. For instance, when a project administrator is logged in and clicks on
the “Downloads” menu option, the sub-link “Administration” appears, allowing
them to modify the files and text appearing on the “Downloads” page. Details
about the administrative functions for each menu item appear in the subsections below.
Exception: The one exception to this structure is administrating the project overview page. To modify
the project overview page, you click Overview -> Update (see Section 4.1.2).
4.2.1 Modify Menu Links/Features Used by a Project
As a project administrator, you control what Simtk.org features are available for a given project and
appear in the left-hand navigation list. To add or remove features, click the links Overview -> Update ->
Edit Menu Items. Check the appropriate boxes to activate a feature:
21
•
Downloads page
•
Surveys
•
Documents page
•
Discussion forums
•
Publications page
•
Project / task manager
•
Wiki
•
Source control repository
•
News
•
Dashboard
•
Mailing lists
•
Features and bug trackers
The Overview and Team web pages are always displayed in the menu.
4.2.2 Project History
As a project administrator, you can view a summary of updates and changes made to your project by
clicking on the links Overview -> Project History. The purpose of this section is strictly informative;
nothing can be edited.
4.3
Project Statistics
Simtk.org provides all its projects with information about activities associated with the project (e.g.,
number of downloads, number of visitors to the site, activity on its discussion forum).
4.3.1 Downloads Data
Simtk.org provides basic statistics about a project’s downloads, including total number of files
downloaded from the project and the number of unique users who have downloaded items from the
project. Data is also broken down by package and release.
To access this information, click on Overview -> Statistics. Only data associated with publicly available
packages and releases will be shown from this link. To see data for all packages and releases, log in as
an administrator and click on the “Tracking” link under “Downloads”.
22
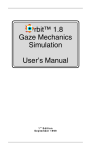
4.3.2 Graphical Display of Project
Activity
A graphical display of project activity is available.
Users can see information such as page hits,
downloads, number of unique visitors to the site,
and discussion forum activity graphed over time.
Access the graphs by clicking on Overview ->
Statistics from the navigation menu, and then
clicking on “Link to Graphs” at the top of the page.
4.3.3 Geography of Use
You can display the number of visits to your project on an overlay of the world. Use this to see the global
distribution of your project and identify places where your project is being used the most. To access this
map, click on Overview -> Geography of use.
23
4.4
Team
Each project has a team, even if that team is composed of only one person. At least one person must be
a project administrator, although a project may have more than one administrator. While only project
leads will be listed in the sidebar of the project overview page, clicking on the “Team” link will show you a
list of all team members associated with that project (leads, administrators, and regular members).
4.4.1 Administration
If you are an administrator for a project, you can modify the list of team members and their roles (and
project access) by clicking on the “Team” link in the left-hand navigation bar and then clicking on
“Administration.” You will then be shown a list of current team members and their roles.
You will also use this interface to set permissions and access levels for non-members of your project
(referred to as the “Observer”).
Add new members: You can add new members either by typing in the user name or by selecting “Add
Users From List” at the bottom of the “Project Members” list.
Remove members: Remove a team member by clicking the “Rm” button next to their name.
24
Modify member’s role: You can edit an existing team member’s role by using the “Role” pull-down
menu next to the relevant team member’s name. Each role has certain privileges and project access (see
Section 4.4.2 below). Once you have changed a member’s role, click the “Upd” button to update the
options for that member.
Add or delete team members from “project leads” list: Project leads are displayed on the project
overview page. To designate a team member as a project lead, check the “Show” button next to their
name and click the “Upd” button. You can modify the order in which the team members are displayed
using the display order field and clicking the “Upd” button.
To remove a team member from the list of project leads, click the “Show” checkbox (so that it is not
checked) and click “Upd.”
Edit Observer: The Observer represents non-members of your project. Click the “Edit Observer” button
to specify permissions and access levels for non-members (including members who are not logged in).
Note that each team member (when logged in) has at least the same privileges as the Observer.
Edit team roles: Edit what privileges a given team role has within your project by going to the “Edit
Roles” section at the bottom of the page. Use the pull-down menu to select an existing role and click
“Edit Role.” If you wish to add an entirely new role, select “Add Role.” See Section 4.4.2 below for more
information.
4.4.2 Roles
When adding or editing a role, you have fine-grained control over what access that role has within your
project. It is highly recommended that you never edit the Administrator role. Doing so will increase
the risk of administrators (including you!) losing access to certain areas of your project. Some of the role
attributes you can edit include:
Project-wide Admin – Specify whether this role has access to administer the project as a whole (“Admin”
vs. “None”).
File Release System – Specify whether the role can add files and packages (“Write”) to the Downloads
area, or simply read those files (“Read”) which already exist.
Source Code Repository - Set this role to have write access (“Write”) or only read access (“Read”) to
the project’s Subversion repository. Alternately, you can revoke access entirely for users in this role (“No
Access”).
Documents - Set whether users can read and post documents in this project, or whether they will have
administrative privileges as well (allowing them to add and edit groups, edit document properties, etc.)
25
Publications - As with Documents, set whether users can only read and add publications, or whether
they will have administrative privileges as well (allowing them to edit and delete publications)
Forums - You can set this role to have admin access to all forums, or set read, post, or admin access on
a forum-by-forum basis. The default for any forums you add after editing this role will be read-only, unless
you’ve set project-wide forum admin access for this role.
Trackers - Much like forums, you can set project-wide tracker admin access or set access on a trackerby-tracker basis. Here you have the additional option of allowing only admins or allowing admins and
those users designed as “techs” to edit trackers. Again, the default for any trackers you add henceforth is
read access, unless this role has project-wide tracker admin status.
Task Managers - As with Trackers, you can set write privileges globally or on a task manager –by-task
manager basis. This has the same setup as trackers, allowing you to give write access to only admins, or
to “techs” as well.
4.5
Downloads Area
4.5.1 Introduction
The File Release System (FRS) is used to upload files to the Simtk.org site and to make these files
available to users in an easy and efficient way. Files can be divided into different packages, which users
can monitor for changes (see Section 4.5.2).
4.5.2 Monitoring Packages
Users can receive an email every time a new file has been added to a package by monitoring it.
Start Monitoring a Package: Click the small envelope icon
next to the package name on the
Downloads page.
View List of Monitored Packages: Log in to Simtk.org and click “My Page.” The list will appear under
the heading “Monitored Files.”
Stop Monitoring a Package: Go to the list of monitored packages under “My Page.” Click the trash can
icon next to the package you wish to stop monitoring.
4.5.3 Administration
The FRS allows you to upload files to Simtk.org and make these files available to the public or just to
team members.
26
4.5.3.1 Downloads page overview
You can provide a description or a link to more detailed notes and instructions at the top of the
“Downloads” page. Click on Downloads -> Administration and select “Update overview and instructions.”
You can also access the page via Downloads -> Add Downloads and click on “Enter an
overview/instructions.”
4.5.3.2 Downloads file organization
Download files are organized into a hierarchy. Packages are at the top of the hierarchy. Each package
is a unit of work, containing one or more releases. A release represents a version or revision and contains
one or more files, including documentation type files.
27
By default, only the latest release in a package is shown on the “Downloads” page. Previous releases
can be viewed by clicking the “List all previous releases” link at the bottom of a package.
You have to define a package and a release before you can upload files to share.
4.5.3.3 Packages
A package is a unit of work, containing one or more releases (only the current release is shown by
default). It should have a descriptive name for it, e.g., “neuromuscular movies” or “SimTK Simulation
Libraries.”
Add a new package: To add a new package, you must be an administrator for the project in question.
Click on the Downloads -> Add Downloads link. From the page that appears, click on “Add a download
package.” Fill out the following fields where they apply:
Name - The package name. This appears as a header on the Downloads page and in the left-hand
column of all your project webpages, under “Downloads & Source Code.”
Description - A description of your package. Good things to put here include the overarching purpose of
all the files contained within this package or notes about the software. This appears underneath the
header for the package.
Logo - Upload a graphic to represent your package here.
Privacy setting - Make your package publicly available (preferred choice) or available only to project
members. Even if your package is publicly available, individual releases and files within the package can
be private.
To make the whole package available only to members of this project, click the button for
“Private.”
Citations – You can optionally add citations to your packages. You may want to include any papers that
reference this software, especially if there are reference(s) others should cite if they use files from the
package. If you check the box for “Categorize under ‘please cite these papers,’” the citation will appear at
the bottom of the package with a sub-header “Please cite these papers.” If the box is not checked, the
citations will appear under the sub-header “Additional papers.”
Download agreement – If you wish users to agree to a specific license or agreement when they
download files from your project website, specify the agreement here.
You can specify a custom
download agreement or use the one provided by Simtk.org. It is recommended that you use the default
download agreement unless there are clauses which you specifically wish to alter.
Specifying the
download agreement here does not mean you are binding your users to it for all your downloadable files;
you can display the agreement on a file-by-file basis (See Section 4.5.3.5 on files).
28
Download notes - You can add notes pertaining to the package here. These notes differ from the
package description in that they will be shown to the user right before downloading any file within this
package, rather than with the list of available files on the “Downloads” page. As with the download
agreement, the notes are displayed on a file-by-file basis (See Section 4.5.3.5 on files).
Click the “Save and Continue” button to then add a release.
Modify a package: To modify the fields for a package, click on the Downloads -> Administration link. A
list of existing packages, releases, and files will be displayed. To modify a package, click on the “Update
Package” link for the desired package.
Delete a package: Deleting a package removes the package, as well as all of its releases and files AND
any associated downloads tracking information.
To delete a package, click on the Downloads ->
Administration link. A list of existing packages, releases, and files will be displayed. Click on the “Delete
Package” link for the desired package.
4.5.3.4 Releases
A release is a sub-unit of a package and represents a version or revision. By default, only the most
current release is displayed on the “Downloads” page. Previous releases, or versions, can be accessed
via the “List all previous releases” link. You can also have hidden releases, which are only accessible to
team members. These are useful for releases that are being prepared and tested for public release and
can be viewed by clicking on the “List all hidden releases” link. (See the “Status” field below for setting up
a hidden release)
Add a new release: To add a new release, you must be an administrator for the project in question.
Click on the Downloads -> Administration link.
To add a release to a new package: Select “Create a package” and follow the instructions (You can also
access this by clicking on Downloads -> Add Downloads).
To add a release to an existing package: Locate the desired package on the list that appears and click
the “Add Release” link underneath it.
The form for a release has the following fields:
• Release Date - This is the date you wish to have listed as the official release date for the files
contained within. By default, it will be set to the current date and time.
• Release Name - Type the name of your release here. The name should be indicative of the version
of your file, e.g., version 8.1.
• Release Description - A brief summary of this release. This will be displayed on the “Downloads”
29
page with the list of downloadable files.
• Status – Indicate whether the release is active and publicly viewable, or hidden and available only
to team members.
• Release Notes - The release notes. These will appear when users click on a “Notes” link
associated with the release on the “Downloads” page. To preserve the formatting of the text you
enter, such as return carriages, check the checkbox at the bottom of the page for “Preserve my
preformatted text.”
• Change Log - This is a log of changes made in this release compared to previous releases within
this package. These appear with the release notes via a “Notes” link, associated with the release,
on the “Downloads” page. To preserve the formatting of the text you enter, such as return
carriages, check the checkbox at the bottom of the page for “Preserve my preformatted text.”
Click the “Save Changes” button to save your new release or click the “Save Changes Then Add Files” to
save the release and continue adding files to it.
Copy a release: If you have a previous release which has a lot of files that you’d like to bring over into a
new release, click on the Downloads -> Administration link. Select the “Add Release” link underneath the
relevant package heading. Fill out the release name and description, plus any relevant changes, and click
on the “Add Release Using Template From Previous Release” button. This will automatically copy all files
and, most importantly, their descriptions from the previous release into the new one, and then you can
delete or edit the ones that need to be changed. The most typical use is to copy a release and then
replace most files with a new version, while only slightly editing their descriptions. All headers (see
Section 4.5.3.5) will also get copied.
Modify a release: To modify the fields for a release, click on the Downloads -> Administration link. A list
of existing packages, releases, and files will be displayed. To modify a release, click on the “Update
Release” link for the desired release.
Delete a release: Deleting a release removes the release, as well as all of its files AND any associated
downloads tracking information. To delete a release, click on the Downloads -> Administration link. A list
of existing packages, releases, and files will be displayed. Click on the “Delete Release” link for the
desired release.
4.5.3.5 Downloadable Files and Links
Within a release, you can provide links to files or to existing web pages. Administrator-defined headings
can be used to organize the files.
Add a new file or link: To add a new file or link, you must be an administrator for the project in question.
Click on the Downloads -> Administration link.
30
To add a file/link to a new release: Select “Create a package” and follow the instructions (You can also
access this by clicking on Downloads -> Add Downloads).
To add a file/link to an existing release: Locate the desired package on the list that appears and click the
“Add Release” link underneath it.
The form for a file/link has the following fields:
File or Link - First, choose whether you wish to upload a file or create a link to a resource that’s already
on the Internet. If the former, leave the button next to “Upload a File” checked. If the latter, check the
button next to “Create a Link.”
If you are uploading a file:
New file - Select the file you wish to upload. Simtk.org will accept most files, but some may be
too large for us to process. In these cases, contact the webmaster to make storage
arrangements.
Display name - You can optionally have a different name displayed and associated with the file.
Simtk.org only allows certain characters in its file names, so if your file contains one of the
disallowed characters you will need to rename it.
Description - Provide a brief description of the file here. This appears on the “Downloads” page.
It is recommended that you provide some information here to let the user know what is contained
within a file.
Actions before download - You can specify some actions which should be taken before a user
is allowed to download a file:
Collect user information - You can collect some information on users who download this file.
This will be displayed in the Downloads -> Tracking section for administrators to view at a later
time. Note that this does require the user to be logged in with a Simtk.org account in order to
download the file.
Show download agreement - If this box is checked, the download agreement you specified
when the package was created (see Section 4.5.3.3) will be shown to the user before
downloading can proceed.
Show download notes - If this is checked, the download notes specified at the package level
(see Section 4.5.3.3) will be shown to the user before downloading.
31
Ask user to join mailing list - If this is checked, the user will be asked to join the specified
mailing list when they download this file. This is a semi-automated way to populate a mailing list,
e.g., for notification of new releases or bug fixes. The mailing list must be created beforehand
(see Section 4.12 on Mailing Lists).
Note that for this to work properly, the “Collect user
information” box must also be checked.
If you are creating a link:
Link URL - You need to enter the link URL in the box provided. Note that the link must be
reachable from the Simtk.org server, or else you will get a warning that the link appears invalid. In
some cases, one URL may forward you to another; in this case, you should copy and paste the
second URL.
Display Name - You should provide a short name for the URL here. This is the name that will be
displayed on the “Downloads” page.
Description – Add a brief description of what information is provided by this URL.
File Type - Regardless of whether you’re adding a file or a link, you will need to categorize it according to
its type. If none of the options provided seem suitable, please choose “Other.” Note that any file or link
that is categorized as “Documentation” will automatically appear under a separate heading on the
“Downloads” page.
Platform - Choose the operating system(s) that this file is designed to work with. In the case of links,
“Any” would be the most suitable option.
Once you hit the “Submit” button, your file will be uploaded or your link will be saved. You should now be
able to see it in the “Downloads” section.
Modify a file/link: To modify the parameters for a file/link, click on the Downloads -> Administration link.
A list of existing packages, releases, and files will be displayed. Click on the “Update” link for the desired
file/link.
Delete a file/link:
Deleting a file/link removes it, as well as any associated downloads tracking
information. To delete a file/link, click on the Downloads -> Administration link. A list of existing packages,
releases, and files will be displayed. Click on the “Delete” link next to the desired file/link.
Copy files from a previous release: If you have a previous release which has a lot of files that you’d like
to bring over into a new release, you can automatically copy the files over. See the instructions in Section
32
4.5.3.4 on Releases.
Reorder files: You can specify the order in which files are listed on the “Downloads” page by clicking on
the Downloads -> Administration link. For each release, there is a header labeled “Files” followed by the
link “Update Files, Reorder Files, Add Headers.” Click on this link to see a list of all files under this
release. Use the left-most box associated with each file to specify the order in which the file should
appear.
Add headers to files: You can provide subheaders to help organize the files within a given release.
Click on the Downloads -> Administration link.
For each release, there is a header labeled “Files”
followed by the link “Update Files, Reorder Files, Add Headers.” Click on this link to see a list of all files
under this release. Provide the header in the field labeled “Optional Header” that is associated with each
file/link. The header will appear in the “Downloads” page, before the file name with which it is associated.
Copying headers to a new release: Headers are unlikely to change from release to release, and are
slightly tedious to set up initially. So when you create a new release, we recommend that you select “copy
previous release.” This will copy all headers, along with all the files, from the previous release to the new
release.
4.6
Documents Manager
4.6.1 Introduction
The Documents Manager provided with Simtk.org gives you a simple way to publish documents on the
site. Files posted in the “Documents” section are organized into a hierarchy of folders, like in a traditional
desktop computing environment. As in that environment, you are able to nest folders within one another
and control the number of files displayed by opening and closing folders.
4.6.2 Administration
Only project administrators are able to add or modify documents posted in the “Documents” section.
Posting files in the “Documents” section vs. the “Downloads” section: The “Documents” section provides
a nested folders interface, compared with the list of files, separated by optional headers, provided by the
“Downloads” section. One interface may work better for your set of files versus the other. Another
important difference to consider is that files downloaded from the “Documents” section are not tracked, as
they are in the “Downloads” section. Files added to either the “Documents” section or the “Downloads”
section can independently be set to private, so that only project team members can view them.
33
4.6.2.1 Add a New Document
To add a document, log in to Simtk.org and navigate to the desired project web page. Click on the link for
Documents -> Add Documents and fill in the following fields:
• Document Title - Enter a relatively brief title for the document, which will appear on the
“Documents” page
• Description – Provide a brief description, which will appear just under the title on the “Documents”
page
• Citation – Enter information to be used in citing this document. This also appears on the
“Documents” page, after the description
• Group that document belongs in - Use the drop-down list to set the group (or folder) for the
document. This feature is used to categorize documents. Only existing groups appear in the dropdown list. To add a new group, see Section 4.6.2.2 below.
• Privacy – Check this box so that only project members can view this document
• Upload File OR Specify URL - Here you should select the file to be uploaded or provide a URL for
a file. You can upload text files (.html, .txt) or binary files (.zip, .doc, .pdf).
Then click the “Send” button.
4.6.2.2 Edit Document Properties
To edit any of the fields associated with a document, log in to Simtk.org and navigate to the desired
project web page. Click on the link for Documents -> Administration. A list of all files appears. Click on
the link for the desired file to edit its properties.
Properties that can be edited are the same as those specified when creating a new document, with one
additional field for the document date:
• Document Title
• Description
• Citation
• Group that the document belongs in
• State – Edit this field to set a file to “active” or “private.” Additional states are available in the edit
view: deleted, hidden, pending. Currently, “deleted” and “pending” result in the same behavior,
where the file is not viewable on the “Documents” page; however, the project administrator(s)
remain able to access the file via the Documents administration page. “hidden” produces the same
behavior as “private,” where only project team members are able to view the document.
• Upload File OR Specify URL
• Document date – Set this date to record when the document was last updated
34
After modifying any desired fields, click on the “Submit Edit” button.
4.6.2.3 Manage Document Groups
To add or edit any of document groups, log in to Simtk.org and navigate to the desired project web page.
Click on the link for Documents -> Administration. Click on “Add/Edit Document Groups” at the top of the
page.
The hierarchy of document groups will be displayed. Click on the group that you wish to edit and you will
be taken to a page where you can either 1) change the name of the group, or 2) change the location of
the group within the hierarchy of folders (e.g., if it should be nested within a different group).
From this page, you can also add a new document group. Provide the following information:
• New Group Name – Enter a descriptive name for the group. This is what will appear on the
“Documents” page.
• Parent Group – Use the pull-down list to indicate which group this new group will fall under. If the
new group does not belong within another group, select “— No parent –.”
Then, click “Add.”
Note that unfortunately, you cannot delete a document group. As a workaround, we recommend renaming
a group that is no longer needed to “temp” or “not used.”
4.7
Publications
4.7.1 Introduction
The “Publications” section provides a list of publications associated with a project. Citations may also be
listed on the “Downloads” page as part of a downloads package.
4.7.2 Administration
Only project administrators are able to add, delete, or modify citations listed in the “Publications” section.
4.7.2.1 Add a Publication
To add a publication, log in to Simtk.org and navigate to the desired project web page. Click on the link
for Publications -> Add Publication and fill in the following fields:
• Publication (required) - Enter the citation (e.g., authors, title, date) for the publication
35
• Abstract (optional) – Provide the abstract for the publication. This is an optional field.
• Year (required) – Enter the year of the publication.
• URL (optional) – Provide a link to the article and/or abstract. This is an optional field, but can
make it easier for a user to locate the related publication.
• Primary citation – A project is only allowed one primary citation. If a primary citation has not yet
been associated with a project, a checkbox for “Primary citation” appears. Checking the box marks
the current citation as a “primary citation,” giving it more visibility on the “Publications” web page
and indicating it should be automatically displayed on the project’s “Overview” page when the
associated project is a “publication project.” If the project already has a primary citation, you will
need to access the Publications -> Administration web page (see Section 4.7.2.2 below) in order to
designate the citation as “primary.”
Click the “Add” button to save the new publication.
4.7.2.2 Edit or Delete a Publication
To edit any of the fields associated with a publication or to delete a publication, log in to Simtk.org and
navigate to the desired project web page. Click on the link for Publications -> Administration. A list of all
publications appears.
Editing: All fields for a publication can be edited by clicking on the associated “[Edit]” link. The one
exception is indicating whether a publication is the “primary citation” or not.
To make a citation the “primary citation” for the project, click on the “Make Primary” button next to it. This
action causes the existing primary citation to be replaced by the newly marked citation. Remember that a
project can only have one primary citation.
You can remove the “primary citation” designation from a publication by clicking the “Undo Primary”
button next to it.
Deleting: Delete a publication by clicking on the “[Delete]” link next to it.
4.8
News
4.8.1 Introduction
The “News” section provides recent information about a project. For example, for software projects, the
“News” section is generally used to announce software releases, milestones, or significant changes in the
software. A project’s news items can be displayed in three different locations on Simtk.org:
•
Complete news items are displayed on a project’s “News” web page
36
•
Headlines can be displayed in the left-hand column of the project home page
•
Complete news items can also be shown on the main Simtk.org News section, if you submit the
item and the Simtk.org administrators approve it.
4.8.2 Administration
To add, delete, or modify news items, you must be an administrator of the project.
4.8.2.1 Add a News Item
Log in to your Simtk.org account and navigate to your project. Add a news item by clicking on the News
-> Add News Item link and providing the details about your news items. All posts for your project will
appear instantly in the “News” section of your project. URLs and basic HTML tags can be used in the
news item. URLs that start with http:// or https:// are made clickable.
Displaying news headlines in the Overview page sidebar: Up to three news headlines can be displayed in
the left-hand column of the project Overview page. Check the “Show in sidebar?” box if the news item
you’re adding should be included on the Overview page.
Displaying news on Simtk.org News page: Posts that are of special interest to the community can be
submitted to appear on the Simtk.org News page by checking the box for “Submit to Simtk.org site news.”
Simtk.org administrators will need to approve the news item before they will appear on the Simtk.org
News page. To monitor the status of these news items, go to News -> Administration.
Click “Submit.”
4.8.2.2 Modify a News Item
Only project administrators can modify a news item and/or the news display. Log in to your Simtk.org
account and navigate to your project. Click on News -> Administration. A list of all news items appears,
along with where they are displayed:
Display in Sidebar – The headline for the news item appears in the left-hand column of the
project Overview page. Only the most recent three news headlines are displayed.
Show in Global News – These news items have been submitted to be displayed on the
Simtk.org overall site news page. The column labeled “Simtk.org News Page Status” indicates
whether the item was Accepted for display, Not Accepted, or Pending a decision by the Simtk.org
administrators.
To change the display options for a news item, check the appropriate boxes and click the “Update News
Display” button at the bottom of the page.
37
To edit the details of a news item, click on the link for the news item. You can change the subject, the
news itself, the date associated with the news item, and the display options. Click the “Resubmit” button
after you have made your modifications.
4.8.2.3 Delete a News Item
Only project administrators can delete a news item. Log in to your Simtk.org account and navigate to
your project. Click on News -> Administration. A list of all news items appears. Click on the link for the
news item to be deleted, and then set the status of the news item to “Delete.” Click the “Resubmit”
button. The news item will no longer appear on the project’s News page, but the administrator will still be
able to access it via the News -> Administration interface.
4.9
Wiki
A wiki is a set of linked web pages that users can collaboratively create and edit. Every Simtk.org project
can have access to its own wiki, providing it the means to augment the structured, well-designed set of
web pages already provided by Simtk.org. Within Simtk.org, the wiki has been used to:
•
Provide tutorials for a project
•
Address frequently asked questions (FAQs) for a project
•
Give examples of how a software is being used
•
Maintain a timeline or roadmap for the project
The wiki’s unstructured, collaborative format makes it suitable for numerous purposes. You can add
images, text, equations, tables, and links. All editing is under version control, so that changes are
carefully noted and it is always possible to return to an earlier version. Accessibility to wiki pages can be
independently controlled, too, so for example, some pages are readable only by team members while
others are readable by all Simtk.org members but can only be modified by team members. All of these
features make the wiki a useful tool for a project.
The Simtk.org wiki is based on MoinMoin.
4.9.1 Set Up Your Project’s Wiki
To enable the wiki functionality for your project, you need to contact a Simtk.org administrator. To display
the link for the wiki in your project’s navigation menu, go to Overview -> Update -> Edit Menu Items and
check the box next to “Wiki.” You must be a project administrator to do this.
38
4.9.2 Getting Started with a Simtk.org Wiki
The Simtk.org wiki has a very large, rich set of functionality. Here we will introduce you to the basic
functions and direct you to resources to learn more.
4.9.2.1 Find the Information You Need
When you first access a Simtk.org wiki, you will be taken to what is referred to as the FrontPage. Think of
it as the home page for a website, the point from which you start exploring the site. Typically, you can
follow the links on this page to get to the information you need. If you want to access a wiki page more
directly, you can try the following:
•
Use the Search box in the upper-right-hand corner. Click the “Titles” button to perform a search
for keywords within the titles of wiki pages. Click the “Text” button to perform a search for
keywords in all the wiki text.
•
Click the “FindPage” tab in the set of Navigation Tabs to access a variety of search options,
including a full-text search, searches by page size or page hits, and categorized listings of all wiki
pages.
•
The Page Header section shows the hierarchy of wiki pages with the current page title shown in
the largest font. This allows you to easily access parent pages. You can also click on the link for
the current page title to display every wiki page that refers to the current page. In the example
above, clicking on “CurrentMetrics” shows all wiki pages with links to the “CurrentMetrics” page.
Add a wiki page to the Navigation Tabs: If there are certain wiki pages that you access frequently, you
can add Navigation Tabs for them by clicking on the “Add Link” option in the Actions Toolbar area. This is
like bookmarking the page.
39
4.9.2.2 Create a Wiki Page
In order to create a new wiki page, it has to be “visited” in some way. The easiest way to do this is to go
to an existing wiki page and create a link to the new page:
Text editing mode: From an existing wiki page, click on Edit (Text) in the Actions Toolbar. Enter the
name of the new wiki page in camel case, as shown on the left below (no spaces; the first letter of a word
is capitalized with the remaining letters in lower-case). With this convention, the text is automatically
recognized to be a link to a new wiki page. Click “Save Changes.”
Graphics editing mode: From an existing wiki page, click on Edit (GUI) in the Actions Toolbar. Click on
the location where you want to add in the link to the new wiki page and then click on the link button
in the Actions Toolbar. In the dialog box that appears, use the pull-down menu to indicate that you are
adding a “WikiPage” and provide the name of the new page in the text box for “Page Name.”
The link to the new page will appear in gray, as shown on the right above, indicating that the page does
not exist yet. Clicking on the link will give the message:
This page does not exist yet. You can create a new empty page, or use one of the page templates.
Select one of the links to create the framework for your new wiki page. Some useful templates, in terms
of security, include the following, from most restrictive to most permissive:
•
SimtkReadTemplate -- Any Simtk.org registered user can read the wiki page. Only team members
can edit the page.
•
PublicReadTemplate -- Anyone can read the wiki page. Only team members can edit the page.
•
PublicWriteTemplate -- Anyone can edit this page. Deletes and reverts are limited to team
members.
To modify permissions for a wiki page, see Section 4.9.2.4. For other ways to create a new page, please
consult HelpOnPageCreation.
40
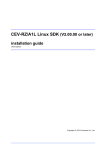
4.9.2.3 Edit a Wiki Page
Wiki pages can be edited by selecting the Edit (Text) or Edit (GUI) links in the Actions Toolbar. While Edit
(GUI) provides an easy-to-understand user interface for formatting, Edit (Text) can be faster though the
user will need to familiarize himself/herself with the wiki markup language. Below is a sample of the wiki
markup language and the corresponding display of it.
41
A short guide on the wiki markup language appears in the text editing area. The subsections below cover
some of the more common tasks Simtk.org members may want to perform in their wikis, aside from basic
text formatting and linking. Comprehensive documentation for editing wiki pages and other helpful pages
can be accessed via the links below:
HelpOnEditing – This page provides links to help on specific wiki markup sections, such as
formatting and headings.
SyntaxReference - This is a fairly complete guide showing how to achieve specific effects (e.g.,
bold-face, superscript, tables, smiley icons,…) using the wiki markup language.
HelpContents: For all help pages
HelpForBeginners: A guide to get you going
4.9.2.3.1 Attachments
The most straightforward way to attach a file to a wiki page is to:
1. Create a link to the attachment
2. Follow that link to upload the file
42
Create a link
Edit (Text) mode: To establish a link to an attachment in a page, type:
attachment:filename.ext
Edit (GUI) mode:
Click the location in the document where you would like to have the
attachment appear. Then click on the Attachment button
and provide the display name of the
attachment.
Upload the file
If the file has not already been uploaded, the following link will appear on the wiki:
Upload new attachment "filename.ext"
Following the link will open the Attachments section of the wiki page, where the file can be selected and
uploaded. The file will be automatically renamed to the name that was given when adding the link, in the
example above, filename.ext.
The Attachments link in the Action Toolbar of the wiki page can be followed directly to attach files to the
page. A link to those attachments will not appear on the wiki page; the link will still need to be created by
using the text or GUI editor.
4.9.2.3.2 Images
The wiki supports images of the format .gif, .jpg, and .png.
Edit (Text) mode: Inserting images into a wiki page is the same as inserting attachments. For example, a
link to the image, given as
attachment:j2c-logo.png
will allow you to upload an image. Once uploaded, the wiki will show the image directly on the page
(rather than as a link, as it does for attached files).
Edit (GUI) mode: Click the location on the wiki page where you would like to add an image. Click on the
Insert/Edit Image button
to add the image. Use the protocol “Attachment” to allow you to upload an
image to be displayed directly on the page.
43
4.9.2.3.3 Equations
This wiki installation supports typesetting of equations using
For standalone equations, use
.
commands as follows:
{{{#!latex
Insert Equation Here
}}}
For example, you can generate a matrix by entering the following:
{{{#!latex
\begin{displaymath}
\mathbf{X} =
\left( \begin{array}{ccc}
x_{11} & x_{12} & \ldots \\
x_{21} & x_{22} & \ldots \\
\vdots & \vdots & \ddots
\end{array} \right)
\end{displaymath}
}}}
This is what would be displayed:
If you wish to generate an equation inline with text, type
commands in brackets:
[[latex(Insert Equation Here)]]
[[latex($E=mc^2$)]]
produces
For more details of
moinmoin-latex.
.
support in MoinMoin, refer to http://johannes.sipsolutions.net/Projects/new-
44
4.9.2.4 Modify Permissions for a Wiki Page
Access control lists (ACLs) control permissions for a wiki page. They determine who can view a wiki
page, who can edit a wiki page, and who has administrative privileges for a given page.
If you created a wiki page using a template, then an ACL was probably set up for the page. The ACL is
specified at the top of the wiki page (in the edit mode) by the following line:
#acl
By specifying user names followed by what they are allowed to do on and with the page (read, write,
delete, revert, admin), you set up the permissions for the page. For example:
#acl SomeUser: read, write All:read
gives SomeUser the ability to read and edit the wiki page, while every other user can view the page but
cannot edit it.
Access order matters! Access is processed in the order listed (from left to right). Once a match has been
found for a user, the user has those associated privileges. So the following two access control lists result
in different behaviors:
#acl SomeUser: read, write All:read
#acl All:read
SomeUser: read, write
Using the first access control list, SomeUser will have read and write access to the wiki page; using the
second access control list, SomeUser will only be able to read the wiki page (since SomeUser belongs to
the All group and that appears first and only has read access, SomeUser will only have read access).
To allow only users logged into Simtk.org to access a given wiki page, you can use the following access
control list:
#acl +Known:read -All:read
Known refers to a user logged into Simtk.org. The plus sign + gives permission for the stated right (in this
case, reading), while the minus sign – denies the stated right. So, remembering that access is processed
from left to right, this access list allows Simtk.org users who are logged in to read the page. If a person
does not fall into the Known group, the next bit of text (-All:read) would apply, which denies them the right
to read the page.
Access
control
lists
can
be
very
powerful
and
complex.
For
more
details,
see
45
http://wiki.simtk.org/dissemination/HelpOnAccessControlLists.
4.9.2.5 Monitor Wiki Activities
4.9.2.5.1 Overall Wiki Activity
The RecentChanges page lists recent editing activities in the wiki in chronological order (most recent
first). This page is a good starting point to learn about the evolution of the wiki site and identify
contributions to individual pages by all team members. Listed items include the name of the edited page
(with a link to it), the team member who changed the page, and brief comments. RecentChanges can be
accessed through the Navigation Tabs.
4.9.2.5.2 Page Activity
Editing activity for individual wiki pages can be accessed through the Info link, located in the Actions
Toolbar. The activity list provides the revision history, including the time stamp of updates, the editor,
comments, and various action links, e.g., viewing a specific revision. The Diff button permits a side-to-side
comparison of different versions.
4.9.2.5.3 Subscriptions & Notifications
Receive e-mail notifications whenever the wiki is changed: Subscriptions can facilitate awareness of
project progress and member contributions. Be notified whenever any part of the wiki is changed by:
•
Subscribing to RecentChanges: Go to the RecentChanges page and click the Subscribe link in
the Actions Toolbar. When a member updates any wiki page, the RecentChanges page is
automatically updated and subscribers will receive an e-mail notification.
OR
•
Subscribing to all pages: While at the wiki site, click the Preferences link next to your user name
in the top-right corner. This opens the UserPreferences page. In the “Subscribed wiki pages”
section, type:
.*
Then click “Save” to subscribe the team member to all wiki pages.
Receive e-mail notifications only when certain wiki pages are changed: A team member may
subscribe to only desired pages by going to the page and following the Subscribe link in the Actions
Toolbar.
46
4.10 Forums
Every Simtk.org project can have its own discussion forums. These forums are like community bulletin
boards, where individuals can post questions and ideas, to which others can respond. When a new
project is created, three forums are automatically created:
• open-discussion - A place to discuss anything and everything
• help - A forum to ask for help related to the project
• developers - A place where developers discuss project developments
4.10.1
Creating a New Forum
New forums can be created via the link Advanced -> Public Forums -> Add Forum. When a new forum is
created, you must provide the following:
•
Forum Name - A name for the forum
•
Description - The description of the forum
•
Public? - Select if the forum is public or private (viewable only by project members)
•
Allow Anonymous Posts - Set whether anonymous posts are allowed on the forum. If
Anonymous posts are enabled, everybody can post messages to the forum, even users that are
not logged in.
•
Email All Posts To - You can also insert an email address where all posts will be sent.
Then, click the “Add This Forum” button.
4.10.2
Searching and Using the Forum
The forums can be accessed via the link Advanced -> Public Forums. Click on the name of the forum to
go to the contents of that forum. You can then read messages that others have posted or post a new
message of your own by clicking the Start New Thread link.
Select the number of messages to be
displayed on each page (25, 50, 75 or 100) by using the pull-down menu at the top of the page.
The forums have two very powerful options:
• Save Place - This function registers the number of messages already inserted in the forum and will
highlight new messages the next time you return to the forum.
• Monitor Forum - You can elect to monitor the forum by clicking on the Monitor Forum link. If this
option is enabled, every post to the forum will be sent to you by email. This allows you to be
47
informed about new messages without being logged on to Simtk.org. The name of the monitored
forum will appear in your home page (click the My Page link in the upper-right) under the section
“Monitored Forums.”
Search Forums: You can search the forums by using the text box at the bottom of the forums page.
Enter key words and then click the Go button.
4.10.3
Forum Admin
To delete or edit a forum’s properties, go to Advanced -> Public Forums. Select the specific forum you
would like to delete or edit (e.g., open-discussion). The Administration option will appear in the navigation
menu on the left, under Public Forums. Click on Administration to perform any of the following actions:
• Delete Message - This allows you to delete a message (and any follow-ups) from a forum. You
must know the message identifier of the message you wish to remove. This can be obtained by
viewing the message in the forums web page and noting the message identifier of the message.
• Delete Entire Forum - This allows you to remove the forum from the project. All messages
contained with the forum are also deleted.
• Update Forum Info/Status - This allows you to alter the properties of the forum, such as its name
and description. You can also enter or modify the email address to which all messages are posted.
4.11 Features and Bug Trackers
4.11.1
What is a Tracker?
The tracker is a generic system where you can store items like bugs, feature requests, patch
submissions, meeting minutes, etc. You can use this system to track virtually any kind of data, with each
tracker having separate user, group, category, and permission lists. You can also easily move items
between trackers when needed. Trackers are referred to as “Artifact Types” and individual pieces of data
are “Artifacts.” “Bugs” might be an Artifact Type, while a bug report would be an Artifact. You can create as
many Artifact Types as you want, but remember you need to set up categories, groups, and permissions
for each type, which can get time-consuming. When a project is created, Simtk.org automatically creates
two trackers:
• Bugs - Used for Bug tracking
• Feature Requests - Requests for enhancements of the software should be posted here
4.11.2
Using a Tracker
Trackers can be accessed by selecting Advanced -> Features & Bugs, and then clicking on the desired
tracker name.
The following descriptions can be applied to any of the trackers. The functionalities
48
between the different trackers are the same, so we’ll use the Bugs tracker as example to describe the
functionality of all trackers. The tracker provides the following functions:
• Submitting a new item
• Browsing items
• Reporting
• Administration
4.11.2.1
Submitting a New Item to a Tracker (Example: Submit a New Bug)
To submit a new bug, click on the “Bugs” tracker. A new set of choices will appear in the left-hand
navigation menu under “Features and Bugs.” Click on the Submit New link. A form will be displayed
where you can insert/select the following data:
• Category - This is generally used to describe the function/module in which the bug appears, e.g.,
for Simtk.org, this might be the items “User Login”, “File releases”, “Forums”, “Tracker”, etc.
• Group – Use this to describe the version of the software (e.g., “3.0pre7”, “3.0pre8”) or the gravity of
the bug, (e.g., “Fatal error,” “Non-fatal error”).
• Assigned To - You can assign the item to a user. Only users who are “Technicians” are listed here.
• Priority - You can select the Priority of the item. In the Browse list for the tracker and the home
page of the users, priorities are displayed in different colors and tracker items can be ordered by
priority.
• Summary - Give a short description of the bug, e.g., “Logging out gives an SQL Error”
• Detailed Description - Insert the most detailed description possible.
• File Upload - You can also upload a file as an attachment to the bug. This can be used to attach a
screenshot with the error and the log file of the application. To upload the file, check the checkbox,
select a file using the Browse button, and insert a file description. NOTE: Attachments to tracker
items can be no larger than 256KB.
4.11.2.2
Browse Tracker Items (Example: Browse Bugs)
The Browse page shows the list of bugs. You can elect to filter the bugs by Assignee, State (open, closed,
etc.), Resolution (accepted, rejected, etc.), Category, Group, or Changed (time period when changes
were made). You can sort the items by ID, Priority, Summary, Open Date, Close Date, Submitter,
Assignee and the Order (ascending, descending). The different colors indicate the different priorities of
the bug; a * near the open date indicates that the request is more than 30 days old. The overdue time
(default 30 days) is configurable for each tracker. When you click on the summary, you go to the
detail/modify Bug page.
49
4.11.2.3
Modify Tracker Item (Example: Modify a Bug)
In the modify Bug page, you can modify the data you inserted. You must be logged in to make changes
to or add information to the Bug page. From this page, you can add the following information:
• Data Type - This combo box lists the trackers of the project. If you select a different tracker and
submit the changes, the item will be reassigned to the selected tracker.
• Status - When an item is inserted, it is created in the “Open” state. When you fix a bug, you should
change the status to “Closed.” When a bug is duplicated or not valid, change it to “Deleted.”
• Resolution - This indicates the resolution of the item.
• Canned Responses - Canned responses are pre-written responses. You can create canned
responses for your project in the Admin section and select the responses in the combo box.
• Comments – You can provide a comment on the item.
The Change Log on the bottom of the page shows in chronological order the changes applied to the item.
Follow-ups can also be viewed.
4.11.2.4
Monitor Track Items (Example: Monitor a Specific Bug)
If you select the Monitor link at the top-left of the Bug detail page, bug monitoring will be enabled. When
you are monitoring a bug, every change to the bug will be sent to you by email. To disable bug monitoring,
simply click the Stop Monitoring link.
4.11.2.5
Reporting for a Tracker
The reporting functions allow a user to check the life-span of items in the tracker, e.g., a bug. The lifespan
is the duration of the bug; it starts when the bug is inserted (opened) in the tracker and ends when the
bug is closed. To view the reports, click on Advanced -> Features & Bugs -> Reporting.
4.11.2.6
Admin Tracker
If you are an Administrator of the tracker, you can add or change bug groups, categories, and canned
responses. You can also add new trackers or delete trackers. To access the administrative functions,
click on Advanced -> Features & Bugs -> Administration. You will see a list of existing trackers, followed
by the section for adding a new tracker.
4.11.2.6.1
Create a New Tracker
The following fields are required to create a new tracker.
• Name – The name of the Tracker. This is the name displayed in the tracker list, e.g., “Bug
Submissions.”
• Description – The description of the tracker, e.g., “This is the tracker dedicated to the Bugs of
50
the project.”
• Publicly Available – Determines whether unprivileged users can see the Tracker. By default,
this checkbox is not checked.
• Allow non-logged-in postings – If this checkbox is enabled, anyone can post items to the
tracker. If this checkbox is not enabled, only logged-in users can post items. By default, this
checkbox is not enabled.
• Display the “Resolution” box – By default, this checkbox is not checked. If checked, the
“Resolution” drop-down box appears in the detailed tracker item display.
• Send email on new submission to address – All new items will be sent to the email address
inserted in the text box.
• Send email on all changes – If this checkbox is checked, all changes on the Tracker’s items
will be sent out via email. It is useful to check this radio button only if in there is an email
address in the “Send email address” box.
• Days till considered overdue – Number of days until tracker items are considered overdue
• Days till pending tracker items time out – (not currently used by Simtk.org)
• Free form text for the Submit new item page – This allows you to put a specific introduction
on the submit new item page.
• Free form text for the Browse items page – This allows you to put a specific introduction on
the Browse items page.
4.11.2.6.2
Edit and Delete Trackers
To edit or delete a tracker, go to Advanced -> Features & Bugs. Click on the desired tracker to modify or
delete. Then select Administration under Features & Bugs from the navigation menu on the left. Options
you can change include:
• Add/Update Pop-Up Boxes – You can add new fields to your tracker, specifying the name of the
new field and whether radio buttons, check boxes, or text boxes are used to make selections.
• Add/Update Categories – You can add new categories or change the name of existing categories.
You can also select a user in the “Auto-Assign To” combo box; every bug with this category will be
auto-assigned to the selected user. This feature can save you lots of time when administering the
tracker.
• Add/Update Groups – You can add new groups or change the name of existing groups. It is
recommended that you not change the group name because other things depend upon it. When
you change the group name, all related items will be changed to the new name.
• Add Update Canned Responses – Canned responses are pre-defined responses. Creating useful
generic messages can save you a lot of time when handling common requests.
• Delete – This feature is not currently supported
• Update preferences – Here you can update much of the information associated with the tracker
51
(See fields under “Create a New Tracker” above). For the “Bugs” and “Features” trackers, only a
subset of the fields are available for editing.
4.11.2.6.3
Mass Update
If you are an Administrator of the tracker, you can use the Mass Update function to change properties for
multiple items at one time. This function is available in the Browse tracker page and allows you to update
the following information:
• Category
• Assignee
• Group
• State
• Priority
• Canned Response
• Resolution
In the Browse view, a checkbox appears to the left of each item ID (i.e., each specific bug). Check one or
more of the IDs to indicate to which items the change will apply. Select one or more of the values from
the Mass Update pull-down boxes and click the Mass Update button. All selected bugs will be modified
with these new values. This function is very useful if you need to change the same information for many
bugs; e.g., assigning 5 bugs to one developer or closing 10 bugs.
4.12 Mailing Lists
Mailing lists can be created to correspond with different groups of users. The Simtk.org mailing lists are
built upon a version of GNU Mailman.
4.12.1
Accessing Mailing Lists
To view the mailing lists available for a project, click on Advanced -> Mailing Lists. The page will show the
list of available mailing lists, along with brief descriptions. From this page, you can subscribe,
unsubscribe, and edit your preferences for a specific mailing list by clicking the appropriate link. You can
also visit the archives for the mailing lists by clicking on the name of the list.
4.12.2
Administration
To administer the project mailing lists, log in to Simtk.org and click on Advanced -> Mailing Lists ->
Administration. This brings you to the Mail Admin page, where the following options are available to you.
• Add Mailing List – Click this link to create a new mailing list. When you create a new mailing list,
you can specify the name of it (of the form [email protected]) and whether
it is to be made public (if non-project members can see and/or join it) or not. You can also add a
description of the list. You will receive an email with the administration password of the list.
• Update Lists - This allows you to change the description of the list and the state of the list (public
52
vs. private or deleted).
• Administrate Lists – Click the Administrate link to access GNU Mailman properties for the list. For
example, through this link, you can add members to the mailing list, set posting policies (such as
who is allowed to post to the list), set spam filters, determine archiving options, and more.
WARNING: We recommend you do NOT change the administration password. Instead log in
to Simtk.org and access the mailing list from the host project. If you change the password,
you will NOT be able to access the administration options via the Simtk.org project page anymore.
You will only be able to view that page by directly accessing the mailing list administration interface
at https://simtk.org/mailman/admin/<mailing list name>.
4.13 Task Manager
The task manager allows you to track the various tasks associated with your project. Similar to MS
Project and other project management software, you can track resource allocations and develop project
schedules (i.e., with a Gantt chart). The Simtk.org task manager is similar to the Simtk.org tracker
functionality, with the following differences:
• You can insert the start date of the item
• You can insert the end date of the item
• You can insert the number of hours for the item
• You can have multiple assignees for the item
• You can handle dependencies between tasks
Tasks are summarized below, but we do not recommend their use as the underlying technology is a bit
outdated.
4.13.1
Task Manager Organization
Tasks are organized into task lists or subprojects. You can view all task lists by clicking Advanced -> Task
Manager. Tasks must be associated with a task list, so to add a new task, you must first create a task list
(See Section 4.13.2).
4.13.2
Task Lists
Task lists are used to organize tasks. When you click on Advanced -> Task Manager, you see a list of all
available task lists. Click on a specific task list to see all tasks associated with it. The navigation menu on
the left will also show two options related to task lists:
•
Reporting – A variety of graphs can be accessed, reporting on the status of project tasks over
different time periods
53
•
Administration – This menu item allows you to add a new task list, edit an existing task list, add
categories, or delete a task list
o
Add a new list: From the Administration page, select the Add A Task List link and fill in
the fields for name, description, public (visible to everyone) or not, and where to send
updates to
o
Edit properties of a list: From the Administration page, select the Edit/Update Task List
link. You can only modify the name, description, and where to send all updates to.
o
Add or edit categories: From the Administration page, select the Edit/Update Task List
link. Then click the Add/Edit Categories link.
o
Delete a list: From the Administration page, select the Edit/Update Task List link. Then
click the Permanently Delete This Task List link.
NOTE: If you click on a task list and view the specific tasks within the list, the navigation menu choices
on the left under Task Manager change. To access the task lists menu options again, you will need to
click the Task Manager link.
4.13.3
Adding a New Task to a Task List
To add a new task to a task list, remember that the task list must already exist. Click on the task list to
which you wish to add a task (access the list of task lists via Advanced -> Task Manager). From the
navigation menu on the left, select Add Task. The Add Task link only appears after you have clicked on a
specific task list.
When you add a task, you will need to provide the following information:
• Category – You can specify a category for the task
• Percent Complete - You can set the completion of the work, expressed as a percentage
• Priority - You can set the priority of the task
• Task Summary (required) - Enter a brief description of the task
• Task Details (required) - You should enter a more detailed description possible of the task
• Start Date - Enter the start date for the task
• End Date - Enter the end date of the task
• Assigned To - You can select one or more assignees to the task. Only users which are defined as
“Technicians” are listed here.
• Dependent on Task - You can enter one or more tasks upon which this task depends
• Estimated Hours (required) - The estimated duration of this task in hours
54
Only Administrators can add new items to the Task Manager, make changes to a task, or close a task.
4.13.4
Browse Tasks
You can view the tasks within a task list by selecting the Browse Tasks link. The Browse Tasks link only
appears when you have already selected a task list (Click Advanced -> Task Manager and then choose a
task list). From the Browse view, you can filter the tasks by assignee, status (i.e., open or closed), and
category. You can also specify how to sort the tasks: by task ID, task summary, start date, end date,
percentage complete.
4.13.5
Mass Update of Tasks
To change the properties for several tasks at once, use the Mass Update function. Go to Advanced ->
Task Manager and select a task list to view its associated tasks.
1.
Select the tasks to be updated by checking the box to the left of their Task IDs.
2. At the bottom of the list are several pull-down menus showing different properties associated with
a task (category, priority, assigned to, state, task list). Set these properties to the desired values.
3. Then click the Mass Update button to change the properties for all selected tasks.
See Section 4.11.2.6.3 for more details.
4.13.6
Gantt Chart
To see a Gantt Chart for a given task list, click on Advanced -> Task Manager. Select the desired task list.
Then choose Gantt Chart from the navigation menu on the left.
4.13.7
My Tasks
Each Simtk.org member can view the tasks that have been assigned to him/her by going to their home
page (click the My Page link in the upper-right corner). The section titled “My Tasks” in the right-hand
column displays all tasks assigned to that member.
4.14 Surveys
Surveys are available via Simtk.org, but we do not recommend using them as the underlying technology
is a bit outdated and there are free tools available for conducting surveys that are easier to use. To be
complete, however, we have documented the survey tool within Simtk.org below.
4.14.1
Introduction
Surveys allow you to ask questions of your developers and users and view their responses. Surveys are
55
often very helpful if you need feedback from users. Examples of surveys might be:
•
Ask users about the strengths and weaknesses of the tutorials you provide
•
Poll users to see how they would like to contribute to your project
•
Get developer feedback on what new features should be implemented
4.14.2
Taking a Survey
To fill in a survey, go to Advanced -> Surveys. A list of existing surveys for a project will be displayed.
Select the survey you wish to take
4.14.3
Creating a New Survey
With the Simtk.org survey, you first create a list of questions that can be used in a multiple number of
surveys. You then create a survey, populating it with the questions that you already created. Follow the
steps below to create a new survey:
1.
Create or edit questions: See Section 4.14.4.
2. Click Advanced -> Survey -> Edit Survey. At the top of the page, you will need to provide the
following data:
• Survey name - The name of the survey
• Active - This indicates whether the survey is active or not. If the survey is active,
individuals can respond to it.
• Question list – Check the box(es) next to the question(s) that you want to appear in the
survey. Modify the order in which the questions appear by going through the Edit Survey
section (see Section 4.14.5).
3. Click the Add This Survey button.
4.14.4
Administering Survey Questions
To add, delete, or modify questions for your surveys, select Advanced -> Surveys -> Edit Questions.
Questions are global for all surveys. Simtk.org surveys handle the following question types:
• Radio Buttons 1-5 - This type of question shows 5 radio buttons where the user can select
between 1 (low) and 5 (high). This is useful for indicating priorities or providing feedback about the
quality of something (e.g., the question might be “did you like the new xxx feature.” and the user
can select 1 (not very much), 2, 3, 4, 5(definitely).
56
• Radio Buttons Yes/No - This type of question is like the Radio Buttons 1-5 but allows only two
choices: Yes or No.
• Comment Only – Provide text in the survey, such as instructions to the user
• Text field - This type of question allows the user to insert some text in a text field.
• Text area - This type of question allows the user to insert some text in a text area. This provides
the user with greater space for responding than a text field.
4.14.5
Modifying a Survey
You can modify an existing survey, although this is not recommended if answers to the survey have
already been given. Be advised that the results of a survey are not consistent if you modify the survey
and users have already inserted answers.
To edit a survey, click Advanced -> Surveys -> Edit Survey. Scroll to the list of surveys at the bottom of
the page and select the “Edit” link associated with the survey you wish to modify. Use this function to
perform the following tasks:
•
Change the name of the survey
•
Delete questions from a survey
•
Reorder the questions listed in a survey
•
Change the status of a survey from active to not active, or vice versa
Remember to click the Submit Changes button at the bottom of the page to register your changes.
4.14.6
Viewing Survey Results
You can view the results of the surveys by clicking Advanced -> Surveys -> Show results. Click on
“Result with Graph and Comments” for the survey results you wish to view. Note: there are also links for
“Result” and “Result with Graph” but these are currently not working.
4.15 Dashboards
Dashboards are part of the Simtk.org nightly build system, which is used to automatically compile and test
code from specific Simtk.org projects on a daily basis.
Build results are displayed using a
green/yellow/red scheme for quickly showing success/warning/error results. You can view a quick
summary of the results of several days’ builds across all platforms or see the details of a specific night’s
builds broken down by platform (e.g., Linux, Mac, Windows 32- and 64-bit builds). Because of the large
computational cost of running nightly builds, user projects cannot automatically become part of the
Simtk.org build system. If you have a project you think should be built nightly on Simtk.org’s machines,
57
please contact the webmaster.
4.16 Repository
The project repository is a centralized place for collaborating on and storing files, including code, models,
and data. Based on Subversion, the repository provides version control so that 1) older versions of files
are maintained and can be accessed, if needed, 2) changes are clearly documented and tracked, and 3)
individuals can modify files simultaneously, merging the changes together at a later point in time.
4.16.1
Accessing the Repository
4.16.1.1
Browsing
A project repository can be "viewed" on-line using any web browser at:
https://simtk.org/websvn/wsvn/<ProjectID>
where the <ProjectID> is the UNIX name or short ID for the project. You can find this ID in the URL for
the project: https://simtk.org/home/<ProjectID>.
The same area can be browsed by accessing the Source Code Repository section under the Advanced
link for the project. Click on the “Browse Subversion Repository” link to view the contents of the
repository.
In the Browse view, you can view the repository, view differences between revisions, and download
versions of a file. Note that project administrators determine the access level for the repositories, so some
repositories may only be viewed by project team members.
While on-line browsing is useful for understanding the repository structure and to quickly view some files
and revision history, individuals who want to work on the files/folders should utilize a Subversion client for
full access.
4.16.1.2
Full Access with a Subversion Client
The repository can be accessed through a Subversion client, which will allow individuals to:
•
Make local copies of the whole repository (or its subfolders)
•
Update their local copies with the most recent versions
•
Provide their changes back to the repository
For these purposes, individuals should direct their Subversion client to:
58
https://simtk.org/svn/<ProjectID>
where the <ProjectID> is the UNIX name or short ID for the project. You can find this ID in the URL for
the project: https://simtk.org/home/<ProjectID>.
A variety of clients can be used to interact with the repository. Lists of available clients can be found at
http://svn-ref.assembla.com/svn-client-guide.html
and
http://en.wikipedia.org/wiki/Comparison_of_Subversion_clients. Some useful clients that have graphical
interfaces include, but are not limited to:
•
RapidSVN (multi-platform)
•
TortoiseSVN (Windows)
4.16.2
Interacting with the Repository
It is possible to interact with the repository through a Unix-based client or through an application like
RapidSVN or TortoiseSVN. This manual will describe some of the general terminology and processes for
interacting with the Subversion repository. It will not, however, cover any specific command syntax or
command use within an application (See http://wiki.simtk.org/j2c/InstructionsForSourceCodeRepository
for specific examples of using Rapid SVN).
The typical workflow involves copying the repository to your local computer (checkout), making changes
in your local version, and then updating the repository with the changes from your local version (add,
commit). Listed below are some of the more common interactions with the repository:
checkout
make a local copy of the on-line repository by downloading the repository contents
to your own computer
update
update the local copy of the repository with files from the on-line repository; changes
made to the local copies of files/folders are not overwritten
add
add a file or folder that has been created in the local copy of the repository to the
on-line repository
commit
upload files/folders (add or change, if they already exist) from the local copy of the
repository to the on-line repository
revert
undo changes conducted on the local copies of files/folders by downloading desired
versions from the repository; overwrites the local files/folders
diff
compare two different versions of a text file; requires utility software for file
59
comparison
4.16.2.1
Checking Out a Local Copy
The checkout command is used to copy the repository, or parts of the repository, to your local computer.
The checkout process requires:
•
The remote address (URL) of the repository for a project:
https://simtk.org/svn/<ProjectID>
where the <ProjectID> is the UNIX name or short ID for the project. You can find this ID in the
URL for the project: https://simtk.org/home/<ProjectID>.
•
The destination directory on the local computer
•
The revision (by default, it is set to the latest)
If authentication is required, enter your Simtk.org username and password. IMPORTANT NOTE: Use
only lowercase letters when entering your user name. Even if there are upper-case letters when
you normally enter in your Simtk.org user name, for accessing the repository, you will need to
convert those letters to lower-case.
4.16.2.2
Updating a Local Copy
You can synchronize a local file or folder with the version in the repository via the update command. By
default, the latest version will be used to update local files and folders recursively (including subfolders
and files). Consult the manual to update a file or folder with an earlier version of it from the repository.
It is recommended that you update your local copy of a file or folder with the most recent version of it in
the repository before modifying it, since another individual may have worked on it.
4.16.2.3
Making Changes to the Repository
Typically, you will work with your local copy of the repository, make changes locally and later, upload
those changes to the remote (on-line) repository.
When you create files and directories under the local copy of the repository, you need to inform the
remote (online) repository of their existence. This can be accomplished by the add operation. Note that
this procedure only notifies the on-line repository that new files and/or folders will be part of it. To upload
these, a commit operation should be performed so that the file and/or folders from the local copy of the
repository are copied to the on-line repository.
60
4.16.3
Helpful Links
•
Documentation for Subversion (http://svnbook.red-bean.com)
•
RapidSVN Documentation (http://www.rapidsvn.org/index.php/Documentation) - RapidSVN is a
cross-platform, free and open source client for Subversion.
•
TortoiseSVN manuals (http://tortoisesvn.net/support) - TortoiseSVN is a Windows-based, free and
open source client for Subversion.
5 Site-wide Functions
5.1
Site-wide News
A compilation of news from different Simtk.org projects can be accessed by clicking the “News” link near
the top of the page. To submit a news item to be displayed on the site-wide news page, add a news item
from one of your projects and check the box for “Submit to Simtk.org site news?” (See Section 4.8.2.1 for
more details). If the Simtk.org webmaster approves the news item, it will then be displayed on the sitewide news page.
5.2
Site Statistics
Statistics about Simtk.org usage and content are available on the site-wide news page and on the
individual driving biological problems (DBP) pages. To access the site-wide news page, click the “News”
link near the top of the page. On that page, you can find:
•
The total number of projects hosted on Simtk.org
•
The total number of Simtk.org members
•
Projects with the most number of downloads
To access a DBP page, go to the Simtk.org Home page and select the desired DBP under the header
“Biological Application Areas.” From there, in the left-hand column, you can select the link for:
•
Activity – See data for the DBP, including the number of projects related to this DBP, the number
of users that have downloaded files from these projects, and the total number of downloads for
this DBP
•
Geography of Use – See a Google map of the number of visitors to projects related to this DBP