1
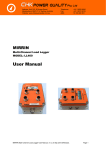
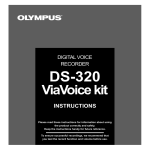
USB Recorder User Guide
Table of Contents
1. Getting Started
1-1.................................................... First Login
1-2.................................. Creating a New User
2. Administration
2-1.............................. General Administration
2-2.................................... User Administration
3. Recording and Playing
3-1..................................... Using the Recorder
3-2..................................... Using the Software
4. Organizing Recordings
4-1............................................. Recording List
4-2........................................... Recording Data
5. Queries
6. Errata
6-1.......................................... Automatic Login
6-2........................................... Sparky Support
6-3…………………………Head Set Support
1. Getting Started
1-1 First Login
When you first start up the USB Recorder software, you will see the following screen:
Enter ADMIN as the User ID, and make the password field blank, then click the OK button. The
administrator settings screen will appear:
The first thing you should do is create a new administrators password. Enter a password in the
New Admin Password field, and then re-enter the pas
Enter in your new users User ID and Password. For now, don’t worry about filling in any of the
other data fields. Click the Save button at the bottom of the window to create the new user.
Log In as the New User
Enter the newly created users ID and Password into the User ID and Password fields, and then
click the OK button. You will see the main recorder screen, and can now begin recording
conversations. For more information, see Section 3.
2. Administration
2-1 General Administration
General administration options are controlled from the General tab on the administration
screen:
Login Needed – If checked, users will always be required to enter a User ID and Password, i.e.
no automatic login.
Always record Room – Used for phones with a low side tone. Should not be checked with the
Sparky+ model. Gain control should be used with the Sparky+ model instead.
Hide recordings – Recordings in the List Tab will not be displayed to the user or agent
Main Data Location – This is the directory where the system will keep the user settings
database.
Email Server – The SMTP server for outgoing user email.
FTP Server – location of the ftp server for users who need the recordings on an ftp site usually to
be viewed by managers.
General Server – Reserved for future use.
New Admin Password / Confirm Password – Use these fields to change the admin password.
– Save button. Click to save your changes.
– Clear button. Click to reset all data fields.
2-2 User Administration
User administration options are controlled from the Users tab on the administration screen:
User List – This popup menu allows the administrator to select any of the users on the system,
and change their settings.
User ID – The users User ID.
Password – The users Password.
User Name – The users name.
Prefix – A three-letter prefix appended to all audio files created by the user.
Data Dir – The first Data Dir field is the directory the user’s audio files are stored in. Click the
Data Dir. button to browse for a new location.
The second Data Dir field is the directory used for storing backups of the user’s audio files. This
directory must be typed in manually.
User Email – The return email address shown on emails the user sends.
Checkbox Settings
Open To System Tray – If checked, the user can only run the software in the background, never
seeing a player, only a system tray icon. In this mode, the user can only record using the buttons
on the USB Recorder itself, or through automatic recording of conversations. Note that a user
with this option enabled cannot even quit the software his or herself—an admin or other user with
higher access must log in first.
Close To System Tray – Indicates that when the player is closed, the application will simply
collapse to the system tray and continue running in the background.
Start With Small Player – This option indicates that upon logging in, the user is initially
presented with the small version of the player. The default is for the large player to come up at
first.
View List LIFO – Orders the users recording list (see Section 4-1) from most recently recorded to
least recently, instead of the other way around.
Disable auto List Update – Stops the software from updating the recording list every time a new
recording is made. Can greatly improve performance in situations where a user has thousands of
saved recordings.
Disable Box Keys – Disallows the user from accessing the USB Recorder functionality by
pressing the buttons on the recorder itself.
Compress Recordings – All recordings will be compressed if this feature is enabled. Note that
compressed files can only be played through the speaker’s and not over the phone.
Automatic Recording Settings
Auto Room Recording / Auto Phone Recording – Enables or disables automatic room/phone
recording. Only one of these can be active at a time; if both are checked, the software defaults to
automatic room recording.
Voice Activation Start – Duration, in seconds, for which system must hear audio to begin
automatic recording. The default is 2 if no value is entered.
Ends – Duration, in seconds, for which system must hear silence to turn off automatic recording.
The default is 2 if no value is entered.
Sensitivity – The threshold at which the automatic recording function determines noise from
silence. The default is 100 if no value is entered.
Rewind/Fast-forward interval - Defaults are 3 seconds.
Recording length - Default is 0 meaning there is no minimum. If set to 10, for example,
recordings with less than 10 seconds will not be saved.
Buttons
– Save button. Click to save a new user, or to save changes to a previous users settings.
– Clear button. Click to reset all data fields.
– Delete button. Click to delete a user from the system.
3. Recording and Playing
3-1 Using the Recorder
Once a user has logged in, he or she can begin recording and playing back conversations. One
of the ways to do that is by using the buttons on the USB Recorder itself, assuming the
administrator has not disabled the user’s ability to do so.
– Plays the last file recorded.
– Begins recording from the phone. Press the button again to stop recording.
– Begins recording from the room, using the room microphone. Press the button
again to stop recording.
3-2 Using the Software
The user can also record and play conversations using the software player.
– Begins recording.
– Stops playback or recording.
– Plays a recorded conversation.
– Pauses playback or recording.
– Rewinds playback by three seconds.
– Fast-forwards playback by three seconds.
– Skips playback to the beginning of the recording.
– Skips playback to three seconds from the end of the recording.
– The slider allows jumping to a given point in the recording.
– If checked, the software player’s record button will record from the USB
Recorders room microphone. Otherwise, the record button will record from the phone.
– If checked, recordings will be played using the telephone, rather than using the
PC speakers. This setting will affect the function of both the software play button and the
[Play/Stop] button on the USB Recorder.
-Pause Image
Concatenating files –
1) Select two or more recordings in the list tab
2) Right-click the selection
3) Choose 'Combine'. Note that the new file will not be displayed in the List tab but will
be displayed in windows explorer.
Export a short clip of a file –
1) Begin playback of a file
2) Pause playback.
3) Right-click the Pause image, choose 'Set Export Clip Start...'.
4) Resume playback, pause again some time later.
5) Again right-click the pause button, this time choose the 'Export
From...' option and save the file.
4. Organizing Recordings
The recorder software provides two functions for organizing recordings. The first, covered in
section 4-1, is a list view of all a users recordings. The second, explained in section 4-2, is a
facility for changing the filenames of recordings, assigning subjects and sources, and
bookmarking/commenting certain locations within the recording.
4-1 Recording List
To view the Recording List, click the List button on the right side of the main player:
Click the List button to bring up the Recording List.
The Recording List will come up below the player:
Click any of the recordings in the list to play that recording. The list can also be sorted by the
data in a given column by clicking on any of the column headers. Clicking on the same column
again switches between an ascending/descending sort orders. An icon of a hand distinguishes
between the two.
Right-clicking a recording brings up a popup menu where you can remove the recording, back it
up (copy it to the user’s backup directory), do both, or email it to a third party:
4-2 Recording Data
With a recording selected from the List tab, click the Rec. Data tab. You can also access the
Recording Data tab from the player by clicking the Data button on the player:
Click the Data button to bring up the Recording Data tab.
The Recording Data tab:
File Name, Subject and Source
File Name – The recordings current file name.
New Name – Here, you can enter a new name for the recording.
Subject – The subject of the recording.
Source – The source of the recording.
– Save button. Click to save changes to the file name, subject or source.
– Delete button. Click to delete the recording altogether.
Bookmarks and Comments
A single recording can have multiple Bookmarks and Comments, as they mark an instant of time
within the recording. A Bookmark is just a simple marker, allowing the user to quickly return to a
specific moment within the recording. A Comment is the same thing, but with the added ability to
attach a note.
Bookmarks
To add Bookmarks, start playing a recording. When the moment you wish to mark arrives, click
either the Bookmark button on the Rec. Data tab:
Click to set a Bookmark.
Or click the Bookmark button to the right of the recording time display on the player:
Click to set a Bookmark.
Added Bookmarks will appear in the Bookmark list, along with a number indicating the number of
seconds into the recording they mark:
To give a Bookmark a short name, click on it, type the name in the field between the list of
Bookmarks and the Bookmark button, and press [Enter]:
Comments
Comments are an extension of Bookmarks that also allow you to save a short note about the
marked position.
To add a Comment, start playing a recording. When the moment you wish to mark arrives, click
either the Comment button on the Rec. Data tab:
Click to mark the Comment location.
Or click the Comment button to the right of the recording time display on the player:
Click to mark the Comment location.
Added Comments will appear in the comment list, along with a number indicating the number of
seconds into the recording they mark:
To give a Comment a short name, click on it, type the name in the field between the list of
Comments and the Comment button, and press [Enter]:
To edit the actual Comment, select the Comment you wish to edit from the list, and then click the
Edit Comment button:
Click to edit a Comment.
The Comment editing screen will appear:
The text seen above starting with Sample Comment is the text of the comment, which you can
edit here. The buttons on the top right work as follows:
– Saves the changes to the Comment.
– Clears the text in the Comment editing section.
– Exits the Comment editing screen without saving changes.
Emailing a Recording
To email a recording, select from the List tab the recording you wish to email, and then click the
Email button at the bottom of the Rec. Data tab:
Click to email a recording.
The Email Recording screen will appear:
Type in an email address in the Send To… field, or select one from the popup menu of addresses
previously used. Next, type your message into the space below the Send To… field. Finally, click
the Check button to send the email.
Click to send the email.
Note: The system administrator must have entered an email server for the system, and an email
address for the user, for this function to be available for a given user.
Other buttons on the Email Recording screen:
– Clears the destination email address, as well as the text in the email editing section.
– Exits the Email Recording screen.
5. Queries
The Query tab displays the Query screen:
To run a query, you select the various options you wish to use when querying the recordings,
and click the Check button. The Recording List screen will appear, with only the recordings which
match the Query displayed.
Click to run the query.
To clear a query and return the List view to showing all recordings, click the New button, which
erases all the query settings, and then the Check button to run the blank query.
Click to reset all query options to blank.
Preset Query Options
The five checkboxes below the Query Name field are preset queries.
All – Return all recordings.
Today – Return recordings made today.
Last – Return the last recording made.
Rec. Phone – Return all recordings made from the phone.
Rec. Room – Return all recordings made from the room.
Date/Time and Length Query Options
You can select a date/time range for the query, as well as a length range. Note that times of day
must be entered in 24-hour format. Both specific times and lengths of time are entered in hourminute-second format.
File Name, Subject and Source Query Options
The File Name, Subject and Source query options all work the same way, and are best explained
by example. The following are the steps to query for all recordings with a subject that contains the
word sales. The File Name and Source query functions operate identically.
First, select the Subject tab. Now, click in the first column of the first line. The word AND should
appear (the AND and OR keywords will be explained momentarily):
Click in the second column, and type *sales*. (The asterisks are wildcards, and indicate that any
string of zero or more characters can occur before or after the word sales.) The input in the
second column is case insensitive, so there is no need to worry about capitalization.
Finally, click on the Check button to run the query. All recordings with subjects containing sales
will be returned:
AND and OR Keywords
The AND and OR keywords have a simple function, if not necessarily straightforward.
Recordings matching query text following any OR keyword will be displayed on the results list. In
contrast, the AND rows query text gets grouped together, so that only recordings matching the
query text of every AND row will appear on the results list. For example, take the following query:
This query will return any recording containing brian in the subject, any recording with ted in the
subject, plus any recording with both sales and the in the subject.
Saving Queries
To save a query in order to run it again later, type a name into the Query Name field, and then
click the Save button.
Click to save a query.
When you wish to re-run the query, simply select it from the Query Name popup menu, and click
the Check button.
6. Errata
6-1 Automatic Login
There are two cases where automatic login will occur, if it has been enabled by the administrator
(see section 2-1).
1.) Users with the Open to System Tray option selected (see section 2-2) will be automatically
logged in, if they were the last user to access the system.
2.) If the last user to access the system is not an Open to System Tray user, the system will
attempt to automatically log in with user URX, using password URX. The administrator must
explicitly create this account if he or she wishes to allow default access to the USB Recorder
software.
6-2 Sparky Support
The Sparky model USB Recorder enables headset usage, and the ability to play recordings over
a phone connection.
Note: The Use Headset checkbox allows headset usage and playing recordings over the phone
simultaneously.
6-3 Head Set Support
Wireless headset’s can be connected to the recorder. The phone should be connected to the
recorder first. Than connect the
Head set amp to the side of the USB Recorder where the handset connects. In other words, the
head set takes the place of the hand set of the recorder.
Phone<=>recorder<=>headset amp
2.5mm wired headset’s can be plugged into the 2.5 mm jack located on the bottom of the
recorder.