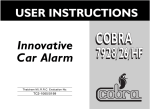
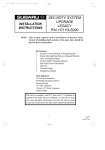
1
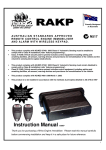
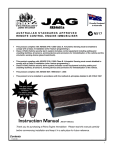
Optional Accessories
This soft clutch central locking unit gives you
keyless entry to your vehicle & operates from
your alarm Remote.
Warranty Registration Card
Owners Name __________________________________
Address _______________________________________
Electric boot release solenoid gives you
added comfort by allowing the boot to be
released with the Alarm Remote.
Phone ________________ Fax ____________________
Vehicle Make ________________ Model_____________
Battery Backed Siren with 125 dB Sound Off,
Protects against power termination from the
vehicle. Comes with a two position high
security key switch.
Some features of the Immobiliser system may
require extra accessories. For more information,
please contact your authorised Steal Shield
dealer.
Vehicle Year ________________ Reg No:____________
Customer Signature___________ _(Accepted with Satisfaction)
Authorised Dealer to Complete
Company ______________________________________
Limited 36 Months Warranty
Address _______________________________________
We will service or replace any faulty units at our discretion
provided that,
• The immobiliser is no older than 36 months from date of purchase
• An authorised Steal Shield installer has installed the system
• The warranty registration card is presented with proof of purchase
• The warranty claim is undertaken by your original installer/dealer
• The installer takes responsibility for installation
• The system is owned by the same owner
Phone No ______________________________________
Immobiliser Model
SS440
SS440U
Serial Number___________________________________
Date Installed ___________________________________
Name of Installer ________________________________
Not covered under Warranty
•
•
•
•
•
•
•
Fluid damage or any misdirected electrical current
System is installed by an unauthorised installer
Batteries, including those for the remote controller and the main unit.
Improper wiring or installation
Normal Wear and Tear
Transportation to authorised Steal Shield dealer for repairs
If any goods are misused or tampered with
We are not liable for any theft or damage to the vehicle or its contents and or any inability on the part of the customer/purchaser to
use the equipment. This warranty is not an insurance policy against
loss.
Customer understands & agrees to, and accepts the above
warranty conditions.
Installer Registration Number ______________________
USER MANUAL
SS440 Vehicle
Immobiliser
System
AU/NZS4601:1999
Immobiliser Standards
Approved
Certificate Number 10202.001
I being the authorised installer for the above company
certify that this Immobiliser has been installed to the AU/
NZ Standards. Sign______________________________
Steal Shield
WWW.STEALSHIELD.COM
INTRODUCTION
EMERGENCY DISARM
SYSTEM OPERATION
Congratulations! on being a proud owner of a Steal Shield.
This Immobiliser system will give you piece of mind against
burglars and intruders.
Digital Pin Code Override System!
Button #1
Button #2
This Product has been approved by the AU/NZS4601:1999
Immobiliser Standards. To obtain the best results from your
security system, we suggest you read the instruction manual
carefully.
STEAL SHIELD “a shield you can trust”
SYSTEM FEATURES
Rolling Code Remote’s
Each time the remote is used, the code changes. The system brain will
only respond to a certain code once, so any attempt to "record and play
back" a remote transmission with a code copier , will not be accepted by
the system brain.
Auto Engine Immobilliser
35 seconds after you turn the ignition off, system immobilise the vehicle.
Security Re-Arm
System will re-arm if it is disarmed & a door is not opened within 35 seconds.
Indicator Flash
Gives a visual indication of the system arm, disarm & trigger.
Theft Deterrent LED
This is normally installed in the dash board, to describe the visual status of
the system to warn the intruders.
Immobiliser
When ever the system is armed, it disables the car engine from being
started, making it harder to steal. If the battery is disconnected and rereconnected, the system will return to the original state.
ride no.
switch.
1.
2.
3.
4.
Press & release the transmitter button #1.
Two chirp & Indicators flash verifies system is on.
Doors will lock ( Central Locking must be installed).
LED will flash slowly.
Disarming the System
1.
2.
Press and release the transmitter button #1.
One chirp & Indicators will stay on for 10 Sec. System is off
doors will unlock (Central locking must be installed).
Personal Protection Alarm (Panic)
1.
2.
3.
Press and hold the transmitter button #1 for 3 sec.
Siren will sound & Indicators will flash for 3 min’s.
To cancel Panic press button #1.
Following example shows how the override number
the installer”
1. Turn the ignition on while the system is armed, the LED will
stay on.
2. Turn the ignition OFF, the LED will start flashing. Count the
number of flashes. After the 4th flash, turn the ignition on. The
LED will stay on.
3. Turn the ignition off, and count the number of flashes. After
the 5th flash, turn the ignition on. The LED will stay on.
4. Turn the ignition off, and count the number of flashes. After
the 2nd flash, turn the ignition on. The LED will stay on.
5. Turn the ignition off, and count the number of flashes. After
the 5th flash, turn the ignition on. The LED will stay on.
Trunk Release Option
Press and hold the transmitter button #2 for 3 sec. Two chirps & Indicators flash indicates operation of trunk release (if installed).
One Time Soft Chirp
(Arm/Disarm chirp can be temporarily disabled from your remote)
1.
Press & release transmitter button #2
Digital LED Reporting
The LED will give a digital diagnostic code to tell you the status;
2 F/S System Armed & 10 F/S Auto Arming, and Security Re-Arm.
2.
Press & release transmitter button for desired function.
IMPORTANT NOTICE
The digital pin card supplied by the Installer must be kept in a secure place
as this contains your unique pin number to disable the system in an emergency.
Each digit is entered individually using the ignition
45258 would be used. “Digital pin should have been given by
Arming the System
Personal Protection Alarm
Works as a personal alarm to grab attention.
Error Sector Isolation
If any sector triggers for 3 times or more when armed, it will automatically
isolate it, till the next arm.
The system can be disarmed by entering 5 digits of the over-
6. Turn the ignition off, and count the number of flashes. After
the 8th flash, turn the ignition on. The siren will chirp once and
the system will disarm.
Note
If the digit is a “0”, wait 10 flashes before turning ignition “on”
Should you miss the LED flashes or enter a digit incorrectly,
wait for 11 flashes and simply repeat the procedure from step
one then re-enter from the first digit of the override code.
Precautions
•
We suggest you test the system weekly to maximize protection for your car
•
If you jump start your car, always use a surge protected jump lead to prevent any damage to the
alarm system
•
If a mobile phone is left in the car with the power on, it can give false alarms due to the radio
waves emitted from the phone