1
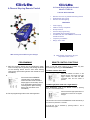
ClickOn
ClickOn
6-Channel Keyring Remote Control
6-Channel Keyring Remote Control
Model: CL-KEY-06
TYPICAL APPLICATIONS
•
•
•
Remote control of any ClickOn Receiving Device
Gate/Garage door Control
Remote controlled lighting
FEATURES
•
•
•
•
•
•
•
•
Code hopping.
Ideal for security complexes.
No dip-switches.
User-friendly programming.
Compatible with all ClickOn devices.
Provides ON, OFF and DIMMING control with
ClickOn dimmers.
Frequency: 433.92Mhz.
Range: 30 to 100m.
6 009625 990547
Add security and comfort to your lifestyle
©
2006 ClickOn Technology (Pty) Ltd.
http://www.clickon.co.za
PROGRAMMING
REMOTE CONTROL FUNCTIONS
1. Place the receiving device into the programming mode.
This is normally done by pressing and holding the button
on the receiving device until it’s LED starts flashing
continuously. (See receiving device user manual for more
information).
Keep in mind that these functions will be available only after
successful programming (see PROGRAMMING).
2.
Press and hold the DESIRED
channel button on the Remote
Control until the remote sounds 3
beeps (approx.10 seconds). Check
for a confirmation signal from the
receiving device. (See receiving
device user manual for more
information).
3. Exit the programming mode on the receiving device.
To switch a device ON or OFF
Press and release the button on the
Remote Control. The remote control will
toggle between the ON and OFF
commands each time the button is
pressed.
To DIM a light (when used with a Light Dimmer)
Enter DIM/BRIGHT mode on the Remote control by pressing
buttons 1 and 2 simultaneously.
Press and hold the appropriate button on
the Remote Control to dim or brighten
the light.
The Remote Control will exit the DIM/BRIGHT mode automatically if
no buttons are pressed for 7 seconds.
A forced exit can be achieved by pressing buttons 1 and 2
simultaneously again.
ADVANCED PROGRAMMING
KEYPAD LOCK FUNCTION
Delete
The keypad lock function can be used to prevent accidental remote
control activation.
A Remote Control channel programmed into a ClickOn
receiving device may be deleted from that device by
following the procedure below:
Enabling the Keypad Lock Function
1. Place the receiving device into the programming mode.
This is normally done by pressing and holding the button
on the receiving device until the receiving device LED
starts flashing continuously. (See receiving device user
manual for more information).
Before the keypad lock function can be used, it has to be
enabled as follows:
Press and hold button 3 and 4 simultaneously until the
remote sounds a burst of beeps (after approximately 5
seconds).
The keypad can now be locked and unlocked (see
Locking/Unlocking the Keypad)
2.
Press and hold the appropriate
button on the remote control until the
remote sounds 3 beeps followed
by another set of 4 beeps. Check
for a confirmation signal from the
receiving device. (See receiving
device user manual for more
information).
3. Exit the programming mode on the receiving device.
Disabling the Keypad Lock Function
Press and hold button 3 and 4 simultaneously until the
remote sounds a short beep (after approximately 5 seconds).
The keypad lock function is now disabled.
Locking/Unlocking the Keypad
Lock or Unlock the Keypad on the Remote Control by
pressing buttons 3 and 4 simultaneously. The Remote
Control will sound a long beep when the Keypad is locked
and any key is pressed on the remote control.
Delete All
All remote control channels programmed into ANY ClickOn
RECEIVING device can be deleted entirely by using any
ClickOn Remote Control. The remote control used for this
need not be one that was previously programmed into the
device. This allows a lost or stolen remote control to be
deleted before reprogramming the new remote control.
BATTERY REPLACEMENT
If the remote control does not respond to any key presses or
the LED fails to come on when a key is held in, the battery
may need replacement.
The remote control uses one type 23A 12V battery.
1. Place the receiving device into the programming mode.
This is normally done by pressing and holding the button
on the receiving device until the receiving device LED
starts flashing continuously. (See receiving device user
manual for more information).
2.
Press and hold any button on the
remote control until the remote
sounds 3 beeps, then 4 beeps and
then 5 beeps (approximately 17
seconds). Check for a confirmation
signal from the receiving device.
(See receiving device user manual
for more information).
WARRANTY
The manufacturer warrants that the product identified in this manual is free
from defects in material or workmanship. This warranty is valid for a period
of 12 months from date of purchase. The manufacturer, at its discretion, will
repair or replace the defective product when returned to the manufacturer
via the retailer of the system. In the event that no satisfaction can be
obtained from the retailer of the system, only then can the manufacturer be
approached directly by the final purchaser. The manufacturer shall not be
responsible for any loss or damage of any nature whatsoever whether direct
or indirect, consequential or otherwise, sustained as a result of the use of
the product. Improper use or mishandling of this product by the purchaser
will render this warranty null and void. No warranty claims will be entertained
without presentation of a valid invoice. The manufacturer will charge the
purchaser for services rendered outside the warranty period. Any implied
warranties in respect of this product are expressly excluded. No agreement
whether implied or referred are binding, unless agreed to in writing by the
manufacturer.
3. Exit the programming mode on the receiving device.
CL-KEY-06-R4.2 MAR 2006 © ClickOn Technology (Pty) Ltd