1
CR Series
LED Luminaire With Emergency Driver
Includes: CR24-EB14, CR14-EB14, CR22-EB14
IMPORTANT SAFETY INFORMATION
Read all instructions before installation
INSTALLATION INSTRUCTIONS
INSTRUCTIONS D’INSTALLATION
CAUTION - Risk of Electric Shock.
ATTENTION - RISQUE DE CHOC
READ AND FOLLOW ALL SAFETY INSTRUCTIONS
1.
DANGER- Risk of shock- Disconnect power before installation.
DANGER – Risque de choc – Couper l’alimentation avant l’installation.
2. This luminaire must be installed in accordance with the NEC or your local electrical
code. If you are not familiar with these codes and requirements, consult a qualified
electrician.
Ce produit doit être installé conformément à NEC ou votre code électrique local. Si
vous n’êtes pas familier avec ces codes et ces exigences, veuillez contacter un
électricien qualifié.
3. Do not install insulation within 3” (76mm) of any part of the luminaire
Ne pas mettre l’isolant à moins de 76 mm (3 po) de toute partie du luminaire.
4. Access above ceiling required.
Accès requis au-dessus du plafond.
5. Do not handle energized module with wet hands or when standing on wet or damp
surfaces, or in water.
6. Suitable for suspended ceilings.
7. Maximum mounting height of 10 feet.
8. Do not use this equipment for other than its intended use.
9. Do not use outdoors.
• The CR Series is for non-insulated
ceiling applications using T-Bar ceiling
grid only.
• Designed for use in 120-277V
50/60 Hz protected circuits (fuse
box, circuit breaker). Supply wire
sized in accordance with national
and local electrical wiring codes
rated 90C or higher.
SAVE THESE INSTRUCTIONS FOR FUTURE REFERENCE
TO INSTALL
1
2
STEP 1:
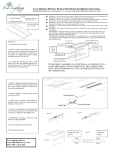
Unpack the CR troffer from its
shipping container. See Figure 1.
STEP 2:
Install the (4) T-Bar clips included with
the luminaire (located in pre-pack
fastened to luminaire J-Box).
STEP 3:
Place the CR troffer into the T-Bar
Ceiling panel. Ensure T-Bar clips are
attached to the T-Bar. See Figure 2.
STEP 4:
3
4
Remove junction box lid by removing
screws to access wiring connections.
Remove all packaging from the battery
compartment prior to installation.
Remove appropriate knockout from
junction box to route input conduit.
See Figure 3.
STEP 5:
Connect input conduit to junctions
box. See Figure 4. Make wiring
connections per the Electrical
Connection Section on the next page.
STEP 6:
Remove the ‘Notice’ label covering
the socket located in the battery
compartment and insert plug from the
battery pack into the socket. Push all
wires back into the junctions box and
reinstall junction box lid.
1 of 3
LPN000130_F
ELECTRICAL CONNECTIONSVIOLET
NOTE: The emergency driver must be fed
from the same branch as the AC Driver.
STEP 1:
To Lutron EcoSystem®
Dimming Controls
VIOLET
& WHITE
DRIVER ASSEMBLY
WHITE
Using customer supplied 90°C minimum
rated wire connectors, make the
following electrical connections:
LUTRON ECOSYSTEM® DIMMING:
a. Connect the black lead to Switched Hot.
b. Connect the red lead to Un-switched Hot
c. Connect white lead to the Neutral.
d. Connect green lead to the Ground.
e. Connect the violet lead to the Lutron
EcoSystem® Dimming Control.
f. Connect the violet/white lead to the
Lutron EcoSystem® Dimming Control.
STEP DIMMING:
a. Connect the black lead to
Switched Hot #1 (S1).
b. Connect the black lead to
Switched Hot #2 (S2).
c. Connect the red lead to Un-switched Hot
d. Connect white lead to the Neutral.
e. Connect green lead to the Ground.
BLACK
LINE S1
UNSWITCHED HOT
Power
Output
RED
Position
DRIVER ASSEMBLY
S1
S2
100%
On
On
50%
On
Off
NEUTRAL
50%
Off
On
UNSWITCHED HOT
0%
Off
Off
LINE
BLACK
S1
BLACK
S2
WHITE
RED
NOTE: (1) DO NOT CONNECT two separate phases of the line voltage to the
input of the CR Series LED Light Engines, the LED driver will be damaged and
not covered by warranty. (3) The AC line inputs must be connected to the same
phase of the line voltage. (4) If step dimming isn’t required, combine BLACK–
Switched HOT #1 (S1) and BLACK– Switched HOT #2 (S2) together.
0-10V
a.
b.
c.
d.
e.
DIMMING:
Connect the black lead to Switched Hot.
Connect the red lead to Un-switched Hot
Connect white lead to the Neutral.
Connect green lead to the Ground.
Connect violet lead to the
supply Positive dimming.
f. Connect grey lead to the supply
Negative dimming.
VIOLET
DRIVER ASSEMBLY
GREY
WHITE
LINE S1
UNSWITCHED HOT
BLACK
RED
USER MANUAL:
INITIATING A BATTERY TEST
Depending on configuration, the EB14 may only enable battery testing when
the battery is fully charged. If the Indicator-LED is showing a “green on solid”,
then the battery is fully charged. The user may initiate a battery test by either: 1)
Pressing and releasing the push-button switch, or 2) Shining a bright light on
the test button optical sensor. Note: The optical sensor is co-located with
the push-button switch and the Indicator-LED’s.
Battery Test Switch
Optical Sensor
Test
Push-Button
Test
CR Series Troffer
www.Cree.com
Indicator LED
Battery Test
Switch
When the user presses and holds the push-button switch for less than 5
seconds, the EB14 initiates a “monthly” test of 30 seconds duration. When the
user presses and holds the push-button switch for more than 5 seconds, the
EB14 initiates a “yearly” test of 90 minutes duration. Similarly the user may
shine a bright light onto the EB14’s optical sensor to initiate the equivalent
tests. For a monthly test, the user shines the light for a minimum of 1 second
and maximum of 5 seconds. For an annual test, the user shines the light for
2 of 3
a minimum of 5 seconds. To provide feedback to the user, the
EB14 momentarily flashes the Green Indicator-LED to signal
initial activation (and subsequent 5-second activation) of the
Button or Optical Sensor.
OBSERVING THE BATTERY TEST
To verify the proper performance of the EB14, the user observes
the light and LED indicators during the battery test. After
initiating the battery test, the user should observe that the light:
1) Transitions rapidly from full brightness to nearly off 2)
Increases illumination gradually (over a few seconds) until it
reaches the initial emergency lighting level. The initial lighting
level is product-dependent, but is typically 1400 lumens. It is
not necessary for the user to observe the entire test (especially
the annual test) for the entire time period; however, it is
necessary for the user to observe at least part of the testing
– see “Observations of Light Output during Battery Test”,
below. Once the test is initiated, the EB14 performs the test
automatically until it either successfully completes the test or it
detects an error condition.
If the EB14 successfully completes the battery test, it simply
returns to normal operation. However if the EB14 uncovers a fault
condition, it reports the error via its Indicator-LED’s. The indicatorLED table shows the possible fault indicator sequences. The EB14
continues to display the fault indicator sequence (via the IndicatorLED’s) until the user clears the fault display.
LPN000130_F
USER MANUAL (CONTINUED):
EB14 State
LED State
AC present, Battery fully charged
(includes trickle charge)
GREEN ON; RED OFF
AC present, Battery charge in progress
GREEN FAST BLINK; RED
OFF
AC present, Test in progress
Alternate blinking RED/
GREEN
AC present, Test complete:
Battery Test Passed = back
to battery charge in progress
state (GREEN FAST BLINK,
RED OFF)
Battery Test Failure = GREEN
OFF, RED FAST BLINK
AC not present, running on battery
GREEN OFF; RED SLOW
BLINK
Critical Error Battery Low
GREEN OFF; RED Double
BLINK
Critical Error (Other)
GREEN OFF; RED Triple
BLINK
Pushbutton or Optical Sensor Stuck
Low
GREEN Double BLINK; RED
OFF
Minor Error (Other)
GREEN Triple BLINK; RED
OFF
OBSERVATION OF LIGHT OUTPUT DURING BATTERY TEST
Maintenance staff must observe the light output during Battery Test
operation, to determine if any fault symptoms are exhibited. Examples of
fault conditions include:
1. Light level is incorrect (too bright or too dim) relative to desired
output.
2. Lighting level increases or decreases dramatically and/or rapidly
over time.
3. Light color is “off” – inconsistent with “normal” color for that
light.
Maintenance staff is responsible for reporting these types of errors, and
replacing the faulty equipment as necessary, since these types of faults may
impact building-occupant safety during an actual emergency condition.
CANCELLING A BATTERY TEST IN PROGRESS
After initiating a battery test, the user may cancel the test in process. Once
the test is underway, and after a 5-second lock-out interval, the user may
cancel the test by either pressing and releasing the push-button, or shining a
bright light on the optical sensor for between 1 and 5 seconds.
CLEARING THE BATTERY TEST RESULTS (IF FAILED)
To clear the display of a failed-battery-test, the user presses and
releases the push-button, or shines a bright light on the optical
sensor for between 1 and 5 seconds.
LED INDICATORS
For normal powered operation – i.e., when both “switched” and “unswitched” AC power sources are applied, the LED Indicators show that the
system is charging or charged, and the output will be either: 1) Green Fast
Blink [charging], or 2) Green On Solid [charged].
During a battery test operation, the LED-Indicators will alternate
between Red On and Green On, for the length of the test. At the
conclusion of a successful battery test, the LED-indicators will return
to that of ‘normal’ operation – i.e., they’ll indicate that the system is
charging or charged. Subsequent a failed battery test, the LED-indicator
output will be Red Fast Blink. The EB14 maintains this output pattern
until the user cancels the fault display. Note: Fault indications require
immediate attention to assure that the EB14 system is ready when
needed.
HANDLING FAULT CONDITIONS
The table below lists the fault conditions that the LED-Indicators may display,
and what steps the user must take to assure that the EB14 is ready when
needed.
IMPORTANT RECOMMENDATIONS FOR THE USER AND
MAINTENANCE STAFF
Maintenance personnel need to be mindful of any unusual LED indicator
pattern, and to take appropriate action when observed.
When not in emergency mode, the EB14 lights operate the same as other
lights wired together on the same system. If the EB14 light is off or dim when
its lighting group is on, this is indicative of a fault condition. If during nonemergency (and non-test) conditions, the EB14 light is operating differently
than its non-EB14 counterparts, this may indicate a fault condition.
It is recommended that at system installation, and subsequently at
routine intervals not exceeding one year, the User performs a test of the
Emergency Lighting system by turning off the “Un-switched” AC power.
PRODUCT SERVICING
For fault conditions described in this User Manual that persist and do not
auto-clear, the user should contact a Cree Authorized representative for
information regarding product services and/or returns.
LED Indicator
Pattern
GREEN ON; RED
OFF
None
GREEN FAST BLINK;
RED OFF
Monitor for 24 hours while un-switched AC
Power applied to verify that system achieves
fully charged state (solid Green indicator). If
system doesn’t achieve full-charge in 24 hour
period (during which no battery discharge
condition occurred, and during which the unswitched AC power was continuously applied)
then proceed to Product Servicing.
Alternate blinking
RED/GREEN
Confirm that a battery test had been initiated;
confirm that the battery test concludes in 30
seconds (for monthly test) or 90 minutes (for
annual test.)
GREEN OFF, RED
FAST BLINK
Confirm that a battery test had been performed, and this is the failure indication.
Proceed to Product Servicing.
GREEN OFF; RED
SLOW BLINK
Confirm that the unit is running on battery –
i.e., that the un-switched AC power is off. If
un-switched AC power is present, proceed to
Product Servicing.
RED Double BLINK
This display sequence generally indicates a
problem with the EB14 battery. If the condition persists, proceed to Product Servicing.
RED Triple BLINK
This display sequence generally indicates an
unspecified problem with the ELM that may
prevent it from performing its emergency
lighting function. If the condition persists,
proceed to Product Servicing.
GREEN Double
BLINK; RED OFF
Pushbutton or Optical Sensor Stuck Low
GREEN Triple BLINK;
RED OFF
Minor Error (Other)
© 2014 Cree, Inc. All rights reserved. For informational purposes only. Content is subject to change. See
www.cree.com/lighting/products/warranty for warranty and specifications. Cree® and the Cree logo are
registered trademarks.
3 of 3
User Action Required
www.cree.com/lighting
LPN000130_F