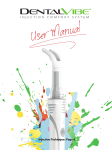
Download DentalVibe GEN3 User Guide
Transcript
USER MANUAL
Get to know your
DentalVibe® GEN 3
Learn the correct pressure that stimulates
the sensory receptors by experiencing the
DentalVibe on yourself first.
1. Place a new comfort tip on to
the DentalVibe and turn it on.
2. Rest the vibrating tip above
your upper lip. Apply differing
pressure to the skin and you
will notice that a light touch
delivers the greatest amount
of stimulation.
For one-on-one personal training
call me directly at 561-613-6377.
Steven G. Goldberg, DDS, FADFE
Inventor of the DentalVibe
Laser Calibrated
laser calibration
Elastomeric coated comfort tips are
laser calibrated to a specific frequency
and amplitude, effectively stimulating
the mechanoreceptors within the oral
mucosa. Heat or chemical sterilization
causes deformation of the elastomeric,
rendering the DentalVibe® ineffective.
This specific frequency and amplitude
is not attainable with a rigid plastic or
metal component.
Do Not restrict the DentalVibe
covering
2
The covering of a tip with any type of
material that restricts the frequency and
amplitude will negate the pain blocking
effect. Any restriction of the vibrating
tip creates excessive wear and tear on
internal moving components rendering
the DentalVibe in-effective, voiding all
warranties.
WARNING: Do Not inject through a
plastic sheath as this will deposit plastic
particulate matter submucosally acting
as a foci for foreign body infection.
Charging
DentalVibe® is equipped with a Nickel Metal
Hydride (NiMH) rechargeable battery.
Only use provided power supply.
Model # GTM 41076-0615
Input 100-240V, 50-60Hz, 0.5A
Output 15V, 0.4A
1. Insert power supply cord into recepticle on charger
base, plug power supply into an electrical outlet. Use
international plug adaptors as needed.
2. C harge the DentalVibe at least 15 hours before initial use.
3. A fter each patient use, place the DentalVibe back in it’s
charging base. Note: Battery does not experience the
“memory effect”.
DENTALVIBE LED INDICATOR LIGHT
BLINKS GREEN (on charger) when ready for use.
BLINKS AMBER (on charger) while charging.
BLINKS AMBER (off charger) when in need of a charge.
Note: DentalVibe needs to be placed on charger until light
blinks green.
3
Comfort Tip
Note: Comfort Tips are Latex-Free.
Installing the Comfort Tip for use
emove a fresh Comfort Tip from it’s sealed bag in plain
R
view of your patient. Align the arrow on the Comfort Tip
with the arrow on the DentalVibe® unit. Push straight
down until it snaps on securely. (see photos)
You are now ready to deliver a comfortable injection!
Removing the Comfort Tip after use
1. While holding the DentalVibe unit in one hand, grasp
the clear plastic portion of the Comfort Tip with your
other hand, rotate 180° counter-clockwise and lift up
to remove. The tip will tear, preventing re-use and
cross contamination.
2. After each patient use, return the DentalVibe unit
back to it’s charging base.
Note: Safe with pacemaker/defibrillator when used normally
in accordance with intended use.
4
On and Off
Watch instructional videos at www.DentalVibe.com/training
INSTALLING//REMOVING
REMOVINGCOMFORT
COMFORTTIP
TIP
INSTALLING
TIP OFF
TIP ON
Align Arrows and
Push Straight Down.
(Do not twist)
Twist the clear plastic portion
BIOHAZARD AFTER USE
180° counter-clockwise
and
Lift Up to Remove.
DO NOT RE-USE
Infection-control protocol for comfort tips.
WARNING: Do Not re-use the Tip.
Comfort Tips must be disposed of after each patient use to
prevent cross-contamination and ensure FDA compliance
of infection-control protocols. These tips are porous,
contain microfilaments and will harbor blood, saliva
and bacteria. Dispose of used White Tip in red bag
(hazardous waste).
5
Injections with
DentalVibe®
1. T he use of a topical anesthetic is optional.
2. Hold the DentalVibe as a retractor in a similar fashion
as you would hold a dental mirror. (It is designed with
the same angles for ease of use.)
3. Activate the DentalVibe by fully depressing the On/
Off button; and then introduce the vibration to your
patient by gently touching the back of their hand or on
the outside of their cheek before placing in the mouth.
4. Position DentalVibe’s Comfort Tip on the oral
mucosa at the injection site. (see photos)
Note: A light touch is all that is needed. Excessive pressure will
dampen the vibration, negating the pain-blocking effect.
For Infiltrations and Mandibular Blocks (IA), maneuver
to retract the lip/cheek as you would with a dental
mirror. For Palatal injections, position the very tip of
one of the prongs on the palate. (see photos)
6
5. U
se the DentalVibe to stimulate the injection site for
3-5 seconds before inserting the needle. Maintain
tissue contact and keep the vibrating prongs on the
oral mucosa while injecting.
With maxillary infiltrations, avoid vibrating the
maxilla as this may cause discomfort in some patients.
Exception: For Mandibular Blocks (IA) you must push
the vibrating prongs deeper into the buccal mucosa
and vibrate the mandible while simultaneously
injecting.
6. Always insert the needle as close as possible
to one of the vibrating prongs. The strongest
vibration is adjacent to the edges of the
prongs (see effective area). Note: It is okay if
the needle touches the vibrating prong.
Effective Area
7. Continue stimulation of the oral mucosa until delivery
of the anesthetic solution is complete. Then, remove the
needle and continue tissue stimulation for an additional
3-5 seconds. This will help diffuse the solution through
the tissue, periosteum and bone.
8. Shut off the DentalVibe by fully depressing the on/off
button.
Infiltrations
Palatal
Block
• Watch included CD or visit www.dentalvibe.com/training
for instructional videos.
7
Caring for your
DentalVibe®
SUPPLIED PARTS: DentalVibe hand piece,
Charging base with Power Supply and Comfort Tips.
CLEANING INSTRUCTIONS: Wipe handle clean with
plastic safe surface disinfectant. Thoroughly wet the
handle and ensure that the surface remains visibly wet
for 1 minute at room temperature (68°F/20°C).
• Do Not place DentalVibe or Comfort Tip in an autoclave.
• Do Not immerse DentalVibe or Charger in water.
• Remove the power cord plug from the electrical outlet
before cleaning the charger.
Permissible environmental conditions during normal use.
Temperature
Operating:
Storage:
8
Humidity
+18°C to +30°C 30-85% RH
-20°C to +45°C 10-85% RH
Barometric Pressure
100kpa-50kpa
100kpa-50kpa
DO NOT OPEN THE
DENTALVIBE OR CHARGING BASE.
The internal circuit boards are
manufactured in a static-free environment.
For service or battery replacement, please
call 1-877-503-VIBE (8423) for an authorized
Bing Innovations, LLC Service Center closest to you.
INTENDED USE:
DentalVibe® is intended for use by dental professionals in
a dental office setting. It has been carefully designed to
offer your patients a more comfortable dental injection
experience that is both safe and effective. It does not
modify the tissue or impart energy and is not intended
for therapeutic, diagnostic or any other purpose.
• The use of the DentalVibe varies between 10-60 seconds per application.
• Contraindication for use: Do not use in an area where an abcess is present.
WARNING:
Read all instructions before use.
Do not place or store the charger where it can fall or be pulled into a sink.
Do not place the hand held unit or charger in water or other liquid.
Do not reach for a charger that has fallen into water. Unplug immediately.
Use this type B applied product only for its intended use as described in the manual.
Do not use attachments or chargers not recommended by the manufacturer.
5. Position the charger so the power supply is easy to unplug.
6. Never insert any objects into any opening of the unit or charger base.
7. Never operate the product if it has a damaged cord or plug, not working properly,
has been dropped, damaged or submerged into water. If any of these occur, contact
a service center and return the product for examination and repair.
1.
2.
3.
4.
IMPORTANT:
8. Periodically check the cord for damage. If cord is damaged, ship the charging unit
to a Bing Innovations Service Center. A damaged or non-functioning unit should
no longer be used.
9. Do not touch the power cord with wet hands as this can cause electric shock.
10. When unplugging, always hold the power plug instead of the cord.
11. Do not put metal objects such as coins or clips on the charger. This may generate
heat, damaging the unit and heating the metal item presenting potential burn
hazards.
12. No User Serviceable Parts. Do not modify this equipment without authorization
of the manufacturer. If equipment is modified, appropriate inspection and testing
must be conducted to ensure continued safe use.
13. Batteries are not user serviceable.
14. Equipment protected from AC power by double insulation or reinforced insulation
by use of the supplied power supply. Will not cause electromagnetic interference
and complies with 601-1-2.
.
9
Limited 1 year
warranty
Bing Innovations, LLC warrants this appliance to be free of defects in
material and workmanship for a period of one year from the date of
original purchase. If appliance exhibits such a defect, Bing Innovations,
LLC will, at its option, repair or replace it without cost for parts and labor.
The product must be shipped, prepaid and insured (recommended),
to an authorized Bing Innovations, LLC Service Center. Proof of date
of original purchase is required. The cost to ship the product to an
authorized Service Center is the responsibility of the dental practice;
the cost to return the product to the dental practice is the responsibility
of Bing Innovations. Warranty does not cover finishes or normal wear,
nor does it cover damage resulting from accident, misuse, dirt, water,
tampering, unreasonable use, use of any tip other than those supplied
by Bing Innovations, LLC or covering the tip with a plastic sleeve, service
performed or attempted by unauthorized service agencies, failure to
provide reasonable and necessary maintenance, including recharging,
or units that have been modified or used for commercial purposes.
ALL IMPLIED WARRANTIES, INCLUDING ANY IMPLIED WARRANTY
OF MERCHANTABILITY OR FITNESS FOR ANY PARTICULAR PURPOSE,
ARE LIMITED IN DURATION TO ONE YEAR FROM DATE OF ORIGINAL
PURCHASE. IN NO EVENT WILL BING INNOVATIONS, LLC BE RESPONSIBLE
FOR CONSEQUENTIAL DAMAGES RESULTING FROM THE USE OF THIS
PRODUCT. Some states do not allow the exclusion or limitation of
incidental or consequential damages, so the above limitation may not
apply to you. This warranty gives you specific legal rights, and you may
have other legal rights which vary from state to state.
10
OBTAINING SERVICE:
Should this product require service, please call 1-877-503-VIBE
(8423) to be referred to the authorized Bing Innovations, LLC
Service Center closest to you.
Contact us at any time for battery replacement and unit
recalibration for a service fee of $50; includes return shipping
cost in U.S.
EXPLANATION OF SYMBOLS
Consult User Manual
Electrical Hazard
Do Not Re-Use
Double Insulated
Biohazard after use
Manufacturer
Warning
European Conformity
Type B applied part
European Authorized Rep.
11
BING INNOVATIONS, LLC.
990 South Rogers Circle, Suite 4 Boca Raton, FL 33487
877.503.VIBE (8423) • www.DentalVibe.com
[email protected]
European Authorized Representative (AR)
Mdi Europa GmbH
Langenhagener Str. 71
30855 Langenhagen
© 2014 Bing Innovations, LLC. All rights reserved. Under the copyright laws, this manual may not
be copied, in whole or in part, without the express written consent of Bing Innovations, LLC. Every
effort has been made to ensure that the information in this manual is accurate. Bing Innovations,
LLC is not responsible for printing or clerical errors. Patented in U.S. & Canada. Other U.S. and
foreign patents pending. FDA Registered. Reverse engineering or disassembly is prohibited.
Model Name: DentalVibe GEN 3
Model # DV0003
Manufactured in the USA.
REV 1 2014-01-31


