1
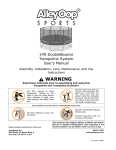
R
Basketball Landing Pad
Installation Instructions
Retain address information for future use.
408-213-2551
www.jumpsport.com
JumpSport, Inc.
2055 South 7th Street, Suite A
San Jose, CA 95112 U.S.A.
1
P/N: INS-P-10492D
Copyright Notice
This material is protected by the United States copyright laws and is proprietary to JumpSport, Inc. Disclosure, reproduction,
translation, modification, or use of this document by anyone other than authorized employees, authorized users, or licensees of
JumpSport without the prior written consent of JumpSport, Inc. is prohibited.
The information in this document is subject to change without notice. JumpSport, Inc. shall not be liable for any damages resulting
from technical errors or omissions, which may be present in this document, or from use of this document.
Copyright © 2006-2009, by JumpSport, Inc. All rights reserved.
Printed: 2009
Instruction Manual P/N: INS-P-10492D
AlleyOop Basketball Landing Pad P/N: PAD-S-10418A
Trademarks
JumpSport® and AlleyOop Sports® are trademarks of JumpSport, Inc.
All other brand or product names are trademarks or registered trademarks of their respective companies or organizations.
Patents
This product includes technology associated with one or more of the following U.S. Patents:
No. 6,053,845
No. 6,261,207
No. 6,840,891
No. 6,846,271
No. 7,060,001
Additional Patents Pending.
How to Contact Customer Support
Should you require customer service or technical support for your AlleyOop Sports Basketball Landing Pad, please contact AlleyOop
Sports’ Customer Service department at:
408-213-2551
8:00am—5:00pm Monday through Friday, Pacific Time
2
Assembly and Installation
Instructions
Thank you for purchasing an AlleyOop Basketball Landing Pad!
Familiarize yourself with the Assembly and Installation Instructions before beginning installation.
The following pages contain diagrams, pictures, and written instructions for installing your Basketball Landing Pad.
WARNING
Trampoline use is not recommended without the frame pad installed (see Picture A, below). The frame pad is
designed to reduce the possibility of injury by protecting the user from coming into contact with the frame and
springs of the trampoline. It is very important that you properly and securely attach the frame pad to the frame, and
that it is in the correct position prior to using the trampoline.
It is also important to be sure that the Basketball Landing Pad is correctly installed before continuing to use the
basketball set (see Picture B, below). The Basketball Landing Pad is designed to be used with a JumpSport or
AlleyOop Sports basketball set to provide further protection for the user in the area surrounding the basketball set.
All users should read and follow the warnings, precautions, and guidelines for safe use provided for the trampoline,
safety enclosure, and basketball set.
Picture A
Picture B
Frame Pad Placement - Showing Correct Placement
over Frame Rails and Springs
(Section of frame pad removed for clarity. Be sure
pad is completely installed before use.)
Picture B
Basketball Landing Pad Placement - Showing
Correct Placement over Frame Rails and Springs
(Be sure Basketball Landing Pad is completely
installed before use.)
Parts List
Your Basketball Landing Pad comes with one landing pad and 3 factory-installed bungee T-anchors.
3
Assembly and Installation Instructions
Before you begin installing your Basketball Landing Pad, please check to see
what kind of frame pad you have installed on your trampoline.
Frame pad with net
connection points on
inside edge of pad.
Net connection
point.
(Connection point design
may vary.)
Net connection
point.
Inside edge of pad,
closest to mat
Type A assembly
instructions—for frame pads with net
connection points on inside edge of
pad—begins on page 5
If your frame pad has net connection points on outer edge of
pad or has no connection points at all, use Type B assembly
instructions beginning on page 7
4
Assembly and Installation Instructions–Type A Installation
Type A Assembly
Pole where basketball
set is installed.
Basketball
Landing Pad
(View from inside of
trampoline)
1) Lay Basketball Landing Pad (BLP) flat on jumping surface 2) Disconnect anything holding bottom of net down on either
(mat) near pole where your basketball set is installed. BLP should side of BLP, such as “bungee T-anchors” or “pad straps”.
be centered with pole that basketball set is installed on, as shown.
Frame pad
Bungee
T-anchor
(View from outside
of trampoline)
3) Lift frame pad and slide BLP under pad.
4) Secure BLP to frame of trampoline using the 3 factory-installed
bungee t-anchors, as shown. After T-anchor is secured, rotate it so
it is underneath rail.
5
Assembly and Installation Instructions–Type A Installation
Grommets on frame pad
Bungee T-anchor passes
through grommet on frame pad
and grommet on BLP.
5) Reconnect net connection attachments as instructed in your safety enclosure user’s manual. Net connectors should pass through
metal grommets in BLP before securing to V-rings on trampoline mat.
Your Basketball Landing Pad is now fully assembled and ready for use!
To remove the Basketball Landing Pad, follow the Installation Instructions in reverse order.
6
Assembly and Installation Instructions–Type B Installation
Type B Assembly
Pole where basketball
set is installed.
(View from inside of
trampoline)
Basketball
Landing Pad
1) Lay Basketball Landing Pad (BLP) flat on jumping surface (mat) near pole where your basketball set is installed. BLP should be
centered with pole that basketball set is installed on, as shown.
Frame pad
Bungee
T-anchor
(View from outside
of trampoline)
2) Lift frame pad and slide BLP under pad.
4) Secure BLP to frame of trampoline using the 3 factory-installed
bungee t-anchors, as shown. After T-anchor is secured, rotate it so
it is underneath rail.
7
Assembly and Installation Instructions–Type B Installation
Closest V-ring
to edge of BLP
Closest V-ring
to edge of BLP
4) Reinstall the bottom of your safety enclosure net as instructed in your safety enclosure user’s manual. If you have bungee
T-anchors / button bungees, they will need to be reattached to bottom strap of net, before securing to V-rings on trampoline mat or
frame of trampoline. This may make it so that you do not have the panels of net divided into thirds anymore. This is normal.
Your Basketball Landing Pad is now fully assembled and ready for use!
To remove the Basketball Landing Pad, follow the Installation Instructions in reverse order.
8
Assembly and Installation Instructions
(This page left intentionally blank.)
9
Assembly and Installation Instructions
(This page left intentionally blank.)
10
R
Limited 90 Day Warranty
What is covered by this warranty? This warranty covers any defects in materials or workmanship on all of the components
of the AlleyOop Sports Basketball Landing Pad, and is extended exclusively to the original retail purchaser.
How long does this coverage last? Warranty coverage for each component begins from the original date of purchase and
lasts for 90 days.
What will AlleyOop Sports do? If you return the defective part to AlleyOop Sports, as instructed below, AlleyOop Sports
will either repair or replace such part, at AlleyOop Sports’ discretion, and return it to you.
What is not covered by this warranty? This warranty does not cover expenses of on-site labor, shipping costs, travel,
assembly or disassembly, or other charges associated with the repair or replacement of covered components. This warranty
also does not cover any problem that is caused by abuse, misuse, commercial or public use, ordinary wear and tear,
weathering, acts of God (such as wind and lightning), failure to follow directions, improper installation, improper maintenance,
or any silk screened graphics. Rust is a natural occurrence with any outdoor steel product and is likewise not covered by this
warranty, to the extent that it does not affect the structural integrity of the part. (This warranty does not cover the trampoline or
any related safety enclosure to which the basketball set attaches. See individual trampoline and safety enclosure warranties for
specific coverage details for those products.)
ALLEYOOP SPORTS IS NOT RESPONSIBLE OR LIABLE FOR INDIRECT, SPECIAL, OR CONSEQUENTIAL DAMAGES
ARISING OUT OF OR IN CONNECTION WITH THE USE OR PERFORMANCE OF THE PRODUCT OR OTHER DAMAGES
WITH RESPECT TO ANY LOSS, INCLUDING BUT NOT LIMITED TO ECONOMIC LOSS, LOSS OF PROPERTY, LOSS OF
REVENUE OR PROFITS, LOSS OF ENJOYMENT OR USE, COST OF REMOVAL, INSTALLATION OR OTHER
CONSEQUENTIAL DAMAGES. SOME STATES DO NOT ALLOW THE EXCLUSION OR LIMITATION OF INCIDENTAL OR
CONSEQUENTIAL DAMAGES. ACCORDINGLY, THE ABOVE LIMITATION MAY NOT APPLY TO YOU.
THE WARRANTY EXTENDED HEREUNDER IS IN LIEU OF ALL OTHER WARRANTIES AND ANY IMPLIED WARRANTY
OF MERCHANTABILITY OR FITNESS FOR A PARTICULAR PURPOSE IS LIMITED IN ITS SCOPE AND DURATION TO
THE TERMS SET FORTH HEREIN. SOME STATES DO NOT ALLOW LIMITATIONS ON HOW LONG AN IMPLIED
WARRANTY LASTS. ACCORDINGLY, THE ABOVE LIMITATION MAY NOT APPLY TO YOU.
How to get a defective part replaced:
1)
2)
3)
Call the AlleyOop Sports Customer Service department at 408-213-2551 to obtain a Return Authorization number. All
returns must be pre-authorized.
Send the part(s) to the designated Service Center, along with a copy of your original sales receipt and a brief written
description of the problem, including how it occurred. You must pay freight and insurance to return the part to AlleyOop
Sports. At AlleyOop Sports’ sole discretion, we may ask you to send photographs in addition to or in lieu of returning the
part.
After inspecting the returned part(s), AlleyOop Sports will make a final determination whether the part is covered by this
warranty. We reserve the right to examine photographs or physical evidence concerning parts claimed to be defective prior
to making a final determination concerning the claim. A repaired or replacement part will be returned to you. Please allow
3 to 4 weeks for delivery.
This warranty gives you specific legal rights. You may also have other rights which vary from state to state.
11
JumpSport, Inc.
2055 South 7th Street, Suite A
San Jose, CA 95112
408-213-2551
http://www.jumpsport.com
12