1
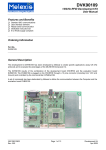
EVB90614 user manual
On the CD you find the Software for the USB evaluation board. Double click and follow
the instructions to install.
The user license needs to be agreed 2 times for different parts of the used software.
Use the typical installation.
The SW will be installed in a file "Melexis".You can start program from
Start/Programs/Melexis/MLX Configurator.
If module is set in PWM mode-push-pull ,yes it cannot go back to SMBus.
If module is set to PWM mode-open drain,module can go back to SMBus mode.
The basic panel looks thus now::
When USBEVB is attached to a usb port a LED on pcb board shines BLUE.
When start program the SW automatically recognizes the module type(single or dual
zone) ,SMBus address and power supply(3 or 5 Volts) and turns on it and the LED shines
GREEN.
If no module presents the LED shines RED, power supply is turn off in this case.When
you insert a module, push the button Refresh (The program checks the module version
and when recognizes it, power supply is turned on) .
The button Promt opens a window from which
you can manually send commands to
USBEVB.The commands supported by USBEVB
you can find in attachments (PromtComands.xls).
The button Measure opens a window "Measure utility"
The red and blue thermometers shows object temperatures To1 and To2 respectively for
dual zone modules.For single zone modules only one thermometer should presents.
The green thermometer shows ambient temperature. Push the button Start to begin
measuring. When the measuring is started, RAM addresses 0x03 till 0x8 will be
automatically acquired in a file log.csv. The button View log opens the log .csv file.
In Min,Max fields you can rescale the graphics
The button Config opens this window.
Push the button Read to read all EEPROM memory.Put a tick in View memory feild to
see all EEPROM memory in hex view.
Here it is possible to make changes in EEPROM ( 9 cells for application mode and
17 cells in calibration mode).
Calibration mode is entered by prompt command cm.
If you made some changes in EEPROM you can write them to the module if you just
push button Write .
With buttons Save file and Load file you can preserve all EEPROM memory on the PC
hard disk and load it again respectively.
The button Undo DOES NOT work for now.
The buttons Macros,Options and Help on the basic panel don't work yet
It is good practice before made any change in EEPROM to
save EEPROM contents for any case