1
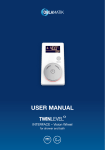
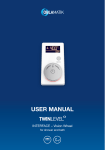
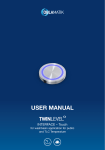
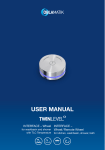
USER MANUAL INTERFACE – Dual Wheel for shower and bath Content Notice 3 Dual Wheel for shower application (with temperature sensor) 4 10 Dual Wheel for bath application (with temperature- and water flow sensor) Disclaimer This manual was created with great care. Oblamatik AG shall not be liable for technical or typographical errors and reserves the right to make changes to the product and/or the instructions at any time without notice. Oblamatik is not liable or responsible for direct or indirect damages, which is in connection with the installation or operation of this product. Imprint This manual is a publication of Oblamatik AG, Gaeuggelistrasse 7, CH-7000 Chur, SWITZERLAND. All rights including translation are reserved. Reproduction by any method, for example, photocopies or electronic recording are not allowed. Reproduction in full or partly is prohibited. 2 These instructions represent the technical status at time of printing. Notice The user manual must be given to the user. Please read this user manual carefully before using the system and keep in a safe place for future reference. To reduce the risk of injuries, scalding and electrical shock, the safety precautions below must be installed and followed Risk of injury This device is not intended for use by persons with different or reduced physical, sensory, or mental abilities, or who lack experience or knowledge, unless they are under the supervision of or receive training for the use of the device by a person responsible for their safety. CONTINUOUSLY TURNING THE CONTROL WHEEL IN THE CLOCKWISE DIRECTION MAY OVERRIDE THE PRE-SET MAXIMUM TEMPERATURE, RESULTING IN A RISK OF SCALDING. If the power cord gets damaged, it must be replaced by the manufacturer, its authorized service agent or qualified personnel to avoid danger. Never operate the device with a damaged cable or plug! Do not pull on the power cable as this could cause damage to the cable and cause electric shock. Malfunctions, Possible cause, Solution The device is not working. Start Diagnostic. Check that: −− The control unit is connected to the mains −− There is no power supply failure −− The electric plug inside the control unit is well connected No water flow when activated. Check that: −− Your faucet is connected to the water supply −− Both angle valves are fully opened −− Check another faucet in the house if water is running −− The water supply hoses are not bent or twisted −− The supply hoses might be soiled −− The control unit is connected to the mains Minimal water flow. Check that: −− Both angle valves are fully opened −− The water supply hoses are not bent or twisted −− The supply hoses might be soiled Continuous water flow −− Press the ON/OFF button −− Close angle valve or main valve −− After a few minutes, open again. It’s still a continuous water flow, close valve and contact your installer. Use soft cloth, soapy solution and water for regular care. Wipe with a dry cloth. Avoid the use of abrasives or solvents, which damage the surface. Damage caused by inappropriate treatment by the user, is not covered by our guarantee. 3 for shower application (with temperature sensor) Explanation of the knobs 4 Functions knob 1 Functions knob 2 −− ON / OFF −− Changing water temperature −− Changing water flow −− Switching hand <> head shower Basic functions Water ON Changing water flow Press 1 × knob 1: Water ON Turn knob 2 when water ON: Change water flow Changing water temperature Water OFF Turn knob 1 when water ON: Change temperature according LED color ring. (blue = cold, red = hot) Press 1 × knob 1: Water OFF Saving Quick Access (factory setting) Quick Access 1 Quick Access 2 Quick Access 3 Press 1 × knob 1: Water ON by 36° Celsius and 80 % water flow Press 2 × knob 1 briefly: Water ON by 37° Celsius and 80 % water flow Press 3 × knob 1 briefly: Water ON by 38° Celsius and 80 % water flow Quick Access 1 Quick Access 2 Quick Access 3 Press 1 × knob 1, water ON like Quick Access 1 Press 2 × knob 1 briefly, water ON like Quick Access 2 Press 3 × knob 1, briefly, water ON like Quick Access 3 Saving Quick Access Changing water temperature: turn knob 1 Changing water flow: turn knob 2 Press & hold knob 1 until LED color ring is flashing PURPLE. Release knob immediately Flashing 2 × PURPLE: Water OFF, setting is saved. 5 Diverting (head shower / hand shower) Diagnostic Press 1 × knob 1: Water ON Press 1 × knob 2: Diverting between hand shower <> head shower Press & hold knob 1 until LED color ring is flashing ORANGE. Release knob immediately. Start Diagnostic: Scalding protection 1. LED color ring is illuminating RED: Check if hot water flows. Turning knob 1: Changing temperature. From ≥ 38° C temperature increase in smaller increments (more wheel turns). Activating the cleaning mode No warm water is flowing: −− Check the hot water supply line −− Is hot water supply line open? −− Is hot water system activated? −− Is mesh filter ok? −− Are cold and warm water supply lines correctly connected? Deactivate Interface Press & hold knob 1 until LED color ring is flashing GREEN. Release knob immediately. Reactivate Interface Press & hold knob 1 until LED color ring GREEN goes out or wait 45 seconds (automatic reactivation). 2. LED color ring is illuminating GREEN: Check if NO water flows. Water flows: −− Device is broken, contact Support Center. 3. LED color ring is illuminating BLUE: Check if cold water flows. No cold water is flowing: −− Check cold water supply line −− Is cold water stop valve opened? −− Is mesh filter ok? −− Are cold and warm water supply lines correctly connected? Diagnostic completed: Flashing 2 × ORANGE: Diagnostic successfully completed. Flashing 3 × ORANGE: Malfunction of the temperature sensors. Contact Support Center. 6 Troubleshooting if LED color ring is NOT illuminating: Please check the cable connection between TLC Controller and Interface. If you were unable to resolve the issue, please contact Support Center. Special functions Press & hold knob 1 until LED color ring is flashing TURQUOISE. Release knob immediately. Flashing 1 × TURQUOISE: Special functions activated Flashing 2 × TURQUOISE: Special functions locked Changing between activation / locking device press & hold knob 1 until LED color ring is flashing TURQUOISE. Release knob immediately. Thermal disinfection * ATTENTION: RISK OF SCALDING! Run disinfection Press & hold knob 1 until LED color ring is flashing TURQUOISE. Release knob immediately. Flashing RED: Flushing with hot water Stop disinfection Press 1 × knob 1 or wait 5 minutes (automatic stop) Factory setting * Press & hold knob 1 until LED color ring is flashing BLUE. Release knob immediately. Flashing 2 × BLUE: Factory setting restored. Functions are depending on the TwinLevel controller used. * Special function must be activated 7 Operation overview TLC menu pop up or diverting * release cleaning mode release pressandholduntil colourchange, thenrelease pop up opens / closes or diver cleaning mode for 45 sec pressandholdfor10seconds diagnostic release hot water Remote Wheel * release pink flashes continuously pre specialfunctions locked special functions specialfunctions unlocked temperature limitations * release turn to select thermal disinfection release thermal disinfe factory settings release 2 × flashes: fac special functions release 2 × flashes: spec release 1 × flashes: special functions unlocked *notineverycontrollerversionavailable 8 rting outlets conds 2 × flashes: OK! no water cold water 3 × flashes: Malfunction temp. sensor 4 × flashes: Malfunction flow sensor 2 × flashes: connection OK! ess Remote Wheel 1 × max. temperature press 1 × to store max. temperature 2 × flashes: settings stored ection for 5 minutes ctory settings reset cial functions locked 9 for bath application (with temperature- and water flow sensor) Explanation of the knobs Functions knob 1 Functions knob 2 −− ON / OFF −− Changing water temperature −− Changing water flow −− Switching tub <> hand-/ head shower 10 Basic functions Water ON Changing water flow Press 1 × knob 1: Water ON Turn knob 2 when water ON: Change water flow Changing water temperature Water OFF Turn knob 1 when water ON: Change temperature according LED color ring. (blue = cold, red = hot) Press 1 × knob 1: Water OFF Quick Access for bath (factory setting) Quick Access 1 Quick Access 2 Quick Access 3 Press 1 × knob 1: Water ON by 36° Celsius an 100 % water flow Press 2 × knob 1 briefly: Water ON by 37° Celsius and 100 % water flow Press 3 × knob 1 briefly: Water ON by 38° Celsius and 100 % water flow Quick Access 1 Quick Access 2 Quick Access 3 Press 1 × knob 1, water ON like Quick Access 1 Press 2 × knob 1 briefly, water ON like Quick Access 2 Press 3 × knob 1, briefly, water ON like Quick Access 3 Saving Quick Access Start tub filling measuerment (10 liters of water will be filled in automatically) Turn knob 1: Change water temperature Turn knob 2: Change water flow Fill in desired water quantity Press & hold knob 1 until LED color ring is flashing PURPLE. Release knob immediately. Flashing 2 × PURPLE: Water OFF, setting is saved (average temperature, water flow and filling quantity which was last set) 11 Reset Quick Access (Special function must be activated) Quick Access 1 Quick Access 2 Quick Access 3 Press 1 × knob 1, water ON like Quick Access 1 Press 2 × knob 1 briefly, water ON like Quick Access 2 Press 3 × knob 1 briefly, water ON like Quick Access 3 Press & hold knob 1 until LED color ring is flashing DARK BLUE. Release knob immediately. Flashing 2 × DARK BLUE: Water OFF, reset settings. (filling quantity is deactivated, temperature and water flow like factory setting) Scalding protection Activating the cleaning mode Turning knob 1: Changing temperature. From ≥ 38° C temperature increase in smaller increments (more wheel turns). Deactivate Interface Press & hold knob 1 until LED color ring is flashing GREEN. Release knob immediately. Pop up open / close Reactivate Interface Press & hold knob 1 until LED color ring is flashing LIGHT BLUE. Release knob immediately. Pop up open or close. Diverting (tub / head-/ hand shower) Press 1 × knob 1: Water ON Press knob 2 briefly: Diverting tub <> hand and head shower Press & hold knob 1 until LED color ring GREEN goes out or wait 45 seconds. (automatic reactivation) Diagnose Press & hold knob 1 until LED color ring is flashing ORANGE. Release knob immediately. Start Diagnostic: 1. LED color ring is illuminating RED: Check if hot water flows. No warm water is flowing: −− Check the hot water supply line −− Is hot water supply line open? −− Is hot water system activated? −− Is mesh filter ok? −− Are cold and warm water supply lines correctly connected? 12 2. LED color ring is illuminating GREEN: Check if NO water flows. Special functions Water flows: −− Device is broken, contact Support Center. Press & hold knob 1 until LED color ring is flashing TURQUOISE. Release knob immediately. 3. LED color ring is illuminating BLUE: Check if cold water flows. Flashing 1 × TURQUOISE: Special functions activated No cold water is flowing: −− Check cold water supply line −− Is cold water stop valve opened? −− Is mesh filter ok? −− Are cold and warm water supply lines correctly connected? Diagnostic completed: Flashing 2 × ORANGE: Diagnostic successfully completed. Flashing 3 × ORANGE: Malfunction of the temperature sensors. Contact Support Center. Flashing 4 × ORANGE: Malfunction of the flow rate sensors. Contact Support Center. Troubleshooting if LED color ring is NOT illuminating: Please check the cable connection between TLC Controller and Interface. If you were unable to resolve the issue, please contact Support Center. Flashing 2 × TURQUOISE: Special functions locked Changing between activation / locking device press & hold knob 1 until LED color ring is flashing TURQUOISE. Release knob immediately. Thermal disinfection * ATTENTION: RISK OF SCALDING! Run disinfection Press & hold knob 1 until LED color ring is flashing TURQUOISE. Release knob immediately. Flashing RED: Flushing with hot water Stop disinfection Press 1 × knob 1 or wait 5 minutes (automatic stop) Factory setting * Press & hold knob 1 until LED color ring is flashing BLUE. Release knob immediately. Flashing 2 × BLUE: Factory setting restored. Functions are depending on the TwinLevel controller used. * Special function must be activated 13 Operation overview TLC menu pop up or diverting * release cleaning mode release pressandholduntil colourchange, thenrelease pop up opens / closes or diver cleaning mode for 45 sec pressandholdfor10seconds diagnostic release hot water Remote Wheel * release pink flashes continuously pre specialfunctions locked special functions specialfunctions unlocked temperature limitations * release turn to select thermal disinfection release thermal disinfe factory settings release 2 × flashes: fac special functions release 2 × flashes: spec release 1 × flashes: special functions unlocked *notineverycontrollerversionavailable 14 rting outlets conds 2 × flashes: OK! no water cold water 3 × flashes: Malfunction temp. sensor 4 × flashes: Malfunction flow sensor 2 × flashes: connection OK! ess Remote Wheel 1 × max. temperature press 1 × to store max. temperature 2 × flashes: settings stored ection for 5 minutes ctory settings reset cial functions locked 15 SANITARY TECHNOLOGIES Oblamatik AG Gäuggelistrasse 7 CH-7000 Chur +41 81 286 70 00 [email protected] oblamatik.ch 222703 © 09 / 15