1
E nglish
Printed in China
LW3962001
www.brother.ca
EL EC TR O
USER’S GUIDE
IN G
N IC L AB EL
SY ST EM
USER’S GUIDE
INTRODUCTION
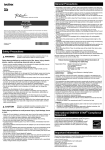
SAFETY PRECAUTIONS
Thank you for choosing the PT-1230PC. Your new P-touch labeller uses P-touch Editor Lite software, which is already installed on your labeller.
There is no need to install any software or drivers onto your PC in order to make creative labels. This manual includes important precautionary
information and simple instructions for operating your new P-touch labeller. Be sure to read the instructions before use and use the product in accordance with these instructions. Keep this manual handy for future reference. If new versions of the PT-1230PC software become available, this
manual may not reflect the updated features. Therefore, you may find that the software and the contents in this guide are different.
WARNING
•
•
•
•
•
Industry Canada Compliance Statement (Canada Only)
This Class B digital apparatus complies with Canadian ICES-003.
•
•
•
•
•
•
Always use the specified voltage and the suggested AC adapter (AD-24) for this machine to prevent any damage or failure.
Unplug the power cord immediately and stop using the P-touch labeller during an electrical storm. There may be a remote risk of electric shock from lightning.
Do not use the AC adapter in places of high humidity such as bathrooms.
Do not overload the power cord.
Do not place heavy objects on, or damage the power cord or plug. Do not forcibly bend or pull the power cord. When disconnecting the power cord from the power outlet, always hold the plug.
To prevent fire or electric shock, make sure that the plug is fully inserted to the power outlet. Do not use an outlet that is loose.
Do not get the machine/AC adapter/power plug wet, such as by handling them with wet hands or spilling beverages onto them.
Do not disassemble or modify P-touch labeller/AC adapter/batteries.
Do not use metallic articles, such as tweezers or a metallic pen, when exchanging the batteries.
Do not throw into fire or heat up the battery.
Disconnect the AC adapter, remove batteries and stop using immediately if you notice any abnormal odor, heat, discoloration, deformation or anything unusual while in use, or
in storage.
CAUTION
•
•
•
•
To avoid injuries, do not touch the blade of the cutter unit or any metal parts near the print head.
Do not apply excessive pressure to the cutter lever.
Remove the batteries and disconnect the AC adapter if you do not intend to use P-touch labeller for an extended period of time.
Do not use old and new batteries together or mix alkaline batteries with other type batteries, or set the positive and negative end in the wrong position. Otherwise, the batteries may leak or be damaged.
• To prevent damage or breakage, do not drop or hit P-touch labeller/AC adapter.
• Use only the USB cable included with the P-touch labeller.
Returning this product is expensive and time consuming for you, your retailer and for us, the manufacturer. Should you encounter any
problem with your new product, please refer to the instruction manual. If you still need assistance, call our "help" line at 1-877-BROTHER
General Precautions
• Depending on the location, material, and environmental conditions, the label may unpeel or become irremovable, the color of the label may change or be transferred to other
objects. Before applying the label, check the environmental condition and the material.
• Do not use the P-touch labeller in any way or for any purpose not described in this guide. Doing so may result in accidents or damage the machine.
mark.
• Use only Brother TZ tapes with this machine. Do not use tapes that do not have the
• Do not clean P-touch labeller with alcohol or other organic solvents. Only use a soft, dry cloth.
• Do not touch the print head with your fingers anytime to prevent from a burn. Use a soft wipe (e.g. a cotton swab) when cleaning the print head.
• Do not put any foreign objects into the tape exit slot or AC adapter connector, etc.
• Do not place the P-touch labeller/battery in direct sunlight or rain, near heaters or other hot appliances, in any location exposed to extremely high or low temperatures (e.g. on
the dashboard or in the back of your car), high humidity, or dusty locations.
• Do not try to print labels using an empty tape cassette in the P-touch labeller. Doing so will damage the print head.
• Do not pull the tape being fed from the P-touch labeller, otherwise the tape cassette or P-touch labeller may be damaged.
Contact Information Website: www.brother.ca
TEL:1-877-BROTHER
Getting Ready
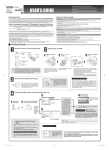
Review the names of P-touch labeller parts.
Install a TZ tape cassette.
LED lamp
Power/feed
button
Tape cutter
button
Print head
Tape exit slot
Open the cassette
cover.
Insert a tape
cassette.
Close the cassette
cover.
Tape cutter
AC adapter(optional)
connecter
USB port
Mode selector
switch
The PT-1230PC has 2 mode selector settings - “EL” and “E”. The mode
selector switch is pre-set at the factory to the EL mode, for use with
P-touch Editor Lite. For E mode, you need to download P-touch Editor 5.0
and the required drivers. For details on how to download the P-touch Editor 5.0, see “Starting P-touch Editor 5.0” below.
Verify that the P-touch labeller is
turned off. Open the cassette cover
as shown by the arrow in the above
illustration while pressing the part
marked "<<".
Insert a TZ tape cassette as shown
in the above illustration.
Connect the P-touch labeller's power supply.
• Make sure that the end of the tape feeds under the tape
guides.
• If the ink ribbon is loose, use your finger to wind the toothed
wheel in the direction of the arrow on the cassette.
• Use only Brother TZ tapes with the P-touch labeller.
• For initial use of the tape, install the tape, press and hold the
power/feed button to feed the tape. Then, push in the tape cutter lever to cut the tape.
Auto Power Off Function
When using the optional AC adapter (AD-24), insert the plug on the
adapter cord into the adapter jack
on the bottom end of the P-touch
labeller. Insert the plug into the
nearest standard electrical outlet.
Insert six new AAA alkaline batteries (LR03),
making sure that their poles point in the
correct directions. Always replace all six
batteries at the same time using brand new
ones.
When the P-touch labeller is operating on battery power
only, it will turn off automatically if not used for a period of 20
minutes. The message “Unsafe Removal of Device” may
be displayed depending on the Operating System running
on your PC. Any data being displayed will be saved. When
you turn the labeller back on, click on the Editor Lite icon to
resume creating your label.
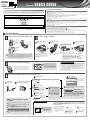
Connect the USB cable and start P-touch Editor Lite.
P-touch Editor Lite
starts immediately.
Windows® 2000 User
For details on using
P-touch Editor Lite,
see the back of this
sheet.
Go to My Computer and open Removable Disk, then start
P-touch Editor Lite by double-clicking PTLITE10.EXE.
Connect the
USB cable.
Turn on the P-touch labeller.
The LED lamp will light up.
Windows® XP User
Pop-up Window
Appears. Select
P-touch Editor Lite
and click OK.
Windows Vista® User
How to disconnect the P-touch
labeller
Exit P-touch Editor Lite by clicking on the
right.
at the top
Pop-up Window
Appears. Click
P-touch Editor
Lite.
It will take longer than usual to start P-touch Editor
Lite when connecting P-touch
labeller to your computer for the
first time. If the software does
not start automatically when you
connect the machine, you may
launch it from My Computer.
Start P-touch Editor Lite by double-clicking
PTLITE10.EXE.
When The device can be safely removed is displayed,
turn off the P-touch labeller and disconnect the USB cable.
When using
Windows Vista®
When connecting the device for the first time, perform the
scan and then select the Always do this for software and
games check box on the dialog box displayed when the
scan completes. P-touch Editor Lite will start automatically
the next time you connect the P-touch labeller.
*Microsoft Windows and Windows Vista are registered trademarks of Microsoft Corporation in the United States and other
countries.
*The name of other software or products used in this document are trademarks or registered trademarks of the respective
companies that developed them.
Starting P-touch Editor 5.0
If you would like to use the more advanced software that is available for your P-touch labeller,
you are able to download P-touch Editor 5.0 from the Brother web site. This advanced software will give you greater label making functionality.
Do not connect the P-touch labeller to your PC before you begin the P-touch
Editor 5.0 installation.
To disconnect the labeller, click the icon in the computer’s
task bar ( , , or ).
Click Safely remove USB Mass Storage Device.
Do not turn off the power or remove the labeller while
using P-touch Editor Lite.
Move the mode selector
switch on the back of the
P-touch labeller to the “E”
position before connecting the USB cable.
Download and install the PT-1230PC’s
driver and P-touch Editor 5.0 from Brother’s website. Connect the P-touch labeller
to your PC when requested during this
installation.
For more information about installing the software, visit http://solutions.brother.com/
Start
P-touch Editor 5.0.
• Double-click the shortcut icon on the desktop
(P-touch Editor 5.0).
• Click P-touch Editor 5.0
under All Programs on
the Start menu.
Use
P-touch Editor 5.0.
If you have trouble using
the software, refer to the
help information available
in P-touch Editor 5.0.
www.brother.ca
EL EC TR O
IN G
N IC L AB EL
SY ST EM
USER’S GUIDE
P-touch Editor Lite
Property Toolbar
Command Toolbar
Icon
Function
Icon
Function
Displays the New screen for creating a new label.
Click
to change the font.
Opens a saved file with P-touch Editor Lite.
Click
to specify the font size.
You can adjust the font size up or down one level by clicking
Saves the data to your PC, etc, but not to the labeller.
Specifies the font style:
Bold
Italic
Underline
Inserts a new text box (convenient when creating labels containing
both single and multiple lines of text).
Specifies the alignment of text in a text box.
Inserts an image onto your label.
From file: Inserts an image stored on your PC.
Screen capture: Inserts the selected area of the PC screen as a
graphic.
Symbol: Inserts one of your PC’s built-in symbols.
Sets the width of the tape. Click
inserted tape.
Inserts a frame.
Sets/cancels the label direction to vertical.
Displays the menu.
The menu includes all P-touch Editor Lite functionality.
Click
to set the zoom factor for the Label View.
You can also change the zoom factor by clicking
or
or
.
to automatically detect the width of the
Sets the length of the label. Click
to automatically adjust the length of the
label to accommodate the entered text.
.
Click
to print normally or to print with options.
Mirror Printing: Prints a mirror image of the label.
Cut Mark: Prints cut marks to easily mark where labels should be manually cut when
printing a strip of labels or setting tape margin to none.
Copies: Prints multiple copies of a label.
Minimizes P-touch Editor Lite.
Exits P-touch Editor Lite.
Label View
Other Functions (available on the menu displayed by right-clicking the mouse)
Display
Function
Display
This label view is displayed when the software is
started. The width of tape currently set is displayed
on the left of label image. When “Auto” is shown on
the right, the length of tape is automatically adjusted
to the length of text.
Function
Menu
Inserted text boxes, images, and frames are treated
as objects. Objects are surrounded by handles (indicated by eight blue points).
You can drag the label border to manually change
the length and width of the label. Move the pointer to
the label area’s border. When the blue line appears,
drag to the desired length or width.
Undo
Redo
Click Undo to undo the last operation.
Click Redo to redo an undone operation.
Cut
Copy
Paste
Select the text area (or object) that you want to cut or copy and select Cut or Copy. Click in the destination
area and select Paste.
Margins
Set the length of blank space on both sides of the label (large or small).
Insert
Click Insert.
Select Text box to insert text onto the label.
Select From File to insert an image stored on your PC.
Select Screen Capture to insert the selected area of the PC screen.
Select Symbol to insert one of your PC’s built-in symbols.
Select Frame to insert one of P-touch Editor Lite built-in frames.
Direction
Select the object text and click either Horizontal Text or Vertical Text to change the direction of the label.
Numbering
Select the number or letter within your text and click Numbering to consecutively advance the number or letter on each label. Click to the right of the Print button and click Print Options. Check the Numbering box
and enter the number of labels being printing in the Count field. Click the Print button.
Change Image
Select the image and click Change Image to replace the current image with a different image.
Rotate
Rotate objects to 0°, 90°, 180° or 270°.
Order
Select one of the objects and click Order, then select Bring to Front, Send to Back, Bring Forward, or
Send Backward to set the order of each object in the layer.
Indicates that an object is selected.
You can adjust the size of the P-touch Editor Lite
window. Simply move the pointer over an edge of
the P-touch Editor Lite window and drag to adjust
the size once the pointer changes to an arrow.
The pointer changes to an arrow when moved over
a handle. You can change the size of the object by
dragging.
Guidelines are sometimes displayed when moving
objects. They are shown when the object is aligned
at the left, right, top, or bottom edge of Printable
area, or in the center. In the illustration to the left, the
guidelines indicate that the object is centered at the
top edge of the tape.
Options
You can move objects by dragging when the pointer
is a crosshair. For text objects, the pointer only
changes to a crosshair over the border of the object.
Do this
Brother Solutions Center
About
Exit
Click Options.
Select either mm (mm) or inches (in) to set the measurement unit setting.
Select P-touch Editor Lite language. Restart the application to apply the new selected “Language”.
Select either Display New Value after Printing or Reset to Original Value after Printing to set the numbering option.
Click Brother Solutions Center to go to the web site for assistance, information or downloading P-touch Editor 5.0.
Click About to learn about the P-touch Editor Lite version.
Click Exit to exit P-touch Editor Lite.
Creating Labels
Adjusting the left and
right margins of your
label
How to reduce the margin size.
Large
ABCD
Small
: ABCD
Margin Setting
When margins are set to Large, (default setting) labels print with approx. 1" (25mm) margins on each side of the printed text. Reduce
this margin by changing the setting to Small.
Select Margins from the menu displayed
when you right click the mouse. Change
the setting to Small.
Enter the desired text and click the Print button.
The tape will advance and place cut marks
where the margin should be manually cut to accommodate small margins.
Select the tape size and enter the desired text.
Insert a few spaces, then click the
button.
Enter the desired text and press the
ENTER key. Enter the desired text on
the second row.
. Select the
Click Symbol under
symbol that you want to enter from the
displayed dialog box.
Creating a mixed
1-row/2-row label
containing a symbol
Troubleshooting
System Requirements PC
Problem
Solution
After exiting P-touch Editor
Lite, how do I restart the
program while the machine
is still on?
There are three ways to restart. Perform any of the followings.
• Turn off the P-touch labeller and then turn it back on.
• Disconnect and then reconnect the USB cable while the labeller is on.
• Launch P-touch Editor Lite from My Computer.
The LED is flashing.
This is an error message.
Please press the Power/feed button to clear the error message.
If the LED remains flashing after performing the above, please contact Brother Customer Service for further assistance.
I cannot turn the P-touch la- Check to see that the batteries are installed correctly, or that the recombeller on.
mended power adapter is securely connected.
I cannot exit P-touch Editor Check to see if an error message is displayed, and try to resolve. Please
Lite.
note that the software cannot be exited while labels are being printed.
A blank horizontal line ap- Streaks or poor quality characters on printed labels generally indicate that
pears through the printed the print head is dirty. Clean the print head using a cotton swab.
label.
* Do not touch the print head directly with your bare hands.
The label is difficult to cut.
Clean the cutter blade using a cotton swab moistened with alcohol.
* Do not touch the cutter blade directly with your bare hands.
Specifications
Item
Dimensions
Weight
Power supply
USB port
Specification
2.1”(W)×6.2”(D)×4.4”(H) (53mm(W)×158mm(D)×112mm(H))
Item
Operating
System
System
Memory
Interface
Graphics Card
Federal Communications Commission (FCC) Declaration of Conformity
(For USA Only)
Specification
Microsoft Windows® 2000 Professional/XP/Windows Vista®
128MB minimum (Windows Vista - 512MB minimum)
USB Port (USB Spec. 1.1 or 2.0 protocol)
SVGA
Accessories (Supplies may differ by distribution)
Accessories
Stock No.
Tape cassette
Brother TZ tape (width) : 9/64” (3.5mm), 1/4” (6mm),
3/8”(9mm), 1/2” (12mm)
For details, see the included “Supplies and Accessories Guide”.
AC Adapter
AD-24
Cutter Unit
TC-5 (replacement)
If the cutter blade becomes blunt after repetitive use and the tape cannot be cut cleanly,
replace it with a new cutter unit (stock no. TC-5) by obtaining from an authorized Brother
reseller.
0.9lbs. (400g ) (without batteries and tape cassette)
Six AAA alkaline batteries (LR03) or optional AC adapter (AD-24)
USB mini B type
Click the Print button.
CAUTION
Do not touch the cutter blade directly with your bare hands.
Responsible Party: Brother International Corporation 100 Somerset Corporate Boulevard
Bridgewater, NJ 08807-0911 USA
TEL: (908) 704-1700
declares that the product: Product Name: P-touch Labeller PT-1230PC
Model Number: PT-1230PC
This device complies with Part 15 of the FCC Rules. Operation is subject to the following two conditions: (1) this device may not cause harmful interference, and (2) this device must accept any interference received, including interference that may cause undesired operation.
This equipment has been tested and found to comply with the limits for a Class B digital device,
pursuant to Part 15 of the FCC Rules. These limits are designed to provide reasonable protection
against harmful interference in a residential installation. This equipment generates, uses and can
radiate radio frequency energy and, if not installed and used in accordance with the instructions, may
cause harmful interference to radio communications. However, there is no guarantee that interference will not occur in a particular installation. If this equipment does cause harmful interference to
radio or television reception, which can be determined by turning the equipment off and on, the user
is encouraged to try to correct the interference by one or more of the following measures:
-Reorient or relocate the receiving antenna.
-Increase the separation between the equipment and receiver.
-Connect the equipment into an outlet on a circuit different from that to which the receiver is connected.
-Consult the dealer or an experienced radio/TV technician for help.
-Changes or modifications not expressly approved by Brother Industries, Ltd. could void the user’s
authority to operate the equipment.
-The enclosed interface cable should be used in order to ensure compliance with the limits for a
Class B digital device.