1
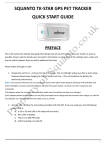
SQUANTO
TK-STAR GPS PET TRACKER
USER MANUAL
PREFACE
Thank you for purchasing the Pet GPS tracker from Squanto Tracking. This manual shows how to operate the
device smoothly and correctly. Make sure to read this manual carefully before using this product. Please note
that specification and information within this document is subject to changes without prior notice. Any change
will be integrated in the latest release. The manufacturer assumes not to be responsible for any errors or
omissions in this document.
1
1. SUMMARY
Working Based on existing GSM/GPRS network and GPS satellites, this product can locate and monitor any
remote targets by SMS or internet. It uses the latest advanced technology of GPS and A-GPS dual positioning.
Content
Dimensions
Specs.
70mm x 37mm x 20mm(2.7”*1.4”*0.78”)
Weight
65g
Network
GSM/GPRS
Band
850/900/1800/1900Mhz
GPS sensitivity
-159dBm
GPS accuracy
5m
Time To First Fix
Cold status 45s
Warm status 35s
Hot status 1s
Car charger
12—24V input
5V output
Wall charger
110-220V input
5V output
Battery
Chargeable changeable 3.7V 1000mAh Li-ion battery
Stand by
300hours
Storage Temp.
-40°C to +85°C
Operation Temp.
-20°C to +55°C
Humidity
5%--95% non-condensing
2
LED INDICATOR STATUS
MEANING
Left-GREEN-Not lit
Device fault or dormant.
Left-GREEN-Continuously lit
No GPRS signal.
Left-GREEN-Flashing
GSM/GPRS communication established.
Center-RED-Not lit
Fully charged.
Center-RED-Solid red
Charging.
Center-RED-Flashing
Low battery.
Right-BLUE-Not lit
No power to the unit or the unit can’t start.
Right-BLUE-Continuously lit
Searching for GPS signal.
Right-BLUE-Flashing
GPS location successful.
3
2. INITIAL SET UP - Before First Use.
Please complete the following in order to make sure your tracker works correctly.
1. Before first use charge battery for 8-12 hours. This conditions the battery for maximum performance. The red
‘charging’ LED light will go out after a while – please continue to charge for up to 12 hours for the first charge.
Troubleshooting Note 1: On occasion when the unit is turned on it will freeze with both Blue and Green LED
lights turned on and will not power off when the power button is pressed nor will it respond to commands.
This happens when the unit goes into protection mode where the battery has been over charged.
If this happens please let the battery run out fully (overnight) and re-charge with the normal 4 hour charge, or
until the red LED goes out. Your unit will then be ready to use as normal.
2. Activate the SIM card. Each SIM is different but will have activation details included – Please make note of the APN
settings that are displayed during the activation as you will need these later. You will need available credit on your
SIM in order to set up and use the tracker.
3. Insert SIM into tracker. You may need to use a screwdriver or pen in order to push the Sim in all the way. You
should push it in until it ‘clicks’ into place. It will only go in one way round. If you have purchased a MICRO SIM ,
you will need to use the Micro SIM adapter enclosed, like this:
4. Take your tracker outside with clear line of sight to the sky (for first activation). Turn the tracker on by pressing the
paw print power button.
Once turned on it will take anywhere between 20 seconds and 5 minutes to make the connection dependent on
the satellite positioning at the time.
Your tracker is now turned on and ready to set up.
The unit works with both GPS and SIM and requires a few commands sent through to the SIM card for initial set up.
There needs to be credit for the unit to respond in order to complete this process.
After that time you can use the web platform and smart phone app’s to use the device.
3. INITIAL SET UP – PLEASE COMEPLETE THESE ACTIONS IN ORDER TO ENSURE CORRECT USE
OF DEVICE
1. Save the SIM Phone number to your phone.
2. Complete the following commands in order by sending the command as a text message to the tracker SIM card
phone number. All messages should be as shown below:
4
INSTRUCTION
COMMAND (TEXT MESSAGE)
REPLY (CONFIRMATION)
1. You need to reboot the device at first
start up to ensure correct working.
Send the unit a SMS message with the
following written in the message:
begin123456
begin ok
2. The admin number ensures your unit
only communicates with you.
Without an admin number anyone can
call/text the unit and receive its location
back via SMS message.
To set the authorised number enter the
following commands:
Note: Once set the unit will only respond
admin123456+(space)+phone
number.
Note: don’t type the words
“+(space)+”… This indicated you
need to leave a space between
the previous words and the next
words.
E.g.
admin ok
to messages from the admin phone.
Please see below to delete or change
Admin123456 07889900112
admin numbers.
Turn on GPRS.
Gprs123456
GPRS is used for App and Web Tracking.
Without GPRS the only tracking that can
be done is SMS Text tracking.
GPRS off will provide a longer battery life
but can only be tracked with SIM.
Once GPRS is on the Green LED should
switch from Solid Green to Flashing
Green once a connection is made.
Gprs ok
Test 1.
To locate the unit you can either call the
SIM card or send it an SMS command.
Call phone number of the SIM.
Let it ring or connect and then
hang up. Within a few seconds
you will receive a SMS message
from the device.
SMS message containing
a Google maps link
showing the current
location.
Test 2.
You can send a SMS message to receive
the same reply as above.
Send the following command:
G123456#
SMS message containing
a Google maps link
showing the current
location of the unit.
Troubleshoot Note 2:
When the device has no GPS signal, or is in sleep mode it will reply with 2 SMS messages. One will be the last known
location with “V:V” in the content of the message, and the second shortly after with “V:A” in the content of the message
and this will be the real time tracking information after the unit establishes a GPS signal.
Your TKStar has a default password of “123456”. This is needed when communicating and logging into the software. You
can change is by following the below commands giving you peace of mind that no one else can send commands or
5
communicate with the unit. Once the password has changed please make sure you substitute the default 123456 in the
below commands with your new 6 digit passcode. Please don’t lose the new passcode – you will need to download the
software and reset the unit in order to use it properly.
In order for your unit to connect to the GPS you now need to complete the following commands using your SIM Cards
Access Point Name (APN) settings. These are usually given during the activation process or can be found by contacting
your SIM Card provider or looking online.
APN
Use this to set the Access point name of
your network.
Send the following command:
Apn123456+(space)+apnname
E.g.: For giffgaff network and SIM
you should enter:
Apn123456 giffgaff.com
Apn ok
APN user name
The user name to access your SIM
network
Apnuser123456+(space)+userna
me
E.g.: For giffgaff network SIM you
apnuser ok
Send the following command:
should enter:
Apnuser123456 giffgaff
APN Password
The password needed to access your SIM
network APN.
Send the following command:
Apnpasswd123456+(space)+pass Apnpasswd ok
word
Note: The giffgaff network has no
password but you still need to set
this function in order for it to
work. If your network APN doesn’t
have a password you should send
this message leaving the
password space blank.
E.G.: Apnpasswd123456
(password)
For the giffgaff network SIM you
should enter:
Apnpasswd123456
(make sure you press the space
bar after the number 6)
It is suggested at this point that you change the access password to help prevent unauthorized use. To do so please
complete the following:
6
Change password.
As above it is important to change the
password to prevent anyone not
authorised by you accessing the device.
PLEASE keep a note of your new
password as it is very difficult to reset
the device without it.
Your password must be 6 numbers long.
Send the following command:
Password123456+(space)+new
password.
E.g.
Password123456 987654
Password ok
Congratulations, your device is now set up and ready to use in both SMS and App/Online Tracking mode.
Your unit will remain in standard tracking mode unless you tell it otherwise. If the unit hasn’t received a message within
5 minutes it will go into standby sleep mode. It will wake up again when you call or send it a message. The sleep mode
saves the battery but is not suitable if you wish to live track the device. You can also set the unit to sleep until it detects
movement (sleeping animal etc.)
4 EXPLANATIONS OF PARAMETERS/CODES IN SMS MESSAGE
1. Google Maps link: This is the link to the Google map showing the position of the tracker unit. When you
click the link it will open maps and show the location of the unit on the map.
2. V:A/V: Indicates GPS signal. V:A indicates there is a GPS signal; V:V indicates there is no GPS signal.
3. 2014-07-29 06:41:43 The date and time stamp when the unit last received a GPS signal.
4. S: 007km/h: This indicates the last known speed of the unit.
5. Bat:80% The approximate amount of battery charge remaining. The value is between5%and 100%, with
100% being fully charged.
6. 4109112546: The IMEI code of tracker device. This number is used for tracking website and the app.
7
5. USING ADDITIONAL FUNCTIONS AND COMMANDS
Please see the below table for different functions and their commands.
Note: if you have changed the password you need to substitute “123456” with your new 6 digit password on all the
below commands.
Instructions
Sleep mode
Sleep mode saves the battery. The
unit can remain in sleep mode for
up to 8 days and will wake up
when you send it a command.
The default setting will put the
unit to sleep after 5 minutes and
wake up when it is issued a
command.
Send the following command:
Sleep by time
The default setting is 5 minutes
and the unit will go into sleep
mode after 5 minutes of no
activity. If you wish you can
change the time it takes to go to
sleep.
No sleep
If you want to use your unit as a
live tracker and monitor its route
through a smartphone app or
website continuously you may
want to disable the auto sleep
function.
The unit will continue to send its
GPS location every few seconds
until either you send it another
command, or the battery runs
out.
In this mode you can have live
tracking up to 15 hours
dependent on signal conditions.
Send the following command:
Turn GPRS mode off.
This setting will only provide
location via the SMS text or call
function and will not use GPS
locations. This is not
Command
sleep123456
Reply
sleep ok
Sleep123456+space+time
Sleep time ok
Time must be in seconds.
sleep123456+space+off
sleep off ok
Nogprs123456
Nogprs ok
8
recommended as it relies on
mobile phone masts for location,
but will save some more battery. If
you wish to save the battery it is
recommended you use the Sleep
mode as above.
Send the following command:
Change the device back into GPRS
mode
Set GMT time zone number
The tracking and SMS work off of
the time zone set on the unit.
To change the time on the device
send the following command:
Format the device (must send by
authorized number)
If you wish to remove all settings
and restore to factory state send
this command. After which you
should start at the top of this
guide and use the begin
command.
All settings including authorised
number, SOS number and APN
settings will be removed.
Send the following command:
gprs123456
gprs ok
timezone123456+(space)+0
For any other time zones change
the 0 to -3,-2,-1,1,2,3,4,5 etc.
dependent on which zone you are
in.
format
time ok
6. TRACKING OPTIONS
Note: You must have set APN and turned Gprs on first as above.
ONLINE TRACKING and APP TRACKING.
Please go to:
http://2.tkstargps.net . Click on the IMEI tab and enter your IMEI and password.
9
App Tracking:
Platform: http://2.tkstargps.net/
IMEI No.: On the inside of the cover
Password: 123456 (or whatever you have set)
APPLICATIONS FOR ANDROID/iOS
Android: Please go to www.tkstargps.net/ for the latest releases of the Android GPS applications.
iOS: Search TKSTAR GPS in the Apple App Store to install the applications on your iOS device.
10