1
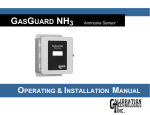
GASGUARD NH3 2%
Ammonia Sensor
OPERATING & INSTALLATION MANUAL
GasGuard NH3 2%
Operating and Installation Manual
2
GasGuard NH3 2%
Operating and Installation Manual
Table of Contents
General description ………………………………. 4
Installation………………………………….………. 4
Locating the sensor …………………………. 4
Installation guidelines………………………… 5
Wiring………………………………………….. 6
Operation ………………………………………….. 7
Start-up ……………………………...………… 7
Calibration ……………………………….….… 7
Maintenance…………………………….………… 9
Specifications…………………………………….. 10
Warranty………………………………………….. 11
Calibration Technologies
866-394-5861
3
GasGuard NH3 2%
Operating and Installation Manual
General Description
The GasGuard NH3 2% sensor is a +24 VDC, threewire, 4/20 mA sensor for ammonia. It is designed to
detect and monitor potentially explosive levels of
ammonia vapors in air over the range of 0-20,000 ppm.
It provides an industry standard linear 4/20 mA output
signal compatible with most gas detection systems and
PLCs. Typical sensor life is 5 years.
The GasGuard NH3 2% provides real-time continuous
monitoring of high concentrations of ammonia utilizing
catalytic bead sensor technology. The transmitter circuit
board is sealed in potting compound, protecting
sensitive electronic components and copper tracing
from corrosion. The specially vented enclosure is made
of a highly impact and chemical resistant polycarbonate
to protect the sensor.
Codes specify an electrical shunt-trip of the compressor
room at a level not higher than 25% LEL (4% or 40,000
ppm) to remove potential ignition sources in the event of
a serious ammonia leak. When mixed with oil,
ammonia can have an even much lower explosive limit.
Calibration Technologies recommends an alarm
setpoint at 2% which adds an extra safety factor for any
leak scenario. While primary applications for the
GasGuard NH3 2% sensor are electrical shunt-trip
activation for compressor rooms, it can be used almost
anywhere high concentrations of ammonia vapors need
to be detected or monitored.
4
Installation
Locating the sensor
One of the most important considerations when
installing the GasGuard NH3 2% sensor is that it must
be easily accessible for calibration and maintenance.
Depending on the location of the ammonia leak and
whether it is liquid or vapor, higher concentrations can
be found higher or lower in a compressor room.
Calibration Technologies recommends mounting the
sensor five feet off of the floor for easy access.
As a general rule of thumb, try to mount sensors within
30 feet of potential leak sources.
GasGuard NH3 2%
Operating and Installation Manual
Installation Guidelines:
• Always mount the sensor vertically.
• Must be easily accessible for calibration and
maintenance.
• Mount the sensor close to the potential leak source.
• For optimum personnel protection, mount sensor in
the “breathing zone” (4’ – 5’ above floor).
• Take air movement and ventilation patterns into
account.
• To prevent electrical interference, keep sensor and
wire runs away from mercury vapor lights, variable
speed drives, and radio repeaters.
• Protect sensor from physical damage(forklifts, etc.).
• If mounting sensor outdoors, consider prevailing
wind direction and proximity to the most likely
source of leaks. Protect the sensor from sun and
rain as much as possible.
• Mount sensor enclosure through the mounting
holes as shown in Figure 1.
Figure 1: Mounting dimensions
5
GasGuard NH3 2%
Operating and Installation Manual
Wiring
Electrical wiring must comply with all applicable codes.
Electrical Power: 24 VDC regulated, 250 mA.
Output: Linear 4/20 mA output. Monitoring equipment
may have a maximum input impedance of 700 ohms.
Cable Recommendation: 20/3 shielded cable
(General Cable C2525A or equivalent). Length of cable
to sensor should be no greater than 1,500 feet.
Monitoring: Monitoring equipment must be configured
to indicate a fault if the signal is below 1 mA. All signals
over 20 mA must be considered high gas
concentrations. Alarm setpoints should not be lower
than 10% of full-scale range.
Wiring Guidelines:
• Always use three conductor, insulated, stranded,
shielded copper cable.
• Do not pull sensor wiring with AC power cables.
This can cause electrical interference.
• If cable runs cannot be made without a splice, all
splice connections should be soldered.
• Ground the shield at the main control panel.
Connect the shield wire in the sensor terminal block
labeled SHLD.
• Use only the existing conduit hole for connections
to the sensor.
6
Figure 2: Wiring diagram
GasGuard NH3 2%
Operating and Installation Manual
Operation
Start-up
Before applying power, make a final check of all wiring
for continuity, shorts, etc. It’s usually best to disconnect
external alarms and other equipment from the sensor
until the initial start-up procedures are completed.
Because sensors are normally located at a distance
from the main unit, the test time required and accuracy
of the response checks will be improved if two people
perform the start-up procedures and use radio contact.
Note: Sensor can be response tested immediately after
power up. Allow sensor to stabilize for 1 hour before
making any zero or span adjustments.
Start-Up Test:
1) One person exposes each sensor to calibration gas
or ammonia/water solution.
2) The second person stays at the control unit to
determine that each sensor, when exposed to the
gas, is connected to the proper input and responds,
causing appropriate alarm functions.
Calibration
The GasGuard NH3 2% Sensor comes factory
calibrated and should require only minimal adjustments
after installation. Calibration should be performed six
months after installation. There are two pots on the
preamp that are used for calibration (see Figure 3).
Note: Never measure sensor output in mA.
Always use mVDC or VDC voltmeter settings.
Calibration Mode: Cal mode is required for calibrating
the sensor. It clears the deadband (factory set at 4.8
mA) and averaging. Pressing the CAL switch enables
cal mode and the green LED will flash. To exit out of
cal mode, press the CAL switch or after 4 minutes it will
automatically time-out.
Zero Calibration: After the unit is installed and has
been powered up for a minimum of 1 hour, the unit can
be zero calibrated by the following:
• Be sure the unit is in clean air.
• Press the CAL switch once to enter cal mode. Do
not adjust the zero pot if the green LED is not
flashing.
• Adjust the zero pot until the sensor outputs 40 mV
from Test [-] to Test [+] (see Figure 3).
Span Calibration: DO NOT ADJUST THE SPAN POT
WITHOUT CERTIFIED CALIBRATION GAS! Do not
remove sensor housing cap during calibration. If span
adjustment is required, the following procedure will span
the unit:
• Press the CAL switch once to enter cal mode.
• Apply 2% NH3 span gas at 0.8 L/min (span gas
must be in air, not nitrogen or other carrier).
• Sensor should react to gas within 15 seconds.
• Once the output signal has peaked (or two minutes
maximum) adjust the span pot until the correct
output is achieved (200 mV) (see Figure 3).
• Calibration is now complete.
7
GasGuard NH3 2%
Operating and Installation Manual
Figure 3: Sensor board components and zero/span adjustments
8
GasGuard NH3 2%
Operating and Installation Manual
4mA adjustment: Sometimes a fine adjustment of the
4mA signal may be desired to compensate for a slight
positive or negative zero-signal reading on the control
panel.
• Make sure the sensor is NOT in calibration mode.
• Adjust the 4mA pot until the control panel reads
zero.
Sensor replacement: If sensor replacement is
required, follow the procedure below.
• Unscrew the sensor housing cap.
• Remove the sensor from the socket by pulling
straight out with it. Discard old sensor.
• Notice orientation dot on backside of new sensor.
The dot on the sensor needs to be facing upwards.
• Carefully plug in new sensor.
• Refer to calibration section on page 7 to calibrate
new sensor.
Note: Below are a few response characteristics which
may be an indication that the gas sensor is at or near
the end of its useful life. If any of these are observed,
the sensor should be replaced:
• Slow response to / recovery from calibration gas.
• Failure of the output to reach 50% of the calibration
gas value prior to span adjustment.
• Unable to achieve correct output during span
adjustment.
Maintenance
The GasGuard NH3 2% was designed for long life and
minimal maintenance. For proper operation it is
essential that the test and calibration schedule be
adhered to. Calibration Technologies recommends the
following maintenance schedule:
Maintenance Guidelines:
• The sensor is shipped with a factory calibration.
•
•
•
•
Sensor should be calibrated 6 months from
purchase date.
Calibrate the detector at least once every 6 months.
Calibration should be performed with certified
calibration gas. Calibration kits and replacement
cylinders are available from Calibration
Technologies.
In highly critical areas, a response test should be
performed between calibrations to verify proper
sensor response and alarm functions. This can be
done with 2% NH3 calibration gas. The response
test is not required if multiple sensors are installed
in the same room.
All tests and calibrations must be logged.
9
GasGuard NH3 2%
Operating and Installation Manual
Sensor Life: This catalytic bead sensor exhibits long
life and is very reliable. Typical sensor life is five years.
As with all gas detectors, regular 6-month calibration
intervals are essential to correct for sensor aging
characteristics.
Replacement sensors can be obtained from Calibration
Technologies. Simply unplug the sensor from the
transmitter, discard the old sensor and replace it with a
new one. Refer to the sensor replacement section on
page 9. The sensor can then be calibrated after a 24
hour warm-up period.
10
Specifications
Detection Principle: Catalytic Bead
Detection Method: Diffusion
Gases: Ammonia (NH3)
Ranges: 0/2% (0/20,000 ppm)
Output Signal:
Linear 4/20 mA (max input impedance: 700 Ohms)
Power Supply: +24 VDC, 250 mA
Response Time:
T50 = less than 30 seconds
T90 = less than 60 seconds
Accuracy:
+/- 5% of value, but dependent on calibration gas
accuracy and time since last calibration
Zero Drift: Less than 0.1% of full-scale per month, noncumulative
Span Drift: Application dependent, but generally less
than 2% per month
Linearity: +/- 0.5% of full-scale
Repeatability: +/- 1% of full-scale
Wiring Connections:
3 conductor, shielded, stranded, 20 AWG cable
(General Cable C2525A or equivalent) up to 1500 ft.
Enclosure: Injection-molded NEMA 4X polycarbonate
sensor housing. Captive screw in hinged lid. For nonclassified areas.
Temperature Range: -40°F to +120°F (-40°C to +49°C)
Humidity Range: 5% to 100% condensing
Dimensions: 7.7” high x 6.7” wide x 3.8” deep
Weight: 2.0 lbs
Limited Warranty & Limitation of Liability
Calibration Technologies, Inc. (CTI) warrants this product to be free from defects in material and workmanship under
normal use and service for a period of one year (gas sensor also covered for one year), beginning on the date of
shipment to the buyer. This warranty extends only to the sale of new and unused products to the original buyer. CTI’s
warranty obligation is limited, at CTI’s option, to refund of the purchase price, repair, or replacement of a defective
product that is returned to a CTI authorized service center within the warranty period. In no event shall CTI’s liability
hereunder exceed the purchase price actually paid by the buyer for the Product.
This warranty does not include:
a) routine replacement of parts due to the normal wear and tear of the product arising from use;
b) any product which in CTI’s opinion, has been misused, altered, neglected or damaged by accident or abnormal
conditions of operation, handling or use;
c) any damage or defects attributable to repair of the product by any person other than an authorized dealer or
contractor, or the installation of unapproved parts on the product
The obligations set forth in this warranty are conditional on:
a) proper storage, installation, calibration, use, maintenance and compliance with the product manual instructions
and any other applicable recommendations of CTI;
b) the buyer promptly notifying CTI of any defect and, if required, promptly making the product available for
correction. No goods shall be returned to CTI until receipt by the buyer of shipping instructions from CTI; and
c) the right of CTI to require that the buyer provide proof of purchase such as the original invoice, bill of sale or
packing slip to establish that the product is within the warranty period.
THE BUYER AGREES THAT THIS WARRANTY IS THE BUYER’S SOLE AND EXCLUSIVE REMEDY AND IS IN
LIEU OF ALL OTHER WARRANTIES, EXPRESS OR IMPLIED, INCLUDING BUT NOT LIMITED TO ANY IMPLIED
WARRANTY OF MERCHANTABILITY OR FITNESS FOR A PARTICULAR PURPOSE. CTI SHALL NOT BE LIABLE
FOR ANY SPECIAL, INDIRECT, INCIDENTAL OR CONSEQUENTIAL DAMAGES OR LOSSES, INCLUDING LOSS
OF DATA, WHETHER ARISING FROM BREACH OF WARRANTY OR BASED ON CONTRACT, TORT OR
RELIANCE OR ANY OTHER THEORY.
11
GG-NH3 2% 02/2013