1
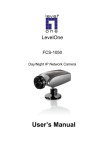
LevelOne
FCS-1030
10/100Mbps IP Network Camera
User’s Manual
Table of Contents
Before You Use This Product..................................................................4
Warning Before Install ..........................................................................5
Package Contents ..................................................................................7
Installation ............................................................................................2
Hardware installation.......................................................................2
Software installation ........................................................................1
Using Installation Wizard.................................................................6
User Interface ............................................................................6
Action buttons ............................................................................7
Function buttons ........................................................................8
Setup ..........................................................................................8
System Setting ...........................................................................9
Change root password ................................................................9
Adjust date and time ................................................................10
Network Setting .......................................................................11
Fix the IP address.....................................................................11
Basic Network Settings.............................................................12
Upgrade....................................................................................12
Device Information...................................................................12
Package Information ................................................................14
File Selection ............................................................................14
Upgrade....................................................................................14
How to Use.....................................................................................15
Authentication ..........................................................................15
Installing plug-in ...........................................................................16
Primary user’s capability................................................................18
Main Screen with Camera View.................................................18
Digital Zoom .............................................................................19
Snapshot ..................................................................................19
Client settings ..........................................................................20
Administrator’s capability ..............................................................23
Fine-tuning for Best Performance.............................................23
-1-
Opening accounts for new users...............................................25
Change homepage layout .........................................................26
Build a multimedia web attraction site .....................................31
Build a security application.......................................................34
Software revision upgrade........................................................35
Definitions in Configuration .................................................................36
System parameters ........................................................................37
Security settings ............................................................................38
Network settings............................................................................39
General .....................................................................................39
SMTP ........................................................................................39
FTP ...........................................................................................40
HTTP.........................................................................................40
Streaming .................................................................................41
DDNS and UPnP settings ................................................................42
Video codec parameters .................................................................42
Motion detection ............................................................................45
Application settings .......................................................................47
Weekly schedule.......................................................................47
Send out the snapshot while motion detection .........................47
Sequential operation ................................................................47
Homepage layout settings ........................................................49
Viewing system log ........................................................................50
Viewing system parameters ...........................................................50
Factory default ...............................................................................50
Appendix .............................................................................................51
A. Troubleshooting .........................................................................51
Status LED ................................................................................51
Reset and restore .....................................................................51
B. Frequently asked questions .......................................................43
C. URL commands of the Network Camera .....................................46
Capture update Snapshot of JPEG image ..................................46
Query status of the digital input ...............................................46
Drive the digital output.............................................................46
Restore factory default settings ...............................................47
-2-
Restart system .........................................................................47
Page URL ..................................................................................48
System resource URL................................................................48
General format of command URL ..............................................49
System configuration URL ........................................................49
Security configuration URL .......................................................50
Network configuration URL.......................................................50
DDNS & UPnP configuration URL ..............................................52
Video configuration URL ...........................................................53
Image quality configuration URL ..............................................54
Application configuration URL ..................................................55
Homepage layout configuration URL.........................................56
D. Technical specifications .............................................................57
-3-
Before You Use This Product
The use of surveillance devices may be prohibited by law in your country.
The FCS-1030 Network Camera is not only a high-performance web-ready
camera but also can be part of a flexible surveillance system. It is the user’s
responsibility to ensure that the operation of such devices is legal before
installing this unit for its intended use.
It is important to first verify that all contents received are complete
according to the list in the "Package Contents" chapter. Take notice of the
warnings in “Quick installation guide” before the Network Camera is
installed,
then
carefully
read
and
follow
the
instructions
in
the
“Installation” chapter to avoid damages due to faulty assembly and
installation.
This also ensures the product is used properly as intended.
The Network Camera is a network device and its use should be
straightforward for those who have basic network knowledge.
The
“Troubleshooting” chapter in the Appendix provides remedies to the most
common errors in set up and configuration. You should consult this chapter
first if you run into a system error.
The Network Camera is designed for various applications including video
sharing, general security/surveillance, etc.
The “How to Use” chapter
suggests ways to best utilize the Network Camera and ensure proper
operations. For the creative and professional developers, the "URL
Commands of The Network Camera " chapter serves to be a helpful
reference to customize existing homepages or integrating with the current
web server.
For paragraphs preceded by
the reader should use caution to
understand completely the warnings.
in serious hazards or injuries.
-4-
Ignoring the warnings may result
Warning Before Install
-5-
-6-
Package Contents
-7-
Installation
In this manual, "User" refers to whoever has access to the FCS-1030 Network
Camera, and "Administrator" refers to the person who can configure the
Network Camera and grant user access to the camera.
Hardware installation
Please verify that your product package contains all
the accessories listed in the foregoing Package
Contents.
Depending on the user’s application, an
Ethernet cable may be needed. The Ethernet cable
should meet the specs of UTP Category 5 and not
exceed 100 meters in length.
Connect the power adapter jack to the Network
Camera before plugging in to the power socket.
This will reduce the risk of accidental electric
Upon powering up, the device runs through a self-test procedure and the front
LEDs will blink between green and red a few times.
If self-test passes, the LED
will be green and the Network Camera will standby for getting IP address. After
getting IP Address, the LED will blink green every second. If self-test fails the
red LED will blink several times. Refer to Appendix A for troubleshooting.
Software installation
The following are steps for the software installation.
STEP 1 Put the Installation disk into the CD-ROM drive, and the installation
should start automatically. If the installation does not start, click on “Start”
on the lower left corner of your screen, open “My Computer” and double click
on the CD-ROM icon. The Installation Wizard Installation Window will appear.
STEP 2 There are links on this page, including Install Software, User’s Manual
and Customer Homepage. Click on “Install Software” to enter Install
Software page.
STEP 3 There are links on this page, including Installation Wizard, User’s
Manual and Surveillance Software. Click on “Installation Wizard” to launch
the setup program.
STEP 4 Select the installation directory for this application software and click
on “Next”. You can also change the installation directory from the default
directory by clicking on “Browse…”
STEP 5 Select a program folder to install the application software into and
then click on “Next”.
STEP 6 Click on “Finish” to finish installation. This completes the installation.
Using Installation Wizard
User Interface
Once you run the Installation Wizard, you will see the user interface. You can
click on the device list to select a device. The three buttons (Setup, Upgrade,
and Reset to default) won’t be enabled until you select at least one device.
Installation wizard allows you to setup or upgrade multiple devices (of the
same model) at the same time. If you selected different models, then the
buttons will be disabled. There are five buttons on the bottom of the main
page, and five buttons on the left panel of the main page.
Action buttons
Click on this button to clean up the device list and search all
devices on the within the same subnet again. It will take about 5
seconds.
To setup or upgrade the devices which can not be found by
Installation Wizard, please click on this button to add them
manually. Click on this button will popup a dialog. You can input the IP
address and click on Ok to add the device into the device list.
Click on this button will remove all the selected devices from the
device list. The devices that you remove might be show up again if
you click the search button or add them into list manually.
While you selected several devices, this button allows you to
uncheck all the selected devices by one click instead of uncheck
the selected devices one by one.
Click on this button will open the web browsers to link to
all the selected devices. (One browser per device)
Function buttons
Click on this button to modify the settings of the selected devices.
For more detail, please refer to 0 Setup.
Click on this button to upgrade the firmware of the selected
devices. For more detail, please refer to 0 Upgrade.
Click on this button to reset the selected devices to default
settings.
Click on this button to close the Installation Wizard.
Click on this button to get information about the Installation
Wizard.
Setup
When you select one or multiple devices (of the same model) , the “Setup”
button will be enabled. Click on it to modify the settings of the selected
device(s). After clicking on the “Setup” button, Installation Wizard will try to
connect to the selected device(s). If the authentication is failed, it will popup
a dialog) to ask for correct password and http port number.
The default password is the MAC address of your own FCS-1030, which marks
at the bottom label of each device.
Please enter the MAC address with capital letters.
System Setting
After connected to the selected device(s), it will switch to system setting
page.
Click on this button to back to the previous page or main page
Click on this button to keep the settings and go to the next page.
Click on this button to discard the settings of the current page and
go to the next page.
Change root password
To change the administrator’s password, type the new password in both root
password and confirm password text boxes identically. What is typed will be
displayed as asterisks for security purposes. The maximum password is 14
characters.
Adjust date and time
There are three ways to adjust system date and time. The easiest way is to
make Network Camera "Sync with computer time". The second way “Manual” is
to set the date and time manually by entering new values. Notice the format
in the related field while typing. The third way “Automatic” is to make Network
Camera automatically synchronize with timeservers over the Internet every
hour.
Network Setting
In this page, you can change the server’s IP address, subnet mask, default
router, primary dns, and secondary dns.
Fix the IP address
Check "Reset IP address at next boot" will force Network Camera to reconfigure
its IP address whenever it reboot. If you want the Network Camera to use a
fixed IP, please uncheck the "Reset IP address at next boot" and assign a valid IP
address. If you select more than one device, changing the IP address is not
allowed and the IP address field will be disabled.
Basic Network Settings
You can setup the network setting by this page. Usually this is no need to be
changed, if you do change it please make sure you input the correct setting or
the device may not be reachable.
Upgrade
When you select one device or multiple devices (of the same model), the
“Upgrade” button will be enabled. Click on it to upgrade the firmware of the
selected device(s). After click on the “Upgrade” button, Installation Wizard
will try to connect the selected device(s). If the authentication is failed, it will
popup a dialog to ask for the correct password and http port number.
The default password is the MAC address of your own FCS-1030, which marks
at the bottom label of each device.
Please enter the MAC address with capital letters.
Device Information
After connected to the selected device, it will display.
Package Information
The package information will show the information about the file that you
selected.
Firmware version: The version number of the selected firmware.
Supported script version: The maximum script version that firmware can
support.
Web page version: The version number of the web page.
Script version: Script version used by web page and server script.
Viewer plugin version: The version number of the viewer plugin.
Upgrade plugin version: The version number of the upgrade plugin
Supported language: The language that the selected file supports.
File Selection
You can use the file combolist to browse the file that you want upgrade onto
the selected device(s). After selecting the file, Installation Wizard will check
whether the file you selected is correct. If it is correct, then the package
information will display the information about the file and enable the
“Upgrade” button. Therefore you can click on the button to upgrade the
firmware. If it is not correct, then it will popup a warning message.
Upgrade
Click on the “Upgrade” button to upgrade the firmware of the selected
device(s). It will popup the dialog to show the progress of the upgrading
process.
After the upgrade process is done. Click
“Done” to finish.
How to Use
Authentication
After opening the Web browser and typing in the URL of the Network Camera,
a dialogue window pops up to request a username and password. Upon
successful authentication, the following figure is displayed.
The foreground is the login window and the background shows the message if
authentication fails. The user may check the option box to save the password
for future convenience.
This option is not available to the Administrator for
obvious reason.
After successful linkage, the authentication window should pop up.
The default user name is root.
The default password is the MAC address of your own FCS-1030, which marks
at the bottom label of each device.
Please enter the MAC address with capital letters.
Installing plug-in
For the initial access to the Network Camera in Windows, the web browser
may prompt for permission to install a new plug-in for the Network Camera.
Permission request depends on the Internet security settings of the user’s PC
or notebook. If the highest security level is set, the computer may prohibit
any installation and execution attempt. This plug-in has been registered for
certificate and is used to display the video in the browser. Users may click on
to proceed. If the web browser does not allow the user to continue to
install, check the Internet security option and lower the security levels or
contact your IT or networking supervisor for help.
Primary user’s capability
Main Screen with Camera View
The main page layout has two parts:
Configuration functions: The camera can be configured using these user
interfaces.
Camera View: What the camera sees.
Click on the configuration link to the left of the image window to enter the
configuration page.
Digital Zoom
Click on the magnifier icon under the camera view then the digital zoom
control panel will be shown. Uncheck “Disable digital zoom” and use the
slider control to change the zoom factors.
Snapshot
Click on “Snapshot”, web browser will pop up a new window to show the
snapshot. Users can point at the snapshot and click the right button of mouse
to save it.
Client settings
At the initial access to the “Connection type” page in Windows, the web
browser will ask for a new plug-in installation, the plug-in being the Network
Camera. This plug-in has been registered for certification and can be used to
change the parameters at the client’s site. The user may click on
to
install the plug-in. If the web browser does not allow the user to complete the
installation, check the Internet security to lower the security level or contact
your IT or networking supervisor.
There are two settings for the client side. One is “Media Option” for users to
determine if audio should be muted. The other is “Protocol Option” which
allows choices on connection protocol between client and server. There are
three protocols choices to optimize your usage - UDP, TCP and HTTP.
The UDP protocol allows for more real-time audio and video streams. However,
some packets may be lost due to network burst traffic and images may be
obscured.
The TCP protocol allows for less packet loss and produces a more accurate
video display. The downside with this protocol is that the real-time effect is
worse than that with the UDP protocol.
The HTTP protocol must be selected if the network is protected by a firewall
and it only allows HTTP Port (80) to be opened. In this mode, audio will not be
sent and only video is operational.
If no special need is required, UDP
protocol is recommended. Generally speaking, the client’s choice will be in
the order of UDP → TCP → HTTP.
After the Network Camera is connected
successfully, “Protocol Option” will indicate the selected protocol. The
selected protocol will be recorded in the user's PC and will be used for the
next connection. If the network environment is changed, or the user wants to
let the web browser to detect again, manually select the UDP protocol, save,
and return HOME to re-connect.
<url> http://<Network Camera>/protocol.html
<Network Camera> is the domain name or the original IP address of the
Network Camera.
Administrator’s capability
Fine-tuning for Best Performance
Best performance generally equates to the fastest image refresh rate with the
best video quality, and at the lowest network bandwidth as possible. The
three factors, “Maximum frame rate”, “Fix bit rate”, and “Fix quality” on the
Video Configuration page, are correlative to allow for achieving the best
performance possible.
For Best Real-time Video Images
To achieve good real-time visual effect, the network bandwidth should be
large enough to allow a transmission rate of greater than 20 image frames
per second. If the broadband network is over 1 Mbps, set the “Fix bit rate” to
1000Kbps or 1200Kbps, and set “Fix quality” at the highest quality. The
maximum frame rate is 30. If your network bandwidth is more than 384Kbps,
you can fix the bit rate according to your bandwidth and set the maximum
frame rate to 30 fps. If the images vary dramatically in your environment, you
may want to slow the maximum frame rate down to 20 fps in order to lower
the rate of data transmission. This allows for better video quality and the
human eyes cannot readily detect the differences between those of 20, 25, or
30 frames per second. If your network bandwidth is below 384 Kbps, set the
“Fix bit rate” according to your bandwidth and try to get the best
performance by fine-tuning with the “Maximum frame rate”. In a slow
network, greater frame rate results in blur images. Another work-around is to
choose “Half” in the “Size” option for better images, or “Halfx2” for a larger
image view. Video quality performance will vary somewhat due to the number
of users viewing on the network; even when the parameters have initially
been finely tuned.
Performance will also suffer due to poor connectivity
because of the network’s burst constraint.
Only Quality Images Will Do
To have the best video quality, you should set “Fix quality” at “Detailed” or
“Excellent” and adjust the “Maximum frame rate” to match your network’s
bandwidth. If your network is slow and you receive “broken” pictures, go to
the TCP protocol in “Connection type” and choose a more appropriate mode of
transmission. The images may suffer a time delay due to a slower connection.
The delay will also increase with added number of users.
Somewhere Between Real-time and Clear Images
If you have a broadband network, set “Fix quality” at ”Normal” or better,
rather than setting “Fix bit rate”. You can also fix the bandwidth according to
your actual network speed and adjust the frame rate.
for best results but not below 15 fps.
select a lower bandwidth setting.
Start from 30 fps down
If the image qualities are not improved,
Opening accounts for new users
1
2
3
4
Protect Network Camera by passwords
The Network Camera is shipped without any password by default. That means
everyone can access the Network Camera including the configuration as long
as the IP address is known. It is necessary to assign a password if the
Network Camera is intended to be accessed by others. Type a new word twice
1 to enable protection. This password is used to identify the administrator.
in ○
2.
Then add an account with user name and password for your friends in ○
Network Camera can provide twenty accounts for your valuable customers or
friends. Each account identifies the access right rather than the real visitor.
That allows multiple visitors share the same account of different level.
An
option to access DI/DO is provided for each account. Some users may need to
prohibit from controlling your attached devices. You may delete some users
3.
from ○
4
More flexible options for viewers ○
The first option allows anyone uses “demo” as the user name to view without
password. The Administrator can also decide if more viewers are allowed to
watch the video if the viewers exceed the limit. The overloaded viewers will
have snapshot mode instead.
Change homepage layout
How to change the font color
1. Click on “Configuration” on homepage,
2. Click on “Homepage layout” at the left column,
3. Find “Font color” and pull down the list to choose any color you like,
4. Click on “Save” button.
* The font color is better to contrast with the background.
How to change the background
1. Click on “Configuration” on homepage,
2. Click on “Homepage layout” at the left column,
If you want to display simple color without any image,
3. Find “Background graph” and choose “blank”,
4. Find “Background color” and pull down the list to choose any color you like,
5. Click on “Save” button.
* The background color is better to contrast with the font.
If you want to use the image from another web site as background,
3. Find “Background graph” and choose “Url”,
4. Type the URL of the image on the Internet in the edit box, for example,
“http://dgl.microsoft.com/thumbnails/j023/j0235217(t).gif”,
5. Click on “Save” button.
If you want to change the default background image stored in the Network
Camera,
3. Find “Background graph” and choose “default”,
4. Click on “Save” button,
5. Prepare an image file with size less than 131000 bytes and rename it to
wallppr.jpg,
6. Open an FTP client program and connect to the Network Camera. The user
name and password is as same as the Administrator’s.
7. Transfer wallppr.jpg in local folder to the Network Camera,
8. Close the FTP program and reload the homepage of the Network Camera.
How to change the image logo at the upper left corner of homepage
1. Click on “Configuration” on homepage,
2. Click on “Homepage layout” at the left column,
If you want to remove any logo,
3. Find “Logo graph” and choose “blank”,
4. Click on “Save” button.
If you want to use the image from another web site as logo,
3. Find “Logo graph” and choose “Url”,
4. Type the URL of the image on the Internet in the edit box, for example,
“http://dgl.microsoft.com/thumbnails/j023/j0234430(t).gif”,
5. Click on “Save” button.
If you want to change the default logo stored in the Network Camera,
3. Find “Logo graph” and choose “default”,
4. Click on “Save” button,
5. Prepare an image file with size less than 65000 bytes and rename it to
logo.gif,
6. Open an FTP client program and connect to the Network Camera. The user
name and password is as same as the Administrator’s.
7. Transfer logo.gif in local folder to the Network Camera,
8. Close the FTP program and reload the homepage of the Network Camera.
If you want to add hyperlink to the logo image,
3. Find “Logo link” and type the hyperlink in the edit box, for example,
http://www.mywebsite.com,
4. Click on “Save” button.
How to design my own homepage to replace the current one
1. Prepare your own homepage with size less than 65000 bytes and rename it
to user.htm,
2. Insert the html codes of video object, the bold Italian text in the following
example, into the appropriate position in user.htm. Note that the codes of
video object must be copied exactly the same including the letter case.
****** Example homepage begin ******
<html>
<head>
<title>Example – custom homepage</title>
</head>
<body background="/pic/wallppr.jpg">
<p>
<a href="/setup/config.html">
<img
src="http://dgl.microsoft.com/thumbnails/j023/j0234430(t).gif"
align="left" width="64" height="64">
</a>
<font size="7" face="Comic Sans MS" color="#FF0000">
Network Camera Demo
</font>
</p>
<p align="left">
<!-- Copy the next bold line to where you want to show the image coming
from Network Camera. This line is remark only and is hidden on
homepage. //-->
<OBJECT ID=VAMCtrl></OBJECT>
</p>
</body>
</html>
3. Open an FTP client program and connect to the Network Camera. The user
name and password is as same as the Administrator’s.
4. Transfer user.htm in local folder to the Network Camera,
5. Close the FTP program and reload the homepage of the Network Camera,
6. Click on “Configuration” on homepage,
7. Click on “Homepage layout” at the left column,
8. Check “Use the customized homepage”.
9. Click on “Save” button and return to homepage.
* The user.htm only provides plain text content that scripts and URL of
external resources can be used to adorn the homepage. Refer to tutorials of
writing HTML and scripts.
If the customized homepage goes wrong and cannot display, link to the
“Homepage
layout”
page,
“http://<IP
Camera>/setup/layout.html”, to disable
address
of
Network
“Use the customized homepage”.
Build a multimedia web attraction site
Demo on multiple sites – mid-scale service
The Network Camera can allow ten visitors on-line simultaneously. After
Installation, focus the Network Camera on any view you would like friends to
share and tell the visitors to type in the web browser address. Caution:
You
may want to maintain your visitor’s list in the security configuration page to
block out unexpected visitors. No need to have the geeks’ skill and
equipments, no need to find suitable software.
Product demo for e-business – large-scale service
If the number of visitors has exceeded the limit, the Network Camera can
allow the "overload" viewers to see the snapshots in JPEG mode, on the
homepage.
These are still images and will be refreshed periodically and
automatically.
It needs a script function supported by the web browser.
1. Click on “Configuration” on homepage,
2. Click on “Security” at the left column,
3. Go to the page bottom and check “Allow more viewers with snapshot
mode”,
4. Set the snapshot interval to refresh the still image automatically. The
longer the snapshot interval is, the better the snapshot mode works for more
viewers.
If you want to expand to allow in more viewers, the host server should be able
to handle large network traffic, which must handle the picture refreshing
from the Network Camera.
If the web space has FTP service,
Set the Network Camera as an FTP client to upload the pictures. The access to
the Network Camera will be independent of the number of viewers and the
picture quality will remain constant.
1. Click on “Configuration” on homepage,
2. Click on “Network” at the left column,
3. Fill the FTP related settings including server, user name and password, as
well as the upload path if specified by the web space,
4. Click on save and wait for system restart,
5. Click on “Application” at the left column,
6. Select “Sequential operation” and set the interval,
7. Select FTP without date time suffix as the upload method and click on save,
8. The image file uploaded to the web space is named “video.jpg”. Check if the
file is successfully uploaded to the correct folder,
9. Prepare a homepage with the embedded image reference to the image file
uploaded via FTP in advance.
If the web space has no FTP service,
An auto-refresh homepage can be used to periodically poll the newest image
from the Network Camera. It is most efficient if using a free web space
provider as the FTP service may be limiting.
1. Prepare an auto-refresh homepage like the following example. The URL of
image is http://“IP address of the Network Camera”/cgi-bin/video.jpg.
Modify the IP address according to your Network Camera. Define the refresh
interval according to your network bandwidth for best result. If the refresh
rate is too fast and there is a large number of visitors, this may overload the
Network Camera and slows the response.
****** Example homepage begin ******
<html>
<head>
<title>Example - auto refresh</title>
</head>
<body background="/pic/wallppr.jpg">
<p align=left>
<font size="7" face="Comic Sans MS" color="#FF0000">
Network Camera Demo
</font>
</p>
<p align=left>
<!-- Begin of scripts to auto refresh the image. Change the IP address in
the image URL and refreshrate if necessary. //-->
<script language=javascript>
var image="http://192.168.0.203/cgi-bin/video.jpg";
//IMAGE
URL
var refreshrate=5;
//SECONDS BETWEEN REFRESH
var imgwidth=352;
//IMAGE WIDTH
var imgheight=240;
//IMAGE HEIGHT (NTSC:240; PAL:288)
function refresh(){
document.images["pic"].src=image+"?"+new Date();
setTimeout('refresh()', refreshrate*1000);}
document.write('<img
src="'+image+'"
height="'+imgheight+'"
width="'+imgwidth+'" name="pic">');
if(document.images)window.onload=refresh;
</script>
<!-- End of scripts to auto refresh the image. //-->
</p>
</body>
</html>****** Example homepage end ******
Build a security application
The Administrator can use the built-in motion detection to monitor any
movement to perform many useful security applications. To upload the
snapshots, users can choose either email or FTP according to user’s needs.
Both e-mail and FTP use the network settings on the network page. Refer to
the definition section for detail configuration.
Click on “Configuration” on homepage,
Click on “Motion detection” at the left column,
Check “Enable motion detection”,
Click on new to have a new window to monitor video,
Type in a name to identify the new window,
Use the mouse to click, hold, and drag the window corner to resize or the title
bar to move,
Fine-tune using the “Sensitivity” and “Percentage” fields to best suit the
camera’s environment. Higher ”Sensitivity” detects the slighter motion.
Higher “Percentage” discriminates smaller objects,
Clicking on “Save” enables the activity display. Green means the motion in
the window is under the watermark set by Administrator and red means it is
over the watermark,
Click on “Application” at the left column,
Check the weekdays as you need and give the period of "Snapshots begin" time
and "Snapshots end" time to monitor the motion detection every day,
Check the “Send out the snapshot while motion detection”.
Set the delay before detecting next motion to avoid continuous false alarms
following the original event,
Set the delay to take snapshots after motion to capture the direction of the
moving objects,
Check the window name set in step 5,
Check the way to upload snapshot,
Click on save to validate.
Software revision upgrade
Customers can obtain the up-to-date software from the web site. An
easy-to-use Upgrade Wizard is provided to upgrade the Network Camera with
just a few clicks. The upgrade function is opened to the Administrator only. To
upgrade the system, follow the procedures below.
1. Download the firmware file named “FLASH.BIN” from the appropriate
product folder.
2. Run the Upgrade Wizard and proceed following the prompts. Refer to the
instructions of the Upgrade Wizard for details.
3. The whole process will finish in a few minutes and it will automatically
restart the system.
If power fails during the writing process of Flash memory, the program
in the memory of the Network Camera may be destroyed permanently. If
the Network Camera cannot restart properly, ask your dealer for technical
service
Definitions in Configuration
Only the Administrator can access system configuration. Each category in the
left column will be explained in the following pages. The bold texts are the
specific phrases on the Option pages. The Administrator may type the URL
below the figure to directly enter the frame page of configuration. If the
Administrator also wants to set certain options through the URL, read the
reference appendix for details.
<url> http://<Network Camera>/setup/config.html
<Network Camera> is the domain name or original IP address of the Network
Camera.
System parameters
"Keep current date and time" Click on this to reserve the current date and time of
the Network Camera. An internal real-time clock maintains the date and time
even when the power of the system is turned off.
"Sync with computer time" Synchronizes the date and time of the Network
Camera with the local computer. The read-only date and time of the PC is
displayed as updated.
“Manual” Adjust the date and time according to what is entered by the
Administrator. Notice the format in the related fields while doing the entry.
“Automatic” Synchronize with the NTP server over the Internet whenever the
Network Camera starts up. It will fail if the assigned time-server cannot be
reached.
“NTP server” Assign the IP address or domain name of the time-server. Leaving
the text box blank connects the Network Camera to the default time-servers.
"Time zone" Adjust the time with that of the time-servers for local settings.
Remember to click on
to immediately validate the changes. Otherwise,
the correct time will not be synchronized.
Security settings
“Root password” Change the Administrator’s password by typing in the new
password identically in both text boxes. The typed entries will be displayed as
asterisks for security purposes. After pressing
, the web browser will ask
the Administrator for the new password for access.
“Add user” Type the new user's name and password and press
to insert
the new entry. The new user will be displayed in the user name list. There is a
maximum of twenty user accounts.
“Delete user” Pull down the user list to find the user’s name and press
to
complete.
“Allow ‘demo’ account to view” Click this to permit anyone who types in “demo”
as user name. No password is needed for demo account. Note that a demo
account is restricted to view only.
“Allow more viewers with snapshot mode” There can only be a maximum of 10
users to simultaneously view the video.
This option allows for the 11th
viewer on, the overloaded viewers, to see only still images. These still images
are automatically refreshed by the interval defined below. This feature must
be supported by the java script capability of the web browsers.
“Snapshot interval” defines the refresh rate of the still image in the homepage
seen by the overloaded viewers.
Network settings
Any changes made on this page will restart the system in order to validate the
changes. Make sure every field is entered correctly before clicking on
.
"Reset IP address at next boot", the default status is checked to get IP address
automatically at the server start. Therefore, once the network settings,
especially the IP address, have been entered correctly, uncheck this option.
General
“IP address” This is necessary for network identification.
“Subnet mask” This is used to determine if the destination is in the same
subnet. The default value is “255.255.255.0”.
“Default router” This is the gateway used to forward frames to destinations in a
different subnet. Invalid router setting will fail the transmission to
destinations in different subnet.
“Primary DNS” The primary domain name server that translates hostnames
into IP addresses.
“Secondary DNS” Secondary domain name server that backups the Primary
DNS.
SMTP
When the SMTP server support SMTP authentication, users need to give the
valid user name and password to send email via the server.
“SMTP (mail) server 1” The domain name or IP address of the external email
server.
“User name of SMTP 1” This granted user name on the external email server.
“Password of SMTP 1” This granted password on the external email server.
“Recipient email address 1” The email address of the recipients for snapshots or
log file. Multiple recipients must be separated by semicolon, ‘;’.
“SMTP (mail) server 2” The domain name or IP address of another email server
once the previous server is unreachable.
“User name of SMTP 2”, granted user name on the backup email server.
“Password of SMTP 2”, granted password on the backup email server.
“Recipient email address 2” The email address of the recipients for the backup
server.
“Sender email address”, the email address of the sender.
FTP
“Local FTP server port” This can be other than the default port 21. The user can
change this value from 1 to 65535. After the changed, the external FTP client
program must change the server port of connection accordingly.
“1st FTP server” The domain name or the IP address of the external FTP server.
The following user settings must be correctly configured for remote access.
“1st FTP user name” Granted user name on the external FTP server.
“1st FTP password” Granted password on the external FTP server.
“1st FTP remote folder” Granted folder on the external FTP server. The string
must conform to that of the external FTP server. Some FTP servers cannot
accept preceding slash symbol before the path without virtual path mapping.
Refer to the instructions for the external FTP server for details. The folder
privilege must be open for upload.
“Primary FTP passive mode” The Network Camera is located inside the network
protected by a firewall, data connection for FTP may be prohibited. By
selecting passive mode, the FTP can bypass the rule and allow snapshot
upload to proceed. If the passive mode is selected, the Network Camera can
automatically attempt for active mode, if the external FTP server does not
support passive mode.
“2nd FTP server” The domain name or IP address of the external FTP server.
“2nd FTP user name” Granted user name on the backup FTP server.
“2nd FTP password” Granted password on the backup FTP server.
“2nd FTP remote folder” Granted folder on the backup FTP server.
“Secondary FTP passive mode” Passive mode setting for the backup FTP server.
HTTP
“Http port” This can be other than the default Port 80. Once the port is changed,
the users must be notified the change for the connection to be successful. For
instance, when the Administrator changes the HTTP port of the Network
Camera whose IP address is 192.168.0.100 from 80 to 8080, the users must
type
in
the
web
browser
“http://192.168.0.100:8080”
instead
of
“http://192.168.0.100”.
Streaming
“Control channel port” This can be something other than the default port 5001 in
order to work with the port opened by the firewall.
“Audio channel port” This can be something other than the default port 5002 in
order to work with the port opened by the firewall.
“Video channel port” This can be something other than the default port 5003 in
order to work with the port opened by the firewall.
“Improve audio quality in low bandwidth environment” If the Network Camera
seems to work in a low bandwidth network environment, the user can use this
option to see if audio quality can be improved by sacrificing some real-time
synchronization.
“Mute” This can force the transmission protocol to HTTP and disable audio.
Some invalid settings may cause the system failing to respond. Change the
configuration only if necessary and consult with your network supervisor or
experienced users for correct settings. Once the system has lost contact, refer
to Appendix A for reset and restore procedures.
DDNS and UPnP settings
“Enable DDNS” This option turns on the DDNS function.
“Provider” The provider list contains four hosts that provide DDNS services.
Please connect to the service provider’s website to make sure the service
charges.
“Host name” If users wants to use DDNS service, this field must be filled.
Please input the hostname that is registered in the DDNS server.
“Username/E-mail” The Username or E-mail field is necessary for logging in the
DDNS server or notify users of the new IP address. Note: when this field is
input as “Username” the following field must be input as “Password”.
“Password/Key” Please input the password or key to get the DDNS service.
“Enable UPnP” This turns on or off the UPnP function. When UPnP is turned off,
the camera cannot be found through network neighbors in MS Windows XP. If
the UPnP network component is installed in Windows XP, the hostname of the
Network Camera will be shown with bracketed IP address in the Network
neighbors. Ex: Network Camera (192.168.0.96). That is: The hostname of the
Network Camera is “Network Camera”, and the IP address of the Network
Camera is 192.168.0.96.
“Save” Click on the button to save current settings for the DDNS service and
UPnP function.
Network Camera provides a free DDNS service. Administrators can choose
safe100.net in the “Providers” field to use it. At the first time, Administrators
must register an account for it.
Video codec parameters
“Text on video” The text will be displayed in the black bar above the video
window with a timestamp. The timestamp is captured from the date and time
of the Network Camera that is maintained by a built-in real-time clock.
“Color” Select either for color or monochrome video display.
“Size” There are five options for three video sizes. “Half” is the quarter size of
“Normal”. “Half x 2” has the same video size as “Normal” but of a lesser quality,
while consuming less network bandwidth. “Normal” is the quarter size of
“Double”. “Normal x 2” has the same video size as “Double” but of a lesser quality,
while consuming less network bandwidth.
“Power line frequency (for fluorescent light)”, the fluorescent light will flash
according to the power line frequency that depends on local utility. Change
the frequency setting to eliminate uncomfortable flash image when the light
source is only fluorescent light.
There are three dependent parameters provided for video performance
adjustment. “Maximum frame rate” This limits the maximal refresh frame rate,
which can be combined with the “Video quality control” to optimize bandwidth
utilization and video quality. If the user wants to fix the bandwidth utilization
regardless of the video quality, choose “Fix bit rate” and select the desired
bandwidth. The video quality may be poor due to the sending of maximal
frame rate within the limited bandwidth when images are moving rapidly.
Consequently, to ensure detailed video quality (quantization rate) regardless
of the network, it will utilize more bandwidth to send the maximal frames
when images change drastically.
“Flip” Vertically rotate the video.
“Mirror” Horizontally rotate the video. Check options both if the Network
Camera is installed upside down.
“White balance” Adjust the value for best color temperature.
Click on this button to pop up another window to tune
“Brightness”, “Contrast”, “Hue” and “Saturation” for video compensation. Each
field has eleven levels ranged from -5 to +5. In “Brightness” and “Contrast”
fields the value 0 indicates auto tuning. The user may press
fine-tune the image. When the image is O.K., press
settings.
to
to set the image
Click on this to recall the original settings without
incorporating the changes.
Motion detection
“Enable motion detection” Check this option to turn on motion detection.
Click on this button to add a new window. At most three windows can
exist simultaneously. Use the mouse to click, hold, and drag the window
frame to resize or the title bar to move. Clicking on the ‘x’ at the upper
right-hand corner of the window to delete the window. Remember to save in
order to validate the changes.
Click on this button to save the related window settings. A graphic bar
will rise or fall depending on the image variation. A green bar means the
image variation is under monitoring level and a red bar means the image
variation is over monitoring level. When the bar goes red, the detected
window will also be outlined in red. Going back to the homepage, the
monitored window is hidden but the red frame shows when motion is
detected.
"Window Name" The text will show at the top of the window.
“Sensitivity” This sets the endurable difference between two sequential
images.
“Percentage” This sets the space ratio of moving objects in the monitoring
window. Higher sensitivity and small percentage will allow easier motion
detection.
The following figure shows the screen when
is clicked. The monitoring
window has been outlined in red and the graphic bar goes red since the
goldfish is moving.
Application settings
Weekly schedule
“Sun” ~ “Sat” Select the days of the week to perform the following operations.
“Snapshots begin at” Set the time to start operations.
“Snapshots stop at” Set the time to stop operations.
Setting identical begin time and stop time means 24-hour operation.
“All the time except for the above schedule” Set the schedule all the time except
for the above in a week.
Send out the snapshot while motion detection
“Delay second(s) before detecting next motion” Set the time delay before
restarting to check on the triggering condition when the current condition is
triggered.
“Take snapshots at second(s) after motion” After the camera has taken a snapshot
when a condition is triggered, another snapshot will be taken after this
configured interval, in seconds.
“Trigger condition” There are three windows for motion detection each can be
assigned a name. If motion detection has not been set up, “undefined” will be
shown instead of the window title. If this happens, clicking on “Motion
detection” and a note will show to direct the User to the configuration page
for motion detection.
Sequential operation
“Snapshot every second(s)” The Network Camera will send snapshots at the
specified intervals to the external server using the method selected below.
Remember: This operation is still subject to the conditions set in the weekly
schedule.
“Send snapshots by email” This selects the uploading method following the
intervals set above. The snapshot named “video.jpg” will be attached in the
email with the subject title “Periodic snapshots”.
“Send snapshots by FTP” The snapshots will be uploaded to the external FTP
server with the file name defined in the next option. This can also be used to
refresh the captured images stored in the external web server to build
creative homepages.
“FTP put snapshots with date and time suffix” This option sets up the snapshot
capture date and time, which can be used to easily differentiate the snapshot
file names in either the sequential or event operation. For instance,
“[email protected]” means the JPEG image was captured in the
year 2003, January the 2nd, at 3 o’clock, 4 minute, and 5 second. If this suffix
is omitted, the file named “video.jpg” on the external FTP server will be
refreshed at the specified interval.
Homepage layout settings
“Use the customized homepage”, check this option to use “user.htm” uploaded
by the Administrator instead of the default one. Refer to the section
“Administrator’s capability” for detail usage. The following options related to
the default homepage will not affect the “user.htm”.
“Logo graph”, the logo located at the upper left corner of homepage can be
hidden, the default one that can be changed by the Administrator, or any
image on the Internet that can be located via URL. The default logo is stored
in memory and can be changed by FTP. The maximal size is 32000 bytes.
Though the file name is fixed to “logo.gif”, the image can be any file format as
long as the web browser can read it. Refer to the section “Administrator’s
capability” for how to change the default logo.
“Logo link”, when users click on the logo image, a
new window will pop up
to show the homepage of the given URL. Clear the URL will disable the link
function.
“Background graph”, the background image can be hidden to show the
background color only, the default one that can be changed by the
Administrator, or any image on the Internet that can be located via URL. The
default background image is stored in memory and can be changed by FTP.
The maximal size is 131000 bytes. Though the file name is fixed to
“wallppr.jpg”, it can be any file format as long as the web browser can read it.
Refer to the section “Administrator’s capability” for how to change the
background image.
”Font color", pull down the list to select any color for the text in the homepage.
”Background color", pull down the list to select any color for the homepage
background. It can be seen when the background image is not displayed.
Viewing system log
Click the link on the configuration page to view the system log file. The
content of the file provides useful information about configuration and
connection after system boot- up.
Viewing system parameters
Click on this link on the configuration page to view the entire system’s
parameter set. The content is the same as those in CONFIG.INI.
Factory default
Click on this link on the configuration page to restore the factory default
settings. Any changes made so far will be lost and the system will be reset to
the initial factory settings. After clicking on the “OK” button and make
confirmation, the system will restart and require the installer program to set
up the network again.
Appendix
A. Troubleshooting
Status LED
After powering up, the Network Camera performs a self-diagnostic to detect
any hardware defects. The following table lists the LED patterns in general. In
case of any fatal error, the LED will blink in a pattern other than those below.
Condition
LED color
During self-diagnostic after power on Blink in interchanged green and red
Ethernet signal is lost
Steady red till Ethernet is detected
Before network is setup
Steady
green
till
IP
address
is
confirmed
After network is setup
Network
is
setup
and
Blink green every second
audio
is Blink green every 4 seconds
disabled
Any hardware failure
Other patterns
Reset and restore
There is a button in the back of the Network Camera. It is
used to reset the system or restore the factory default
settings. Sometimes resetting the system sets the system
back to normal state. If the system problems remain after
reset, restore the factory settings and install again.
RESET:
Click on the button.
RESTORE: 1. Press on the button continuously.
2. Wait for self-diagnostic to run twice.
3. Free the button as soon as the second self-diagnostic
Restoring the factory
defaults will erase any previous settings. Reset or
starts.
restore the system after power on.
B. Frequently asked questions
Q What if I forget my password?
A After the Administrator's password is assigned, every access to the
Network Camera needs authentication. If you are one of the managed users,
you have to ask the Administrator for the password. If you are the
Administrator, there is no way to recover the root password except for
restoring factory default. Refer to Appendix A for the procedures.
Q Why can I not watch video from the Network Camera after it is
authenticated?
A There are many possible scenarios regarding this problem,
1. If you have just installed the Network Camera and are unable to watch the
video, check if the heartbeat LED is blinking or the lens cap is removed. If the
heartbeat LED is dim, perform the software installation again.
2. If the Network Camera is well installed and you are accessing the Network
Camera for the first time using Internet Explorer, adjust the security level of
Internet Explorer to allow installation of plug-ins.
3. If the problem still exists after adjusting, and the message over the image
window is showing "connecting", the network traffic may be too crowded.
Q What is the plug-in for?
A The plug-in provided by the Network Camera is used to display motion
pictures and audio in Internet Explorer. If your system does not allow
installation of any plug-in software, the security level of the web browser
may need to be lowered. It is recommended that you consult your network
supervisors in your office regarding adjustment of the security level.
Software installation may be regulated in some offices.
Q Why is the timestamp different from the system time of my PC or notebook?
A The timestamp is based on the system time of the Network Camera. It is
maintained by a real-time clock inside and can be automatically synchronized
with the time server if the Network Camera is connected to the Internet and
the function is enabled. Differences of several hours may result from the time
zone setting.
Q Can I install it on ceiling?
A Yes. There are flip and mirror options in video configuration page to correct
the images for upside down installation.
Q The image is not clear enough.
A Rotate the lens to adjust the focus after the Network Camera is installed in
the proper position. The image settings and white balance can be fine tuned
to achieve the best visual effect. Also notice the power line frequency must
match the local utility to synchronize and minimize the effect of flickering
florescent lights.
Q Why does the image not refresh regularly?
A Some anti-virus programs filter the received web content. It takes time to
perform data examination and affect the streaming application such as the
Network Camera. However it only affects the HTP mode of the Network
Camera. If the network allows only HTTP mode, disable the web filtering
function of the anti-virus program temporarily. During the period, users
should be aware of the risk of malicious network activity.
Q I have opened motion detection windows but it cannot work.
A If the motion detection windows are setup and names are given, check to
see if the function is checked at the first line. While it is enabled, adjust the
sensitivity and percentage to monitor the level indicator for best results.
Q I cannot hear any sound while watching.
A If there is "V_ONLY" shown above the image, click on connection type to
uncheck "Disable audio". If there is "V" shown instead of "AV", the sound
card in your PC may not properly installed. If "AV" is shown, check the audio
source of the Network Camera.
Q How many users are allowed to watch the Network Camera at the same
time?
A Too many users requesting the real-time multimedia content will jam the
network. For best results, the Network Camera is designed to accommodate
maximum ten (10) users to watch and listen to the Network Camera at the
same time. For a larger number of users, it is recommended to build another
web server to host the retrieving contents from the Network Camera.
Q How fast is the video rate of the Network Camera?
A The MPEG4 codec engine can process 30 frames per second internally.
However the total performance is subject to many coefficients as follows:
1. Network throughput,
2. Bandwidth share,
3. Number of users,
4. The complicated/detailed objects and movement in view,
5. The level of your PC or notebook computer that is responsible for displaying
images.
In general, the transfer rate in a general local network environment can
achieve over 200 kilobytes per second and approximately 10 to 20 pictures
per second from a regular environment.
Q How can I keep the Network Camera as private as possible?
A The Network Camera is designed for surveillance purposes and has many
flexible interfaces. The user authentication and special confirmation in
installation can keep the Network Camera from unauthorized access. You
may also change the HTTP port to non-public number. The demo account is
good to separate guests from normal users and thus you can easily block
guests anytime. You can check the system log to examine any abnormal
activities and trace the origins.
Q Why can I not access the Network Camera when I setup some options in the
application?
A Since the Network Camera is a "network device", any incorrect network
settings will make it unreachable. If this happens, restore the factory default
settings following the procedures in Appendix A.
C. URL commands of the Network Camera
For some customers who already have their own web site or web control
application, the Network Camera can be easily integrated through convenient
URLs. This section lists the commands in URL format corresponding to the
basic functions of the erase Network Camera.
Capture update Snapshot of JPEG image
/cgi-bin/video.jpg?size=<value>
The Network Camera will return the most up-to-date snapshot in JPEG format.
The value of size can be 1, 2 and 3. 1 means half, 2 means normal and 3 means
double. If users do not set the size in this command, the snapshot size will be
the same as the setting of video option.
Query status of the digital input
/cgi-bin/getdi.cgi
The Network Camera will return the status of digital input.
Drive the digital output
/cgi-bin/setdo.cgi?do=<state>
The state is either “H”, or “L”.”H” means high, that is NC is connected with
COMMON and “L” means low that is NO is connected with COMMON.
For instance, typing http://192.168.0.201/cgi-bin/setdo.cgi?do=h in the
address bar of the web browser will command the Network Camera, with IP
address of 192.168.0.201, to set digital output to connect to NC with
COMMON.
Restore factory default settings
/setup/restore.cgi
The Network Camera will automatically restart after restoring factory default
configurations.
Restart system
/setup/reset.cgi
Restart the Network Camera without warning.
Page URL
The configuration page has a frame layout including an option list frame and
an option page frame. Referenced URLs, except for the configuration page,
direct users to the option page frame only. Some pages, such as image quality
setting and preset setting, are opened in new windows for preview.
Only the Administrator can access these URLs.
Homepage name
Referenced URL
connection type page
/client.html
configuration page
/setup/config.html
system option
/setup/system.html
security option
/setup/security.html
network option
/setup/network.html
DDNS and UPnP option
/setup/ddns.html
video option
/setup/video.html
motion detection
/setup/motion.html
image quality option
/setup/image.html
application option
/setup/app.html
homepage layout option
/setup/layout.html
system log
/setup/logfile.html
system parameters
/setup/parafile.html
set factory default
/setup/factory.html
System resource URL
There are some images used on the homepage when the homepage layout is
in image mode. The Administrator may use the following links to show the
images saved in the Network Camera on another page.
Resource name
Referenced URL
system logo image
/pic/logo.gif
background image
/pic/wallppr.jpg
General format of command URL
Every configuration can be set through URL with POST method by the
Administrator only.
<general format>
URL[?[name=value][&name=value]……]
<method>
POST
<authorized user>
root
System configuration URL
URL:
/setup/system.cgi
NAME
VALUE
DESCRIPTION
host
<text string shorter than 40 system name
characters>
method keep
keep date and time unchanged
auto
use NTP server to synchronize
manu
directly adjust date and time
<yyyy/mm/dd>
year, month and date separated
date
by slash
time
<hh:mm:ss>
hour,
minute
and
second
separated by colon
ntp
<domain
name
or
IP NTP server
address>
zone
-12 ~ 12
time zone, 8 means GMT +8:00
Security configuration URL
URL:
NAME
/setup/security.cgi
VALUE
DESCRIPTION
rootpass <text string shorter than 16 change root password
characters>
username <text string shorter than 16 add new user
characters>
userpass <text string shorter than 16 new user's password
characters>
deluser
<text string shorter than 16 existing user name
characters>
action
<blank>
validate demo users with “open”
open
yes
grant for demo account
no
prohibit for demo account
Yes
allow more guests with snapshot
slow
mode
no
forbid
more
guests
with
snapshot mode
selay
0 ~ 99
snapshot interval
Network configuration URL
URL:
/setup/network.cgi
NAME
VALUE
DESCRIPTION
reset
yes
enable installation at next boot
no
disable installation at next boot
ip
<IP address>
Network Camera's IP address
subnet
<IP address>
subnet mask
router
<IP address>
default gateway
dns1
<IP address>
primary DNS server
dns2
<IP address>
secondary DNS server
smtp1
<domain
name
or
IP primary SMTP server
address>
smtp1Usr <string
shorter
than
characters>
smtp1pass <string
server
shorter
than
characters>
mail1
<string
63 user name for primary SMTP
15 password
for
primary
SMTP
server
shorter
than
80 mail recipient address
characters>
smtp2
<domain
name
or
IP secondary SMTP server
address>
smtp2Usr <string
shorter
than
characters>
smtp2pass <string
server
shorter
than
characters>
mail2
63 user name for secondary SMTP
15 password for secondary SMTP
server
<text string shorter than 80 mail recipient address
characters>
retmail
<text string shorter than 80 return email address
characters>
ftpp
<number less than 65535> FTP port
ftp1
<domain
name
or
IP primary FTP server
address>
ftpuser1
<text string shorter than 63 user name for primary FTP server
characters>
ftppass1
<text string shorter than 15 password for primary FTP server
characters>
ffd1
Pasv1
<text string shorter than 40 upload folder in primary FTP
characters>
server
yes
access FTP server in passive
mode
no
ftp2
<domain
access FTP server in active mode
name
or
IP secondary FTP server
address>
ftpuser2
<text string shorter than 63 user name for secondary FTP
characters>
server
ftppass2
<text string shorter than 15 password
characters>
ffd2
for
secondary
FTP
server
<text string shorter than 40 upload folder in secondary FTP
Pasv2
characters>
server
yes
access FTP server in passive
mode
no
access FTP server in active mode
http
<number less than 65535> HTTP port
cport
<number less than 65535> control Channel port
aport
<number less than 65535> audio Channel port
vport
<number less than 65535> video Channel port
band
yes
optimal for the low bandwidth
no
keep the original way
yes
disable audio
no
enable audio
mute
DDNS & UPnP configuration URL
URL:
/setup/ddns.html
NAME
VALUE
DESCRIPTION
enddns
anything
Enable
DDNS
function.
This
option must be resent whenever
the
URL
is
called,
if
DDNS
function is to be enabled.
provider 1
host
DynDNS.org(Dynamic)
2
DynDNS.org(Custom)
3
TZO.com
4
dhs.org
<text string shorter than 63 The hostname of the Network
characters>
Camera
usermail <text string shorter than 63 The login username of DDNS
characters>
server
or
the
email
address
registered in DDNS server.
passkey <text string shorter than 20 The login password of DDNS
characters>
server or the key given by the
DDNS server.
enupnp anything
Enable
UPnP
function.
This
option must be resent whenever
the
URL
is
called,
if
UPnP
function is to be enabled.
Video configuration URL
URL:
/setup/video.cgi
NAME
VALUE
DESCRIPTION
text
<text string shorter than 16 enclosed caption
characters>
color
size
mode
quality
quan
bitrate
B/W
monochrome
<other than B/W>
color
1
half
2
half x 2
3
normal
4
normal x 2
5
double
50Hz
synchronize with 50Hz utility
60Hz
synchronize with 60Hz utility
fixb
fix bit rate
<other than fixb>
fix quantization
1
lowest quality of video
2
lower quality of video
3
normal quality of video
4
higher quality of video
5
highest quality of video
64000
set bit rate to 64K bps
128000
set bit rate to 128K bps
256000
set bit rate to 256K bps
frame
384000
set bit rate to 384K bps
512000
set bit rate to 512K bps
768000
set bit rate to 768K bps
1000000
set bit rate to 1000K bps
1200000
set bit rate to 1200K bps
1
set maximum frame rate to 1 fps
2
set maximum frame rate to 2 fps
3
set maximum frame rate to 3 fps
5
set maximum frame rate to 5 fps
10
set maximum frame rate to 10
fps
15
set maximum frame rate to 15
fps
20
set maximum frame rate to 20
fps
25
set maximum frame rate to 25
fps
30
set maximum frame rate to 30
fps
flip
mirror
wb
yes
flip image
no
normal image
yes
mirror image
no
normal image
1
auto white balance
2
fixed indoor(2800K)
3
fixed fluorescent 1(3600K)
4
fixed fluorescent 2(4000K)
5
fixed outdoor(6000K)
Image quality configuration URL
URL:
NAME
/setup/image.cgi
VALUE
DESCRIPTION
brightness <-5 ~ 5>
adjust brightness of image
contrast
<-5 ~ 5>
adjust contrast of image
hue
<-5 ~ 5>
adjust hue of image
saturation <-5 ~ 5>
adjust saturation of image
preview
<not required>
not save the parameters
restore
<not required>
recall the original settings
save
<not required>
save the parameters
Application configuration URL
URL:
/setup/app.cgi
NAME
VALUE
DESCRIPTION
emode
<not required>
Upload snapshot when motion
detected
smode
<not required>
smethod mail
sequential mode application
upload snapshots by email
ftp
upload snapshots by FTP
suffix
<not required>
FTP file with date and time suffix
delay
<integer>
seconds delay to detect next
event
inter
<integer>
seconds
delay
to
capture
post-event
motion1 < not required >
set motion window1 as trigger
condition
motion2 < not required >
set motion window2 as trigger
condition
motion3 < not required >
set motion window3 as trigger
condition
sinter
<integer>
seconds interval for sequential
mode
sbegin
<hh:mm:ss>
time to start sequential mode
send
<hh:mm:ss>
time to stop sequential mode
Homepage layout configuration URL
URL:
NAME
/setup/layout.cgi
VALUE
cuslogo blank
DESCRIPTION
hide logo
def
use default logo
url
use image from URL
logourl <text string shorter than 80 URL of image for logo
characters>
linkurl
<text string shorter than 80 URL to link when clicking on logo
characters>
cusback blank
hide background image
def
use default background
url
use image from URL
backurl <text string shorter than 80 URL of image for background
characters>
fcolor
<0 ~ 15>
color index for font
bcolor
<0 ~ 15>
color index for background
D. Technical specifications
- System
CPU: Trimedia PNX1300
RAM: 16MB SDRAM
ROM: 2MB FLASH ROM
- Networking
Protocol
TCP/IP, HTTP, SMTP, FTP, DDNS, UPnP , Telnet,
NTP, DNS and DHCP
Physical
10 baseT or 100 baseT Fast Ethernet auto
negotiation
- Video
Algorithm supported
MPEG4(short header mode) for streaming video
JPEG for still image
Features
Adjustable image size, quality and bit rate
Time stamp and text overlay
3 motion detection windows
Resolution
Up to 30/25 frames at 160x120
Up to 30/25 frames at 320x240
Up to 10 frames at 640x480
- Camera Specification
1/4 inch color CMOS sensor
Resolution: 640x480
AGC, AWB, AES
Electronic shutter: 1/60 ~ 1/15000 second
- Lens
Fixed focal with fine tuning, 4.0mm, F2.0
- Audio
Bite rate: 24Kbps
Supporting audio mute
- Microphone
Omni-directional
Frequency: 50 – 16000Hz
S/N ratio: more than 60dB
- LED indicator
Dual color status indicator
- Dimension
28.6mm(D) * 72.8mm(W) * 115.2mm(H)
- Weight
NET. 215g
- Power
Input: 100-240VAC, 50/60Hz, 0.4A
Output: 5VDC, 2A
- Operating Environment
Temperature: 0-50°C/32-122°F
Humidity: 95%RH
- EMI & Safety
CE, FCC
- Viewing system requirement
Operating system
Microsoft Windows 98SE/ME/2000/XP
Browser
Internet Explorer 5.x or above
GNU GENERAL PUBLIC LICENSE
Version 2, June 1991
Copyright (C) 1989, 1991 Free Software Foundation, Inc.
59 Temple Place, Suite 330, Boston, MA 02111-1307 USA
Everyone is permitted to copy and distribute verbatim copies of this license document, but
changing it is not allowed.
Preamble
The licenses for most software are designed to take away your freedom to share and change it.
By contrast, the GNU General Public License is intended to guarantee your freedom to share
and change free software--to make sure the software is free for all its users. This General
Public License applies to most of the Free Software Foundation's software and to any other
program whose authors commit to using it. (Some other Free Software Foundation software is
covered by the GNU Library General Public License instead.) You can apply it to your
programs, too.
When we speak of free software, we are referring to freedom, not price. Our General Public
Licenses are designed to make sure that you have the freedom to distribute copies of free
software (and charge for this service if you wish), that you receive source code or can get it if
you want it, that you can change the soft-ware or use pieces of it in new free programs; and
that you know you can do these things.
To protect your rights, we need to make restrictions that forbid anyone to deny you these rights
or to ask you to surrender the rights. These restrictions translate to certain responsibilities for
you if you distribute copies of the software, or if you modify it.
For example, if you distribute copies of such a program, whether gratis or for a fee, you must
give the recipients all the rights that you have. You must make sure that they, too, receive or
can get the source code. And you must show them these terms so they know their rights.
We protect your rights with two steps: (1) copyright the software, and (2) offer you this license
which gives you legal permission to copy, distribute and/or modify the software.
Also, for each author's protection and ours, we want to make certain that everyone
understands that there is no warranty for this free software. If the software is modified by
someone else and passed on, we want its recipients to know that what they have is not the
original, so that any problems introduced by others will not reflect on the original authors'
reputations.
Finally, any free program is threatened constantly by software patents. We wish to avoid the
danger that redistributors of a free program will individually obtain patent licenses, in effect
making the program proprietary. To prevent this, we have made it clear that any patent must
be licensed for everyone's free use or not licensed at all. The precise terms and conditions for
copying, distribution and modification follow.
GNU GENERAL PUBLIC LICENSE
Terms And Conditions For Copying, Distribution And Modification
0. This License applies to any program or other work which contains a notice placed by the
copyright holder saying it may be distributed under the terms of this General Public License.
The "Program", below, refers to any such program or work, and a "work based on the
Program" means either the Program or any derivative work under copyright law: that is to say,
a work containing the Program or a portion of it, either verbatim or with modifications and/or
translated into another language. (Hereinafter, translation is included without limitation in the
term "modification".) Each licensee is addressed as "you".
Activities other than copying, distribution and modification are not covered by this License;
they are outside its scope. The act of running the Program is not restricted, and the output from
the Program is covered only if its contents constitute a work based on the Program
(independent of having been made by running the Program). Whether that is true depends on
what the Program does.
1. You may copy and distribute verbatim copies of the Program's source code as you receive it,
in any medium, provided that you conspicuously and appropriately publish on each copy an
appropriate copyright notice and disclaimer of warranty; keep intact all the notices that refer to
this License and to the absence of any warranty; and give any other recipients of the Program
a copy of this License along with the Program.
You may charge a fee for the physical act of transferring a copy, and you may at your option
offer warranty protection in exchange for a fee.
2. You may modify your copy or copies of the Program or any portion of it, thus forming a work
based on the Program, and copy and distribute such modifications or work under the terms of
Section 1 above, provided that you also meet all of these conditions:
a) You must cause the modified files to carry prominent notices stating that you changed the
files and the date of any change.
b) You must cause any work that you distribute or publish, that in whole or in part contains or is
derived from the Program or any part thereof, to be licensed as a whole at no charge to all third
parties under the terms of this License.
c) If the modified program normally reads commands interactively when run, you must cause it,
when started running for such interactive use in the most ordinary way, to print or display an
announcement including an appropriate copyright notice and a notice that there is no warranty
(or else, saying that you provide a warranty) and that users may redistribute the program under
these conditions, and telling the user how to view a copy of this License. (Exception: if the
Program itself is interactive but does not normally print such an announcement, your work
based on the Program is not required to print an announcement.)
These requirements apply to the modified work as a whole. If identifiable sections of that work
are not derived from the Program, and can be reasonably considered independent and
separate works in themselves, then this License, and its terms, do not apply to those sections
when you distribute them as separate works. But when you distribute the same sections as
part of a whole which is a work based on the Program, the distribution of the whole must be on
the terms of this License, whose permissions for other licensees extend to the entire whole,
and thus to each and every part regardless of who wrote it. Thus, it is not the intent of this
section to claim rights or contest your rights to work written entirely by you; rather, the intent is
to exercise the right to control the distribution of derivative or collective works based on the
Program.
In addition, mere aggregation of another work not based on the Program with the Program (or
with a work based on the Program) on a volume of a storage or distribution medium does not
bring the other work under the scope of this License.
3. You may copy and distribute the Program (or a work based on it, under Section 2) in object
code or executable form under the terms of Sections 1 and 2 above provided that you also do
one of the following:
a) Accompany it with the complete corresponding machine-readable source code, which must
be distributed under the terms of Sections 1 and 2 above on a medium customarily used for
software interchange; or,
b) Accompany it with a written offer, valid for at least three years, to give any third party, for a
charge no more than your cost of physically performing source distribution, a complete
machine-readable copy of the corresponding source code, to be distributed under the terms of
Sections 1 and 2 above on a medium customarily used for software interchange; or,
c) Accompany it with the information you received as to the offer to distribute corresponding
source code. (This alternative is allowed only for noncommercial distribution and only if you
received the program in object code or executable form with such an offer, in accord with
Subsection b above.)
The source code for a work means the preferred form of the work for making modifications to it.
For an executable work, complete source code means all the source code for all modules it
contains, plus any associated interface definition files, plus the scripts used to control
compilation and installation of the executable. However, as a special exception, the source
code distributed need not include anything that is normally distributed (in either source or
binary form) with the major components (compiler, kernel, and so on) of the operating system
on which the executable runs, unless that component itself accompanies the executable.
If distribution of executable or object code is made by offering access to copy from a
designated place, then offering equivalent access to copy the source code from the same
place counts as distribution of the source code, even though third parties are not compelled to
copy the source along with the object code.
4. You may not copy, modify, sublicense, or distribute the Program except as expressly
provided under this License. Any attempt otherwise to copy, modify, sublicense or distribute
the Program is void, and will automatically terminate your rights under this License. However,
parties who have received copies, or rights, from you under this License will not have their
licenses terminated so long as such parties remain in full compliance.
5. You are not required to accept this License, since you have not signed it. However, nothing
else grants you permission to modify or distribute the Program or its derivative works. These
actions are prohibited by law if you do not accept this License. Therefore, by modifying or
distributing the Program (or any work based on the Program), you indicate your acceptance of
this License to do so, and all its terms and condi-tions for copying, distributing or modifying the
Program or works based on it.
6. Each time you redistribute the Program (or any work based on the Program), the recipient
automatically receives a license from the original licensor to copy, distribute or modify the
Program subject to these terms and conditions. You may not impose any further restrictions on
the recipients' exercise of the rights granted herein. You are not responsible for enforcing
compliance by third parties to this License.
7. If, as a consequence of a court judgment or allegation of patent infringement or for any other
reason (not limited to patent issues), conditions are imposed on you (whether by court order,
agreement or otherwise) that contradict the conditions of this License, they do not excuse you
from the conditions of this License. If you cannot distribute so as to satisfy simultaneously your
obligations under this License and any other pertinent obligations, then as a consequence you
may not distribute the Program at all. For example, if a patent license would not permit
royalty-free redistribution of the Program by all those who receive copies directly or indirectly
through you, then the only way you could satisfy both it and this License would be to refrain
entirely from distribution of the Program.
If any portion of this section is held invalid or unenforceable under any particular circumstance,
the balance of the section is intended to apply and the section as a whole is intended to apply
in other circumstances.
It is not the purpose of this section to induce you to infringe any patents or other property right
claims or to contest validity of any such claims; this section has the sole purpose of protecting
the integrity of the free software distribution system, which is implemented by public license
practices. Many people have made generous contributions to the wide range of software
distributed through that system in reliance on consis-tent application of that system; it is up to
the author/donor to decide if he or she is willing to distribute software through any other system
and a licensee cannot impose that choice.
This section is intended to make thoroughly clear what is believed to be a consequence of the
rest of this License.
8. If the distribution and/or use of the Program is restricted in certain countries either by
patents or by copyrighted interfaces, the original copyright holder who places the Program
under this License may add an explicit geographical distribution limitation excluding those
countries, so that distribution is permitted only in or among countries not thus excluded. In
such case, this License incorporates the limitation as if written in the body of this License.
9. The Free Software Foundation may publish revised and/or new versions of the General
Public License from time to time. Such new versions will be similar in spirit to the present
version, but may differ in detail to address new problems or concerns.
Each version is given a distinguishing version number. If the Program specifies a version
number of this License which applies to it and "any later version", you have the option of
following the terms and condi-tions either of that version or of any later version published by
the Free Software Foundation. If the Program does not specify a version number of this
License, you may choose any version ever published by the Free Software Foundation.
10. If you wish to incorporate parts of the Program into other free programs whose distribution
conditions are different, write to the author to ask for permission. For software which is
copyrighted by the Free Software Foundation, write to the Free Software Foundation; we
sometimes make exceptions for this. Our decision will be guided by the two goals of preserving
the free status of all derivatives of our free software and of promoting the sharing and reuse of
software generally.
NO WARRANTY
11. BECAUSE THE PROGRAM IS LICENSED FREE OF CHARGE, THERE IS NO
WARRANTY FOR THE PROGRAM, TO THE EXTENT PERMITTED BY APPLICABLE LAW.
EXCEPT WHEN OTHERWISE STATED IN WRITING THE COPYRIGHT HOLDERS AND/OR
OTHER PARTIES
PROVIDE THE PROGRAM "AS IS" WITHOUT WARRANTY OF ANY KIND, EITHER
EXPRESSED OR IMPLIED, INCLUDING, BUT NOT LIMITED TO, THE IMPLIED
WARRANTIES OF MERCHANTABILITY AND FITNESS FOR A PARTICULAR PURPOSE.
THE ENTIRE RISK AS TO THE QUALITY AND PERFORMANCE OF THE PROGRAM IS
WITH YOU. SHOULD THE PROGRAM PROVE DEFECTIVE, YOU ASSUME THE COST OF
ALL NECESSARY SERVICING,
REPAIR OR CORRECTION.
12. IN NO EVENT UNLESS REQUIRED BY APPLICABLE LAW OR AGREED TO IN
WRITING WILL ANY COPYRIGHT HOLDER, OR ANY OTHER PARTY WHO MAY MODIFY
AND/OR REDISTRIBUTE THE PROGRAM AS PERMITTED ABOVE, BE LIABLE TO YOU
FOR DAMAGES, INCLUDING ANY GENERAL, SPECIAL, INCIDENTAL OR
CONSEQUENTIAL DAMAGES ARISING OUT OF THE USE OR INABILITY TO USE THE
PROGRAM (INCLUDING BUT NOT LIMITED TO LOSS OF DATA OR DATA BEING
RENDERED INACCURATE OR LOSSES SUSTAINED BY YOU OR THIRD PARTIES OR A
FAILURE OF THE PROGRAM TO OPERATE WITH ANY OTHER PROGRAMS), EVEN IF
SUCH HOLDER OR OTHER PARTY HAS BEEN ADVISED OF THE POSSIBILITY OF SUCH
DAMAGES.
This product incorporates open source code into the software and therefore falls under
the guidelines governed by the General Public License (GPL) agreement.
Adhering to the GPL requirements, the open source code and open source license for
the source code are available for free download at http://global.level1.com.
If you would like a copy of the GPL or other open source code in this software on a
physical CD medium, LevelOne (Digital Data Communications) offers to mail this CD to
you upon request, for a price of US$9.99 plus the cost of shipping.