1
MODEL
ZBR-20A
Portable Bead Breaker
Toll Free: 1-800-579-8088 Web: www.zinko.com
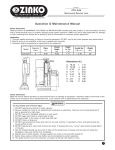
Operation & Maintenance Manual
Important Receiving Information
Inspect all parts for shipping damage. If you find any damage, notify the carrier at once. Shipping damage is not covered
by your warranty. The carrier is responsible for all costs of replacement or repair caused by shipping damage.
Description
The ZBR-20A Bead Breaker is used on all types of rims except 5 piece Earthmover rims. It is ideal for use with trucks,
farm tractors, grader, combine, and skidder tires.
Caution Remarks Used In This Manual
is only used when your action or lack of action can cause serious injury or death.
indicates a potential danger that requires correct procedures or practices to avoid personal injury.
is used to indicate correct operating maintenance procedures and practices to prevent damage to
or destruction of equipment or other property.
Safety Information
To avoid personal injury or property damage while using this product, read and follow all DANGERS, WARNINGS,
CAUTIONS, and INSTRUCTIONS that are attached to, or included with this product.
Operator Responsibility
It is the operator's responsibility to read and understand all of the following safety statements:
1. Follow the instructions of the tire manufacturer and the vehicle manufacturer when deflating, mounting,
demounting, and inflating tires.
2. These operating instructions DO NOT apply to any specific rim. Therefore, contact the rim manufacturer for the
correct procedure for your rim.
3. To avoid serious personal injury, always wear proper protective gear, such as hard hats, safety glasses, gloves,
and steel-toe shoes when using hydraulic equipment.
The Bead Breaker, and all tire tolls should be used only by persons properly trained according to
OSHA regulation #29CFR1910.177, "Servicing Single-Piece & Multi-Piece Wheels." Free copies
of this regulation are available upon request from ZINKO.
NOTE: ZINKO cannot be held responsible for damage or injury resulting from unsafe use of this product, lack of
maintenance, or incorrect product and system application. Contact ZINKO when in doubt about safety precautions or
applications.
Operating Instructions
Removing the Wheel
1. Chock the wheels opposite the jack.
2. Jack up the vehicle.
3. Crib the vehicle with safety stands or blocking devices after jacking it up.
DO NOT WORK UNDER AN UNBLOCKED LOAD.
Failure to chock the wheels and crib the vehicle can result in serious injury or death.
4. Remove the valve core; deflate tires completely.
5. Insert a thin piece of wire through the valve stem to make sure air is flowing freely and the valve stem is not blocked.
NOTE: Deflate both tires if you have dual mounting.
Always deflate tires before removing a wheel, a rim, or part of a rim, such as rim clamp or nut. If you
do not deflate the tire, the tire could explode causing serious injury or death.
6a. If you are breaking the tire bead with the wheel on the vehicle; proceed to Positioning the Bead Breaker below.
6b. If you are breaking the tire bead with the wheel off the vehicle; remove the tire/rim assembly from the vehicle and
place it flat on the ground with the gutter side up. Then proceed to "Positioning the Bead Breaker" below.
Zinko Hydraulic Jack
Model: ZBR-20A Operating Instructions (Continued)
Positioning the Bead Breaker
Position the Bead Breaker so that the wedge-shaped teeth will grab evenly under the rim flange when the clamping jaw
tightens.
NOTE: Make sure the Bead Breaker is about 30", or at least 12", to one side of the flange butt weld.
Activating the Bead Breaker
The Bead Breaker uses a long stroke and high force. Be careful not to damage or bend rim parts, such
as the flange, when using the Bead Breaker.
1. Run the air hydraulic pump so that the clamping jaw begins to tighten against the rim. Make sure the wedge shaped
teeth are placed well into the tire bead and against the rim flange.
NOTE: To grab the rim flange evenly, you may have to try several times. DO NOT force the Bead Breaker when grabbing
the flange.
2. Continue to apply hydraulic pressure until the bead breaking ram extends about 1/4" from the Bead Breaker.
3. Maintain the Bead Breaker so that it is nearly perpendicular 90 degrees to the rim. If necessary, adjust the position of
the Bead Breaker.
4. Step away from the Bead Breaker.
Always stand to one side of the rim when using the OTR Bead Breaker. Standing to one side of the
rim allows you to maintain control of the Bead Breaker.
DO NOT hold the OTR Bead Breaker when breaking the tire bead. If it is not seated properly and flies
off the rim, the Bead Breaker could cause serious injury or death.
5. Continue to apply hydraulic pressure until the bead breaking ram extends 1/2" to 3/4" from the bead breaker.
NOTE: Never try to break the tire bead with only one push. Instead, proceed to Continuing to Break the Tire Bead.
Continue to Break the Tire Bead
1. Move the OTR Bead Breaker 8" to 12" from its current position.
2. Repeat steps, starting with Positioning the Bead Breaker until the rim is completely separated from the tire bead.
Breaking the Bead on the Other Side
1. Turn the tire over on the other side.
2. Repeat all steps, starting with Positioning the Bead Breaker.
Mounting and Inflation
Jacking Up the Vehicle
1. Chock the wheels opposite the jack.
2. Jack up the vehicle.
3. Crib the vehicle with safety stands or blocking devices after jacking it up. DO NOT work under an unblocked load.
Failure to chock the wheels and crib the vehicle can result in serious injury or death.
Conversion Kits
ZBR-20B adapts to bead breaker for use with larger rim size.
1. Interchanges with the special longer adapter feet and shovel.
2. Allowing the rim size R24 to R25.
3. Jaw opens to : 6-1/8”.
4. Weight: 4.4 lbs.
Zinko Hydraulic Jack
Models: ZBR-20A Parts Breakdown
Part #
1
2
3
4
5
6
7
8
9
10
11
12
Description
Body
Spring
O-Ring
Backup Ring
End Plug
Steel Ball
Screw Pin
O-Ring
Backup Ring
Screw
Nut
Top Bar Handle
Part #
13
14
15
16
17
18
19
20
21
22
23
24
Description
Washer (Large)
Long Shaft Piston
Washer (Small)
O-Ring
Backup Ring
U-Cup Seal
Plunger
Shovel
Screw Pin
Washer
Switch (Male)
Switch (Female)
Part #
25
26
27
28
29
30
31
32
33
34
35
36
(909)989-9526
(909)989-1724
Description
Spring
Screw Pin
Right Feet
Left Feet
Screw
Claw
Axel
Link Rod
Washer
Screw Pin
Hook Screw Pin
Screw Pin
Part #
37
38
39
40
41
42
43
44
45
46
Description
Screw Pin
Backup Ring
O-Ring
Steel Ball
Spring
Screw Pin
Cylinder
Plunger
Support Bar
Handle