1
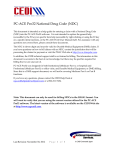
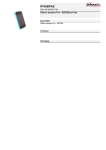
azure pcr
AccuCall
real-time results
Quick Start Guide
C
D
█ █ Running █ █ █ █ █ █ █ █ █ █ █ ♥
192.168.0.1
Front
B
A
Back
Setting up your AccuCall Node™ :
1. Connect the power supply to A and plug the network cable into B and
theother end into your local network Router.
2. Turn on the AccuCall Node using the power button .CA light should appear and
the LCD D screen will start working.
3. If the AccuCall Node is connected properly, after a few minutes the LCD screen
will display a series of numbers known as the IP address.
If you do not see the IP address, please check your Network connection and restart the
AccuCall Node.
Connecting your AccuCall Node directly to your PC:
1. Plug a network cable from B to the network port on your PC (if this port is
in use, you may use a USB to Ethernet adapter instead).
2. After a few minutes, the LCD screen will display ‘Router Unreachable’. This
indicates that the Node has switched to allow direct PC connection.
Installing the AccuCall driver software on to a PC:
1. Insert the USB key into the USB port of the PC where the software should be
installed.
Do not insert the USB key into the AccuCall Node.
2. Using Windows Explorer, open the USB drive and double click ‘Install AccuCall
Driver.exe’.
3. Follow the on-screen instructions to complete installation.
4. It is recommended that you restart the computer once installation is
complete.
By default, the AccuCall driver software will open every time you start your computer.
Analysing your first run using AccuCall:
1. Ensure the AccuCall Node is connected to the network (see previous page).
2. The driver icon AccuCall
should appear in the Windows System Tray located in the
bottom right-hand corner of your screen.
azure pcr
real-time results
a. If you cannot see it, click the Windows symbol to see more options.
b. If the Timesaver is not running at all, double click the Driver icon on
3. Double click on the driver icon.
4. Select ‘Change Configuration’ from the top right –hand corner of the screen.
5. Check that the following textboxes are filled according to:
a. Node Address: azurenode
If you are having trouble accessing the Azure Node, change the Azure Node address to the
IP address on your LCD screen (see previous page).
b. User: user
c. Password: user
The Configuration screen is also the place where you can define the folders to be monitored
and Report output type you require.
6. Then click ‘Select file to be analysed’ and follow instructions.
For routine use it may be easier to configure a monitored folder. Runs saved to this folder will
be analysed and a report generated automatically with no need to open the Driver.
By default, your reports will be saved to the My Documents folder. You can change this in the
Configuration screen.
If you have any questions, please check your User Manual.
AccuCall
real-time results
Azure PCR Ltd
59a Brent Street
London
NW4 2EA
QS001
azure pcr