1
User’s
Manual
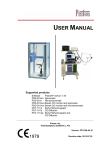
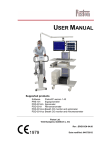
Supported devices
PDD-401
Audiometer
Piston Ltd.
1033 Budapest, Szőlőkert u. 4/b
Rev 1.02
December 21. 2011.
TABLE OF CONTENTS
Introduction ..........................................................................................................4
Introduction ........................................................................................................4
General information ...........................................................................................5
Installation.............................................................................................................6
Electric shock protection ...................................................................................6
Minimum PC configuration...............................................................................7
Installation of PDD-401 audiometer.................................................................8
Software installation ..........................................................................................9
Maintenance ....................................................................................................... 13
Device maintenance.........................................................................................13
Disinfecting comprehensive table ...................................................................13
Troubleshooting................................................................................................. 14
Possible problems ............................................................................................14
The program’s main functions........................................................................ 15
Patient database................................................................................................15
Automatic safety backup .................................................................................15
Available tests ..................................................................................................15
Test modes........................................................................................................15
User interface ..................................................................................................... 19
Icons..................................................................................................................19
User interface ...................................................................................................23
Setup.................................................................................................................... 25
Dane instytucji..................................................................................................25
Lekarze .............................................................................................................25
Language selection...........................................................................................26
Patient identification format............................................................................26
Graph settings...................................................................................................26
Devices .............................................................................................................28
Baza danych pacjentów .................................................................................... 31
User interface overview ...................................................................................31
Data input form ................................................................................................32
Patient’s personal data .....................................................................................33
Finding a patient in the database.....................................................................33
Viewing previous measurements ....................................................................34
Comment field for patients..............................................................................35
Measurements.................................................................................................... 36
General measurement process – daily routine................................................36
Patient selection ...............................................................................................37
Preparations ......................................................................................................37
Measurements...................................................................................................38
Piston Audiometry 2
Enter comment .................................................................................................39
Store ..................................................................................................................39
Printing .............................................................................................................39
Export report into graphical formats...............................................................41
Interface to information systems.....................................................................41
Calibration ......................................................................................................... 43
Measurement...................................................................................................... 45
Goal of the measurement.................................................................................45
Reference values ..............................................................................................45
Process of measurement ..................................................................................46
Signal types ......................................................................................................46
Measurement modes ........................................................................................46
PRE / POST........................................................................................................ 48
The PRE / POST measurement.......................................................................48
Retrieve measurement......................................................................................48
Report compilation...........................................................................................48
Printing .............................................................................................................48
Technical data.................................................................................................... 49
Warranty ...........................................................................................................49
Limited liability................................................................................................49
Safety instructions............................................................................................49
Informing values ..............................................................................................50
Electrical data ...................................................................................................50
PDD-401 – Audiometer...................................................................................50
Mechanical data ...............................................................................................51
Guaranteed values ............................................................................................51
List of accessories ............................................................................................51
Certificates of Quality Management System ................................................ 52
EC Declaration of Conformity ...................... Hiba! A könyvjelző nem létezik.
Appendix I.......................................................................................................... 54
Format of the patient identification field ........................................................54
Piston Audiometry 3
Introduction
INTRODUCTION
Introduction
The PDD-401 is an IBM/PC based screening audiometer for air conductive testing the hearing system.
There are two versions of the program one is the modular version and the
other one is with database management.
The modular version can be called from the host system. In this case the
host system has its own database management.
The database version has an integrated database management system.
The PDD-401 makes easy to measure the hearing level. It is well suited
for screening and following up changes in hearing level.
Thanks to the IBM/PC base it is easy to handle but at the same time offers a lot of features. During measurement the hearing level is shown in
real time. Results can be printed out even in colours.
The PDD-401 screening audiometer provides the following modes and
services:
•
•
•
•
•
•
•
Continuous signal
Impulse signal
Continuous interrupted signal
Manual mode
Ascending algorithm
Descending algorithm
Automatic sequence
Piston Audiometry 4
Introduction
General information
Information on the main components of the audiometer:
Portable device
Connecting to a laptop PC full portability is provided even in battery
mode. The audiometer takes power supply only from the USB port of the
PC
Headset
Type: Telephonics TDH 39
Speakers built into a Peltor noise protecting case with 40 dB attenuation
Noise protecting case
Type: Peltor OPTIME II
Hand switch
Robust hand switch for the patient’s feed back
Piston Audiometry 5
Installation
INSTALLATION
Electric shock protection
The safety precautions in this chapter must be followed!
Only Piston Ltd., as manufacturer, or its authorized distributor’s personnel, or the distributor’s representatives may install the lung diagnostics
device. The above mentioned companies only accept responsibility for
systems installed by them.
Before installing the lung diagnostics devices the personnel must make
sure the computer, the monitor and the printer installed as medical electronic devices comply with the standards, for the given country or the
user declares concerning this with responsibility.
Information exchange with the computer goes through USB connection.
For low leakage current relating to medical devices standards this connection is optically isolated inside the device.
Before shipping we check the device’s leakage current. The operator has
the opportunity to have the leakage current checked periodically, if he /
she finds it necessary.
The system must be installed so the examined person is at least 1.5m
away from those devices that are electrically connected to the computer
equipment.
Parts of the system (computer, monitor and printer) can only be replaced
in case of failure, modification or for any other reason, if the part to be
installed has the same electric shock protection conditions as the original
one.
The personnel installing the device will train the operator concerning operation electric shock protection. This training includes the contents of
this section. The operator verifies the training in official written form.
Piston Audiometry 6
Installation
Minimum PC configuration
The operation of the audiometric system requires a personal computer
with the following minimum configuration:
Description
Operating system
Processor for
PDD-301 family
Minimum
Windows XP
600 MHz
Processor for
PDT-111 family
1 GHz
Screen resolution
Printer
Internet connection
1024×768
Windows compatible
Recommended
Intel Celeron / Pentium 3 / Core 2
family
AMD K6 / Athlon / Duron family
Intel Celeron/Pentium 4 / Core 2
family
AMD K6/Athlon/Duron family
1280×1024
Colour
For software updates
Piston Audiometry 7
Installation
Installation of PDD-401 audiometer
The hearing test should be performed in an environment where the background noise level doesn’t exceed the 18 dB sound pressure according to
the 11th paragraph of the ISO 8253-1:1989 standard
Connect the Audiometer to a free USB port of the
IBM/PC
Connect the patient feedback switch to the Audiometer
Connect the headphone set to the Audiometer
Piston Audiometry 8
Installation
Software installation
Perform the installation from the included CD.
The most up-to-date version is available from our website:
http://www.pistonmedical.com In the Downloads / Software section.
Click on the Start menu and select Run
Click on the Browse button and
select the install program.
When installing from the CD
select the CD drive.
Find the pxp_setup.exe file in the
Programs folder.
Click OK
The install program starts
Select the preferred language for
the setup and the installed
software
Click OK
A welcome screen appears, just
click Next
Piston Audiometry 9
Installation
Carefully read the License
Agreement, click I accept the
agreement and click Next
If you do not accept the
agreement, exit the installation
You can specify the install
destination.
Click Next
You can select which part of the
program to install (experienced
users)
Click Next
You can enter the name the
program appears under in the Start
menu (experienced users)
Click Next
Piston Audiometry 10
Installation
You can select whether a
PistonXP icon should be created
on the desktop (experienced users)
Click Next
An install summary window
appears, and if all settings are
acceptable
Click Install
The install process begins
Please wait until it finishes
installing the software
After installing the software,
external components will be
installed also
The installation of the Oracle XE
Database Server / Client runs in
background and the process can
take several minutes
Please wait until it finishes
installing the software
Piston Audiometry 11
Installation
Finally USB Drivers are being
installed
Please wait until it finishes
installing the software
A window indicates the end of the
installation
Click Finish to close the install
wizard
This concludes installation
Start the program
The program automatically
detects the connected devices
Piston Audiometry 12
Maintenance
MAINTENANCE
Device maintenance
The audiometer doesn’t request any special maintenance.
Parts which are getting in direct contact with the patient like headset and
the hand switch should be disinfected after every use.
For disinfection the mentioned parts a formaldehyde-free detergent
should be used which is recommended for electronic devices.
Always follow instructions of the manufacturer.
Disinfecting comprehensive table
In the table below we comprehend which parts of the audiometer should
be cleaned and disinfected and some sample materials are given for use.
Of course always follow the regulations of the cleaning and disinfecting
materials.
Name
Material
Cleaning and disinfecting material
Patient’s feedback
switch
Unbreakable Polystyrene
Incidur spray
Headset
Unbreakable Polystyrene
Incidur spray
PVC pillow
Case
Unbreakable Polystyrene
Incidur spray
Piston Audiometry 13
Troubleshooting
T ROUBLESHOOTING
Possible problems
Audiometry
Malfunction
Diagnose
No signal in headsets Connection problem
Communication problem
The signal of the
Connection problem
hand switch is not
detected by the software
Communication problem
Fixing
Check the connection of the headset
Reconnect the device to the PC
Check the connection of the hand
switch
Reconnect the device to the PC
Piston Audiometry 14
The program’s main functions
T HE PROGRAM ’S MAIN FUNCTIONS
Patient database
The software is able to store any number of the patients and any number
of the test
Automatic safety backup
The software makes automatic safety backups according to the user definable intervals
Available tests
The air conductive hearing level of the patient can be determined by the
audiometer
Test modes
The following test modes are available:
•
•
•
•
Manual
Semi automatic ascending iteration according to Hughson-Westlake
protocol
Semi automatic descending iteration
Programmable automatic sequence
Manual mode
Frequency and the sound level is set by the user manually
Piston Audiometry 15
The program’s main functions
Ascending iteration
In the ascending iteration the sound level is raised from the unheard level
to the level when the patient indicates that the sound is heard already.
Set starting sound pressure
Frequency selection
Signal is heard?
No
Sound pressure increased by 10dB
Yes
Sound pressure decreased by 20dB
Yes
Signal is heard?
No
Sound pressure increased by 5dB
No
No
Signal is heard?
Yes
Signal is heard?
Yes
Record the sound level
Sound pressure decreased by 10dB
No
Does the number of
equivalent sound levels reach
the desired quntity?
Igen
Finished
The hearing level is defined
No
Does the number of trials
reach the prescribed quanity?
Yes
Invalid
There are not enough equivalent
hearing levels!
Piston Audiometry 16
The program’s main functions
Descending iteration
In the descending iteration the sound level is decreased from the well
heard level to the level when the patient indicates that the sound is not
heard yet.
Set starting sound pressure
Select frequency
Signal is heard?
No
Sound pressure increased by 10dB
Yes
Sound pressure decreased by 5dB
Yes
Signal is heard?
No
Record previous sound pressure
No
Does the nuber of equivalent
hearing levels reach the
desired quantity?
Yes
Finished
The hearing level is defined
No
Does the number of trials
reach the desired quantity?
Yes
Invalid
There are not enough equivalent
hearing levels!
Piston Audiometry 17
The program’s main functions
Automatic sequence
The automatic test sequence can be compiled and stored by the operator
and the hearing test will be performed according to the previously compiled sequence.
Piston Audiometry 18
User interface
USER INTERFACE
Icons
Main window
Open patient database
Open comment opinion editor
Open lung function test sub-menus
Health Level Seven (HL7) and GDT import and export functions
Open report editor, printing
Exit the program
Main window – Audiometry
Audiometry
User’s Manual
Patient database
Clear patient quick search fields
Enter new patient
Modify patient data
Store entered / modified data
Cancel changes
Piston Audiometry 19
User interface
Load all measurements from the selected meeting(s)
Load selected measurements
Health Level Seven (HL7) import and export functions
Settings
Set institute data
Doctor records
Devices’ settings connected to the PC
Program operation related settings
Display graphs and other program parts
Maintenance, safety backup related settings
Reference value calculating algorithms
List of parameters to be displayed
Service panels
Enter new doctor
Modify doctor’s data
Store entered / modified data
Cancel changes
Accept changes and close Options panel
Piston Audiometry 20
User interface
Measurement windows – Audiometry
Test of left ear
Test of right ear
Turn on microphone
Muting
Manual mode
Ascending mode
Descending mode
Impulse signal
Continuous interrupted signal
Continuous signal
AUTO
MODE
Start automatic sequence
Configuration of automatic sequence
Store results
Piston Audiometry 21
User interface
Report editor
Print preview for audiometry
Print selected measurement results
Store a report as PDF document or image
Close Report editor
Piston Audiometry 22
User interface
User interface
The mainframe software provides control of pulmonary function tests.
Zero button
Device selector
Menu
Patient data
Navigator
Frequency selector
PRE/POST
Audiogram
Sound pressure
Ear selector
Signal type selector
Test mode
Results
Device selector
The device selector indicates the connected devices. Select the device to
be used from the drop down list.
Menu
The program’s general main menu, which contains the grouped basic
functions.
Patient data
Contains the most important measurement data for the patient selected
from the database.
Piston Audiometry 23
User interface
Navigator
Controls that group the basic phases of daily routine
Frequency selector
Selection of frequency of the generated signal
PRE/POST
PRE/POST comparison can be compiled of the actually measured tests
and of the retrieved tests from database
Audiogram
Graphic presentation of the hearing level
Sound pressure
The sound pressure can be entered by numbers or by the vertically sliding control
Ear selector
The left or right ear can be selected for the tests
Signal type selector
For selection of the sound signal type
Test mode
For selection of the tests mode
Results
The result table shows the values of the actual and previous tests and the
difference of them
Piston Audiometry 24
Setup
SETUP
The Ustawienie/Opcje menu item allows customization of the system.
Settings that can be changed during measurement are also available in the
Ustawienie tab of the measurement windows.
Program settings appear grouped on the left side.
Dane instytucji
You can enter the following information at the Ustawienie/Opcje/Dane
instytucji menu item:
Institute name, Site address, Mailing address, Phone number, Fax number, Web page, E-mail address.
This data appears in the header of the printed report.
Lekarze
The doctor’s data can be entered at the Ustawienie/Opcje/Lekarze menu
item.
New doctor
Press the [Nowy lekarz] button to enter data for a new doctor.
Complete the fields.
Make sure that two doctors cannot have the same identifier.
Press the [Zapisać] button to store the entered data.
Piston Audiometry 25
Setup
Modify data
Select the doctor from the [Nazwisko lekarza] drop down list whose
data you would like to modify.
Click the [Modyfikuj] button.
Change the desired fields.
When done, press the [Zapisać] button.
You will see feedback about the success of the data storage.
If you do not wish to store the entered data, press the [Odrzuć] button.
About deleting …
To preserve consistency and for future searches, it is not possible to delete from the database.
All diagnosis has traces in the database.
Language selection
You can select the program’s language in the
Ustawienie/Opcje/Zadanie menu item.
All supported languages are displayed in English and in the specific language as well.
Select the language you would like to use.
Patient identification format
You can enter the patient identification
Ustawienie/Opcje/Zadanie menu item.
format
in
the
Format descriptions may be found in the Appendix I. (page 54) section.
Graph settings
Graph displays may be set in the Ustawienie/Opcje/Wyświetlacz menu
item.
Schemat graficzny
You can select the graph color settings:
• Ciemne tło, jasne wykresy
• Jasne tlo, ciemne wykresy
• Tak jak na wydruku (white background)
Raster
The grid may be enabled or disabled on the graph
Piston Audiometry 26
Setup
Pokaż krzywe
It can be selected for several same type measurements:
• The diagrams appear in one coordinate system.
• All the diagrams appear in different coordinate systems.
Piston Audiometry 27
Setup
Devices
Some of the parameters may seriously influence the accuracy of the
measurements.
These parameters are only shown on the user’s screens and these
can’t be modified.
These parameters can be modified in the PistonXP.ini file but only
by a trained person.
Audiometer
Select the Audiometer group in the Ustawienie/Opcje/Urządzenia
menu
Calibration
Values of the Calibration Sheet for the older series can be entered in this
window. For more detailed information please refer to the Calibration
chapter (page 43)
Ustawienie czasu
The waiting period prior to signal generation can be specified.
The waiting period is randomly set between the minimal and maximal
values.
Automatyczna konfiguracja
Fix początkowego ciśnienia akustycznego
The initial sound pressure for the automatic iterations
If this option is set, this initial sound pressure will be valid instead of the
value specified in the measuring window.
Wzrost ciśnienia akustycznego w stanie początkowym (rosnąco i
malejąco)
The initial value of the increasing sound pressure for the coarse determination of hearing level during automatic iterations
Spadek ciśnienia akustycznego w stanie początkowym (rosnąco)
The initial value of the decreasing sound pressure for the coarse determination of hearing level during automatic iterations
Liczba prób
Number of repeated trials for Rosnąco and Malejąco iterations to determine the hearing level
Liczba równoważnych progów słuchu
During Rosnąco and Malejąco iterations the hearing level is determined
repeatedly. The iteration declared to be successful when the number of
equal hearing levels reaches the value specified here.
Piston Audiometry 28
Setup
Automatyczna konfiguracja sekwencji
Select the Audiometer group in Ustawienie/Opcje/Urządzenia menu
Click ont he [Inne...] button
or
Click on the [Konfiguruj...] button at the Audiometer test window
Po raz pierwszy badane ucho
Here you can select which ear to be tested first
Rodzaj iteracji
Here you can select which type of iteration to be used Rosnąco or
Malejąco
Setting of automatic sequence can be done here as well.
For more information refer to the Automatyczna konfiguracja chapter
(page 28.).
Akceptowana różnica między pomiarem BAZA a KONTROL
A KONTROL test can be included into the automatic sequence.
The frequency of the KONTROL test equals to the frequency of the
BAZA test.
Piston Audiometry 29
Setup
After the KONTROL test the software compares the hearing level value
of the very first BAZA test. The difference of these two tests can’t exceed the specified value of this field.
Compilation of Automatic Test Sequence
Drag the desired frequency from the [Dostępne częstotliwości] list and
drop into the [Test złożony] list. For insertion the [ ] button can be used
as well.
The undesired frequencies can be dropped back to the [Dostępne częstotliwości] list or can be deleted with the [ ] button.
The compiled list of frequencies can be modified with mouse or the []
and [] buttons.
Connection of an audiometer device will be detected within 2 seconds.
Piston Audiometry 30
Baza danych pacjentów
BAZA DANYCH
PACJENTÓW
User interface overview
Main window
Quick search
Patient list
Details
Control panel
Visits
Measurements
Load
Measurement selection
Quick search
Helps find a patient.
Patient list
A list of patients meeting the search criteria.
Details
Displays the selected patient’s most important parameters for the selected
measurement.
Control panel
Basic database operations: enter new patient, modify patient data, store.
Visits
Dates of previous visits.
Measurements
A list of measurements for the selected date or measurement type.
Load
Control buttons to display the selected measurements.
Measurement selection
Measurements may be listed according to measurement type as well.
Piston Audiometry 31
Baza danych pacjentów
Data input form
Content of the Data input form can be set in the menu Ustawienie /
Opcje / Wyświetlacz / Zawartość arkusza pacjenta *
Identifying data
Accessibility
Body mass index
List of incomplete fields
Control panel
Identifying data
Group of data essentially identifying the patient: Name, date of birth, social security number, sex, etc.
Accessibility
Patient’s accessibility: Address, phone numbers, e-mail address.
Body mass index (calculated value)
The patient’s current body weight index: square of the height of the patient in meter divided by body weight
List of incomplete fields
A list of fields that either have to be completed and are still empty, or
that have been filled out incorrectly.
Control panel
Basic database operations: new patient, modification, store.
* Musisz zamknąć bazę danych pacjenta, aby zachować zmiany!
Piston Audiometry 32
Baza danych pacjentów
Patient’s personal data
The program can store an arbitrary number of patients.
Pink fields indicate fields that have to be completed.
New patient
To enter a new patient, press the [Nowy pacjent] button. Complete the
fields and make sure that two patients cannot have the same identifier.
To store the patient, press the [Zapisać] button.
You will receive feedback about the success of data storage.
If you do not wish to save the data, press the [Anulować] button.
Modify data
Select the patient to modify
Click on the [Modyfikuj] button
After modification press the [Zapisać] button
You will receive feedback about the success of data storage
If you do not wish to save the modified data, press the [Anulować] button
About deleting …
To preserve consistency and for future searches, it is not possible to delete from the database. All diagnosis has traces in the database.
Finding a patient in the database
The top section of the patient database window is the search block.
You can search based on several criteria. When those criteria change, the
program automatically lists the patients meeting the updated criteria
Normal search
Search only based on the patient’s family and surname.
Enter the patient’s name or part of it.
Piston Audiometry 33
Baza danych pacjentów
Detailed search
Click the [Szczegółowe wyszukiwanie] button.
You can refine the search criteria in the window:
•
•
•
•
•
patient‘s sex
date of birth with interval
address or part of it
doctor
identifier (social security number)
Viewing previous measurements
All previous measurements can be reloaded, so reports can be printed at
anytime.
Viewing previous measurements
To reload previous measurements:
• Select the patient
• Select the visit by date
• If you only wish to view the results of certain measurement mode select
the one from the list
• Select required measurements
If you wish to see all measurement results of a selected visit, click the
[Otwórz] button
If only certain measurements are important; click them while holding the
CTRL button down
After selection click on the [Otwórz] button!
If you wish to include further measurements to the report click the [Baza
danych pacjentów] button to reopen the Patient database.
Select further measurements and click the [Dodaj pomiar] button to include them to the report.
WARNING:
You can only simultaneously load eight measurements of the same
mode.
For this reason, the [Załaduj wszystko] button is not always available.
Piston Audiometry 34
Baza danych pacjentów
PRE / POST evaluation
To load the data for all previous visits, check the [Wszystkie pomiary]
checkbox.
This displays a patient’s all previous measurements sorted according to
the following:
• Date
• Measurement mode
• Measurement results quality
Select the results of at least two identical measurement mode, for example two FVC measurements.
Load the data as mentioned earlier.
PRE / POST measurements are detailed in the PRE / POST section (Page
48).
Comment field for patients
Comments may be entered about the patients even for every visit. All
comments are stored separately in the database and may be retrieved individually.
To enter a comment:
•
•
•
•
•
•
Open the Patient database
Selected the desired patient
Click the [Diagnoza] button to open the text editor window
Select the [Pacjent] operating mode from the list
Enter the comment
Press the [Przechowaj] button to store the comment
Previous diagnosis
All previous comments about the patient may be retrieved from the
[Historia] list.
The currently entered text is not lost when viewing a previous diagnosis.
To display the currently entered text again, select the [Pacjent] option
from the list of operating modes again.
Piston Audiometry 35
Measurements
MEASUREMENTS
General measurement process – daily routine
Start of the program
Calibration if necessary (page . 64.)
Enrolment into the database
(page 61)
Yes
New patient?
No
Retrieve from the database (page. 59)
Reload previous tests if necessary (page 62)
Test mode selection (page.71)
Setting initial sound pressure (page 70.)
Ear selection (page 70)
Frequency selection (page 72)
No
Is the test ready
Yes
Comment entry (page 75)
Store test results (page 75)
Print report (page 76)
No
End of service?
Yes
Exit from the program
Piston Audiometry 36
Measurements
Patient selection
Before starting the measurement it is necessary to enter patient data using
one of the following methods:
• Enter new patient
• Search for patient already in the database
Preparations
Device
Connection
Make sure that the device you wish to use is connected to the computer.
If not, connect the device as detailed in the Installation (6. page) section.
Selection
The Audiometer might be selected from the Device selection list.
If there are no other devices the Audiometer is selected automatically.
Parts in direct contact with the patient
It is advisable to disinfect both the headset and the hand switch after each
patient (see chapter Maintenance, page 13)
Environment
The hearing test should be performed in an environment where the background noise level doesn’t exceed the 18 dB sound pressure according to
the 11th paragraph of the ISO 8253-1:1989 standard
Patient
Recommended body position
• Sitting on a chair
• Straight back
• Level head
Directions
The hearing level test requires co-operation from the patient so it is necessary to inform and prepare the patient for the test.
•
•
•
Let know the patient about the goal and process of the test
Pay attention the proper adjustment and setting of the headset
Teach the patient how to use the hand switch. It is advisable to
monitor the proper operation of the hand switch on the screen. Select any frequency and sound level and by pushing the hand switch
observe the hand switch state icon.
Piston Audiometry 37
Measurements
Measurements
Detailed description of the hearing test can be found in the Calibration
procedure of the audiometer depends on the serial number of the device.
Devices from the newer series don’t need manual calibration because
correction Sound Pressure Levels are stored in the device.
Device with serial number of the interval 401-U-2004-001 to 401-U2008-118 needs entering the Sound Pressure Levels for all frequencies
manually. Calibration sheet is included to the set of the audiometer.
Please refer to the following paragraph.
Select the Audiometer group in the Ustawienie/Opcje/Urządzenia
menu
Select the desired SPL correction option from the [Standard] rolling
down:
• IEC 645-1
• SABS 0154
Most accepted standard
Standard for South African Republic
To return the original settings push the [Domyślnie] button
Enter into the [SPL mierzone] column values from the Calibration sheet
„Average Measured SPL”.
Please pay special attention during entering the correction values because
these values strongly influent the accuracy of the device.
We don’t take any responsibility of the consequences of the faulty entered SPL correction values.
Piston Audiometry 38
Measurements
If there is no other regulation in the Quality Management System of the
user it is advisable to validate the audiometer annually. Validation can be
done only by a calibrated sound pressure meter.
The periodic validation and recalibration of the audiometer has to be
done in the similar way as it was done during the very first installation.
To save modifications push the [Wykonano] button or to cancel modification push the [Odrzuć] button.
Measurement chapter (page 43)
Enter comment
A separate comment may be entered for all measurement modes.
All comments are stored separately in the database.
• Click on the [Diagnoza] icon to open Kreator diagnozy
• Select the measurement mode or the Patient mode from the list to
which you would like to add a comment
• Enter the comment
• Press the [Przechowaj] button to store the comment in the database attached to the measurement
Previous comments
Previously created comments for the given measurement mode can be
viewed anytime in the [Historia] list. The currently entered comment is
not lost when viewing a previous or another measurement modes’ comments. To display the comment select the measurement mode you would
like to edit from the list.
Store
To store curves marked Visible and Questionable, press the
[Przechowaj] button
Successful data storage returns a feedback
Printing
PRE / POST
The system can print two types of reports:
• Normal report: Three measurements’ results simultaneously.
• PRE / POST report: Two measurements’ results simultaneously and
their difference in absolute and percentage format.
Customized reports
The printed report has the following parts:
• Header
Piston Audiometry 39
Measurements
• Parameter table
• Graphs
• Comment
The header is the only fixed part of the header, the other three may be
turned on and off arbitrarily, only the desired parts make it into the report.
Highlight rows
To highlight odd rows at colour or grayscale printing select the [Zaznacz
nieparzyste wiersze] checkbox
Simplified report
To print only the best measurements of all modes select the [Tylko najlepszy pomiar ] checkbox
Printing
Before printing measurement results have to be stored so the printed reports can be followed up.
•
•
•
•
•
Click the [Drukuj…] icon in the main menu
Select the graphs, tables and manual diagnosis you would like to print
Select the report language
Select the report type: normal or PRE / POST
Click on a button in the [Podgląd wydruku] section to view the print
preview
• After making the necessary settings, click the [Print] button
During printing graph display is similar to on-screen display:
• Complete curve or only the representative curve section
• One or more graphs
Piston Audiometry 40
Measurements
Export report into graphical formats
This feature provides export of the printed report into the commonly used
graphical formats. Exported reports can be stored and for example sent as
an attachment to an e-mail.
Supported formats
•
•
•
•
•
PDF, Adobe Acrobat document
GIF picture
JPEG picture
BMP Windows Bitmap picture
EMF and WMF vector graphics
Settings
The Export function is in the Report edition window
•
Click on the [Drukuj…] button at the main menu
Contents and the format of the exported report are fully identical to the
printed version. More information can be found in the chapter Printing on
page 39.
Export procedure
Prior to printing and exporting results of measurements have to be stored
in order to provide reliable traceability
•
•
•
•
•
•
Click on the [Drukuj…] button at the main menu
Select graphs, tables and text fields to be exported
Select the language of the report
Select the type of the report PRE / POST
For previewing the report click on any button at the [Podgląd wydruku] section
After setting click on the [Przechowaj] button
Exported graphs are fully identical to the graphs shown on the screen:
•
•
Full curve or only the important part
One or more graphs
Interface to information systems
Interface to frame systems
Our system provides communication according to the more commonly
used protocols:
•
•
Health Level Seven (HL7, USA)
Geräte Daten Träger (GDT, Germany)
These protocols provide exchange of the patient data and measured results between the lung diagnostics equipment and the frame systems.
Piston Audiometry 41
Measurements
These protocols are predefined by the System administrator consequently
can not be modified by the user.
Receiving the request for tests
Click on the [LINK…] button in the main menu and open the Import/Export window
According to your frame system type click one of the [HL7] or [GDT]
buttons in the Import section in order to receive a Request for tests
If a Request for test is available the system automatically acquires it and
lists all the requested tests
Exporting
Click on the [LINK…] button in the main menu and open the Import/Export window
According to your frame system type click one of the [HL7] or [GDT]
buttons in the Export section. The system automatically exports the results of the tests.
Filling special forms
The system provides filling customer defined forms. Templates of the
forms can be compiled in any ASCII format (HTML, XML, CSV etc.).
Compilation of the form is the competence of the System administrator.
Filling a form
User may select a form from the preinstalled templates.
Click on the [LINK...] button in the main menu to open the Import/Export window
Click on the [HTML] button to open the Raport indywidualny window
Select the desired template from the a [Szablony] list
Click on the [Wybierz] button and the form is automatically filled out
Piston Audiometry 42
Calibration
CALIBRATION
Calibration procedure of the audiometer depends on the serial number of
the device.
Devices from the newer series don’t need manual calibration because
correction Sound Pressure Levels are stored in the device.
Device with serial number of the interval 401-U-2004-001 to 401-U2008-118 needs entering the Sound Pressure Levels for all frequencies
manually. Calibration sheet is included to the set of the audiometer.
Please refer to the following paragraph.
Select the Audiometer group in the Ustawienie/Opcje/Urządzenia
menu
Select the desired SPL correction option from the [Standard] rolling
down:
• IEC 645-1
• SABS 0154
Most accepted standard
Standard for South African Republic
To return the original settings push the [Domyślnie] button
Enter into the [SPL mierzone] column values from the Calibration sheet
„Average Measured SPL”.
Please pay special attention during entering the correction values because
these values strongly influent the accuracy of the device.
We don’t take any responsibility of the consequences of the faulty entered SPL correction values.
If there is no other regulation in the Quality Management System of the
user it is advisable to validate the audiometer annually. Validation can be
done only by a calibrated sound pressure meter.
Piston Audiometry 43
Calibration
The periodic validation and recalibration of the audiometer has to be
done in the similar way as it was done during the very first installation.
To save modifications push the [Wykonano] button or to cancel modification push the [Odrzuć] button.
Piston Audiometry 44
Measurement
MEASUREMENT
Goal of the measurement
The air conductive hearing level at different frequencies can be determined by the device.
Reference values
The system displays the Statistical Distribution of hearing thresholds as
function of age according to the NF EN ISO 7029:2000 standard.
Meaning of the curves:
There is a percentage value at the right side of all curves which shows the
ratio of the population which has better hearing ability.
For example 75% means that ¾ of the population have a better hearing
ability.
Piston Audiometry 45
Measurement
Process of measurement
Measurement modes:
•
•
•
•
Manual mode
Ascending iteration
Descending iteration
Automatic sequence
Signal types
•
•
•
Continuous
Impulse
Interrupted
When the selected signal is generated and the signal is audible for patient
the patient has to push the hand switch.
If there is a proper feedback the actual sound level is stored for that frequency.
Signal types
Continuous
Signal is generated continuously.
This signal type is available only at Manual mode.
Impulse
The signal generated only once for adjustable time (typically 1-2 seconds)
This signal type is available for all measurement modes.
Interrupted
The continuous signal is interrupted and attenuated by 20 dB.
This signal type is available only at Manual mode.
Measurement modes
Manual mode
Sound pressure and frequency can be set freely
Select Manual mode
Select signal type
Set the desired sound pressure
Select ear
Set frequency
Piston Audiometry 46
Measurement
Tip:
If you click with the mouse at any point of the audiogram signal whit
the selected frequency and sound pressure will be generated right
away
Rosnąco mode
During Rosnąco mode a week inaudible signal generated and the sound
pressure level is incremented till the moment the patient indicates that the
signal is audible already.
Select Rosnąco mode
Set the initial sound pressure
Select ear
Set frequency
Malejąco mode
During Malejąco mode a strong surely audible signal generated and the
sound level decreased till the moment the patient indicates that the signal
is inaudible already
Select Malejąco mode
Set the initial sound pressure
Select ear
Set frequency
Automatic sequence
Automatic sequence provides full automatic hearing level determination
for both ears.
For configuration of Automatic sequence please refer to the
Automatyczna konfiguracja sekwencji chapter (page 29)
To start the measurement push the [AUTO MODE] button
Evaluations of the results
During Automatic sequence an icon is shown after each step
Successful iteration
Unsuccessful iteration
Successful KONTROL test
Unsuccessful KONTROL test: difference between the BAZA
and the KONTROL tests exceeds the allowed tolerance
Unsuccessful KONTROL test: any of the BAZA and/or the
KONTROL test was unsuccessful
Piston Audiometry 47
PRE / POST
PRE / POST
The PRE / POST measurement
The system supports measurement comparison – previous measurements
may be compared against measurements made later:
•
•
•
•
•
Select the patient
Select and load the PRE (or previous) measurements
Measure the current, POST values with the patient
Select the two measurement to be compared
Print the PRE / POST report
Retrieve measurement
Perform the steps in the Baza danych pacjentów (page 2.) section:
•
•
•
•
Open the database
Select the patient
Select one or more measurements
Load the measurement results
Max. 8 measurements may be displayed simultaneously, so if you loaded
6 measurements, you can perform 2 more measurements.
Notice
The program also makes it possible to print the PRE / POST report from
the actually performed measurements.
Report compilation
Procedure of the compilation of PRE / POST report:
•
•
Select two measurements from the PRE / POST list
Upon selection the result table will be refreshed automatically
Printing
Printing is identical to the regular report automatically a PRE / POST report will be printed out
Piston Audiometry 48
Technical data
T ECHNICAL DATA
Warranty
The device complies with the effective Technical Specifications.
The manufacturer guarantees the product according to the terms of the
Installation/Delivery protocol.
The warranty does not cover post-delivery careless shipping, unprofessional storage, violent damaging, abnormal operation, unprofessional operation, inefficient protection against external effects, natural disasters, or
not following the contents of the User Manual.
Check package condition after delivery.
If packaging is damaged, notify the carrier and Piston Ltd., or its
representative.
Limited liability
Piston Ltd. and its carriers, according to the valid laws, do not accept any
responsibility for any individual, unforeseeable, direct or indirect damages (including loss of business profit, interruption of business activity,
loss of business data, or any other damages due to financial loss), resulting from the use or non-usefulness of the product.
Safety instructions
To avoid possible damages and accidents, please pay attention to the following safety instructions:
•
•
•
•
•
•
•
•
•
•
•
Make sure the mains voltage is the same as that on the product label
Make sure the connection cable is not damaged
Take care of your device according to the maintenance section
Only use the device according to the manual
Do not use any accessories not recommended for the device
Store the device in a dry place
Keep the cable away from heat source, sharp objects, rough surfaces
and check the cable’s good condition
Do not expose the device to direct sunlight or strong light (more than
1500 lux)
Do not use the device in a highly dusty environment
Do not use the device in a highly vibrating environment
Take care to ensure the current environmental conditions
The device complies with the contents of the detailed standards in the
Hiba! A hivatkozási forrás nem található. section (Hiba! A
könyvjelző nem létezik. page).
Piston Audiometry 49
Technical data
Shipping conditions
Air temperature:.....................................................-30 °C ÷ +60 °C
Relative humidity: ...................................................... 10% ÷ 100%
Atmospheric pressure:......................................... 500 ÷ 1060 mbar
Storage conditions
Air temperature:........................................................ 0 °C ÷ +50 °C
Relative humidity: ........................................................ 10% ÷ 85%
Atmospheric pressure:......................................... 500 ÷ 1060 mbar
Operating conditions
Air temperature:....................................................+10 °C ÷ +40 °C
Relative humidity: ........................................................ 30% ÷ 75%
Atmospheric pressure:......................................... 700 ÷ 1060 mbar
Informing values
Expected lifetime
Devices .................................................................................. 8 years
Electrical data
The connected computer’s and printer’s electrical data is found in the respective manufacturer provided specifications.
The following values apply only to the Piston Ltd. manufactured devices:
PDD-401 – Audiometer
PC connection ....................................................................USB 1.1
Power........................................... Does not require external power
Maximal supply current .................................................... 360 mA
Piston Audiometry 50
Technical data
Mechanical data
PDD-401 – Audiometer
Size: ......................................................L 150 * W 82 * H 45 mm
Weight including headset:.......................................................960 g
Headset:............................................................................... TDH 39
Noise attenuation of protecting case: .................................... 40 dB
Expected lifetime of the device: .......................................... 5 years
Step of sound pressure:............................................................. 5 dB
Frequencies: ........................ 125Hz, 250Hz, 500Hz, 750Hz, 1kHz
........................................ 1,5kHz, 2kHz, 3kHz, 4kHz, 6kHz, 8kHz
Sound pressure level:.................................-10dB HL - +110dBHL
Guaranteed values
PDD-401 – Audiometer
Total harmonic distortion:....................................................... < 1%
Accuracy of frequency: ........................................................... ±1%
List of accessories
Included accessories
The current Shipping contract contains the list of accessories included in
the purchase price.
Optionally purchased accessories
The following information must be provided when ordering accessories
and disposables:
•
•
•
•
Description
Type
Part number
Device type and serial number for which the accessories are used
Piston Audiometry 51
Certificates of Quality Management System
CERTIFICATES OF Q UALITY MANAGEMENT SYSTEM
Piston Audiometry 52
Certificates of Quality Management System
•
Piston Audiometry 53
Appendix I.
APPENDIX I.
Format of the patient identification field
The format of the patient identification filed can be any free text or some
predefined format according to a special mask.
If this mask is defined the ID field is compulsory to fill during adding a
new patient. Otherwise the field can be left empty.
!
If a ! character appears in the mask, optional characters are represented in
the text as leading blanks. If a ! character is not present, optional characters
are represented in the text as trailing blanks.
>
If a > character appears in the mask, all characters that follow are in uppercase until the end of the mask or until a < character is encountered.
<
If a < character appears in the mask, all characters that follow are in lowercase until the end of the mask or until a > character is encountered.
<>
If these two characters appear together in a mask, no case checking is done
and the data is formatted with the case the user uses to enter the data.
\
The character that follows a \ character is a literal character. Use this character to use any of the mask special characters as a literal in the data.
L
The L character requires an alphabetic character only in this position. For
the US, this is A-Z, a-z.
l
The l character permits only an alphabetic character in this position, but
doesn't require it.
A
The A character requires an alphanumeric character only in this position.
For the US, this is A-Z, a-z, 0-9.
a
The a character permits an alphanumeric character in this position, but
doesn't require it.
C
The C character requires an arbitrary character in this position.
c
The c character permits an arbitrary character in this position, but doesn't
require it.
0
The 0 character requires a numeric character only in this position.
9
The 9 character permits a numeric character in this position, but doesn't
require it.
#
The # character permits a numeric character or a plus or minus sign in this
position, but doesn't require it.
:
The : character is used to separate hours, minutes, and seconds in times. If
the character that separates hours, minutes, and seconds is different in the
regional settings of the Control Panel utility on your computer system, that
character is used instead.
/
The / character is used to separate months, days, and years in dates. If the
character that separates months, days, and years is different in the regional
settings of the Control Panel utility on your computer system, that character
is used instead.
Piston Audiometry 54