1
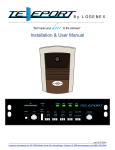
Basic User Guide for MX –
a collaborative content management system for revisionary systematists
v. 1.0 by Johan Liljeblad <[email protected]> Dec 19, 2006
Index
Introduction
Requirements
Overview
Auto-complete picklists
Taxon names
OTU’s
Images
Characters
Ontology
Matrices
Coding
Exporting and working off-line
Further help and documentation
Acknowledgments
1
2
3
4
5
6
7
7
11
16
17
19
20
20
Introduction
With the chalcid Tree of Life project we are aiming at resolving the phylogeny for the superfamily Chalcidoidea
at the subfamily-level, including also some key lower-level taxa such as Idioporus and Coccobius. The study is
mainly based on adult external morphology with additions from life-history and behavior. There are also some
internal morphological characters included as well as features of the larva.
By collaborating through MX we aim at keeping all characters and codings in one place, building one
large matrix (Fig. 1) for anyone involved to analyze and ultimately expand upon. This means we will have to
agree on one set of main characters (Fig. 2). Any user can make their own customized characters, character lists
Fig. 1. The full matrix in grid view.
–1–
Fig. 2. Listing all characters.
and matrices, but at a certain point in time there must be
one main set which cannot be modified further. This, to
ensure that codings reflects the adequate characters state
definitions.
Requirements
If you haven’t already, download the Firefox browser
from http://www.mozilla.com/firefox/. Install and make sure
Javascript is allowed (should be so by default). It seems
MX is currently not compatible with the Firefox extension NoScript even if you set it to allow everything, including Javascript. This is an extension you need to actively install, so if you haven’t heard about it you need
not worry.
You may have success with other browsers but we
Fig. 3. Login screen.
–2–
Fig. 4. Choose a project.
cannot guarantee it or tell to what extent. You might also find browsing the site difficult unless you have a screen
resolution of at least 1024x768. We think, however, that this is a reasonable requirement these days.
Overview
MX, short for matrix, is essentially a custom systematics database built to be accessible over The Internet. There
are also a few features available to facilitate offline work, be it on a computer or plain paper.
Login: Go to http://peet.tamu.edu/ and enter your username (Login) and Password (Fig. 3). After you have
successfullly logged in for the first time you should change your password as soon as possible. You do this by
going to http://peet.tamu.edu/account/change_password
Choose project: Click on Chalcidoid Morphology (Heraty Lab) (Fig. 4). Once you have chosen your project
you will find that everything is organized into categories. These are available through a row of tabs at the top of
the page (Fig. 5). I will first introduce the ones that are of more direct importance for our project.
Everything centers around the OTUs (Fig. 5), or Operational Taxonomic Units, which can be either described or undescribed species, represent a particular specimen or even a unique user’s interpretation of a single
specimen. If you like, this could also be a way to represent a higher level taxon, such as the ground-plan of a family.
When you create a new OTU you assign it to a Taxon name (Fig. 6) at some level of hierarchy. If it is an
undescribed species in an undescribed genus you can simply say it is a species belonging to a select subfamily
if that is the level you feel confident of. If the species is already described you need to make sure that the taxon
name is already entered — same goes for any name, but everything from subfamily and up is already in there. If
you add new names you should use John Noyes’ Universal Chalcidoidea Database located at http://www.nhm.ac.uk/
research-curation/projects/chalcidoids/. If not, make sure you are basing your entries on well documented sources.
Characters (Fig. 2) currently contains a list of characters that is the result of further work on the list that
came out of the Workshop in Riverside 2005. The list is fully editable and you can also add and delete characters
Fig. 5. Tabs and OTUs.
–3–
Fig. 6. Taxon names.
here. Each character is defined by a number of states, a character description and any number of figures for both
states and the character in general. Characters can be assigned to groups for more convenient access to data. You
access these groupings through the Character groups link on top of the page in figure 2. You can also show the
whole list sorted by group through the List by character group link to the top of the page. The Ontology is basically
a way to maintain a list of morphological terms with definitions, synonyms, preferred usage, etc.
To build a matrix (Fig. 7) you just give it a name and then add to it a set of OTUs and a set of characters.
From the matrix you can now code the characters for the OTUs. There are several ways to do this - either by clicking a cell in the matrix or by one-click coding; one-click you can use to code one OTU for all characters or, vice
versa, one character for all OTUs. Once you are done coding you have the option of exporting to either NEXUS
or TNT format so you can analyse the data.
When you are working in MX you can often find some extra help by clicking the help link located in the
upper right-hand corner.
As you can see, there are also the categories Content, Material, DAN, Refs, Associations and Keys available. I will not describe them here as they are of minor importance for the chalcid morphology project.
Auto-complete picklists
You will encounter auto-complete picklists (Fig. 6 & 8) every time you enter something into a light blue box with
green borders. These work as a way of quickly finding something. A list will pop up almost instantly when you
start entering text in this box. The list is composed of all entries that contain – not only start with – that particular
combination of letters. It will get more exclusive as you enter more characters. Once it is short enough you select
the item of your choice. Important: you cannot simply type in the full word. You need to pick from the list
even if you know exactly what you are looking for!
Taxon names
When accessing taxon names by clicking on the corresponding tab (Fig. 6), you will find that the listing is sorted
–4–
alphabetically with all family-level names first, followed by all genus-level names and last all species-level names
sorted by the genus they belong to before epithet.
The fastest way of finding an existing name is to enter it into the blue box with green borders that you find
above the listing and then choose from the auto-complete picklist. E.g., if you enter Chalcid, a list of six name will
appear almost instantly. If you want to see the full record of one of these, you just select it and click the show but-
Fig. 7. Matrices.
Fig. 8. New taxon name.
–5–
ton. From here you can now view the information or go one step further and edit it.
The first thing you need to do whenever you add a new taxon name, is to make sure its parent, the name
immediately above it in the taxonomic hierarchy, already exists. Otherwise you will have to create that name first.
There are only a few things that are among the minimum requirements: Taxon name, ICZN-group and the aforementioned parent. The rest can be entered later if need be.
OTUs
The first page you see is a listing of all current OTUs in alphabetical order by taxon name (Fig. 5). To find an OTU
you either choose one from the list or enter enough of one of its associated names (Taxon name, OTU name, Manuscript name or Matrix name) to make it appear in the auto-complete picklist. You can then view or edit the data.
Creating a new OTU is pretty straightforward. Once you have made sure that the taxon name you want
to assign your OTU to already exists, you start by clicking the New OTU link at the top of the page (Fig. 5). On
the new page (Fig. 8) the top-most blue box is where you choose the taxon name you want to assign to your new
OTU. If, e.g., your OTU is an undescribed species you would have chosen here the genus it belongs to. You then
Fig. 8. New OTU.
proceed to check the box next to Is the OTU a child of the taxon name? Now, give your OTU a name, specify which
ICZN group (in this case species) it belongs to and click create to be done with the minimum amount of information required. You can easily add any extra information later if you want to. Matrix name, e.g., is only needed if
you want something else than the OTU name to appear in the matrices. Do not enter a manuscript name as Name.
These should only be entered in the corresponding box.
–6–
Images
I will treat this section before the characters since you need to submit images here (or to MorphBank) before they
are available to illustrate characters and states within MX. For now, all you need to know is about the defualt images subsection you see when clicking on the Images tab.
The default view shows a list of images in thumbnail format, sorted by ID# (Fig. 9). The first one is smaller because
it is linked from MorphBank (see Box 1) while the other three are stored within MX. Simply click on a thumbnail
to view details or click the edit description, edit or delete links depending upon what you want to do.
I am here assuming that uploading new images will mostly be with the primary purpose of illustrating a character
or a character state. If you want to add in arrows like in the example images in figure 9 you have to do so before
uploading the image. Also, if you keep the image size down and save it to a compressed format like jpeg, pages
with the illustrated characters will load faster than if you use full size SEM’s like TIFF-files.
You can see an example of a filled out page (Fig. 10) after you have clicked the New image link in figure 9. There
is very little information that is required but things like Originally taken, Technique and Copyright holder are always
useful. You do, however, need to assign the image to a particular OTU and, hence, taxon name. You can create the
Fig. 9. Images.
OTU here but you need for the taxon name to already exist. In case you want to use an image that does not belong
to any particular (or single) OTU there is nothing inherently stopping you from creating a dummy OTU for these.
I suggest you assign such an OTU to Chalcidoidea Parasitica simply.
Characters
From the initial list of characters (Fig. 2) you can either just browse and pick one or search by typing part of its
name in the blue box, choose from the auto-complete picklist and click show. Having made your choice you will
be taken to a new window looking something like in figure 11. There is a heading with the character name below
which you will find first the states with any figure examples. This is intended to give you immediate access to the
state definitions when you view a character. Hopefully you will not have to, but you can easily remove a state (the
x to the right of Fig) or add a new one in the box immediately below the existing ones: Add new state.
–7–
Box 1. MorphBank: Biological image databasing @ http://www.morphbank.net/
MorphBank is an open web repository of images serving the biological research community. It is currently
being used to document specimens in natural history collections, to voucher DNA sequence data, and to
share research results in disciplines such as taxonomy, morphometrics, comparative anatomy, and phylogenetics. MorphBank can serve as a virtual reference collection of named organisms or a resource for comparative morphological study; new use cases are continuously added. Each image in the database is associated with fully searchable text information, and images can be downloaded in several different formats.
MorphBank is open to any biologist interested in storing and sharing digital images of organisms. A major
advantage of MorphBank is that images and data associated with them are maintained in a system based
on open standards and free software, facilitating the development of tools for image uploading, retrieval,
annotation, and related tasks. The MorphBank team is currently working on a range of such tools. The MorphBank team is also working together with other developers on connecting their software to the MorphBank
system.
Any image submitted to MorphBank is meant to eventually become available free for non-commercial use.
There is a suggested maximum time-limit of five years during which you can chose to either keep the image
to yourself or share it with other users via groups such as the HymAToL group. Currently, we are depositing
all our images for use by the Heraty Laboratories group.
As of writing there are 57,687 images in MorphBank, of which 10,708 are of Hymenoptera.
Each image, or collection of images, have their own unique ID which can be used for permanent links from
another source such as a publication or mx. You can also link directly to actual image files, such as a jpgformat thumbnail or a fullscale TIFF. This last option is what can be used in mx. Note, however, that any
such image used for our project has to be available for everyone directly from MorphBank; either by being
fully published or belonging to a group accessible by all the chalcid project members.
–8–
If you want to add a new figure and/or edit the existing ones, here is where you click on Fig located to the
right of each state definition. A window will pop up, looking something like the one in figure 12. You can change
the position or remove an existing figure by using the up, down and x links. To add a figure you search for it by
finding the right OTU (and optionally also Part and View). After hitting Search you will be presented with any
matching images immediately below. Click on the image of your choice, drag it to the topmost elongate window
and drop it there when you see it being selected as indicated by changing color to green. Your chosen image will
now appear next to any already existing figures where you can add a caption and change its position. Remember
to click Edit to save before clicking close at the top of the pop-up. You will then have to refresh the page in order
to view any changes.
A note about the unassigned character state: this is intended as a way of documenting why a specific OTU
not is assigned any state. More on that in the section on coding.
Further down on the page (Fig. 11) we find information about the character, the most important being the
actual Document character description. It can be accompanied by a figure which you attach/edit/remove in a manner analogous to the state figures. To do so, you click the Fig link found in the lower part of the top left menu.
In order to edit states you choose Edit while the edit expanded is better suited for editing the actual character
description text. Both options are found in the menu to the top left. The former should be fairly self explanatory
(even though it is strongly recommended to read the online help before attempting to merge states/codings). The
latter may need some further detailing. The layout is simple, since the idea is to facilitate text editing. Instead of
allowing for the use of HTML (which could impose both layout and security problems) MX gives you the option
to use Textile: http://en.wikipedia.org/wiki/Textile_(markup_language). This is an easy way to get access to things like
Fig. 10. New mx image.
–9–
– 10 –
Fig. 11.
Single character show.
Fig. 12. State figures.
bold and italics in the character description text. E.g., the previous sentence would be written like this using textile: This is an easy way to get access to things like *bold* and _italics_ in the character description text.
You can read more and find links in the above Wikipedia-link on Textile.
Ontology
One of the strengths of databasing is the possibility to cross-reference. In our project we have the potential to
take advantage of this by accessing the Hymenoptera Ontology Project. Whenever you are viewing a character
description (Fig. 11) you can click markup description in the menu to the left and MX will highlight all words in
the description with a corresponding entry in the ontology. The highlights are links, each of which will take you
to a definition on a public webpage also powered by MX (Fig. 13). Furthermore, there is a private part which is
available to all users of the chalcid project (Fig. 14). Just click Change projects at the top right of a page and choose
Hymenoptera Ontology located immediately below the chalcid project in figure 3. There is no need to log out first,
and you can even access both projects and have multiple windows open simultaneously.
The first view presents you with a choice of what to do. Typically you will want to either list all the terms
(Fig. 14), search for term through the blue box, add a new term (Fig. 15 & 16) or edit an existing definition. All these
procedures are pretty straightforward and all you really need to know is that when creating a new term you are not
required to enter highest taxon name to which this term applies (Fig. 16) although we would recommend it. A term can
also have a number of relationships such as the terminal button being part_of the antenna. If we would later decide
on another name for terminal button this can be indicated by it being a synonym_of, e.g., reduced apical flagellomere.
– 11 –
Fig. 13. Public ontology.
Fig. 14. Listing terms.
– 12 –
Fig. 15. New term.
Fig. 16. Show term.
Or the entry could simply be destroyed.
There is actually an ontology part of the chalcid project too, but everything is set up so that the chalcid
project is accessing the collaborative general ontology rather than the local version which is accessible for our
project only. This way we can make use of the many already entered terms.
– 13 –
Fig. 17. Matrix information.
Fig. 18. Matrix OTUs.
Fig. 19. Matrix characters.
– 14 –
Fig. 20. Coding by OTU.
Fig. 21. Coding by character.
– 15 –
Matrices
Now that we have a list of characters and know how to create our OTUs we are set to create matrices. The first
thing to understand, however, is that the codings are not stored in the actual matrices. If you change how a certain
OTU is coded for a certain character it will change everywhere where this combination of OTU and character
occurs. This also means that if you code subsets of either characters or taxa and then combine them into a larger
matrix, all codings will show there too. Since large matrices can be problematic both when it comes to layout and
computer resources, smaller subsets are recommended when carrying out the actual coding.
When choosing the Matrices tab you get a listing of all currently available matrices (Fig. 7). If you want
Fig. 22. Grid coding.
Fig. 23. Tagging a coding.
– 16 –
Fig. 24. Grid tags.
to start from scratch and create a new matrix you simply click New mx in the top left corner. All you have to do at
the first step is give it a name. Next, you are presented with some basic information and a few options (Fig. 17).
Basically, in the menu to the left, you click the OTUs link to add (or code by) OTUs and characters to add (or code
by) characters. If you have created groups of OTUs and/or characters you can add those whole groups here also.
When you add something, it shows up in a list below the boxes used for adding (Figs 18 & 19). There are links to
change the position of the OTUs if you like. Important: once you are done adding characters you need to click
on Sort characters as seen in figure 19. No need to do anything more, but if you like you can rearrange the order of
the characters also.
Coding
Now we are ready to start coding. There are three ways of doing this: by OTUs (Fig. 20), by characters (Fig. 21) or
Fig. 25. A character group.
– 17 –
by viewing the whole matrix (grid coding, Figs 1 & 22).
To code a specific OTU for all characters you click (code) to the right of this OTU in the matrix OTU view
(Fig. 18). This will take you to the one-click coding view (Fig. 20) where you simply click on the appropriate character state in the list. This will immediately take you to the next character. If you need more information about any
character you can open a new window showing the character description (see Fig. 11) by clicking the id no. next to
the character name. Note: both this and the following type of one-click coding do not clear any previous codings.
You can, however, see if there are any such previous codings by noting if any state has the Tag link after it. Only
actual codings can be tagged and are therefore the only ones with the Tag link.
Coding all OTUs for a specific character works in the same way as coding by OTU. Click (code) next to
the character name in the matrix character view (Fig. 19) to get to the one-click coding by character (Fig. 21). When
Fig. 26. Detailed character list.
– 18 –
you click a state you are taken to the next OTU. The only difference from OTU coding in the example is that only
one of them is showing a character with illustrated states. Note also that you can only assign a single state this
way. If you need to enter multiple states you need to use the following, third alternative.
Grid coding is accessed through the top left menu. There are two views: the actual grid (Fig. 1) and the
coding (Fig. 22). You will notice, in the former, that any OTU or character matrix name provides a link to more information about the item. Also, positioning the mouse cursor over any cell will show you the corresponding OTU,
character and coding in clear text immediately above the grid (see Fig. 1). The latter view (Fig. 22), is what you
see whenever you click on a cell in the matrix. Here is where you change the coding by checking the appropriate
boxes and hitting submit, but potentially also by adding a Tag to an already existing coding.
Tags can be used throught MX to attach notes and comments to various data. Here, we use tags specifically
in order to differentiate between different kinds of missing data. This is the reason why every character has an
unassigned state. Tags can only be added to existing codings. Note that only state unassigned has a Tag link next
to it in Figs 22 & 23 and is also the only state with its box checked. We make the following distinctions:
UNCODED simply means any untouched cell. These are symbolized by a long dash in the grid view.
UNASSIGNED is a general term to denote any of the three following until explicitly specified.
INAPPLICABLE means that the character does not apply for this taxon, like features of veins of
apterous insects. This, and unknown, is coded by a short dash.
UNKNOWN means there is no information available, but at least someone had a look at it.This and inapplicable are coded by a short dash.
UNDECIDED means someone had a look but cannot decide for a coding. This could, at least in theory, be
indicated by checking ALL states of the character for this taxon (except unassigned).
UNCERTAIN is when two or more states are checked because the person that did the coding couldn’t decide. Undecided could therefore be viewed as a special case of uncertain.
POLYMORPHIC is when two or more states are checked because all these states apply to the taxon (e.g. in different
forms such as sexual and parthenogenetic generation females).
Unknown and inapplicable both need a tag to be distinguishable. The same is true for uncertain and polymorphic with the difference that you will have to arbitrarily choose one of the coded states to attach the tag to. Undecided, too, needs a tag in order to be unambiguously coded and not construed as fully polymorphic.
When you click Tag you get a pop-up window (Fig. 23), from the first box of which you pick the desired
keyword. Proceed to click create unless you want to add something into the Notes field. The resulting tagged coding will look like in figure 22.
In order to quickly find out which codings have a tag associated with them you choose the grid tags view
(Fig. 24). A highlighted cell with a T indicates a tag, and clicking it will take you to the full view of that coding
(Fig. 22 again).
Exporting and working off-line
These two subjects are somewhat connected since you need to export data in order to work off-line. The first thing
that comes to mind may be exporting the finished matrix for phylogenetic analyses in software like PAUP and
TNT. While working with any matrix you simply click on either NEXUS or TNT to view the corresponding file
format as text on a page. Copy this text, paste into a simple text document and save with a suitable name and you
are done. For the TNT format there is even an option for saving to a text file directly.
To enable coding off-line we suggest either printing the matrix while in grid coding view or, alternatively,
exporting and printing, e.g. the NEXUS file format using Mesquite. You can of course also code directly into the
application of your choice that can handle any of the NEXUS and TNT formats.
For off-line access to character and state descriptions you go to Characters –> Character groups. First you
choose a group of characters and then click show detailed (Fig. 25). Either you simply print the resulting page
(Fig. 26) or, if you have access to a laptop while off-line, save it for off-line viewing. Access Save Page As... from
the File menu and save to someplace you will remember, using the option Web Page, complete. Firefox will create
an html-file and a folder with content files. When later off-line, you just open the html-file in Firefox again (most
– 19 –
other browsers should work fine as well). Alternatively you could print to a pdf and use that single file for off-line
purposes.
Further help and documentation
MX is open source software and as such it is available through http://sourceforge.net/projects/mx-database/
You are free to download, install and modify your own copy at no charge, providing you follow the open source
software guidelines. If you are looking for help http://sourceforge.net/forum/forum.php?forum_id=606307 might be a
way to get answers to your questions. MX also features context related within-system help through the link at the
top right of project pages.
Acknowledgments
I would like to thank first and foremost Matt Yoder for developing MX and providing feedback and prompt responses to feature requests and bug reports. Thanks also to developer Krishna Dole, and Andy Deans for heading
the Hymenoptera Ontology. Invaluable feedback and suggestions from John Heraty with additional comments
from Christina Romero. Katja Seltmann assisted with MorphBank-related issues.
– 20 –