1
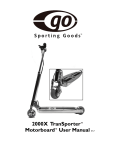
™
1500X TranSporter™User Manual
Get Ready...
Congratulations on the purchase of your new Go Motorboard 1500X TranSporter™.You’re in for a great ride.
You can Go faster, further, more safely and silently than ever on a motorized scooter. Plus, you can quickly
recharge and Go again. Note: It is highly recommend that the user be well coordinated and be a
minimum of 16 years of age.
Your Go Motorboard 1500X TranSporter™ is unlike any other powered scooter on the market today. Your 1500X
Transporter™ is not a toy! It is equipped with the most advanced Drive System available, which is comprised of
TWO electric motors with Speed Control, and
Regenerative Braking. This is a new class of high
1.
performance Motorboard combining advanced
technology, materials, durability, safety features,
non-polluting “green” power, and value.
3.
2.
It is extremely important to read this User Manual
before operating your Go Motorboard™. This manual
includes key information regarding set-up
instructions, use, maintenance, and safety procedures
that will show you how to obtain maximum
performance from your Go Motorboard™.
Contents of your Go Motorboard™ carton.
A.
1. Go Motorboard
2. 110v — 220v battery charger
3. User Manual
Get Set...
Please read the following information to properly
set-up your Go Motorboard for first time use.
B.
Unfold the Go Motorboard:
1.
Remove from the shipping carton and place your
folded Go Motorboard™, deckboard side up, on the
floor or other solid, even surface. Remove plastic
wrapping. (Fig. A)
2.
Locate the Folding Lever. (This is a large lever
located near the Front Wheel and is adjacent to the
Master Hinge at the base of the Steering Column.)
With your thumb, firmly press down and hold the
Folding Lever. (Fig. B)
3.
With your other hand, hold the Steering Column
and pull up until it stops at an approximate 30
degree angle.Your GO Motorboard™ is now in the
Kickstand position. (Fig. C )
C.
•2•
Secure Handlebars:
4. Locate the Foam Grips.(They are hanging from the Handlebar at the
top of the Steering Column on elastic cords). Pick up the right hand
Foam Grip and insert the metal shaft side into the hole at one end
of the handlebar. Rotate the Foam Grip forward/clockwise until you
hear a click and the Battery Gauge is in view facing upward. (Fig. D)
5.
Locate the spring-loaded handlebar button. (This pencil eraser sized
button is located on the metal shaft part of the foam grip). Press in
the Handlebar Button with your thumb, while sliding the foam grip
into place with your other hand. The Handlebar Button will click/
lock into place in a small hole in the Handlebar. Repeat the same
procedure for the left hand Foam Grip with the Brake. (Fig. E)
D.
E.
Extend Steering Column:
6.
Locate the Steering Column Nut. (This is a large, 1 1/2" diameter
nut located at the base of the Steering Column). Loosen/turn the
Steering Column Nut counter clockwise. Slowly pull the steering
column upward until it is fully extended and clicks/locks into place.
IMPORTANT: THE STEERING COLUMN MUST BE FULLY
EXTENDED AND LOCKED INTO POSITION FOR SAFE USE.
Re tighten/turn the Steering Column Nut clockwise. It should be
tightened very firmly by hand. (Fig. F)
Do not use a wrench or other tool to tighten.
F.
Clockwise
to tighten
The set-up of your Go Motorboard™ is now complete. Please read the
following information prior to using your Go Motorboard for the first time.
Survey the landscape:
1)
Find a safe, clear, smooth area that is free of pedestrian and
vehicular traffic.
2)
Turn the Power “ON”: Though your Go Motorboard™ comes
equipped with a charged battery pack, IT IS HIGHLY
RECOMMENDED TO FULLY CHARGE THE BATTERY PRIOR
TO EXTENDED USE. Locate the “ON/OFF” (Power) Switch under
the Deckboard, on the right side, and turn the unit “ON.” You will
see a green light on the Speed Controller. (Fig. G) IMPORTANT:
ALWAYS TURN THE POWER “ON” BEFORE RIDING.
NEVER OPERATE THIS VEHICLE WITH THE POWER
SWITCH IN THE “OFF” POSITION OR YOU MAY
DAMAGE THE ELECTRONICS.You can operate your
Go Motorboard™ alternately as a push scooter and as
a motorized Motorboard, as long as the power switch is
turned “ON” prior to any use.
3)
Practice pushing yourself around: From the Kickstand Position,
place your Go Motorboard™ into Riding Position by pushing the
Handlebars forward until the Folding Lever locks into place.Your
•3•
G.
ON/OFF Power Switch
Go Motorboard™ is now in Riding Position. To return to Kickstand
Position, firmly pull back the Folding Lever with one hand while
pulling the Foam Grip/Handlebar back with your other hand.
4)
Practice with your Go Motorboard™ as a PUSH SCOOTER until
you feel comfortable riding with the speed of the electric motors.
Grasp the Foam Grips on the Handlebars with both hands, place
one foot on the Deckboard, and push-off a few times with your
other foot to move forward. IMPORTANT: NEVER ATTEMPT
TO DRIVE YOUR GO MOTORBOARD™ IN REVERSE.
YOU MAY DAMAGE THE ELECTRONICS.
5)
Practice Starting the Drive System: Your Go Motorboard™ has a
unique power saving, safety feature that ensures that the electric
motors do not engage until the vehicle is traveling in excess of 3 m.p.h.
6)
To Accelerate: Push scoot your Go Motorboard™ to 3 m.p.h. and,
when you are ready to accelerate, gently squeeze the Speed
Controller Trigger with your right index finger located above the
right hand Foam Grip. Your Go Motorboard™ electric motors are
now engaged. Gently continue squeezing the Speed Controller
Trigger until you attain the desired speed.You can control speeds
within a range of 3 to 15 m.p.h. (Fig. H)
Practice riding your Transporter on a flat safe area. Go slowly and
practice accelerating, decelerating and braking. Do not go any faster
than your skills allow. Remember, most importantly, ALWAYS WEAR
AN APPROVED SAFETY HELMET AND OTHER SAFETY GEAR
WHEN RIDING YOUR 1500X TRANSPORTER .
7)
Your Go Motorboard™ has a patented Drive System and Speed
Controller that allows you to accelerate and decelerate with
regenerative breaking technology. This feature helps recharge
your battery.
8)
To Decelerate: While riding your Go Motorboard™ with the
electric motors engaged, release the Speed Controller Trigger
slowly and incrementally to slow down using active regenerative
braking. With the Speed Controller, you have control of both your
rates of acceleration and deceleration. (Fig. I)
IMPORTANT: EACH TIME YOU DECELERATE BY USING THE
SPEED CONTROLLER,YOU ACTIVATE THE REGENERATIVE
BRAKING SYSTEM AND ACTUALLY RECHARGE YOUR
BATTTERY. USING THE SPEED CONTROLLER TRIGGER TO
BRAKE, WILL NOT RESULT IN A COMPLETE STOP WHICH
MUST BE EFFECTUATED WITH THE USE OF THE LEFT HAND
BRAKE. This operation may take a little practice so we recommend
doing this repeatedly in a safe, controlled area until you are
comfortable with this braking procedure.
•4•
H.
To Accelerate gently squeeze the
Speed Controller.
I.
To Decelerate let go of the
Speed Controller.
9)
To Brake Mechanically (STOP): While riding your Go Motorboard™,
decelerate by incrementally releasing the Speed Control Trigger.
Once you have slowed to 3 M.P.H., squeeze the Mechanical Brake
Trigger (located above the left hand Foam Grip) to come to a
complete stop. (Fig. J)
10) Coasting: Remember always ride with your Transporter in the
turned “ON” position. To COAST, while in motion, release the
Speed Controller Trigger completely. While coasting, you will
gradually lose speed. You can accelerate again at any time by
squeezing the Speed Controller Trigger. You can accelerate and coast
intermittently at speeds above 3 m.p.h. You may also push-scoot and
coast intermittently, speed permitting. Once your speed falls below
3 m.p.h., you must push-scoot up to the 3 m.p.h. speed again in order
to engage the electric motors and accelerate again. To brake while
coasting, follow normal braking procedures.
NOTE: COASTING DOES NOT ACTIVATE THE MOTOR OR THE
REGENERATIVE BRAKING. USE YOUR MECHANICAL “LEFT” BRAKE
IN THIS MODE. This operation may take a little practice so we
recommend doing this repeatedly in a safe, controlled area until you are
comfortable with this procedure.
GO...
Don’t GO into or over H20:
1)
2)
3)
IMPORTANT: EXPOSURE TO WATER MAY CAUSE SEVERE
DAMAGE TO THE REAR TIRE AND/OR DRIVE SYSTEM. IF YOU
ACCIDENTALLY DRIVE THROUGH WATER, STOP IMMEDIATELY,
DRY YOUR REAR WHEEL, AND INSPECT FOR DAMAGE. Listen for
clicking or knocking sounds when riding. Check the rear tire for chewed
out notches or ground rubber “grit” similar to the residue you see from
a used eraser.
If the rear tire has been damaged, replace it as soon as possible
before riding again.
Carry a small piece of absorbent cloth to use in case of accidental
water exposure.
Use Caution Going Uphill
1)
Generally, Go Motorboard™ riders weighing up to 200 lbs., can easily
climb an approximate 10% gradient. Riders over 200 lbs., or those
ascending steeper inclines, can unduly strain the drive system
resulting in serious damage. IMPORTANT: IF YOUR TRANSPORTER
CANNOT MAINTAIN A SPEED OF 5 M.P.H. AT FULL THROTTLE
ON AN INCLINE, THE INCLINE IS TOO STEEP. IMMEDIATELY
RELEASE THE SPEED CONTROLLER TRIGGER FULLY AND KICK
SCOOT TO ASCEND. FAILURE TO DO SO MAY RESULT IN
SERIOUS DAMAGE.
•5•
J.
Mechanical Hand Brake
How to Fold-Up Your Go Motorboard™:
The 1500X Transporter™ is unlike any transportation device on the
market today in terms of its light weight (22 lbs.), compact size, and
unprecedented portability. With your Go Motorboard™, you can ride to
your destination, fold it, and carry or stow it almost anywhere.
Folding Your Go Motorboard:
K. Counter Clockwise
to loosen
Lower Your Steering Column:
1)
Locate the Steering Column Nut. This is a large 1 1/2" diameter nut
located at the base of the Steering Column. Loosen/turn the Steering
Column Nut counter-clockwise. (Fig. K)
2)
Locate the spring-loaded Steering Column Button. This pencil eraser
sized button is located on the front of the Go Motorboard™ 5 inches
below the Steering Column Nut. Depress the Steering Column
Button and, with your other hand, slowly push the Steering Column
downward. (Fig. L)
Folding Your Go Motorboard
3)
Locate the Folding Lever. This is a large lever located near the front
wheel and is adjacent to the Master Hinge at the base of the Steering
Column. With your thumb, firmly press down and hold the Folding
Lever. (Fig. M)
4)
With your other hand, hold the Steering Column and pull down until
it stops. Your Go Motorboardis now in the Folded Position. (Fig. N)
L.
Turn off the power after each use:
Remember to turn your Go Motorboard™ off after each use. Keeping the
power “ON” for intermittent use throughout the day does not
substantially affect battery life. However, you should turn the power “off”
if you do not plan to ride within 12 hours.
M.
Regular Maintenance: Keep it Clean. Keep it Going.
1)
Your Go Motorboard is NOT a toy. It is a serious transportation
device that requires regular cleaning and attention to maintain peak
performance. IMPORTANT: WHEN CLEANING YOUR GO
MOTORBOARD, DO NOT USE A WATER HOSE, RUNNING
WATER, OR WATER UNDER PRESSURE IN DIRECT CONTACT
WITH THIS UNIT. ALSO, DO NOT CLEAN WITH COMMERCIAL
CLEANSERS. MANY WILL LEAVE A SLIPPERY RESIDUE THAT WILL
INHIBIT PERFORMANCE OR DESTROY THE TIRE MATERIAL AND
CAUSE PERMANENT DAMAGE.
2)
Remove embedded dirt and debris using a soft bristled brush such as
an old toothbrush. Pay special attention to pins, hinges, and spaces
around the Folding Lever and Front Tire.
3)
Make a diluted solution of mild laundry detergent and water. (Use
one teaspoon laundry detergent to one of gallon of water.) Wipe
•6•
N.
aluminum, wood parts, and tires with a soft cloth or sponge that has been slightly dampened with a
diluted solution of mild detergent and water. Tires may also be cleaned with a soft cloth or sponge
slightly dampened with 70% pure isopropyl alcohol. (Do not flood the tires with alcohol, which can thin
the lubricant on the tire’s bearings.)
Condition Your Battery.
Every 10 quick charges, be sure to charge for at least 12-24 hours.
Check Your Tires.
Check to make sure that the tires are not too tight or loose. Always check for wear and tear and replace
worn-out or damaged tires as soon as possible. Contact either your dealer or go to our website,
www.gomotorboard.com to purchase replacement components.
Keepin’ It Going...
Keep it Lubricated:
A little oil goes a long way. Clean and lubricate the folding mechanism.
Use just a drop or two of 3-in-1™ Oil or 5w-30w synthetic motor oil on
a Q-Tip™ to lubricate the spot where the Hinge Pin slides in and out of
the locking position on each side of the Steering Head. Also apply just
one drop of 3-in-1™ Oil or 5w-30w synthetic motor oil at each pivot
point. It’s very important to use just a small amount of oil when
lubricating the folding mechanism. Using excessive oil causes your 1500X
TranSporter™ to become overly sticky resulting in trapped dirt and grit.
This excess dirt and grit can damage the unit. Also, conventional motor
oil gets sticky very quickly compared to synthetic motor oil or 3-in-1™
brand oil.
Clean and lubricate the steering mechanism by applying one drop of
3-in-1™ brand Oil at each part of the Steering Hinge. As with the folding
mechanism, any excessive lubricant can attract dirt and grit and damage
the steering components.
Removing a tire:
Removing a tire from your Go Motorboard™ Transporter for
cleaning, lubrication, or replacement is quick and easy. Use an
adjustable wrench to remove the nut from the wheel axle bolt. Once the
wheel axle bolt is removed, the tire will be free.
Changing your Deckboard:
Your Go Motorboard™ Transporter has multiple deckboard designs
available so you can change the look of your Go Motorboard™ to suit
your taste or mood! To remove the deckboard, simply unscrew the deck
screws with a sturdy Philips screwdriver. Avoid leaving the battery
unprotected for any extended period of time. DO NOT ATTEMPT TO
TAMPER WITH ANY OF THE ELECTRONICS BELOW THE BOARD
ONCE REMOVED AS THIS MAY DAMAGE THE UNIT AND VOID YOUR WARRANTY.
•7•
Questions...
How do you keep the battery at peak performance?
Your new Go Motorboard™ has a revolutionary new battery like the ones used in F-16 fighter jets. To get the
most out of this new technology, make a habit of “conditioning” your battery. About every 10 times you use
your 1500X TranSporter™, leave it on the charger for 12 to 24 hours to bring the battery up to maximum power
storage again. This conditioning technique will ensure better long-term use. Your Go Motorboard™ can realize
about 5% better battery performance if you charge the battery for more than 10 hours but less than 16 hours
every time you use your TranSporter.
What if all three Speed Controller lights (green, yellow and red) are illuminated?
If this occurs, the computerized “Smart System” has detected a hazardous condition. Shut down the throttle
immediately to protect your 1500X TranSporter™. This alert may have been caused by water, by a sharp bump
during acceleration, or if the rear wheel was not on the ground during acceleration.
What if the GREEN and RED Speed Controller lights are illuminated?
This combination will often light briefly when you start, especially when the battery is fully charged. This is
normal and the green light should show by itself in a minute or two. However, if after three minutes you still see
the red and green lights simultaneously, and you notice diminished performance, you will need to recharge the
battery. Reset your Motorboard to double-check this if you are sure your battery is well charged. (See the last
question on this page for resetting instructions.)
What if the red light glows slightly when riding, even when the green indicator light is bright?
This is a harmless sequence that has no effect on performance, range or speed. It is usually noticed at twilight or
in low light conditions.
What if the indicator light is flashing red and the drive does not function?
This means your battery is fully discharged. You must recharge the battery. The drive will not function when the
battery is discharged and the red light flashes.
How can the indicator lights be reset?
You can reset any light sequence and system shut-down by turning “off” the power switch, waiting five seconds,
then switching it “on” again.
What causes low performance?
A common cause of low or slow performance is simply a low-level battery charge. You will notice slightly
diminished performance when your battery gets below the medium charge level. At that point, it’s time to
recharge the battery.
Another cause of poor performance could be that the sidewalls of your rear tire have been compromised either
by riding through water or using too much power on a steep hill. In both cases, the drive system will slip and be
only about 1/3 as powerful. (See the question and answer below for more information on wheel damage.)
What if I hear a persistent clicking noise coming from the rear wheel?
If you hear a clicking or knocking when riding, check your rear wheel for notches chewed out by the drive
spindles and for ground rubber “grit” similar to the residue you see from a used eraser. The clicking noise may
also be the result of a cracked wheel due to hard “scrubbing” or cornering with a heavy rider. Care should be
taken to prevent a condition leading to wheel breakage. Although two TranSporter wheels can carry the weight
of a medium car, it is possible to crack them. Jumping curbs can cause wheels to crack or fracture. The
wheels may crack near the bearings with repeated abuse.
•8•
Traveling with notches or cracks in the sidewalls of your rear tire may damage one or both motors. If this
type of damage has occurred, the wheel, bearings, and spacer should be replaced immediately.
What if I have to travel with a damaged rear wheel?
Four tips for emergency travel.
1. Turn “off” the power switch.
2. If the wheel is wet, dry it; especially the sidewalls.
3. If you see the “eraser grit,” use your thumb to rub as much off as you can.
4. Swap the front and rear tires as soon as possible. Using the damaged tire in the front will not reduce
the performance. However, you should replace the damaged tire as soon as possible and ride at a
reduced, safer, speed.
What causes a poor recharge?
If the battery does not seem to be operating at full performance, it may be caused by a poor recharge. This
situation is rare, but is usually the result of a short recharge cycle, and “deep discharging” without the
once-every-10-charges “conditioning” charge recommended.
The Go Motorboard™ battery is different. The common practice of fully discharging the battery just
to recharge it fully, often called “Deep Discharging”, is not recommended for the TranSporter™ 1500X. This
practice may damage this battery slightly. For best results, simply leave the battery on the charger for 1824 hours to achieve a maximum charge. This amount of time should return the battery to at least 90% of
its original performance. That level of recharge is substantially higher than any other battery technology
currently used. It is important not to leave your Go Motorboard™ charging continuously for
more than 48 hours.
Leaving the battery charging for more than a week can also cause loss of performance. This overcharging
damage is rare and easily discovered by our service department. It is not covered by warranty. A simple
remedy is to use the overcharged battery through several cycles. Usually, it will gradually return to
acceptable performance levels. Remember to condition your battery with one 12-hour charge after every
10 times you use a quick 2-or 3-hour charge.
Why am I having difficulty folding my Motorboard?
Avoid using extra force to move the folding mechanism. Crunching or grinding resistance is caused by
trapped grit. This grit can gouge the aluminum parts if you forcefully move the folding mechanism.
Thoroughly clean the entire Motorboard and lubricate it before attempting to fold it again.
Go Safely...
Take a few moments to review the following safety precautions designed to keep you safe and sound while
riding your Go Motorboard™. Use common sense and courtesy when riding.
•9•
WARNINGS...
THIS IS NOT A TOY! The recommended minimum age for use of this Motorboard is 16 years of age.
• The Go Motorboards™ are not intended for use on public streets, roads, or highways.
• We encourage you to check into your local city ordinances, state laws and/or statutes and restrictions
regarding use of push electronic Motorboards or scooters.
• ALWAYS wear an approved safety helmet, goggles, protective elbow and kneepads and always wear
proper footwear.
• DO NOT ride this Motorboard in the rain or in wet conditions.. Wet weather impairs traction, braking
and visibility. The risk of accident is dramatically increased in wet conditions.
• Riding after dark or at times of poor visibility is DANGEROUS.
• Avoid roadways, paths or other areas used by motor vehicles. Avoid sandy areas.
• DO NOT stunt ride. Ride in control at all times!
• DO NOT carry passengers or operate with more than one rider operator.
• DO NOT operate this Motorboard in traffic or on wet, frozen, oily or unpaved surfaces.
• Avoid potholes and surface cracks.
• DO NOT jump off curbs.
• DO NOT operate while under the influence of drugs or while intoxicated.
• DO NOT immerse in water as it will damage the Motorboard’s electronic components.
• Keep hands, face, feet and hair away from all moving parts.
IMPORTANT SAFETY WARNINGS
• Recycle or dispose of batteries properly & in accordance with local regulations for lead acid batteries.
• Before each use, inspect your Motorboard thoroughly for loose or missing parts.
• DO NOT leave the power switch ON when not in use.
• DO NOT place your Go Motorboard™ near fire or heat as this may cause the battery to explode.
• DO NOT expose the charger or Go Motorboard™ to moisture or water.
• Keep hands, face, feet and hair away from all moving parts.
• Your Motorboard is designed to only start by kicking off first. This is a safety feature.
YOUR INSURANCE POLICIES MAY NOT PROVIDE COVERAGE FOR ACCIDENTS INVOLVING THE USE
OF THIS SCOOTER. TO DETERMINE IF COVERAGE IS PROVIDED,YOU SHOULD CONTACT YOUR
INSURANCE COMPANY OR AGENT.
NOTE:
• The status of the Go Motorboard™ as a “motor vehicle” is subject to driver’s licensing, insurance and
registration requirements which vary from state to state.
• Check with a reliable authority in your state to see if the Go Motorboard™ must be registered as a
motor vehicle.Your police department or local department of motor vehicles may be able to answer
your questions or direct you to a reliable authority.
The recommended age and minimum weight for the Go Motorboard™ is 16 years or older and
between 100 to 250 pounds. This is subject to the physical coordination of the rider, the ability of the rider
to wear protective gear and to take responsibility for his/her own actions.
Returning a Damaged Motorboard:
Either contact the dealer you purchased the unit from or go to our website. www.gomotorboards.com and we
will advise what to do.
We recommend that you only return your Motorboard to Go Motorboards™ for repair and service.
•10•
Features:
• An industry first military-grade battery the same technology used on the F-15 and F-16
fighter jets.
• 750 watt high-torque custom twin motors that produce 1 horse power
& weigh and amazing 12 oz. each.
• “Bullet Proof ” polycarbonate wheel hub; three times stronger than
other hubs.
• Advanced microprocessor controlled motors. Pulse Width Modulated
(PWM) at 100,000 times per second.
• Three-second folding and locking mechanism.
• Tough, aerospace-grade 6061 T6 aluminum body, heat hardened.
• Revolutionary regenerative braking system. The energy from braking actually recharges
the battery.
• “Always on” free wheeling system. The scooter glides with or without power.
• Ergonomic variable-speed throttle, 38" steering column & low deck for efficient Kicking
& dismounting.
• Single stroke-folding lever with an integrated kneeling kickstand.
• Silent and silky gearless drive system is both highly efficient and vibration free. The drive
system weighs only 6 grams.
• Solid brushing hinge is stronger than the “tricycle class” unit found on most scooters.
• High-performance polyester tires. High rebound and durability makes average
polyurethane skate wheels look like stoneage relics.
• Anti-lock lever-actuated rear brake.
• Precision steering for excellent
slow and high speed maneuvering.
• Easy view color battery gauge.
• Mechanical Braking system for
quick & secure stops to ZERO MPH.
• ANTI-LOCK BRAKING SYSTEM
FOR GRADUAL STOPS DOWN TO 2 MPH.
IT ALSO RECHARGES THE GO MOTORBOARD™ BATTERY.
Warranty:
Go Motorboards,™ LLC., warranties our Motorboard to be free of manufacturing defects for a Limited 90 day
period from date of purchase. This Limited warranty does not cover normal wear and tear, nor any damage,
failure or loss caused by improper assembly, maintenance, storage or use of the product.
Warranty return shipping is the responsibility of the customer.
PATENT PENDING.
Go Motorboards™ contact information:
Go Motorboards™
2300 Celsius Ave • Oxnard, CA 93030
PO Box 5767 • Oxnard, CA 93031
Web Site:
e-mail:
toll free:
www.gomotorboards.com
[email protected]
1-866-326-0055
™
•11•
YOUR INSURANCE POLICIES MAY NOT PROVIDE COVERAGE FOR ACCIDENTS
INVOLVING THE USE OF THIS SCOOTER. TO DETERMINE IF COVERAGE IS PROVIDED,
YOU SHOULD CONTACT YOUR INSURANCE COMPANY OR AGENT.