Download INTEGRATED 3G/4G/WI-FI SYSTEM To browse the Internet along
Transcript
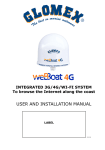
INTEGRATED 3G/4G/WI-FI SYSTEM
To browse the Internet along the coast
USER AND INSTALLATION MANUAL
Serial Number
Version 1.2
Effective February 1st, 2014
TECHNICAL SPECIFICATIONS
Antenna dimensions (diam.x H): 250 x 300 mm / 10x12"
Antenna weight: 1,2 kg / 2,65 lb
Automatic switch from Wi-FI registred networks to 4G.
4G backup WAN function
LTE 4G up to 100 Mbps in download and 50 Mbps in upload
DC- HSPA+ up to 42 Mbps in download and 5.76 Mbps in upload
Four Ethernet ports
2 Diversity (high) performance antennas
SMS reboot function
Android and iOS App for an easy control
Easy installation require only power supply connection 12/24V
UV waterproof resistant Dome
General Feautures
LTE FDD bands: B1/B2/B3/B5/B7/B8/B20
DC- HSPA+/HASPA+/HSPA/UMTS: 850/900/1900/2000 MHz
GSM/GPRS/EDGE: 1900/1800/900/850 MHz
Power Class 3 (23 dBm) for LTE FDD
Power Class 3 (24 dBm) for UMTS
Power Class E2 (26 dBm) for EDGE 1800/1900 MHz
Power Class E2 (27 dBm) for EDGE 850/900 MHz
Power Class 1 (30 dBm) for GSM/GPRS 1900/1800 Mhz
Power Class 4 (33 dBm) for GSM/GPRS 900/850 Mhz
Data
Mode LTE: DL 100 Mbps - 50 Mbps UL
DC-HSPA+: DL 42 Mbps - 5.76 Mbps UL
WCDMA PS: DL 384 Kbps - 384 Kbps UL
EDGE: DL 236,8 Kbps - 236,8 Kbps UL
GPRS: DL 85,6 Kbps - 85,6 Kbps UL
Complies with IEEE 802.11n, IEEE 802.11g and IEEE 802.11b wireless
Complies with IEEE 802.3 and IEEE 802.3u Ethernet standards - I Access
point for connecting Wi-FI
2
INDEX
1.
FORWARD. . . . . . . . . . . . . . . . . . . . . . . . . . . . . . . . . . . . . . 4
1.1
1.2
1.3
1.4
1.5
2.
DELIVERY LETTER . . . . . . . . . .
IDENTIFICATION Yacht Connect
WARRANTY. . . . . . . . . . . . . . .
GENERAL SAFETY RULES . . . . .
ENVIRONMENT . . . . . . . . . . . .
.
.
.
.
.
.
.
.
.
.
.
.
.
.
.
.
.
.
.
.
.
.
.
.
.
.
.
.
.
.
.
.
.
.
.
.
.
.
.
.
.
.
.
.
.
.
.
.
.
.
.
.
.
.
.
.
.
.
.
.
.
.
.
.
.
.
.
.
.
.
.
.
.
.
.
.
.
.
.
.
.
.
.
.
.
.
.
.
.
.
.
.
.
.
.
.
.
.
.
.
.
.
.
.
.
.
.
.
.
.
.
.
.
.
.
4
.4
4
5
6
PRODUCT DESCRIPTION . . . . . . . . . . . . . . . . . . . . . . . . . 6
3.
CONTENTS . . . . . . . . . . . . . . . . . . . . . . . . . . . . . . . . . . 8
3.1 INSTALLATION . . . . . . . . . . . . . . . . . . . . . . . . . . . . . . . . . 9
3.2 INSERTING THE SIM CARD . . . . . . . . . . . . . . . . . . . . . . . 13
4.
HOW TO DOWNLOAD CONTROL APP FOR Yacht Connect. . . 14
5.
FIRST TIME SETUP . . . . . . . . . . . . . . . . . . . . . . . . . . . . 16
3
1.
FORWARD
1.1
DELIVERY LETTER
Welcome: with the installation of this antenna, the world of fast Internet
comes on board your boat.
This manual has been drafted in order to help you with the correct installation and operation of the YachtConnect to meet all your requirements.
1.2
IDENTIFICATION
For any communication with Yacht Connect or its service center, always
have the serial number and the model of the YachtConnect shown on
page one of the manual, on the packaging and on the router inside the
Yacht Connect.
1.3
WARRANTY
YachtConnect guarantees the device against conformity defects for a
period of 24 (twenty-four) months from the date of shipment. Warranty is
intended as the repair or replacement of the equipment showing conformity
defects, with no charge for the materials. In case of conformity defects, the
customer is solely entitled to the replacement of the goods with no charge,
the warranty specifically does not include any charges whatsoever for labor
and any consequential damages should they occur.
The warranty is only valid if the product comes with a valid proof of purchase
(receipt or invoice).
The non-conforming product must be sent back to a Service Center or
authorized retailer, who, if necessary, will forward it to:
Yacht Connnect
4545 Ponce De Leon Blvd.
Coral Gables, Fl 33146
The serial number must neither be erased nor made illegible, otherwise any
warranty will be voided.
S
CAUTION
Preserve the installation and user manual with care! Losing
the serial number makes the warranty null and void!
4
The warranty does not apply in case of damage due to carelessness, use or
installation not compliant with the instructions given, tampering, product or
serial number modification, damage due to accidental causes or to the
buyer’s negligence.
Moreover, warranty does not apply in case of damage consequent to connections of the equipment to different voltages than those indicated or to sudden voltage variations of the network the equipment is connected to, as well
as in case of damage caused by leakage, fire, inductive/electrostatic discharges or discharges due to lightning, use of cables different to those provided, overvoltages or other phenomena not related to the equipment.
Finally, the warranty does not apply to problems caused by the telephone operator, network issues and/or at a WI-FI hotspot.
The parts subject to wear consequent to use such as connection cables, connectors, external parts and plastic supports are covered by a oneyear warranty period.
The following are not covered by warranty: periodic monitoring, software
updates, settings of the product, maintenance.
After the expiration of the warranty period, any technical support
activities will be carried out by charging the customer for the replaced
parts, the labor costs and freight charges, according to current rates.
The equipment will be replaced or repaired under warranty only and
exclusively on YachtConnect quality control department’s approval.
The warranty is provided by:
Yacht Connect
4545 Ponce De Leon Blvd.
Coral Gables, Fl 33146
1.4
GENERAL SAFETY RULES
Carefully read the instructions and follow the recommended precautions to
avoid potential hazards and safeguard your health and safety, before
carrying out any installation and maintenance. This manual contains the
following indications:
S
CAUTION
This symbol warns against potential damage to the equipment which could involve the operator’s safety.
5
Failure to comply with the instructions preceded by the above-mentioned
keywords (WARNING) can cause serious accidents or even the death of the
persons involved.
Moreover, in this Manual, some instructions are given with text in italics, preceded by the word NOTE.
The information and specifications given in this manual are based upon the
information available at the moment it is written.
In case of doubts, do not hesitate to contact YachtConnect at the following
email:
[email protected]
1.5
ENVIRONMENT
Do not throw the appliance away with the normal household waste at the
end of its life, but hand it in at an official point for recycling. By doing this,
you will help preserve the environment.
Fig. 1
2.
PRODUCT DESCRIPTION
YachtConnect 3G/4G IT1004 is the new integrated system for surfing the
internet with 4G network and Wi-Fi both with the boat in the harbor and
along the coast at more than 10 nautical miles offshore. Suitable for all
types of boats, ships and yachts where coverage of Cellular networks and
Wi-Fi permits. The YachtConnect 4G is also compatible with LTE, 3G
systems, UMTS and GPRS data.
NOTE The distance from the coast within which the YachtConnect
range depends on the 3G/4G signal coverage from the transmitter
of your telephone network operator, on the correct installation of
YachtConnect and on its height over the water.
Inside the ASA radome there is a 3G/4G antenna, a Wi-Fi antenna, a specifically constructed router with dedicated software to operate on the boat and
an access point which, protected from the elements, to allow you to
have a simple and convenient high-speed internet connection on your boat
in a few
6
minutes: simply insert a SIM card (not supplied) into the external slot and
you can connect to the system via its Wi-Fi, any type internet device
(iPhone, smartphone, iPad, tablet, PC...) through the Yacht Connect App and
further connect the system to the Wi-Fi network of the harbor or to the 3G/4G
network. In addition, the router inside the radome compact size
(250mm/10" in diam-eter and 300mm/12" in height), automatically switches
from 3G/4G net-work to the Wi-Fi network (if you have already
registered), and vice versa to be certain of a cost effective internet
connection without interruption. Finally to provide an extremely easy and
convenient manner to connect to the integrated system, YachtConnect also
offers an App for iOS and Android.
wifi and 4G
connection
2G
UMTS
GPRS
Fig. 2
7
3.
CONTENTS
The YachtConnect is shipped packed in a cardboard box and sealed with
"SEAL OF SAFETY" which acts as a seal for the WARRANTY OF CONTENTS.
Upon receipt, check that:
- the packaging is whole and the warranty is present;
- the supply matches the order specifications;
- there is no damage to the antenna;
- there is the label with SSID, S/N and PASSWORD to access the
YachtConnect.
In case of damage or missing parts, immediately inform the Retailer, if
possible with appropriate photos.
Fig. 3
8
sIailboats
INSTALLATION ON SAILBOATS
It is advisable to place the YachtConnect to a maximum height of 27-35 ft
on the shaft cross with the YachtConnect stainless steel universal mount
(not supplied).
The YachtConnect must be fixed to the support by tightening the screw
on the bottom of YachtConnect with a screwdriver (Fig. 6). IMPORTANT:
Do not install the YachtConnect masthead.
NO
OK WITH
masthead mount
(optional)
OK WITH
stainless steel
universal mount
8 - 10 m MAX
(optional)
Fig. 5
GL00153
Fig. 6
9
OK
GL00154
Fig. 7
Installation on motor boats in metal
SECOND
ACCESS
POINT
THIRD
ACCESS
FOURTH POINT
ACCESS
POINT
Fig. 8
Use up to 4 access points
10
GL00189
Warning:
- The antenna must be fixed to a base/support by tightening the screw
in the base of the YachtConnect by means of a screwdriver (Fig. 6 ).
- The installation of the YachtConnect near or above a flat metal
surface may result in significant reduction of the Wi-Fi and 3G/4G
signal strength.
- Do not mount the YachtConnect near metal obstructions that may
interfere with the wi-fi signal
On metal crafts, the Wi-Fi signal is blocked, for this reason it is necessary to
place a second access point (up to a maximum of 4 APs) inside the boat and
connect them with a switch (optional) to the router inside of YachtConnect
via an Ethernet cable (optional) (Fig. 9). The access point present
inside the radome can be used for the Wi-Fi coverage outside the boat.
LAN1
LAN3
Fig. 9
GL00187
Electric connections
For the proper functioning of YachtConnect, simply connect the antenna to
a 12/ 24 Vdc power supply cable (not provided) according to the following
guide-lines.
Connect the brown (positive) and the blue wire (negative) coming out from
the base of YachtConnect to the battery through a red/black power cable.
The connection can be made by soldering or with a clamp. It is advisable to
have this procedure carried out by a technician.
IMPORTANT: A polarity reversal on the power supply will burn the fuse.
The power line (not supplied) which connects the two wires coming out from
the base of YachtConnect must have cables with a cross section of 1.5 mm²
by a length up to 33 ft, and 2.5 mm² for longer lengths.
WARNING: we recommend placing a switch in the power line, upstream
to avoid electricity consumption when the YachtConnect is not used.
11
Fig.10
NOTE: In order to receive the signal from the YachtConnect inside metal
crafts, up to a maximum of four access points (according to your needs)
must be placed inside the boat, which must be linked with a switch to
the router inside the via an Ethernet network cable.
12
3.2 INSERTING THE SIM CARD
Insert the SIM CARD into the upper socket of the "EXTERNAL SLOT"
of the YachtConnect, which is located at the bottom of the radome.
Insert the SIM card with the contacts facing down and the cut edge of
the SIM facing outward, as shown in Fig. 11.
NOTE Insert the SIM CARD with YachtConnect off.
IMPORTANT: If the SIM card has a PIN, you must remove the PIN code
request before inserting the SIM card into YachtConnect. This can be done
via a mobile phone and varies according to the individual mobile phones.
Please check the steps in the instructions of your mobile phone, or
contact your operator.
BOTTOM OF RADOME
SIM CARD
SLOT
CUT EDGE OF
SIM CARD
UPPER SOCKET
Fig.11
13
4.
HOW TO DOWNLOAD CONTROL APP
Register your YachtConnect with free downloading of the
YachtConnect App from the Apple Store for Apple devices or from
the Play Store for Android devices.
The App YachtConnect is essential to setup the YachtConnect.
Fig.12
IMPORTANT: The app instructions s h o u l d b e u s e d o n l y
b y t h e YachtConnect owner/administrator (using only one
device). After following all the steps in the following
instructions, all the other internet devices (up to 31) must
simply select the wi-fi network of the YachtConnect and enter
the password, if required.
14
After the download, activate the Wi-Fi connection, then connect to the
YachtConnect. The network name is “YachtConnect 4GXXX” (Fig. 13); access
to the network requires a password. The password is shown on the delivery
box and should be written on page 1 of this manual.
Please note YOU MUST CONNECT YOUR IOS OR ANDROID DEVICE
TO THE WI-FI NETWORK OF THE YACHTCONNECT AND NOT
TO THE HARBOR, OFFICE NETWORK OR OTHERS.
Fig.13
15
5.
FIRST TIME SETUP
The YachtConnect has only one OWNER/administrator who needs to
complete the following setup once with a single device.
Open the App and select the language clicking the flag (Fig. 14).
Fig.14
If the Wi-fi is connected, the page is displayed (Fig. 15). If the app does
not work, check the presence of connection. In this case, check that the
YachtConnect device Wi-Fi connection is enabled and try again.
Fig. 15
16
YachtConnect 4G After selecting the language, open the drop-down
menu on the left and select “YachtConnect Internet” (Fig. 16).
Fig.16
When you first open the app you will be asked
to record some data, fill in the request form,
then click the Record/Save button and wait
(Fig. 17).
Fig.17
IMPORTANT: Fill in the YachtConnect S/N (serial number) field
with the correct code, located on the on the box or on the router inside
the YachtConnect. (Fig. 18).
Fig.18
If the YachtConnect S/N (serial number)
field is not complete, we can not guarantee
immediate assistance.
When you are prompted for a password, enter admin01
(Fig. 19)
Fig.19
17
After your registration, the page "YachtConnect control App" will open.
Some information may be missing on the page, in this case you must
refresh it. Click the refresh button at the top of the page (Fig. 20) and wait
until the process is complete. This could take a while.
Fig.20
GL00167
Once refreshed, the page will have all the necessary information. You will
also notice that the "4G in use" button is green; this means that the 4G is
active (Fig. 21).
Fig.21
18
To continue , click "APN in use" (Fig. 23), click the World icon at the top
(Fig. 22) and select your country from the list (Fig. 24); select the APN compatible with your network operator (Fig. 25) and click "OK" to confirm.
GL00170
Fig.22
GL00169
Fig.23
Fig.24
Fig.25
19
NOTE If your compatible APN is not in the list, click States to go back (Fig.
26) and click APN- (Fig. 27). At this point you will see the "Manual APN setting" screen; click the "arrow" at the top (Fig. 28) and fill in the information
requested on the form. Once this is done, click Save (Salva) (Fig. 29). If you
do not know the APN of your device, contact your service provider.
Fig.26
GL00173
Fig.27
GL00174
GL00175
Fig.28
Fig.29
20
If, by mistake, you select the wrong operator, click Cancel and select again.
In case of an error in the selection of the state, click the world icon to return
to the list and select the correct state.
Once all the information provided is correct, click "OK" (Fig. 30) and wait for
the setup.
Note: this process could take a few minutes.
Fig.30
Once the configuration was successful, the YachtConnect is ready to
surf the internet using the 4G mode.
S
CAUTION
If the App is not correctly set, the device cannot browse the
internet through the 3G/4G. Some operators have dedicated
APN for special contracts; in this case, contact your service
provider.
Note: ensure that the App is correct and installed.
Fig.31
21
If you want to add a Wi-Fi connection external to the 4G YachtConnect to
share with the devices on the boat, click "Scan Wi-Fi Network" (Fig. 32) and
wait. A list of available connections will be displayed. Click the name of the
Wi-Fi connection required (Fig. 33) and click OK to confirm. Enter the
password for the Wi-Fi network selected and click OK/CONNECT (Fig. 34),
and wait a few minutes. Now, the information of the Wi-Fi network you have
chosen will appear in the Wireless table (Fig. 35).
The "auto switch" button is green and the "4G Ready" is yellow.
This means that you are using the selected Wi-Fi network (SSID)
to surf the internet.
Fig.32
Fig.33
Fig.34
Fig.35
22
S
CAUTION
Some hotspots cannot be used by the YachtConnect
because the device is recognized as a router.
Finally, to return to the 3G/4G, click the yellow button "4G Ready". Wait a
few minutes for the setup. At the end of the procedure, the "4G Ready"
button is green. This means that now you are connected to the internet in
4G mode.
NOTE The use of the external Wi-Fi network has priority over 3G/
4G to limit service network costs.
YachtConnect automatically switches between the harbor or land
Wi-Fi to 3G/4G when the Wi-Fi signal is no longer received.
If the Wi-Fi signal is weak, you can force the use of 3G/4G by clicking on "4G READY" (Fig. 35).
WARNING: if you change the SIM card in the YachtConnect, repeat the
procedure from chapter 5.
23
NOTE : Specifications may change without notice
Toll Free: 888.898.8608
www.YachtConnect.com
4545 Ponce de Leon Blvd.
Coral Gables Fl. 33146
24


