1
Sixnet_DistributedIO_ETxxx_user_D801
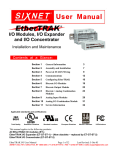
EtherTRAK
Ethernet Distributed I/O
Contents at a Glance:
3
Section 1
General Information
Section 2
Ethernet, RS232, RS485 Wiring RemoteTRAK, EtherTRAK Expansion
5
Section 3
Configuration Tools
RM-232-SETUP and Windows Tools
7
Section 4
Discrete I/O Modules
ET-8DI2-8DO2-H, ET-16DI2-H, ET-8CNT 10
Section 5
Discrete Output Module
ET-16DO2-H
13
Section 6
Discrete / Analog Modules
ET-8DI2-8AI2-H, ET-4RTD-4DI2-U
14
Section 7
Analog Input Modules
ET-16AI2-H, ET-8INS-U
16
Section 8
Analog I/O Module
ET-8AI2-4AO2-H
18
Section 9
Ethernet Gateways
ET-GT-232-1, ET-GT-485-1, ET-GT-ST-1
19
Section 10
Service Information
Service Information and Product Support
22
RM-PS-024-01F
Class I, Division 2,
Groups A, B, C, and D
Hazardous Locations
SIXNET • Box 767 • Clifton Park, NY 12065 USA • +1 (518) 877-5173 • FAX +1 (518) 877-8346 • [email protected]
PROTECTED TECHNOLOGY POLICY
SIXNET protects your investment in SIXNET systems with long-term planned technology and our unique Protected
Technology Policy. We will continue to support the specified capabilities of standard SIXNET products for at least five years.
We plan each product improvement and new feature to be upward compatible with existing designs and installations. Our
goals are to make each new software release bring new power to your SIXNET systems and have every existing feature,
applications program and data file continue to work.
We protect your investment even further with a liberal five-year trade-in policy. Exchange standard products for upgraded
versions of the same product to take advantage of new features and performance improvements at any time for five years. A
prorated trade-in allowance will be given for your existing equipment.
SIXNET protects your long-term productivity with state-of-the-art planned technology and continued support.
STATEMENT OF LIMITED WARRANTY
Digitronics SIXNET (`SIXNET'), manufacturer of SIXNET products, warrants to Buyer that products, except software,
manufactured by SIXNET will be free from defects in material and workmanship. SIXNET' obligation under this warranty
will be limited to repairing or replacing, at SIXNET' option, the defective parts within one year of the date of installation, or
within 18 months of the date of shipment from the point of manufacture, whichever is sooner. Products may be returned by
Buyer only after permission has been obtained from SIXNET. Buyer will prepay all freight charges to return any products to
the repair facility designated by SIXNET.
SIXNET further warrants that any software supplied as part of a product sale, except obsolete products, will be free from nonconformances with SIXNET published specifications for a period of 90 days from the time of delivery. While SIXNET
endeavors to improve the features and performance of software associated with its products, no effort on the part of SIXNET
to investigate, improve or modify SIXNET software at the request of a customer will obligate SIXNET in any way.
For the convenience of existing customers, SIXNET continues to supply certain products that are classified as obsolete. No
warranty on the software features of these products is stated or implied and SIXNET specifically is not obligated to improve
the design of these products in any way. Information about the status of any product is available upon request and customers
are advised to inquire about the status of older products prior to making a purchase.
This limited warranty does not cover losses or damages which occur in shipment to or from Buyer or due to improper
installation, maintenance, misuse, neglect or any cause other than ordinary commercial or industrial applications. In
particular, SIXNET makes no warranties whatsoever with respect to implied warranties of merchantability or fitness for any
particular purpose. All such warranties are hereby expressly disclaimed. No oral or written information or advice given by
SIXNET or SIXNET’s representative shall create a warranty or in any way increase the scope of this warranty. This limited
warranty is in lieu of all other warranties whether oral or written, expressed or implied. SIXNET's liability shall not exceed
the price of the individual units, which are the basis of the claim. In no event shall SIXNET be liable for any loss of profits,
loss of use of facilities or equipment, or other indirect, incidental or consequential damages.
These products must not be used to replace proper safety interlocking. No software based device (or other solid state device)
should ever be designed to be responsible for the maintenance of consequential equipment or personnel safety. In particular,
SIXNET disclaims any responsibility for damages, either direct or consequential, that result from the use of this equipment in
any application.
Note: All information in this document applies to EtherTRAK I/O modules and gateways, except where
otherwise noted. Refer to the SIXNET I/O Tool Kit software online help systems for detailed
product specifications and configuration settings.
EtherTRAK manual.doc
Last Revised: August 2001
Section 1
Overview
General Information
This manual will help you install and maintain EtherTRAK I/O and gateways. In summary,
wiring for power, communications and I/O is connected to each module’s base. Then, setup
choices are entered using the SIXNET I/O Tool Kit software and the system will be ready to run.
Shown below are some typical system configurations using EtherTRAK I/O:
Using EtherTRAK I/O as Expansion I/O for a VersaTRAK RTU
Typical ET-GT-232 Connection
Typical ET-GT-ST-1 Connection
Section 1
General Information
3
General
Specifications
These general specifications apply to all EtherTRAK I/O modules. More detailed product
specifications may be found in the online help system of the SIXNET I/O Toolkit configuration
utility.
Supply Voltage
Ethernet Isolation
Operating Temperature
Storage Temperature
Humidity
10 - 30 VDC, 1.2 Watt typical per module
(48 mA @ 24 VDC – varies by module and load).
Connect up to 32 RemoteTRAK modules or Modbus
devices using RS485
1200 Volts RMS (for 1 minute)
-30 to 70 °C
-40 to 85 °C
5 to 95% (non-condensing)
Protocols Supported
Modbus /TCP, SIXNET Universal
RS485 Expansion
Note 1: EtherTRAK gateways do not convert protocols. If a gateway’s serial port is configured
for Modbus Passthru protocol then you must communicate to the gateway over Ethernet
with Modbus/TCP or Modbus/UDP. If the gateway’s serial port is configured for
SIXNET Passthru protocol then you must communicate to the gateway over Ethernet
with the SIXNET protocol.
DC Power
Overview
EtherTRAK modules can be powered from the same DC source that is used to power your I/O
devices. No separate power supply is required. Typically, 10 to 30 VDC power is applied to
terminals 24 and 25 on the base of each module. Refer to the upcoming wiring diagram for each
module for power connections.
Note:
The ET-GT-ST-1 operates on 18 to 30 VDC. Refer to Section 9 for wiring details.
The RM-PS-024-01 can be used to power your EtherTRAK modules, instrumentation loops, and
other devices. It operates on 85-264 VAC (47-63 Hz) or 120-370 VDC and outputs 24 VDC at up
to 1 A. Refer to the figure below for the proper power connections. Tighten the screw terminals to
a maximum of 3.48 in-lbs.
Section 2
RS485 Wiring
4
Section 2
Ethernet, RS232, RS485 Wiring
Gateway
Ethernet
Wiring
EtherTRAK gateways communicate with a master device (such as a PC, SIXTRAK Gateway, or
VersaTRAK RTU) using 10BaseT Ethernet media. Electrical isolation is provided on the
Ethernet port for increased reliability. Please follow normal Ethernet wiring practices when
installing EtherTRAK gateways.
ET-GT-232-1
The RS232 port on the ET-GT-232-1 is a female DB9 that follows the DCE pin-out convention.
Refer to the diagrams below for connection details.
RS232 Wiring
ET-GT-ST-1
RS232 Wiring
Section 2
The RS232 port on the ET-GT-ST-1 is a female DB9 that follows the DTE pin-out convention.
Refer to the diagrams below for connection details.
Ethernet, RS485 Wiring
5
RS485 Wiring
Guidelines
The RS485 party-line consists of two signal wires and a communications ground wire. It is
recommended that the RS485 ground terminals of all stations be connected together, and should
not be connected to any panel ground or earth ground point. The RS485 port of each
RemoteTRAK module is isolated from the module’s internal circuitry, local power source, and
I/O wiring to improve communications reliability. It is recommended that a maximum of 32
RemoteTRAK modules be connected on any RS485 party-line, and that the termination jumper be
installed on the last module on each end of the RS485 network. Limiting the cabling to two
network arms (segments) radiating from the master controller will yield the best signal results.
Screw Torque
All the screw terminals on the base should be tightened to a maximum of 3.48 in-lbs.
Section 2
RS485 Wiring
6
Section 3
Configuring EtherTRAK I/O
RM-232-SETUP Remote I/O Setup Module
Operation
This setup tool is recommended to initially configure each EtherTRAK and/or RemoteTRAK I/O
module. To use the setup module, simply unplug any EtherTRAK or RemoteTRAK module from
its base and insert the setup module into the base.
Note:
EtherTRAK and RemoteTRAK “smart bases” allow hot swap of live modules -- an
exclusive SIXNET feature that makes it permissible to configure EtherTRAK and
RemoteTRAK modules in live systems.
The EtherTRAK or RemoteTRAK module configuration you created the SIXNET I/O Tool Kit
program will be written into permanent memory in the module’s base. When the EtherTRAK or
RemoteTRAK module is reinserted into its base, the module will find and upload the configuration
information, instantly configure itself and begin scanning I/O.
Once an EtherTRAK or RemoteTRAK module has been configured with an appropriate station
address and IP address (EtherTRAK only), modified configuration data can be downloaded
through the Ethernet port or RS485 port into the module base.
More information on the Remote I/O Setup Module can be found in the online help system of the
SIXNET I/O Toolkit.
RS232 Wiring
Connect the setup module to your Windows PC using a standard SIXNET ST-CABLE-PF RS232
cable. Only the transmit (TD), receive (RD) and common return (GND) signals are actively used.
The RS232 port on this configuration tool is electrically isolated to protect your computer in the
event of field wiring errors. The setup module runs on the DC power connected to terminals 17 and
18 of the module base it is plugged into. No other connections are required. (I/O wiring can be left
undisturbed.)
RS232 Mode
Selection
This module always communicates to the host PC at 9600 baud, with no parity and eight data bits.
Be sure to select “Use Setup Module’s Settings” as the communication device selection in the
SIXNET I/O Tool Kit program.
Section 4
Discrete I/O Modules
7
SIXNET I/O
Tool Kit
EtherTRAK and RemoteTRAK modules are configured using the SIXNET I/O Tool Kit software.
Configuration parameters are written over Ethernet, RS485 or RS232 (setup module only) into
permanent memory in the module’s base. Refer to the SIXNET I/O Tool Kit help for details.
Here are the basic steps for configuring an EtherTRAK I/O module or gateway.
1.
Connect DC power to the module or gateway.
2.
Connect an Ethernet cable to the module / gateway. Use a straight-through cable if you are
connecting to an Ethernet hub or switch. Use a cross-wired cable if you are connecting directly
to a PC. Make sure the LNK LED on the module / gateway is on solid (not blinking).
3.
Run the SIXNET I/O Tool Kit. You can use the Plug & Play Wizard to define the parameters
for the module / gateway. Be sure to do the following:
4.
•
Choose an IP address that is appropriate for your network. See the help file for details.
•
Enter in the serial number that is printed on a label on the module / gateway.
•
Choose a station (slave) number for the module / gateway that is unique from other
modules / gateways and the device you are interfacing to.
•
Select the appropriate RS232 or RS485 com parameters (protocol, baud rate, etc.) to
match the device that you are interfacing to.
Once you’ve completed the wizard, save your project file. Go to the Device menu and choose
the appropriate communication device. Then go to the Operations menu and select Load. This
should set the IP address in the module / gateway and then load down your other parameters.
If this load fails for some reason, here are some items to check:
•
Make sure the LNK LED is on solid. If it is off or blinking then a typical cause is a bad
cable, an incorrect cable, or you are plugged into the wrong port on your hub/switch.
•
Try to “ping” the gateway. Ping is a utility that comes with your PC. Start an MSDOS
prompt and type “ping” followed by the IP address of the gateway and then hit <CR>. For
example, “ping 10.1.0.1” (do not type the quotes). If you get an “unknown command”
error then you will need to install the TCP/IP Ethernet protocol on your computer. If you
get “destination unreachable” then make sure the gateway’s IP address is valid with
respect to the IP address and subnet mask of your computer. If you get “request timeout”
then check all the items above.
Note: Information on Ethernet networking can be found in the online help system for the
SIXNET I/O Toolkit.
5.
Reset Button
(ET-GT-232,
ET-GT-422)
Once you establish that you can communicate with the module / gateway from the Remote I/O
Tool Kit you then should attempt to communicate with your device using your master software
(i.e. KepServer, Citect, Intellution, etc.).
The ET-GT-232-1 and ET-GT-485-1 converters have a reset button that can be used to restore the
RS232 or RS485 port to factory defaults. This should only be necessary if the settings for the serial
port are unknown or cannot be determined.
The reset button is accessible through a small hole in the cover, just to the right of the DC power
terminals. To reset the serial port, insert a paper clip into the hole. Depress and hold the button
until the Status LED begins to blink. This will take approximately three seconds. Once the
blinking begins, release the button. After approximately two seconds the blinking will stop. At this
point the port will have been reset.
Section 2
RS485 Wiring
8
EtherTRAK
LEDs
Every EtherTRAK I/O module or gateway has a number of LEDs. These LEDs can be useful for
system diagnostics. These LEDs can be observed in the following states:
I/O Module
Status LED
On, with a quick “OFF” BLINK (1.9 seconds ON, .1 seconds OFF) - The module is configured
and fully operational, but has not received a valid request from the host for a time longer than the
specified time out period. A communication time out has occurred.
Full ON - The module is configured, fully operational, and has received communication from the
host device before the timeout period expired. This is the desired LED indication during
system operation.
HALF BLINK (1 second ON, 1 second OFF) - The module is not adequately configured and
requires a download from the SIXNET I/O Tool Kit program.
Full OFF - There is no power to the module, or the status LED is being turned off intentionally
by the SIXNET I/O Tool Kit during the module loading operation.
Off, with a quick “ON” BLINK (1.9 seconds OFF, .1 seconds ON ) - The module failed self-test
at initialization. It will not attempt communication and should be replaced.
Gateway
Status LED
On, with a quick “OFF” BLINK (1.9 seconds ON, .1 seconds OFF) - The gateway is configured
and fully operational, but has not received a valid request from the host for a time longer than the
specified time out period. A communication time out has occurred.
Full ON - The gateway is configured, fully operational, and has received communication from
the host device before the timeout period expired. This is the desired LED indication during
system operation.
HALF BLINK (1 second ON, 1 second OFF) - The gateway is not adequately configured and
requires a download from the SIXNET I/O Tool Kit program.
Full OFF - There is no power to the gateway, or the status LED is being turned off intentionally
by the SIXNET I/O Tool Kit during the module loading operation.
Off, with a quick “ON” BLINK (1.9 seconds OFF, .1 seconds ON ) - The gateway failed selftest at initialization. It will not attempt communication and should be replaced.
Status LED
Wink Feature
The “Status” LED of an I/O module or gateway can be intentionally winked (10 blinks/ second)
by the SIXNET I/O Tool Kit program to visually identify the module when other modules are
present.
Gateway
TD / RD LEDs
The Receive Data (RD) LED will be ON when characters are being sent out the serial port.
ACT / LNK
LEDs
The activity (ACT) LED on an EtherTRAK gateway or I/O module will flicker anytime there is
traffic on the Ethernet network, regardless of whom the network messages are intended for. The
link (LNK) LED will be ON whenever a valid link to another Ethernet device is detected.
The best troubleshooting tools for EtherTRAK gateways and I/O modules are the Status, ACT,
and LNK LEDs on each module. Each EtherTRAK Status LED indicates the health of the module
and also the status of communication from the host device. You can use the Wink feature to
provide continuous transmission to an EtherTRAK gateway. Note that an EtherTRAK gateway or
I/O module does not send a reply in response to a Wink command.
Section 2
The Transmit Data (TD) LED will be ON when characters are being received into the serial port.
RS485 Wiring
9
Section 4
Discrete I/O Modules
ET-8DI2-8DO2-H
ET-16DI2-H
ET-8DI2-8DO2
Overview
8 Discrete Inputs and 8 Discrete Outputs
16 Discrete Inputs
This module provides one terminal for each input or output channel. All inputs may be wired as
sourcing or sinking. Outputs are wired in a sourcing (power switching) configuration only. An
input count feature uses analog input registers to accumulate the positive transitions of each input.
More information can be found in the on-line help in the SIXNET I/O Tool Kit program.
Number of Channels
Input Voltage Range
Input Current @ 24 VDC
Output Voltage Range
Maximum Count Rate
8 discrete inputs, 8 discrete outputs (ET-8DI2-8DO2 only)
12/24 VDC/VAC
6.7 mA
10 – 30 VDC
100 Hz (6000 / minute) each input, plus selectable 2KHz
(120,000 / minute) mode for input 1 only
Wiring and
Jumpers
One wire from each sourcing field input should be bussed together and connected to terminal 17
(DC +). One wire from each sourcing field output and/or or sinking field input should be bussed
together and connected to terminal 18 (DC GND). Refer to the wiring diagram below. Set jumper
W1 to match the wiring configuration of the inputs.
TPO Feature
Time proportioned outputs pulse ON and OFF with a duty cycle proportional to an analog value
stored in an analog output register. TPO outputs are a low cost way to get smooth proportional
control of heaters and other process variables. Typically, TPO analog output registers are assigned
to the output of PID or other control logic in an ISaGRAF or other program. Use the SIXNET I/O
Tool Kit to set pulse cycling as fast as 10 mS or as slow (many minutes) as your system dynamics
require. Each output may be configured as a TPO or ordinary discrete output.
I/O Registers
Function
Discrete Inputs
Discrete Outputs
TPO Values
Counter Inputs
Section 2
RS485 Wiring
SIXNET Registers
X0 – X7
Y0 – Y7
AY0 – AY7
AX0 – AX7
Modbus Registers
10001 – 10008
00001 – 00008
40001 – 40008
30001 – 30008
10
ET-16DI2-H
ET-16DI2
Overview
High Density Discrete Input Module
This module provides sixteen input channels. Inputs may be wired as all sourcing or sinking. An
input count feature uses analog input registers to accumulate the positive transitions of each
input. More information on this and other features can be found in the on-line help supplied with
the SIXNET I/O Tool Kit program.
Number of Channels
Input Voltage Range
Input Current @ 24 VDC
16 discrete inputs (connected to a common source)
12/24 VDC/VAC
6.7 mA
Wiring and
Jumpers
Positive DC or AC voltage must be applied to an input to indicate an ON condition. All channels
are referenced to a common return or supply, which is connected to the negative side (ground) or
positive side (DC+) of the DC power source. One wire from each sourcing field input should be
bussed together and connected to terminal 17 (DC +). One wire from each sinking field input
should be bussed together and connected to terminal 18 (DC GND). Refer to the wiring diagram
below. Set jumper W1 to match the wiring configuration of the inputs.
I/O Registers
Function
Discrete Inputs
Counter Inputs
Section 4
SIXNET Registers
X0 – X15
AX0 – AX15
Discrete I/O Modules
Modbus Registers
10001 – 10016
30001 – 30016
11
ET-8CNT
ET-8CNT
Overview
High Speed Counter Module
This high-speed counter module has eight isolated circuits that accept pulse inputs from a variety
of sources, including quadrature and incremental encoders. Count values are reported in 16 bit
analog input registers or 32 bit long registers. The states of the counter inputs are also reported
as discrete inputs. Pulse rates up to 50 kHz are supported. The counters can be reset by toggling
discrete output bits. Counter modes are selected using the SIXNET I/O Tool Kit program. More
information on this and other features can be found in the on-line help supplied with the
SIXNET I/O Tool Kit program.
Number of Channels
Input Voltage Range
Input Current @ 24 VDC
Input Wiring
8 discrete inputs, isolated
12/24 VDC/VAC
6.7 mA
Screw terminal assignments are shown below. For best noise immunity, connect input signals
using twisted wire pairs. To maintain the best differential noise rejection, do not connect (-)
screw terminals together at the I/O base. Positive DC voltage must be applied to an input to
indicate an ON condition. Refer to the wiring diagram below.
Any odd-numbered input can be gated by connecting a gating signal to the next highest evennumbered input. For example, Input 2 can gate the counter for Input 1.
I/O Registers
Section 4
Function
Discrete Inputs
Counter Inputs
SIXNET Registers
X0 – X7
AX0 – AX7 or LI0 – LI7
Resets
Y0 – Y7
Discrete I/O Modules
12
Modbus Registers
10001 – 10008
30001 – 30008
35001 – 35008
00001 – 00008
Section 5
Discrete Output Modules
ET-16DO2-H
Et-16DO2
Overview
High Density Discrete Output Module
Sixteen discrete output channels each provide up to 1 Amp DC to motor contactors, valves, and
other loads. Inductive surge protection is provided. Each of the sixteen outputs may optionally be
configured as Time Proportioned Outputs that pulse ON at a duty cycle proportional to an analog
output register value. Typically these TPO outputs are controlled by a PID loop or other process
algorithm in a control program. More information can be found in the on-line help supplied with
the SIXNET I/O Tool Kit program.
Number of Channels
Output Voltage Range
Max. Load per Output
Max. Load per Module
Max. Inrush Current
16 discrete outputs connected to a common DC source
10 - 30 VDC
1 Amp
8 Amps
5 Amps (for 100 mS)
Wiring
A single terminal is provided for each output channel. All outputs are powered from the DC
power terminal. All channels are referenced to a common return, which is connected to the
negative side (ground) of the DC power source.
TPO Feature
Time proportioned outputs pulse ON and OFF with a duty cycle proportional to an analog value
stored in an analog output register. TPO outputs are a low cost way to get smooth proportional
control of heaters and other process variables. Typically, TPO analog output registers are assigned
to the output of PID or other control logic in an ISaGRAF or other program. Use the SIXNET I/O
Tool Kit to set pulse cycling as fast as 10 mS or as slow (many minutes) as your system dynamics
require. Each output may be configured as a TPO or ordinary discrete output.
I/O Registers
Function
Discrete Outputs
TPO Values
Section 5
SIXNET Registers
Y0 – Y15
AY0 – AY15
Discrete Output Modules
Modbus Registers
00001 – 00016
40001 – 40016
13
Section 6
Discrete / Analog Modules
ET-8DI2-8AI2-H
ET-8DI2-8AI2
Overview
8 Discrete Inputs and 8 4-20 mA Inputs
Eight 4-20 mA inputs provide 14 bit analog measurements. Discrete inputs may be wired as all
sourcing or sinking. An input count feature uses analog input registers to accumulate the positive
transitions of each input. More information on this and other features can be found in the on-line
help supplied with the SIXNET I/O Tool Kit program.
Number of Channels
Input Range
Analog Input Impedance
Discrete Input Voltage Range
Input Current @ 24 VDC
8 analog inputs (14 bit resolution), 8 discrete inputs
4 - 20 mA (analog), 12/24 VDC/VAC (discrete)
100 ohms Note: input voltage drop = 2 volts at 20 mA
12/24 VDC/VAC
6.7 mA
Wiring and
Jumpers
Positive DC or AC voltage must be applied to an input to indicate an ON condition. All channels
are referenced to a common return or supply, which is connected to the negative side (ground) or
positive side (DC+) of the DC power source. One wire from each sourcing field input should be
bussed together and connected to terminal 17 (DC +). One wire from each sinking field input
should be bussed together and connected to terminal 18 (DC GND). Refer to the wiring diagram
below. Set jumper W1 to match the wiring configuration of the discrete inputs. A single input
terminal is provided for each analog input channel. Care must be taken to externally provide a
suitable instrumentation ground for these single ended input circuits.
Current
Shunts
Precision 100 ohm current shunts, beneath the hinged access door in the wiring base, pass
current and maintain loop integrity even if the module is unplugged. A spare shunt is provided
and may be simply inserted in place of any shunt that open circuits as a result of a current
overload.
I/O Registers
Function
Analog Inputs
Discrete Inputs
Counter Inputs
Section 6
SIXNET Registers
AX0 – AX7
X0 – X7
AX8 – AX15
Discrete / Analog Modules
Modbus Registers
30001 – 30008
10001 – 10008
30009 – 30016
14
ET-4RTD-4DI2-U
ET-4RTD-4DI2
Overview
4 RTD Inputs and 4 Discrete Inputs
Four RTD inputs provide 16 bit high resolution analog measurements. Discrete inputs may be
wired as all sourcing or sinking. An input count feature uses analog input registers to accumulate
the positive transitions of each input. More information on this and other features can be found
in the on-line help supplied with the SIXNET I/O Tool Kit program.
Number of Channels
RTD Input Type / Range
Discrete Input Range
Input Current @ 24 VDC
4 RTD inputs (16 bit resolution), 4 discrete inputs
100 ohm platinum, -200 to 850 °C
12/24 VDC/VAC
6.7 mA
Wiring and
Jumpers
See the wiring diagram below for RTD inputs. Discrete inputs need positive DC or AC voltage
applied to an input to indicate an ON condition. All channels are referenced to a common return
or supply, which is connected to the negative side (ground) or positive side (DC+) of the DC
power source. One wire from each sourcing field input should be bussed together and connected
to terminal 17 (DC +). One wire from each sinking field input should be bussed together and
connected to terminal 18 (DC GND). Refer to the wiring diagram below. Set jumper W1 to
match the wiring configuration of the discrete inputs
I/O Registers
Function
RTD Inputs
Discrete Inputs
Counter Inputs
Section 2
SIXNET Registers
AX0 – AX3
X0 – X3
AX4 – AX7
RS485 Wiring
Modbus Registers
30001 – 30004
10001 – 10004
30005 – 30008
15
Section 7
Analog Input Modules
ET-16AI2-H
ET-16AI2
Overview
High Density 4-20 mA Analog Input Module
Sixteen 4-20 mA inputs provide 14 bit high resolution analog measurements. More information
can be found in the on-line help supplied with the SIXNET I/O Tool Kit program.
Number of Channels
Input Range
Input Impedance
16 (14 bit resolution)
4 - 20 mA
100 ohms Note: input voltage drop = 2 volts at 20 mA
Wiring
A single input terminal is provided for each measurement channel. Care must be taken to
externally provide a suitable instrumentation ground for these single ended input circuits.
Current
Shunts
Precision 100 ohm current shunts, beneath the hinged access door in the wiring base, pass
current and maintain loop integrity even if the module is unplugged. A spare shunt is provided
and may be simply inserted in place of any shunt that open-circuits as a result of a current
overload.
I/O Registers
Function
Analog Inputs
Section 7
SIXNET Registers
AX0 – AX15
Analog Input Modules
Modbus Registers
30001 – 30016
16
ET-8INS-U
ET-8INS
Overview
Instrumentation Analog Input Module
Eight configurable inputs provide 16 bit high resolution analog measurements. More information
can be found in the on-line help supplied with the SIXNET I/O Tool Kit program.
Number of Channels
Input Range
Input Impedance (current)
Input Impedance (other ranges)
ET-8INS
Wiring
4-20 mA Input
Jumpers
8 (16 bit resolution)
0/4 - 20 mA, 62 mV to 10V, JKERTBCNS thermocouples
100 ohms Note: input voltage drop = 2 volts at 20 mA
200K Ohms
Two input terminals are provided for each measurement channel. Channel to channel isolation is
provided.
This module has a 4-20 mA input enable jumper for each channel. Set each jumper to match
the desired input as shown in the diagram below. The jumper setting must match the range
selection in the SIXNET I/O Tool Kit.
Current
Shunts
Precision 100 ohm current shunts, beneath the hinged access door in the wiring base, pass
current and maintain loop integrity even if the module is unplugged. A spare shunt is provided
and may be simply inserted in place of any shunt that open-circuits as a result of a current
overload.
I/O Registers
Function
Analog Inputs
Section 7
SIXNET Registers
AX0 – AX7
Analog Input Modules
Modbus Registers
30001 – 30008
17
Section 8
Analog I/O Module
ET-8AI2-4AO2-H
ET-8AI2-4AO2
Overview
Combined Analog Input and Output Module
This module combines eight 4-20 mA analog inputs and four 4-20 mA outputs. More
information can be found in the on-line help supplied with the SIXNET I/O Tool Kit program.
Number of Analog Inputs
Input Range
Input Impedance
Number of Analog Outputs
Output Range
8 (14 bit resolution)
4 - 20 mA
100 ohms Note: input voltage drop = 2 volts at 20 mA
4 (16 bit resolution)
4 - 20 mA
Wiring
A single input terminal is provided for each input and output channel. Care must be taken to
externally provide a suitable instrumentation ground for these input and output circuits.
I/O Registers
Function
Analog Inputs
Analog Outputs
Section 8
SIXNET Registers
AX0 – AX7
AY0 – AY3
Analog I/O Module
Modbus Registers
30001 – 30008
40001 – 40004
18
Section 9
Ethernet Gateways
ET-GT-232-1
ET-GT-232-1
Overview
Ethernet to RS232 Converter
This Ethernet to RS232 gateway is typically used in one of these situations:
• To connect an older SIXNET device such as an IOMUX or Versamux to an Ethernet network
• To connect a Modbus RS232 slave device to an Ethernet network
• To connect a Modbus RS232 master device, such as a display, to an Ethernet network
• To interchange between a telephone modem and Ethernet interface
Ethernet Protocols Supported
Serial Protocols Supported
Supply voltage
Virtual Analog Outputs
Virtual Discrete Outputs
Modbus/TCP (Open Modbus) and SIXNET
Modbus ASCII, Modbus RTU and SIXNET
10 – 30 VDC, 0.5 watt typical
16
16
More information can be found in the on-line help of the SIXNET I/O Tool Kit program.
Power and
RS232 Wiring
This gateway operates on 10 to 30 volts DC. Connect this power to terminals 2 and 3. Connect
terminal 1 to a suitable earth ground.
In many cases a straight-through RS232 cable, such as the SIXNET VT-CABLE-MDM, can be
used to connect the RS232 port of this gateway to a SIXNET or Modbus serial device.
This gateway can be connected to an Ethernet hub with a straight-through 10BaseT Ethernet
cable. Use a cross-wired cable if you are connecting this gateway directly to a computer or other
Ethernet master device.
I/O Registers
The ET-GT-232-1 has sixteen virtual discrete output registers and sixteen virtual analog output
registers. These are provided so that a master RS232 Modbus device (such as a display) can pass
register values over Ethernet to a computer or other device.
Function
Discrete Outputs
Analog Outputs
Section 9
SIXNET Registers
Y0 – Y15
AY0 – AY15
Ethernet Gateways
Modbus Registers
00001 – 00016
40001 – 40016
19
ET-GT-485-1
ET-GT-485-1
Overview
Ethernet to RS485 Converter
This Ethernet to RS485 gateway is typically used in one of these situations:
• To connect one or more Modbus RS485 slave devices to an Ethernet network
• To connect a Modbus RS485 master device, such as a display, to an Ethernet network
• To connect RemoteTRAK modules to an Ethernet network
Ethernet Protocols Supported
Serial Protocols Supported
Supply voltage
Virtual Analog Outputs
Virtual Discrete Outputs
Modbus/TCP (Open Modbus) and SIXNET
Modbus ASCII, Modbus RTU and SIXNET
10 – 30 VDC, 0.5 watt typical
16
16
More information may be found in the on-line help of the SIXNET I/O Tool Kit program.
Power and
RS485 Wiring
This gateway operates on 10 to 30 volts DC. Connect this power to terminals 2 and 3. Connect
terminal 1 to a suitable earth ground.
Refer to the diagram below for RS485 wiring.
This gateway can be connected to an Ethernet hub with a straight-through 10BaseT Ethernet
cable. Use a cross-wired cable if you are connecting this gateway directly to a computer or other
Ethernet master device.
I/O Registers
The ET-GT-485-1 has sixteen virtual discrete output registers and sixteen virtual analog output
registers. These are provided so that a master RS485 Modbus device (such as a display) can pass
register values over Ethernet to a computer or other device.
Function
Discrete Outputs
Analog Outputs
Section 9
SIXNET Registers
Y0 – Y15
AY0 – AY15
Ethernet Gateways
Modbus Registers
00001 – 00016
40001 – 40016
20
ET-GT-ST-1
ET-GT-485-1
Overview
Ethernet to SIXTRAK Converter
This Ethernet to SIXTRAK gateway is typically used connect one or more SIXTRAK modules to
an Ethernet network.
Ethernet Protocols Supported
Serial Port Protocols Supported
Maximum number of SIXTRAK modules
Maximum number of I/O
Supply voltage
Power Consumption (less modules)
Modbus/TCP (Open Modbus) and SIXNET
Modbus ASCII / RTU and SIXNET
20 without expander, 128 using expanders
1024
18 – 30 VDC
2.5 watts
More information can be found in the on-line help of the SIXNET I/O Tool Kit program.
Power, STBus Wiring
This gateway operates on 18 to 30 volts DC. Connect this power to terminals 2 and 3. Connect
terminal 1 to a suitable earth ground.
Refer to the diagram below for ST-Bus wiring.
This gateway can be connected to an Ethernet hub with a straight-through 10BaseT Ethernet
cable. Use a cross-wired cable if you are connecting this gateway directly to a computer or other
Ethernet master device.
ST-Bus
Wiring
Guidelines
Section 9
The ET-GT-ST-1 supports up to 128 SIXTRAK I/O modules using expanders. Refer to the
SIXTRAK User Manual for more ST-Bus wiring information.
Ethernet Gateways
21
Section 9
Service
Information
Service Information
We sincerely hope that you never experience a problem with any SIXNET product. If you do need
service, call SIXNET at (518) 877-5173 and ask for Applications Engineering. A trained
specialist will help you to quickly determine the source of the problem. Many problems are easily
resolved with a single phone call. If it is necessary to return a unit to us, an RMA (Return Material
Authorization) number will be given to you.
SIXNET tracks the flow of returned material with our RMA system to ensure speedy service. You
must include this RMA number on the outside of the box so that your return can be processed
immediately.
The applications engineer you are speaking with will fill out an RMA request for you. If the unit
has a serial number, we will not need detailed financial information. Otherwise, be sure to have
your original purchase order number and date purchased available.
We suggest that you give us a repair purchase order number in case the repair is not covered under
our warranty. You will not be billed if the repair is covered under warranty.
Please supply us with as many details about the problem as you can. The information you supply
will be written on the RMA form and supplied to the repair department before your unit arrives.
This helps us to provide you with the best service, in the fastest manner. Normally, repairs are
completed in two days. Sometimes difficult problems take a little longer to solve.
If you need a quicker turnaround, ship the unit to us by air freight. We give priority service to
equipment that arrives by overnight delivery. Many repairs received by mid-morning (typical
overnight delivery) can be finished the same day and returned immediately.
We apologize for any inconvenience that the need for repair may cause you. We hope that our
rapid service meets your needs. If you have any suggestions to help us improve our service, please
give us a call. We appreciate your ideas and will respond to them.
For Your Convenience:
Please fill in the following and keep this manual with your SIXNET system for future reference:
P.O. #:__________________ Date Purchased: ___________________
Purchased From:______________________________________________
Product
Support
To obtain support for SIXNET products, call SIXNET and ask for applications engineering. Our
phone numbers are:
+1 (518) 877-5173 Office
+1 (518) 877-8346 Fax
e-mail: [email protected]
Our mailing address:
SIXNET
331 Ushers Rd.
P.O. Box 767
Clifton Park, NY 12065
Section 10
Service Information
22