1
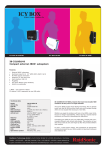
3.5"
eSATA + USB 2.0
External Enclosure
XE-311EX/SU
Tabele of Contents
1. Introduction
1.1 Features
1.2 Specifications
1.3 System Requirements
1.4 Package Contents
1
2
3
3
2. Installation
2.1 Installing the Hard Disk Drive
2.2 Installing the Driver
4
10
3. Operation
3.1 Device Controls
3.2 LED Indicators
3.3 Connecting to a PC with an eSATA Cable
3.4 Connecting to a PC with an USB Cable
3.5 Backing up Files
12
15
16
17
17
4. Important Notices
18
1. Introduction
1.1 Features
- Supporting 3.5" SATA hard disk drives
- Silent operation with fanless air-cooled aluminum housing and tray
- Dual interface: eSATA and USB 2.0
- Maximum transfer rate up to 3Gbits/s (eSATA) or 480 Mbits/s (USB 2.0)
- Plug and play; hot-swappable connection
- Easy One-Touch backup to copy/save files (specified models only)
1
1.2 Specifications
- Interface: SATA HDD to eSATA + USB 2.0
- Power Supply: External 12V/2A AC adapter
- Chipset: Oxford OXU921DS or J Micron JM20336
- Platforms: Windows XP/2000/Me/98SE/ Mac OS X or above
- Display: LED display (power, HDD access)
- Case material: Aluminum
- Dimensions: 9.2" (L) x 5.1" (W) x 1.5" (H)
232.5 mm (L) x 130.5 mm (W) x 37 mm (H)
2
1.3 System Requirements
- Windows XP/2000/Me/98SE
- Mac OS X or above
- SATA/eSATA or USB 1.1/2.0 Enabled System
1.4 Package Contents
- eSATA + USB 2.0 External Enclosure
- eSATA to eSATA Cable
- USB 2.0 Cable (eSATA + USB 2.0 model only)
- External AC adapter
- USB 2.0 driver CD for Windows 98 SE
- User manual & Installation Guide
- Screw Package
3
2. Installation
2.1 Installing the Hard Disk Drive
1. Push the latch on the left hand side and hold it.
2. Draw the Control Board Tray outward
from the Aluminum housing.
4
3. Place a 3.5" SATA hard disk drive into the aluminum tray.
5
4. Slide the hard disk drive to the eSATA connnector on the Control Board.
6
5. Secure the hard disk drive with the four screws found in the screw bag as shown
in the illustration.
7
6. Slide the Control Board Tray back into the Aluminum body.
8
7. The installation is completed.
9
2.2 Installing the Driver (for USB 2.0 only)
- Windows 98SE
1. Insert the driver CD into your CD-ROM. Run Setup.exe from the root directory of
the CD.
2. Follow the on-screen instructions to copy the necessary files to your computer.
3. When Setup has finished installing all the files to your computer, it prompts you to
restart your computer. Click OK.
4. Connect the enclosure and turn it on.
5. Open "My Computer" to see the enclosure.
10
- Windows ME/2000/XP
No drivers are required.
- Mac OS 9.0 or above
No drivers are required.
11
3. Operation
3.1 Device Controls
Power Switch
Backup Button
12
3.1 Device Controls (eSATA Model)
DC Jack
eSATA Port
13
3.1 Device Controls (eSATA + USB 2.0 Model)
DC Jack
eSATA Port
USB Port
14
3.2 LED Indicators
Green: Hard Drive Access
Blue: Power On
15
3.3 Connecting to a PC with an eSATA Cable
1 . Slide the power switch to the "on" position.
2. Plug either end of the eSATA cable found in the package to the eSATA port of
the enclosure.
3. Plug the other end of the eSATA cable to the eSATA port of the computer.
4. The cable can be connected or disconnected while the computer is running.
16
3.4 Connecting to a PC with an USB Cable
1. Slide the power switch to the "on" position.
2. Plug the USB B Type connector of the USB cable found in the package to the
USB port of the enclosure.
3. After turning on the computer and starting Windows, plug the USB A Type
connector to the USB port of the computer.
4. Your computer will search and install the enclosure automatically in a few
seconds.
3.5 Backing up Files
Please refer the special instruction sheet, which can be found only in the package
of the models with this function .
17
4. Important Notices
1. Do NOT operate this product, if your hands are wet.
2. We recommend you to discharge static electricity by touching a metal object
before operating this product.
3. To prevent data loss, do NOT disconnect power or restart this product when
performing backup.
4. To prevent data loss, do NOT shake this product when performing backup.
18
VERSION 1.0