1
TORQTECH
Operation Instructions
CA-5IF-O
Geared Contra Angle Handpiece Attachment
2011-03-22 PUB. H5082-E
Thank you for purchasing a TorqTech geared contra angle motor handpiece attachment. For optimum
safety and performance, read this manual thoroughly before using the unit and pay close attention to the
warnings and notes. Keep this manual in a handy place for ready reference.
The following symbols and expressions indicate the degree of danger and harm that could result
from ignoring the instructions they accompany:
• After inserting a burr, always operate the handpiece outside of the oral cavity to make sure it runs smoothly.
• If a burr comes out during use, stop using the attachment immediately and have the instrument repaired.
• Never use a burr or point to pull up on a metal crown or other metal piece. This is very dangerous; the burr could come
out and injure the patient or be swallowed.
• Never use the instrument with no or too little cooling air; this could cause it to heat up and possibly burn the doctor’s
hand or the patient’s mouth.
• Always use water spray; otherwise the head could heat up and cause a burn.
• Do not try to force the handpiece into a space if the patient cannot open his mouth wide enough. You might inadvertently
press the push button up against the teeth opposite the working area, especially in molar regions. If the button is
pressed while the handpiece is running, it could heat up and result in burning the oral mucosa, your finger etc.
• Always use a soft (feather), intermittent touch to avoid injury to the pulp.
• Wait for the burr to stop rotating before taking it out of the oral cavity.
• To avoid cutting your finger etc., wait until the instrument has completely stopped rotating before inserting or removing a
burr or point.
Specifications
Troubleshooting
This warns the user of the possibility of extremely serious injury or complete
destruction of the instrument as well as other property damage including the
possibility of fire.
Geared Contra Angle Handpiece Attachment
Type
CA-5IF-O
Rotation Speed Ratio
1 : 5 (speed up)
This warns the user of the possibility of mild injury or damage to the
instrument.
Maximum Motor Speed
42,000 rpm
Length
94 mm
This alerts the user of important points concerning operation or the risk of
equipment damage.
Weight
68 g
Usable Burrs *
Shank Type 3 (FG)
Chuck Type
Push Button
Chuck Gripping Power
Conforms to ISO 7785-2
Cooling Air Flow
Minimum 6 NL / min. (from motor)
Spray Flow
50 ml / min., minimum (for 0.2 MPa instrument pressure)
Tip Air Flow
1.5 L / min., minimum (for 0.2 MPa instrument pressure)
Disclaimer
■■ The J. Morita Mfg. Corp. will not be responsible for accidents, equipment damage, or bodily injury resulting from:
1. repairs made by personnel not authorized by the J. Morita Mfg. Corp. / 2. any changes, modifications, or alterations
of its products / 3. the use of products or equipment made by other manufacturers, except for those procured by the
J. Morita Mfg. Corp. / 4. maintenance or repairs using parts or components other than those specified by the J. Morita
Mfg. Corp. and other than in their original condition / 5. operating the equipment in ways other than the operating
procedures described in this manual or resulting from the safety precautions and warnings in this manual not being
observed / 6. workplace conditions and environment or installation conditions which do not conform to those stated
in this manual such as improper electrical power supply / 7. fires, earthquakes, floods, lightning, natural disasters, or
acts of God
■■ The J. Morita Mfg. Corp. will supply replacement parts and be able to repair the product for a period of 10 years after
the manufacture of the product has been discontinued.
Connection Type
Conforms to ISO 3964 and DIN 13940
Connectable Motors
Conforms to ISO 13294 and ISO 11498
Usable Burr Length
12 mm
Usable Burr Diameter
Φ1.590 to Φ1.600 mm
Maximum Burr Length
22 mm
Maximum working area diameter
2 mm
■■ Warranty is honored only when a claim is accompanied by the warranty agreement with purchase date, product name
and model, serial number (inscribed on the body of the product) and name of the distributor.
* Use burrs that conform to ISO 1791-1
[Specifications may be changed without prior notice due to improvements.]
■■ Do not fail to thoroughly read the user manual for your motor and follow all the instructions and cautionary remarks in it.
■■ The owner (clinic, hospital or medical institution) is responsible for use and maintenance of medical devices.
■■ This instrument must not be used by anyone except legally qualified dentists and oral surgeons / practitioners.
This instrument equipment must be only used for its specified dental treatment purpose.
Caution: Federal law restricts this device to sale by or on the order of a dentist (for U.S.A.).
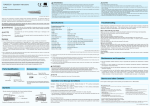
Parts Identification
Push Button
Head
Identification Ring
(Red: 1:5 gear ratio)
Always use burrs and points with clean shanks; dirty shanks cause the chuck to wear out more quickly and lose its gripping power.
Spray Nozzle
(Disinfect with ethanol)
Spray Hole Wire
(Disinfect by autoclave)
Chuck Tester (yellow)
(Disinfect with ethanol)
* For parts that wear
out and need periodic
replacement, refer to the
Inspection Items and
replace parts whenever
necessary.
Symbols
Before inspecting or adjusting the instrument, make sure the main power switch is turned on and that the
main air and water valves are open. If the instrument does not work properly even after inspection and
adjustment, contact your local dealer or the J. Morita corp. and have it repaired.
Burr or Point will not go in chuck.
Make sure the burr or point is OK. Clean and lubricate the instrument with LS Spray (sold separately).
If this does not solve the problem, have the instrument repaired.
Burr does not rotate.
Make sure motor is properly connected to its tube. Take the TorqTech attachment off the motor and step
on the foot pedal to see if the motor runs. If the motor runs, put the attachment back on and see if the burr
rotates. If it doesn't, have the TorqTech attachment repaired. If the motor doesn't run, refer to the user
manual for the motor.
Spray is not emitted.
Take the TorqTech attachment off the motor and step on the foot pedal to see if water comes out of the
motor joint. If water comes out, check the o-rings on the motor joint and
replace them if they are worn out or damaged. Coat new o-rings with
a little oil. If the o-rings are OK, clean the air and water holes on the
TorqTech attachment. Also clean the water filter ; see diagram to the
right. If there is still no spray, have the TorqTech attachment repaired.
Spray Filter
If water doesn't come out, refer to the user manual for the motor.
Overheating
Make sure flows for cooling air and spray are up to specifications. Also make sure the motor is operating properly.
Maintenance and Inspection
Always carefully remove all cleaning fluids before inserting a burr into the chuck; some cleaning fluids are corrosive, and
if a burr or point with cleaning fluid on it is inserted, the chuck could be ruined.
■■ The user (hospital, medical institute or clinic) is responsible for inspection and maintenance of medical
devices.
Diamond points are easily bent. Even new burrs and points are sometimes poorly balanced: if a burr makes a loud, metallic noise during rotation, stop using it.
■■ The user (i.e., clinic, hospital etc.) must perform the inspection procedures specified in “Maintenance
and Inspection” every three months.
If a dirty burr or one with cleaning fluid has been inserted by mistake, contact your local dealer or the J. Morita Office to
have the instrument inspected.
Accessories
• Wear safety glasses to prevent eye injury.
• Never switch rotation direction from forward to reverse or vice versa while the motor is actually running.
• Remove burrs and points before returning the instrument to its holder in the treatment unit; otherwise, there is a risk of
injury or damage.
• Do not press the push button until the instrument has come to a complete stop; otherwise, the back of the button could
wear out and a burr could accidentally come out.
• Crown removal and other similar operations produce considerable vibration and can cause the burr to get stuck in the
handpiece. Avoid this by frequently taking the bur out and putting it back in again. If a burr gets stuck, do not try to
take it out with a pair of pliers or other forceful means; this could damage the chuck and create a risk of a burr coming
out during operation. Contact J. Morita and have the instrument repaired.
• If the instrument makes abnormal noise, vibrates too much, or overheats, take out the burr and replace it with a new
one. If the same problem persists, have the instrument repaired.
• Follow all recommendations of the burr manufacturer concerning burr rotation speed and direction.
• Never use the following types of burrs and points; they could come out and injure the patient or be swallowed:
• Those which do not conform to ISO standards. Those with scratched or bent heads or shanks. Those which are rusty,
chipped or broken. Those which have been modified or altered such as those having shortened shanks.
• If a burr has a welded or soldered joint, do not use it if the head wobbles.
Operation and Storage Conditions
■■ For parts that wear out and need periodic replacement, refer to the Inspection Items and replace parts
whenever necessary.
■■ It is assumed that the user will perform regular maintenance and inspection procedures. However,
if necessary or desired, these may be performed by a trained professional qualified to repair
medical devices. Contact your local dealer or the J. Morita Office. Inspect the following items:
1. Motor connection. 2. Burr and point insertion. 3. TorqTech rotation, spray and light. 4. Overheating.
Service and other Contacts
■■ For repairs or other types of service contact your local dealer or the J. Morita Office.
Operation : Temp.: 10° C (50° F) to 40° C (104° F). Relative Humidity: 30 ~ 75 % (without condensation).
Atmospheric Pressure: 700 ~ 1,060 hPa
Storage : Temp.: -10 (14° F) to 70° C (158° F). Relative Humidity: 10 ~ 85 % (without condensation).
Atmospheric pressure: 700 ~ 1,060 hPa
May be cleaned and disinfected with a thermal washer-disinfector.
Autoclavable up to 135° C.
Model
Gear Ratio
Manufacturer
Conforms to European medical device Directive 93 / 42 EEC.
*Avoid frequent or prolonged exposure to direct sunlight.
*If instrument will not be used for a long time, autoclave it and store it in a clean, dry place.
*The working-life of TORQTECH attachments is 7 years from the date of shipment provided they are
regularly and properly inspected and maintained.
Disposal of Medical Devices :
Type
Serial Number
Any medical devices which could possibly be contaminated must be first decontaminated by the responsible
doctor or medical institution and then be disposed of by an agent licensed and qualified to handle medical
and industrial waste.
Printed in Japan
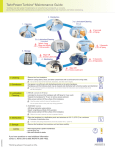
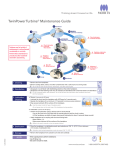
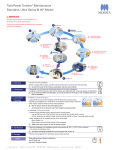
1. Inspect and Autoclave Before Use
6. Disinfection
Wipe the attachment with a piece of gauze that has been dampened with ethanol and wrung out thoroughly.
Clean the end of the light guide if the light seems to be dim.
The TORQTECH attachments are not autoclaved before shipping. Do not fail to autoclave the attachments before using them.
Make sure the cap, body and screw are properly assembled and not loose. Make sure that
the cap fits flush up against the head. Make sure the light guide is not chipped, cracked or
sticking out. Make sure the chuck opening is rust-free and clean. Make sure the motor joint
is clean and not damaged. Connect the attachment to the motor and operate it. Make sure it
rotates smoothly, emits a fine, misty spray, and there is no air or water leakage from the motor
joint. Also make sure that there is no abnormal noise, excessive vibration, or overheating.
Cap
Do not use anything except ethanol. Do not use too much ethanol; it could seep inside and damage the instrument.
Screw
Rotation and spray delivery will be impaired if debris gets inside the water or air lines.
Never wipe the instrument with corrosive solutions such as electrolytic acids, strong alkaline solutions, or other special cleaning solutions commonly available.
Light Guide
Joint
• Do not use the attachment if the body or cap are bent, warped or otherwise deformed or if the cap screw is loose or damaged.
2. Motor Connection
Improper cleaning modes and solutions will damage the instrument.
Follow the disinfector manufacturer’s recommendations for cleaning solutions and methods for dental instruments. Do not use strong acidic or alkaline solutions. Thoroughly rinse off all
cleaning solution.
*Refer to the user manual for the motor.
Make sure the o-rings on the motor’s connection cylinder are OK.
Push the TorqTech attachment straight onto the motor’s connection cylinder until you
hear it snap into place. If the attachment is equipped with a light, turn it after attaching it
to line up the projection on the attachment with the notch in the motor’s connection cylinder. Press down lightly and turn it until you hear it click into place.
Projection
Thermal Washer Disinfector :
Instruments with this symbol may be cleaned and disinfected with a thermal washer-disinfector. To use a thermal washer-disinfector, first read
the operation instructions for the unit. Strictly follow the instructions attached for cleaning mode and solution.
7. Lubricate and Remove Excess Oil
*Lubricate with LS Spray (sold separately) before autoclaving and after morning and afternoon treatment sessions.
1.
2.
3.
4.
5.
Make sure the motor’s connection cylinder is free of dust, dirt, and debris.
Notch
Do not connect this attachment to a motor that rotates faster than 40,000 rpm.
The light will not work if you simply slide the attachment onto the motor connection.
1.
2.
3.
4.
5.
Do not drop the instrument or bang it against anything. This could cause it to malfunction or damage the light guide.
Attachments cannot be connected to motors that do not have a light connection; they could come off.
• Give the attachment a light tug before using it to make sure it is securely connected.
• Wait for the motor to come to a complete stop before connecting or disconnecting the attachment.
• Use a motor that conforms to ISO 13294/ ISO 11498; otherwise there is a risk of electrical leakage.
*Air Nozzle: Motor accessory
Remove the burr or point and take the TorqTech attachment off the motor.
Screw the nozzle onto the LS Spray can and then lift up the lever on it. Insert the nozzle into the chuck and spray for about 2 seconds.
Push the lever back down.
Insert the nozzle into the connection end of the TorqTech attachment, hold it firmly and then spray for about 2 seconds.
Put an air nozzle (motor accessory) on the end of a threeway syringe. Put the nozzle in the connection end of the TorqTech attachment and blow
air through it for 20 or 30 seconds. Wipe off the oil that gets on the surface of the instrument with a piece of gauze.
The instrument will fail if it is not lubricated and cleaned with LS Spray regularly.
Do not use LS spray for any instruments except those with ball bearings.
3. Insert and Remove Burrs and Points
Do not use any lubricant except LS Spray. Other lubricants will cause the connection o-rings to swell and make it difficult to connect and disconnect. Absolutely never use AC Cleaner, which
is for air bearings. If you do, the bearings will burn out as soon as the instrument is rotated.
The head could get quite cold if the spray is applied for more than 5 seconds. In this case, wait awhile before operating the handpiece; otherwise the bearings could be damaged.
Insert
1. Insert the burr as
far as it will go.
Remove
2. Hold the button down and push
the burr or point all the way in.*
Shake the LS spray can 2 or 3 times before use and always use it in an upright position. Use only the special nozzle provided.
*
It’s easiest to hold the button down
if you put your index finger where
the head joins the body.
OK
NO
• Always cover the attachment with gauze before spraying. If spray accidentally gets into your eyes, wash them out with plenty of water and see a doctor. Use soap and water to wash off any
spray on your skin.
• Do not use the LS Spray in an enclosed area which is not properly ventilated. Do not point the spray nozzle at anyone and do not use the spray near an open flame.
• Do not fail to eliminate excess oil after lubricating the attachment; otherwise, oil might seep into the motor and damage it. Also excess oil could cause the attachment to overheat.
Hold the push button down firmly and pull the burr straight out.
8. Test Chuck’s Gripping Power
• Always insert burrs and points all the way in and give them a light tug to make sure they will not come out. Otherwise, a burr or point could come out and injure the patient or be
swallowed.
• Wait for the instrument to completely stop rotating before inserting or removing a burr or point.
Blue Line
• Take care not to injure your fingers when inserting and removing burrs and points.
• Do not force burrs in without holding the button down. This will damage both the burr and the chuck
4. After Use
If the tester come out of the chuck before the blue
line appears, the chuck does not have enough gripping
strength. Lubricate the chuck with LS Spray and test it again.
Insert the chuck tester. Hold down the push button and push the chuck tester all the way in and then release the button. Carefully pull the tester until the
blue line is visible. If the blue line appears, the chuck is OK. Stop pulling on the tester, hold the button down and then pull the tester out of the chuck.
*Refer to the user manual for the motor.
Take out the burr or point and disconnect the TorqTech attachment from the motor.
*It may be hard to remove a burr or point if it is left in the attachment.
• Test the chuck’s gripping strength at least once a day or whenever it seems to have lost strength. If the chuck does not pass the test, do not use the attachment. If cleaning and lubrication with
LS Spray does not solve the problem, have the attachment repaired..
9. Packaging and Sterilization
Wipe the attachment with gauze, put it in a sterilization pouch, and autoclave it.
Recommended Autoclaving Conditions:
In a sterilization pouch, at least 6 minutes at 134° C (273.2° F) or at least 60 minutes at 121° C (249.8° F)
5. Cleaning
*Autoclaving and drying temperatures must not exceed 135° C (275° F), Minimum drying time after sterilization: 10 minutes.
Clean debris off the attachment with a brush and running water.
Clean the spray holes with the wire provided if they get plugged up with
cutting debris or impurities in the water. After cleaning, dry it off with air
from the threeway syringe or some other method, and then wipe it with
a piece of gauze dampened with ethanol.
Do not sterilize in any way except autoclave. Do not fail to clean and lubricate the instrument before autoclaving it. After autoclaving, take the instrument out of the autoclave as soon as it cools off.
High autoclave temperatures can damage the o-rings etc. Keep the handpiece from directly contacting heat sources or the inside of the autoclave by putting it into a sterilization pouch.
• To prevent the spread of serious, life-threatening infections such as HIV and hepatitis B, the TorqTech attachments must be autoclaved after finishing the treatment of each patient.
• Instruments are extremely hot after autoclaving; do not touch them until they cool off.