1
Kentucky Health Benefit Exchange Contact
Center
Interactive Intelligence - Interaction
Center User Manual
20130715
Version 0.02
Interaction Center User Manual
Table of Contents
1.
Customer Service Representative
1.1.
5
Managing Phone Calls ............................................................................................. 5
1.1.1. Log on
1.1.2. Set the CSR’s status
1.1.3. CSR Status Codes:
1.2.
Using the toolbar ....................................................................................................... 6
1.2.1.
1.2.2.
1.2.3.
1.2.4.
1.2.5.
1.2.6.
2.
5
5
5
Answer a call
Place a call on hold
Disconnect a call
Transfer and park calls
Record the user’s personal prompts
Help
6
6
6
6
7
7
Customer Contact Center Supervisor
2.1.
8
Phone Features/Functions ................................................................................... 8
2.1.1. Polycom Unit Quick Reference
2.2.
8
Interaction Client Procedures/Features ..................................................... 12
2.2.1. IC 4.0 TUI
2.2.2. Manage Voice Messages (1)
2.2.3. Send Voicemail (4)
2.2.4. Manage Personal Options (5)
2.2.5. Access Company Directory (6)
2.2.6. Initiate Office-wide Alert (7)
2.2.7. Access Mailbox Subfolders (8)
2.2.8. Access Outlook Options (9)
2.2.9. Managing Phone Calls
2.2.10. Transfer and Park Calls
2.2.11. Working Voicemail
2.2.12. Conferencing Option
2.2.13. Interaction Client Options
2.2.14. Tips for the Advanced User
2.3.
12
13
13
13
15
16
16
16
16
17
17
18
18
20
Reports .......................................................................................................................... 21
2.3.1.
2.3.2.
2.3.3.
2.3.4.
2.3.5.
07/15/2013
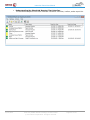
ICS Report Listing
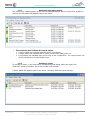
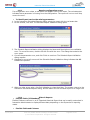
Creating Reports
Open Interaction Report Assistant File
Recently Viewed Reports
Saved Report Query
Kentucky Health Benefit Exchange Contact Center
© 2013 Xerox Corporation. All rights reserved.
21
36
48
50
51
Page 2 of 170
Interaction Center User Manual
2.3.6. Edit a Report
2.3.7. Distributing a Report
2.3.8. Scheduled Reports
2.3.9. Determine and load output data (report) destination
2.3.10. Schedule the time and frequency of the report generation
2.3.11. Determine the report status
2.3.12. Activate a report
2.3.13. Resolve configuration errors
2.3.14. Historic Reports
2.3.15. DNIS Detail Report
2.3.16. Example Reports
2.4.
Interaction Center Feedback ............................................................................. 89
2.4.1.
2.4.2.
2.4.3.
2.4.4.
3.
CFI Group’s Top 10 Customer Satisfaction
Types of surveys
Creating Surveys
Survey Results
89
89
89
91
Workforce Solutions
3.1.
94
Interaction Optimizer ............................................................................................ 94
3.1.1.
3.1.2.
3.1.3.
3.1.4.
3.1.5.
3.1.6.
4.
53
53
53
58
59
61
61
62
62
71
75
Scheduling Process
Volume Forecasting
Headcount Forecasting
Schedule Generation and Administration
Time Off Requests
Reports
94
97
116
136
139
144
HELP (Additional Information)
4.1.1. Search
4.1.2. Change User’s Password
4.1.3. Logon dialog box
4.1.4. Status Bar
4.1.5. Working with Calls
4.1.6. Call Transfer Shortcut Keys
4.1.7. Whisper Mode
4.1.8. Call History
4.1.9. Camp Desktop Alert
4.1.10. Using the Dial Pad
07/15/2013
Kentucky Health Benefit Exchange Contact Center
© 2013 Xerox Corporation. All rights reserved.
160
160
160
161
162
162
164
168
168
169
170
Page 3 of 170
Interaction Center User Manual
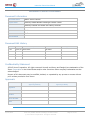
Document Control Information
Document Information
Document Name
HBECC Service Guide
Project Name
Kentucky Health Benefit Exchange Contact Center
Client
Kentucky Cabinet for Health and Family Services
Document Author
Xerox Business Services
Document Version
V0.01
Document Status
Draft
Date Released
Document Edit History
Version
0.01
Date
Description
06/12/13 Initial draft
Author
Approver
Bill Daws
Confidentiality Statement
©2013 Xerox Corporation. All rights reserved. Xerox® and Xerox and Design® are trademarks of the
Xerox Corporation in the United States and/or other countries. Other company trademarks are also
acknowledged.
No part of this document may be modified, deleted, or expanded by any process or means without
prior written permission from Xerox.
Approvals
Submitting Organization’s
Approving Authority
CMS’s
Approving Authority
Signature
Printed Name
Position
Phone Number
Date
07/15/2013
Kentucky Health Benefit Exchange Contact Center
© 2013 Xerox Corporation. All rights reserved.
Page 4 of 170
Interaction Center User Manual
1.
Customer Service Representative
Managing Phone Calls
1.1.
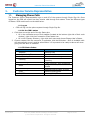
The Customer Service Representative logs on and off of the system through Single Sign On. Once
logged on, the CSR will control how they receive calls through their status. There are different types
of status a CSR would use from the table below.
1.1.1.Log on
CSRs will log into the phone system through Single Sign On
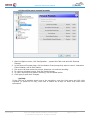
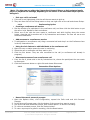
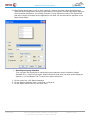
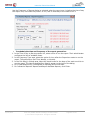
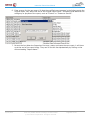
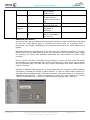
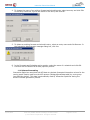
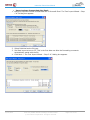
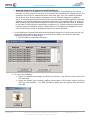
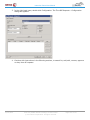
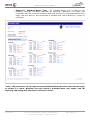
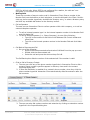
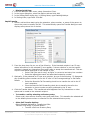
1.1.2.Set the CSR’s status
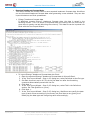
1. Click the arrow at the end of the My Status box.
Or in the notification area of their taskbar (located at the bottom right side of their main
window), right-click their Interaction Client status icon.
Or in the Company Directory, right-click their name and choose Change User’s Status.
2. Choose a status from the menu and, if applicable, click the OK button. Once in Available calls
will automatically come in and be answered so it is important to be ready to take a call when
going into and while in available.
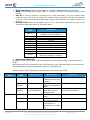
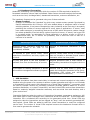
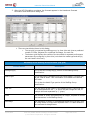
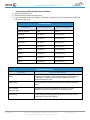
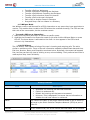
1.1.3.CSR Status Codes:
Status
Available
Receive Calls
Available No ACD
Await Transfer
At A Training Session
For scheduled training
Scheduled and unscheduled
coaching
Coaching
In a Meeting
Break
07/15/2013
Used For
Team meetings, other as advised
Assigned breaks, unscheduled
breaks
Special Project
Assigned special tasks/ Projects
Email
Working Email Queue
TDD/TTY
Working TDD/TTY Line
Kentucky Health Benefit Exchange Contact Center
© 2013 Xerox Corporation. All rights reserved.
Page 5 of 170
Interaction Center User Manual
1.2.
Using the toolbar
Use buttons on the Interaction Client .NET Edition toolbar to help manage the CSR’s calls. Many of
these functions are also available by right-clicking a call.
1.2.1.Answer a call
If the CSR are not connected to another call, pick up their telephone handset.
If the CSR are connected to another call, click the
Pickup button. The first call is placed on hold.
1.2.2.Place a call on hold
1. Click the call that the CSR wants to put on hold, then click the Hold button, or right-click it
and choose Hold.
2. To reconnect to the call, click Hold again.
3. To suppress hold music for the caller, click Mute before or after clicking Hold.
1.2.3.Disconnect a call
1. To disconnect a call with their handset, just hang up the telephone.
2. To disconnect a call with the client:
Highlight the call to disconnect.
lick the Disconnect button or right- click the call and choose Disconnect.
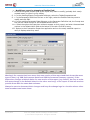
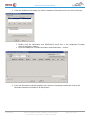
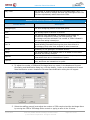
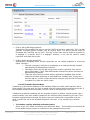
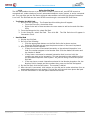
1.2.4.Transfer and park calls
1. Inform the caller of the transfer and on the Call Control toolbar click the Transfer button. The
Transfer dialog box opens.
2. In the Transfer To: field, type all or part of the recipient’s name or number. In the dropdown
list that appears select “Dial [their entry] as Digits" to convert a text entry into numbers or
select the appropriate contact name and associated extension or phone number.
3. Click the Transfer button or choose from the following transfer options:
Park: Place a call on hold in the recipient’s My Interactions queue.
Voicemail: Direct the call to a recipient’s voicemail.
Consult: Opens the Consult Call dialog box and allows them to select the Consult button to
speak to the transfer recipient while their caller stays on hold or the Caller button to speak
to the caller without exiting the transfer operation, or the Transfer Now button if the
recipient answers the phone and agrees to the transfer.
07/15/2013
Kentucky Health Benefit Exchange Contact Center
© 2013 Xerox Corporation. All rights reserved.
Page 6 of 170
Interaction Center User Manual
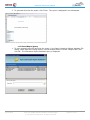
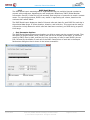
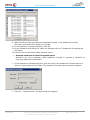
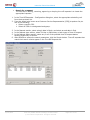
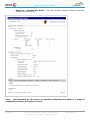
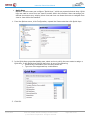
1.2.5.Record the user’s personal prompts
1. Open the Options menu, click Configuration…, expand the Calls node and click Personal
Prompts.
2. In the Personal Prompts page, click the button of the prompt they want to record. Interaction
Client initiates a call to their station.
3. Pick up the call and record the prompt, thenpress 1 to end the recording.
4. To review a recorded prompt, click the Preview button.
5. To return a prompt to a generic recording, click the Reset button.
6. Click Apply to save their changes.
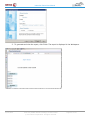
1.2.6.Help
If the CSR has a question about how to do something, open the Help menu and click Help
Contents (or press the F1 key), then click or search for a topic on which they want more
information.
07/15/2013
Kentucky Health Benefit Exchange Contact Center
© 2013 Xerox Corporation. All rights reserved.
Page 7 of 170
Interaction Center User Manual
2.
Customer Contact Center Supervisor
2.1.
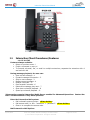
Phone Features/Functions
2.1.1.Polycom Unit Quick Reference
Features
Hard-coded keys: The user’s phone has these pre-stamped feature keys: Dial, Menu,
Line 1, Line 2 (or Messages), Hold, Headset, Speakerphone, Mute, Volume (+ / -), and
menu navigation keys.
Soft keys: Depending on the state / activity on the phone (e.g. idle or on a call), there
will be one or more context-sensitive features offered on the display (e.g. New Call, End
Call, Transfer, Conf, etc.). Press the corresponding key beneath the display to use the
feature.
Volume Control
Ringer: While the phone is ringing or not in use, the + / - buttons control the ringer
volume.
Remote Party: While on a call, the volume buttons control the volume of the remote
party, and is independently set for handset, headset, or speakerphone.
Placing a Call
Internal: Dial the 4-digit extension number
External: No need to enter 9 or 1 for outside line access or long distance!
Ending a Call
Handset: If talking via the handset, hang up the handset or press the End Call soft key.
Speakerphone: If talking via speakerphone, press the Speaker button or the End Call
soft key.
Headset: If talking via a headset, press the Headset button or the End Call soft key.
Answering a Call
Handset:
Lift the handset
Speakerphone: Press the Speaker button
Headset:
Press the Headset button
Answer: Pressing the Answer soft key will answer the call on speakerphone, unless the
user’s handset is already off-hook or the user can use a headset.
Ignore: Pressing Ignore stops the ringing, but the call still flashes on the line key and
the caller still hears ringing. If they don’t answer, the call will roll to their voice mail or
other programmed destination.
Reject: Pressing More, and then Reject removes the incoming call from the user’s
phone; but the caller still hears ringing until the call forwards to voice mail or other
programmed destination.
Muting
Press the Mute button (microphone icon) while on a call to toggle the microphone on and
off – whether the user is talking via handset, headset, or speakerphone. While their
microphone is muted, there will be a red light at the top of the phone and the
microphone muted icon will flash on the phone display. While the user’s microphone is
muted, the user can hear the other party, but they cannot hear the user.
07/15/2013
Kentucky Health Benefit Exchange Contact Center
© 2013 Xerox Corporation. All rights reserved.
Page 8 of 170
Interaction Center User Manual
Redialing
Press the Dial button or the right navigational arrow to display the Placed Calls list.
Press the up or down arrow buttons to scroll through the list, and then press Dial to call
the displayed number. The user can press the right arrow for more options.
Press Callers to display the Received Calls list. Scroll through the list and press Dial to
call the displayed number. The user can press the right arrow for more options.
Placing a call on hold
Put a call on Hold: Press the Hold button. Then the user can press the New Call soft
key to place a 2nd call, or hang up the handset until they are ready to take the call off
hold.
Take a call off Hold: BEFORE lifting the handset, press the red-flashing held line key, or
the Resume soft key, or the Hold key. Important: If the user lifts the handset before
taking the call off hold, the system assumes they want to place a separate call, so they
will hear dial tone. From there they can press End Call and Resume to return to held
call.
Transferring a call
* Note: The Transfer feature will appear for a soft key when the user has a caller on
the line.
Consult Transfer (Allows the user to check if the other person is there and the user can
talk privately with them before completing the transfer)
1. Press Transfer (do not put the caller on hold first)
2. Enter the number to transfer to and press Send
3. Wait for the other party to answer to see if they can take the call, or to see if voice
mail picks up
4. If the other person answers and can take the call, press Transfer – OR - Cancel: If the user gets their voice mail, press Cancel to return to the caller
(just hanging up will NOT put the caller into voice mail!) Then transfer directly
to their voice mail (see below)
Cancel: If they answer, but do not want to take the call, press Cancel to return
to the caller. If they want to leave a message, transfer the caller directly to
their voice mail – see below.
Blind Transfer (Transfers the caller without the user connecting to/talking to the 3rd
party first)
1. Press Transfer
2. Press Blind
3. Enter the number to transfer to and press Send
Transfer a caller directly to someone’s voice mail
1. Press Transfer
2. Press Blind
3. Enter the number to transfer to, and immediately press the star (*) button
1.
2.
3.
4.
07/15/2013
Conference (3 parties)
With a caller on the line, press Confrnc (this puts the caller in a holding mode)
Enter the number to conference in and then press Dial to dial their number
Wait for the 3rd party to answer, and then ask if they can join the user on a conference call
Press Conference to join all 3 parties – OR - Cancel: If the 3rd party does not answer or cannot join the conference, press the
Cancel soft key to disconnect the 3rd party and return to the 1st party.
Checking messages (voicemail)
Kentucky Health Benefit Exchange Contact Center
© 2013 Xerox Corporation. All rights reserved.
Page 9 of 170
Interaction Center User Manual
Press the Messages button. (It might be configured for the user to press * + Dial; or
extension _______).
At the menu, press the # button
Enter the user’s extension + password + #
To set password from the user' mailbox Main Menu:
o Option 5 - Manage Personal Options
o Option 3 - Change Their IC Password
o Follow the prompts to enter a new password
o Passwords must be minimum of ___ digits and contain at least ___
different digits.
Creating the user’s mailbox name
From the user’s mailbox Main Menu:
Option 5 - Manage Personal Options
Option 5 - Manage Personal Prompts
Option 5 - Record their Name
Follow the prompts to Record and Save.
Creating the user’s mailbox greeting
From their mailbox Main Menu:
Option 5 - Manage Personal Options
Option 5 - Manage Personal Prompts
Option 3 - Record No Answer / Standard
Creating out-of-office mailbox greeting
From their mailbox Main Menu:
Option 5 - Manage Personal Options
Option 5 - Manage Personal Prompts
Option 1 - Record Out of Office Greeting: This greeting plays when their Status
is a NON-Available one and calls go directly to voice mail.
Option 7 - Activate Out of Office Greeting
*Note: Personal out-of-office greeting must have the following steps completed…
1. Record & Save the user’s Out of Office greeting
2. Activate their Out of Office greeting
3. Set the User Status to a non-available one
If the user uses Interaction Client software and are logged in with an Available status,
they will hear the user’s mailbox main menu. If they are not logged in or their status is
not available, they will be prompted to enter their extension + Password + # to get to
their mailbox main menu.
Setting the User Status
Do Not Disturb On
On their Polycom phone, press Menu
Select 1 - Features
Select 2 – Do Not Disturb
Press Menu
The user’s phone display will show Do Not Disturb & their calls will go to their
voicemail, unless something different is configured for the user.
Do Not Disturb Off
Press Menu
Select 1 - Features
07/15/2013
Kentucky Health Benefit Exchange Contact Center
© 2013 Xerox Corporation. All rights reserved.
Page 10 of 170
Interaction Center User Manual
Select 2 – Do Not Disturb
Press Menu
To Change the User’s Status Via The Phone:
From their mailbox Main Menu:
Option 5 -- Manage Personal Options
Option 1 – Set User Status
Select the appropriate Status (1 thru 15) from the list of Statuses that are
played.
Default
07/15/2013
Status
1 = Available (allows ACD Q call delivery)
2 = Available, Forward
3 = At a Training Session
4 = At Lunch
5 = Do Not Disturb
6 = (not used)
7 = Gone Home
8 = In A Meeting
9 = Away From Desk
10 = Available, No ACD
11 = On Vacation
12 = Out of the Office
13 = Out of Town
14 = Working at Home
15 = Available, Follow Me
Generic Voicemail options
Skip over someone’s greeting and get to the recording beep by pressing 1-1.
Leave someone a message without ringing their phone: From a phone on the same
system, enter their extension + star (*)
Voice mail attached to email: If the user is configured to receive voice mail attached to
an email, then they can easily listen, forward, save, and delete messages just like they
would any other email.
Voice mail via the phone: If they call into their mailbox via the telephone, the following
are some common tasks when listening to messages:
Listen to messages: Mailbox Main Menu > 1-1
Forward a message to another mailbox on the same system: During or after
message playback, press 2 to Forward and then follow the prompts. Then the
user can save or delete the message from their mailbox.
Delete a message: During or after message playback, press 7 to Delete the
message.
Undelete a message: If they deleted a message and haven’t hung up from the
voice mail session yet, then from their mailbox Main Menu, press 5-7 and follow
the prompts.
Kentucky Health Benefit Exchange Contact Center
© 2013 Xerox Corporation. All rights reserved.
Page 11 of 170
Interaction Center User Manual
2.2.
Interaction Client Procedures/Features
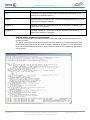
2.2.1.IC 4.0 TUI
Features always available:
Return to previous menu *
Finish a command or entry #
To forward voicemail, fax, or email to multiple extensions, separate the extension with #
and end with ##
During message playback, the user can:
Save current message – 1
Forward message to extension - 2
Skip to next message - 3
Replay current message - 4
Rewind 6 seconds - 5
Fast forward 6 seconds - 6
Delete this message, play next - 7
Slow down voicemail playback - 8
Speed up voicemail playback – 9
*Some options require Interaction Media Server enabled for Advanced Operations. Contact the
User’s IC Administrator if they have questions.
Enter
the Interaction Mail system:
Dial voicemail system number: <Place Holder>
Dial access code (i.e. 99 + “extension” + “password”: <Place Holder>
Enter # to complete the access code.
Mail Interaction Mail Options
07/15/2013
Kentucky Health Benefit Exchange Contact Center
© 2013 Xerox Corporation. All rights reserved.
Page 12 of 170
Interaction Center User Manual
Manage Voice Messages – 1
Manage Faxes - 2
Manage Email - 3
Send Voicemail - 4
Manage Personal Options - 5
Access Company Directory - 6
Initiate Office-wide Alert - 7
Access Mailbox Subfolders - 8
Access Outlook Options – 9
2.2.2.Manage Voice Messages (1)
Listen to All New Messages – 1
Listen to Saved Messages – 2
Listen to Today’s New Messages – 3
1 – Save current voicemail
2 – Forward message to extension
3 – Skip to next message
4 – Replay current message
5 – Reply to current message
6 – Play envelope information
7 – Delete this message, play next
1-Delete all with this subject
2-Delete all addressed to this recipient list
8 – Play text in message body
2.2.3.Send Voicemail (4)
Listen to All New Emails – 1
Dial by name (optional) – 2
Play list of workgroups (optional) – 3
Enter one or more extensions (separated by #, end lit with ##)
Record message:
2 – Review message
3 – Rerecord message
4 – Send message and return to Main Menu
5 – Cancel message and return to Main Menu
6 – Set Priority *
1-High
2-Low
3-Normal
7 – Set Sensitivity
1-Normal
2-Personal
3-Private
4-Confidential
*This option is available only if configured by the user’s IC Administrator.
2.2.4.Manage Personal Options (5)
07/15/2013
Set User Status (1)
1 - Available
2 - Available at a forward number
3 - At a training session
4 - At lunch
5 - Do not disturb
Kentucky Health Benefit Exchange Contact Center
© 2013 Xerox Corporation. All rights reserved.
Page 13 of 170
Interaction Center User Manual
7 - Gone home
8 - In a meeting
9 - Away from desk
10 - Available, No ACD
11 - On vacation
12 - Out of the office
13 - Out of town
14 - Working at home
15 - Available, follow me routing
*Optionally set date, time, or both, depending on status.
Set Forward Number (2)
1 – Enter remote phone number (+ #)
2 – Enter call coverage setting
1-Modify forward coverage option
2-Modify DND coverage options
3-Modify phone coverage options
4-Modify “no answer” coverage: The first four options can be set to work with
these calls…
1-All 3 External
2-Internal 4 Unknown
5-Change coverage phone number; Enter an internal number or IC extension
followed by #.
6-Modify voicemail destination
1-Set my voicemail box
2-Specify call coverage mailbox #
Change IC Password (3)
Entering 1 to 10 character password followed by #
Set Playback Options (4)
1 - Message playback mode:
2 - Message sorting:
3 - Play high priority messages first:
4 - Play mailbox extension greeting:
5 - Play current status greeting:
6 – Configure available message type
7 – Configure saved message type
Manage Personal Prompts (5)
1 – Record “Out-of-Office” greeting
2 – Hear “Out-of-Office” greeting
3 – Record “No Answer” greeting
4 – Hear “No Answer” greeting
5 – Record the user’s name
6 – Hear the user’s name prompt
7 – Activate “Out-of-Office” greeting
8 – Turn off “Out-of-Office” greeting
9 – Turn off “No Answer” message
Manage One Number Follow-Me (6)
1 – Turn Follow Me on or off
2 – Listen to current configuration options
07/15/2013
1=Verbose
1=Oldest, first
1=Activated
1=Activated
1=Activated
1=Voicemail
1=Voicemail
Kentucky Health Benefit Exchange Contact Center
© 2013 Xerox Corporation. All rights reserved.
2=Brief
2=Newest, first
2=Deactivate
2=Deactivate
2=Deactivate
2=Fax
2=Fax
3=Email
3=Email
Page 14 of 170
Interaction Center User Manual
3 – Add a telephone number
4 – Edit a telephone number
5 – Delete a telephone number
Manage Deleted Messages (7)
1 – Manage Deleted Voicemail
1-Save current voicemail
2-Forward message to extension
3-Skip to next message
4-Replay current message
5-Reply to current message
6-Play text in message body
7-Permanently remove message
8-Play envelope information
2 – Mange Deleted Faxes
1-Save current fax
2-Forward fax to extension
3-Skip to next fax
4-Receive fax (enter destination number followed by #)
6-Play envelope information
7-Delete current fax & play next
1-Delete all with this subject
2-Delete all from this sender
8-Play envelope information
3 – Manage Deleted Email
1-Save current email
2-Forward message to extension
3-Skip to next email
4-Replay current email
5-Reply to local email by voicemail
6-Play text in email message
7-Permanently remove this email
8-Play envelope information
4 – Restore all messages
5 – Erase all messages
Personal Notification Options (8)
1 – Set alert types
1-Turn notifications off
2-Email-based alerts
3-Paper-based alerts
4-Telephone-based alerts
5-Pager carrier-based alerts
2 – Set alert reasons
1-Voicemail arrives: 1-Any voicemail
2-Faxes
3-Set alert schedule
1-Dial this person’s extension
2-Alert only during certain hours
3-Set Start/End times
07/15/2013
2-Urgent only
2.2.5.Access Company Directory (6)
Enter an extension followed by # (1)
Dial by name (2)
Kentucky Health Benefit Exchange Contact Center
© 2013 Xerox Corporation. All rights reserved.
Page 15 of 170
Interaction Center User Manual
1 – Dial this person’s extension
2 – Dial this person’s home phone
3 – Dial this person’s mobile phone
2.2.6.Initiate Office-wide Alert (7)
Route the user’s call to each consecutive extension with an Available status.
2.2.7.Access Mailbox Subfolders (8)
Follow the prompts to access their custom subfolders, their Sent Items folder, or their
Deleted Items folder.
Press “0” to return to the user’s Inbox.
2.2.8.Access Outlook Options (9)
Access Outlook Calendar (1)
1 - Hear today’s meeting schedule
2 - Hear meeting for another day (DD-MM-YY)
Out-of-Office Assistant Options (2)
1-Turn Out-of-Office Assistant on
2-Turn Out-of-Office Assistant off
2.2.9.Managing Phone Calls
Using the toolbar
1. In the Number: field; type the phone number the user wants to call.
2. Click the Make Call button next to the Number: field or press Enter.
Dial a recently dialed number
4. Click the arrow at the end of the Number: field drop-down list.
5. Click a number from the list of numbers the user has recently dialed.
6. Click the Make Call button next to the Number: field or press Enter.
Note: The user can also dial a recently dialed number by opening the Call History view and
clicking the number they wish to call, or right-clicking the number and choosing Dial from the
menu that appears.
Dial a number inside the organization
1. Click a directory tab.
2. Do one of the following:
Double-click a name from the directory list.
Single-click any displayed phone number.
Right-click a person’s name and choose one of the displayed “Dial…” entries from the
menu that appears.
Answer a call
If the user is not connected to another call, pick up their telephone handset.
If the user is connected to another call, click the “Pickup” button. The first call is placed
on hold.
Place a call on hold
1. Click the call the user wants to put on hold, then click the Hold button, or right-click it and
choose Hold.
2. To reconnect to the call, click Hold again.
3. To suppress hold music for the caller, click Mute before or after clicking Hold.
07/15/2013
Kentucky Health Benefit Exchange Contact Center
© 2013 Xerox Corporation. All rights reserved.
Page 16 of 170
Interaction Center User Manual
1.
2.
3.
4.
5.
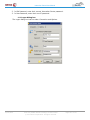
Forward the User’s calls
Click the My Status drop-down list.
Select Available, Forward from the list.
Click the Set status details link to the right of the My Status list. The Set Status box opens.
In the Forward Number: field; enter the remote phone number for forwarded calls.
Click OK.
Disconnect a call
1. To disconnect a call with the user’s handset, just hang up the telephone.
2. To disconnect a call with the client:
Highlight the call to disconnect.
Click the Disconnect button or right-click the call and choose Disconnect.
2.2.10.
Transfer and Park Calls
Transfer a call to another person
4. Inform the caller of the transfer and on the Call Control toolbar click the Transfer button. The
Transfer dialog box opens.
5. In the Transfer To: field, type all or part of the recipient’s name or number. In the dropdown
list that appears select “Dial [the User’s entry] as Digits" to convert a text entry into numbers
or select the appropriate contact name and associated extension or phone number.
6. Click the Transfer button or choose from the following transfer options:
Park: Place a call on hold in the receiver’s My Interactions queue.
Voicemail: Direct the call to a receiver’s voicemail.
Consult: Opens the Consult Call dialog box and allows the user to select the Consult
button to speak to the transfer recipient while their caller stays on hold or the Caller
button to speak to the caller without exiting the transfer operation, or the Transfer Now
button if the recipient answers the phone and agrees to the transfer.
2.2.11.
Working Voicemail
Listen to the User’s voicemail
1. Open their email inbox.
2. Open the email with the attached voicemail.
07/15/2013
Kentucky Health Benefit Exchange Contact Center
© 2013 Xerox Corporation. All rights reserved.
Page 17 of 170
Interaction Center User Manual
*Note: The User can use either the Interaction Voicemail Player or their selected media
player to playback the message, depending on the choice in the Voicemail Player Options
dialog box.
Pick up a call in voicemail
1. If the call is not highlighted, click the call the user wants to pick up.
2. They can then click on the Pickup button or they can right-click on the call and choose Pickup.
2.2.12.
Conferencing Option
Creating a conference call session
1. Dial the number of a participant in the conference call, and then click the Hold button to put
the call on hold. Repeat for each contributor.
2. Select one of the calls the user wants to conference and while holding down the mouse
button, drag that call to another call in My Interactions and release. The user will see a new
conference interaction.
Add someone to a conference session
1. To add parties to a conference call, drag a connected call and drop it on the Conference item
in the My Interactions list.
Using the Join feature to add individuals to the conference call
1. Open the user or station queue the user is monitoring.
2. Select the call or conference call they want to join.
3. Click the Join button. They are now connected to the call (or conference call already in
progress).
Disconnect someone from a conference call
1. From the list of joined calls in the My Interactions list, choose the participant the user wants
to disconnect.
2. Click the Disconnect button or right-click and choose Disconnect.
2.2.13.
Interaction Client Options
Record the user’s personal prompts
1. Open the Options menu, click Configuration, expand the Calls node and click Personal
Prompts.
2. In the Personal Prompts page, click the button of the prompt they want to record.
3. Pick up the call and record the prompt, then choose option 1 to end the recording.
4. To review a recorded prompt, click the Preview button.
5. To return a prompt to a generic recording, click the Reset button.
07/15/2013
Kentucky Health Benefit Exchange Contact Center
© 2013 Xerox Corporation. All rights reserved.
Page 18 of 170
Interaction Center User Manual
6. Click Apply to save their changes.
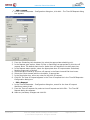
Set the user’s status
1. Click the arrow at the end of the My Status box. Or in the notification area of the user’s
taskbar (located at the bottom right side of their main window), right-click their Interaction
Client status icon. Or in the Company Directory, right-click their name and choose Change
User’s Status.
2. Choose a status from the menu and, if applicable, click the OK button. View another person’s
status Right-click a person's name in the Company Directory or other directory tab.
Interaction Client .NET Edition lists the person’s availability in the menu that appears.
*Note: The View Directory Status Columns Access Control right determines whether the
user can view a user's status in the directory context menu.
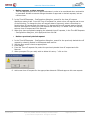
Set another person’s status
*Note: They need the Change Status Users Access Control right for a specific user to be
able to change that user's status.
1. Right-click the user’s name in the Company Directory or other directory view.
2. Select Change User’s Status from the menu that appears. The Set Status dialog box appears.
3. Select a status from the drop-down list and enter other applicable status information. Then
click OK.
07/15/2013
Kentucky Health Benefit Exchange Contact Center
© 2013 Xerox Corporation. All rights reserved.
Page 19 of 170
Interaction Center User Manual
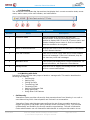
Tips for the Advanced User
2.2.14.
Interaction functions
Shortcut
Function
Shortcut
Function
Ctrl+B
Ctrl+P
Ctrl+H
Ctrl+U
Ctrl+T
Ctrl+K
Ctrl+M
Ctrl+Shift +P
Callback
Pickup
Hold
Mute
Transfer
Park Orbit
Voicemail
Properties
Ctrl+D
Ctrl+J
Ctrl+L
Ctrl+R
Ctrl+E
Ctrl+I
Ctrl+N
Ctrl+Shift +R
Disconnect
Join
Listen In
Record
Pause
Private
Assistance
Remove from Queue
Menu Shortcuts
Shortcut
Function
Alt+F+O
Alt+F+S
Alt+F+C
Alt+F+X
Alt+V+A
Alt+O+R
Alt+O+C
Logout
Change Station
Close (hide)
Exit
Active Camps
Rules
Configuration
More Keyboard Tips
Press WinKey+C to pop the client window, regardless of the application currently
running in the foreground. If an interaction is in the user’s queue, the focus is on My
Interactions. If a call is not selected, the focus goes to the Number: field, allowing they
to make a call quickly.
*Note: The Winkey is the Windows logo key typically located between the Ctrl and Alt
keys.
Press F2 to give focus to My Interactions and press F3 to give focus to the Company
Directory.
When a view in a docked area has focus, the user can move between tabs within that
zone with their left and right arrow keys. If they want to move to a different docked
area, use Alt+[left, right, up, or down] arrow key.
A list of recent calls is available from the Number: drop-down list. Eliminate unwanted
numbers from this list by selecting an entry and pressing Delete.
*Note: These shortcuts work only if an interaction or view is selected before the user
performs the action by clicking with the mouse or navigating with the Tab and arrow keys
on the keyboard. A view must have focus before they use the shortcut keys. The view
with focus is indicated by a highlighted tab with its name is in bold type. For shortcuts to
work properly, hold down the Ctrl or Alt key while pressing and releasing the second and
then, if needed, the third key.
07/15/2013
Kentucky Health Benefit Exchange Contact Center
© 2013 Xerox Corporation. All rights reserved.
Page 20 of 170
Interaction Center User Manual
2.3.
Reports
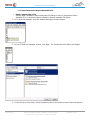
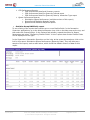
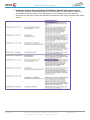
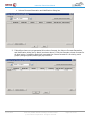
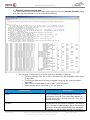
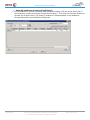
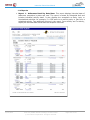
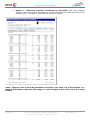
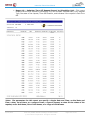
2.3.1.ICS Report Listing
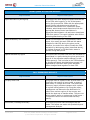
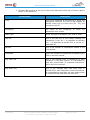
AGENT AVAILABILITY REPORTS
Report Name
Report Description
(Supervisor) Agent Availability Detail
This report is sorted by IC user IDs and shows each
time the user’s status changed throughout the
selected dates and times, and how long they were
in the status each time it changed. It also provides
total time they were logged in, available for ACD
calls, in a do not disturb status and After Call Work
status.
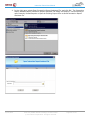
(Supervisor) Agent Availability Summary
Shows how long users were in an Available state to
take calls, and each user’s status while they were
unavailable. Provides a general overview of each
state entered for each day and the duration of these
states.
Shows time logged into Interaction Client, Time in
ACD / Available status; time in Non-ACD statuses
(available for non-ACD calls, such as Available
Follow-Me and Available Forward); time in statuses
marked as Do Not Disturb statuses; time in
statuses marked as After Call Work (such as Followup). This report is sorted by IC user IDs.
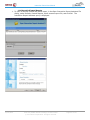
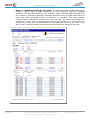
AGENT PERFORMANCE REPORTS
Report Name
Report Description
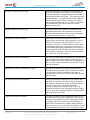
Agent Performance Detail for Queue-
This report is for supervisors who want to analyze
CSRs and their interaction activity at more of a
detail level. The Supervisor can select CSRs
individually or by queue. This report is sorted
alphabetically by selected CSR, then by date, and
then showing a line of activity for each of the CSR’s
queues for each date. It also includes a summary
line for all of the CSR’s queues for each selected
day, and a grand total summary line for the CSR.
Agent Performance Summary for Queue-
This report is for supervisors who want to analyze
CSRs and their interaction activity at a summary
level. The Supervisor can select CSRs individually or
by queue. This report is sorted alphabetically by
selected CSR and shows one summary line of
activity for each CSR, combining all the days
specified in the report, and combining all queues for
each CSR.
07/15/2013
Kentucky Health Benefit Exchange Contact Center
© 2013 Xerox Corporation. All rights reserved.
Page 21 of 170
Interaction Center User Manual
AGENT QUEUE ACTIVATION REPORTS
Report Name
Report Description
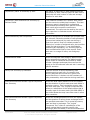
Agent Activation by Workgroup
This report lists each workgroup queue and then all
of the CSRs who logged in or out of that queue
during the given period. CSRs with the appropriate
Access Control permissions and activate or
deactivate themselves from a particular queue.
Likewise, administrators and supervisors with the
appropriate Access Control permissions in
Interaction Administrator can activate or deactivate
CSRs from queue. The report indicates who did the
activating/deactivating of the CSR.
Agent Availability with Activation
Similar to the Supervisor CSR Availability Detail
report, this report lists each CSR and the status
changes for that CSR during the given period.
However, the end of this report includes the CSR
Activation by Workgroup report (described above),
to indicate changes in CSR activation status in
queues during that period.
Queue Activation by Agent
This report lists only each CSR who was activated or
deactivated in a queue during the given period, and
then all of the activation status changes for that
CSR's queue(s). This is similar to the CSR Activation
by Workgroup report described above except it is
organized by CSR name with queue activation
status changes listed together for that CSR.
CALL SUPERVISOR REPORTS
Report Name
Report Description
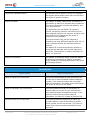
(Graph) Area Code
This graph lists all outbound calls by area code. The
Supervisor can specify all area codes, a range of
area codes, or a single area code. The Area Code
Summary report provides managers with a picture
of regional calling patterns. By using this report,
management can determine the distribution of
callers from various regions of the country and
decide the best way to handle callers. They are not
able to specify users or workgroups in this report –
it shows ALL calls to the area codes that they
specify.
Area Code / Exchange Summary
This report pinpoints exact exchanges that are
dialed. This report can assist with productivity and
management analysis.
07/15/2013
Kentucky Health Benefit Exchange Contact Center
© 2013 Xerox Corporation. All rights reserved.
Page 22 of 170
Interaction Center User Manual
(Graph) Incoming Calls by User
Shows the number of inbound calls associated with
each user specified in the range. It includes calls
delivered through a workgroup Q and calls dialed or
transferred directly to the User. This report includes
abandoned calls – call was alerting to the CSR and
caller hung up before CSR answered. This report
also includes missed calls, so it is NOT an indication
of calls handled. This report does not include
system-owned calls.
(Graph) Outgoing Calls by User
This graph shows the number of outbound calls
associated with each user specified in the range.
Use the Calls Outbound Line Group by Hour graph
to see the number of calls on each line.
(Supervisor) Caller ID Detail
Information can be established from Caller ID
reports such as customer calling patterns, time to
service the account, and level of service to the
customer. The Caller ID Detail Report is best used
by managers who want to see how accounts are
serviced and determine przofitability of the account.
Shows inbound caller ID, date and time of the call,
the End User connected to the call, their extension,
any hold time, and call duration.
(Supervisor) Caller ID Summary
The Caller ID Summary summarizes the number of
calls received into the Interaction Center from a
specific Caller ID number. Each line is reflected with
the number of calls received from a specific ID and
the call durations.
(Supervisor) Caller ID Summary by Date
The Caller ID Summary by Date summarizes the
number of calls received into the Interaction Center
from a specific Caller ID number. Each date is
reflected with the number of calls received and the
call durations.
(Supervisor) User Call Summary
This report displays a summary of all calls for the
specified IC users for each day in the given range.
The report is designed to give a summary report of
the user’s call volume. It shows counts for
Incoming, Outgoing, Unknown, and Total, and
shows total Duration and Average Duration of each
type. It does not distinguish between Incoming ACD
and Incoming Direct calls.
(Supervisor) User Call Detail
The User Call Detail report displays all calls for one
or more users for a given time period. The report is
designed to give each user their own report of calls.
A manager can use the User Call Detail Report to
audit a user’s productivity. System administrators
may choose to use the User Call Detail Report to bill
users and departments for their long distance calls.
07/15/2013
Kentucky Health Benefit Exchange Contact Center
© 2013 Xerox Corporation. All rights reserved.
Page 23 of 170
Interaction Center User Manual
(Supervisor) Caller ID Summary by User
The Caller ID Summary by User displays summary
information by User, then by Caller ID. Each user is
listed with the total number of calls and average
duration for each date.
(Supervisor) User Outbound Call Summary by
Number Dialed
Lists outbound numbers for a specific time period
and the users who called these numbers. This User
Summary report is beneficial for professional
services and environments with specific accounts.
Each user’s calls to specific numbers are
summarized. The report can be used by the user or
their supervisor to evaluate account and service
information.
Calls Processed by User Comparison
A tool for supervisors to evaluate and compare user
call volumes. Shows the number of calls processed
(inbound and outbound) by each user during a
given time period. Does not indicate number of
inbound vs. number of outbound calls; just provides
a total for both directions. To see inbound and
outbound calls separately, run Incoming Calls by
User and Outbound Calls by User reports. Enter
each user or a range of users; not workgroup
names.
Dialed Number Detail
Shows all outbound calls sorted by dialed number
during a specific time period. The dialed number
report shows all outbound calls sorted by dialed
number. Managers and supervisors can use this
report to find all outbound calls and who is servicing
specific accounts.
Hourly Call Summary by Extension
Lists the number of calls processed by each
extension during each hour of a specific time
period. Analyzes call volumes for a given time
period. Each hour is broken out with numbers of
calls processed by each extension during each hour.
International Remote Number Logical Component
One Summary
Shows the area codes dialed out from the system,
and the duration of calls to each area code within a
particular country. This is sorted by country code
and then area code. The "Logical Component One"
refers to a subdivision of the called number that is
normally used for the area code (XXX-999-9999) in
the United States but may have other uses in some
other countries.
International Remote Number Logical Component
Two Summary
Shows the exchanges dialed out from the system,
and the duration of calls to those exchanges within
the specified area codes. This is sorted by country
code and then by exchange. The "Logical
Component Two" refers to a subdivision of the
called number that is normally used for the
exchange (999-XXX-9999) in the United States but
07/15/2013
Kentucky Health Benefit Exchange Contact Center
© 2013 Xerox Corporation. All rights reserved.
Page 24 of 170
Interaction Center User Manual
may have other uses in some other countries.
(Supervisor) Number Search
The Number Search Report is a tool for managers
and system administrators who wish to track down
the callers of specific numbers.
Station ID Detail
The Station ID Detail report shows the Station ID
information by date for a selected range of stations.
This report information includes call duration, end
user, and hold time.
The Supervisor can use Station ID reports to
monitor call activity placed or received from nonUser assigned phones or for a phone, including time
when a User is not logged into the phone or
Interaction Client software.
This report shows if the call was inbound or
outbound, but does NOT show specific caller ID, nor
does it indicate whether the call was internal or
external.
The station ID is the actual extension number or
name that we associate with the MAC address of
the phone. The extension is usually the station ID
with a 1 in front of it.
Station ID Summary
The Station ID Summary report shows the Station
ID summary information by date for a selected
range of stations, including call duration, call count,
and average duration.
CALL REPORTS
Report Name
Report Description
Caller ID Detail for Current User
This report shows details of calls received by the
current user to each identified external telephone
number. If the external number did not include
caller ID information, it is listed under the External
Call group at the end of the report.
Caller ID Summary for Current User
This report shows summary of information on
inbound calls the current IC user received from
each identified external telephone number. If the
external number did not include caller ID
information, its Caller ID is listed as External Call.
Number Search for Current User
This report allows the Supervisor to search for
numbers dialed or calls received from a specific
phone number for the current user. This report is
sorted by the phone numbers searched for and
retrieved.
07/15/2013
Kentucky Health Benefit Exchange Contact Center
© 2013 Xerox Corporation. All rights reserved.
Page 25 of 170
Interaction Center User Manual
User Call Detail for Current User
The User Call Detail Report displays all calls for the
current user running the report for a given time
period. The report is designed to give the user a
report of each his or her calls. By default, all
interaction Client users have access to this report.
System administrators may choose to use the User
Call Detail Report to bill users and departments for
their long distance calls.
User Call Summary for Current User
The User Call Summary for Current User (labeled as
User Summary by Date) report displays a summary
of all calls for the current IC user on each day in the
given range. The report is designed to give a
summary report of the individual users call volume.
User Outbound Call Summary by Number Dialed for
Current User
This report lists dialed outbound numbers called by
the current user for a specific time. This User
Outbound Summary report can help individual users
keep track of all dialed numbers. Each user’s calls
to specific numbers are summarized.
DNIS REPORTS
Report Name
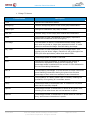
Report Description
Statistics Group DNIS Daily
This report summarizes a day’s queue activity by
DNIS, including percentages of calls answered and
abandoned within service levels, for specified
statistics groups (IF statistics groups are
configured. Talk with IC Installation Engineer). This
is an interval report and will report statistics up to
the end of the previous interval. For example, if it is
currently 11:15 am and the Supervisor runs the
report for today, it will show data up until 11:00
am.
DNIS Detail
The Statistics Group DNIS Report displays a detail
by day for the specified DNIS or DNIS range. The
report is designed to give a summary report of the
day’s queue activity by DNIS. This report displays
the number of ACD calls, number of abandoned
calls, and percentages on abandoned and answered
within the first service level as configured in
Interaction Administrator. This report has Flexible
Fields, allowing the Supervisor to substitute certain
columns of data for other data (see the Reporting
on-line help for details).
Warning!! DNIS statistics collection will significantly increase data collection. For this reason,
the DNIS server parameter, QueuePeriodStatisticsGenDNISData, default value is No. The
07/15/2013
Kentucky Health Benefit Exchange Contact Center
© 2013 Xerox Corporation. All rights reserved.
Page 26 of 170
Interaction Center User Manual
Supervisor must set this server parameter in Interaction Administrator to Yes if they want to
collect the DNIS data.
QUEUE REPORTS
Report Name
Abandoned Call Profile
Report Description
This graph plots the number of abandoned calls
during each interval of a specified date range.
This graph sorts by queue name, shows data by
interval (typically half-hour), combines all days in
the range together, and includes a summary graph
page. So, the Supervisor can see trends by
intervals throughout the day, but not able to see
trends among the days of the week.
Answered Call Profile
This graph plots The number of calls that were
answered in an ACD queue per reporting interval of
the specified date range.
This graph sorts by queue name, shows data by
interval (typically half-hour), combines all days in
the range together, and includes a summary graph.
Profile of Average Wait to Answer
This graph plots the average wait to answer time of
calls during each interval of a specified date range.
This graph sorts by queue name, shows data by
interval (typically half-hour), combines all days in
the range together, and includes a summary graph
page.
Profile of Calls Abandoned in the 1st Service Level
This graph plots the number of abandoned calls in
the 1st service level during each specified interval
of a specified date range.
The service level tells managers the percentage of
calls answered within the goal of X seconds.
Supervisors can set the goal to 10 seconds, 60
seconds, or more depending on the environment
settings.
This graph sorts abandoned calls in the 1st service
level by queue name and includes a summary graph
page named Grand Total Sum All Queues.
Profile of Calls Answered in the 1st Service Level
07/15/2013
This graph plots the number of answered calls in
the 1st service level during each interval of a
Kentucky Health Benefit Exchange Contact Center
© 2013 Xerox Corporation. All rights reserved.
Page 27 of 170
Interaction Center User Manual
specified date range.
The service level tells managers the percentage of
calls answered within the goal of X seconds.
Supervisors can set the goal to 10 seconds, 60
seconds, or more depending on the environment
settings.
This graph sorts answered calls in the 1st service
level by queue name and includes a summary graph
page named Grand Total Sum All Queues.
Profile of Calls Entering ACD
This report shows the number of calls entering an
ACD queue during each interval of the specified
date range.
An entered call occurs when a call enters a queue,
regardless if it is answered, goes to voice mail, etc.
This report also provides a graph that sorts the
number of ACD calls entering a queue by queue
name and includes a summary graph page named
Grand Total Sum ALL Queues – combined.
This is an interval report, so it shows calls broken
down by intervals. If the Supervisor runs it over
multiple days, they can see which interval (halfhour) of the day tends to be the busiest and the
slowest, etc... This can help with staffing.
Profile of Maximum Wait to Answer
This graph plots the maximum wait to answer time
of calls during each interval of the specified date
range.
This graph sorts the maximum wait to answer time
by queue name, by reporting interval, showing
interval statistics and a graph for each selected
queue. It includes a summary graph page for all
queues combined, and a summary line of max wait
time for all queues combined.
Queue Period Statistics (QPS) Abandon Report
07/15/2013
The QPS Abandon report displays the percentages
of all ACD interactions abandoned at the various
service level thresholds. The service level
thresholds are determined by their settings in
Interaction Administrator. This report includes
interactions answered, interactions entering the
queue, and the percentage of interactions
abandoned at each service level threshold.
Kentucky Health Benefit Exchange Contact Center
© 2013 Xerox Corporation. All rights reserved.
Page 28 of 170
Interaction Center User Manual
Queue Period Statistics (QPS) Abandon Report
(Accumulative Percentage)
The QPS Abandon Report (Accumulative
Percentage) displays the accumulated percentages
of all ACD interactions abandoned at the various
service level thresholds. The service level
thresholds are determined by the Supervisor’s
settings in Interaction Administrator. This report
includes interactions answered, interactions
entering the queue, and the accumulated
percentage of interactions abandoned at each
service level threshold.
Queue Period Statistics (QPS) Response Report
The QPS Response report displays the percentages
of all ACD interactions answered at the various
service level thresholds. The service level
thresholds are determined by the Supervisor’s
settings in Interaction Administrator. This report
includes interactions answered, interactions
entering the queue, and the percentage of
interactions answered at each service level
threshold.
Queue Period Statistics QPS) Response Report
(Accumulative Percentage)
The QPS Abandon Report (Accumulative
Percentage) displays the accumulated percentages
of all ACD interactions abandoned at the various
service level thresholds. The service level
thresholds are determined by their settings in
Interaction Administrator. This report includes
interactions answered, interactions entering the
queue, and the accumulated percentage of
interactions abandoned at each service level
threshold.
Distribution Queue Performance (Date by Queue)
This report allows they want to see a detailed view
of queue activity with a breakdown by date. It
includes such information as interactions answered,
total talk time, average talk times, average wait
time. It also shows information on ACW time and
Abandons.
Distribution Queue Performance (Date by Queue by
Interaction Type)
This report allows the Supervisor to see a detailed
view of queue activity grouped by date. It includes
such information as interactions answered, total
talk time, average talk times, average wait time. It
also shows information on ACW time and Abandons.
Distribution Queue Performance (Queue by Date)
This report is broken down by Q, with a one-line
summary for each date in the report range. It does
not provide a total line for each queue; instead it
provides a total line for all of the selected Queues
combined for all of the days in the report range.
Distribution Queue Performance (Queue by Date by
Interaction Type)
This report allows the Supervisor to see a detailed
view of queue activity with a breakdown by date
and interaction. It includes such information as
07/15/2013
Kentucky Health Benefit Exchange Contact Center
© 2013 Xerox Corporation. All rights reserved.
Page 29 of 170
Interaction Center User Manual
interactions answered, total talk time, average talk
times, average wait time. It also shows information
on ACW time and Abandons.
Distribution Queue Performance (Queue by
Interaction Type)
This report allows they to see a detailed view of
queue activity grouped by interaction type. It
includes such information as interactions answered,
total talk time, average talk times, average wait
time. It also shows information on ACW time and
Abandons.
Distribution Queue Performance (Queue by Date by
Interval) *
This report allows the Supervisor wants to see a
somewhat detail view of queue activity grouped by
date. This report also allows a supervisor to
compare intervals for a particular day on a
particular queue. It includes such information as
interactions answered, average talk time, total talk
time, max wait time, average speed of answer, svc
level 1. It also shows information on ACW time and
Abandons.
Broken down by Q, by date, by interval (e.g. every
30 or 60 min, depending on interval configured)
with a 1-line summary at top of each date, and a
total line for each Q for all the days. Next to last
page is 1 summary line for Site. Final page is 1
summary line for Grand Total.
IVR REPORTS
Report Name
Report Description
IVR Summary by Date
Displays an IVR summary report for a level, which
shows IVR level name, interactions, duration,
average duration, percent of calls by IVR level
name, repeated calls, and percent of calls repeated.
IVR Audit Report
Displays interaction ID, date, time, sequence
number, and events 1, 2, and 3.
IVR Breakdown
Displays an IVR breakdown report by date, which
shows IVR level name, interactions, duration,
average duration, and percent of calls by IVR level
name, repeated calls, and percent of calls repeated.
IVR Exit Path
Displays date, interaction, path duration, average
duration, and repeated interactions.
IVR Summary Abandoned Report
Displays an IVR summary report by date, which
shows level name, interactions, aborted
interactions, average aborted duration, percent
07/15/2013
Kentucky Health Benefit Exchange Contact Center
© 2013 Xerox Corporation. All rights reserved.
Page 30 of 170
Interaction Center User Manual
aborted, repeated aborts, and percent repeated.
IVR Summary
Displays an IVR summary report for a level (default
= 4), which shows IVR level name, interactions,
duration, average duration, percent of calls by IVR
level name, repeated calls, and percent of calls
repeated.
AGENT REPORTS
Report Name
Report Description
Agent Availability Detail
This report shows how long the Supervisor was in
an Available state to take calls, and their status
while they were unavailable.
Agent Availability Summary
This report shows how long the CSRs were in an
Available state to take calls, and their status while
they were as unavailable.
INTERACTION RECORDER REPORTS
Report Name
Report Description
Interaction Recorder Scoring Detail
This report provides detailed information about the
scoring of each recording scored via an Interaction
Recorder questionnaire. The report is grouped by
the Title and Date/Time of each recording, and
under that the details of each IC User's
performance on that recording are displayed. Each
question group and specific questions from the
questionnaire are shown along with the scorer's
answer and score for each question.
Interaction Recorder Questionnaire Detail
This report provides detailed information about each
questionnaire included in the range. It enables
supervisors and managers to analyze all of the
questions, score ranges, types of questions, weights
and other possible values available in a
questionnaire.
Interaction Recorder Scoring Summary
This report summarizes the questionnaire scores for
each Interaction Recorder questionnaire in the
specified range. It lists a summary line for each
scored recording under each questionnaire name
included in the report. Recordings that have not
been scored will not appear in the list. The
summary line provides an overview of how an CSR
performed on each recorded, scored interaction in
07/15/2013
Kentucky Health Benefit Exchange Contact Center
© 2013 Xerox Corporation. All rights reserved.
Page 31 of 170
Interaction Center User Manual
the range.
Interaction Recorder Scoring User Summary
This report summarizes the questionnaire scores for
each IC user and Interaction Recorder questionnaire
in the specified range. It lists a summary line for
each scored recording under each user name
included in the report. Recordings that have not
been scored will not appear in the list. The
summary line provides an overview of how an CSR
performed on each recorded, scored interaction in
the range.
Deleted Recording Audit by Date
The Deleted Recording Audit by Date report is an
Interaction Recorder report that displays deleted
recordings by Date and Time the Recording was
deleted, and then by User ID.
Deleted Recording Audit by User
The Deleted Recording Audit by User report is an
Interaction Recorder report that displays deleted
recordings by User and then by Date/Time the
recording was deleted.
Recorder Scoring Summary for Admin
This report summarizes the questionnaire scores for
each Interaction Recorder questionnaire in the
specified range. It lists a summary line for each
scored recording under each questionnaire name
listed by IC Scorer (reviewer). Recordings that have
not been scored will not appear in the list. The
summary line provides an overview of how an CSR
performed on each recorded, scored interaction in
the range.
Recorder Scoring User Summary for Admin
This report summarizes the questionnaire scores for
each IC user and Interaction Recorder questionnaire
in the specified range. It lists a summary line for
each scored recording under each IC User name
included in the first column of the report, and is
sorted by that name. Recordings that have not been
scored will not appear in the list. The summary line
provides an overview of how an CSR performed on
each recorded, scored interaction in the range.
INTERACTION TRACKER REPORTS
Report Name
Report Description
Tracker Individual Detail Report
Displays an individual detail report.
Tracker Individual Summary
Displays an individual summary report.
Tracker Interaction Segment Detail for Admin
Report
Tracker Interaction segment detail report.
07/15/2013
Kentucky Health Benefit Exchange Contact Center
© 2013 Xerox Corporation. All rights reserved.
Page 32 of 170
Interaction Center User Manual
Tracker Interaction Segment Detail for Current User
Tracker Interaction segment detail report for
current user.
Tracker Interaction Segment Detail by IC User
Tracker Interaction segment detail report by IC
user.
Tracker Interaction Segment Summary for Admin
Tracker Interaction segment summary report for all
users.
Tracker Interaction Segment Summary for Current
User
Tracker Interaction segment summary report for
current user.
Tracker Interaction Segment Summary by IC User
Tracker Interaction segment summary report by IC
user.
Tracker Location Detail
Displays a location detail report.
Tracker Location Summary
Displays a location summary report.
Tracker Organization Details
Displays an organization detail report.
Tracker Organization Summary
Displays an organization summary report.
Voicemails Tracker Contacts (Search by Contact)
Displays the date and time, and durations of voice
mails left by a Tracker contact to the different IC
users.
Voicemails Tracker Contacts (Search by IC User)
Displays the date and time, and durations of voice
mails left by Tracker Contacts to the different IC
users.
INTERACTION FEEDBACK REPORTS
Report Name
Report Description
Satisfaction Trends (Line Graph)
The Survey Satisfaction Trends report shows the
satisfaction trend for an CSR over time, by survey.
Displayed in a line graph.
Survey Scoring Detail
The Survey Scoring Detail report shows the average
survey score for CSRs during a date and time
range. The report also shows survey detail by user,
including survey scores, percentile, and score and
weight by question.
Survey Scoring Summary
The Survey Scoring Summary report shows the
average survey score for CSRs during a date and
time range.
Survey vs. Quality Scores
This report compares survey and quality scores
from Interaction Recorder for a given CSR.
07/15/2013
Kentucky Health Benefit Exchange Contact Center
© 2013 Xerox Corporation. All rights reserved.
Page 33 of 170
Interaction Center User Manual
INTERACTION OPTIMIZER REPORTS
Report Name
Report Description
Individual Schedule Detail
Shows the detail of the Interaction Optimizer
published schedule for an individual.
Individual Schedule Summary
Shows the duration of each scheduled activity in the
Interaction Optimizer published schedule for an
individual.
Schedule (List)
Shows start time and end time for every activity on
the Interaction Optimizer schedule of users.
Schedule (Graph)
Shows a graph, Interaction Optimizer scheduled
activities on intervals of 15 minutes for specified
users.
Schedule (Text based)
Shows in a text based graph (can be printed on
color or black-and-white printers), Interaction
Optimizer scheduled activities on intervals of 15
minutes for specified users.
Adherence Detail by User/Date
Shows user exceptions to activities and durations
that did not adhere to the published Interaction
Optimizer schedule.
Adherence Detail by Date/User
Shows the exceptions to activities and durations for
different dates of a user on the Interaction
Optimizer published schedule.
Adherence Summary by User/Date
Shows duration and total exceptions for users in the
Interaction Optimizer published schedule, by date.
Adherence Summary by Date/User
Shows duration and total of exceptions for different
dates in the Interaction Optimizer published
schedule, by users.
LINE GROUP REPORTS
Report Name
Calls Entered Line Group by Hour
07/15/2013
Report Description
This graph shows the number of inbound and
outbound calls attempted on each line for every
hour of a specified day. This graph can be used to
evaluate calling volumes throughout the day on
each line. Each lines call volume is plotted for each
hour to allow system administrators to see line
traffic at a glance. Call attempts are evaluated
versus actual connected calls to give a true picture
of line activity.
Kentucky Health Benefit Exchange Contact Center
© 2013 Xerox Corporation. All rights reserved.
Page 34 of 170
Interaction Center User Manual
Calls Inbound Entered Line Group by Hour
This graph shows the number of inbound call
attempts per hour for each line during an interval
the Supervisor specify. This includes all inbound
calls that reached a Connected state (i.e.,
connected to the IC server, not necessarily
Client_Connected where an CSR answered a call).
Calls Outbound Blocked Line Group by Hour
This graph shows all outbound blocked line group
calls by hour. This graph sorts the outbound calls by
blocked line group name.
Calls Outbound Line Group by Hour
This graph shows the number of outbound call
attempts per hour for each line (LineID), during an
interval the Supervisor specifies. Outbound call
attempts include all calls, including wrong or invalid
numbers, busy calls, etc.)
Erlang Study
Evaluates the number of lines required to handle
line traffic at half-hour intervals. An advanced
report for system administrators to evaluate lines
required to accommodate line traffic. Simply
defined, an Erlang is the total line usage divided by
the number of seconds available on one line in one
hour (e.g., One Erlang is equal to one full hour of
conversation). The Erlang can be used in an Erlang
calculation to help determine the number of lines
necessary to handle the call activity.
Line Group All Trunks Busy for Interval by Day
This report shows all intervals a report line group
had when all lines were busy. Use this report to
evaluate line traffic distribution and the need for
line resources.
Line Group All Trunks Busy for Interval by Grade of
Service
This report shows all intervals during which a report
line group had all lines busy, and the line group had
a grade of service less than the grade of service
report parameter value entered during runtime. Use
this report to evaluate line traffic distribution and
the need for line resources.
Line Group Identification
This report shows the line group membership and
the line configuration information to assist
configuration management and problem resolution.
Line Group Least Used Trunks by Day
This report shows the least used lines for each
reporting line group for a specified day.
Percent All Lines Busy by Hour
This graph plots report line groups when all lines
were busy during the hours in the specified date
and time range. Used to evaluate line traffic
distribution and the need for line resources.
Percent Line Group Busy by Hour
This graph plots the percent of report line groups
that were busy by hour during the hours included in
07/15/2013
Kentucky Health Benefit Exchange Contact Center
© 2013 Xerox Corporation. All rights reserved.
Page 35 of 170
Interaction Center User Manual
the specified date and time range. Use this graph to
evaluate line traffic distribution and the need for
line resources.
Line Activity by Hour
This report evaluates call activity on the lines in a
line group on an hourly basis. It shows LineID, start
time, duration, utilization, and out of service time.
Line Activity Summary by Day
This report compares day to day line activity in a
summary. This report shows the call activity on the
configured lines in a line group across several days.
Line Activity Summary by Line
This report evaluates line activity for a day. This
report shows the call activity for all lines in the
specified range of line groups for a specified time
and date range.
Line Group Activity Summary by Day
This report shows the daily summary of line group
activity.
Line Group Activity Summary by Line
This report evaluates the line group activity for a
day, showing call activity on the configured line
groups across several days.
2.3.2.Creating Reports
Starting the Interaction Report Assistant
1. In IC Business Manager, click the Default Workspace module tab. The Create New View
window will be displayed.
07/15/2013
Kentucky Health Benefit Exchange Contact Center
© 2013 Xerox Corporation. All rights reserved.
Page 36 of 170
Interaction Center User Manual
2. In the Group by drop-down, select Categories, and in the left pane select Historical Reports.
3. In the right pane, select New Interaction Report Assistant, and click OK.
4. In the right pane, select New Interaction Report Assistant, and click OK. Then the Interaction
Report Assistant wizard is started.
07/15/2013
Kentucky Health Benefit Exchange Contact Center
© 2013 Xerox Corporation. All rights reserved.
Page 37 of 170
Interaction Center User Manual
07/15/2013
Kentucky Health Benefit Exchange Contact Center
© 2013 Xerox Corporation. All rights reserved.
Page 38 of 170
Interaction Center User Manual
07/15/2013
Creating Queries and Reports
Here’s how to use Interaction Report Assistant to create queries and reports.
On the Welcome to the Interaction Report Assistant screen, click Next. The Package and
layout dialog is displayed.
Kentucky Health Benefit Exchange Contact Center
© 2013 Xerox Corporation. All rights reserved.
Page 39 of 170
Interaction Center User Manual
Designing a report
Interaction Report Assistant wizard guides the user through designing and generating their
specialized report.
1. Choosing a data package: When they design their report, first select the package that
contains the Data records they want to base their report on, and then select the report
Layout—Table or Matrix.
2. Choosing report fields: Next, based on the available fields for the package selected, add the
columns or rows to display the data in their custom report.
07/15/2013
Kentucky Health Benefit Exchange Contact Center
© 2013 Xerox Corporation. All rights reserved.
Page 40 of 170
Interaction Center User Manual
3. Table Layout: Select fields for columns that will appear in their report.
4. Table Summary fields: They can summarize fields in Table reports. For more information, see
―Grouping data‖ later in this document.
5. Matrix design: Select fields for columns and rows that will appear in their report.
6. Selecting Users: After designing their report layout, the Supervisor will select users for which
to run their report on. Select users from a workgroup or select specific users.
07/15/2013
Kentucky Health Benefit Exchange Contact Center
© 2013 Xerox Corporation. All rights reserved.
Page 41 of 170
Interaction Center User Manual
7. Selecting Users in a Workgroup: If the Supervisor’s package is based on User data, the
following dialog is displayed. Select users in a workgroup by choosing a Site ID and
Workgroup from the drop-down boxes, and clicking Add to display the users in the Selected
Users list box. If they want multiple users from a workgroup but not all users, it might be
easier to add a workgroup and individually remove the users they do not want to report on.
8. Selecting specific users: If a user is not in a workgroup, they can select Advanced Options to
search by User ID or by name.
9. After selecting Advanced Options, click Add. The Advanced User Search dialog is displayed.
07/15/2013
Kentucky Health Benefit Exchange Contact Center
© 2013 Xerox Corporation. All rights reserved.
Page 42 of 170
Interaction Center User Manual
10. Use any of the fields to search for a specific user. The Supervisor can search for a user by
Site, Workgroup, User ID, or by name. They can use one or more fields to refine their search.
Click Search to display their results. Select the users to include in their report and click Add,
or click Add All. Use the Advanced User Search dialog repeatedly to create a list of all the
Users to include in their report..
11. Selecting Workgroups: If the package they selected includes data from multiple sites, the
following dialog is displayed. Use this dialog to select one or more workgroups from specific
sites.
12. Click on the column headings to sort by Site ID or Workgroup.
07/15/2013
Kentucky Health Benefit Exchange Contact Center
© 2013 Xerox Corporation. All rights reserved.
Page 43 of 170
Interaction Center User Manual
13. Filtering their data: Use the Filters dialog to refine the data to display in their report. First,
select a filter from the Available Filters box. Select the data to be displayed in their report
from the options displayed for the filter they have chosen.
14. Grouping data: For a Table layout report, they can choose to group the information. When
they select a Group by box, the report will be sorted by the Friendly Name field. If the field is
numeric, they can summarize the data by Average, Count, or Sum using the Summary Type
drop-down box.
15. Confirming their choices: The Wizard selection dialog displays the selections they made for
the Package, Layout, and Date criteria for their report. In the Report Orientation box they
07/15/2013
Kentucky Health Benefit Exchange Contact Center
© 2013 Xerox Corporation. All rights reserved.
Page 44 of 170
Interaction Center User Manual
can change the format of the generated report. Click Back to change any of their selections.
This orientation will be the one kept when they export their report.
16. Generating the report: When they click Finish, the generated report is displayed in the
Workspace.
17. Print Layout: The Print Layout icon is on the toolbar at the top of the Report Viewer window.
07/15/2013
Kentucky Health Benefit Exchange Contact Center
© 2013 Xerox Corporation. All rights reserved.
Page 45 of 170
Interaction Center User Manual
18. The Print Layout icon is a toggle command that allows they to switch between viewing the
report in print layout and the report session. When Print Layout is on, they are able to
visualize how the report will print. Print their report when Print Layout is on.
19. If Print Layout is off, the normal view of the report session is displayed in the Workspace.
20. Page Setup: The Page Setup icon is on the toolbar at the top of the Report Viewer in the
Workspace.
07/15/2013
Kentucky Health Benefit Exchange Contact Center
© 2013 Xerox Corporation. All rights reserved.
Page 46 of 170
Interaction Center User Manual
21. Page Setup allows them to set up their report for printing purposes. Page dimensions are
initialized by the application during the generation of the report. Use the Page Setup dialog to
override these dimensions, for printing purposes. If they Export the report, the dimensions
that were initially generated by the application are used, not the dimensions specified in the
Page Setup dialog.
Save Report query Selection
They can save the Supervisor’s customized report selections as an Interaction Report
Assistant File (*.i3rpt) to use again. Report selections that have not been saved display an
asterisk (*) on the Report Tab. To save their report selections:
1. On the menu bar, click Report Assistant
2. On the Report Assistant menu, click Save, or Save As
3. On the dialog name their file, and click Save.
07/15/2013
Kentucky Health Benefit Exchange Contact Center
© 2013 Xerox Corporation. All rights reserved.
Page 47 of 170
Interaction Center User Manual
2.3.3.Open Interaction Report Assistant File
Open a saved report file
Use the Open Interaction Report Assistant File dialog to open an Interaction Report
Assistant File. To access the Open Interaction Report Assistant File dialog:
1. In IC Business Manager, click the Default Workspace module button.
2. On the IC Business Manager toolbar, click New. The Create New View dialog will display.
3. In the Group by drop-down, select Categories, and in the left pane select Historical Reports.
07/15/2013
Kentucky Health Benefit Exchange Contact Center
© 2013 Xerox Corporation. All rights reserved.
Page 48 of 170
Interaction Center User Manual
4. In the right pane, select Open Interaction Report Assistant File, and click OK. The Interaction
Report Assistant Open Interaction Report Assistant File dialog is displayed. Use this dialog to
open Recently Viewed Reports or Open An Existing Report from a saved Interaction Report
Assistant file.
07/15/2013
Kentucky Health Benefit Exchange Contact Center
© 2013 Xerox Corporation. All rights reserved.
Page 49 of 170
Interaction Center User Manual
2.3.4.Recently Viewed Reports
1. To open a recently viewed and saved report, in the Open Interaction Report Assistant File
dialog, under Recently Viewed Reports, select a saved report file, and click OK. The
Interaction Report Assistant query is displayed.
07/15/2013
Kentucky Health Benefit Exchange Contact Center
© 2013 Xerox Corporation. All rights reserved.
Page 50 of 170
Interaction Center User Manual
2. To generate and view the report, click Finish. The report is displayed in the Workspace.
2.3.5.Saved Report Query
1. To open a saved report file and view the report, in the Open Interaction Report Assistant File
dialog, under Open an Existing Report, use the browse button to select a Report Path, and
click OK. The Interaction Report Assistant query is displayed.
07/15/2013
Kentucky Health Benefit Exchange Contact Center
© 2013 Xerox Corporation. All rights reserved.
Page 51 of 170
Interaction Center User Manual
2. To generate and view the report, click Finish. The report is displayed in the Workspace.
07/15/2013
Kentucky Health Benefit Exchange Contact Center
© 2013 Xerox Corporation. All rights reserved.
Page 52 of 170
Interaction Center User Manual
2.3.6.Edit a Report
Edit a Report Query
1. When a report is displayed in the Workspace, they can edit the query using the Report
Assistant menu. On the menu bar, click Report Assistant, point to Report, and on the
submenu select which part of the query they want to edit. The options are: Table Design,
Users, and Filters.
2. Table Design: Select Table Design to make changes to fields and columns that appear in the
report. When they click Table Design on the Report Assistant menu, the wizard page appears
with their previous selections. Make their new selections and press Next to continue.
3. Users: Select Users to make changes to the users on which to run the report. When they
click Users on the Report Assistant menu, the wizard page appears with their previous
selections. Make their new selections and press Next to continue.
4. Filters: Select Filters to make changes to the filters that display the data in their report.
When they click Filters on the Report Assistant menu, the wizard page appears with their
previous selections. Make their new selections and press Next to continue.
2.3.7.Distributing a Report
Saving a report to a file for distribution
1. To save the report, on the menu bar, clicks Report Assistant; point to Export, and on the
submenu select which format to export the report to. The export options are: Excel, PDF, and
Word.
2.3.8.Scheduled Reports
Scheduled Reports allows Interaction Center users to schedule IC Historical Reports to run on a
daily, weekly, or monthly, basis, and it can distribute those reports to multiple locations. The
Scheduled Reports application consists of four main components: the database, monitoring
service, IC handlers, and the Scheduled Reports Client.
The database contains configuration information for each of the scheduled reports.
The monitoring service sends a notification to the IC handlers to run a scheduled report
and monitors for updates to the database.
The IC handlers receive the notifications from the monitoring service at the time a report
is scheduled to run.
The Scheduled Reports Client is the user interface for report administrators to schedule
the running and distributing of reports.
07/15/2013
Kentucky Health Benefit Exchange Contact Center
© 2013 Xerox Corporation. All rights reserved.
Page 53 of 170
Interaction Center User Manual
To start the Scheduled Reports Client on the Supervisor’s workstation:
1. Click Start and select All Programs.
2. Click Interactive Intelligence and select Scheduled Reports Client. The Interaction Scheduled
Reports dialog opens.
07/15/2013
Kentucky Health Benefit Exchange Contact Center
© 2013 Xerox Corporation. All rights reserved.
Page 54 of 170
Interaction Center User Manual
07/15/2013
Understanding the Scheduled Reports Client interface
The Scheduled Reports Client user interface includes a menu bar, toolbar, and a report list.
Kentucky Health Benefit Exchange Contact Center
© 2013 Xerox Corporation. All rights reserved.
Page 55 of 170
Interaction Center User Manual
Icon
Using the toolbar
The Scheduled Reports Client toolbar contains buttons with the following commands:
Name
Function
New
Click this button to create a new scheduled report. Options include New Crystal
Reports Report, New Interaction Reporter Report, and New Report Assistant
Report.
Edit
Click this button to open a scheduled report to change.
Copy
Click this button to create a new scheduled report from the currently selected
report.
Details
Click this button to display the details of the selected scheduled report.
Delete
Click this button to delete the selected report.
Test
Click this button to test the selected report for errors in configuration or
distribution locations.
Activate
Use this toggle button to activate and de-activate the selected report. Only
activated reports run on their scheduled date and time.
Schedule a report
1. Click the arrow at the end of the New button and select one of the following:
New Crystal Reports Report
New Interaction Reporter Report
New Report Assistant Report
2. If the Supervisor chose New Crystal Reports Report, the Crystal Reports Report Info dialog
opens. Complete the following fields:
Name field. Type a name for the Scheduled Report. This name is displayed in the Name
column of the report list.
Category drop-down list. Select a report category from this drop-down list. Reports from
the selected category appear in the following Report field. If they select All, the Report
field displays all available reports listed in the drop-down list.
Report drop-down list. Select the report to run from this drop-down list.
Description field. This field displays description stored in Interaction Administrator.
Run Report Start Date drop-down list. Select the date to begin running this report. If a
future start date is not required, select the No Start Date check box to run the report at
the next scheduled time.
Run Report End Date drop-down list. Select the date to stop running this report. If no
stop date is required, select the No End Date check box to run the report according to
the schedule.
Report Parameters. This area displays the list of parameters for this report as configured
in Interaction Administrator.
07/15/2013
Kentucky Health Benefit Exchange Contact Center
© 2013 Xerox Corporation. All rights reserved.
Page 56 of 170
Interaction Center User Manual
3. If the Supervisor chose New Interaction Reporter Report, the Interaction Reporter Report Info
dialog opens. Complete the following fields:
Filter: Type the name of the Interaction Report filter, or click the Browse button to
search for the .i3filter file.
Name field. Type the name of the Scheduled Report.
IC User: Type the IC user credentials.
IC Password: Type the IC password.
IC Server: Type the name of the IC server.
Run Report Start Date drop-down list. Select the date to begin running this report. If a
future start date is not required, select the No Start Date check box to run the report at
the next scheduled time.
Run Report End Date drop-down list. Select the date to stop running this report. If no
stop date is required, select the No End Date check box to run the report according to
the schedule.
Report Parameters. This area displays the list of parameters for this report as configured
in Interaction Administrator.
4. If the Supervisor choses New Report Assistant Report, the Report Assistant Report Info dialog
opens. Complete the following fields:
a. Filter: Type the name of the Report Assistant filter, or click the Browse button to
search for the .i3rpt file.
Name field. Type the name of the Scheduled Report.
IC User: Type the IC user credentials.
IC Password: Type the IC password.
IC Server: Type the name of the IC server.
Run Report Start Date drop-down list. Select the date to begin running this report. If a
future start date is not required, select the No Start Date check box to run the report at
the next scheduled time.
Run Report End Date drop-down list. Select the date to stop running this report. If no
stop date is required, select the No End Date check box to run the report according to
the schedule.
Report Parameters. This area displays the list of parameters for this report as configured
in Interaction Administrator.
07/15/2013
Kentucky Health Benefit Exchange Contact Center
© 2013 Xerox Corporation. All rights reserved.
Page 57 of 170
Interaction Center User Manual
5. For Crystal Reports only: To modify a report parameter, double-click the parameter in the
Report Parameters list box. The Set Report Parameter dialog opens.
6. The next step is to determine the method and format for distributing the report.
2.3.9.Determine and load output data (report) destination
1. From the Scheduled Reports: Report Information dialog, click Next. The Scheduled Reports –
Destination of Report dialog opens.
07/15/2013
Kentucky Health Benefit Exchange Contact Center
© 2013 Xerox Corporation. All rights reserved.
Page 58 of 170
Interaction Center User Manual
2. Use the Scheduled Reports – Destination of Report dialog to choose the method and format
for distributing the scheduled report.
Distribute the report through e-mail
1. In the Destination of Report dialog, select the Email check box.
2. In the Email Addresses drop-down list, enter a valid e-mail address to which to send the
report and click add to add the address to the field on the right.
3. Repeat step two to add additional e-mail addresses to the list.
4. To delete an e-mail address, select the e-mail address and click remove.
5. In the File Format drop-down list, select the file format for the report.
Save the report to a file
1. In the Destination of Report dialog, select the File check box. The fields in the File area are
now made available.
2. Click the File Location drop-down list, choose a file path, and then click add to add the file
paths to the list box on the right. The system saves the report in the file path locations in the
list box on the right.
3. Repeat step two to add additional file paths to the list.
4. To delete paths from the list box, select the path and click remove.
5. In the File Format drop-down list, select the file format for the saved report file.
6. Use the Overwrite Freq drop-down list to determine when to overwrite report files. The default
values are Daily, Weekly, Monthly, Yearly, or Never.
Send the report to a printer
1. In the Destination of Report dialog, select the Printer check box. The fields in the Printer area
are now made available.
2. In the Printer Location drop-down list, select the printer name to which to send the report.
3. Click Add to add the printer location to the list box on the right.
4. Repeat step two to add additional printer locations. The system sends the report to the printer
locations in the list box on the right.
5. To delete locations from the list, click Remove.
2.3.10.
Schedule the time and frequency of the report
generation
After the Supervisor completes the destinations for their report, click on Next. The Scheduled
Reports - Frequency of Reports dialog opens and the report name appears in the Name field.
07/15/2013
Kentucky Health Benefit Exchange Contact Center
© 2013 Xerox Corporation. All rights reserved.
Page 59 of 170
Interaction Center User Manual
Use the Frequency of Reports dialog to schedule when the report runs, including the time of day
the report runs, how often they want it to run, and on what day of the week to run it.
To schedule the time and frequency of the report generation:
1. In the Time of Day to Run drop-down list, select a time to run the report. Their administrator
configures the lists of available times.
2. In the Frequency Type area, select the option for how often the Supervisor wants to run the
report. The options are: One Time, Weekly, or Monthly.
3. In the Pick Day(s) of Week area, select the check boxes for the days of the week on which to
run the report. The Next Scheduled Run Date(s) appear to the right of the dialog.
4. For Crystal Reports only, to designate a reporting period click Next.
5. For Interaction Reporter Reports and Report Assistant Reports, click Finish.
07/15/2013
Kentucky Health Benefit Exchange Contact Center
© 2013 Xerox Corporation. All rights reserved.
Page 60 of 170
Interaction Center User Manual
2.3.11.
Determine the report status
The report they created appears in the list of Scheduled Reports. When a report first appears in
the list, colored status dots appear next to the report.
These colored dots indicate the report status:
A yellow status dot indicates that the report is not active.
A green status dot indicates that a report is active and ready to be run.
A red status dot indicates that errors exist in the configuration. The report cannot run
until the Supervisor corrects these errors.
2.3.12.
Activate a report
To activate a report, in the Interaction Scheduled Reports dialog, select the report the
Supervisor wants to activate, and on the toolbar click activate.
A green status dot appears next to the report, indicating that this report is active.
07/15/2013
Kentucky Health Benefit Exchange Contact Center
© 2013 Xerox Corporation. All rights reserved.
Page 61 of 170
Interaction Center User Manual
2.3.13.
Resolve configuration errors
If a configuration error exists, a red status dot appears next to the report. The red status dot
indicates that a parameter is missing from the configuration. The report will not run until they
correct the error.
To identify and resolve the missing parameter:
1. In the Interaction Scheduled Reports dialog, select the report with the red status dot.
2. On the toolbar, click test. The Schedule Report Validation dialog opens.
3. The Schedule Report Validation dialog displays the Name and Description of the validation
error. To correct the error, double-click the line with the error. The dialog that contains the
error opens.
4. Correct the parameter error, and click Finish to continue. The Schedule Report Validation
dialog reopens.
5. Continue to correct all errors until the Schedule Report Validation dialog indicates that NO
ERRORS are present.
6. When no other errors exist, click Exit Validation to close the dialog. The system returns to the
Interaction Scheduled Reports dialog, and the status for the corrected report is no longer red.
2.3.14.
Historic Reports
Flexible Fields (IC Standard)
Flexible Fields are columns in an IC Standard Historical Report that can be easily customized in
Interaction Administrator to display different data, depending on the Supervisor’s reporting
needs.
07/15/2013
Flexible Fields and Columns
Kentucky Health Benefit Exchange Contact Center
© 2013 Xerox Corporation. All rights reserved.
Page 62 of 170
Interaction Center User Manual
CSR Performance Reports:
CSR Performance Detail and Summary reports
CSR Performance Detail for Queue by Interval report
CSR Performance Detail for Queue by Date by Interaction Type report
Queue Performance Reports:
Distribution Queue Performance (multiple versions of this report)
Queue Period Statistics Abandon reports
Queue Period Statistics Response reports
Statistics Group DNIS Daily report
To see a listing of the reports that contains one or more flexible fields: In the Interaction
Supervisor applications, go to the Historical Reports view, click on the Help menu at the top, and
then select the Content option. In the Contents tab window, expand the option for Report
Parameters and select “Configuring Flexible Fields”. A list of reports that contain Flexible Fields
will be displayed on the right.
In the Supervisor’s Interaction Supervisor on-line help, at the screen shown above, click on the
link for this report: Distribution Queue Performance (Queue by Date). They will then see a
sample of the report, such as seen below, which shows the default columns of data for this
report.
07/15/2013
Kentucky Health Benefit Exchange Contact Center
© 2013 Xerox Corporation. All rights reserved.
Page 63 of 170
Interaction Center User Manual
07/15/2013
Fields and columns that are flexible (Distribution Queue Performance report)
This section displays: The Report Element / column names, The Report Field or Values in
the database, and the Field or Value Descriptions. Scroll through the listing and the
Supervisor will see which Fields are identified as flexible for this report (partial listing shown
below).
Kentucky Health Benefit Exchange Contact Center
© 2013 Xerox Corporation. All rights reserved.
Page 64 of 170
Interaction Center User Manual
Interaction Administrator to determine the values for each flexible field
1. In Interaction Administrator, in the System Configuration options on the left, select the
Reports container. Then from the list of reports on the right, double-click on the Distribution
Queue Performance (Queue by Date) report.
07/15/2013
Kentucky Health Benefit Exchange Contact Center
© 2013 Xerox Corporation. All rights reserved.
Page 65 of 170
Interaction Center User Manual
2. In the resulting Report Configuration dialogue goes to the Tables/Parameters tab.
3. In the Parameter Definitions list box on the right, select one of the flexible fields and click the
Edit button.
4. In the resulting Parameter Data dialogue (screen shot below), on the Parameter Definition
tab, the Prompt text box lists the value choices for the selected flexible column. The
Supervisor can click in the field and arrow right or left to see all of the choices. Each choice
has a corresponding number, and the Default Value field shows which value is currently
displayed when they run this particular report.
07/15/2013
Kentucky Health Benefit Exchange Contact Center
© 2013 Xerox Corporation. All rights reserved.
Page 66 of 170
Interaction Center User Manual
07/15/2013
Flexible/Column/Field 1 (Distribution Queue Performance report):
1 = Average Wait to Answer (How long caller waited in Queue for a CSR to answer)
2 = Answered Service Level 1 (% of calls answered in the first Service Level)
3 = Load Ratio (Ratio of total ACD talk time to the amount of time actually worked
during the selected interval.)
4 = Load – Hold Ratio (Ratio of total ACD talk time minus the time the interactions were
on hold to the amount of time actually worked during the selected interval.)
5 = Entered ACD (Number of interactions that entered the queue)
6 = Transferred ACD (Number of interactions that were transferred while in the queue)
7 = Flow Out ACD (Number of interactions in the Q that flow from one Q to another Q
before connecting to a CSR. If when waiting in an ACD queue the caller has the option to
leave a voice mail and they choose that option, transferring the call from the Q directly
to a mailbox will count as an Abandon in the Q. To avoid that, transfer the call to
another Q named CS VM Q, for instance, and make the action of the 2nd queue to “Send
to voicemail”. That way, the first Q will show a flow out and the 2nd queue will show all
abandons.)
8 = Local Disconnect ACD (The number of ACD calls that were disconnected locally)
9 = Supervisor Requests (When CSRs clicks the Assistance button in Interaction Client)
10 = Custom Value 1 (requires custom handler configuration)
11 = Custom Value 2 (requires custom handler configuration)
If everyone in the Supervisor’s organization who utilizes this report wants to see the
same statistic in the flexible field(s), then in the Default Value field enter the value for
the corresponding statistic that they want to appear on default standard report.
However, if different groups want to see different statistics in the flexible field(s), then
follow the instructions below to first make a copy of the default standard report and then
change the flexible field on the new copy of the report.
Kentucky Health Benefit Exchange Contact Center
© 2013 Xerox Corporation. All rights reserved.
Page 67 of 170
Interaction Center User Manual
Change a flexible fields for a specific workgroup or purpose
If different workgroups in their contact center want to display different columns of data on the
report, or if one workgroup wants different versions of the report (to display different flexible
values), they can copy the original report, rename it for that workgroup or purpose, and change
the appropriate flexible fields accordingly.
1.
2.
3.
4.
5.
07/15/2013
In IC Admin highlight the report to copy
Select Edit
Choose Copy
Click on Edit
Then choose Paste
Kentucky Health Benefit Exchange Contact Center
© 2013 Xerox Corporation. All rights reserved.
Page 68 of 170
Interaction Center User Manual
6. Enter a name for the new report. So that the modified report appears in the listing next to the
original report, only add to the end of the original report name – something that identifies the
workgroup or purpose of the report, such as “Custom” or “Customer Service”.
7. Re-sort the list. When the Supervisor first copy, paste, and name the new report, it will show
up at the end of the report listing. They can re-sort the list alphabetically by clicking on the
column heading “Report Name”.
07/15/2013
Kentucky Health Benefit Exchange Contact Center
© 2013 Xerox Corporation. All rights reserved.
Page 69 of 170
Interaction Center User Manual
Modifying a report by changing a Flexible Field
7. In the list of reports, double-click on the report they want to modify (probably their newlycreated report) to open it up for editing.
8. b. In the resulting Report Configuration dialogue, select the Tables/Parameters tab
9. c. In the Parameter Definitions list box on the right, select the flexible field they want to
modify and click Edit.
10. d. In the resulting Parameter Data dialogue, on the Parameter Definition tab, the Prompt text
box lists the value choices for the selected flexible column.
11. e. Select the option the Supervisor wishes to appear on their report, and enter the associated
number in the Default Value field at the bottom of the tab. Click OK to save.
12. f. Return to their Interaction Supervisor application and run the newly modified report to
verify it displays what they want.
Warning!! For reports that have more than one version of the report and that shows the same
type of data (e.g. CSR Performance Detail and CSR Performance Summary reports), if the
Supervisor changes a Default Value for one version of the report (e.g. Detail), be sure to make
the same change in the Default Value for the other version(s) of the report so that all versions
provide them with the same data columns.
Always be sure to document their changes and keep the change logs in a location where other
team members can locate them.
07/15/2013
Kentucky Health Benefit Exchange Contact Center
© 2013 Xerox Corporation. All rights reserved.
Page 70 of 170
Interaction Center User Manual
2.3.15.
DNIS Detail Report
The DNIS Detail report was designed for organizations that use multiple inbound numbers to
connect with workgroups, departments, and employees. Oftentimes, DNIS (Dialed Number
Information Service) is used for toll-free numbers that are given to customers to reach a contact
center. For reporting purposes, DNIS is very useful in segmenting call volume, based on the
numbers their callers dialed.
The DNIS Detail report displays a detail of inbound calls and chats for each DNIS for each day in
the selected date range. It shows duration, direction, and hold time. This report can be used by
a Supervisor to help determine which calls and chats were received, per DNIS during a specific
time range.
Sort Parameter Options
The DNIS Detail Report allows several options on which a report may be grouped / sorted. They
can specify a range of dates, times, DNIS’s, and site IDs to include in the report. IC sorts this
report by DNIS, then by date, and then by time. A summary of calls for each DNIS is shown
first, followed by the details of each call to the DNIS. Descriptions of each tab in the Report
Parameters dialog box that is shown in the below screenshot…
07/15/2013
Kentucky Health Benefit Exchange Contact Center
© 2013 Xerox Corporation. All rights reserved.
Page 71 of 170
Interaction Center User Manual
Date Time Range: Allows a single date or a range of dates separated by a hyphen.
DNIS: Allows a discrete (single) DNIS or a range of DNIS’s to be entered using string
format.
Site ID: If their IC system is configured as a multi-site system (not just multiple office
locations running off of one IC server; but multiple IC servers, where each one is configured
as its own site), then the Site ID parameter allows individual sites or a range of sites to be
queried.
Purpose Code: When the interaction type is "Call", this further segments the type of call
placed (see code descriptions in the below table.)
Purpose
Code
Null or 0
1
2
3
4
5
6
7
8
9
>100
Description
No specific purpose has been
assigned to this call object.
Fax
Call initiated by Interaction Dialer
Tie Line
Remote Station
Forward
Conference Bridge
Voicemail Return
Follow me
SIP Station
All values above 100 are userdefined as needed in Handlers.
Data Origin and Fields:
All statistics on the DNIS Detail report are pulled from one reporting table: Call Detail Record
(CDR).
While some fields pull raw data from the Call Detail log, most fields appearing on the report are
calculated values, using raw data and formulas in Crystal Reports.
Log field names and/or calculations, and descriptions for each report field:
Summary/
Detail
Summary
Detail
07/15/2013
Report
Field
DNIS
DNIS
Total Call
Duration
CallDurationSecond
s
Average
Duration
CallDurationSecond
s, ConnectedDate
Date Time
ConnectedDate
Caller ID
RemoteNumberFmt
Name
RemoteName
Table Field(s)
Description
DNIS obtained for an
inbound call from the
network
Total time spent on
calls for the specified
DNIS
Average amount of
time spent on calls
with the DNIS
DNIS call Date and
Time
Formatted version of
the remote number
Calling party’s name
if information is
passed with the caller
ID
Kentucky Health Benefit Exchange Contact Center
© 2013 Xerox Corporation. All rights reserved.
Calculation
Not applicable
Sum (CallDurationSeconds)
Sum (CallDurationSeconds)/
Count(ConnectedDate)
Not applicable
Not applicable
Not applicable
Page 72 of 170
Interaction Center User Manual
User
LocalUserId
Extension
LocalNumber
Station ID
CallDurationSecond
s
CallDurationSecond
s
Call
Duration
Hold Time
HoldDurationSecon
ds
User ID (as defined in
IA) for person
receiving call
Local phone number
of the extension
number receiving the
call
Time spent on
specified DNIS call
Duration of call
expressed as
hh:mm:ss
Duration that the call
was in a hold status
(hh:mm:ss)
Not applicable
Not applicable
Not applicable
Not applicable
Not applicable
Additional Information:
In order to allow any pre-defined post-interaction handlers to make modifications, the data
for the Call Detail Record table is collected one minute after an interaction ends /
disconnects. Any handler modifications are therefore made before the actual statistics are
logged.
Because information is collected only on the final user who touched an interaction in the Call
Detail Record log, the DNIS Detail report is not intended for use in evaluating Users, rather
for reporting on volume and attributes associated with calls placed on specific DNIS
numbers.
Due to only the final User information being recorded in the log, as well as the Call Detail
Record table not being associated with specific interval settings (such as the interval queue
and line statistics logs), this table has very limited relationships with other tables that are
used for reporting.
Analysis of database requirements of IC demonstrates that the collection of DNIS statistics
significantly increases the amount of data collection. In order to activate DNIS collection in
the Queue Period Statistics table, DNIS data collection must be activated. It is activated in
Interaction Administrator > Server Configuration > open the main container for editing
>Report Configuration tab > check the “Generate DNIS reporting data” check box.
07/15/2013
Kentucky Health Benefit Exchange Contact Center
© 2013 Xerox Corporation. All rights reserved.
Page 73 of 170
Interaction Center User Manual
07/15/2013
Report Construction Schematic:
Kentucky Health Benefit Exchange Contact Center
© 2013 Xerox Corporation. All rights reserved.
Page 74 of 170
Interaction Center User Manual
2.3.16.
07/15/2013
Example Reports
Kentucky Health Benefit Exchange Contact Center
© 2013 Xerox Corporation. All rights reserved.
Page 75 of 170
Interaction Center User Manual
07/15/2013
Kentucky Health Benefit Exchange Contact Center
© 2013 Xerox Corporation. All rights reserved.
Page 76 of 170
Interaction Center User Manual
07/15/2013
Kentucky Health Benefit Exchange Contact Center
© 2013 Xerox Corporation. All rights reserved.
Page 77 of 170
Interaction Center User Manual
07/15/2013
Kentucky Health Benefit Exchange Contact Center
© 2013 Xerox Corporation. All rights reserved.
Page 78 of 170
Interaction Center User Manual
07/15/2013
Kentucky Health Benefit Exchange Contact Center
© 2013 Xerox Corporation. All rights reserved.
Page 79 of 170
Interaction Center User Manual
07/15/2013
Kentucky Health Benefit Exchange Contact Center
© 2013 Xerox Corporation. All rights reserved.
Page 80 of 170
Interaction Center User Manual
07/15/2013
Kentucky Health Benefit Exchange Contact Center
© 2013 Xerox Corporation. All rights reserved.
Page 81 of 170
Interaction Center User Manual
07/15/2013
Kentucky Health Benefit Exchange Contact Center
© 2013 Xerox Corporation. All rights reserved.
Page 82 of 170
Interaction Center User Manual
07/15/2013
Kentucky Health Benefit Exchange Contact Center
© 2013 Xerox Corporation. All rights reserved.
Page 83 of 170
Interaction Center User Manual
07/15/2013
Kentucky Health Benefit Exchange Contact Center
© 2013 Xerox Corporation. All rights reserved.
Page 84 of 170
Interaction Center User Manual
`
07/15/2013
Kentucky Health Benefit Exchange Contact Center
© 2013 Xerox Corporation. All rights reserved.
Page 85 of 170
Interaction Center User Manual
07/15/2013
Kentucky Health Benefit Exchange Contact Center
© 2013 Xerox Corporation. All rights reserved.
Page 86 of 170
Interaction Center User Manual
07/15/2013
Kentucky Health Benefit Exchange Contact Center
© 2013 Xerox Corporation. All rights reserved.
Page 87 of 170
Interaction Center User Manual
07/15/2013
Kentucky Health Benefit Exchange Contact Center
© 2013 Xerox Corporation. All rights reserved.
Page 88 of 170
Interaction Center User Manual
2.4.
Interaction Center Feedback
2.4.1.CFI Group’s Top 10 Customer Satisfaction
Use a scientific questionnaire design
Define the goal
Keep surveys short and sweet
Measure what matters
Use the right scale
Don’t strive for a benchmark – find the “rightmark”
Coordinate with IT
Don’t use survey results to evaluate individuals
Report often and make results accessible
If you’ve invested, make it work
2.4.2.Types of surveys
Automated post-call surveys: For inbound interactions that involve a live agent in a workgroup
queue. The Interaction Feedback survey module in IC Business Manager lets survey authors
(typcially contact center and other business operations users) create and manage surveys
without involving technical or programming resources. From the same module, users can also
access survey results. Business users can quickly adapt surveys to changing business needs
with a flexible, intuitive interface and wizard-driven survey creation process. Features like predefined templates, context menus, “copy” capability and the ability to organize surveys by team
or business need help increase the speed and ease of survey creation.
2.4.3.Creating Surveys
Item
Survey Group
Survey Settings
Automatically Record
Calls
Minimum Acceptable
Score
Rank Group
07/15/2013
Description
Allows similar surveys to be put under a user-defined heading. For example,
an organization might want to put all of its Customer Service surveys under
one survey group, and all Marketing surveys in another.
A wizard-driven process quickly guides the user through the set-up of new a
new survey, including selection of required and optional settings specific to
that survey.
Customers with Interaction Recorder can select a setting to automatically
record interactions for calls where participants “opt-in” to a survey, ensuring
call recordings will be available for review if indicated as necessary by survey
scores.
Users can configure a setting to configure alerts in Interaction Supervisor to
notify appropriate personnel when a completed survey score falls below this
threshold.
Rank Group is the grading scale that is used for a Survey. The same Rank
Groups are shared between Interaction Feedback and Interaction Recorder,
to provide a consistent basis for comparison between internal and external
(customer) perceptions of performance for a given interaction. Users may
define as many different Rank Groups as they like, however each Survey can
have only one Rank Group associated with it. The Survey Scoring Reports will
display satisfaction ranking results for an individual agent or groups of
agents. The Satisfaction vs. Quality Report will provide comparisons data for
satisfaction vs. quality scores for an agent or a group of agents. The
Kentucky Health Benefit Exchange Contact Center
© 2013 Xerox Corporation. All rights reserved.
Page 89 of 170
Interaction Center User Manual
consistent ranking calibration between agent performance improvement and
customer satisfaction available in CIC’s all-in-one platform enables
organizations to link Quality with the Voice of the Customer, and better
support coaching or evaluation efforts.
Rule Conditions
Different organizations may have very different business requirements for
surveying customers. Yet often, existing “bolt-on” (or even custom) solutions
offer only limited options for survey call selection. To offer more flexibility,
Interaction Feedback allows multiple rule conditions for each survey. A rule
condition is a set of criteria that Interaction Feedback evaluates to determine
if a call should receive a survey invitation. Because Interaction Feedback is
tightly integrated to the Interaction Center platform, a user can define
custom attributes of a call to survey, such as the results of a database
lookup, and use those attributes to trigger a survey invitation. Configurable
selections allow survey authors to define which calls receive a survey
invitation and under what conditions based on parameters such as:
Survey Prompts
Users can specify “general” survey prompts to be used for things like the
survey invitation that asks a caller to participate, or a confirmation of that
caller’s “opt-in” that thanks them and reminds them to stay on the line
following their interaction. Pre-configured prompts are available, or users can
create custom prompts by:
Questions
Workgroup
ANI
DNIS
Every nth call (frequency)
Maximum number of surveys per day
Day, Date, Time selections
Call attribute
Uploading pre-recorded .wav files
Recording through the handset
Using Text-To-Speech (TTS)
Questions are the building blocks for Surveys, and what Interaction
Feedback’s entire scoring system is built around. The name actually refers to
the type of question response, which can be a True/False statement, numeric
scale, or multiple choice. Each Question is assigned a number of possible
answers, and a score is assigned to each answer. Weights can also be
assigned to a question.
Question Types:
Question Prompts
07/15/2013
Multiple Choice
Numeric
True/False (yes/no)
Free-form comments
Each Question will have its own prompt that plays for the caller. Like the
general Survey prompts, Question Prompts can be uploaded as pre-recorded
.wav files (including professionally recorded prompts), recorded through the
handset, or Text-To-Speech (TTS).
Kentucky Health Benefit Exchange Contact Center
© 2013 Xerox Corporation. All rights reserved.
Page 90 of 170
Interaction Center User Manual
Question Categories
Free-form
(Recorded)
Comments
Scoring and
weighting
Survey Questions can be grouped in Categories, to allow organizations to
identify how customers evaluate them on key “drivers” of satisfaction or
desired future behaviors.
Customer comments are often where “dissatisfiers” (factors that contribute to
customer attrition) are revealed. Interaction Feedback enables organizations
to offer survey participants the opportunity to record their “free-form”
comments. These recorded comments are managed by Interaction Feedback
and accessible for playback, along with survey questions and responses, in
the Survey Results.
Users can configure scoring and optional weighting selections for each
question response for a survey. The system will calculate an overall score for
a Survey based on the scoring and weighting for each survey Question. Each
Question can be weighted so that its score contributes more or less to the
overall score of the Survey to which it belongs.
2.4.4.Survey Results
Part of the value of Interaction Feedback surveys will be the immediacy of access to survey
results.
Dashboards
Dashboards provide a “heads-up” display view for at-a-glance information about a particular
survey, by date: average score for a survey, by overall ranking, and number completed.
Based upon the configured rankings for a particular survey, dashboards display red “danger”
zones, and green “ideal” zones.
Search
From the Interaction Feedback Client interface, authorized users will be able to search and
view survey results. Users will have the ability to quickly configure “nested” searches, using
compound attributes, to quickly access the desired information, without having to use
complex query logic. For example, someone might want to search by survey name, for a
particular agent, within a certain date range.
07/15/2013
Kentucky Health Benefit Exchange Contact Center
© 2013 Xerox Corporation. All rights reserved.
Page 91 of 170
Interaction Center User Manual
Results search attributes
07/15/2013
Monitoring
Supervisors can monitor survey activity to see real-time statistics by survey that can
include:
Surveys offered last hour
Surveys offered today
Active surveys (in-process)
Completed surveys
Abandoned surveys
Surveys where callers opted-out
Surveys with scores below “minimum acceptable score”
Kentucky Health Benefit Exchange Contact Center
© 2013 Xerox Corporation. All rights reserved.
Page 92 of 170
Interaction Center User Manual
07/15/2013
Alerts
Survey best practices underscore the importance of timing for survey delivery.
Recommendations are that in order to increase results accuracy, a survey should be offered
as close to the conclusion of the interaction as possible. But equally important is timing
relative to the speed at which an organization can respond to customer issues. Interaction
Feedback offers real-time alerts that can be configured to trigger based on a survey score or
any other available Interaction Supervisor survey statistic. For example, survey scores that
fall below a “minimum acceptable score,” real-time alerts can be set to notify appropriate
personnel (a Supervisor or “Customer Retention Specialist,” for example), prompting
proactive approaches to address issues before they escalate past the “point of no return.”
Kentucky Health Benefit Exchange Contact Center
© 2013 Xerox Corporation. All rights reserved.
Page 93 of 170
Interaction Center User Manual
3.
Workforce Solutions
3.1.
Interaction Optimizer
3.1.1.Scheduling Process
Schedule Process Distinct Phases:
Volume Forecasting — Interaction Optimizer calculates the number of interactions per
route group per time slice based on historical ACD data and the individual weights
applied to the days of the previous week(s). Administrators can manually adjust the
volume forecast after it is generated, as necessary.
Headcount Forecasting — The schedule administrator determines which headcount
forecast method to use (Erlang-C or ACD simulation). Interaction Optimizer uses the
selected method and the volume forecast to arrive at the number of CSRs is required to
cover the predicted contact load at the requested service level.
Schedule Generation — Interaction Optimizer uses the headcount forecast along with the
weekly and daily shift definitions (and associated constraints and activities), CSR’s
constraints and activities, and accepted time off requests to arrive at a generated
schedule.
Schedule Administration — Schedule administrator alters the generated schedule in
Interaction Optimizer Administration as necessary, and publishes it from there to the
CSRs. For more information, see the Interaction Optimizer Administration online help.
Scheduling Procedure
Select a scheduling unit.
Review the ACD data.
Forecast volume.
Forecast headcount.
Generate an initial schedule.
Adjust the schedule.
Publish the schedule.
Process Navigation
Scheduling Unit dialog box
1.
2.
3.
4.
ACD Data Review (Optional)
Volume Forecasting
Headcount Forecasting
Scheduling
*Notes:
07/15/2013
Kentucky Health Benefit Exchange Contact Center
© 2013 Xerox Corporation. All rights reserved.
Page 94 of 170
Interaction Center User Manual
The wide button toward the bottom of the Forecasts and Schedules tab changes
text as Workforce move through the scheduling process.
Double click each numbered step in the navigation list — or the button — as
Workforce performs each step.
Use the process navigation check boxes as a reference for tracking their
progress in the schedule creation process. Check them when they are done
with a step; leave unchecked the steps Workforce have not yet completed.
Select a Scheduling Unit
1. In Interaction Administrator, expand the Interaction Optimizer container and select the
Forecasts and Schedules container. All the scheduling units configured in the Scheduling Units
sub-container that Workforce has the rights to view appear.
Forecast and Schedule
07/15/2013
Kentucky Health Benefit Exchange Contact Center
© 2013 Xerox Corporation. All rights reserved.
Page 95 of 170
Interaction Center User Manual
2. Do one of the following to select the scheduling unit for which to create a schedule. The
Forecast and Schedules dialog appears for the selected scheduling unit. All previous schedule
units setup by Workforce will appear under the Forest and Schedules entry list.
Double-click a scheduling unit.
Right-click a scheduling unit and select Properties.
3. To create a new schedule, click Add. In the Entry name box, type a name for the new forecast
and schedule entry. Optionally, select a different month in the Start month box and starting
date in the Week of box. Click OK.
07/15/2013
Kentucky Health Benefit Exchange Contact Center
© 2013 Xerox Corporation. All rights reserved.
Page 96 of 170
Interaction Center User Manual
4. To change the name of an existing forecast and schedule entry, select an entry and click Edit.
In the Entry name box, type a new name for the entry and click OK.
5. To delete an existing forecast and schedule entry, select an entry name and click Remove. In
the Interaction Administrator message dialog box, click Yes.
6. In the Forecasts and Schedule entries section, select the name of a schedule and click OK.
7. Continue with the Review ACD data (optional) section.
3.1.2.Volume Forecasting
Interaction Optimizer uses historical ACD data to calculate forecasted interaction volume for the
coming week. Data is read from the ACD queues (IWrkgrpQueueStats table) by route group
(see definition below). This data is automatically read by Interaction Optimizer during the
Volume Forecast generation process.
07/15/2013
Kentucky Health Benefit Exchange Contact Center
© 2013 Xerox Corporation. All rights reserved.
Page 97 of 170
Interaction Center User Manual
Review ACD Data
1. After Workforce selects a scheduling unit and either created a new forecast and schedule
entry or selected an existing forecast and schedule entry (see Select a Scheduling Unit
procedure), in the Forecast and Schedule process navigation section, do one of the following:
Double-click the 1. ACD Data Review (optional) step.
Select the 1. ACD Data Review (optional) step in the Forecast and Schedule Process
Navigation section and click the ACD Data Review…button or double-click the ACD Data
Review entry.
2. Review the data by doing any or all of the following:
Use the arrows on the top left of the screen to scroll by day (the inner directional
arrows), or by week (the outer directional arrows).
Click the arrow at the end of the Selected date drop-down list to display a calendar
which enables Workforce to pick a date within the range of historical data.
3. In the ACD Data Details dialog box, in the Day classification section, click the Modify button to
edit the day classification of the currently displayed day.
*Note: These day classifications are configured in the Day Classifications sub-container in the
Interaction Optimizer container. The day classification configuration controls which day
classifications are available for the currently selected day. See the Day Classification
07/15/2013
Kentucky Health Benefit Exchange Contact Center
© 2013 Xerox Corporation. All rights reserved.
Page 98 of 170
Interaction Center User Manual
configuration in the Interaction Optimizer container in Interaction Administrator online help for
more details.
4. In the ACD Data Details dialog box, click the Graph button to display several graphs pertinent
to the ACD data. After Workforce completes their review of the graphs, click Close.
*Note: The Historic ACD Data Daily Graphs dialog box is a data review screen; none of the data
displayed on it can be edited. Workforce can select a different graph by selecting a tab in the
Historic ACD Data Daily Graphs dialog box.
07/15/2013
Available Graphs:
Summary Graphs. The Interactions Offered graph shows the time and number of
interactions (calls, chats, and emails) that were offered. The Average Handle Time (sec)
graph shows the time and handled time in average seconds of interactions (calls, chats,
and emails) received.
Media Detail Graphs. These graphs show the calls, chats and emails offered by time
based on skills. There is only one media type per graph.
Kentucky Health Benefit Exchange Contact Center
© 2013 Xerox Corporation. All rights reserved.
Page 99 of 170
Interaction Center User Manual
5. In the Historic ACD Data Daily Graphs dialog box, click the Configuration button to change the
workgroup(s) and skill set(s) displayed on these graphs. Click OK to display the changes to
the graphs.
6. When Workforce completes the ACD Data Review, in the ACD Data Details dialog box, click
OK.
7. In the Scheduling Unit dialog box, select the checkbox next to 1. ACD Data Review and click
Apply.
*Note: This step commits all the SQL which, up to clicking this button, is a transaction.
Continue with the following
07/15/2013
Kentucky Health Benefit Exchange Contact Center
© 2013 Xerox Corporation. All rights reserved.
Page 100 of 170
Interaction Center User Manual
Select and weight days used in the volume forecast:
1. In the Scheduling Unit dialog box, in the Forecast and Schedule Process Navigation section,
do one of the following:
Double-click the 2. Volume Forecasting step.
Select the 2. Volume Forecasting step and click the Volume Forecasting button.
2. In the Volume Forecasts section, do one of the following:
To create a new volume forecast, click Add. In the Name box, type a name for the new
volume forecast and click OK.
07/15/2013
Kentucky Health Benefit Exchange Contact Center
© 2013 Xerox Corporation. All rights reserved.
Page 101 of 170
Interaction Center User Manual
To change the name of an existing volume forecast, select a forecast name and click
Edit. In the Name box, type a new name for the existing forecast. Click OK.
To delete an existing volume forecast, select a forecast name and click Remove. In the
Interaction Administrator message dialog box, click Yes.
3. In the Volume Forecasts entries section, select the name of a volume forecast and does one
of the following:
To accept default day selection and weighting, skip the rest of this procedure and go to the
Volume forecast generation and modification section.
To adjust the day selection and weighting used for volume forecasting, do one of the
following:
Double-click the Day selection and Weighting (optional) step.
Select the Day selection and Weighting (optional) checkbox and click the Day
Selection and Weighting button.
07/15/2013
Understanding the Day Selection dialog
The Dates(s) list shows the historic dates for the selected day of the week corresponding
to the date selected in Forecast date.
Kentucky Health Benefit Exchange Contact Center
© 2013 Xerox Corporation. All rights reserved.
Page 102 of 170
Interaction Center User Manual
The number of rows in the Dates(s) list is controlled by the Weeks of ACD data to import
for forecasting settings in the Miscellaneous Scheduling Unit Configuration tab of the
Scheduling Unit dialog box. See the Scheduling Unit configuration in the Interaction
Optimizer container in Interaction Administrator online help for more details.
The Day Classification column displays the day classification assigned to this particular
ACD data date. A special day classification such as Catalog Release Date acts as a
reminder that Workforce may want to adjust the Weight assigned to this date.
The Weight column indicates the relative importance Workforce wants to place on the
particular date of historical ACD data.
The UTC Offset column displays the offset from Coordinated Universal Time (UTC). Time
zones around the world are expressed as positive or negative offsets from UTC. Since
the historic ACD data is stored in local time, a UTC offset must be specified so that the
volume forecast times can be stored in UTC. By default, the UTC offset is the IC server's
current UTC offset.
Adjusting Historic Date values
Workforce can add, edit or remove a historic date according to the qualitative
information they possess about a given day’s interactions. Perform any or all of the
following steps in the Day Selection dialog box:
To include a historic date outside the date range, click the Add button. Add the
appropriate values and click OK.
Historic date
Dropdown List
Day classification
The Day Classification defaults from the ACD data
and cannot be modified here. Workforce can assign
special day classifications during ACD Data Review
in the Desired Day Classification dialog box (see the
dialog box in the Review ACD data section).
Weight
This integer value assigns the relative weight to the
selected day’s interaction volume data when
arriving at next week’s interaction volume.
Example: If Workforce assigns a weight of “2”, to
Monday, 7/24/2006, and leave the other days’ data
as “1”, this indicates that this historic day’s data is
counted double in the data used to average
07/15/2013
Kentucky Health Benefit Exchange Contact Center
© 2013 Xerox Corporation. All rights reserved.
Page 103 of 170
Interaction Center User Manual
interaction volume for all the Mondays in the
historic data to arrive at the average interaction
volume predicted for the coming week’s schedule.
Note: In order to reduce the relative weight placed
on a given day’s interaction data, since this value is
an integer and cannot be less than 1, increase the
weights of all the other historic days’ data. For
example, to lower the weight of Monday, 7/24/2006
to 1/2, leave the record Workforce wants reduced
at “1” and set the others to “2”. Or, it may be
easier to remove this day's date from the averaging
formula entirely by selecting the record in the Day
Selection dialog box and clicking Remove.
UTC offset (minutes)
UTC stands for Coordinated Universal Time which is
the international time standard also known as
Greenwich Mean Time. This value, in minutes, is
used to account for differences on the given days’
time. Use this value to make manual adjustments
for Daylight Savings Time which may have either
gone into or out of effect in the middle of the
historical data’s time period.
To edit a date, select a row and click the Edit button, or double click on a
highlighted row. Edit the available values and click OK.
*Note: Workforce can edit the Weight and UTC Offset in minutes, but they cannot edit the
Historic date or Day classification.
07/15/2013
Kentucky Health Benefit Exchange Contact Center
© 2013 Xerox Corporation. All rights reserved.
Page 104 of 170
Interaction Center User Manual
To remove a date, select the date and click the Remove button. In the
Interaction Administrator message dialog box, click on Yes.
Note: For example, if Workforce is using the last six weeks of data by default, but this includes
an errant day that they don't want to use, they can remove the day selection.
4. When Workforce have completed Day Selection and Weighting, in the Day Selection dialog
box, select the checkbox next to Day Selection and Weighting and click OK.
5. Proceed to the next section, Volume forecast generation and modification.
Generate a volume forecast
1. Do one of the following in the Volume Forecasts dialog box:
Double-click the Generation and Modification check box in the Volume Forecast process
navigation list.
Select the Generation and Modification check box and click the Volume Forecast
Generation and Modification… button.
07/15/2013
Kentucky Health Benefit Exchange Contact Center
© 2013 Xerox Corporation. All rights reserved.
Page 105 of 170
Interaction Center User Manual
Volume Forecast Generation and Modification dialog box
2. If Workforce have not yet generated this volume forecast, the Volume Forecast Generation
and Modification dialog box is blank (as shown above). Click the Generate volume forecast for
all days button. Interaction Optimizer generates the volume forecast for all existing route
groups (workgroup/skill/media type) by time slice.
07/15/2013
Kentucky Health Benefit Exchange Contact Center
© 2013 Xerox Corporation. All rights reserved.
Page 106 of 170
Interaction Center User Manual
Forecast date controls at the top of the screen determine which set of volume data is
shown on the below list…
Column Name
Description
Time
This is the beginning of the interval in which the
interactions occurred. The time of day appears as
HH:MM. Hours are in 24 hour time (00 - 23), and
minutes are 00-59.
Workgroup
The name of the workgroup
interactions were routed.
Media Type
This is the type of interaction: call, chat or email.
Skill Set
This is the skill set of the CSR(s) handling the
interactions. It can be '*' to represent a summary
row, '-' to represent no specific skill, or can be a '|'
separated list.
Offered
This is the number of interactions offered in the
time interval.
Completed
This is the number of interactions completed by the
CSRs in the time interval.
Avg. Talk Time
This is the average time in HH:MM:SS of each
interaction in the time interval. It is calculated by
total talk time/number of completed interactions,
within the time increment.
Avg. ACW Time
This is the average after call work time in
HH:MM:SS for each interaction in the time interval.
It is calculated by total after call work time/number
of interactions that had after call work time.
07/15/2013
Kentucky Health Benefit Exchange Contact Center
© 2013 Xerox Corporation. All rights reserved.
to
which
Page 107 of 170
the
Interaction Center User Manual
3. In the Volume Forecast Generation and Modification dialog box, select a Forecast date and a
displayed value, then either type a new value or use the spinner control to set a new value.
Workforce can edit values in these columns:
Offered
Completed
Avg. Talk Time
Avg. ACW Time
4. In the Volume Forecast Generation and Modification dialog box, select a Forecast date and
click the Modify… button to change the data en masse. The Volume Forecast Data Modification
dialog box appears.
07/15/2013
Kentucky Health Benefit Exchange Contact Center
© 2013 Xerox Corporation. All rights reserved.
Page 108 of 170
Interaction Center User Manual
Make changes to a range of data
Select the route groups by placing a checkmark in the Modify column.
Adjust the values for Interactions offered, Talk time, and/or ACW time by
adjusting the slider controls or typing a new value in the appropriate % box.
Then click Ok.
Warning: Adjusting this data by a given percentage removes the existing data. The only way to
“undo” that increase is to click the Cancel button on the Volume Forecast Data Modification
screen.
5. In the Volume Forecast Generation and Modification dialog box, click the Erlang-C calculator…
button to display a simple Erlang-C calculator.
07/15/2013
Kentucky Health Benefit Exchange Contact Center
© 2013 Xerox Corporation. All rights reserved.
Page 109 of 170
Interaction Center User Manual
6. In the Volume Forecasts dialog box, do one of the following:
In the Volume Forecasts dialog box, click the Volume Forecast name to which to import
data and click Import… to retrieve previously saved volume forecast data. In the Volume
Forecast Import dialog box, click the … (ellipsis) button. In the Open dialog box, select a
file containing volume forecast data and click Open. In the Volume Forecast Import
dialog box, click Replace Data to replace the existing headcount forecast data with the
data in the import file or click Merge Data to merge the existing headcount forecast data
with the data in the import file. Click OK.
7. In the Volume Forecast Generation and Modification dialog box, click the Graph… button, to
display graphs based on the data in the grid. After Workforce completes their review of the
graphs, click Close.
Summary Graphs. The Interactions Offered graph shows the time and number of
interactions (calls, chats, and emails) that were offered. The Average Handle Time (sec)
graph shows the time and handled time in average seconds of interactions (calls, chats,
and emails) received.
Media Detail Graphs. These graphs show the calls, chats and emails offered by time
based on skills. There is only one media type per graph.
07/15/2013
Kentucky Health Benefit Exchange Contact Center
© 2013 Xerox Corporation. All rights reserved.
Page 110 of 170
Interaction Center User Manual
8. In the Volume Forecast Daily Graphs dialog box, click the Configuration button to select route
groups to include in the graphs. The Configure Detail Graph Workgroups and Skills dialog box
appears. One selection row exists for each route group identified in the data. Select the
Enable checkbox of the desired workgroup and skill set, and then click OK to view the
changes in the graph.
9. When they finish generating the volume forecast, in the Volume Forecast Generation and
Modification dialog box, click OK.
10. In the Volume Forecasts dialog box, select the checkbox next to Generation and Modification
and click OK.
11. In the Scheduling Unit dialog box, select the checkbox next to 2. Volume Forecasting and click
Apply.
12. Continue with Headcount Forecasting section.
07/15/2013
Kentucky Health Benefit Exchange Contact Center
© 2013 Xerox Corporation. All rights reserved.
Page 111 of 170
Interaction Center User Manual
Exported volume forecast data
This section details the format and content of data exported from the Volume Forecast dialog
box. Data can be exported for use in an Excel spreadsheet.
The following is a description of the file format for Workforce reference.
Columns must go from left to right in the text file in the sequential order shown
in the table.
The Column Name does not have to appear in the text file; just the data as
described.
Each column is separated by one <TAB> (0x09) character.
Rows starting with a pound sign (“#”) are ignored.
Column Name
Description
Time
This is the beginning of the interval in which the
interactions occurred. The time of day appears as
HH:MM. Hours are in 24 hour time (00 - 23), and
minutes are 00-59.
Duration
The duration of this period, in seconds. This value is
set in Interaction Administrator, Server Parameters
container, QueuePeriodStatisticsInterval parameter.
By default it is set for 1800 seconds (30 minutes).
07/15/2013
Kentucky Health Benefit Exchange Contact Center
© 2013 Xerox Corporation. All rights reserved.
Page 112 of 170
Interaction Center User Manual
Do not change it in this file unless Workforce has
changed this server parameter when they installed
CIC, before they started collecting statistics.
Workgroup
The media type. To enable combinations of the
three available media types, each one has been
assigned an integer which, when converted to base
2 (binary), indicates which media type(s) is (are)
selected.
The following list helps decode “media” column to
the combinations of media each integer represents.
Integer Value
1
2
3
4
5
6
7
Media Type(s)
Call
Chat
Call, Chat
Email
Call, Email
Chat, Email
Call, Chat, Email
Skills
This is the skill set of the CSR(s) handling the
interactions. It can be '*' to represent a summary
row, '-' to represent no specific skill, or can be a '|'
separated list.
#Offered
The number of interactions offered in the time
interval.
#Completed
The number of interactions completed by the CSRs
in the time interval.
Talktime
The time in seconds that all of the interactions in
this time slice took to process.
#ACW
The number of after call work occurrences for
interactions.
ACWTime
The time in seconds that all of the after call work
occurrences took for this time slice.
07/15/2013
Kentucky Health Benefit Exchange Contact Center
© 2013 Xerox Corporation. All rights reserved.
Page 113 of 170
Interaction Center User Manual
Import volume forecast data into Excel:
1. Open the exported volume forecast data file in Microsoft Excel. The Text Import Wizard – Step
1 of 3 dialog box appears.
2. Select Delimited as the file type.
3. Set Start import at row to 32. This is the first data row after the formatting comments
automatically saved with the file.
4. Click Next >. The Text Import Wizard – Step 2 of 3 dialog box appears.
07/15/2013
Kentucky Health Benefit Exchange Contact Center
© 2013 Xerox Corporation. All rights reserved.
Page 114 of 170
Interaction Center User Manual
5. In the Text Import Wizard – Step 2 of 3 dialog box, select Tab in the Delimiters section. Set
Text Qualifier to {none}.
6. Click Next >. The Text Import Wizard – Step 3 of 3 dialog box appears.
7. Workforce can specify the data type of each column according to the format, but Excel does a
very good job of identifying the data type and configuring each cell accordingly.
8. Click Finish to import the data to a blank spreadsheet.
07/15/2013
Kentucky Health Benefit Exchange Contact Center
© 2013 Xerox Corporation. All rights reserved.
Page 115 of 170
Interaction Center User Manual
3.1.3.Headcount Forecasting
Headcount forecasting is the process by which the number of CSRs required to handle the
forecasted interaction volume load is predicted. Other factors are used to adjust the forecast,
such as service level, shrinkage factor, abandoned interactions, customer satisfaction, etc.
The headcount forecast can be generated using one of these methods:
Erlang-C method
Erlang-C is considered the “standard” by which many contact centers operate. Developed by
Danish mathematician A.K. Erlang in 1917 who studied delays in telephone traffic in central
switching stations, it has become accepted by many industries as the first step in accurately
predicting the number of servers required for many types of applications. A “server” used
here means someone (or something) that serves a client which arrives at a random interval
but whose probability of arrival during a given time slice is known. A “server” can be an CSR
in a contact center, an automated or human tollbooth on a bridge, a teller or ATM at a
neighborhood bank, etc. It returns the probability that a client will have to wait for a
resource to be served.
Advantages of Erlang-C
Disadvantages of Erlang-C
Assumes random interaction arrival and that
interactions queue if an CSR is not
immediately available.
Assumes no abandoned interactions or busy
signals.
Is accurate at good service levels, where
abandoned interactions and busy signals are
minimal.
Assumes “steady state” arrival, or that traffic
does not increase or decrease beyond random
fluctuation within the time period.
Is easy and quick to use and available in
software form from a wide variety of sources.
Assumes Workforce have a fixed number of
staff handling interactions throughout the time
period.
Is the basis for staffing calculations in almost
all workforce management software programs.
Assumes that all CSRs within a group can
handle the interactions presented to the group.
(Overlapping CSR groups and skill-based
routing not taken into account.)
ACD simulation
Computer simulations have been used widely in business and economic analysis to help predict
demand using the power of a computer’s random number generation and logic to run hundreds
or thousands of virtual events. Also referred to as a “Monte Carlo simulation,” a computer could
be used to forecast revenue by simulating consumer purchase patterns based on a known
purchase distribution, or to place “interactions” and have virtual CSRs service those interactions
based on randomly assigned interaction attributes, such as arrival time and duration, and a
given service level.
Interaction Optimizer takes the volume of interactions forecasted, generates a workgroup, skill
and media type for each interaction then randomizes arrival time and AHT. It then feeds each
interaction into a simulated ACD according to the generated arrival time. Virtual CSRs are
assigned to take the interactions and are tagged as "busy" until the randomly generated AHT
has expired. Virtual CSRs are added to take the virtual interactions to meet the configured
service level. The number of virtual CSRs required becomes the headcount forecast which is
then used to generate the schedule.
07/15/2013
Kentucky Health Benefit Exchange Contact Center
© 2013 Xerox Corporation. All rights reserved.
Page 116 of 170
Interaction Center User Manual
Import
Calculating shrinkage (Rostered staff factor)
The concept of shrinkage is that even though CSRs are scheduled to be taking interactions for a
given shift, some will not be taking interactions. This factor must be calculated to enable
adequate staffing. Shrinkage could be due to many things:
Breaks
Meals
Unscheduled absences*
Vacations
Training
Coaching
Holidays
Non-Adherence*
Meetings
1.
2.
3.
4.
One possible way to calculate shrinkage:
Identify base staff required per time slice by media type.
Identify the activities that keep CSRs away from responding to contacts.
Add base staff to the number of CSRs who are not answering phones in a given time slice.
Divide the total number of CSRs required by the base. This is their shrinkage factor for the
given time slice. It may be necessary to average these to enter a shrinkage factor for a given
scheduling unit.
Select a forecast headcount method
1. Once Workforce has completed reviewing and possibly adjusting data on the Volume Forecast
screens, do one of the following in the Scheduling Unit dialog box:
Double click the 3. Headcount Forecasting check box in the Forecast and Schedule
process navigation section.
Select the 3. Headcount Forecasting check box and click the Headcount Forecasting...
button.
07/15/2013
Kentucky Health Benefit Exchange Contact Center
© 2013 Xerox Corporation. All rights reserved.
Page 117 of 170
Interaction Center User Manual
2. In the Headcount Forecasts section, do one of the following:
To create a new headcount forecast, click Add…. In the Name box, type a name for the
new headcount forecast. From the Volume forecast dropdown list, select an existing
volume forecast and click OK.
To change the name of an existing headcount forecast or to associate it with a different
volume forecast, select a headcount forecast name and click Edit…. Type a new name in
the Name box and/or select a different volume forecast from the Volume forecast
dropdown list and click OK.
To delete an existing headcount forecast, select a headcount forecast name and click
Remove. In the Interaction Administrator message dialog box, click on Yes.
07/15/2013
Kentucky Health Benefit Exchange Contact Center
© 2013 Xerox Corporation. All rights reserved.
Page 118 of 170
Interaction Center User Manual
3. From the Headcount Forecasts list, select a headcount forecast and do one of the following:
Double click the Generation and Modification check box in the Headcount Forecast
Process Navigation section.
Click the Headcount Forecast Generation and Modification... button.
4. From the Generation method dropdown list, select a forecasting method and click on the
Generate headcount forecast for all day button.
07/15/2013
Kentucky Health Benefit Exchange Contact Center
© 2013 Xerox Corporation. All rights reserved.
Page 119 of 170
Interaction Center User Manual
Generate headcount forecast using Erlang-C
1. In the Headcount Forecast Generation and Modification dialog, click the arrow at the end of
the Generation method drop-down list and select Erlang-C. Then click the Generate headcount
forecast for all days button. The Erlang-C headcount forecast appears in the Headcount
Forecast Generation and Modification dialog box.
07/15/2013
Kentucky Health Benefit Exchange Contact Center
© 2013 Xerox Corporation. All rights reserved.
Page 120 of 170
Interaction Center User Manual
Erlang-C Columns
Column Name
Description
Time
The time the interaction started.
Workgroup
The ACD workgroup portion of the route group identification.
Media Type
The type of interaction: call, chat, or email.
Skill Set
The skill set(s) of the CSR(s) who handled the interactions.
CSRs
The number of CSRs, represented by an integer, required to
handle the interactions in this route group.
Shrinkage
The calculation to factor in unscheduled events during a shift,
such as a long break or longer than expected lunches. It is also
called non-excused shrinkage. See Calculating shrinkage.
Adj. CSRs
The number of CSRs multiplied by the shrinkage factor. This
number may not be an integer, therefore it can be thought of as
FTEs (full-time equivalents) rather than whole CSRs.
ASA
The average speed of answer in seconds.
SL%
The Service Level percentage. It is based on the number of
interactions responded to within the time specified. This
percentage would be achieved if the number of CSRs indicated in
the row were taking interactions.
Occ.%
The Occupancy percentage. It is the amount of time a CSR would
spend handling interactions during the given time slice as a
percentage of their total time available to take interactions.
p(0)%
The probability of a delay greater than 0 seconds, meaning the
probability of not getting an immediate answer.
Delay
The average delay of all delayed calls. It is based on only those
calls that are actually delayed.
Queue1
The average number of interactions in queue at any given time,
including times when there are not interactions in queue.
Queue2
The average number of interactions in queue when all CSRs are
busy, and there are interactions in queue.
07/15/2013
Kentucky Health Benefit Exchange Contact Center
© 2013 Xerox Corporation. All rights reserved.
Page 121 of 170
Interaction Center User Manual
2. To adjust the number of CSRs and Shrinkage factor en masse, in the Headcount Forecast
Generation and Modification dialog box, click the Modify button or click Cancel on the
Headcount Forecast Data Modification dialog box. The Headcount Forecast Data Modification
dialog box appears.
3. Select the route group(s) and adjust the number of CSRs required and the shrinkage factor by
moving the CSRs or Shrinkage slider controls or typing a value in the % boxes.
Warning: Adjusting this data by a given percentage removes the existing data. Meaning, the
only way to “undo” that increase is to click Cancel and then click the Modify… button again on
the Headcount Forecast Data Modification dialog box.
4. In the Headcount Forecasts dialog box, click the Export… button to save headcount forecast
data. In the Save As dialog box, in the File name box, type a name for the data file. The file
extension is ".tsv" by default.
5. In the Headcount Forecast Generation and Modification dialog box, click the Graph… button,
to display graphs based on the data in the grid. After Workforce completes their review of the
graphs, click Close.
Available Graphs:
Graphs
Descriptions
Headcount/Occupancy Summary
These graphs display Adjusted Headcount and Occupancy % with all
media types (calls, chats, and emails) for all route groups combined.
Service Level/ASA Summary
These graphs display Service Level and Average Speed of Answer with
all media types (calls, chats, and emails) for all route groups
combined.
Delay Summary
These graphs display Chance of Delay % and Average Delay of
Delayed Interactions with all media types (calls, chats, and emails) for
all route groups combined.
07/15/2013
Kentucky Health Benefit Exchange Contact Center
© 2013 Xerox Corporation. All rights reserved.
Page 122 of 170
Interaction Center User Manual
Media Headcount
These graphs display Adjusted Headcount for individual Call, Chat and
Email media types by route group.
Media Occupancy
These graphs display the Occupancy % for individual Call, Chat and
Email media types by route group.
Media Service Level
These graphs display the Service Level % for individual Call, Chat and
Email media types by route group.
Media ASA
These graphs display the Average Speed of Answer for individual Call,
Chat and Email media types by route group.
Media Chance of Delay
[this is the “P(0)” column]. These graphs display the Chance of Delay
% for individual Call, Chat and Email media types by route group.
Media Average Delay
These graphs display the Average Delayed of Delayed for individual
Call, Chat and Email media types by route group.
07/15/2013
Kentucky Health Benefit Exchange Contact Center
© 2013 Xerox Corporation. All rights reserved.
Page 123 of 170
Interaction Center User Manual
6. In the Headcount Forecast (Erlang-C) Graphs dialog box, click the Configuration… button to
change the workgroup(s) and skill set(s) displayed on these graphs. Click OK to display the
changes to the graphs.
7. When Workforce finishes generating the headcount forecast, in the Headcount Forecast
Generation and Modification dialog box, click OK.
8. In the Headcount Forecasts dialog box, click OK.
9. In the Scheduling Unit dialog box, select the checkbox next to 3. Headcount Forecasting and
click Apply.
10. Continue with the Generate a New Schedule section.
07/15/2013
Kentucky Health Benefit Exchange Contact Center
© 2013 Xerox Corporation. All rights reserved.
Page 124 of 170
Interaction Center User Manual
Generate headcount forecast using ACD simulation
This method uses a simulated ACD to route the interactions, as predicted by the volume
forecast, by route group by time slice, to simulated CSRs organized into staffing groups. The
interaction arrival time is randomized within each time slice, as is the interaction duration
and wrap-up time. During multiple simulation runs the CSRs are assigned, by staffing
group, to meet the desired service level and/or average speed of answer specified. One can
expect a more optimal headcount requirement with more cross trained CSRs (e.g. ability to
take interaction of multiple media types for multiple workgroups and skill sets) as opposed
to the case of CSRs being very specifically configured (e.g. limited workgroup membership,
limited media type utilization, and/or limited skills set). A headcount is predicted for each
time slice and the process is repeated throughout the entire schedule.
1. In the Headcount Forecast Generation and Modification dialog box, click the arrow at the end
of the Generation Method drop-down list, select ACD simulation, and click the Generate
headcount forecast for all days button.
ACD Simulation Parameters dialog box.
2. Do one of the following:
Adjust the staffing percentages by editing the values in the Percent column then click
Run with edits.
Accept the default (pre-rounding) staffing percentages in the Percent column and then
click Run with defaults. The ACD Simulation dialog box will appear after Workforce
clicks OK.
07/15/2013
Kentucky Health Benefit Exchange Contact Center
© 2013 Xerox Corporation. All rights reserved.
Page 125 of 170
Interaction Center User Manual
3. After the ACD Simulation completes, the forecast appears in the Headcount Forecast
Generation and Modification dialog box.
There are two distinct items in this dialog:
The top grid is organized by staffing group, by time slice and gives a predicted
number of CSRs, adjusted for unplanned shrinkage, for each row.
The bottom grid displays the results of the simulation’s expected performance
parameters by workgroup by time slice (note that the media type and skill(s)
are not listed in this item).
Summary of the Staffing Group columns (top grid)
Column Name
Description
Workgroup(s)
This is the ACD workgroup(s) portion of the Staffing Group
identification.
Media Type
This is the type of interaction the CSR could handle. The type may
be call, chat or email. This information is not based on historical
ACD data.
This is also the Media Type portion of the Staffing Group
identification.
Skill Set
The skill set(s) of the CSR(s) in the staffing group. There may not
be an associated skill set '-', or there may be a single skill set, or
multiple skill sets separated by '|' (pipe).
CSRs
The number of CSRs, represented by an integer, required to handle
the interactions in the Staffing Group.
Shrinkage
The calculation to factor in unscheduled events during a shift, such
as a long break or longer than expected lunch. It is also called the
Non-excused shrinkage factor.
07/15/2013
Kentucky Health Benefit Exchange Contact Center
© 2013 Xerox Corporation. All rights reserved.
Page 126 of 170
Interaction Center User Manual
Adj. CSRs
The number of CSRs multiplied by the Shrinkage factor. This
number may not be an integer and thus can be thought of as FTEs
(full-time equivalents) rather than whole CSRs.
Summary of the Group columns (bottom grid)
Column Name
Description
Workgroup(s)
The ACD workgroup portion of the route group.
ASA
The average speed of answer in seconds.
The Service Level percentage. It is based on the number of
interactions responded to within the time specified. This
percentage would be achieved if the number of CSRs indicated in
the row were taking interactions.
The Occupancy percentage. It is the amount of time an CSR would
spend handling interactions during the given time slice as a
percentage of their total time available to take interactions.
The probability of a delay greater than 0 seconds, meaning the
probability of not getting an immediate answer.
The average delay of all delayed calls. It is based on only those
calls that are actually delayed.
The average number of interactions in queue at any time, including
times when there are no interactions in queue.
The average number of interactions in queue when all CSRs are
busy, and there are interactions in queue.
SL%
Occ.%
P(0)%
Delay
Queue1
Queue2
4. To adjust the number of CSRs and Shrinkage factor en masse, in the Headcount Forecast
Generation and Modification dialog box, click the Modify… button on the Headcount Forecast
Data Modification screen. Headcount Forecast Data Modification dialog box will appear.
5. Select the staffing group(s) and adjust the number of CSRs required and the shrinkage factor
by moving the CSRs or Shrinkage slider controls or typing a value in the % boxes.
07/15/2013
Kentucky Health Benefit Exchange Contact Center
© 2013 Xerox Corporation. All rights reserved.
Page 127 of 170
Interaction Center User Manual
Warning: Adjusting this data by a given percentage removes the existing data. Meaning, the
only way to “undo” that increase is to click Cancel and then click the Modify… button again and
reduce the given data by a corresponding percentage on the Headcount Forecast Data
Modification screen.
6. In the Headcount Forecasts dialog box, click the Export… button to save headcount forecast
data. In the Save As dialog box, in the File name box, type a name for the data file. The file
extension is ".tsv" by default.
7. In the Headcount Forecast Generation and Modification dialog box, click the Graph… button,
to display graphs based on the data in the grid. After Workforce complete their review of the
graphs, click Close.
Available Graphs:
Headcount Summary. This graph displays the Adjusted Headcount for all media
types (Calls, Chats, and Emails) for all route groups combined.
Media Headcount. These graphs display the Adjusted Headcount for Call, Chat
and Email by staffing group.
Workgroup Occupancy. This graph displays Workgroup Occupancy by staffing
group.
Workgroup Service Level/ASA. These graphs display Workgroup Service Level
% and Workgroup Average Speed of Answer by staffing group.
Workgroup Delay. These graphs display Workgroup Chance of Delay % and
Workgroup Average Delay of Delayed Interactions by staffing group.
8. In the Headcount Forecast (Simulations) Graphs dialog box, click the Configuration button to
change the workgroup(s) and skill set(s) displayed on these graphs. Click OK to display the
changes to the graphs.
07/15/2013
Kentucky Health Benefit Exchange Contact Center
© 2013 Xerox Corporation. All rights reserved.
Page 128 of 170
Interaction Center User Manual
9. When Workforce finish generating the headcount forecast, in the Headcount Forecast
Generation and Modification dialog box, click OK.
10. In the Headcount Forecasts dialog box, click OK.
11. In the Scheduling Unit dialog box, select the checkbox next to 3. Headcount Forecasting and
click Apply.
12. Continue with the Generate a New Schedule section.
Generate headcount forecast using data import
Workforce can use a previously saved headcount forecast to generate a schedule by
importing headcount forecast data.
1. In the Headcount Forecasts dialog box, click the name in the Headcount Forecasts section to
which to import data and click Import. The Headcount Forecast Import dialog box appears.
2. Click the … (ellipsis) button. The Open dialog box appears.
07/15/2013
Kentucky Health Benefit Exchange Contact Center
© 2013 Xerox Corporation. All rights reserved.
Page 129 of 170
Interaction Center User Manual
Select the appropriate headcount forecast data file and click Open.
3. Do one of the following:
Click Replace Data to replace the existing headcount forecast data with the data in the
import file.
Click Merge Data to merge the existing headcount forecast data with the data in the
import file.
4. Click OK. The imported data appears in the Headcount Forecast Generation and Modification
dialog box.
07/15/2013
Kentucky Health Benefit Exchange Contact Center
© 2013 Xerox Corporation. All rights reserved.
Page 130 of 170
Interaction Center User Manual
Exported headcount forecast data
This section details the formats used to save exported headcount forecast data. Workforce
can use this saved headcount forecast data when generating a new schedule. They can also
import this data to an Excel spreadsheet.
Erlang-C headcount forecast data
If Workforce exports Erlang-C Headcount Forecast data, the data is saved in the
following format. This is a screen of exported data (the columns do not look lined up
since there is exactly one tab delimiting the columns). This data file can be imported into
Excel with the Text Import Wizard.
To import Erlang-C Headcount Forecast data into Excel:
1. Open the exported Erlang-C Headcount Forecast data in Microsoft Excel.
2. In the Text Import Wizard – Step 1 of 3 dialog box, select Delimited as the file type.
3. Set Start import at row to 46. This is the first data row after the formatting
comments automatically saved with the file.
4. Click Next >.
5. In the Text Import Wizard – Step 2 of 3 dialog box, select Tab in the Delimiters
section. Set Text Qualifier to {none}.
6. Click Next >.
7. In the Text Import Wizard – Step 3 of 3 dialog box, Workforce can specify the data
type of each column according to the format, but Excel does a very good job of
identifying the data type and configuring each cell accordingly.
07/15/2013
Kentucky Health Benefit Exchange Contact Center
© 2013 Xerox Corporation. All rights reserved.
Page 131 of 170
Interaction Center User Manual
8. Click Finish to import the data to a blank spreadsheet. The following is a description
of the file format for their reference.
Columns must go from left to right in the text file in the sequential order shown
in the table.
The Column Name does not have to appear in the text file; just the data as
described.
Each column is separated by one <TAB> (0x09) character. Rows starting with
a pound sign (“#”) are ignored.
Column Name
Description
Time
The time of day in HH:MM. Hours are in 24 hour time (00 - 23), and
minutes are 00-59.
Duration
The duration of this period, in seconds. This value is set in Interaction
Administrator, Server Parameters container,
QueuePeriodStatisticsInterval parameter. By default it is set for 1800
seconds (30 minutes). Do not change it in this file unless Workforce
has changed this server parameter when they installed CIC, before
they started collecting statistics.
Workgroup
The name of the ACD workgroup.
Media
The media type. To enable combinations of the three available media
types, each one has been assigned an integer which, when converted
to binary, indicates which media type(s) is (are) selected.
The following list helps decode “media” column to the combinations of
media each integer represents.
Integer Value
1
2
3
4
5
6
7
Media Type
Call
Chat
Call, Chat
Email
Call, Email
Chat, Email
Call, Chat, Email
Skills
The skill set used. It can be '*' to represent a summary row, '-' to
represent no specific skill, or can be a '|' separated list.
#Resources
Number of CSRs, represented by an integer, required to service the
route group.
Shrinkage
Non-excused shrinkage factor.
ASA
The average speed of answer in seconds.
SL
Service Level percentage: the number of interactions responded to
within the time specified which would be achieved if the number of
CSRs indicated in the row were to be taking interactions.
Occ
Occupancy percentage: the amount of time an CSR would be servicing
interactions as a percentage of their total time available to take
07/15/2013
Kentucky Health Benefit Exchange Contact Center
© 2013 Xerox Corporation. All rights reserved.
Page 132 of 170
Interaction Center User Manual
interactions.
P(0)
Probability of a delay greater than 0 seconds (the probability of not
getting an immediate answer).
DlyDly
Average Delay of Delayed Calls. This is the average delay only of those
calls that are actually delayed.
AvgQLen1
Average number of interactions in queue at any time, including times
when there is no queue.
AvgQLen2
Average number of interactions in queue when all CSRs are busy, i.e.,
when there actually is a queue.
07/15/2013
ACD simulation headcount forecast data
If Workforce export ACD Simulation Headcount Forecast data, the data are saved in the
following format.
The below screenshots show data exported from the Headcount Forecast Generation and
Modification dialog box when the ACD Simulation method is selected. It is not possible to
import this data directly into Excel or some other tool without first separating the data by
record types.
Kentucky Health Benefit Exchange Contact Center
© 2013 Xerox Corporation. All rights reserved.
Page 133 of 170
Interaction Center User Manual
Below is a description of each record type for their reference:
Columns must go from left to right in the text file in the sequential order shown
in the table.
The Column Name does not have to appear in the text file; just the data as
described.
Each column is separated by one <TAB> (0x09) character.
Rows starting with a pound sign (“#”) are ignored.
The following is a description of the "R" (route group) records in the exported
file:
Column Name
Description
Time
The time of day in HH:MM. Hours are in 24 hour
time (00 - 23), and minutes are 00-59.
Duration
This is the duration of this period, in seconds.
Workgroup
This is the name of the ACD workgroup.
Media
This is the media type. To enable combinations of
the three available media types, each one has been
assigned an integer which, when converted to
binary, indicates which media type(s) is (are)
selected.
The following list helps decode “media” column to
the combinations of media each integer represents.
07/15/2013
Kentucky Health Benefit Exchange Contact Center
© 2013 Xerox Corporation. All rights reserved.
Page 134 of 170
Interaction Center User Manual
Integer Value
1
2
3
4
5
6
7
Media Type
Call
Chat
Call, Chat
Email
Call, Email
Chat, Email
Call, Chat, Email
Skills
This is the skill set used. It can be '*' to represent a
summary row, '-' to represent no specific skill, or
can be a '|' separated list.
#Resources
This is the number of CSRs, represented by an
integer, required to handle all interactions in the
staffing group.
Shrinkage
This is the calculation to factor in unscheduled
events during a shift, such as a long break or longer
than expected lunch. It is also called the Nonexcused shrinkage factor.
The following is a description of the "W" (workgroup or Staffing Group) records in the
exported file:
Column Name
Description
Time
The time of day in HH:MM. Hours are in 24 hour
time (00 - 23), and minutes are 00-59. Times are
all specified in the time zone local to the user
running Interaction Administrator. The time is
converted from Coordinated Universal Time (UTC)
on export, and converted back to UTC on import.
Duration
The duration of this period, in seconds.
Workgroup
The name of the ACD workgroup.
ASA
The average speed of answer in seconds for all
interactions.
Occ
The Occupancy percentage. It is the amount of time
each CSR would be handling interactions during the
specified time interval as a percentage of their total
time available to take interactions.
P(0)
The probability of a delay greater than 0 seconds,
meaning the probability of not getting an immediate
answer.
DlyDly
The average delay of all calls that were actually
delayed.
07/15/2013
Kentucky Health Benefit Exchange Contact Center
© 2013 Xerox Corporation. All rights reserved.
Page 135 of 170
Interaction Center User Manual
AvgQLen1
The average number of interactions in queue at any
given time, including times when there are no
interactions in queue.
AvgQLen2
The average number of interactions in queue when
all CSRs are busy and there actually are interactions
in queue.
Importing ACD simulation headcount forecast data
There are two record types in one text file required to import simulation data (see preceding
file format). Data imported to this grid will either replace existing data which match the
specified Staffing Group and time slice, or it will append data with a Staffing Group and time
slice not present in the current data. It will not merge data which match an existing Staffing
Group and time slice row.
Warning: Only the staffing group records (“R” recordtype) will be imported during an import
procedure. Workgroup records (“W” recordtype) may be exported but not imported.
3.1.4.Schedule Generation and Administration
Headcount forecast methods
Schedule Generation and Administration is the process of generating a preliminary schedule
then adjusting it for information not available to the scheduling engine, such as new
marketing campaigns, catalog drops, bill due dates and other factors. Additionally, the
Supervisor may notice that weekly shift constraints or specific CSR exception shift
constraints sometimes cause unworkable schedules to be generated. Maintenance of this
configuration data may be necessary and a schedule may need to be regenerated to have a
workable starting point. Or they may need to make only minor adjustments by hand to the
generated schedule before publishing it.
Working with schedules
Generate new schedules in the Interaction Optimizer module, available in IC Business
Manager. In addition, use the Interaction Optimizer module to publish, make changes to,
and remove existing schedules. For more information, see the Interaction Optimizer online
help.
Copy
The Supervisor can copy (and optionally rename) a schedule from another forecast schedule
entry. This will also copy the associated headcount forecast, volume forecast, and day
selections data.
1. Click Copy From… on the Scheduling dialog box. The Copy Schedule page appears.
07/15/2013
Kentucky Health Benefit Exchange Contact Center
© 2013 Xerox Corporation. All rights reserved.
Page 136 of 170
Interaction Center User Manual
Duplicate…
Workforce can duplicate both published and pending schedules. They can also duplicate an
unpublished schedule to experiment with it without making changes to the original.
If a schedule is currently in effect, they can publish only a copy of the currently published
schedule.
1. In the Scheduling Unit dialog box, select the Scheduling step and click the Scheduling…
button. In the Scheduling dialog box, select a schedule name and click Duplicate…. The
duplicated schedule appears.
2. If any time off requests were approved between the time the schedule was generated and
when the Supervisor copy it, the Apply Time Off Requests dialog box appears.
07/15/2013
Kentucky Health Benefit Exchange Contact Center
© 2013 Xerox Corporation. All rights reserved.
Page 137 of 170
Interaction Center User Manual
3. Do one of the following:
Click Yes to apply the listed time off requests to the schedule.
Click No to avoid applying the listed time off requests to the schedule.
Warning: If Workforce chooses not to apply the listed time off requests, they will not be
prompted again to apply them. This can result in CSRs being scheduled during approved time
off periods.
07/15/2013
Kentucky Health Benefit Exchange Contact Center
© 2013 Xerox Corporation. All rights reserved.
Page 138 of 170
Interaction Center User Manual
3.1.5.Time Off Requests
Time off requests recorded and approved in the Time Off Requests container in Interaction
Administrator are automatically included in the calculations for generating a schedule.
Processing time off requests
Workforce works with time off requests in the Interaction Administrator Time Off Requests subcontainer. All of the procedures in this section begin with accessing this container.
1. In Interaction Administrator, expand the Interaction Optimizer container.
2. Select the Time Off Requests sub-container.
07/15/2013
Kentucky Health Benefit Exchange Contact Center
© 2013 Xerox Corporation. All rights reserved.
Page 139 of 170
Interaction Center User Manual
3. In the right-hand pane, double-click Configuration. The Time Off Requests – Configuration
dialog box appears.
4. Continue with instructions in the following sections, to search for, add, edit, remove, approve
or deny time off requests.
07/15/2013
Kentucky Health Benefit Exchange Contact Center
© 2013 Xerox Corporation. All rights reserved.
Page 140 of 170
Interaction Center User Manual
Search for a request
The first step in editing, removing, approving or denying time off requests is to locate the
appropriate requests.
1. In the Time Off Requests – Configuration dialog box, select the appropriate scheduling unit
from the drop down list.
2. From the Agent (also known as a Customer Service Representative [CSR]) dropdown list, do
one of the following:
Select a specific CSR.
Select all CSRs in a designated workgroup.
3. In the Request section, select a begin date in Begin: and select an end date in End.
4. In the Request type section, select Full day or Partial day or both types of time off request.
5. In the Request status section, select any or all of the possible time off request states:
Pending, Approved, or Denied.
6. After Workforce selects the search parameters, click the Search button. Time off requests that
match their search criteria appear in the Time Off Requests list.
07/15/2013
Kentucky Health Benefit Exchange Contact Center
© 2013 Xerox Corporation. All rights reserved.
Page 141 of 170
Interaction Center User Manual
Add a request
1. In the Time Off Requests – Configuration dialog box, click Add…. The Time Off Request dialog
box appears.
2. From the Scheduling Unit dropdown list, select the appropriate scheduling unit.
3. In the Request type section, select Full day or Partial day as appropriate for this time off
request. Note: The default start time for partial time off requests is the shift start time.
4. In the Request status section, select the appropriate time off request state: Submitted,
Pending, Approved, or Denied.
5. Select the days covered by this time off request in the Start time and End time boxes.
6. Select the Counts toward paid time checkbox, if appropriate.
7. In the Description box, enter any notes for this time off request.
8. Click OK. The time off request appears in the Time off requests list in the Time Off Requests –
Configuration dialog box.
Edit a Request
1. In the Time Off Requests – Configuration dialog box, search for the time off request
Workforce wants to edit.
2. From the Time off requests list, select a time off request and click Edit…. The Time Off
Request dialog box appears.
3. Make any necessary changes and click OK.
07/15/2013
Kentucky Health Benefit Exchange Contact Center
© 2013 Xerox Corporation. All rights reserved.
Page 142 of 170
Interaction Center User Manual
Delete, approve, or deny requests
Time off requests must be in an approved status in order to be considered when a schedule
is generated. Workforce cannot change the state of approved or denied requests, but can
remove them.
1. In the Time Off Requests – Configuration dialog box, search for the time off request
Workforce wants to edit. From the Time off requests list, select a time off request and do one
of the following: To change the time off request state to Approved, select a Submitted or
Pending time off request and click Approve. To change the time off request state to Denied,
select a Submitted or Pending time off request and click Deny. To delete a time off request,
select a time off request and click Remove.
2. When they have completed managing the selected time off requests, in the Time Off Requests
– Configuration dialog box, click Apply and then click OK.
Delete a previously denied request
1. In the Time Off Requests – Configuration dialog box, search for the previously denied time off
request by selecting Denied in the Request state section.
2. Set the other search criteria as appropriate.
3. Click Search.
4. From the Time off requests list, select the previously-denied time off request and click
Remove.
5. When prompted “Do you really wish to delete this entry…” click on Yes.
6. Add a new time off request for the appropriate date and CSR and approve this new request.
07/15/2013
Kentucky Health Benefit Exchange Contact Center
© 2013 Xerox Corporation. All rights reserved.
Page 143 of 170
Interaction Center User Manual
3.1.6.Reports
Report 1 - Adherence Detail by Date/User: This report displays historical data of
Adherence exceptions by date and user. The report is sorted by Scheduled Unit and
includes individual activity detail. It also displays the exceptions as Early, Late, or
Unscheduled activities--for example, if a CSR went to an activity early or late from a
scheduled activity. Two additional columns in the report, From Activity and To Activity,
display the activities before and after the exception occurred.
07/15/2013
Kentucky Health Benefit Exchange Contact Center
© 2013 Xerox Corporation. All rights reserved.
Page 144 of 170
Interaction Center User Manual
Report 2 - Adherence Detail by User/Date: The Adherence Detail by User/Date report
contains historical data of CSRs' exceptions to their Interaction Optimizer published
schedules. CSR work shift activities, such as breaks, meals, meetings, and scheduled ACD,
are included in Interaction Optimizer generated schedules. When a CSR's status does not
match that CSR's scheduled activity, an exception is generated. This report displays
historical data of Adherence exceptions by user and date. The report also displays the
exceptions as Early, Late, or Unscheduled activities--for example, if an CSR went to an
activity early or late from a scheduled activity. Two additional columns in the report, From
Activity and To Activity, display the activities before and after the exception occurred.
07/15/2013
Kentucky Health Benefit Exchange Contact Center
© 2013 Xerox Corporation. All rights reserved.
Page 145 of 170
Interaction Center User Manual
Report 3 - Adherence Summary by Date/User: The Adherence Summary by Date/User
report contains historical data of CSRs' exceptions to their Interaction Optimizer published
schedules. CSR work shift activities, such as breaks, meals, meetings, and scheduled ACD,
are included in Interaction Optimizer generated schedules. When an CSR's status does not
match that CSR's scheduled activity, an exception is generated. This report displays a
summary of historical data of Adherence exceptions including the date and user. The report
also displays a summary of the exceptions as early, Late, or Unscheduled activities.
*Note: Reports 1 through 3 has the parameters of Specify a Unit Name and a start and end
range to include in a report. Workforce can also specify a Date and Time range, and user names
to include in a report.
07/15/2013
Kentucky Health Benefit Exchange Contact Center
© 2013 Xerox Corporation. All rights reserved.
Page 146 of 170
Interaction Center User Manual
Report 4 - Adherence Summary Percentage by Date/User: This report displays
duration, total of exceptions, percentage in and out of adherence by date, and users in the
scheduling unit. The report is sorted by Date and then by User.
07/15/2013
Kentucky Health Benefit Exchange Contact Center
© 2013 Xerox Corporation. All rights reserved.
Page 147 of 170
Interaction Center User Manual
Report 5 - Adherence Summary Percentage by User/Date: This report displays
duration, total of exceptions, percentage in and out of adherence by date, and users in the
scheduling unit. The report is sorted by User and then by Date.
*Note: Reports 4 and 5 have the parameters of specify: Unit name, list of Unit Names, or a
range of Unit Names; a Date and Time range, or a set of ranges; a User, list of users, or a range
of Users.
07/15/2013
Kentucky Health Benefit Exchange Contact Center
© 2013 Xerox Corporation. All rights reserved.
Page 148 of 170
Interaction Center User Manual
Report 6 - Headcount Summary: Scheduled vs. Forecasted - This report displays the
summary of scheduled and forecasted headcount reported in 15-minute intervals for a given
schedule.
*Note: Parameters for Report 6 is specify: a Schedule Name, list of Schedule Names, or a
range of Schedule Names; a Forecast Schedule Date and Time range; a User, list of Users, or
range of Users; a Start Date and Time for the report; and an End Date and Time.
07/15/2013
Kentucky Health Benefit Exchange Contact Center
© 2013 Xerox Corporation. All rights reserved.
Page 149 of 170
Interaction Center User Manual
Report 7 - Individual Schedule Detail: The Individual Schedule Detail report is an
Interaction Optimizer scheduling report. It shows the work activities of the Interaction
Optimizer published schedule for an individual. Use this report to view planned activities for
an individual's work load based on an Interaction Optimizer schedule generated for
anticipated workload. This report shows start and stop times for each activity, and includes
Total and Paid hours.
*Note: The parameters for this report are the specified a Schedule Name and a start and end
range to include in a report. Workforce can also specify a Published Date and user names to
include in a report.
07/15/2013
Kentucky Health Benefit Exchange Contact Center
© 2013 Xerox Corporation. All rights reserved.
Page 150 of 170
Interaction Center User Manual
Report 8 – Optimizer Actual vs. Forest Historical Analysis Report: This report
displays the offered interactions, completed interactions, ACD talk time, and Number ACW
for actual and forecasted volumes.
*Note: The parameters for this report are specify: the Forecast start Date and Time; a
Schedule Name, list of Schedule Names, or range of Schedule Names; a queue name, list of
queues, or range of queues; a Site ID, list of site IDs, or range of site IDs; and if Workforce
wants tracking skills.
07/15/2013
Kentucky Health Benefit Exchange Contact Center
© 2013 Xerox Corporation. All rights reserved.
Page 151 of 170
Interaction Center User Manual
Report 9 - Optimizer Time Off Request Report by Customer Service Representative
(CSR): This report displays the time off request by CSR, and includes: Request Date, CSR,
Request Type, the state of the request, Time Off Duration, and indicates it the request is
Paid Time Off.
*Note: The parameters for this report are specified: a Begin Date and Time; an End Date and
Time; a User, list of Users, or a range of Users; a type of request; and a value for the status of
the request.
07/15/2013
Kentucky Health Benefit Exchange Contact Center
© 2013 Xerox Corporation. All rights reserved.
Page 152 of 170
Interaction Center User Manual
Report 10 - Optimizer Time Off Request Report by Scheduling Unit: This report
displays the time off request by scheduling unit, and includes: Request Date, CSR, Request
Type, the state of the request, Time Off Duration, and indicates it the request is Paid Time
Off.
*Note: The parameters for this report are specify: a Begin Date and Time; an End Date and
Time; a User, list of Users, or a range of Users; a type of request; a value for the status of the
request; and a Unit Name, list of Unit Names, or a range of Unit Names.
07/15/2013
Kentucky Health Benefit Exchange Contact Center
© 2013 Xerox Corporation. All rights reserved.
Page 153 of 170
Interaction Center User Manual
Report 11 - Schedule (Graph): The Schedule (Graph) is a report based on the published
employee schedules generated by Interaction Optimizer. This report displays a graph of
individuals' start and end times--in 15 minute intervals--of planned work shift activities, for
a specified date and time range. Use this report to view a summary of planned work shift
activities for a group of individuals in a graph format.
*Note: The parameters for this report are specified a Schedule Name and a start and end range
to include in a report. Workforce can also specify a Published Date, user names, and the
beginning and ending date and time to include in a report.
07/15/2013
Kentucky Health Benefit Exchange Contact Center
© 2013 Xerox Corporation. All rights reserved.
Page 154 of 170
Interaction Center User Manual
Report 12 - Schedule (Graph) All schedules: Published and not Published: This report
displays a graph of published and not published scheduled activities in intervals of 15
minutes for selected users.
*Note: The parameters for this report are specified: a Schedule Name, a list of Schedule
Names, or a range of Schedule Names; a Forecast Schedule Date/Time range; a User, list of
Users, or range of Users; and a Begin Date and Time, and an End Date and Time.
07/15/2013
Kentucky Health Benefit Exchange Contact Center
© 2013 Xerox Corporation. All rights reserved.
Page 155 of 170
Interaction Center User Manual
Report 13 - Schedule (text based): The Schedule (text based) is a report based on the
published employee schedules generated by Interaction Optimizer. This report displays a
text-based graph of individuals' start and end times--in 15 minute intervals--of planned
work shift activities, for a specified date and time range. Use this report to view a summary
of planned work shift activities for a group of individuals in a text-based graph format. This
graph can be printed in color or black and white.
*Note: The parameters for this report are specified a Schedule Name and a start and end range
to include in a report. Workforce can also specify a Published Date, user names, and the
beginning and ending date and time to include in a report.
07/15/2013
Kentucky Health Benefit Exchange Contact Center
© 2013 Xerox Corporation. All rights reserved.
Page 156 of 170
Interaction Center User Manual
Report 14 - Schedule (Text Based) All schedules: Published and not Published: This
report displays a text-based graph, for non-graphical printers, of published and not
published scheduled activities in intervals of 15 minutes for selected users.
*Note: The parameters for this report are specified is a Schedule Name, a list of Schedule
Names, or a range of Schedule Names; a Forecast Schedule Date/Time range; a User, list of
Users, or range of Users; and a Begin Date and Time, and an End Date and Time.
07/15/2013
Kentucky Health Benefit Exchange Contact Center
© 2013 Xerox Corporation. All rights reserved.
Page 157 of 170
Interaction Center User Manual
Report 15 - Schedule Report (List): The Schedule Report (List) is based on the
published employee schedules generated by Interaction Optimizer. This report lists
individuals' start and end times of planned work shift activities, for a specified date and time
range. Use this report to view the details of planned work shift activities for a group of
individuals.
*Note: The parameters for this report are specified Schedule Name and a start and end range
to include in a report. Workforce can also specify a Published Date, user names, and the
beginning and ending date and time to include in a report.
07/15/2013
Kentucky Health Benefit Exchange Contact Center
© 2013 Xerox Corporation. All rights reserved.
Page 158 of 170
Interaction Center User Manual
Report 16 - Schedule Unit Detail:
Schedule Unit information.
This report displays detailed Interaction Optimizer
*Note: The parameters for this report are specified scheduling Unit Name or a range of
scheduling Unit Names to include in a report.
07/15/2013
Kentucky Health Benefit Exchange Contact Center
© 2013 Xerox Corporation. All rights reserved.
Page 159 of 170
Interaction Center User Manual
4.
HELP (Additional Information)
Interaction Client is available in two different editions: Interaction Client .NET Edition and Interaction
Client Web Edition. It is also available as the Interactive Intelligence Right Now Integration. In this help
system, "Interaction Client" denotes the specific edition the users are using. The full product name
appears at the top of each help topic. The full product name may also be used in a help topic when
necessary to distinguish between Interaction Client editions.
4.1.1.Search
A user can search for specific terms in both the HTML and the WebHelp versions of the help.
There is a basic search and an advanced search available from the Search tab. A basic search is
simple: just type whatever single word or phrase they want to search, press [enter] or click the
List Topics button (HTML version only), and a list of topics containing that word or phrase is
displayed. When searching for a phrase, use quotation marks to enclose the phrase.
An advanced search involves wildcard (HTML version only) and Boolean expressions. Wildcard
expressions allow they to search for one or more characters using an asterisk or question mark.
Wildcard search examples:
“Wildcard” Search
Examples
Term(s)
Results
Init*
Initial, initiate, etc.
1?3
123, 133, 143, etc.
Alert AND urgent
Results containing the word “alert” and
“urgent”
Chat OR call
Results containing the word “chat” or “call”
Speed NOT accuracy
Results containing “speed”, but not the word
“accuracy”
4.1.2.Change User’s Password
1. From the File menu, select Change Password. The Change Password dialog box appears.
07/15/2013
Kentucky Health Benefit Exchange Contact Center
© 2013 Xerox Corporation. All rights reserved.
Page 160 of 170
Interaction Center User Manual
2. In Old Password, enter their current Interaction Center password.
3. In New Password, enter their new IC password.
4.1.3.Logon dialog box
The Logon dialog box has two tabs: Connection and Options.
07/15/2013
Kentucky Health Benefit Exchange Contact Center
© 2013 Xerox Corporation. All rights reserved.
Page 161 of 170
Interaction Center User Manual
4.1.4.Status Bar
The Interaction Client status bar has sections that display their current connection state, server
name, station name, voice mail indicator, and notifications:
Status Bar Features
Number
Name
Description
1
Connection State
Click this section to connect if the users are
disconnected. If they are connected, point to this
section to display their IC User ID, IC server name, and
Session Manager server name. A lock icon indicates
that the connection is encrypted.
2
Station or Remote Number
Displays the name of their currently active workstation
or their Remote Number.
3
Voice Mail Indicator
This icon is in color if they have one or more unheard
voice mail messages. If the icon is dimmed, they do
not have any voice mail messages.
4
Notification Area
This scrolling list displays their current notifications. For
more information, see Supervisor Client Memos.
5
Message Viewer
Click this icon to display the Message Viewer and read
all their current notifications.
4.1.5.Working with Calls
Interaction Client provides many ways to handle or manage calls. This section describes the
following call features:
Call Security
Making Calls
Picking Up Calls
Transferring Calls
Forwarding Calls
Making Conference Calls
Using Speed Dial
Using Other Call Features
Call Security
Interaction Center provides call security that prevents others from listening in on a call or
even determining which internal parties are involved in a conversation.
Interaction Center administrators can configure the use of two encryption protocols to
support encryption of call audio (SRTP) and call control information (TLS). This provides
confidentiality and flexibility for security-sensitive organizations. The user’s Interaction
Center administrator can use Interaction Administrator to configure their station to use
07/15/2013
Kentucky Health Benefit Exchange Contact Center
© 2013 Xerox Corporation. All rights reserved.
Page 162 of 170
Interaction Center User Manual
SRTP for all their calls. When SRTP is not configured for a station, the calls are “nonencrypted” or not secure from network interception.
Making Calls
There are a number of ways to make a call in Interaction Client. Enter a number in the
Number field, use the buttons on their telephone, or use the dial pad in the Client. Doubleclick any phone number hyperlinks, doubleclick a directory entry, or select a directory entry
and click any available dial button on the directory toolbar.
Call an Operator
The user can use Interaction Client to call an operator within their company, or to call an
external telephone operator.
1. To call an internal operator type 0 or the internal operator number in the Number field
and click Make Call.
2. To call an external operator (i.e., Phone Company), do one of the following:
Type 00 in the number to dial field on the Windows Call Control toolbar and
press Enter.
Type 00 or the internal operator number in the Number field and click Make
Call.
Call Back a Disconnected Call
1. Do one of the following:
Right-click the disconnected call and select Call Back from the pop-up menu.
Double-click the disconnected call.
Select the call and press the shortcut keys Ctrl+B.
The Call Back option dials the number of the selected call if the number is valid.
Click to Dial a Directory Contact
1. The user can click any of the phone number hyperlinks in Interaction Client to dial a
contact. Phone number hyperlinks appear in directory views and in the contact
Properties dialog box.
2. If Auto Dial Extension is enabled for a contact's phone number, when they click the
phone number hyperlink Interaction Client automatically dials the extension after the
call connects.
3. The user can also dial a phone number and extension by clicking an extension number
hyperlink in the Properties dialog box.
07/15/2013
Kentucky Health Benefit Exchange Contact Center
© 2013 Xerox Corporation. All rights reserved.
Page 163 of 170
Interaction Center User Manual
Click to Dial a Web Page Hyperlink
Interaction Client enables the user to use the CALLTO protocol to make calls. They can dial
specially formatted phone numbers just by clicking them. The phone number must be
formatted with the HTML tag <a href>. This tag is most often used to create a hyperlink to
a webpage or a specific point in a webpage. However, it can also be used to create
hyperlinks that place phone calls.
Finding Phone Number Hyperlinks
Appropriately formatted phone number hyperlinks are not usually available on most web
pages. However:
The user’s company could set up a webpage on an internal site that contains
appropriately formatted phone numbers.
Interaction Client can also dial using phone number hyperlinks from a thirdparty CRM system, if their CRM administrator ensures the phone numbers are
appropriately formatted.
There are some internet browser add-on applications available that convert
telephone numbers appearing on web pages into clickable links. If they use a
browser add-on, it must convert the phone numbers using the CALLTO protocol
to enable IC to place the call for them.
4.1.6.Call Transfer Shortcut Keys
Transferring a call without speaking to the intended recipient is called a blind transfer. Use a
blind transfer if the user does not need to speak with the recipient before transferring the call. If
the intended recipient does not answer, the call is sent to the recipient’s voice mail.
Transferring a call after speaking with the intended recipient is called a consult transfer. Use a
consult transfer if the user needs to speak with the recipient before transferring the call. If the
intended recipient does not answer the phone, they can resume their conversation with the
caller, transfer the call to the intended recipient’s voice mail, or try transferring to another
person.
07/15/2013
To transfer a call by selecting a directory entry:
Select a call, then select a directory entry and press Enter. This transfers the selected call
to the default phone number or extension for the selected directory entry.
Kentucky Health Benefit Exchange Contact Center
© 2013 Xerox Corporation. All rights reserved.
Page 164 of 170
Interaction Center User Manual
To use any of the following shortcut keys:
1. Select a connected call.
2. Select the appropriate directory entry.
3. Press the shortcut key combination to transfer the call to one of the alternate configured
numbers for the user.
Shortcut Keys
Transfer To…
No Consultation
After Consultation
Default Number
Enter
Ctrl+T
Assistant
Ctrl+Alt+R
Ctrl+Shift+R
Business
Ctrl+Alt+B
Ctrl+Shift+B
Business 2
Ctrl+Alt+U
Ctrl+Shift+U
Fax
Ctrl+Alt+F
Ctrl+Shift+F
Home
Ctrl+Alt+H
Ctrl+Shift+H
Home 2
Ctrl+Alt+O
Ctrl+Shift+O
Mobile
Ctrl+Alt+I
Ctrl+Shift+I
Pager
Ctrl+Alt+G
Ctrl+Shift+G
Operator Console
Keyboard Shortcuts
Shortcut
Features Description
Enter
Toggle a connected or alerting call between connected and
hold states, or transfer the currently selected call to a
selected directory entry.
Shift+Enter
Dial the default number for the currently selected directory
entry.
Call Transfer
Transfer the currently selected call to any one of the
alternate numbers configured for a directory entry.
Shortcut Keys
Quick Keys
07/15/2013
Create and use custom keyboard shortcuts for any view in
Interaction Client .NET Edition.
Kentucky Health Benefit Exchange Contact Center
© 2013 Xerox Corporation. All rights reserved.
Page 165 of 170
Interaction Center User Manual
Quick Keys
Operator Console users can configure “Quick Keys,” which are personal shortcut keys. Quick
keys are used to move from one view to another within the interface. Users can assign predefined shortcuts to any existing client view and then use these shortcuts to navigate from
view to view within the interface.
1. From the Options menu, click Configuration, expand the Views node then click Quick Keys.
2. In the Quick Keys properties details pane, select a view to which the user wants to assign a
Quick Key. In the Quick Keys field for that view, do one of the following:
Select a key combination from the drop-down list.
Type one of the approved key combinations.
3. Click OK.
07/15/2013
Kentucky Health Benefit Exchange Contact Center
© 2013 Xerox Corporation. All rights reserved.
Page 166 of 170
Interaction Center User Manual
1.
2.
3.
4.
Display Quick Keys
From the Windows Start menu, select Interaction Client.
In the Logon dialog box, select the Options tab and click Add.
In the Setting Editor dialog box, in Setting Name, type EnableQuickKeys.
In Setting Value, type False. Click OK.
Rapid Transfer
1. Select a call and then start typing the extension, phone number, or name of the person to
whom they want to transfer the call. This automatically opens the Transfer dialog box and
displays a drop-down list of choices.
`
2. From the drop-down list, do one of the following. If the intended recipient is an IC user,
status information for the selected IC user appears. It shows whether or not the transfer
recipient is logged into Interaction Client and is able to accept the transferred call. This can
help the user decide what kind of call transfer to use.
Select "Dial [the user’s entry] as Digits" to convert a text entry into numbers.
Select the appropriate name and associated extension number.
3. Optionally, if they selected an IC user as a recipient, do one of the following. IC disregards
any forwarding phone number set for this IC user in Call Coverage settings or Set Status
Details.
Select the Override Call Forwarding check box to transfer the call to the IC
user's extension.
Clear the Override Call Forwarding check box to transfer the call to the
extension or phone number currently preferred by the IC user.
4. Click the Transfer button. The transferred call disappears from My Interactions or other
queue and is routed to the selected recipient.
To transfer a call by selecting a directory entry:
Select a call, then select a directory entry and press Enter. This transfers the selected call
to the default phone number or extension for the selected directory entry.
Other Call Transfer Options
Other Standard Methods for Transferring Calls:
Transfer a Call Using a Transfer Button
Transfer a Call to a Directory Entry
07/15/2013
Kentucky Health Benefit Exchange Contact Center
© 2013 Xerox Corporation. All rights reserved.
Page 167 of 170
Interaction Center User Manual
Transfer a Call to a Workgroup
Transfer a Call After Consulting the Recipient
Transfer a Call Without Consulting the Recipient
Transfer a Call to Another Person's Voicemail
Transfer a Call to the user’s Voicemail
Park a Call on Another Person's Extension
Drag and Drop a Call on a Name in a Directory
4.1.7.Whisper Mode
Use Whisper mode to add themself to a CSR’s interaction on any queue they have permission to
monitor. This enables them to talk to the CSR without the customer knowing. The CSR can hear
their side of the conversation, but the customer cannot.
To coach a CSR on an interaction:
1. Make sure they have permission to monitor a specific queue.
2. Highlight the interaction the Supervisor wants to join and click the Whisper Button or press
Ctrl+W. The Listen button is activated on the client. An icon appears in the CSR's Lstns
column in My Interactions.
4.1.8.Call History
The Call History view displays a listing of the user’s incoming and outgoing calls. The tab is
similar to a directory view. Some of the call information available includes Start date and time,
End time, Number, Name, and Disposition as shown below. By default, the newest call appears
first, but they can sort this view by clicking on any column heading. Their preferred sort order is
used anytime they view Call History.
History Features
Item
Disposition
Description
Answered: An incoming call that was answered.
Called: An outbound call.
Missed: An incoming call that was not answered.
Unknown: This is displayed if the server has no information on
whether the call was inbound or outbound.
Name
The name of the caller or the person called as found on the IC server or
delivered by the Public Switched Telephone Network (PSTN) as part of
Caller ID.
Number
For an outbound call, this is the number that was dialed. For an inbound
07/15/2013
Kentucky Health Benefit Exchange Contact Center
© 2013 Xerox Corporation. All rights reserved.
Page 168 of 170
Interaction Center User Manual
call, this is the number of the caller.
Start
The time when the call is added to the user’s queue.
End
The time when the call disconnected if it was still in their queue. If the
call leaves the CSR’s queue before being disconnected, the end time is
when the call left their queue.
Duration
The difference in time between Start and End.
Call ID
The call identifier for the call can be handy if users must report a
problem with a call to their administrator.
Displaying the Call History View
Re-adding the Call History view after the user removed it:
1. Do one of the following:
From the File menu, chose New View.
Right-click a tab in the area where the user wants the Call History view to
appear and select New View. The Create New View dialog box appears.
2. From the Categories list, select Call History.
3. In the Views list, select Call History. Then click OK.
Removing the Call History View
To remove the Call History view, in the client window, right-click the Call History tab and
click Close Call History.
Call History – Make Calls
The user can click anywhere in a call history row or click directly on the Number hyperlink to
dial the phone number associated with the call.
Call History Retention
History is tracked for calls that appeared in My Interactions. These are calls that were
inbound to the user, calls placed by the user, calls transferred to the user, and calls used to
retrieve voice mail messages.
Call history is maintained by Client Services on the Interaction Center server. By default,
call history information is retained for three (3) days or 300 calls, whichever comes first, per
user. The amount of call history data stored per user depends on the version of Client
Services running on the server and how it is configured by the IC administrator.
4.1.9.Camp Desktop Alert
The Camp desktop alert lets the user know when another user whose status they are
monitoring, changes his status.
07/15/2013
Kentucky Health Benefit Exchange Contact Center
© 2013 Xerox Corporation. All rights reserved.
Page 169 of 170
Interaction Center User Manual
4.1.10.
Using the Dial Pad
The Dial Pad enables the user to a dial phone number to place a call, send DTMF tones to a
connected call, make selections from an automated telephone menu system, or end a connected
call. They can also use the Dial Pad to dial and make another call while the selected interaction
is on hold. The Dial Pad can also send DTMF tones through a connected SIP Soft Phone.
To display the Dial Pad:
1. Do one of the following. The Create New View dialog box will appear.
From the File menu, chose New View.
Right-click a tab in the area where the user wants to add a view and click New
View.
2. From the Categories list, select Dial Pad.
3. In the Views list, select Dial Pad. Then click OK. The Dial Pad view will appear in
Interaction Client.
Use Dial Pad
1. Display the Dial Pad.
2. Do one of the following:
Click the appropriate buttons on the Dial Pad to dial a phone number.
Select the Dial Pad tab and type the phone number on the user’s keyboard.
3. One of the below items happens:
If they do not have a connected interaction or the selected interaction is on
hold, the numbers appear in the Number field. Click the Make Call button and
the number is dialed.
If they have a connected or selected interaction that is not on hold, the
numbers are sent to the interaction. This can be used to make selections from
an automated telephone menu system. It's just like using a touch tone phone
Dial Pad.
If the user have a recent interaction selected in the Number dropdown list, the
Number field is cleared and the numbers they press on the Dial Pad appear.
4. On the Dial Pad, click the Call button. The number is dialed.
5. After the call is connected, click buttons on the dial pad to make selections from an
automated telephone menu system. It's just like using a touch tone phone dial pad.
6. Click the End button on the dial pad to disconnect the call.
07/15/2013
Kentucky Health Benefit Exchange Contact Center
© 2013 Xerox Corporation. All rights reserved.
Page 170 of 170