1
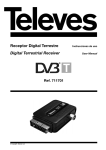
Receptor Digital Terrestre Digital Terrestrial Receiver Ref. 711701 © Copyright, Televés, S.A. Instrucciones de uso User Manual User manual “SCART DVB-T 711701” Page 1.- Precautions . . . . . . . . . . . . . . . . . . . . . . . . . . . . . . . . . . . . . . . . . . . . . . . . . . . . . . . . . . . . . . . . . . . . . . . . . . . 2.- General information . . . . . . . . . . . . . . . . . . . . . . . . . . . . . . . . . . . . . . . . . . . . . . . . . . . . . . . . . . . . . . . . . . . . . 2.1.- Main features . . . . . . . . . . . . . . . . . . . . . . . . . . . . . . . . . . . . . . . . . . . . . . . . . . . . . . . . . . . . . . . . . . . . . 2.2.- Contents . . . . . . . . . . . . . . . . . . . . . . . . . . . . . . . . . . . . . . . . . . . . . . . . . . . . . . . . . . . . . . . . . . . . . . . . 2.3.- General operation . . . . . . . . . . . . . . . . . . . . . . . . . . . . . . . . . . . . . . . . . . . . . . . . . . . . . . . . . . . . . . . . . 3.- Description of connections . . . . . . . . . . . . . . . . . . . . . . . . . . . . . . . . . . . . . . . . . . . . . . . . . . . . . . . . . . . . . . . 3.1.- Remote control . . . . . . . . . . . . . . . . . . . . . . . . . . . . . . . . . . . . . . . . . . . . . . . . . . . . . . . . . . . . . . . . . . . 4.- Equipment installation . . . . . . . . . . . . . . . . . . . . . . . . . . . . . . . . . . . . . . . . . . . . . . . . . . . . . . . . . . . . . . . . . . . 4.1.- Connections. . . . . . . . . . . . . . . . . . . . . . . . . . . . . . . . . . . . . . . . . . . . . . . . . . . . . . . . . . . . . . . . . . . . . . . 5.- Start of installation . . . . . . . . . . . . . . . . . . . . . . . . . . . . . . . . . . . . . . . . . . . . . . . . . . . . . . . . . . . . . . . . . . . . . . . 6.- Basic Functions . . . . . . . . . . . . . . . . . . . . . . . . . . . . . . . . . . . . . . . . . . . . . . . . . . . . . . . . . . . . . . . . . . . . . . . . . 6.1.- Selecting a program . . . . . . . . . . . . . . . . . . . . . . . . . . . . . . . . . . . . . . . . . . . . . . . . . . . . . . . . . . . . . . . . 6.2.- TV/Radio Mode . . . . . . . . . . . . . . . . . . . . . . . . . . . . . . . . . . . . . . . . . . . . . . . . . . . . . . . . . . . . . . . . . . . 6.3.- Volume Control . . . . . . . . . . . . . . . . . . . . . . . . . . . . . . . . . . . . . . . . . . . . . . . . . . . . . . . . . . . . . . . . . . . 6.4.- Channel information . . . . . . . . . . . . . . . . . . . . . . . . . . . . . . . . . . . . . . . . . . . . . . . . . . . . . . . . . . . . . . . 6.5.- Favorites List . . . . . . . . . . . . . . . . . . . . . . . . . . . . . . . . . . . . . . . . . . . . . . . . . . . . . . . . . . . . . . . . . . . . 6.6.- Audio Menu . . . . . . . . . . . . . . . . . . . . . . . . . . . . . . . . . . . . . . . . . . . . . . . . . . . . . . . . . . . . . . . . . . . . . . 6.7.- Zoom Function . . . . . . . . . . . . . . . . . . . . . . . . . . . . . . . . . . . . . . . . . . . . . . . . . . . . . . . . . . . . . . . . . . . 6.8.- Mosaic Function . . . . . . . . . . . . . . . . . . . . . . . . . . . . . . . . . . . . . . . . . . . . . . . . . . . . . . . . . . . . . . . . . . 6.9.- Return to previous program . . . . . . . . . . . . . . . . . . . . . . . . . . . . . . . . . . . . . . . . . . . . . . . . . . . . . . . . . . 7.- EPG (Electronic Programming Guide) . . . . . . . . . . . . . . . . . . . . . . . . . . . . . . . . . . . . . . . . . . . . . . . . . . . . . . . 8.- Teletext / Subtitles . . . . . . . . . . . . . . . . . . . . . . . . . . . . . . . . . . . . . . . . . . . . . . . . . . . . . . . . . . . . . . . . . . . . . . 9.-Recording Programmes . . . . . . . . . . . . . . . . . . . . . . . . . . . . . . . . . . . . . . . . . . . . . . . . . . . . . . . . . . . . . . . . . . . 10.- TimeShift function . . . . . . . . . . . . . . . . . . . . . . . . . . . . . . . . . . . . . . . . . . . . . . . . . . . . . . . . . . . . . . . . . . . . . . 11.- Main Menu . . . . . . . . . . . . . . . . . . . . . . . . . . . . . . . . . . . . . . . . . . . . . . . . . . . . . . . . . . . . . . . . . . . . . . . . . . . 12.- Digital TV . . . . . . . . . . . . . . . . . . . . . . . . . . . . . . . . . . . . . . . . . . . . . . . . . . . . . . . . . . . . . . . . . . . . . . . . . . . . . 12.1.- Program Editing . . . . . . . . . . . . . . . . . . . . . . . . . . . . . . . . . . . . . . . . . . . . . . . . . . . . . . . . . . . . . . . . . . . 12.1.1- Program Organizing . . . . . . . . . . . . . . . . . . . . . . . . . . . . . . . . . . . . . . . . . . . . . . . . . . . . . . . . . 12.1.2.- Ordering Programs . . . . . . . . . . . . . . . . . . . . . . . . . . . . . . . . . . . . . . . . . . . . . . . . . . . . . . . . . . 12.1.3.- Grouping Programs . . . . . . . . . . . . . . . . . . . . . . . . . . . . . . . . . . . . . . . . . . . . . . . . . . . . . . . . . 12.1.4.- Editing Programs . . . . . . . . . . . . . . . . . . . . . . . . . . . . . . . . . . . . . . . . . . . . . . . . . . . . . . . . . . . 12.1.5.- Erase all . . . . . . . . . . . . . . . . . . . . . . . . . . . . . . . . . . . . . . . . . . . . . . . . . . . . . . . . . . . . . . . . . . 12.2.- Installation . . . . . . . . . . . . . . . . . . . . . . . . . . . . . . . . . . . . . . . . . . . . . . . . . . . . . . . . . . . . . . . . . . . . . . 12.2.1.- Free / All . . . . . . . . . . . . . . . . . . . . . . . . . . . . . . . . . . . . . . . . . . . . . . . . . . . . . . . . . . . . . . . . . . 12.2.2.- Automatic search . . . . . . . . . . . . . . . . . . . . . . . . . . . . . . . . . . . . . . . . . . . . . . . . . . . . . . . . . . . 12.2.3.- Manual search . . . . . . . . . . . . . . . . . . . . . . . . . . . . . . . . . . . . . . . . . . . . . . . . . . . . . . . . . . . . . 12.2.4.- Range search . . . . . . . . . . . . . . . . . . . . . . . . . . . . . . . . . . . . . . . . . . . . . . . . . . . . . . . . . . . . . . 12.2.5.- LCN Configuration . . . . . . . . . . . . . . . . . . . . . . . . . . . . . . . . . . . . . . . . . . . . . . . . . . . . . . . . . . 12.2.6.- Aerial Configuration . . . . . . . . . . . . . . . . . . . . . . . . . . . . . . . . . . . . . . . . . . . . . . . . . . . . . . . . . 12.3.- Configuration . . . . . . . . . . . . . . . . . . . . . . . . . . . . . . . . . . . . . . . . . . . . . . . . . . . . . . . . . . . . . . . . . . . 12.3.1.- OSD (On-Screen Display) Configuration . . . . . . . . . . . . . . . . . . . . . . . . . . . . . . . . . . . . . . . . . 12.3.2.- TV Configuration . . . . . . . . . . . . . . . . . . . . . . . . . . . . . . . . . . . . . . . . . . . . . . . . . . . . . . . . . . . 12.3.3.- System Configuration . . . . . . . . . . . . . . . . . . . . . . . . . . . . . . . . . . . . . . . . . . . . . . . . . . . . . . . . 12.3.4.- Time Configuration . . . . . . . . . . . . . . . . . . . . . . . . . . . . . . . . . . . . . . . . . . . . . . . . . . . . . . . . . . 12.3.5.- Alarm Clock Configuration . . . . . . . . . . . . . . . . . . . . . . . . . . . . . . . . . . . . . . . . . . . . . . . . . . . . 12.3.6.- Parent Control . . . . . . . . . . . . . . . . . . . . . . . . . . . . . . . . . . . . . . . . . . . . . . . . . . . . . . . . . . . . . 12.4.- Software Updating . . . . . . . . . . . . . . . . . . . . . . . . . . . . . . . . . . . . . . . . . . . . . . . . . . . . . . . . . . . . . . . . 12.5.- Plant Configuration Values . . . . . . . . . . . . . . . . . . . . . . . . . . . . . . . . . . . . . . . . . . . . . . . . . . . . . . . . . . 12.6.- Information Technology Version . . . . . . . . . . . . . . . . . . . . . . . . . . . . . . . . . . . . . . . . . . . . . . . . . . . . . . 13.- Cinema ............................................................................ 14.- Music ............................................................................. ............................................................................. 15.- Photos 16.- Games ............................................................................. 17.- Disk Management .................................................................... 18.- Partition-format ...................................................................... Description of Connectors . . . . . . . . . . . . . . . . . . . . . . . . . . . . . . . . . . . . . . . . . . . . . . . . . . . . . . . . . . . . . . . . . . Glossary of Terminology . . . . . . . . . . . . . . . . . . . . . . . . . . . . . . . . . . . . . . . . . . . . . . . . . . . . . . . . . . . . . . . . . . . . Menu Structure . . . . . . . . . . . . . . . . . . . . . . . . . . . . . . . . . . . . . . . . . . . . . . . . . . . . . . . . . . . . . . . . . . . . . . . . . . . Technical Features . . . . . . . . . . . . . . . . . . . . . . . . . . . . . . . . . . . . . . . . . . . . . . . . . . . . . . . . . . . . . . . . . . . . . . . . Guarantee . . . . . . . . . . . . . . . . . . . . . . . . . . . . . . . . . . . . . . . . . . . . . . . . . . . . . . . . . . . . . . . . . . . . . . . . . . . . . . . 41 42 43 43 43 43 44 45 46 46 47 49 49 49 49 50 50 51 51 52 52 53 54 55 56 57 58 58 58 59 59 60 60 61 61 61 61 62 62 62 63 63 64 65 66 67 68 69 70 70 71 71 72 72 73 73 74 75 76 77 78 ENGLISH INDEX User manual “SCART DVB-T 711701” 1.- Precautions The adaptor you have just purchased has been manufactured to international safety standards. We recommend you to read the following safety tips carefully. ALIMENTATION: 100 - 250 V~ 50/60 Hz. OVERLOAD: Do not overload points, extension cords or adaptors to avoid fire and electric shock risks. > 50°C LIQUIDS: Do not expose the Adaptor to water leakage or spray. Do not place objects or vessels containing liquids on the equipment or near it. SMALL OBJECTS: Avoid the proximity of small metal objects to the equipment. These could slip through the ventilation slots of the Adaptor, causing it serious damage. > 80 % CLEANING: Disconnect the Adaptor from the power source before cleaning. Use a soft rag, slightly moistened in water (without detergent) to clean the outside of the Adaptor. VENTILATION: Place the Receiver in a well-ventilated area so that the slots are not blocked in any way. Avoid exposure to the sun, to other sources of heat or flames. Do not place on top of other equipment. < 5°C CONNECTIONS: Make only the recommended connections, in order to avoid possible damage to the equipment. CONNECTIONS TO TV/VCR: Turn off the Adaptor before connecting or disconnecting to a TV set or a VCR. NOT DOING THIS may damage the TV or the VCR. LOCATION: Locate the Adaptor in an interior room, safe from electrical discharges, rain or direct sunlight. Install the Receiver in horizontal position. WARNING RISK ELECTRICAL SHOCK DO NOT OPEN IN ORDER TO REDUCE RISK OF ELECTRICAL DISCHARGE, DO NOT REMOVE THE LID. THERE ARE NO USER-REPAIRABLE PARTS INSIDE THE MACHINE. FOR ANY REPAIRS, CONTACT A QUALIFIED TECHNICIAN This symbol indicates that “voltage levels are dangerous” within the product, and that this presents a risk of electric shock or other personal harm. This symbol indicates that there are important instructions for the use of this product 42 User manual “SCART DVB-T 711701” 2.- General Information The SCART DVB-T 711701 receiver enables you to tune in to a wide range of land-based channels. This manual explains how to carry out the receiver installation and the necessary steps for using the different functions. It also explains in detail the special functions that are available only in this receiver, and eases the use of these functions. 2.1.- Main features Allows MPG files to be recorded directly onto an external disk or pen drive (FAT 32) by USB. Supports LCN function (Automatic Channel Organizing) TimeShift Function Zoom Function Allows to play AVI, MPG, DviX, JPG and MP3 files. Mosaic function (9 programmes)) Advanced functions to play (Repeat, Lang, Goto). MPEG2, DVB Compatible Supports OSD Teletext and Subtitling functions (standard and TXT) Easy to use menu Supports VBI Teletext Guided initial installation Parental and menu lock Diverse program editing functions (favorites, move, block, erase...) Multi-video Output - CVBS, RGB Stores up to 1500 programs Automatic PAL/NTSC Conversion Quick and easy software updating through the use of USB. Automatically stores the last program Electronic Programming Guide (EPG) On-screen 256 color Display Offers a range of 3 games Download and upload of channel list via USB. Timer function automatically. turning the receiver on and off T EXIT LIS DEVICE A-SCAN GO TO ZOOM MOSAIC 711701 FILE SUBT AUDIO TIMESHIFT VOL+ PAUSE ALT CH+ CH- TV/RADIO OK VOL- MENU MUTE REC TEXT 6 9 FAV 3 2 5 INFO 8 0 EPG 1 4 7 MOVIE POWER - 1 x Remote control LANG - 1 x Digital terrestrial receiver ref. 711701 REPEAT Check that the following components are included in the shipment: - 1 x Voltage adaptor - 1 x IR Receiver extension - 2 x ”AAA" Type Batteries - 1 x RCA Cable - 1 x USB Cable - Instructions Manuals 2.3.- General Operation Throughout this manual you will observe that the daily use of the receiver is based on a series of very easy to use menus and displays. These menus will help you to enjoy your Televés receiver, by guiding you through the installation, program organizing, viewing and many other functions. If you should have any problems with the functioning of your receiver simply read the corresponding paragraph of this manual, or alternatively call you installer or Televés’s Technical Assistance Service. 43 ENGLISH 2.2.- Contents User manual “SCART DVB-T 711701” 3.- Description of connections SCART TO TV A/V OUT Host USB IR DC INPUT RF IN Name SCART TO TV Host USB RF IN DC INPUT IR A/V OUT Function Connection to the Euroconnector of the TV or VCR Connection of the USB cable to connect a memory stick, an MP3 player or an external disk Signal input from the terrestrial aerial Connection for the power adaptor Connection for the IR sensor. The sensor should be located in a visible spot Audio/Video signal output to connect to other devices 44 User manual “SCART DVB-T 711701” 3.1.- Remote control Button Function Turns receiver on and off. POWER MUTE MUTE Suppresses sound. 0 ... 9 Selects a program number for viewing. Direct input of data on menu. MOVIE 1 2 3 FAV 4 5 6 REPEAT 9 MENU 7 8 MOVIE 0 LANG EPG MENU FAV REPEAT INFO EXIT CH+ VOL- EPG OK ALT ST LI REC TEXT TV/RADIO PAUSE AUDIO SUBT ZOOM DEVICE TIMESHIFT FILE MOSAIC A-SCAN GO TO Shows the favorite programs list. Repeats one or several audio or video files. To enable the main menu or to leave the menus. Enables the EPG (Electronic Program Guide) of the current transponder. LANG Allows to select the audio of a film (AVI). INFO Shows current program information. If pressed again before the disappearance of the banner, will show details of the current program. Gives extra information on some menus. EXIT Returns to the previous menu on the menu screen. VOL+ CH- Accesses the Films menu. CH+ Selects following program / Upward movement. CH- Selects the previous program / Downward movement. VOL- Reduces volume level. Moves left. VOL+ Increases volume level. Moves right. OK Executes the menu option chosen, or enters the desired value in any input mode. Enables the general program list. Selects the previous track. Selects the next track. Fast forwards the image in reproduction mode (X2, X4, X8, X20). 711701 Commutes to the last program tuned. LIST Enables the general program list. REC TEXT Records the program currently being watched. In TDT mode, activate the Teletext. In Multimedia mode, stops playing a file. TV/RADIO In TDT mode, switches between TV and Radio modes. In Multimedia mode, starts playing a file. PAUSE Enables you to freeze the image viewed. To go on watching, press again. AUDIO Selects the different audio languages available. Selects the audio output type (L. R. Stereo). SUBT In TDT mode enables the Subtitles Menu. In Multimedia mode show the subtitles during the playing of MPEG2, DivX or Xvid files. ZOOM Enables the Zoom function. DEVICE Selects the signal source. TIMESHIFT FILE Access to Timeshift function. Shows the list of recorded files. MOSAIC Shows a mosaic of 9 small screens. A-SCAN /GO TO In TDT mode, initiates automatic program search. In Multimedia mode, shows a time meter to have direct access to scenes. Note: The red, green, yellow and blue buttons have secondary functions that are not described here and which may appear on the different menus. 45 ENGLISH Fast rewind the image in reproduction mode (X2, X4, X8, X20). ALT User manual “SCART DVB-T 711701” 4.- Equipment installation This section explains how to install the SCART DVB-T 711701 Receiver. Read the manuals supplied with the equipment for the installation of external devices such as the aerial. When adding a new device, read the respective part of the manual for installation instructions 4.1.- Connections - Connect the receiver directly to the TV Euroconnector or do so with cable A/V (RCA). - Connect the aerial to the RF IN port of the receiver. - Connect the IR sensor extension cord to the IR connector. Place the sensor in full view enabling the use of the remote control. - Connect the feed adaptor plug to the DC INPUT socket of the receiver. - Plug the network adaptor into a wall socket (100 - 250V~). - The receiver will start functioning normally showing the channels tuned. SCART DVB-T 711701 Analog TV + Digital TV Option Important note: If you want to connect an external disk (FAT 32) to the receiver, you must do so before connecting the receiver to the mains (230V~). Antenna TDT signal Analog signal All cables used for Receiver connection should be of the screened type. DO NOT PLUG the Receiver into the network before finalizing all connections 46 User manual “SCART DVB-T 711701” 5.- Start of installation When the receiver is first turned on, it will show an initial installation window. This menu consists of four options: OSD Language, Area, LCN and Enabled Aerial. To set up these parameters, follow the instructions below: Using buttons / locate the cursor on the language window. Using buttons CH+ / CH- select the desired menu language. The available menus are: English, French, German, Italian, Spanish, Swedish, Portuguese, Finnish, Dutch, Turkish, Czech, Greek and Danish. Press button OK to confirm. Shift the cursor to the next optionn Area using the button CH-. Using buttons / locate the cursor on the country window. Using buttons CH+ / CH- select the zone for local configuration of parameters. The areas or zones available are: Germany, England, Italy, France, Spain, Holland, Taiwan, China, Norway, Sweden, Finland, Greece and Australia. Shift the cursor to the next option LCN using button CH-. Using buttons / locate the cursor on the options window. Using buttons CH+ / CH- select the enabling (on) or disabling (off) of the LCN option (Automatic channel organizing). Press button OK to confirm. Move the cursor to the next option Active Antenna using button CH-. Using buttons / locate the cursor on the options window. Using buttons CH+ / CH- indicate if you wish to feed (on) or not (off) a potential amplifier into the aerial. If no amplifier is available, you should select the Off option, otherwise you might damage the receiver. Press button OK to confirm. 47 ENGLISH Press button OK to confirm. User manual “SCART DVB-T 711701” Finally an emerging window will appear requesting confirmation to start the search. Select the option YES and press OK button to start the search. The receiver will carry out a search over the whole input frequency band. Once this search has ended, the receiver will show the first program on the list. 48 User manual “SCART DVB-T 711701” 6.- Basic Functions Below we describe the basic functions of the SCART DVB-T 711701 receiver that may be used while you are watching TV programs or listening to land-based radio programs. 6.1.- Selecting a program To select a program, use the buttons CH+ / CH- on the remote control or the number keys. As well as this normal function, the receiver offers a quick program change function. While you are watching TV, press button OK on the remote control. A program list will appear on screen. To select a channel, move through this menu using the CH+ / CHbuttons and select the desired program. Press button OK to watch your chosen program. If you have also included programs in predefined groups, you can select them by topic (none, news, science, sports, movies, kids, music, fashion). To change the group, press the buttons / . 6.2.- TV/Radio Mode While you are watching a TV program, press button TV/RADIO on the remote Control to switch between TV and Radio mode. ENGLISH You will then switch to one of the Radio stations in the memory. 6.3.- Volume Control Volume Control - To raise or lower Volume use remote control buttons VOL- / VOL+ . Note: The receiver has 10 Volume levels. Volume may also be adjusted using the volume control on your TV set. Mute - To suppress sound entirely, press the MUTE ( ) button on the remote. To re-enable sound, press this button once again. 49 User manual “SCART DVB-T 711701” 6.4.- Channel information Each time you change programs, some information on the new program will appear for a few seconds. This same information will appear if you press the INFO button at any point. If you press it again, while the information window is being displayed, transponder information will appear (name, frequency, bandwidth, etc) as also, if available, information on the next program to be shown. The indication “SUB” on this window shows that the program is subtitled. The indication “TXT” on this window indicates that the program has a teletext option. The indication “A” on this window indicates that the program offers audio in several languages. You will also see two bars indicating the quality and intensity level of the signal received. 6.5.- Favorites List To access the favorite program list, press button FAV on the remote. The selected favorite program list will then be displayed. By pressing the TV/RADIO button you can select the TV or Radio favorites list. To select a program, browse the list using the CH+ / CH- buttons and confirm by pressing OK. Note: - If there is not any programme assigned to the favourites list, the message “Favourite channels not available” will appear. - To leave the favorites list, select a program on the general list. The method used to create/modify the favorite programs list is explained in paragraph 12.1.1.- “Program Organizer”. 50 User manual “SCART DVB-T 711701” 6.6.- Audio Menu Mode selection - Press the AUDIO button on the remote control to enable the emerging “Multi-audio” menu. - Using the buttons / (Left, Right or Stereo). you may select the audio configuration mode - Press button OK to confirm your selection, or else press button EXIT leaving the menu unchanged. Language selection Some channels are broadcast with several audio options. This function depends on whether the broadcast includes this information in the signal sent by the operator. - Press AUDIO on the remote control enabling an emerging “Multi-audio” menu. - You may select the audio language from among those available, with buttons CH+ / CH- (however, if the broadcast is in only one language, no change is possible). 6.7.- Zoom Function This function enables you to zoom in or out on the full-screen picture you are viewing at the moment . - Each time you press ZOOM button, the zoom factor changes in this sequence: zoom x2, zoom x3, zoom x4, zoom out 1/2, zoom out 1/3, zoom out 1/4 and zoom off. The “zoom x” sequence will gradually blow up the image, while “zoom out” will progressively shrink it. - To browse through hidden parts of the blown up image use the buttons CH+ / CH- and / . - To exit the Zoom option, press button ZOOM repeatedly up to “Zoom off”. NOTE: Bear in mind that as you go increasing the zoom factor, the image quality will progressively deteriorate. 51 ENGLISH - Press button OK to confirm your selection, or else press button EXIT leaving the menu unchanged. User manual “SCART DVB-T 711701” 6.8.- Mosaic function This function allows to visualize an image mosaic (group of channels) formed by 9 screens. - Press the MOSAIC key to activate this option. - Once the mosaic appears on the screen, you can choose the programme you wish using the CH+ / CH- and / keys and then press OK. - Press the EXIT key to return to normal visualization mode. NOTE: This function does not allow to visualize two programmes at the same time. 6.9.- Return to previous program Press button ALT on the remote control to return to the last program you were viewing 52 User manual “SCART DVB-T 711701” 7.- EPG (Electronic Programming Guide) The SCART DVB-T 711701 receiver provides the EPG function for the user to have access to the TV (or radio) guide that shows information on the current or next programs on different channels, such as name, starting and ending times, plus a brief description, ..... - To view EPG information, press EPG on the remote control while viewing a program. - The EPG window corresponding to this program will appear on screen. - EPG display can be shown in Daily or Weekly mode. Daily Mode - This is the default mode. - In it, the EPG will appear divided into five groups. In the two upper ones are shown the date, time and day of the week. The center one shows on the left side the list of available channels and on the right side the starting and ending times and the names of all of the different programs being broadcast throughout the day corresponding to the channel that has been selected. - Press buttons CH+ / CH- to browse up/down both through the channel list (left) and through the different programs of that day (right). To move from the channels list to the programs list, you will have to use the following two buttons / . - If you click the yellow button on one of the programs on the list, the receiver will show more detailed information on that program. If the information takes up more than one page on the screen, use the buttons CH+ / CH- to browse downwards. To leave this menu, press EXIT. - By clicking the blue button on one of the programs on the list, a new timer will be automatically created for that program. The Wakeup Timer menu will be shown on screen with the data corresponding to the program. Press button OK to memorize the timer and return to the EPG. - Finally, at the bottom of the screen an information line will be shown for each event. Weekly Mode - Once the EPG is enabled, by pressing the green button, you fo to the Weekly mode. - In this case, the EPG appears distributed into six groups. The difference with the Daily mode is that instead of the day of the week, the whole week is shown and each day is divided into hourly bands. The operation mode is the same as previously. - To return to Daily mode, press the red button. To finally leave EPG press button EXIT. NOTES: The information appearing on the EPG is provided by the service supplier, so on certain occasions it may not be available. If the program selected does not supply data for the EPG, the legend 'No information available" will appear. To programme a recording of a specific event, press the TEXT (blue) key on the event. This will directly access the alarm menu, where you must then select the “Recorder” option in the “Wakeup mode” section, and then confirm by pressing OK. 53 ENGLISH To obtain further information on how to program an event, see paragraph 12.3.5.- Alarm clock. User manual “SCART DVB-T 711701” 8.- Teletext / Subtitles This receiver will enable you to choose among all the Teletext and/or subtitling options provided by the service supplier. Teletext - Press button TEXT on the remote control to enable Teletext and press OK. - The teletext services will be displayed in the usual way. - Even if your TV set does not possess a Teletext decoder, you may view it on screen, since the receiver generates it automatically. - The receiver control has colored keys enabling rapid access to Teletext pages. - To leave Teletext press button EXIT. Subtitles - Press button SUBT on the control to enable subtitles. - Select the options “Subtitle” or “TXT-Subtitle”, using the buttons / to show the subtitle text. If you wish to eliminate subtitling, select the “Off” option. - Using the buttons CH+ / CH- you can select the language in which the teletext is displayed (the option is available if the service supplier provides this information). - The subtitling services will be visible on the lower part of the screen. NOTE: Not all service suppliers provide this kind of information. 54 User manual “SCART DVB-T 711701” 9.- Recording programmes This receiver allows programmes to be recorded in two different ways: in real time, or by using the “Wakeup Timer” option. To use this function, you must have an external disk or pen drive in FAT 32 format, which must be connected before plugging the receiver into the mains. - Before starting the recording, press the DEVICE key to show the list of devices. Select the device using the CH+ / CH- keys, and then press OK on the device. A confirmation message will be shown. - The device will indicate you, using color signals, which functions you can do in the selected disk. If the “Speed” signal is red you can only read files. If it is yellow, you can record and if the signal is green, you can run the TimeShift function. - Press the EXIT key to exit the device list. Real time recording - Press the REC key once to record the programme you are currently watching. The indication “ ” will the shown on the screen, and you will not be able to access any other programme. If you press this key twice, you will be able to define how long the recording lasts (15, 30, 45, 60, 75, 90, 105 or 120 minutes), and then confirm using the OK key. - If the signal level drops or disappears during the recording, the message “REC PAUSE” will be shown on the screen, and the recording will halt. Recording will begin again once the signal returns. Recording with Wakeup/EPG - There are two ways of programming a recording, either through the information of the EPG or directly using the Wakeup option. - For information on how to create events indicating the start time and end time for recordings, programme, etc., see section 12.3.5.- Wakeup Timer Configuration. NOTES:The recordings will be stored in files with a maximum size of 3.8 GB (due to the 4GB limit of the FAT 32 format). Subtitles will not be available while recording a programme. 55 ENGLISH - To stop recording, press the TEXT key. A message will be shown asking you if you want to stop the recording, by selecting YES or NO. User manual “SCART DVB-T 711701” 10.- TimeShift function To make this function possible, you must have an external disk or a pen drive (memory stick) with FAT 32 format, which must be connected before supplying the receiver. Timeshift is the time that passes between the video in real time and the video recorded in the hard disk. - Press the TIMESHIFT key while you are watching a TV programme. The “TIMESHIFT” indication will appear on the screen. From that moment on, all the information will be being stored in the receiver´s memory. - Press the key if you want to stop the image and the key to continue watching the programme starting at same point where you had stopped. Use the / keys if you want to adjust the time bar to search certain scenes. - Press the TEXT in real time. key to stop the TimeShift function and return to play - Before finishing this function, a window will appear asking you if you wish to save in the disk the recordings from the TimeShift function. NOTES:- The maximum time assigned to this function will depend on the size of the external disk connected to the unit. - During the TimeShift function subtitles and teletext will not be available. - During the TimeShift function you cannot change programmes. You must stop this function before changing them. 56 User manual “SCART DVB-T 711701” 11.- Main Menu Press button MENU to enable the main menu. This menu consists of seven sub-menus as shown below. - Digital TV - Movie - Music - Photo - Games - Disk Manager - Partition-format Select one of the menu options, using the buttons press OK to accept. CH+ / CH- and You can also select the sub-menu lines by using the numeral keyboard: (1 ... 9). All you have to do is type in the desired line number directly. On the menus that show the indication “ INFO: ¡Operating guide!”, by pressing the INFO button, an emerging menu will appear, showing the functions and the keys that may be used on that menu. ENGLISH Press button EXIT to leave the previous menu and to finally exit from the menus. 57 User manual “SCART DVB-T 711701” 12.- Digital TV 12.1.- Program Editing 12.1.1.- Program Organizing Note: As the radio programs are organized in the same way as the TV programs, we will only describe the process required for organizing the TV programs. To access the General Programs List, press the MENU. button. Select the options “Digital TV”, “Channel Manager”, and finally “Channel Organizer”. On this General List, all the programs found during the search will appear. You can browse through the programs list by using the buttons CH+ / CH-. The following options are used for editing the programs: Favorites This is the function used to select programs which will form part of the Favorites List. Select a program from the list, using the buttons CH+ / CH- and then press the red button. The programs which are marked for inclusion in the favorites list will be marked with icon “ ”. To eliminate this mark click the red button on the program again. Move Programs on the list may be repositioned as desired. You can select a program by using the buttons CH+ / CH-, then you can press the yellow button, and using buttons CH+ / CH- locate it in its new position on the list and press OK. Note: When the LNC is activated, the receiver allows you to change the programme´s location but keeping its numbering. Lock This blocks a selected program which may only be seen through the use of an access code. The programs that were blocked are shown on the list with icon “ ”. Select the program using the buttons CH+ / CH- and press the blue button to block it. You will then be asked to give a password. To eliminate the block mark click on the program again with the blue button. Delete Select a program from the list by using the buttons CH+ / CH-. If you wish to totally delete the program selected, press the green button. The programs that are marked for deletion will be shown with the icon “ ”. To eliminate the deletion mark, click on the program again with the green button. Rename Select a program from the list by using the buttons CH+ / CH-. Press button / to enable an emerging keyboard. Create the new name and press OK. To save the changes and exit from the editing option, press the EXIT button. 58 User manual “SCART DVB-T 711701” 12.1.2.- Channel Sorting There are three ways to organize a program list. The whole area (by region); All Area, Free (FTA), Scramble; by alphabetical order (A-Z or Z-A), LCN+ and LCN-. - Using the buttons CH+ / CH- select the program organizing method you choose from those available and using buttons / select the parameter for each option. - Press button OK to confirm your organization choice. Note: To organise programmes by LCN+/-, this option must be activated. 12.1.3.- Channel Grouping This option enables you to group the programs by content topic. The available topics are: None, News, Science, Sports, Movie, Kids, Music and Fashion. - Using the buttons CH+ / CH- select the channel you want to include in a group, then press one of the number keys on the remote from 1 to 8 coinciding with the name of the desired group. The icon of this group will appear beside the program name. - Press button EXIT to leave the menu and confirm the grouping action. NOTE: A program that is grouped on one of these lists will no longer be available on the general list. 59 ENGLISH You will view the channels grouped by topic on pressing the LIST button. User manual “SCART DVB-T 711701” 12.1.4.- Edit Channels Using this menu you can add new programmes to the list, or modify features of the existing programmes. - Press the red button to enter the sub-menu “Add programs”. - Using the buttons CH+ / CH- you can browse through the parameters defining the new program. - Press buttons / to switch to the option ranges for each parameter and using the buttons CH+ / CH- select the one you wish. Press OK to confirm. - Click button / on the parameter “ChannelName”. It will produce an emerging menu where you can create a name for the program. - Click the yellow button on a program from the list to edit the parameters by: Name, PID Audio, PID Video and PID PCR. Press OK to confirm the changes. - Press button EXIT to leave the menu. 12.1.5.- Delete All Using this menu, you can erase the TV or Radio programs. - Click the OK button on the option “Delete all”. You will be asked to insert the access PIN code. By default: 0 0 0 0. - Using the buttons CH+ / CH- select between erasing All TV Programs and All Radio channels. - An emerging window will ask you to confirm your decision to erase all programs. Select YES and press OK to confirm. - Press button EXIT to leave the menu. 60 User manual “SCART DVB-T 711701” 12.2.- Installation There are different ways of carrying out the channel search. 12.2.1.- Only FTA/All - Select the type of search among All (all of the programs found) or Only Free (only those being broadcast openly). - To do so, once you have selected the option “FTA/All” press button OK to accept. You will then access a sub-menu where you can use the buttons / to choose whether to carry out the FTA Channel search. - Press button OK to confirm. 12.2.2.- Automatic search - Select this mode to carry out an automatic search over the whole receiver input band. - To do so, once you have selected the option “Automatic Search” press the button OK to start the search. This will be done over the whole input bandwidth of your receiver. - The complete search may take several minutes. ENGLISH - If you wish to interrupt the search, press EXIT. 12.2.3.- Manual Search - Select this mode when you want to search for an individual channel. - For the purpose, once you have selected the option “Manual Search” press button OK to accept. You will thus access a sub-menu where you must indicate if the search will be by Number or by Frequency using the buttons / . Number - Using the buttons / select an available channel using the option “Channel Name”. Note whether the channel you have selected is a digital one. You will know this easily if the lower “Quality” bar is showing an acceptable quality percentage level. By Frequency - Using the numerical keyboard enter the frequency to be scanned for in the option “Freq.(KHz)“. - Select the appropriate “Bandwidth” from among 6, 7 or 8 MHz using buttons / . 61 User manual “SCART DVB-T 711701” - Bear in mind that if these values are not the correct ones, the search will fail. - Finally, press button OK to start the search. You can follow the search process using the indications shown on the TV screen. 12.2.4.- Range Search - Select this mode to carry out a selective search between two frequencies. - To do so, once you have selected the option “Range Search” press button OK to accept. You will thus access a sub-menu where you should indicate both the starting and ending frequencies. - Select the appropriate Bandwidth among 6, 7 or 8 MHz using buttons / . - Finally, press button OK to start the search. 12.2.5.- LCN Setting - This option allows the user to enable or disable the channel organization mode that has been defined by the operator. - To do so, once you have selected the option “LCN Setting” press button OK to accept. You will access a sub-menu where you can enable (on) or disable (off) the automatic organizing mode with buttons / . - Finally, press button OK to confirm. 12.2.6.- Antenna Setting - This option allows the user to enable or disable the feed on a potential aerial amplifier. - To do so, once you have chosen the option “Antenna Setting” press button OK to accept. You will thus access a sub-menu in which you should enable (on) or disable (off) the amplifier feed using buttons / . Note: If there is no amplifier, you must select the option NO, otherwise you can damage the adaptor. - Finally, press button OK to confirm. 62 User manual “SCART DVB-T 711701” 12.3.- Configuration 12.3.1.- OSD (On-Scree Display) Configuration This is the menu used for personalizing menu configuration. OSD This option enables you to change the color of the menu choosing from 5 options. To do so, using buttons CH+ / CH- locate the cursor on the “OSD” parameter and with / select the desired option. Time on OSD With this option you can show the time on screen. To do so use buttons CH+ / CH- locating the cursor on parameter “Time on OSD”, using the / active (on) buttons. OSD Timeout This option modifies the time during which the information screen is displayed. To use it, with buttons CH+ / CH- locate the cursor on parameter “OSD Tmiout” and using the / select a time between 1 and 6 seconds. OSD Language This option enables you to change the language in which the menus are shown on screen. To use it, with buttons CH+ / CH- locate the cursor on parameter “OSD Language”. Using buttons / switch to the list of available languages and then using buttons CH+ / CH- select the desired language. Press OK to accept. MP4 Subtitle Language This option allows you to modify the language of the subtitles shown on the screen, if they are transmitted with the signal. 1. Audio Language This option enables you to switch between different audio languages, if they are being broadcast with the signal. To do so, using buttons CH+ / CH- locate the cursor on parameter “1. Audio Language”. Using buttons / switch to the available language list and then using buttons CH+ / CH- select the desired language. Press OK to accept. 2. Audio Language If the Audio selected as “1. Audio Language” is unavailable, the option “2. Audio Language” will be automatically selected”. Finally press button OK to confirm the new parameters. 63 ENGLISH Transparency of OSD This option modifies the transparency with which the menus are shown on screen. To use it, with buttons CH+ / CH- locate the cursor on parameter “Transp. of OSD” and with buttons / select a percentage of transparency between 0 and 60%. User manual “SCART DVB-T 711701” 12.3.2.- TV Configuration Using this menu, you can configure the parameters of your screen. Display Mode Using buttons CH+ / CH- locate the cursor on the parameter “Display Mode” and with buttons / select the appropriate video standard. The options are: Automatic, PAL or NTSC. Automatic is the default configuration. Aspect Ratio Using buttons CH+ / CH- locate the cursor on the parameter “Aspect rartio” and with / select the desired format among 4:3LB, 4:3PS,16:9 or Auto. This option enables the automatic configuration of your screen depending on the model of your TV set. Video Output This option enables you to choose the type of output signal through the Euroconnector. To do so, using buttons CH+ / CH- locate the cursor on the “Video Output” parameter, and with buttons / select between RGB and CVBS. RGB is the default configuration. Brightness This option enables you to change picture brightness. To do so, using buttons CH+ / CH- locate the cursor on parameter “Brightness”. With / change to the list of values and with buttons CH+ / CH- select a percentage between 0 and 100%. Press OK to accept. Contrast This option enables you to change picture contrast. To do so, using buttons CH+ / CH- locate the cursor on parameter “Contrast”. Using buttons / switch to the values list and using buttons CH+ / CH- select the percentage of contrast between 0 and 100%. Press OK to accept. HUE This option enables you to change picture color. To do so, using buttons CH+ / CH- locate the cursor on parameter “Color”. Using buttons / switch to the values list and using buttons CH+ / CH- select the contrast level between -6 and +6. Press OK to accept. Saturation This option enables you to change saturation (tone) of the picture. To do so, using buttons CH+ / CH- locate the cursor on parameter “Saturation”. Using buttons / switch to the values list and using buttons CH+ / CH- select the saturation level between 0 and 12. Press OK to accept. Finally press button OK to confirm the changed parameters. 64 User manual “SCART DVB-T 711701” 12.3.3.- System Configuration Using this menu, you can configure the system parameters. Equalizer Using buttons CH+ / CH- locate the cursor on the “Equalizer” parameter, and using buttons / select the kind of equalizer you desire. The options are: Standard, Classical, Rock, Jazz or Pop. Surround Using buttons CH+ / CH- locate the cursor on the “Surround” parameter, using buttons / to select the desired effect. The options are: Off, Concert, Church, Passive and Direct. Active Antenna If you are using an active aerial (with amplifier) you should enable this option to feed the respective amplifier with +5V/100mA. The feeding is done through the selfsame coaxial cable that is connected to the RF IN port of the receiver. To do so, using buttons CH+ / CH- locate the cursor on parameter “Active antenna” and with buttons / enable (on) the feed process. If no amplifier is available, you should select the option “Off”, otherwise the receiver may be damaged. LCN This option allows you to enable or disable the LCN Function (Automatic Channel Organizing). To do so, using buttons CH+ / CH- locate the cursor on parameter “LCN” and with buttons / enable (on) or disable (off) this option. Note: The enabling of this option affects the way in which the receiver automatically organizes channels when it is carrying out a channel search. Area This option enables the selection of the area or zone where the receiver will be located. To do this, using buttons CH+ / CH- locate the cursor on parameter “Area”. With buttons / switch to the zone list, and with buttons CH+ / CH- select the desired country. Press OK to accept. Note: The selection of a given area determines default parameters. Menu Lock This option allows you to lock the access to the main menu. To do so, place the cursor on the “Lock Menu” parameter using the CH+ / CH- keys and activate (on) or deactivate (off) this lock using the / keys. Note: Once this menu is activated, you will have to enter the PIN code every time you access the main menu. Finally, press button OK to confirm the parameters you have changed. 65 ENGLISH JPEG Effect This option enables you to give the picture a similar effect to that of JPEG. To do so, using buttons CH+ / CH- locate the cursor on parameter “JPEG Effect”, and with buttons / enable (on) the effect. User manual “SCART DVB-T 711701” 12.3.4.- Time Configuration Using this menu, you can configure the way in which the receiver manages the Time information it receives with the signal. Timer Mode Using buttons CH+ / CH- locate the cursor on parameter “Timer Mode” and using buttons / select the time setting: Automatic or Manual. Selecting the Automatic mode will enable you to change the parameters “GMT Offset” and “Summer Time”. Selecting the Manual mode will enable you to edit the values corresponding to “Date” and “Time”. Date Using buttons CH+ / CH- locate the cursor on parameter “Date”. Using buttons / you enable an emerging calendar where the date can be updated. Using buttons CH+ / CH- y / select the day on the calendar. If you select a day which is outside the current month, it will change to the previous or next month. Using the red and yellow buttons, select the month. With the blue and green buttons select the year. Time Using buttons CH+ / CH- locate the cursor on parameter “Time”. Using buttons / the digits corresponding to the hour and minute values are selected. Using the numerical keyboard enter the correct value for each digit. GMT Offset Using this option, you will be able to indicate the time shift of the equipment location relative to GMT. To do so, using buttons CH+ / CH- locate the cursor on parameter GMT Adjustment. With buttons / switch to the values list and using buttons CH+ / CH- select the shift desired. Press OK to accept. Summer Time This option allows you to enable or disable the summer time function. For the purpose, using the buttons CH+ / CH- locate the cursor on parameter “Summer Time” and using buttons / enable (on) or disable (off) this option. Finally, press button OK to confirm the change in parameters. 66 User manual “SCART DVB-T 711701” 12.3.5.- Wakeup Timer Configuration Using this menu you can turn the receiver On/Off at a previously programmed time. You can program several events with different execution frequencies (once daily, weekly, etc... ).. Timer N° Using buttons CH+ / CH- locate the cursor on parameter “Timer N°”. Using the buttons / switch to the timer list, and using the buttons CH+ / CH- select one of the 8 options available. Press OK to accept. If any one of the timers is enabled, the cursor will self-locate on the next one available. Timer Mode Using buttons CH+ / CH- locate the cursor on parameter “Timer Mode”. Using the buttons / select one of the options: OFF, Once, Daily, Weekly or Yearly. Wakeup Mode Using buttons CH+ / CH- locate the cursor on parameter “Wakeup Mode”. Using the buttons / select one of the options: Off (disabled), Message (shows a message on screen), Program (shows the program selected), ON (turns the receiver on without a preset turnoff time) or Recorder (records the selected programme on the external disk or pen drive). Wakeup Date Select the date for enabling the alarm clock. To do so, using buttons CH+ / CH- locate the cursor on parameter “Wakeup Date”. Using buttons / a calendar is enabled on which you should indicate the day. Press OK to accept. On Time Indicate the time when the alarm should be activated. To do so, using buttons CH+ / CH- locate the cursor on parameter “On Time” and on the numerical keyboard type in the activation time. Duration Indicate event duration. To do so, using buttons CH+ / CH- locate the cursor on parameter “Duration” and on the numerical keyboard type in the duration of the event. Default Partition Select the disk in which the programme indicated for the alarm clock mode will be recorded. Finally press button OK to confirm the change of parameters. 67 ENGLISH Wakeup Channel Select the message or channel that will be shown on screen when the alarm clock is enabled. Depending on the mode set in the previous item, a message or a channel will be displayed. To do so, using buttons CH+ / CH- locate the cursor on parameter “Wakeup Channel”. Then using / select the desired type. User manual “SCART DVB-T 711701” 12.3.6.- Parental Lock When your receiver’s password is discovered, or you need to update it for any reason, this menu will allow you to change your password within the system. This will enable you to prevent both undesired manipulation of the system and access to inappropriate channels. Changing your PIN Code: - The plant default PIN Code is 0 0 0 0. Note: Do not forget your PIN Code. - To change the PIN code, first enter the current code. - Then enter the new PIN code. - Finally re-enter the new PIN code to confirm the operation. Notes: - The password is entered using the numerical keyboard (0 ... 9) on the remote control. - Parental control affects the system configuration menus and the programs that are blocked. - Do not forget your new password. Without it you will not be able to access the blocked menus and/or programs. - If you forget your password, get in touch with our technical service. 68 User manual “SCART DVB-T 711701” 12.4.- Software Updating Download from USB If you have an updated version of the software and wish to update the Receiver, proceed as follows. - Copy the software onto a memory stick (pen drive). - Connect the memory stick to the Receiver using the USB cable supplied. - Select the option “Software Updating” on the Digital TV menu using buttons CH+ / CH- and press OK. - Click OK on the option “USB Transfer”. - Select the software file (.bin) using the buttons CH+ / CH- and press OK. - The update process may take a few minutes. Please wait. Once the software is updated, the receiver will go to the “Installation Startup” menu. Download Channel Data If you have a customized channel list and you want to update the receiver with it, follow these steps. - Copy the file onto a pen drive. - Connect the pen drive to the receiver using the USB cable provided.. - Select the “Software upgrade” option in the Digital TV menu using the CH+ / CH- keys and press OK. - Select the channeldata.bin file using the CH+ / CH- keys and press OK. Upload Channel Data If you have a customized channel list in the receiver and you want to save it, follow these steps. - Connect a pen drive to the receiver using the USB cable provided. - Select the “Software upgrade” option in the Digital TV menu using the CH+ / CH- keys and press OK. - Press OK on the “Upload Channel Data” option. - The channel list will be saved as channeldata.bin in the pen drive. 69 ENGLISH - Press OK on the “Download Channel Data” option. User manual “SCART DVB-T 711701” 12.5.- Factory Default If you wish to return to plant configuration values, you may do so at any time. This function will allow you to return to the receiver’s parameters at the time when it left the plant, deleting any subsequent configuration it might have been given. - Select the parameter “Factory Default” using the buttons CH+ / CHand press OK. - Enter your PIN Code. - On the emerging confirmation window, you should indicate whether you wish to restore the plant values (Yes) or leave the current ones in place (No). Select the desired options using buttons / and press OK. Note: When you perform this operation you will be shown the message “Data base empty” until a channel search is carried out. 12.6.- Information Technology Version This function enables you to see the software and hardware versions in the receiver. - Select the parameter “Version” by using the buttons CH+ / CH- and press OK. - You will be shown a screen with the current versions. - Press the EXIT button to leave this menu and return to the previous one. 70 User manual “SCART DVB-T 711701” 13.- Movie This menu allows you to view a video file in MPG, AVI and DivX format from a USB memory stick or an SD/MMC card reader. - Select the parameter “Movie” using the buttons CH+ / CH- and press OK to confirm. This menu can also be accessed directly by pressing the MOVIE key in normal viewing mode. - Select the corresponding video file directory, once again doing this by using the buttons CH+ / CH-. The video files should be reproduced from the “Movie” menu. Press OK to accept the file and EXIT to go up one level in the directory. - To reproduce a file, select it and press button OK. (TV/RADIO) or button - During the reproduction of a video, the button LIST allows you to fast forward the picture, while the button ALT allows fast picture rewind, the button skips to the next track, the button skips back to the previous track, the button PAUSE pauses the image and the REPEAT key repeats the file in different ways (one, dir., shuff., off). - Press the LANG key to select the audio (if the file is .avi). - Press the GOTO key to skip to a particular position in the time bar. In the popup window you must insert the value of the time you want to move to and press OK. This value must be included within the total time of the file that is being played. - To stop playing the video at any moment you can press the buttons TEXT or EXIT. 14.- Music This menu enables you to listen to audio files in MP3 format from a USB memory stick, an SD/MMC card reader or an MP3 reader. - Select the parameter “Music” by using the buttons CH+ / CH- and press OK to confirm. - Select the directory in which the audio file is located by pressing the buttons CH+ / CH-. The audio files should be reproduced from the “Music” menu. Press OK to accept the file, and EXIT to move upward one level in the directory. - To play a file, select it and then press button OK. (TV/RADIO) or button - During the reproduction of a track, the button LIST will enable you to fast forward the track, button ALT will enable the rapid rewind of the track, the button skips forward one track, the button skips back one track, button PAUSE halts play and the REPEAT key repeats the file in different ways (one, dir., shuff., off). - To stop reproduction at any time, simply press the TEXT buttons. 71 or EXIT ENGLISH Note: Depending on the type of compression used, not all files in AVI and DivX format can be played. User manual “SCART DVB-T 711701” 15.- Photos This menu enables you to play video files in JPEG and BMP format from a USB memory stick or an SD/MMC card reader. - Select the parameter “Photos” using the buttons press OK to confirm. CH+ / CH- and - Select the directory in which the video files are located, for this purpose using the buttons CH+ / CH-. The video files should be reproduced from the “Photos” menu. Press OK to accept the file, and EXIT to go up one of the levels in the directory. - In order to sequentially reproduce the files, press the button (TV/RADIO) or the OK button. - During image reproduction, the button will skip to the following image, button skips to the previous image, buttons CH+ / CHreverse the image horizontally and vertically, and buttons / rotate the image by 90º. - To stop reproduction at any time, press the TEXT or EXIT buttons. 16.- Games On this menu, you can choose among one of the three games available on the Receiver, namely: - Box Man - Tetris - Hit Rat - Select one of the available games by using the buttons CH+ / CHand press OK to confirm. - To play, follow the instructions appearing on screen. - To leave the game at any time, press button OK to stop the game, select the option “Exit Game” and press OK again. 72 User manual “SCART DVB-T 711701” 17.- Disk Manager This menu allows you to control the information available in the disk or pen drive (memory stick). - Select the “Disk manager” option on the main Menu and press OK. Then, a list with the files saved in the external disk will appear. If there is not any file, the message “without file” will appear. - Press the green key ( ) to select the operation you want to do between: Play: plays the selected file, Delete One: deletes the selected file, Delete All: deletes all files from the list or Rename: allows to rename the file using the popup keyboard. - Select the file using the CH+ / CH- keys and press the OK key to run the selected option. - Press the EXIT key to exit this menu. 18.- Partition-Format In this menu you can format the disk or external disk to enable them to store information. - Select the “Partition-Format” option in the main menu and press the OK key. - Select the disk you want to format using the CH+ / CH- keys and press OK to confirm. - A popup window will ask you to confirm (YES or NO) if you want to format the disk. Note: All data available in the external disk will be deleted when you do this function. 73 ENGLISH Note: this function will only affect video files. User manual “SCART DVB-T 711701” Connector Description SCART PIN TV 1 2 3 4 5 6 7 8 9 10 11 12 13 14 15 16 17 18 19 20 21 Audio outlet (R) N/A Audio outlet (L) Grounding audio Grounding blue N/A Outlet blue Switch voltage Grounding green N/A Outlet green N/A Grounding red “Fast Blanking” grounding Outlet red “Fast Blanking” outlet Grounding Video Grounding Video Outlet Video N/A Grounding 20 21 18 19 16 17 14 15 12 13 DC INPUT PIN 1 2 3 4 Description 3 1 4 2 +3,3 V (1200 mA) +5 V (600 mA) Grounding (GND) +12 V (300 mA) 74 10 1 9 8 4 6 7 5 2 3 1 User manual “SCART DVB-T 711701” Glossary of Terminology The following is a short and simple explanation of the meanings of some terms and acronyms used throughout this User’s Manual. • DVB : Digital Video Broadcasting. A consortium formed by different international organizations and firms whose purpose is to set worldwide standards for the development of digital television. • EPG : Electronic Programme Guide A guide that provides the user with a listing of events that will be broadcast in each of the programs, the time when they will be aired and the description of their content. • Fast Blanking : A signal sent by SCART, controlling the RGB status of the TV set. • FTA : Free To Air Open (non-coded) broadcast programs. • Letterbox : One of the display modes for 4:3 ratio TV sets of programs broadcast in 16:9 ratio. Two black bands appear on the top and bottom of the screen to create a window with the ratio that is needed. • LCN : Automatic Channel Ordering As long as this function is enabled, the Adaptor orders the channels found according to the operator’s pre-determined listing. • MPEG 2 : Family of audio-visual compression standards used by the DVB. • OSD : On Screen Display. • VCR : ENGLISH A system of onscreen menus. Video Casette Recorder. A home video machine. • COFDM : Coded Orthogonal Frequency Division Multiplexing COFDM modulation technology enables more reliable and robust digital transmission than its analog predecessors, since stable transmissions are possible in urban contexts even when no direct line of vision exists between aerials. Its basic function is the division of the digital data frame to be transmitted among multiple narrow carriers that occupy the whole available band width, and the increased length of transmission time for each symbol, including a safety interval. • USB : Universal Serial Bus Standard for the connection of peripheral. 75 User manual “SCART DVB-T 711701” Menu Structure Channel Manager Installation Channel Organizer Fav, Mov, Lock, Del Channel Sorting Area, All, LCN Channel Grouping News, Science, Movie, ... Edit Channels Add, Edit Delete All TV, Radio Channels FTA/ALL FTA/ALL Area Search Start Manual Search Number, Frequency Range Search Start/End Freq, BW LCN Setting On/Off Antenna Setting On/Off OSD theme, time, lang .... Digital TV Configuration TV Mode, video, color ... System Setup EQ setup, LCN, Area, ... Time Mode, GMT, Summer t. Wakeup Timer Nº, mode, date, time ... Parental Lock Change password Download from USB Download Channel dat Software Upgrade Upload Channel data Factory Default Reset Version HW, SW, Data Movie MPG, AVI, DivX Music MP3 Fhoto JPEG, BMP Games Box Man, Tetris, Hit Rat Native Games Disk Manager Play/Delete/Rename Partition-Format Format 76 User manual “SCART DVB-T 711701” Technical Features 170...230 MHz and 470...862MHz CEI 75 Ohms IEC PAL B/G, SECAM, NTSC 6, 7, 8 MHz CODFM 2k/8k 5V/100mA MPEG II, ISO/IEC 13818-1 Video Decoding: Video compression Video Standard Image Format MPEG-2 Compatible MP@ML (Main profile @ main level) PAL / NTSC 720 pixels x 576 lines / 724 pixels x 480 lines 4:3 Letterbox / 4:3 Pan Scan / 16:9 / Auto Audio Decoding: Compression Audio Mode Frequency sample MPEG-2 Layer I & II Dual (main/sub), Stereo 32KHz, 44.1KHz, 48KHz Audio Parameters: Analog Output: Output level Output impedance THD 0.5 rms (nominal) 600 Ohms >60dB (1KHz) Video Parameters: Output CVBS Output level RED Output level GREEN Output leve BLUE Output level: 1 Vpp / 75 Ohms 0.7 Vpp / 75 Ohms 0.7 Vpp / 75 Ohms 0.7 Vpp / 75 Ohms Tele-text: Tele-text Standard ETS 300 472 SCART Connector: Output: CVBS and RGB USB Interface: Type USB port Mini USB 1.1/2.0 Mains: Mains power: DVB-T powering: USB powering: Power consumed: 100 - 250V~ 50/60 HZ 12V (300mA), 5V (600mA), 3,3V (1200mA) 5V (1A) <8W General: EPG Timer OSD Language Temperature Humidity Dimensions (L x W x H): Weight: ENGLISH DVB-T Receiver: Input frequencies Input Connector Impedance Output Connector Video System Filter Demodulation Aerial feed De-Multiplexing Current events, future events and those prior to the selected program 8 events, up to one year ahead of time English, French, German, Italian, Spanish, Swedish, Portuguese, Finnish, Dutch, Turkish, Czech, Greek and Danish +15 ºC....+35 ºC <80% 100mm x 69mm x 23,5mm 200 grs. 77 User manual “SCART DVB-T 711701” Guarantee Televés S.A. offers a two year guarantee, beginning from the date of purchase for countries in the EU. For countries that are not part of the EU, the legal guarantee that is in force at the time of purchase is applied. Keep the purchase invoice to determine this date. During the guarantee period, Televés S.A. complies with the guarantee by repairing or substituting the faulty equipment. The harm produced by improper usage, wear and tear, manipulation by a third party, catastrophes or any other cause beyond the control of Televés S.A. is not included in the guarantee. Disposal of Old Electrical & Electronic Equipment (Applicable in the European Union and other European countries with separate collection systems). This symbol on the product or on its packaging indicates that this product shall not be treated as household waste. Instead it shall be handed over to the applicable collection point for the recycling of electrical and electronic equipment. By ensuring this product is disposed of correctly, you will help prevent potential negative consequences for the environment and human health, which could otherwise be caused by inappropriate waste handling of this product. The recycling of materials will help to conserve natural resources. For more detailed information about recycling of this product, please contact your local city office, your household waste disposal service or the shop where you purchased the product. 78 “SCART DVB-T 711701” cdbk`q`shnm?ne?bnmenqlhsx?m ?OXOVQWPSPWOO cdbk`q`bhóm?cd?bnmenqlhc`c cdbk`q`çân?cd?bnmenqlhc`cd cdbk`q`shnm?cd?bnmenqlhsd chbgh`q`yhnmd?ch?bnmenqlhsÞ l\‹·¢\¦ l\‹·¢\¦ ·‒¡‒ ·‒¡‒?N?e\ ‒ ¦\‹ ¡?N?e\ ‒ ¦\‹ ¡?N?e\ ‒ ¦\‹ ?N?e\ ‒ ¦\‹ ¡?N e\ ‒ ¤\‹ ?N?ゑサトサデゾスドサデトゲテ?N?s ¡‒¤\‒¡?N?u\ « \ \Y `` ‒¡‒¡ w?N?c ‒¡¦¦ ,‹?N?c ‒¡¦ š›?N?` ‒¡ ¡?N?h‹ ‒ ›?N?` ‒¡ ¡?N るソスパゼドチデセ?N?` ‒¡ ?N?n › ¡Y u`s u`s?N?mhe?N?mhe?N?u`s?N?u`s?N?r ¡·¡‒‹·««¡‒?N?よオん?N?l›« ?N?`kuY jnmenqlhsãsrdqjkãqtmf イゐェエィイィゐゎエゐゑィ?ェォんんィゥオキェゎェ eöqrãjq`m?nl?öudqdmrrsãlldkrd u``shltrsdmltj`hrttru`jttstr s¡ ¡ " ?rM`M q3\?a¡‹"¢ ¦\? ¡?b›‹‚›K?PV? PTVOULr\‹ \£›? ¡?b›«fi› ¡ \?Grfi\ ‹H `LPTOPOPVU c¡¦ \‒¡?·‹ \‒¡?·‹ ¡‒?›·‒?›•‹?‒¡ ¡‒?›·‒?›•‹?‒¡fi›‹ fi›‹ „? „? ⁄¡?¦›‹¢›‒« ⁄¡?¦›‹¢›‒« „?›¢?„?›¢? ⁄¡?fi‒› ⁄¡?fi‒› ·¦ www?N?c¡¦ ·¦ \‒\? \ ›? ·?¡‚¦ · \?‒¡ fi›‹ \ \ ? \?¦›‹¢›‒« \ ¡ ?fi‒› ·¦ ›?N?c¡¦ \‒\? › ? ·\?¡‚¦ · \?‒¡ fi›‹ \ \ ¡?\?¦›‹¢›‒« \ ¡? ›?fi‒› · ›?N?c"¦ \‒¡? ›· ?‹› ‒¡?fi‒›fi‒¡?‒¡ fi›‹ \ "? \ ¦›‹¢›‒« "??? ¡??¦¡??fi‒› · ??N??c ¦⁄ \‒\?? › ›?? \?? ·\??¡ ¦ · \??‒¡ fi›‹ \ Ÿ?? \??¦›‹¢›‒« Ÿ?? ¡ ??fi‒› › ›??N??v ‒??5 ¡‒‹¡⁄«¡‹?? ¡? u¡‒\‹•›‒ ·‹£?¢5‒? ¡?j›‹¢›‒« ™ ? ¡ ?o‒› ·¤ ¡ ?N?イソデトッツッソッパダス?ダス?ジソゾソグ?ダサテ?スドゼパチセ?トセチ?デドダダバヅナネデセ?トッド?ツヅッノバチトッテ?N?e/‒ ™¤‒\‒ ›«?????/ ¡‒ ™««¡ ¡???¡‹ £ ??? ¡‒¤\‒¡‹ ???¡£¡ ??\‹ \‒??¢/‒??fi‒› ·¤ ¡‹??N??u\¤·· \««¡??„ ¤ ‹›«\\‹??›«\ \?? \ ·· \««¡?? ·› ¡¡‹? „⁄ ¡‹«·¤\ ·· Y q¡¢¡‒¡‹¦¡w?N?q¡¢¡‒¡‹¦ \?N?q¡¢¡‒#‹¦ \?N?q"¢"‒¡‹¦¡?N?`‒ ¦› ›?N q¡¢¡‒¡‹¦¡ `‒ ¤¡ ‹·««¡‒?N?るゲタネデセ?N?q¡¢¡‒¡‹ ?N?q¡¢¡‒¡‹ Y c¡ c¡ ¦‒ ¦‒ fifi ›‹ ›‹?N?c¡ ¦‒ fi¦ ,‹?N?c¡ ¦‒ š›?N?c¡ ¦‒ fi ›‹?N?c¡ ¦‒ ›‹¡?N a¡ ¦⁄‒¡ ·‹£?N?イスヅソシヅサナゲ?N?a¡ ¤‒ ‹ ‹£?N?j· \· Y s‒\ s‒\¡«\‒¤‚‚?N?l\‒¦\?N?l\‒¦\?N?l\‒fl·¡?N?l\‒¦⁄ ¡«\‒¤ ›?N?g\‹ ¡ «\‒¤¡?N んグヅゾサ?N?u\‒·«™‒¤¡?N?s\ \‒\«¡‒¤¤ Y VPPVww e‒¡¡ ¡• ¦\‒ ? ¡ ? ›fi ›‚ s¡ ¡ " vv⁄??? ⁄? ⁄¡??‒¡fl· ⁄¡?‒¡fl· ‒¡«¡‹ ‒¡«¡‹ ??›¢??N??b›‹?? ?›¢ › ?‒¡fl·¡‒ « ¡‹ › ? ¡?N?b›«?\ ?¡ fi¡¦ ¢ ¦\ .¡ ? ¡?N?` ¡¦? ¡ ?¦›‹ ›‹ ? ¡?N?b›‹? ?‒¡fl· u›‒\· ¡ ·‹£¡‹?¡‒¢5 ¡‹?N?んス?トソテ?サツサソトゲデスソテ?トッド?N?d‹ £ ?¢/ \‹ ¡? ¡ ™««¡ ¡‒?N?r¡·‒\\ ¡‹?«™™‒ „¤ ¡‹Y ? ?N?c ¡? Ô?dlb?c ‒¡¦ ¡?QOOS?N?POW?N?dbM Ô?k›•?u› \£¡?c ‒¡¦ ¡?QOOU?N?XT?N?dbM ›• ‹£??? ‹£? \‹ e› ›• \‹ \‒ \‒ ??N??b›‹?? \ ??‹›‒«\ ??N??b›«??\ ?‹›‒«\ ?N?r¡ ›‹? ¡ ?‹›‒«¡ ?N?b›‹? ¡?‹›‒«¡?N?e› £¡‹ ¡?`‹¢›‒ ¡‒·‹£?N?よゾバタッドゼサ? ツヅバトドツサ?N?e/ \‹ ¡? \‹ \‒ ?N?r¡·‒\\ ¡‹? \‹ \‒ ¡‹Y dm?UOXTOLPY?QOOP?J?`PPYQOOSY dm?UOXTOLPY?QOOP?J?`PPYQOOSY?h‹¢›‒«\ ›‹? ¡¦⁄‹› ›£„?¡fl· fi«¡‹ ?L?r\¢¡ „?L?o\‒ ?PY?f¡‹¡‒\ ?‒¡fl· ‒¡«¡‹ dm?TTOPRYQOOP?J?`PYQOOR?J?`QYQOOUY dm?TTOPRYQOOP?J?`PYQOOR?J?`QYQOOUY?r›·‹ ?\‹ ? ¡ ¡ ›‹? ‒›\ ¦\ ?‒¡¦¡ ¡‒ ?\‹ ?\ ›¦ \ ¡ ?¡fl· fi«¡‹ ?L?q\ ›? ·‒ \‹¦¡ ¦⁄\‒\¦ ¡‒ ¦ ?L?k « ?\‹ ?«¡ ⁄› ?›¢?«¡\ ·‒¡«¡‹ ? dm?TTOQOYQOOQ?J?`PYQOOR?J?`QYQOOTY dm?TTOQOYQOOQ?J?`PYQOOR?J?`QYQOOTY?r›·‹ ?\‹ ? ¡ ¡ ›‹? ‒›\ ¦\ ?‒¡¦¡ ¡‒ ?\‹ ?\ ›¦ \ ¡ ?¡fl· fi«¡‹ ?L?h««·‹ „?¦⁄\‒\¦ ¡‒ L?k « ?\‹ ?«¡ ⁄› ?›¢?«¡\ ·‒¡«¡‹ ? r\‹ \£›? ¡?b›«fi› ¡ \K?QW? ¡?i· ›? ¡?QOOX i› "?kM?e¡‒‹Ž‹ ¡ ?b\‒‹¡‒› s¡¦⁄‹ ¦\ ?c ‒¡¦ ›‒ 79 ¦ RED COMERCIAL - COMMERCIAL NETWORK UNITED KINGDOM FRANCE GERMANY TELEVES (UK) Ltd. 11 Hill Street Industrial Estate Cwmbran, Gwent NP44 7PG UNITED KINGDOM Telephone: +44 1633 875821 Fax: +44 1633 866311 EMail: [email protected] TELEVES FRANCE Sarl 1 Rue Louis de Broglie Parc d'Activités de l'Esplanade 77400 St. Thibault des Vignes FRANCE Telephone: +33 1 6035 9210 Fax: +33 1 6035 9040 EMail: [email protected] PREISNER KOMMUNIKATIONSTECHNIK GmbH An den Kiesgruben 6, 73240 Wendlingen DEUTSCHLAND Telephone: +49 7024 55358 Fax: +49 7024 6295 EMail: [email protected] CHINA TELEVES CHINA Unit 207-208, Building A, No 374 Wukang Rd, Xuhui District 200031 Shanghai CHINA (P.R.C.) Telephone: +86 21 6126 7620 Fax: +86 21 6466 6431 EMail: [email protected] USA TELEVES USA LLC. 9800 Mount Pyramid Court, Suite 400 80112 Englewood, CO USA Telephone : +1 303 256 6767 Fax : +1 303 256 6769 EMail: [email protected] PORTUGAL ITALY MIDDLE EAST TELEVES ELECTRONICA PORTUGUESA Via Dr. Francisco Sa Carneiro, Lote 17 Zona Ind. Maia 1 Sector X 4470 Barca-Maia-Oporto PORTUGAL Telephone: +351 22 94 78900 Fax: +351 22 94 78900 EMail: [email protected] TELEVES ITALIA Srl. Via Liguria 24 2068 Peschiera Borromeo (MI) ITALIA Telephone: +39 02 5165 0604 Fax: +39 02 5530 7363 EMail: [email protected] TELEVES MIDDLE EAST FZE P.O. Box 17199 Jebel Ali Free Zone Dubai UNITED ARAB EMIRATES Telephone: +971 48 834 344 Fax: +971 48 834 644 EMail: [email protected] Oficinas Centrales / Head Office Delegaciones / Subsidiaries Sucursales / Distributors Para conocer nuestra red de sucursales en el mundo, le rogamos consulte en nuestra pagina web Please visit Televés web site to find your nearest Official Distributor Rúa Benéfica de Conxo, 17 15706 - Santiago de Compostela ESPAÑA (SPAIN) Tel: +34 981 52 22 00 - Fax: +34 981 52 22 62 [email protected] - www.televes.com Miembro de número del 711701_000_ES-UK Empresa Registrada ER 224/1/94