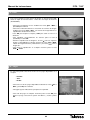
1
Receptor Digital Terrestre
Digital Terrestrial Receiver
Ref. 7142
© Copyright, Televés, S.A.
Instrucciones de uso
User Manual
Manual de instrucciones
“DTR - 7142”
Pag.
1.- Precauciones . . . . . . . . . . . . . . . . . . . . . . . . . . . . . . . . . . . . . . . . . . . . . . . . . . . . . . . . . . . . . . . . . . . . . . . . . .
2.- Información General . . . . . . . . . . . . . . . . . . . . . . . . . . . . . . . . . . . . . . . . . . . . . . . . . . . . . . . . . . . . . . . . . . . .
2.1.- Características Principales . . . . . . . . . . . . . . . . . . . . . . . . . . . . . . . . . . . . . . . . . . . . . . . . . . . . . . . . . .
2.2.- Contenido . . . . . . . . . . . . . . . . . . . . . . . . . . . . . . . . . . . . . . . . . . . . . . . . . . . . . . . . . . . . . . . . . . . . . . .
2.3.- Funcionamiento General . . . . . . . . . . . . . . . . . . . . . . . . . . . . . . . . . . . . . . . . . . . . . . . . . . . . . . . . . . . .
3.- Descripción de conexiones . . . . . . . . . . . . . . . . . . . . . . . . . . . . . . . . . . . . . . . . . . . . . . . . . . . . . . . . . . . . . . .
3.1.- Mando a distancia . . . . . . . . . . . . . . . . . . . . . . . . . . . . . . . . . . . . . . . . . . . . . . . . . . . . . . . . . . . . . . . .
4.- Instalación del Equipo . . . . . . . . . . . . . . . . . . . . . . . . . . . . . . . . . . . . . . . . . . . . . . . . . . . . . . . . . . . . . . . . . . .
4.1.- Conexiones . . . . . . . . . . . . . . . . . . . . . . . . . . . . . . . . . . . . . . . . . . . . . . . . . . . . . . . . . . . . . . . . . . . . . . .
5.- Comienzo de la instalación . . . . . . . . . . . . . . . . . . . . . . . . . . . . . . . . . . . . . . . . . . . . . . . . . . . . . . . . . . . . . . . .
6.- Funciones Básicas . . . . . . . . . . . . . . . . . . . . . . . . . . . . . . . . . . . . . . . . . . . . . . . . . . . . . . . . . . . . . . . . . . . . . . .
6.1.- Seleccionar un programa. . . . . . . . . . . . . . . . . . . . . . . . . . . . . . . . . . . . . . . . . . . . . . . . . . . . . . . . . . . . .
6.2.- Modo TV / Radio . . . . . . . . . . . . . . . . . . . . . . . . . . . . . . . . . . . . . . . . . . . . . . . . . . . . . . . . . . . . . . . . . .
6.3.- Ajuste del Volumen . . . . . . . . . . . . . . . . . . . . . . . . . . . . . . . . . . . . . . . . . . . . . . . . . . . . . . . . . . . . . . . .
6.4.- Información del programa . . . . . . . . . . . . . . . . . . . . . . . . . . . . . . . . . . . . . . . . . . . . . . . . . . . . . . . . . .
6.5.- Lista de Favoritos . . . . . . . . . . . . . . . . . . . . . . . . . . . . . . . . . . . . . . . . . . . . . . . . . . . . . . . . . . . . . . . . .
6.6.- Menú de Audio . . . . . . . . . . . . . . . . . . . . . . . . . . . . . . . . . . . . . . . . . . . . . . . . . . . . . . . . . . . . . . . . . . .
6.7.- Función Zoom . . . . . . . . . . . . . . . . . . . . . . . . . . . . . . . . . . . . . . . . . . . . . . . . . . . . . . . . . . . . . . . . . . . .
6.8.- Función Mosaico . . . . . . . . . . . . . . . . . . . . . . . . . . . . . . . . . . . . . . . . . . . . . . . . . . . . . . . . . . . . . . . . .
6.9.- Regreso al programa anterior . . . . . . . . . . . . . . . . . . . . . . . . . . . . . . . . . . . . . . . . . . . . . . . . . . . . . . . . .
7.- EPG (Guia de Programas Electrónico) . . . . . . . . . . . . . . . . . . . . . . . . . . . . . . . . . . . . . . . . . . . . . . . . . . . . . . .
8.- Teletexto/Subtítulos . . . . . . . . . . . . . . . . . . . . . . . . . . . . . . . . . . . . . . . . . . . . . . . . . . . . . . . . . . . . . . . . . . . . .
9.- Grabar programas . . . . . . . . . . . . . . . . . . . . . . . . . . . . . . . . . . . . . . . . . . . . . . . . . . . . . . . . . . . . . . . . . . . . . . .
10.- Función TimeShift . . . . . . . . . . . . . . . . . . . . . . . . . . . . . . . . . . . . . . . . . . . . . . . . . . . . . . . . . . . . . . . . . . . . . .
11.- Menú Principal . . . . . . . . . . . . . . . . . . . . . . . . . . . . . . . . . . . . . . . . . . . . . . . . . . . . . . . . . . . . . . . . . . . . . . . .
12.- TV Digital . . . . . . . . . . . . . . . . . . . . . . . . . . . . . . . . . . . . . . . . . . . . . . . . . . . . . . . . . . . . . . . . . . . . . . . . . . . . .
12.1.- Editor de Programas . . . . . . . . . . . . . . . . . . . . . . . . . . . . . . . . . . . . . . . . . . . . . . . . . . . . . . . . . . . . . . .
12.1.1- Organizador de Programas . . . . . . . . . . . . . . . . . . . . . . . . . . . . . . . . . . . . . . . . . . . . . . . . . . . .
12.1.2.- Ordenar Programas . . . . . . . . . . . . . . . . . . . . . . . . . . . . . . . . . . . . . . . . . . . . . . . . . . . . . . . . .
12.1.3.- Agrupar Programas . . . . . . . . . . . . . . . . . . . . . . . . . . . . . . . . . . . . . . . . . . . . . . . . . . . . . . . . .
12.1.4.- Editar Programas . . . . . . . . . . . . . . . . . . . . . . . . . . . . . . . . . . . . . . . . . . . . . . . . . . . . . . . . . . .
12.1.5.- Borrar todo . . . . . . . . . . . . . . . . . . . . . . . . . . . . . . . . . . . . . . . . . . . . . . . . . . . . . . . . . . . . . . . .
12.2.- Instalación . . . . . . . . . . . . . . . . . . . . . . . . . . . . . . . . . . . . . . . . . . . . . . . . . . . . . . . . . . . . . . . . . . . . . .
12.2.1.- Solo Libres/todos . . . . . . . . . . . . . . . . . . . . . . . . . . . . . . . . . . . . . . . . . . . . . . . . . . . . . . . . . . .
12.2.2.- Búsqueda automática . . . . . . . . . . . . . . . . . . . . . . . . . . . . . . . . . . . . . . . . . . . . . . . . . . . . . . .
12.2.3.- Búsqueda manual . . . . . . . . . . . . . . . . . . . . . . . . . . . . . . . . . . . . . . . . . . . . . . . . . . . . . . . . . .
12.2.4.- Búsqueda de gama . . . . . . . . . . . . . . . . . . . . . . . . . . . . . . . . . . . . . . . . . . . . . . . . . . . . . . . . .
12.2.5.- Configuración LCN . . . . . . . . . . . . . . . . . . . . . . . . . . . . . . . . . . . . . . . . . . . . . . . . . . . . . . . . . .
12.2.6.- Configuración antena . . . . . . . . . . . . . . . . . . . . . . . . . . . . . . . . . . . . . . . . . . . . . . . . . . . . . . . .
12.3.- Configuración . . . . . . . . . . . . . . . . . . . . . . . . . . . . . . . . . . . . . . . . . . . . . . . . . . . . . . . . . . . . . . . . . . .
12.3.1.- Configuración OSD . . . . . . . . . . . . . . . . . . . . . . . . . . . . . . . . . . . . . . . . . . . . . . . . . . . . . . . . .
12.3.2.- Configuración TV . . . . . . . . . . . . . . . . . . . . . . . . . . . . . . . . . . . . . . . . . . . . . . . . . . . . . . . . . . .
12.3.3.- Configuración Sistema . . . . . . . . . . . . . . . . . . . . . . . . . . . . . . . . . . . . . . . . . . . . . . . . . . . . . . .
12.3.4.- Configuración de la Hora . . . . . . . . . . . . . . . . . . . . . . . . . . . . . . . . . . . . . . . . . . . . . . . . . . . . .
12.3.5.- Configuración Despertador . . . . . . . . . . . . . . . . . . . . . . . . . . . . . . . . . . . . . . . . . . . . . . . . . . .
12.3.6.- Control parental . . . . . . . . . . . . . . . . . . . . . . . . . . . . . . . . . . . . . . . . . . . . . . . . . . . . . . . . . . . .
12.4.- Actualización Software . . . . . . . . . . . . . . . . . . . . . . . . . . . . . . . . . . . . . . . . . . . . . . . . . . . . . . . . . . . .
12.5.- Configuración Valores de Fábrica . . . . . . . . . . . . . . . . . . . . . . . . . . . . . . . . . . . . . . . . . . . . . . . . . . . .
12.6.- Información Versión . . . . . . . . . . . . . . . . . . . . . . . . . . . . . . . . . . . . . . . . . . . . . . . . . . . . . . . . . . . . . . .
13.- Cine
...............................................................................
14.- Música
............................................................................
15.- Fotos
..............................................................................
16.- Juegos
............................................................................
17.- Gestión del disco
....................................................................
18.- Formatear partición
..................................................................
Descripción de conectores . . . . . . . . . . . . . . . . . . . . . . . . . . . . . . . . . . . . . . . . . . . . . . . . . . . . . . . . . . . . . . . . . .
Glosario de términos . . . . . . . . . . . . . . . . . . . . . . . . . . . . . . . . . . . . . . . . . . . . . . . . . . . . . . . . . . . . . . . . . . . . . . .
Estructura del Menú . . . . . . . . . . . . . . . . . . . . . . . . . . . . . . . . . . . . . . . . . . . . . . . . . . . . . . . . . . . . . . . . . . . . . . .
Características técnicas . . . . . . . . . . . . . . . . . . . . . . . . . . . . . . . . . . . . . . . . . . . . . . . . . . . . . . . . . . . . . . . . . . . .
Garantía . . . . . . . . . . . . . . . . . . . . . . . . . . . . . . . . . . . . . . . . . . . . . . . . . . . . . . . . . . . . . . . . . . . . . . . . . . . . . . . . .
3
4
5
5
5
5
6
7
8
8
9
11
11
11
11
12
12
13
13
14
14
15
16
17
18
19
20
20
20
21
21
22
22
23
23
23
23
24
24
24
25
25
26
27
28
29
30
31
32
32
33
33
34
34
35
35
36
37
38
39
40
ESPAÑOL
ÍNDICE
Manual de instrucciones
“DTR - 7142”
1.- Precauciones
El Receptor que acaba de adquirir ha sido construido conforme las normas
internacionales de seguridad.
Le aconsejamos que lea atentamente los siguientes consejos de seguridad.
ALIMENTACIÓN:
100 - 250 V~ 50/60 Hz.
SOBRECARGA:
No sobrecargar las tomas, prolongaciones o adaptadores para evitar el riesgo
de incendio o descarga eléctrica.
> 50°C
LÍQUIDOS:
No exponer el Receptor a la caída o salpicaduras de agua.
No situar objetos o recipientes que contengan líquido sobre o en las
proximidades del aparato.
PEQUEÑOS OBJETOS:
Evitar la proximidad de pequeños objetos metálicos. Estos podrían entrar por
las ranuras o conectores del Receptor y causar graves daños.
> 80 %
LIMPIEZA:
Desenchufar el Receptor de la red antes de efectuar la limpieza.
Utilizar un paño suave, ligeramente humedecido en agua (sin detergentes) para
limpiar el exterior del Receptor.
< 5°C
VENTILACIÓN:
Colocar el Receptor en un lugar bien ventilado con las ranuras al descubierto.
Evitar la exposición al sol, a fuentes de calor o a llamas.
No colocar encima otros equipos.
CONEXIONES:
Efectúe solamente las conexiones recomendadas para evitar posibles daños.
CONEXIÓN AL TV o VCR:
Desenchufe el Receptor antes de conectarlo o desconectarlo a un TV o VCR.
NO ACTUANDO ASI, PODRÍA DAÑAR EL TV o VCR.
UBICACIÓN:
Colocar el Receptor en un local interior protegido de descargas, lluvia o sol
directo.
WARNING
RISK ELECTRICAL SHOCK
DO NOT OPEN
PARA REDUCIR EL RIESGO DE DESCARGA ELÉCTRICA, NO RETIRAR LA TAPA.
NO HAY PARTES REPARABLES POR EL USUARIO EN EL INTERIOR.
PARA UNA REPARACIÓN, CONSULTE CON UN TÉCNICO CUALIFICADO
Este símbolo indica "voltaje peligroso" dentro del producto que puede presentar un
riesgo de descarga eléctrica o daños personales.
Este símbolo indica que existen instrucciones importantes para este producto.
4
Manual de instrucciones
“DTR - 7142”
2.- Información General
El receptor DTR - 7142 le permite ver una amplia gama de canales terrestres.
Este manual le explica cómo realizar la instalación del receptor y los pasos necesarios al usar sus diferentes funciones.
También explica en detalle las funciones especiales disponibles únicamente en este receptor, y facilita el uso de estas
funciones.
2.1.- Características principales
Permite grabar directamente ficheros MPG en disco
externo o en pen drive (FAT 32) por USB o tarjeta de
memoria (SD/MS/MMC).
Soporta la función LCN (Ordenación Automática de
Canales)
Función TimeShift por USB.
Guía Electrónica de Programación (EPG)
Permite la reproducción de ficheros AVI, MPG, DviX, JPG
y MP3.
Función Pausa y Zoom
Lector de tarjetas SD/MS/MMC.
Soporta la función OSD Teletexto y Subtítulos (estándar y
TXT)
Funciones avanzadas en la reproducción (Repeat, Lang,
Goto).
Soporta Teletexto VBI
Bloqueo paterno y de menú
Compatible MPEG2, DVB
Dos salidas SCART (TV y VCR)
Menú fácil de usar
Salida multi-video - CVBS, RGB
Primera instalación guiada
Display en pantalla de 256 colores
Varias funciones de edición de programas (favoritos,
mover, bloquear, borrar...)
Conversión automática PAL/NTSC
Almacena hasta 1500 programas
Guarda el último programa automáticamente
Actualización de software rápida y fácil a través de USB.
Display alfanumérico
Descarga y carga de la lista de canales via USB.
Dispone de 3 juegos
Función temporizador, enciende y apaga el receptor
automáticamente.
Bajo consumo
2.2.- Contenido
LIST
PAUSE
ALT
DEVICE
A-SCAN
GO TO
CH-
MOSAIC
ZOOM
TV/RADIO
TEXT
SUBT
FILE
DTR-7142
MUTE
3
REC
AUDIO
TIMESHIFT
9
FAV
EXIT
VOL+
6
5
INFO
8
0
CH+
OK
2
1
4
EPG
VOL-
POWER
7
MOVIE
LANG
MENU
- 1 x Receptor digital terrestre ref. 7142
REPEAT
Verifique que los siguientes componentes están incluidos en el embalaje:
- 1 x Mando a distancia
- 1 x Adaptador de corriente
- 2 x Pilas tipo ”AAA"
- Manuales de Instrucciones
2.3.- Funcionamiento general
A lo largo de este manual se dará cuenta que el uso diario del receptor está basado en una serie de menús y displays en
pantalla muy fáciles de usar. Estos menús le ayudarán a disfrutar de su receptor Televés, al guiarle por la instalación, la
ordenación de programas, la visualización y muchas otras funciones.
Si tiene algún problema con el funcionamiento de su receptor, lea el apartado correspondiente de este manual, o
alternativamente llame a su instalador o al servicio de asistencia técnica de Televés.
5
ESPAÑOL
Función mosaico (9 programas)
Manual de instrucciones
“DTR - 7142”
3.- Descripción de conexiones
Panel Frontal
Nombre
IR
Display
HOST USB
SD/MS/MMC
Función
Sensor IR
En modo normal muestra el nº de canal, en modo STANDBY muestra la hora actual
Conexión para un stick de memoria, un reproductor MP3 o disco externo
Conexión para una tarjeta de memoria
Panel Posterior
Nombre
ANT IN
ANT OUT
SCART TO TV
SCART TO VCR
Función
Entrada de señal de la antena terrestre (alimentación +5V/100mA seleccionable por menú)
Salida de señal RF para conectar a un TV o VCR.
Para conectar a un TV mediante euroconector.
Para conectar a un VCR mediante euroconector.
S/PDIF
Salida óptica de audio digital.
DC 12V
Conexión para el adaptador de corriente.
I/O
Interruptor encendido/apagado
6
Manual de instrucciones
“DTR - 7142”
3.1.- Mando a distancia
Tecla
Función
Enciende y apaga el receptor.
MUTE
MUTE
Suprime el sonido.
0 ... 9
Selecciona un número de programa para ver.
Entrada directa de datos en el menú.
MOVIE
Accede al menú de Películas.
1
2
3
4
5
6
REPEAT
7
8
9
MENU
Para activar el menú Principal o para salir de los menús.
MOVIE
0
FAV
EPG
Activa la EPG (Guia Electrónica de Programas) del actual
transpondedor.
LANG
EPG
MENU
REPEAT
INFO
EXIT
CH+
VOL-
FAV
OK
ALT
TV/RADIO
ST
LI
REC
TEXT
PAUSE
AUDIO
SUBT
ZOOM
DEVICE
TIMESHIFT
FILE
MOSAIC
A-SCAN
GO TO
Repite uno o varios ficheros de audio o video.
LANG
Permite seleccionar el audio de una pelicula (AVI).
INFO
Muestra información del programa actual. Si pulsa otra vez antes de
que desaparezca el banner, mostrará detalles del programa actual.
En algún menú información adicional.
EXIT
Vuelve al menú anterior en la pantalla del menú
VOL+
CH-
Muestra la lista de programas favoritos.
CH+
Selección del programa posterior / Movimiento hacia arriba
CH-
Selección del programa anterior / Movimiento hacia abajo
VOL-
Disminuye el nivel de volumen. Movimiento hacia la izquierda.
VOL+
Aumenta el nivel de volumen. Movimiento hacia la derecha.
OK
Ejecuta la opción seleccionada en el menú, o introduce el valor
deseado en cualquier modo de entrada.
Activa la lista general de programas
Selecciona la pista anterior.
Selecciona la pista siguiente.
Avance rápido de la imagen en modo reproducción (X2, X4, X8, X20).
Retroceso rápido de la imagen en modo reproducción (X2, X4, X8, X20).
DTR-7142
ALT
Regresa al canal visionado anteriormente.
LIST
Activa la lista general de programas.
REC
TEXT
Graba el programa que se está visualizando.
En modo TDT, activa la función Teletexto.
En modo Multimedia, detiene la reproducción de un fichero.
TV/RADIO
En modo TDT, cambia entre los modos TV y Radio.
En modo Multimedia, inicia la reprodución de un archivo
PAUSE
Permite congelar la imagen que se está visualizando. Para continuar
visionando, volver a pulsar.
AUDIO
Selecciona los diferentes idiomas de audio disponibles. Selecciona
el tipo de salida del audio (Izq. Der. Estéreo)
SUBT
En modo TDT activa el menú Subtítulos.
En modo Multimedia muestra los subtítulos durante la reproducción
de archivos MPEG2, DivX o Xvid.
ZOOM
Activa la función de Zoom.
DEVICE
Selecciona la fuente de señal.
TIMESHIFT
Accede a la función Timeshift.
FILE
MOSAIC
Muestra la lista de archivos grabados.
Muestra un mosaico de 9 pequeñas pantallas.
A-SCAN
/GO TO
En mod TDT realiza una búsqueda de canales automática.
En modo Multimedia muestra un contador de tiempo para el acceso
directo a escenas.
Nota: Las teclas de color rojo, verde, amarilla y azul tienen funciones secundarias que
no aparecen descritas aqui y que pueden aparecer en los diversos menús.
7
ESPAÑOL
POWER
Manual de instrucciones
“DTR - 7142”
4.- Instalación del equipo
Esta sección explica la instalación del Receptor DTR-7142.
Lea los manuales que vienen con el equipo para la instalación del equipo exterior como, por ejemplo, la antena.
Al añadir algún equipo nuevo, lea la parte correspondiente del manual para su instalación.
4.1.- Conexiones
- Conecte la antena a la entrada ANT IN del adaptador.
- Conecte el adaptador al Televisor mediante un euroconector.
- Conecte el adaptador a la toma de corriente.
DTR-7142
Nota: Si desea conectar algún disco externo (FAT 32) al receptor, deberá hacerlo antes de conectar el
receptor a la red (230V~).
Todos los cables utilizados para las conexiones de los Receptores serán de tipo apantallado.
NO ENCHUFE el receptor a la red antes de finalizar todas las conexiones de la unidad.
8
Manual de instrucciones
“DTR - 7142”
5.- Comienzo de la instalación
La primera vez que se encienda el receptor, mostrará una ventana de
instalación inicial.
Este menú está formado por cuatro opciones: Idioma de OSD, Area, LCN y
Antena activa.
Con las teclas
Con las teclas
menús.
/
sitúe el cursor en la ventana de los idiomas.
CH+ /
CH- seleccione el idioma deseado para los
Los idiomas disponibles son: Inglés, Francés, Alemán, Italiano, Español,
Sueco, Portugués, Finlandés, Holandés, Turco, Checo, Griego y Danés.
Pulse la tecla OK para confirmar.
Mueva el cursor a la siguiente opción Area mediante la tecla CH-.
Con las teclas / sitúe el cursor en la ventana de los paises.
Con las teclas CH+ / CH- seleccione la zona para la configuración
local de parámetros.
Las areas o zonas disponibles son: Alemania, Inglaterra, Italia, Francia,
España, Holanda, Taiwan, China, Noruega, Suecia, Finlandia, Grecia y
Australia.
Pulse la tecla OK para confirmar.
Mueva el cursor a la siguiente opción LCN mediante la tecla CH-.
Con las teclas / sitúe el cursor en la ventana de las opciones.
Con las teclas CH+ / CH- seleccione la activación (on) o
desactivación (off) de la opción LCN (Ordenación automática de
canales).
Pulse la tecla OK para confirmar.
Mueva el cursor a la siguiente opción Antena activa mediante la tecla
CH-.
Con las teclas / sitúe el cursor en la ventana de las opciones.
Con las teclas CH+ / CH- indique si desea alimentar (on) o no (off) un
posible amplificador en la antena.
Si no dispone de amplificador deberá seleccionar la opción Off, de lo
contrario podría dañar el receptor.
Pulse la tecla OK para confirmar.
9
ESPAÑOL
A fin de configurar estos parámetros, siga las instrucciones siguientes:
Manual de instrucciones
“DTR - 7142”
Finalmente aparece una ventana emergente donde se le pide
confirmación para comenzar la búsqueda.
Seleccione la opción SI y pulse la tecla OK para iniciar la búsqueda.
El receptor realizará una búsqueda por toda la banda de frecuencia de
entrada del mismo.
Una vez finalizada la búsqueda el receptor mostrará el primer programa
de la lista.
10
Manual de instrucciones
“DTR - 7142”
6.- Funciones Básicas
A continuación, se describen las funciones básicas del receptor DTR - 7142 que puede realizar cuando se encuentre viendo
programas de TV u oyendo programas de radio terrestre.
6.1.- Seleccionar un programa
Además de esta función normal, el receptor proporciona una función rápida
para cambiar de programa.
Mientras mira la TV, pulse la tecla OK en el mando a distancia. Aparecerá
una lista de programas en la pantalla.
Para seleccionar un canal, muévase a través de este menú con las teclas
CH+ / CH- y seleccione el programa deseado. Pulse la tecla OK para
ver el programa elegido.
Si además ha incluido programas en los grupos predefinidos, puede
seleccionarlos por temas (noticias, ciencia, deporte, cine, infantil, música,
moda). Para cambiar de grupo pulse las teclas / .
6.2.- Modo TV/Radio
Mientras esta visionando un programa de TV, pulse la tecla TV/RADIO en el
mando a distancia para cambiar entre modo TV y modo Radio.
Pasará de este modo a escuchar una de las emisoras de radio
memorizadas.
6.3.- Control del Volumen
Control del Volumen
- Para subir o bajar el Volumen, utilice las teclas
mando a distancia.
VOL- /
VOL+ del
Nota: El receptor tiene 10 niveles de Volumen. El volumen también podrá
ser controlado a través del volumen de su TV.
Mute
- Para suprimir el sonido, pulse la tecla MUTE ( ) del mando a distancia.
Para volver a tener sonido, pulse esta tecla una vez más.
11
ESPAÑOL
Para seleccionar un programa, utilice las teclas CH+ / CH- en el mando
a distancia o las teclas numéricas.
Manual de instrucciones
“DTR - 7142”
6.4.- Información del canal
Cada vez que cambie de programa, se mostrará una pequeña información
del mismo durante unos segundos.
Esta misma información aparece si en cualquier momento pulsa la tecla
INFO. Si vuelve a pulsarla una segunda vez mientras esta visible la ventana
de información, se muestra información del transpondedor (nombre,
frecuencia, canal, etc) y si está disponible la información, el próximo evento
que se emitirá.
La indicación “SUB” en esta ventana indica que el programa posee
subtítulos.
La indicación “TXT” en esta ventana indica que el programa dispone de
opción teletexto.
La indicación “A” en esta ventana indica que el programa dispone del audio
en varios idiomas.
Dispone además de unas barras de nivel donde se indica la calidad y el
nivel de señal recibido.
6.5.- Lista de Favoritos
Para acceder a lista de programas favoritos, pulse la tecla FAV en el mando
a distancia. Se muestra entonces la lista de programas seleccionados
como favoritos.
Pulsando la tecla TV/RADIO puede seleccionar la lista de favoritos de TV o
de Radio.
Para seleccionar un programa, muévase por la lista con las teclas CH+ /
CH- y confirme pulsando OK.
Notas: - Si no hay ningún programa asignado a la lista de favoritos, se
muestra el mensaje “Lista de FAV no disponible”.
- Para salir de la lista de favoritos seleccione un programa
perteneciente a la lista general.
El método que se usa para crear/modificar la lista de los programas
favoritos se explica en el apartado 12.1.1.- “Organizador de Prog.”.
12
Manual de instrucciones
“DTR - 7142”
6.6.- Menú de Audio
Selección del modo
- Pulse la tecla AUDIO en el mando a distancia para activar el menú
emergente “Multiaudio”.
- Mediante las teclas / podrá seleccionar el modo de configuración
del audio (Izquierdo, Derecho o Estéreo).
Selección del Idioma
Algunos canales son transmitidos con varios audios. Esta función depende
de si la transmisión incluye esta información en la señal enviada por el
operador.
- Pulse la tecla AUDIO en el mando a distancia para activar el menú
emergente “Multiaudio”.
- Podrá seleccionar el idioma del audio de entre los disponibles con la
teclas CH+ / CH- (si la transmisión sólo dispone de un audio no
podrá modificarlo).
- Pulse la tecla OK para confirmar la selección o bien pulse la tecla EXIT
para salir del menú sin modificar.
6.7.- Función Zoom
Esta función le permite ampliar o reducir la imagen a pantalla completa que
se está visionando en ese momento.
- Cada vez que pulse la tecla ZOOM se va modificando el factor de zoom
en la secuencia zoom x2, zoom x3, zoom x4, zoom out1/2, zoom out1/3,
zoom out1/4 y zoom Off.
La secuencia “zoom x” irá ampliando la imagen, mientras que “zoom out”
la irá minimizando.
- Para desplazarse por el resto de la imagen ampliada use las teclas CH+
/ CH- y / .
- Para salir de la opción Zoom, pulse la tecla ZOOM hasta la indicación
“Zoom Off”.
NOTA: Tenga en cuenta que al ir aumentando el factor de zoom, la calidad
de la imagen irá empeorando.
13
ESPAÑOL
- Pulse la tecla OK para confirmar la selección o bien pulse la tecla EXIT
para salir del menú sin modificar.
Manual de instrucciones
“DTR - 7142”
6.8.- Función Mosaico
Esta función le permite visualizar un mosaico de imágenes (conjunto de
canales) constituido por 9 pantallas.
- Pulse la tecla MOSAIC para activar esta opción.
- Una vez mostrado el mosaico en pantalla, es posible escoger el programa
deseado mediante las teclas CH+ / CH- y / y luego pulsar OK.
- Para volver al modo de visualización normal pulse la tecla EXIT.
NOTA: Esta función no permite la visualización de dos programas
simultáneamente.
6.9.- Regreso al programa Anterior
Pulse la tecla ALT en el mando a distancia para volver al último programa
que estaba visionando.
14
Manual de instrucciones
“DTR - 7142”
7.- EPG (Guia Electrónica de Programas)
El receptor DTR - 7142 proporciona la función EPG para que el usuario tenga
acceso a la guía de TV (o guía de radio) que mostrará información sobre el
programa actual o siguiente en los diferentes canales tal como nombre, hora
de comienzo, hora de finalización, un pequeño resumen, .....
- Para ver la información de la EPG, pulse EPG en el mando a distancia
mientras visiona un programa.
- Surge en la pantalla la ventana EPG correspondiente a ese programa.
- Existen dos formas de mostrar la EPG: modo Diario y modo Semanal.
- En él, la EPG aparece distribuida en cinco grupos. En los dos superiores se
muestra la fecha, la hora y el día de la semana. En el centro muestra, al lado
izquierdo, el listado de canales disponibles y a su derecha la hora de
comienzo/finalización y el nombre de los distintos programas que se emiten
durante todo el día correspondientes al canal seleccionado.
- Pulse las teclas CH+ / CH- para desplazarse arriba/abajo tanto por la
lista de canales (izquierda) como por los distintos programas del día
(derecha). Para pasar de la lista de canales a la lista de programas use las
teclas / .
- Si pulsa la tecla amarilla sobre uno de los programas de la lista, el receptor
mostrará información mas detallada sobre ese programa. Si la información
ocupa más de una página en la pantalla, use las teclas CH+ / CH- para
desplazarse hacia abajo. Para salir de este menú pulse EXIT.
- Pulsando la tecla azul sobre uno de los programas de la lista, se crea
automáticamente un nuevo temporizador con ese programa. Se muestra el
menú Despertador en pantalla mostrando los datos correspondientes al
evento. Pulse la tecla OK para memorizar el temporizador y volver a la EPG.
Para obtener mas información acerca de como programar un evento, vea el
apartado 12.3.5.- Lista de Temporizador.
- Finalmente, en la parte inferior se muestra una linea de información de cada
evento.
Modo Semanal
- Una vez activada la EPG, pulsando la tecla verde se pasa al modo semanal.
- En este caso la EPG aparece distribuida en seis grupos. Se diferencia del
modo Diario en que en vez del día de la semana se muestra toda la semana
y cada día aparece dividido en franjas horarias. El modo de funcionamiento
es el mismo que en el caso anterior.
- Para volver al modo Diario, pulse la tecla roja.
Para salir finalmente de la EPG pulse la tecla EXIT.
NOTAS: La información que aparece en la EPG la suministra el proveedor del
servicio, por lo que en ocasiones puede no estar disponible.
Si el programa seleccionado no proporciona datos para la EPG,
aparecerá la indicación “Sin información".
Para programar una grabación de un determinado evento, pulse la
tecla TEXT (azul) sobre el evento. Accederá directamente al menú
despertador donde deberá seleccionar la opción “Grabar” en el
apartado “Modo despertador” y confirmar con la tecla OK.
15
ESPAÑOL
Modo Diario
- Es el modo que se muestra por defecto.
Manual de instrucciones
“DTR - 7142”
8.- Teletexto / Subtítulos
Este receptor permite seleccionar todos los servicios de teletexto y/o
subtítulos proporcionados por el proveedor de servicios.
Teletexto
- Pulse la tecla TEXT del mando para activar el Teletexto y pulse OK.
- Los servicios de teletexto se visualizarán de la manera habitual.
- Incluso si su TV no dispone de descodificador de Teletexto, Ud. podrá
visualizarlo en pantalla, ya que el receptor lo genera automáticamente.
- El mando del receptor dispone de teclas de colores que facilitan el
acceso rápido a las páginas del Teletexto.
- Pasa salir del Teletexto pulse la tecla EXIT.
Subtítulos
- Pulse la tecla SUBT del mando para activar los subtítulos.
- Seleccione lo opción “Subtítulo” o “TXT-Subtitle” con las teclas /
para que se muestre el texto de los subtítulos. Si desea eliminar los
subtítulos, seleccione la opción “Off”.
- Mediante las teclas CH+ / CH- puede seleccionar el idioma en que
se muestra el teletexto (opción disponible si el proveedor de servicios
proporciona dicha información).
- Los servicios de subtítulos se visualizarán en la parte inferior de la
pantalla.
NOTA: No todos los proveedores proporcionan este tipo de información.
16
Manual de instrucciones
“DTR - 7142”
9.- Grabar programas
Este receptor permite grabar un determinado programa de dos maneras
distintas. Una en tiempo real y otra utilizando la opción “Despertador”.
Para que esta función sea posible, deberá disponer de un disco
externo o un pen drive (memoria stick) con formato FAT 32 o una
tarjeta de memoria (SD/MS/MMC) que deberá ser conectado antes de
alimentar el receptor.
Nota importante:
- Antes de iniciar la grabación, para mostrar la lista de dispositivos pulse
la tecla DEVICE. Seleccione el dispositivo con las teclas CH+ / CHy pulse OK sobre el seleccionado. Se mostrará un mensaje de
confirmación.
- Mediante una indicación de colores, el dispositivo le indica que
funciones puede realizar en el disco seleccionado. Si la indicación de
“Velocidad” se muestra en color rojo solo podrá leer archivos, si se
muestra en color amarillo podrá grabar y si la indicación se muestra en
color verde podrá ejecutar la función TimeShift.
- Pulse la tecla EXIT para salir de la lista de dispositivos.
Nota: Las tarjetas de memoria no soportan la función TimeShift.
Grabación en tiempo real
- Pulse una vez la tecla REC
para grabar el programa que esté
visualizando. Durante la grabación se mostrará en pantalla la indicación
“ ” y no le permitirá acceder a otro programa. Si pulsa una segunda
vez esta tecla, puede definir la duración de la grabación entre 15, 30,
45, 60, 75, 90, 105 y 120 minutos. Confirme con la tecla OK.
- Si durante la grabación el nivel de señal baja o desaparece, se muestra
el mensaje “REC PAUSE” y se detiene la grabación. Se reanudará la
grabación una vez regrese la señal.
- Para detener la grabación pulse la tecla TEXT . Se mostrará un
mensaje de aviso donde deberá confirmar su intención de detener la
grabación seleccionando SI o NO.
Grabación con Despertador/EPG
- Hay dos maneras de programar una de grabación. A través de la
información de la EPG o directamente en la opción Despertador.
- Para obtener información sobre como crear eventos indicando la hora
de comienzo de la grabación, hora de finalización, programa, etc, vea el
apartado 12.3.5.- Configuración Despertador.
NOTAS:- Las grabaciones efectuadas serán guardadas en ficheros con un
máximo de 3.8 GB (debido al límite de 4 GB del formato FAT 32).
- Durante la grabación de un programa los subtítulos no estarán
disponibles.
17
ESPAÑOL
Para que la grabación se realice de forma correcta, el disco, pendrive o
tarjeta conectada al receptor deberá tener un mímimo de 2GB libres.
Manual de instrucciones
“DTR - 7142”
10.- Función TimeShift
Para que esta función sea posible, deberá disponer de un disco
externo o un pen drive (memoria stick) con formato FAT 32 que deberá
ser conectado antes de alimentar el receptor.
Las tarjetas de memoria (SD/MS/MMC) no soportan esta función.
El tiempo que transcurre entre el video en tiempo real y el grabado en el
disco duro es lo que se llama TimeShift.
- Pulse la tecla TIMESHIFT mientras está viendo un programa de TV. Se
mostrará la indicación “TIMESHIFT” en pantalla. A partir de este
momento, se estará almacenando toda la información en la memoria del
receptor.
- Utilice la tecla si desea detener la imagen y la tecla para continuar
viendo el programa en el mismo punto donde lo había dejado. Utilice las
teclas
/
si desea moverse por la barra de tiempo para buscar
alguna escena concreta.
- Si pulsa la tecla TEXT
detiene la función TimeShift y vuelve al modo
de reproducción en tiempo real.
- Antes de finalizar la función, se muestra una ventana donde se le
pregunta si desea guardar en disco la grabación procedente de la
función TimeShift.
NOTAS:- El tiempo máximo destinado para esta función dependerá de la
capacidad del disco externo conectado.
- Durante la función TimeShift los subtítulos y el teletexto no
estarán disponibles.
- Durante la función TimeShift no podrá cambiar de programa.
Deberá primero detener esta función.
18
Manual de instrucciones
“DTR - 7142”
11.- Menú Principal
Pulse la tecla MENU para activar el menu principal.
Este menú está formado por siete submenús como puede verse en la
imagen.
- TV Digital
- Cine
- Música
- Fotos
ESPAÑOL
- Juegos
- Gestión del Disco
- Formatear Partición
Seleccione una de las opciones del menú con las teclas CH+ / CH- y
pulse OK para aceptar.
También se pueden seleccionar las lineas de los submenus usando el
teclado numérico (1 ... 9). Basta con teclear directamente el número de
linea deseado.
En los menús que aparezca la indicación “ INFO: ¡Guía de
operaciones!”, pulsando la tecla INFO se muestra un menú emergente
donde se le indican las funciones y teclas que puede usar en ese menú.
Pulse la tecla EXIT para salir al menú anterior y finalmente salir de los
menús.
19
Manual de instrucciones
“DTR - 7142”
12.- TV Digital
12.1.- Edición de Programas
12.1.1.- Organizador de Programas
Nota: Como la forma de organización de los programas de radio es la
misma que la de los programas de TV, solo describiremos el
funcionamiento correspondiente a los programas de TV.
Para acceder a la Lista General de programas pulse la tecla MENU.
Seleccione la opción “TV Digital”, “Editor de Programas” y finalmente
“Organizador de Programas”.
En esta Lista General aparecen todos los programas encontrados durante
la búsqueda. Se puede mover dentro de la lista de programas con las teclas
CH+ / CH-.
Las opciones para editar los programas son:
Favoritos
Mediante esta función se seleccionan los programas que pasarán a
formar parte de la Lista de Favoritos.
Seleccione un programa de la lista con las teclas CH+ / CH-. y a
continuación pulse la tecla roja. Los programas marcados para incluir en
la lista de favoritos aparecen con el icono “ ”. Para eliminar la marca
vuelva a pulsar la tecla roja sobre el programa.
Mover
Puede desplazar los programas en la lista para recolocarlos a su gusto.
Seleccione un programa con las teclas CH+ / CH-, a continuación
pulse la tecla amarilla y mediante las teclas CH+ / CH- sitúelo en la
nueva posición en la lista y pulse OK.
Nota: Cuando la función LCN se encuentre activa, el receptor permite
mover el programa de posición pero mantiene su numeración.
Bloquear
Bloquea el programa seleccionado necesitando una clave de acceso
para poder verlo. Los programas bloqueados aparecen en la lista con el
icono “ ”.
Seleccione el programa con las teclas CH+ / CH- y pulse la tecla azul
para bloquearlo. Se le pedirá que introduzca so contraseña. Para eliminar
la marca vuelva a pulsar la tecla azul sobre el programa.
Borrar
Seleccione un programa de la lista mediante las teclas CH+ / CH-. Si
desea eliminar definitivamente el programa seleccionado pulse la tecla
verde. Los programas marcados para borrar aparecen con el icono “ ”.
Para eliminar la marca vuelva a pulsar la tecla verde sobre el programa.
Renombrar
Seleccione un programa de la lista mediante las teclas CH+ / CH-.
Pulse la tecla / para activar un teclado emergente. Cree el nuevo
nombre y pulse OK.
Para grabar los cambios y salir de la opción de edición pulse la tecla EXIT.
20
Manual de instrucciones
“DTR - 7142”
12.1.2.- Ordenar Programas
Existen tres formas para ordenar la lista de programas.
Toda el área (por región); Todos, Libres (FTA), Codificados; por orden
alfabético (A-Z o Z-A), LCN+ y LCN-.
- Mediante las teclas CH+ / CH-. seleccione la forma de ordenar los
programas de entre las tres disponibles y con las teclas / seleccione el
tipo de parámetro para cada opción.
Nota: Para ordenar los programas por LCN+/-, es necesario que esta
opción esté activa.
12.1.3.- Agrupar Programas
Esta opción le permite tener los programas agrupados por temas. Los
temas disponibles son: Ninguno, Noticias, Ciencia, Deportes, Cine, Infantil,
Música y Moda.
Podrá ver los canales agrupados cuando pulse la tecla LIST.
- Mediante las teclas CH+ / CH-. seleccione el canal que quiera agrupar,
luego pulse una de las teclas numéricas del mando del 1 al 8 coincidiendo
con el nombre del grupo deseado. El icono de dicho grupo aparece al
lado del nombre del programa.
- Pulse la tecla EXIT para salir del menú confirmar la agrupación.
NOTA: Al agrupar un programa en una de estas listas, dejará de estar
disponible en la lista general.
21
ESPAÑOL
- Pulse la tecla OK para confirmar la ordenación.
Manual de instrucciones
“DTR - 7142”
12.1.4.- Editar Programas
Mediante este menú puede añadir nuevos programas a la lista o modificar
alguna característica de los ya existentes.
- Pulse la tecla roja para entrar en el submenú “Añadir programas”.
- Mediante las teclas CH+ / CH- puede desplazarse por los parámetros
que conforman el nuevo programa.
- Pulse las teclas / para cambiarse al cuadro de opciones para cada
parámetro y con las teclas CH+ / CH- seleccionar la deseada. Pulse
OK para confirmar.
- Pulse la tecla / en el parámetro “Nombre del prog”. Surgirá un menú
emergente donde podrá crear un nombre para el programa.
- Pulse la tecla amarilla sobre un programa de la lista y podrá editar los
parámetros: nombre, PID Audio, PID Video y PID PCR. Pulse OK para
confirmar los cambios.
- Pulse la tecla EXIT para salir del menú.
12.1.5.- Borrar todo
Mediante este menú puede borrar los programas de TV o de Radio.
- Pulse la tecla OK sobre la opción “Borrar todo”. Se le pedirá que
introduzca el PIN de acceso. Por defecto 0 0 0 0.
- Mediante las teclas CH+ / CH- seleccione entre borrar Todos los
programas de TV y Todas las cadenas de radio.
- En una ventana emergente se le pedirá confirmación para borrar los
programas. Seleccione SI y pulse OK para confirmar.
- Pulse la tecla EXIT para salir del menú.
22
Manual de instrucciones
“DTR - 7142”
12.2.- Instalación
Existen diferentes formas de realizar la búsqueda de canales.
12.2.1.- Solo Libres/Todos
- Seleccione el tipo de búsqueda entre ALL (todos los programas
encontrados) o bien FTA (únicamente los que se emiten en abierto)
- Para ello una vez seleccionada la opción “FTA/ALL” pulse la tecla OK
para aceptar. Se accede así a un submenú donde debe seleccionar con
la teclas / el tipo de búsqueda a realizar.
ESPAÑOL
- Pulse la tecla OK para confirmar.
12.2.2.- Búsqueda automática
- Seleccione este modo para realizar una búsqueda en toda la banda de
entrada del receptor de forma automática.
- Para ello una vez seleccionada la opción “Area de Búsqueda” pulse la
tecla OK para comenzar la búsqueda. Esta se realizará sobre el ancho
de banda de entrada de su receptor.
- La búsqueda completa puede tardar varios minutos.
- Si desea interrumpir la búsqueda pulse la tecla EXIT.
12.2.3.- Búsqueda manual
- Seleccione este modo para realizar una búsqueda sobre un canal
concreto.
- Para ello, una vez seleccionada la opción “Búsqueda Manual” pulse la
tecla OK para aceptar. Se accede así a un submenú donde debe indicar
si la búsqueda se realizará por Canal o por Frecuencia mediante las
teclas / .
Por Canal
- Mediante las teclas / seleccione uno de los canales disponibles en
la opción “Nombre del programa”. Observe si el canal seleccionado es
un canal digital. Lo sabrá fácilmente si la barra inferior “Calidad” indica
un porcentaje de calidad aceptable.
Por Frecuencia
- Mediante el teclado numérico introduzca la frecuencia a escanear en la
opción “Freq.(KHz)“.
- Seleccione el “Ancho de Banda” adecuado entre 6, 7 u 8 MHz con las
teclas / .
23
Manual de instrucciones
“DTR - 7142”
- Tenga en cuenta que si estos valores no son los correctos, la búsqueda
resultará fallida.
- Finalmente pulse la tecla OK para comenzar la búsqueda.
Puede seguir el proceso de búsqueda mediante las indicaciones que se
muestran en la pantalla del TV.
12.2.4.- Búsqueda de gama
- Seleccione este modo para realizar una búsqueda de forma selectiva
entre dos frecuencias.
- Para ello una vez seleccionada la opción “Búsqueda de gama” pulse la
tecla OK para aceptar. Se accede así a un submenú donde debe indicar
la frecuencia tanto de inicio como de finalización.
- Seleccione el Ancho de Banda adecuado entre 6, 7 u 8 MHz con las
teclas / .
- Finalmente pulse la tecla OK para comenzar la búsqueda.
12.2.5.- Configuración LCN
- Esta opción permite al usuario activar o desactivar el modo de
organización de los canales definido por el operador.
- Para ello una vez seleccionada la opción “Config. LCN” pulse la tecla
OK para aceptar. Se accede así a un submenú donde debe activar (on)
o desactivar (off) la ordenación automática con las teclas / .
- Finalmente pulse la tecla OK para confirmar.
12.2.6.- Configuración antena
- Esta opción permite al usuario activar o desactivar la alimentación de
un posible amplificador en la antena.
- Para ello una vez seleccionada la opción “Config. Antena” pulse la tecla
OK para aceptar. Se accede así a un submenú donde debe activar (on)
o desactivar (off) la alimentación de amplificadores con las teclas / .
Nota: Si no dispone da amplificador deberá seleccionar la opción NO,
de lo contrario podría dañar el adaptador.
- Finalmente pulse la tecla OK para confirmar.
24
Manual de instrucciones
“DTR - 7142”
12.3.- Configuración
12.3.1.- Configuración OSD
Mediante este menú puede personalizar la configuración de los menús.
Hora en OSD
Esta opción permite mostrar la hora en pantalla.
Para ello, con las teclas CH+ / CH- sitúe el cursor en el parámetro
“Hora en OSD” y con las teclas / active (on) esta función.
Tiempo de OSD
Esta opción permite modificar el tiempo que se muestra la ventana de
información en pantalla.
Para ello, con las teclas CH+ / CH- sitúe el cursor en el parámetro
“Tiempo de OSD” y con las teclas / seleccione el tiempo entre 1 y 6
segundos.
Transparencia de OSD
Esta opción permite modificar la transparencia con la que se muestran
los menús en pantalla.
Para ello, con las teclas CH+ / CH- sitúe el cursor en el parámetro
“Transp. de OSD” y con las teclas / seleccione el porcentaje de
transparencia entre 0 y 60%.
Idioma del menú
Esta opción permite modificar el idioma con el que se muestran los
menús en pantalla.
Para ello, con las teclas CH+ / CH- sitúe el cursor en el parámetro
“Idioma del menú”. Con las teclas / cámbiese a la lista de idiomas
disponibles y a continuación con las teclas CH+ / CH- seleccione el
idioma deseado. Pulse OK para aceptar.
Idioma Subtítulos
Esta opción permite modificar el idioma con el que se muestran los
subtitulos en pantalla, si éstos son transmitidos con la señal.
1. Idioma del Audio
Esta opción permite cambiar entre varios idiomas de audio, si estos son
transmitidos con la señal.
Para ello, con las teclas CH+ / CH- sitúe el cursor en el parámetro
“1. Idioma del Audio”. Con las teclas / cámbiese a la lista de idiomas
disponibles y a continuación con las teclas CH+ / CH- seleccione el
idioma deseado. Pulse OK para aceptar.
2. Idioma del Audio
Si el Audio seleccionado como “1. Idioma del Audio” no está disponible,
se seleccionará automáticamente el “2. Idioma del Audio” definido.
Finalmente pulse la tecla OK para confirmar los parámetros modificados.
25
ESPAÑOL
OSD
Esta opción permite al usuario cambiar el color del menú entre 5 temas
diferentes.
Para ello, con las teclas CH+ / CH- sitúe el cursor en el parámetro
“OSD” y con las teclas / seleccione el tema deseado.
Manual de instrucciones
“DTR - 7142”
12.3.2.- Configuración TV
Mediante este menú puede configurar los parámetros de su pantalla.
Norma TV
Con las teclas CH+ / CH- sitúe el cursor en el parámetro “Norma TV”
y con las teclas / seleccione el estándar de video adecuado.
Las opciones son Automático, PAL o NTSC. Automático es la
configuración por defecto.
Formato pantalla
Con las teclas CH+ / CH- sitúe el cursor en el parámetro “Formato
pantalla” y con las teclas
/ seleccione el formato deseado entre
4:3LB, 4:3PS, 16:9 o Auto. Esta opción permite la configuración
automática de su pantalla dependiendo del modelo de su TV.
Salida de Video
Esta opción permite seleccionar el tipo de señal de salida por el
euroconector.
Para ello, con las teclas CH+ / CH- sitúe el cursor en el parámetro
“Salida de video” y con las teclas / seleccione entre RGB y CVBS.
RGB es la configuración por defecto.
Brillo
Esta opción permite modificar el brillo de la imagen.
Para ello, con las teclas CH+ / CH- sitúe el cursor en el parámetro
“Brillo”. Con las teclas / cámbiese a la lista de valores y con las teclas
CH+ / CH- seleccione el porcentaje de brillo entre 0 y 100%. Pulse
OK para aceptar.
Contraste
Esta opción permite modificar el contraste de la imagen.
Para ello, con las teclas CH+ / CH- sitúe el cursor en el parámetro
“Contraste”. Con las teclas / cámbiese a la lista de valores y con las
teclas CH+ / CH- seleccione el porcentaje de contraste entre 0 y
100%. Pulse OK para aceptar.
Color
Esta opción permite modificar el color de la imagen.
Para ello, con las teclas CH+ / CH- sitúe el cursor en el parámetro
“Color”. Con las teclas / cámbiese a la lista de valores y con las
teclas CH+ / CH- seleccione el nivel de contraste entre -6 y +6. Pulse
OK para aceptar.
Saturación
Esta opción permite modificar la saturación (tono) de la imagen.
Para ello, con las teclas CH+ / CH- sitúe el cursor en el parámetro
“Saturación”. Con las teclas / cámbiese a la lista de valores y con las
teclas CH+ / CH- seleccione el nivel de saturación entre 0 y 12. Pulse
OK para aceptar.
Finalmente pulse la tecla OK para confirmar los parámetros modificados.
26
Manual de instrucciones
“DTR - 7142”
12.3.3.- Configuración Sistema
Mediante este menú puede configurar parámetros del sistema.
Surround
Con las teclas CH+ / CH- sitúe el cursor en el parámetro “Surround” y
con las teclas / seleccione el efecto deseado.
Las opciones son: Off, Concierto, Iglesia, Pasivo y Vivo.
Antena activa
Si está utilizando una antena activa (con amplificador) deberá activar
esta opción para alimentar el amplificador de la misma con +5V /
100mA. La alimentación se realiza a través del propio cable coaxial
conectado a la entrada RF IN del receptor.
Para ello, con las teclas CH+ / CH- sitúe el cursor en el parámetro
“Antena activa” y con las teclas / active (on) la alimentación.
Si no dispone de amplificador deberá seleccionar la opción “Off”, de
lo contrario podría dañar el receptor.
Efecto JPEG
Esta opción permite dar a la imagen un efecto similar a una imagen
JPEG.
Para ello, con las teclas CH+ / CH- sitúe el cursor en el parámetro
“Efecto JPEG” y con las teclas / active (on) el efecto.
LCN
Esta opción le permite activar o desactivar la función LCN (Ordenación
Automática de Canales).
Para ello, con las teclas CH+ / CH- sitúe el cursor en el parámetro
“LCN” y con las teclas / active (on) o desactive (off) esta opción.
Nota: La activación de esta opción afecta a la forma en que el receptor
ordena los canales automáticamente cuando se realiza una
búsqueda de canales.
País
Esta opción permite seleccionar el área o zona donde estará ubicado el
receptor.
Para ello, con las teclas CH+ / CH- sitúe el cursor en el parámetro
“País”. Con las teclas / cámbiese a la lista de zonas y con las teclas
CH+ / CH- seleccione el país deseado. Pulse OK para aceptar.
Nota: La selección de un país u otro determina parámetros por defecto.
Menu Lock
Esta opción permite bloquear el acceso al menú principal.
Para ello, con las teclas CH+ / CH- sitúe el cursor en el parámetro
“Menu Lock” y con las teclas / active (on) o desactive (off) el bloqueo.
Nota: Una vez activado, será necesario introducir el código PIN cada vez
que acceda al menú principal.
Finalmente pulse la tecla OK para confirmar los parámetros modificados.
27
ESPAÑOL
Ecualizador
Con las teclas CH+ / CH- sitúe el cursor en el parámetro
“Ecualizador” y con las teclas / seleccione el tipo de ecualizador
deseado.
Las opciones son: Estándar, Clásico, Rock, Jazz o Pop.
Manual de instrucciones
“DTR - 7142”
12.3.4.- Configuración de la Hora
Mediante este menú puede configurar la forma en que el receptor gestiona
la información horaria que recibe con la señal.
Modo Temporizador
Con las teclas CH+ / CH- sitúe el cursor en el parámetro “Modo
Temporizador” y con las teclas / seleccione la forma de gestión de la
hora: Automática o Manual.
La selección del modo Automático le permitirá modificar los parámetros
“Ajuste GMT” y “horario de Verano”.
La selección del modo Manual le permitirá editar los valores de “Fecha” y
“Hora”.
Fecha
Con las teclas CH+ / CH- sitúe el cursor en el parámetro “Fecha”. Con
las teclas / se activa un calendario emergente donde podrá actualizar
la fecha.
Con las teclas CH+ / CH- y / seleccione el día en el calendario. Si
selecciona un día fuera del mes actual, se cambia al mes anterior o
posterior.
Con las teclas roja y amarilla seleccione el mes.
Con las teclas azul y verde seleccione el año.
Hora
Con las teclas CH+ / CH- sitúe el cursor en el parámetro “Hora”. Con
las teclas / se seleccionan los dígitos correspondientes a la hora y
minutos. Con el teclado numérico introduzca el valor adecuado en cada
dígito.
Ajuste GMT
Mediante esta opción podrá indicar la deriva horaria del lugar donde se
encuentra con relación a la hora GMT.
Para ello, con las teclas CH+ / CH- sitúe el cursor en el parámetro
“Ajuste GMT”. Con las teclas / cámbiese a la lista de valores y con
las teclas CH+ / CH- seleccione el margen deseado. Pulse OK para
aceptar.
Horario de Verano
Esta opción le permite activar o desactivar la función horario de verano.
Para ello, con las teclas CH+ / CH- sitúe el cursor en el parámetro
“Horario de Verano” y con las teclas / active (on) o desactive (off)
esta opción.
Finalmente pulse la tecla OK para confirmar los parámetros modificados.
28
Manual de instrucciones
“DTR - 7142”
12.3.5.- Configuración Despertador
Mediante este menú podrá Encender/Apagar el receptor a una hora
programada.
Podrá programar varios eventos, pudiendo estos tener tiempos de
ejecución diferentes (una vez, diariamente, semanalmente... ).
Tipo de temporizador
Con las teclas CH+ / CH- sitúe el cursor en el parámetro “Tipo de
temporizador”. Con las teclas / seleccione una de las opciones: OFF,
Una vez, Diariamente, Semanalmente o Anualmente.
Modo despertador
Con las teclas CH+ / CH- sitúe el cursor en el parámetro “Modo
despertador”. Con las teclas / seleccione una de las opciones: Off
(desactivado), Mensaje (muestra un mensaje en pantalla), Programa
(muestra el programa seleccionado), ON (enciende el receptor sin tiempo
definido para apagar) o Grabar (Graba en el disco externo o pen drive el
programa seleccionado).
Mensaje / Canal despertador
Seleccione el mensaje o canal que se mostrará en pantalla al activarse el
despertador. Dependiendo del modo del apartado anterior, se mostrará
un mensaje o un canal.
Para ello, con las teclas CH+ / CH- sitúe el cursor en el parámetro
“Mensaje / Canal despertador”. Con las teclas / seleccione el tipo
deseado.
Fecha despertador
Seleccione la fecha de activación del despertador.
Para ello, con las teclas CH+ / CH- sitúe el cursor en el parámetro
“Fecha despertador”. Con las teclas / se activa un calendario donde
deberá indicar el día. Pulse OK para aceptar.
Hora
Indique la hora de activación del despertador.
Para ello, con las teclas CH+ / CH- sitúe el cursor en el parámetro
“Hora” y con el teclado numérico teclee la hora de inicio.
Duración
Indique la duración del evento.
Para ello, con las teclas CH+ / CH- sitúe el cursor en el parámetro
“Duración” y con el teclado numérico indique la duración del evento.
Disco Predefinido
Seleccione el disco donde se grabará el programa indicado para el modo
despertador.
Finalmente pulse la tecla OK para confirmar los parámetros modificados.
29
ESPAÑOL
Nº temporizador
Con las teclas CH+ / CH- sitúe el cursor en el parámetro “Nº
Temporizador”. Con las teclas
/
cámbiese a la lista de
temporizadores y con las teclas CH+ / CH- seleccione uno de los 8
disponibles. Pulse OK para aceptar.
Si alguno de los temporizadores está activado, el cursor se situará en el
próximo disponible.
Manual de instrucciones
“DTR - 7142”
12.3.6.- Control parental
Cuando el password de su receptor sea descubierto o necesite
actualizarlo por cualquier motivo, este menú le permite cambiar su
contraseña en el sistema.
Con ello evitará tanto las manipulaciones indeseadas del sistema como el
acceso a canales no apropiados.
Cambiar código PIN:
- El código PIN de fábrica por defecto es 0 0 0 0.
Nota: No olvide su código PIN.
- Para cambiar el código PIN, introduzca en primer lugar el código
actual.
- Teclee a continuación el nuevo código PIN.
- Finalmente vuelva a teclear el nuevo PIN para confirmarlo.
Notas:
- La contraseña se introduce mediante el teclado numérico (0 ... 9) del
mando a distancia.
- El control parental afecta a los menús de configuración del sistema y a los
programas que se bloquean.
- No olvide su nueva contraseña. Sin ella no podrá acceder a los menús y/o
programas bloqueados.
- Si pierde su contraseña, póngase en contacto con el servicio de
asistencia técnica.
30
Manual de instrucciones
“DTR - 7142”
12.4.- Actualización software
Actualizar desde USB o una tarjeta de memória (SD/MS/MMC)
Si dispone de una versión de software actualizada y desea actualizar el
receptor, proceda como se indica.
- Copie el software en un lápiz de memoria (pen drive).
- Conecte el lápiz de memoria al receptor mediante el cable USB
suministrado.
- Seleccione la opción “Actualización software” en el menú TV Digital
con las teclas CH+ / CH- y pulse OK.
- Seleccione el archivo de software (.bin) con las teclas CH+ / CH- y
pulse OK.
- La actualización puede tardar unos momentos. Por favor, espere.
Una vez actualizado el software, el receptor se posiciona en el menú de
“Instalación Inicial”.
Descarga Lista Prog.
Si dispone de una lista de canales personalizada y desea actualizar el
receptor con ella, proceda como se indica.
- Copie el archivo en un lápiz de memoria (pen drive) o una tarjeta de
memória (SD/MS/MMC).
- Conecte el lápiz de memoria al receptor.
- Seleccione la opción “Actualización software” en el menú TV Digital
con las teclas CH+ / CH- y pulse OK.
- Pulse OK sobre la opción “Descarga Lista Prog.”.
- Seleccione el archivo channeldata.bin con las teclas
pulse OK.
CH+ / CH- y
Upload Lista Prog.
Si dispone de una lista de canales personalizada en el receptor y desea
guardarla, proceda como se indica.
- Conecte un lápiz de memoria o una tarjeta de memoria (SD/MS/MMC)
al receptor.
- Seleccione la opción “Actualización software” en el menú TV Digital
con las teclas CH+ / CH- y pulse OK.
- Pulse OK sobre la opción “Upload Lista Prog.”.
- La lista de canales será grabada como channeldata.bin en el lapiz de
memoria
31
ESPAÑOL
- Pulse OK sobre la opción “Actualizar desde USB”.
Manual de instrucciones
“DTR - 7142”
12.5.- Configuración Valores de Fábrica
Si desea volver a establecer los ajustes de fábrica, puede hacerlo en
cualquier momento.
Esta función le permite volver a los parámetros que tenía el receptor al salir
de fábrica, perdiendo cualquier configuración posterior que pudiese tener.
- Seleccione el parámetro “Valores de fábrica” mediante las teclas CH+
/ CH- y pulse OK.
- Introduzca su código PIN.
- En la ventana emergente de confirmación deberá indicar si desea
restaurar los valores de fábrica (Si) o bien dejar los actuales (no).
Seleccione la opción deseada con las teclas / y pulse OK.
Nota: Al realizar esta operación se muestra el mensaje “Base de datos
vacía” mientras no se realiza una búsqueda de canales.
12.6.- Información Versión
Esta función le permite visualizar las versiónes de software y hardware del
receptor.
- Seleccione el parámetro “Versión” mediante las teclas CH+ / CH- y
pulse OK.
- Se muestra una pantalla con las actuales versiones.
- Pulse la tecla EXIT para salir y regresar al menú anterior.
32
Manual de instrucciones
“DTR - 7142”
13.- Cine
Este menú le permite visionar un archivo de video en formato MPG, AVI y
DviX desde un lápiz de memoria USB o a través de una tarjeta de memoria
(SD/MS/MMC).
- Seleccione el parámetro “Cine” mediante las teclas CH+ / CH- y
pulse OK para confirmar. También se puede acceder directamente a
este menú pulsando la tecla MOVIE en modo de visualización normal.
- Seleccione el directorio donde se encuentra el archivo de video
mediante las teclas CH+ / CH-. Los archivos de video deben ser
reproducidos desde el menú “Video”.
- Para reproducir un archivo, selecciónelo y pulse la tecla
o la tecla OK.
(TV/RADIO)
- Durante la reproducción de un video, la tecla LIST
le permite un
avance rápido de la imagen, la tecla ALT
permite un retroceso rápido
de la imagen, la tecla salta a la siguiente pista, la tecla
salta a la
pista anterior, la tecla PAUSE detiene la imagen y la tecla REPEAT
repite un fichero, en varias formas (uno, directorio, aleatorio, off).
- Pulse la tecla LANG para seleccionar el audio (si el fichero es .avi).
- Pulse la tecla GOTO para saltar a una posición determinada en la linea
de tiempo. En la ventana emergente deberá introducir el valor del
tiempo a donde va a saltar y pulse la tecla OK. Este valor deberá estar
dentro del tiempo total del archivo que se reproduce.
- Para parar la reproducción en cualquier momento pulse la tecla
TEXT o EXIT.
Nota: Dependiendo del tipo de compresión, no todos los ficheros en
formato AVI y DivX podrán ser reproducidos.
14.- Música
Este menú le permite escuchar archivos de audio en formato MP3 desde
un lápiz de memoria USB, a través de una tarjeta (SD/MS/MMC) o lector
MP3.
- Seleccione el parámetro “Música” mediante las teclas CH+ / CH- y
pulse OK para confirmar.
- Seleccione el directorio donde se encuentra el archivo de audio
mediante las teclas CH+ / CH-. Los archivos de audio deben ser
reproducidos desde el menú “Música”.
Pulse OK para aceptar la carpeta y EXIT para subir un nivel en el
directorio.
- Para reproducir un archivo, selecciónelo y pulse la tecla
o la tecla OK.
(TV/RADIO)
- Durante la reproducción de una pista, la tecla LIST
le permite un
avance rápido de la pista, la tecla ALT
permite un retroceso rápido
de la pista, la tecla salta a la siguiente pista, la tecla salta a la pista
anterior, la tecla PAUSE detiene la reproducción y la tecla REPEAT
repite un fichero, en varias formas (uno, todos, aleatorio, off).
- Para parar la reproducción en cualquier momento pulse la tecla
TEXT o EXIT.
33
ESPAÑOL
Pulse OK para aceptar la carpeta y EXIT para subir un nivel en el
directorio.
Manual de instrucciones
“DTR - 7142”
15.- Fotos
Este menú le permite mostrar archivos de imagen en formato JPEG, BMP
desde un lápiz de memoria USB o a través de una tarjeta de memoria
(SD/MS/MMC).
- Seleccione el parámetro “Fotos” mediante las teclas CH+ / CH- y
pulse OK para confirmar.
- Seleccione el directorio donde se encuentran los archivos de imagen
mediante las teclas CH+ / CH-. Los archivos de imagen deben ser
reproducidos desde el menú “Fotos”.
Pulse OK para aceptar la carpeta y EXIT para subir un nivel en el
directorio.
- Para reproducir secuencialmente los archivos pulse la tecla
(TV/RADIO) o la tecla OK.
- Durante la reproducción de imágenes, la tecla
salta a la siguiente
imagen, la tecla salta a la imagen anterior, las teclas CH+ / CHvoltean la imagen horizontal y verticalmente y las teclas / rotan la
imagen 90º.
- Para parar la reproducción en cualquier momento pulse la tecla
TEXT o EXIT.
16.- Juegos
En este menú puede seleccionar uno de los tres juegos disponibles en el
receptor.
- Box Man
- Tetris
- Hit Rat
- Seleccione uno de los juegos disponibles mediante las teclas CH+ /
CH- y pulse OK para confirmar.
- Para jugar siga las indicaciones que aparecen en pantalla.
- Para salir del juego en cualquier momento pulse la tecla OK para
detener el juego, seleccione la opción “Exit Game” y vuelva a pulsar
OK.
34
Manual de instrucciones
“DTR - 7142”
17.- Gestión del Disco
Este menú le permite gestionar la información disponible en el disco o pen
drive (memoria stick) o una tarjeta de memoria (SD/MS/MMC).
- Seleccione la opción “Gestión del disco” en el Menú principal y pulse
OK. Se muestra a continuación una lista con los archivos grabados en
el disco externo. Si no hay archivos se muestra el mensaje “Sin
archivo”.
- Pulse la tecla verde ( ) para seleccionar la operación a realizar entre:
Reproducir: Reproduce el fichero seleccionado,
Borrar todos: Borrar todos los ficheros de la lista o
Renombrar: Permite renombrar el fichero mediante el teclado
emergente.
- Seleccione el fichero con las teclas CH+ / CH- y pulse la tecla OK
para ejecutar la opción seleccionada.
- Pulse la tecla EXIT para salir de este menú.
Nota: Esta función solo afecta a ficheros de video.
18.- Formatear Partición
En este menú puede formatear el disco o discos externos o una tarjeta de
memoria (SD/MS/MMC) para ponerlos en condiciones de almacenar
información.
- Seleccione la opción “Formatear Partición” en el menú principal y
pulse la tecla OK.
- Seleccione el disco a formatear mediante las teclas
pulse OK para confirmar.
CH+ /
CH- y
- Mediante un mensaje emergente se le pedirá que confirme SI o NO el
formateo del disco.
Nota: Al realizar esta opción se borrarán todos los datos disponibles en
el disco externo.
35
ESPAÑOL
Borrar uno: Borra el fichero seleccionado,
Manual de instrucciones
“DTR - 7142”
Descripción de conectores
Euroconector (salida SCART TV)
PIN
TV
1
2
3
4
5
6
7
8
9
10
11
12
13
14
15
16
17
18
19
20
21
Salida audio (D)
N/C
Salida audio (I)
Masa audio
Masa azul
N/C
Salida azul
Tens. conmutac.
Masa verde
N/C
Salida verde
N/C
Masa rojo
Masa “Fast Blanking”
Salida rojo
Salida “Fast Blanking”
Masa video
Masa video
Salida video
N/C
Masa
20
21
36
18
19
16
17
14
15
12
13
10
1
9
8
4
6
7
5
2
3
1
Manual de instrucciones
“DTR - 7142”
Glosario de términos
En lo que sigue se explica de forma breve y sencilla el significado de alguno de los términos y siglas utilizados a lo largo de
este Manual de Usuario.
• DVB :
Digital Video Broadcasting.
Consorcio de distintos organismos internacionales y empresas cuyo objetivo es la realización de
estándares a nivel mundial encaminados al desarrollo de la televisión digital.
Electronic Programme Guide (Guía Electrónica de Programas ).
Guía que proporciona al usuario un listado de los eventos que se emitirán en cada uno de los
programas, el horario de emisión de los mismos y una descripción de su contenido.
• Fast Blanking :
Señal enviada por el SCART que controla el estado RGB del televisor.
• FTA :
Free To Air
Programas emitidos en abierto, es decir, sin codificar.
• Letterbox :
Uno de los modos de presentar en televisores 4:3 los programas emitidos con relación de aspecto
16:9.
En este caso se utilizan bandas negras en la parte superior e inferior de la pantalla para crear sobre el
televisor una ventana con la relación de aspecto deseada.
• LCN :
Ordenación Automática de Canales
Siempre que este en funcionamiento, el receptor ordena los programas encontrados de acuerdo con
el listado predeterminado por el operador.
• MPEG 2 :
Familia de estándares de compresión de audio/video digital utilizados por el DVB.
• OSD :
On Screen Display.
Sistema de Menús en pantalla.
• VCR :
Video Casette Recorder.
Aparato de video doméstico.
• COFDM :
Coded Orthogonal Frequency Division Multiplexing
La tecnología de modulación COFDM permite una transmisión digital más fiable y robusta que sus
antecesores analógicos, ya que posibilita transmisiones estables en entornos urbanos incluso sin
visión directa entre antenas. Sus fundamentos básicos son la división de la trama a transmitir entre
múltiples portadoras estrechas que ocupan todo el ancho de banda disponible, y el aumento del
tiempo en que cada símbolo es transmitido con un intervalo de guarda.
• USB :
Universal Serial Bus
Estándar para la conexión de periféricos.
37
ESPAÑOL
• EPG :
Manual de instrucciones
“DTR - 7142”
Estructura del Menú
Editor de Programas
Instalación
Organizador de Prog.
Fav, Mov, Bloq, Apag
Ordenar programas
Area, Todos, LCN
Grupo de programas
Noticias, Ciencia, Cine ...
Editar programas
Añadir, Editar
Borrar todo
Programas TV, Radio
Libres/Todos
FTA/ALL
Area de Búsqueda
Inicio
Búsqueda manual
Canal, Frecuencia
Búsqueda de gama
Frec. inicio/final, BW
Config. LCN
On/Off
Config. Antena
On/Off
OSD
tema, hora, idioma ....
TV Digital
Configuración
TV
Norma, salida, color ...
Configuración sistema
Ecualiz., LCN, Pais, ...
Hora
Modo, GMT, H. verano
Despertador
Nº, tipo, fecha, hora ...
Control parental
Cambio PIN
Transferencia de USB
Descarga Lista Prog.
Actualización softw.
Upload Lista Prog.
Valores de fábrica
Reset
Versión
HW, SW, Fecha
Cine
MPG, AVI, DivX
Música
MP3
Fotos
JPEG, BMP
Juegos
Box Man, Tetris, Hit Rat
Juegos originales
Gestión del Disco
Repr/Borrar/Renomb.
Formatear Partición
Formatear partición
38
Manual de instrucciones
“DTR - 7142”
Receptor DVB-T:
Frecuencias de entrada
Conector de entrada
Impedancia
Conector de salida
Sistema Video
Filtro
Desmodulación
Alimentación antena
De-multiplexado:
170...230 MHz y de 470...862MHz
CEI
75 Ohms
CEI
PAL B/G, SECAM, NTSC
6, 7, 8 MHz
CODFM 2k/8k
5V/100mA
MPEG II, ISO/IEC 13818-1
Descodificación Video:
Compresión Video
Estándar Video
Imagen
Formato
MPEG-2 Compatible MP@ML (Main profile @ main level)
PAL / NTSC
720 pixels x 576 lineas / 724 pixels x 480 lineas
4:3 Letterbox / 4:3 Pan Scan / 16:9 / Auto
Descodificación Audio:
Compresión
Modo Audio
Frecuencia muestreo
MPEG-2 Layer I & II
Dual (main/sub), Estéreo
32KHz, 44.1KHz, 48KHz
Parámetros Audio:
Salida analógica:
Nivel de salida
Impedancia de salida
THD
0.5 rms (nominal)
600 Ohms
>60dB (1KHz)
Parámetros Video:
Salida SCART TV:
Nivel de salida CVBS
Nivel de salida ROJO
Nivel de salida VERDE
Nivel de salida AZUL
1 Vpp sobre 75 Ohms
0.7 Vpp sobre 75 Ohms
0.7 Vpp sobre 75 Ohms
0.7 Vpp sobre 75 Ohms
Teletexto:
Teletexto
Estándar ETS 300 472
Conector SCART:
Salida SCART TV:
CVBS y RGB
Interfaces:
USB tipo
Puerto USB
Lector tarjetas
Mini USB
1.1/2.0
SD/MS/MMC
Alimentación:
Alimentación principal:
Alimentación DVB-T:
Alimentación USB:
Poténcia máxima:
Stand-by:
100 - 250 V~ 50/60 HZ
12V (1,5 A)
5V (5 W)
6,5 W
<1W
General:
EPG
Temporizador
Idioma OSD
Temperatura
Humedad
Dimensiones (L x A x H):
Peso:
Eventos actuales, futuros y anteriores del programa seleccionado
8 eventos, hasta un año de anticipación
Inglés, Francés, Alemán, Italiano, Español, Sueco, Portugués, Finlandés, Holandés, Turco, Checo,
Griego y Danés
+15'C....+35'C
<80%
240mm x 115mm x 36mm
300 grs.
39
ESPAÑOL
Características técnicas
Manual de instrucciones
“DTR - 7142”
Garantía
Televés S.A. ofrece una garantía de dos años calculados a partir de la fecha de compra para los países de la UE. En los países no
miembros de la UE se aplica la garantía legal que está en vigor en el momento de la venta. Conserve la factura de compra para determinar
esta fecha.
Durante el período de garantía, Televés S.A. se hace cargo de los fallos producidos por defecto del material o de fabricación. Televés S.A.
cumple la garantía reparando o sustituyendo el equipo defectuoso.
No están incluidos en la garantía los daños provocados por uso indebido, desgaste, manipulación por terceros, catástrofes o cualquier
causa ajena al control de Televés S.A.
Tratamiento de los equipos eléctricos y electrónicos al final de su vida útil
(Aplicable en la Unión Europea y en países europeos con sistemas de recogida selectiva de residuos).
Este símbolo en su equipo o su embalaje indica que el presente producto no puede ser tratado como residuos
domésticos normales, sino que deben entregarse en el correspondiente punto de recogida de equipos
eléctricos y electrónicos. Asegurándose de que este producto es desechado correctamente, Ud. está
ayudando a prevenir las consecuencias negativas para el medio ambiente y la salud humana que podrían
derivarse de la incorrecta manipulación de este producto. El reciclaje de materiales ayuda a conservar las
reservas naturales. Para recibir información detallada sobre el reciclaje de este producto, por favor, contacte
con su ayuntamiento, su punto de recogida más cercano o el distribuidor donde adquirió el producto.
40
User manual
“DTR - 7142”
Page
1.- Precautions . . . . . . . . . . . . . . . . . . . . . . . . . . . . . . . . . . . . . . . . . . . . . . . . . . . . . . . . . . . . . . . . . . . . . . . . . . .
2.- General information . . . . . . . . . . . . . . . . . . . . . . . . . . . . . . . . . . . . . . . . . . . . . . . . . . . . . . . . . . . . . . . . . . . . .
2.1.- Main features . . . . . . . . . . . . . . . . . . . . . . . . . . . . . . . . . . . . . . . . . . . . . . . . . . . . . . . . . . . . . . . . . . . . .
2.2.- Contents . . . . . . . . . . . . . . . . . . . . . . . . . . . . . . . . . . . . . . . . . . . . . . . . . . . . . . . . . . . . . . . . . . . . . . . .
2.3.- General operation . . . . . . . . . . . . . . . . . . . . . . . . . . . . . . . . . . . . . . . . . . . . . . . . . . . . . . . . . . . . . . . . .
3.- Description of connections . . . . . . . . . . . . . . . . . . . . . . . . . . . . . . . . . . . . . . . . . . . . . . . . . . . . . . . . . . . . . . .
3.1.- Remote control . . . . . . . . . . . . . . . . . . . . . . . . . . . . . . . . . . . . . . . . . . . . . . . . . . . . . . . . . . . . . . . . . . .
4.- Equipment installation . . . . . . . . . . . . . . . . . . . . . . . . . . . . . . . . . . . . . . . . . . . . . . . . . . . . . . . . . . . . . . . . . . .
4.1.- Connections. . . . . . . . . . . . . . . . . . . . . . . . . . . . . . . . . . . . . . . . . . . . . . . . . . . . . . . . . . . . . . . . . . . . . . .
5.- Start of installation . . . . . . . . . . . . . . . . . . . . . . . . . . . . . . . . . . . . . . . . . . . . . . . . . . . . . . . . . . . . . . . . . . . . . . .
6.- Basic Functions . . . . . . . . . . . . . . . . . . . . . . . . . . . . . . . . . . . . . . . . . . . . . . . . . . . . . . . . . . . . . . . . . . . . . . . . .
6.1.- Selecting a program . . . . . . . . . . . . . . . . . . . . . . . . . . . . . . . . . . . . . . . . . . . . . . . . . . . . . . . . . . . . . . . .
6.2.- TV/Radio Mode . . . . . . . . . . . . . . . . . . . . . . . . . . . . . . . . . . . . . . . . . . . . . . . . . . . . . . . . . . . . . . . . . . .
6.3.- Volume Control . . . . . . . . . . . . . . . . . . . . . . . . . . . . . . . . . . . . . . . . . . . . . . . . . . . . . . . . . . . . . . . . . . .
6.4.- Channel information . . . . . . . . . . . . . . . . . . . . . . . . . . . . . . . . . . . . . . . . . . . . . . . . . . . . . . . . . . . . . . .
6.5.- Favorites List . . . . . . . . . . . . . . . . . . . . . . . . . . . . . . . . . . . . . . . . . . . . . . . . . . . . . . . . . . . . . . . . . . . .
6.6.- Audio Menu . . . . . . . . . . . . . . . . . . . . . . . . . . . . . . . . . . . . . . . . . . . . . . . . . . . . . . . . . . . . . . . . . . . . . .
6.7.- Zoom Function . . . . . . . . . . . . . . . . . . . . . . . . . . . . . . . . . . . . . . . . . . . . . . . . . . . . . . . . . . . . . . . . . . .
6.8.- Mosaic Function . . . . . . . . . . . . . . . . . . . . . . . . . . . . . . . . . . . . . . . . . . . . . . . . . . . . . . . . . . . . . . . . . .
6.9.- Return to previous program . . . . . . . . . . . . . . . . . . . . . . . . . . . . . . . . . . . . . . . . . . . . . . . . . . . . . . . . . .
7.- EPG (Electronic Programming Guide) . . . . . . . . . . . . . . . . . . . . . . . . . . . . . . . . . . . . . . . . . . . . . . . . . . . . . . .
8.- Teletext / Subtitles . . . . . . . . . . . . . . . . . . . . . . . . . . . . . . . . . . . . . . . . . . . . . . . . . . . . . . . . . . . . . . . . . . . . . .
9.-Recording Programmes . . . . . . . . . . . . . . . . . . . . . . . . . . . . . . . . . . . . . . . . . . . . . . . . . . . . . . . . . . . . . . . . . . .
10.- TimeShift function . . . . . . . . . . . . . . . . . . . . . . . . . . . . . . . . . . . . . . . . . . . . . . . . . . . . . . . . . . . . . . . . . . . . . .
11.- Main Menu . . . . . . . . . . . . . . . . . . . . . . . . . . . . . . . . . . . . . . . . . . . . . . . . . . . . . . . . . . . . . . . . . . . . . . . . . . .
12.- Digital TV . . . . . . . . . . . . . . . . . . . . . . . . . . . . . . . . . . . . . . . . . . . . . . . . . . . . . . . . . . . . . . . . . . . . . . . . . . . . .
12.1.- Program Editing . . . . . . . . . . . . . . . . . . . . . . . . . . . . . . . . . . . . . . . . . . . . . . . . . . . . . . . . . . . . . . . . . . .
12.1.1- Program Organizing . . . . . . . . . . . . . . . . . . . . . . . . . . . . . . . . . . . . . . . . . . . . . . . . . . . . . . . . .
12.1.2.- Ordering Programs . . . . . . . . . . . . . . . . . . . . . . . . . . . . . . . . . . . . . . . . . . . . . . . . . . . . . . . . . .
12.1.3.- Grouping Programs . . . . . . . . . . . . . . . . . . . . . . . . . . . . . . . . . . . . . . . . . . . . . . . . . . . . . . . . .
12.1.4.- Editing Programs . . . . . . . . . . . . . . . . . . . . . . . . . . . . . . . . . . . . . . . . . . . . . . . . . . . . . . . . . . .
12.1.5.- Erase all . . . . . . . . . . . . . . . . . . . . . . . . . . . . . . . . . . . . . . . . . . . . . . . . . . . . . . . . . . . . . . . . . .
12.2.- Installation . . . . . . . . . . . . . . . . . . . . . . . . . . . . . . . . . . . . . . . . . . . . . . . . . . . . . . . . . . . . . . . . . . . . . .
12.2.1.- Free / All . . . . . . . . . . . . . . . . . . . . . . . . . . . . . . . . . . . . . . . . . . . . . . . . . . . . . . . . . . . . . . . . . .
12.2.2.- Automatic search . . . . . . . . . . . . . . . . . . . . . . . . . . . . . . . . . . . . . . . . . . . . . . . . . . . . . . . . . . .
12.2.3.- Manual search . . . . . . . . . . . . . . . . . . . . . . . . . . . . . . . . . . . . . . . . . . . . . . . . . . . . . . . . . . . . .
12.2.4.- Range search . . . . . . . . . . . . . . . . . . . . . . . . . . . . . . . . . . . . . . . . . . . . . . . . . . . . . . . . . . . . . .
12.2.5.- LCN Configuration . . . . . . . . . . . . . . . . . . . . . . . . . . . . . . . . . . . . . . . . . . . . . . . . . . . . . . . . . .
12.2.6.- Aerial Configuration . . . . . . . . . . . . . . . . . . . . . . . . . . . . . . . . . . . . . . . . . . . . . . . . . . . . . . . . .
12.3.- Configuration . . . . . . . . . . . . . . . . . . . . . . . . . . . . . . . . . . . . . . . . . . . . . . . . . . . . . . . . . . . . . . . . . . .
12.3.1.- OSD (On-Screen Display) Configuration . . . . . . . . . . . . . . . . . . . . . . . . . . . . . . . . . . . . . . . . .
12.3.2.- TV Configuration . . . . . . . . . . . . . . . . . . . . . . . . . . . . . . . . . . . . . . . . . . . . . . . . . . . . . . . . . . .
12.3.3.- System Configuration . . . . . . . . . . . . . . . . . . . . . . . . . . . . . . . . . . . . . . . . . . . . . . . . . . . . . . . .
12.3.4.- Time Configuration . . . . . . . . . . . . . . . . . . . . . . . . . . . . . . . . . . . . . . . . . . . . . . . . . . . . . . . . . .
12.3.5.- Alarm Clock Configuration . . . . . . . . . . . . . . . . . . . . . . . . . . . . . . . . . . . . . . . . . . . . . . . . . . . .
12.3.6.- Parent Control . . . . . . . . . . . . . . . . . . . . . . . . . . . . . . . . . . . . . . . . . . . . . . . . . . . . . . . . . . . . .
12.4.- Software Updating . . . . . . . . . . . . . . . . . . . . . . . . . . . . . . . . . . . . . . . . . . . . . . . . . . . . . . . . . . . . . . . .
12.5.- Plant Configuration Values . . . . . . . . . . . . . . . . . . . . . . . . . . . . . . . . . . . . . . . . . . . . . . . . . . . . . . . . . .
12.6.- Information Technology Version . . . . . . . . . . . . . . . . . . . . . . . . . . . . . . . . . . . . . . . . . . . . . . . . . . . . . .
13.- Cinema
............................................................................
14.- Music
.............................................................................
15.- Photos
.............................................................................
16.- Games
.............................................................................
17.- Disk Management
....................................................................
18.- Partition-format
......................................................................
Description of Connectors . . . . . . . . . . . . . . . . . . . . . . . . . . . . . . . . . . . . . . . . . . . . . . . . . . . . . . . . . . . . . . . . . .
Glossary of Terminology . . . . . . . . . . . . . . . . . . . . . . . . . . . . . . . . . . . . . . . . . . . . . . . . . . . . . . . . . . . . . . . . . . . .
Menu Structure . . . . . . . . . . . . . . . . . . . . . . . . . . . . . . . . . . . . . . . . . . . . . . . . . . . . . . . . . . . . . . . . . . . . . . . . . . .
Technical Features . . . . . . . . . . . . . . . . . . . . . . . . . . . . . . . . . . . . . . . . . . . . . . . . . . . . . . . . . . . . . . . . . . . . . . . .
Guarantee . . . . . . . . . . . . . . . . . . . . . . . . . . . . . . . . . . . . . . . . . . . . . . . . . . . . . . . . . . . . . . . . . . . . . . . . . . . . . . .
41
42
43
43
43
43
44
45
46
46
47
49
49
49
49
50
50
51
51
52
52
53
54
55
56
57
58
58
58
59
59
60
60
61
61
61
61
62
62
62
63
63
64
65
66
67
68
69
70
70
71
71
72
72
73
73
74
75
76
77
78
ENGLISH
INDEX
User manual
“DTR - 7142”
1.- Precautions
The adaptor you have just purchased has been manufactured to international safety
standards.
We recommend you to read the following safety tips carefully.
ALIMENTATION:
100 - 250 V~ 50/60 Hz.
OVERLOAD:
Do not overload points, extension cords or adaptors to avoid fire and electric
shock risks.
> 50°C
LIQUIDS:
Do not expose the Adaptor to water leakage or spray.
Do not place objects or vessels containing liquids on the equipment or near it.
SMALL OBJECTS:
Avoid the proximity of small metal objects to the equipment. These could slip
through the ventilation slots of the Adaptor, causing it serious damage.
> 80 %
CLEANING:
Disconnect the Adaptor from the power source before cleaning.
Use a soft rag, slightly moistened in water (without detergent) to clean the
outside of the Adaptor.
VENTILATION:
Place the Receiver in a well-ventilated area so that the slots are not blocked in
any way. Avoid exposure to the sun, to other sources of heat or flames.
Do not place on top of other equipment.
< 5°C
CONNECTIONS:
Make only the recommended connections, in order to avoid possible damage to
the equipment.
CONNECTIONS TO TV/VCR:
Turn off the Adaptor before connecting or disconnecting to a TV set or a VCR.
NOT DOING THIS may damage the TV or the VCR.
LOCATION:
Locate the Adaptor in an interior room, safe from electrical discharges, rain or
direct sunlight.
Install the Receiver in horizontal position.
WARNING
RISK ELECTRICAL SHOCK
DO NOT OPEN
IN ORDER TO REDUCE RISK OF ELECTRICAL DISCHARGE, DO NOT REMOVE THE LID.
THERE ARE NO USER-REPAIRABLE PARTS INSIDE THE MACHINE.
FOR ANY REPAIRS, CONTACT A QUALIFIED TECHNICIAN
This symbol indicates that “voltage levels are dangerous” within the product, and
that this presents a risk of electric shock or other personal harm.
This symbol indicates that there are important instructions for the use of this product
42
User manual
“DTR - 7142”
2.- General Information
The DTR - 7142 receiver enables you to tune in to a wide range of land-based channels.
This manual explains how to carry out the receiver installation and the necessary steps for using the different functions.
It also explains in detail the special functions that are available only in this receiver, and eases the use of these functions.
2.1.- Main features
Supports LCN function (Automatic Channel Organizing)
Allows MPG files to be recorded directly onto an external
disk or pen drive (FAT 32) by USB or memory card
(SD/MS/MMC).
Electronic Programming Guide (EPG)
Zoom Function
TimeShift Function by USB
Mosaic function (9 programmes))
Allows to play AVI, MPG, DviX, JPG and MP3 files.
SD/MS/MMC Card reader.
Supports OSD Teletext and Subtitling functions (standard
and TXT)
Advanced functions to play (Repeat, Lang, Goto).
Supports VBI Teletext
MPEG2, DVB Compatible
Parental and menu lock
Easy to use menu
2 SCART Outputs (TV and VCR)
Guided initial installation
Multi-video Output - CVBS, RGB
Diverse program editing functions (favorites, move, block,
erase...)
On-screen 256 color Display
Automatic PAL/NTSC Conversion
Stores up to 1500 programs
Automatically stores the last program
Quick and easy software updating through the use of
USB.
Alphanumeric display
Offers a range of 3 games
Download and upload of channel list via USB.
Timer function
automatically.
turning
the
receiver
on
and
Low consumption
off
EXIT
T
LIS
A-SCAN
GO TO
MOSAIC
FILE
DTR-7142
VOL+
PAUSE
ALT
DEVICE
CH+
CH-
TV/RADIO
ZOOM
OK
VOL-
TEXT
SUBT
MUTE
REC
AUDIO
TIMESHIFT
6
9
FAV
3
2
5
INFO
8
0
EPG
1
4
POWER
7
MOVIE
LANG
MENU
- 1 x Digital terrestrial receiver ref. 7142
REPEAT
Check that the following components are included in the shipment:
- 1 x Remote control
- 1 x Voltage adaptor
- 2 x ”AAA" Type Batteries
- Instructions Manuals
2.3.- General Operation
Throughout this manual you will observe that the daily use of the receiver is based on a series of very easy to use menus
and displays. These menus will help you to enjoy your Televés receiver, by guiding you through the installation, program
organizing, viewing and many other functions.
If you should have any problems with the functioning of your receiver simply read the corresponding paragraph of this
manual, or alternatively call you installer or Televés’s Technical Assistance Service.
43
ENGLISH
2.2.- Contents
User manual
“DTR - 7142”
3.- Description of connections
Front panel
Name
IR
Display
HOST USB
SD/MS/MMC
Function
IR sensor
In the normal mode, it shows channel N°, in the STANDBY mode it shows the time of day
Connection to connect a memory stick, an MP3 player or an external disk
Memory Card-connection
Rear panel
Name
ANT IN
Function
Input for terrestrial aerial signal (feed + 5V/100mA menu selection)
ANT OUT
RF outlet for connecting TV or VCR.
SCART TO TV
To connect a TV set using a SCART.
SCART TO VCR
To connect a VCR using a SCART.
S/PDIF
Optical output of digital audio.
DC 12V
Jack for power adaptor.
I/O
On/off switch
44
User manual
“DTR - 7142”
3.1.- Remote control
Button
Function
Turns receiver on and off.
POWER
MUTE
MUTE
Suppresses sound.
0 ... 9
Selects a program number for viewing.
Direct input of data on menu.
MOVIE
1
2
3
FAV
4
5
6
REPEAT
7
8
9
MENU
MOVIE
LANG
0
EPG
MENU
FAV
REPEAT
INFO
EXIT
CH+
VOL-
EPG
OK
ALT
TV/RADIO
ST
LI
REC
TEXT
PAUSE
AUDIO
SUBT
ZOOM
DEVICE
TIMESHIFT
FILE
MOSAIC
A-SCAN
GO TO
Shows the favorite programs list.
Repeats one or several audio or video files.
To enable the main menu or to leave the menus.
Enables the EPG (Electronic Program Guide) of the current
transponder.
LANG
Allows to select the audio of a film (AVI).
INFO
Shows current program information. If pressed again before the
disappearance of the banner, will show details of the current
program. Gives extra information on some menus.
EXIT
Returns to the previous menu on the menu screen.
VOL+
CH-
Accesses the Films menu.
CH+
Selects following program / Upward movement.
CH-
Selects the previous program / Downward movement.
VOL-
Reduces volume level. Moves left.
VOL+
Increases volume level. Moves right.
OK
Executes the menu option chosen, or enters the desired value in any
input mode.
Enables the general program list.
Selects the previous track.
Selects the next track.
Fast forwards the image in reproduction mode (X2, X4, X8, X20).
ALT
Commutes to the last program tuned.
LIST
Enables the general program list.
REC
TEXT
Records the program currently being watched.
In TDT mode, activate the Teletext.
In Multimedia mode, stops playing a file.
TV/RADIO
In TDT mode, switches between TV and Radio modes.
In Multimedia mode, starts playing a file.
PAUSE
Enables you to freeze the image viewed. To go on watching, press
again.
AUDIO
Selects the different audio languages available. Selects the audio
output type (L. R. Stereo).
SUBT
In TDT mode enables the Subtitles Menu.
In Multimedia mode show the subtitles during the playing of MPEG2,
DivX or Xvid files.
ZOOM
Enables the Zoom function.
DEVICE
Selects the signal source.
TIMESHIFT
FILE
Access to Timeshift function.
Shows the list of recorded files.
MOSAIC
Shows a mosaic of 9 small screens.
A-SCAN
/GO TO
In TDT mode, initiates automatic program search.
In Multimedia mode, shows a time meter to have direct access to
scenes.
Note: The red, green, yellow and blue buttons have secondary functions that are not
described here and which may appear on the different menus.
45
ENGLISH
Fast rewind the image in reproduction mode (X2, X4, X8, X20).
DTR-7142
User manual
“DTR - 7142”
4.- Equipment installation
This section explains how to install the DTR - 7142 Receiver.
Read the manuals supplied with the equipment for the installation of external devices such as the aerial.
When adding a new device, read the respective part of the manual for installation instructions
4.1.- Connections
- Connect the aerial to the ANT IN port of the receiver.
- Connect the Adaptor to the TV set using a SACRT.
- Connect the adaptor to the mains power.
DTR 7142
Important note:
If you want to connect an external disk (FAT 32) to the receiver, you must do so before connecting the
receiver to the mains (230V~).
All cables used for Receiver connection should be of the screened type.
DO NOT PLUG the Receiver into the network before finalizing all connections
46
User manual
“DTR - 7142”
5.- Start of installation
When the receiver is first turned on, it will show an initial installation window.
This menu consists of four options: OSD Language, Area, LCN and Enabled
Aerial.
To set up these parameters, follow the instructions below:
Using buttons
/
locate the cursor on the language window.
Using buttons CH+ / CH- select the desired menu language.
The available menus are: English, French, German, Italian, Spanish,
Swedish, Portuguese, Finnish, Dutch, Turkish, Czech, Greek and
Danish.
Press button OK to confirm.
Shift the cursor to the next optionn Area using the button CH-.
Using buttons / locate the cursor on the country window.
Using buttons CH+ / CH- select the zone for local configuration of
parameters.
The areas or zones available are: Germany, England, Italy, France,
Spain, Holland, Taiwan, China, Norway, Sweden, Finland, Greece and
Australia.
Shift the cursor to the next option LCN using button CH-.
Using buttons / locate the cursor on the options window.
Using buttons CH+ / CH- select the enabling (on) or disabling (off)
of the LCN option (Automatic channel organizing).
Press button OK to confirm.
Move the cursor to the next option Active Antenna using button CH-.
Using buttons / locate the cursor on the options window.
Using buttons CH+ / CH- indicate if you wish to feed (on) or not (off)
a potential amplifier into the aerial.
If no amplifier is available, you should select the Off option, otherwise
you might damage the receiver.
Press button OK to confirm.
47
ENGLISH
Press button OK to confirm.
User manual
“DTR - 7142”
Finally an emerging window will appear requesting confirmation to start
the search.
Select the option YES and press OK button to start the search.
The receiver will carry out a search over the whole input frequency band.
Once this search has ended, the receiver will show the first program on
the list.
48
User manual
“DTR - 7142”
6.- Basic Functions
Below we describe the basic functions of the DTR - 7142 receiver that may be used while you are watching TV programs or
listening to land-based radio programs.
6.1.- Selecting a program
To select a program, use the buttons CH+ / CH- on the remote control or
the number keys.
As well as this normal function, the receiver offers a quick program change
function.
While you are watching TV, press button OK on the remote control. A
program list will appear on screen.
To select a channel, move through this menu using the CH+ / CHbuttons and select the desired program. Press button OK to watch your
chosen program.
If you have also included programs in predefined groups, you can select
them by topic (none, news, science, sports, movies, kids, music, fashion).
To change the group, press the buttons / .
6.2.- TV/Radio Mode
While you are watching a TV program, press button TV/RADIO on the
remote Control to switch between TV and Radio mode.
ENGLISH
You will then switch to one of the Radio stations in the memory.
6.3.- Volume Control
Volume Control
- To raise or lower Volume use remote control buttons
VOL- /
VOL+ .
Note: The receiver has 10 Volume levels. Volume may also be adjusted
using the volume control on your TV set.
Mute
- To suppress sound entirely, press the MUTE ( ) button on the remote.
To re-enable sound, press this button once again.
49
User manual
“DTR - 7142”
6.4.- Channel information
Each time you change programs, some information on the new program will
appear for a few seconds.
This same information will appear if you press the INFO button at any point.
If you press it again, while the information window is being displayed,
transponder information will appear (name, frequency, bandwidth, etc) as
also, if available, information on the next program to be shown.
The indication “SUB” on this window shows that the program is subtitled.
The indication “TXT” on this window indicates that the program has a
teletext option.
The indication “A” on this window indicates that the program offers audio in
several languages.
You will also see two bars indicating the quality and intensity level of the
signal received.
6.5.- Favorites List
To access the favorite program list, press button FAV on the remote. The
selected favorite program list will then be displayed.
By pressing the TV/RADIO button you can select the TV or Radio favorites
list.
To select a program, browse the list using the CH+ / CH- buttons and
confirm by pressing OK.
Note: - If there is not any programme assigned to the favourites list, the
message “Favourite channels not available” will appear.
- To leave the favorites list, select a program on the general list.
The method used to create/modify the favorite programs list is explained in
paragraph 12.1.1.- “Program Organizer”.
50
User manual
“DTR - 7142”
6.6.- Audio Menu
Mode selection
- Press the AUDIO button on the remote control to enable the emerging
“Multi-audio” menu.
- Using the buttons /
(Left, Right or Stereo).
you may select the audio configuration mode
- Press button OK to confirm your selection, or else press button EXIT
leaving the menu unchanged.
Language selection
Some channels are broadcast with several audio options. This function
depends on whether the broadcast includes this information in the signal
sent by the operator.
- Press AUDIO on the remote control enabling an emerging “Multi-audio”
menu.
- You may select the audio language from among those available, with
buttons CH+ / CH- (however, if the broadcast is in only one
language, no change is possible).
6.7.- Zoom Function
This function enables you to zoom in or out on the full-screen picture you
are viewing at the moment .
- Each time you press ZOOM button, the zoom factor changes in this
sequence: zoom x2, zoom x3, zoom x4, zoom out 1/2, zoom out 1/3,
zoom out 1/4 and zoom off.
The “zoom x” sequence will gradually blow up the image, while “zoom
out” will progressively shrink it.
- To browse through hidden parts of the blown up image use the buttons
CH+ / CH- and / .
- To exit the Zoom option, press button ZOOM repeatedly up to “Zoom off”.
NOTE: Bear in mind that as you go increasing the zoom factor, the image
quality will progressively deteriorate.
51
ENGLISH
- Press button OK to confirm your selection, or else press button EXIT
leaving the menu unchanged.
User manual
“DTR - 7142”
6.8.- Mosaic function
This function allows to visualize an image mosaic (group of channels)
formed by 9 screens.
- Press the MOSAIC key to activate this option.
- Once the mosaic appears on the screen, you can choose the programme
you wish using the CH+ / CH- and / keys and then press OK.
- Press the EXIT key to return to normal visualization mode.
NOTE: This function does not allow to visualize two programmes at the
same time.
6.9.- Return to previous program
Press button ALT on the remote control to return to the last program you
were viewing
52
User manual
“DTR - 7142”
7.- EPG (Electronic Programming Guide)
The DTR - 7142 receiver provides the EPG function for the user to have
access to the TV (or radio) guide that shows information on the current or next
programs on different channels, such as name, starting and ending times,
plus a brief description, .....
- To view EPG information, press EPG on the remote control while viewing a
program.
- The EPG window corresponding to this program will appear on screen.
- EPG display can be shown in Daily or Weekly mode.
Daily Mode
- This is the default mode.
- In it, the EPG will appear divided into five groups. In the two upper ones are
shown the date, time and day of the week. The center one shows on the left
side the list of available channels and on the right side the starting and
ending times and the names of all of the different programs being broadcast
throughout the day corresponding to the channel that has been selected.
- Press buttons CH+ / CH- to browse up/down both through the channel
list (left) and through the different programs of that day (right). To move
from the channels list to the programs list, you will have to use the
following two buttons / .
- If you click the yellow button on one of the programs on the list, the receiver
will show more detailed information on that program. If the information takes
up more than one page on the screen, use the buttons CH+ / CH- to
browse downwards. To leave this menu, press EXIT.
- By clicking the blue button on one of the programs on the list, a new timer
will be automatically created for that program. The Wakeup Timer menu will
be shown on screen with the data corresponding to the program. Press
button OK to memorize the timer and return to the EPG.
- Finally, at the bottom of the screen an information line will be shown for each
event.
Weekly Mode
- Once the EPG is enabled, by pressing the green button, you fo to the
Weekly mode.
- In this case, the EPG appears distributed into six groups. The difference with
the Daily mode is that instead of the day of the week, the whole week is
shown and each day is divided into hourly bands. The operation mode is the
same as previously.
- To return to Daily mode, press the red button.
To finally leave EPG press button EXIT.
NOTES: The information appearing on the EPG is provided by the service
supplier, so on certain occasions it may not be available.
If the program selected does not supply data for the EPG, the legend
'No information available" will appear.
To programme a recording of a specific event, press the TEXT (blue)
key on the event. This will directly access the alarm menu, where you
must then select the “Recorder” option in the “Wakeup mode”
section, and then confirm by pressing OK.
53
ENGLISH
To obtain further information on how to program an event, see paragraph
12.3.5.- Alarm clock.
User manual
“DTR - 7142”
8.- Teletext / Subtitles
This receiver will enable you to choose among all the Teletext and/or
subtitling options provided by the service supplier.
Teletext
- Press button TEXT on the remote control to enable Teletext and press
OK.
- The teletext services will be displayed in the usual way.
- Even if your TV set does not possess a Teletext decoder, you may view
it on screen, since the receiver generates it automatically.
- The receiver control has colored keys enabling rapid access to Teletext
pages.
- To leave Teletext press button EXIT.
Subtitles
- Press button SUBT on the control to enable subtitles.
- Select the options “Subtitle” or “TXT-Subtitle”, using the buttons / to
show the subtitle text. If you wish to eliminate subtitling, select the “Off”
option.
- Using the buttons CH+ / CH- you can select the language in which
the teletext is displayed (the option is available if the service supplier
provides this information).
- The subtitling services will be visible on the lower part of the screen.
NOTE: Not all service suppliers provide this kind of information.
54
User manual
“DTR - 7142”
9.- Recording programmes
This receiver allows programmes to be recorded in two different ways: in
real time, or by using the “Wakeup Timer” option.
To use this function, you must have an external disk or pen drive in
FAT 32 format or a Memory Card (SD/MS/MMC), which must be
connected before plugging the receiver into the mains.
Important:
For a correct recording, the disk, pendrive or memory card connected to
the receiver must have a storage capacity of minimum 2GB.
- Before starting the recording, press the DEVICE key to show the list of
devices. Select the device using the CH+ / CH- keys, and then press
OK on the device. A confirmation message will be shown.
- The device will indicate you, using color signals, which functions you
can do in the selected disk. If the “Speed” signal is red you can only
read files. If it is yellow, you can record and if the signal is green, you
can run the TimeShift function.
- Press the EXIT key to exit the device list.
Note: Memory cards (SD/MS/MMC) do not support the TimeShift
function.
Real time recording
- Press the REC
key once to record the programme you are currently
- If the signal level drops or disappears during the recording, the message
“REC PAUSE” will be shown on the screen, and the recording will halt.
Recording will begin again once the signal returns.
- To stop recording, press the TEXT
key. A message will be shown
asking you if you want to stop the recording, by selecting YES or NO.
Recording with Wakeup/EPG
- There are two ways of programming a recording, either through the
information of the EPG or directly using the Wakeup option.
- For information on how to create events indicating the start time and
end time for recordings, programme, etc., see section 12.3.5.- Wakeup
Timer Configuration.
Notes: The recordings will be stored in files with a maximum size of 3.8
GB (due to the 4GB limit of the FAT 32 format).
Subtitles will not be available while recording a programme.
55
ENGLISH
watching. The indication “ ” will the shown on the screen, and you will
not be able to access any other programme. If you press this key twice,
you will be able to define how long the recording lasts (15, 30, 45, 60,
75, 90, 105 or 120 minutes), and then confirm using the OK key.
User manual
“DTR - 7142”
10.- TimeShift function
To make this function possible, you must have an external disk or a
pen drive (memory stick) with FAT 32 format, which must be
connected before supplying the receiver.
Memory cards (SD/MS/MMC) do not support this function.
Timeshift is the time that passes between the video in real time and the
video recorded in the hard disk.
- Press the TIMESHIFT key while you are watching a TV programme. The
“TIMESHIFT” indication will appear on the screen. From that moment
on, all the information will be being stored in the receiver´s memory.
- Press the key if you want to stop the image and the key to continue
watching the programme starting at same point where you had stopped.
Use the
/
keys if you want to adjust the time bar to search certain
scenes.
- Press the TEXT
in real time.
key to stop the TimeShift function and return to play
- Before finishing this function, a window will appear asking you if you
wish to save in the disk the recordings from the TimeShift function.
NOTES:- The maximum time assigned to this function will depend on the
size of the external disk connected to the unit.
- During the TimeShift function subtitles and teletext will not be
available.
- During the TimeShift function you cannot change programmes.
You must stop this function before changing them.
56
User manual
“DTR - 7142”
11.- Main Menu
Press button MENU to enable the main menu.
This menu consists of seven sub-menus as shown below.
- Digital TV
- Movie
- Music
- Photo
- Games
- Disk Manager
- Partition-format
Select one of the menu options, using the buttons
press OK to accept.
CH+ /
CH- and
You can also select the sub-menu lines by using the numeral keyboard:
(1 ... 9). All you have to do is type in the desired line number directly.
On the menus that show the indication “ INFO: ¡Operating guide!”, by
pressing the INFO button, an emerging menu will appear, showing the
functions and the keys that may be used on that menu.
ENGLISH
Press button EXIT to leave the previous menu and to finally exit from the
menus.
57
User manual
“DTR - 7142”
12.- Digital TV
12.1.- Program Editing
12.1.1.- Program Organizing
Note: As the radio programs are organized in the same way as the TV
programs, we will only describe the process required for organizing
the TV programs.
To access the General Programs List, press the MENU. button. Select the
options “Digital TV”, “Channel Manager”, and finally “Channel Organizer”.
On this General List, all the programs found during the search will appear.
You can browse through the programs list by using the buttons CH+ /
CH-.
The following options are used for editing the programs:
Favorites
This is the function used to select programs which will form part of the
Favorites List.
Select a program from the list, using the buttons CH+ / CH- and then
press the red button. The programs which are marked for inclusion in the
favorites list will be marked with icon “ ”. To eliminate this mark click the
red button on the program again.
Move
Programs on the list may be repositioned as desired.
You can select a program by using the buttons CH+ / CH-, then you
can press the yellow button, and using buttons CH+ / CH- locate it in
its new position on the list and press OK.
Note: When the LNC is activated, the receiver allows you to change
the programme´s location but keeping its numbering.
Lock
This blocks a selected program which may only be seen through the use
of an access code. The programs that were blocked are shown on the list
with icon “ ”.
Select the program using the buttons CH+ / CH- and press the blue
button to block it. You will then be asked to give a password. To eliminate
the block mark click on the program again with the blue button.
Delete
Select a program from the list by using the buttons CH+ / CH-. If you
wish to totally delete the program selected, press the green button. The
programs that are marked for deletion will be shown with the icon “ ”. To
eliminate the deletion mark, click on the program again with the green
button.
Rename
Select a program from the list by using the buttons CH+ / CH-. Press
button / to enable an emerging keyboard. Create the new name and
press OK.
To save the changes and exit from the editing option, press the EXIT
button.
58
User manual
“DTR - 7142”
12.1.2.- Channel Sorting
There are three ways to organize a program list.
The whole area (by region); All Area, Free (FTA), Scramble; by alphabetical
order (A-Z or Z-A), LCN+ and LCN-.
- Using the buttons CH+ / CH- select the program organizing method
you choose from those available and using buttons
/
select the
parameter for each option.
- Press button OK to confirm your organization choice.
Note: To organise programmes by LCN+/-, this option must be activated.
12.1.3.- Channel Grouping
This option enables you to group the programs by content topic. The
available topics are: None, News, Science, Sports, Movie, Kids, Music and
Fashion.
- Using the buttons CH+ / CH- select the channel you want to include in
a group, then press one of the number keys on the remote from 1 to 8
coinciding with the name of the desired group. The icon of this group will
appear beside the program name.
- Press button EXIT to leave the menu and confirm the grouping action.
NOTE: A program that is grouped on one of these lists will no longer be
available on the general list.
59
ENGLISH
You will view the channels grouped by topic on pressing the LIST button.
User manual
“DTR - 7142”
12.1.4.- Edit Channels
Using this menu you can add new programmes to the list, or modify
features of the existing programmes.
- Press the red button to enter the sub-menu “Add programs”.
- Using the buttons CH+ / CH- you can browse through the parameters
defining the new program.
- Press buttons / to switch to the option ranges for each parameter and
using the buttons CH+ / CH- select the one you wish. Press OK to
confirm.
- Click button / on the parameter “ChannelName”. It will produce an
emerging menu where you can create a name for the program.
- Click the yellow button on a program from the list to edit the parameters
by: Name, PID Audio, PID Video and PID PCR. Press OK to confirm the
changes.
- Press button EXIT to leave the menu.
12.1.5.- Delete All
Using this menu, you can erase the TV or Radio programs.
- Click the OK button on the option “Delete all”. You will be asked to insert
the access PIN code. By default: 0 0 0 0.
- Using the buttons CH+ / CH- select between erasing All TV Programs
and All Radio channels.
- An emerging window will ask you to confirm your decision to erase all
programs. Select YES and press OK to confirm.
- Press button EXIT to leave the menu.
60
User manual
“DTR - 7142”
12.2.- Installation
There are different ways of carrying out the channel search.
12.2.1.- Only FTA/All
- Select the type of search among All (all of the programs found) or Only
Free (only those being broadcast openly).
- To do so, once you have selected the option “FTA/All” press button OK
to accept. You will then access a sub-menu where you can use the
buttons / to choose whether to carry out the FTA Channel search.
- Press button OK to confirm.
12.2.2.- Automatic search
- Select this mode to carry out an automatic search over the whole
receiver input band.
- To do so, once you have selected the option “Automatic Search” press
the button OK to start the search. This will be done over the whole input
bandwidth of your receiver.
- The complete search may take several minutes.
ENGLISH
- If you wish to interrupt the search, press EXIT.
12.2.3.- Manual Search
- Select this mode when you want to search for an individual channel.
- For the purpose, once you have selected the option “Manual Search”
press button OK to accept. You will thus access a sub-menu where you
must indicate if the search will be by Number or by Frequency using the
buttons / .
Number
- Using the buttons / select an available channel using the option
“Channel Name”. Note whether the channel you have selected is a
digital one. You will know this easily if the lower “Quality” bar is
showing an acceptable quality percentage level.
By Frequency
- Using the numerical keyboard enter the frequency to be scanned for in
the option “Freq.(KHz)“.
- Select the appropriate “Bandwidth” from among 6, 7 or 8 MHz using
buttons / .
61
User manual
“DTR - 7142”
- Bear in mind that if these values are not the correct ones, the search will
fail.
- Finally, press button OK to start the search.
You can follow the search process using the indications shown on the TV
screen.
12.2.4.- Range Search
- Select this mode to carry out a selective search between two
frequencies.
- To do so, once you have selected the option “Range Search” press
button OK to accept. You will thus access a sub-menu where you
should indicate both the starting and ending frequencies.
- Select the appropriate Bandwidth among 6, 7 or 8 MHz using buttons
/ .
- Finally, press button OK to start the search.
12.2.5.- LCN Setting
- This option allows the user to enable or disable the channel organization
mode that has been defined by the operator.
- To do so, once you have selected the option “LCN Setting” press
button OK to accept. You will access a sub-menu where you can enable
(on) or disable (off) the automatic organizing mode with buttons / .
- Finally, press button OK to confirm.
12.2.6.- Antenna Setting
- This option allows the user to enable or disable the feed on a potential
aerial amplifier.
- To do so, once you have chosen the option “Antenna Setting” press
button OK to accept. You will thus access a sub-menu in which you
should enable (on) or disable (off) the amplifier feed using buttons / .
Note: If there is no amplifier, you must select the option NO, otherwise
you can damage the adaptor.
- Finally, press button OK to confirm.
62
User manual
“DTR - 7142”
12.3.- Configuration
12.3.1.- OSD (On-Scree Display) Configuration
This is the menu used for personalizing menu configuration.
OSD
This option enables you to change the color of the menu choosing from 5
options.
To do so, using buttons CH+ / CH- locate the cursor on the “OSD”
parameter and with / select the desired option.
Time on OSD
With this option you can show the time on screen.
To do so use buttons CH+ / CH- locating the cursor on parameter
“Time on OSD”, using the / active (on) buttons.
OSD Timeout
This option modifies the time during which the information screen is
displayed.
To use it, with buttons CH+ / CH- locate the cursor on parameter
“OSD Tmiout” and using the
/
select a time between 1 and 6
seconds.
OSD Language
This option enables you to change the language in which the menus are
shown on screen.
To use it, with buttons CH+ / CH- locate the cursor on parameter
“OSD Language”. Using buttons / switch to the list of available
languages and then using buttons CH+ / CH- select the desired
language. Press OK to accept.
MP4 Subtitle Language
This option allows you to modify the language of the subtitles shown on
the screen, if they are transmitted with the signal.
1. Audio Language
This option enables you to switch between different audio languages, if
they are being broadcast with the signal.
To do so, using buttons CH+ / CH- locate the cursor on parameter “1.
Audio Language”. Using buttons / switch to the available language
list and then using buttons CH+ / CH- select the desired language.
Press OK to accept.
2. Audio Language
If the Audio selected as “1. Audio Language” is unavailable, the option
“2. Audio Language” will be automatically selected”.
Finally press button OK to confirm the new parameters.
63
ENGLISH
Transparency of OSD
This option modifies the transparency with which the menus are shown
on screen.
To use it, with buttons CH+ / CH- locate the cursor on parameter
“Transp. of OSD” and with buttons
/
select a percentage of
transparency between 0 and 60%.
User manual
“DTR - 7142”
12.3.2.- TV Configuration
Using this menu, you can configure the parameters of your screen.
Display Mode
Using buttons CH+ / CH- locate the cursor on the parameter “Display
Mode” and with buttons / select the appropriate video standard.
The options are: Automatic, PAL or NTSC. Automatic is the default
configuration.
Aspect Ratio
Using buttons CH+ / CH- locate the cursor on the parameter “Aspect
rartio” and with / select the desired format among 4:3LB, 4:3PS,16:9
or Auto. This option enables the automatic configuration of your screen
depending on the model of your TV set.
Video Output
This option enables you to choose the type of output signal through the
Euroconnector.
To do so, using buttons CH+ / CH- locate the cursor on the “Video
Output” parameter, and with buttons
/ select between RGB and
CVBS. RGB is the default configuration.
Brightness
This option enables you to change picture brightness.
To do so, using buttons CH+ / CH- locate the cursor on parameter
“Brightness”. With / change to the list of values and with buttons
CH+ / CH- select a percentage between 0 and 100%. Press OK to
accept.
Contrast
This option enables you to change picture contrast.
To do so, using buttons CH+ / CH- locate the cursor on parameter
“Contrast”. Using buttons
/
switch to the values list and using
buttons CH+ / CH- select the percentage of contrast between 0 and
100%. Press OK to accept.
HUE
This option enables you to change picture color.
To do so, using buttons CH+ / CH- locate the cursor on parameter
“Color”. Using buttons / switch to the values list and using buttons
CH+ / CH- select the contrast level between -6 and +6. Press OK to
accept.
Saturation
This option enables you to change saturation (tone) of the picture.
To do so, using buttons CH+ / CH- locate the cursor on parameter
“Saturation”. Using buttons / switch to the values list and using
buttons CH+ / CH- select the saturation level between 0 and 12.
Press OK to accept.
Finally press button OK to confirm the changed parameters.
64
User manual
“DTR - 7142”
12.3.3.- System Configuration
Using this menu, you can configure the system parameters.
Equalizer
Using buttons CH+ / CH- locate the cursor on the “Equalizer”
parameter, and using buttons / select the kind of equalizer you desire.
The options are: Standard, Classical, Rock, Jazz or Pop.
Surround
Using buttons CH+ / CH- locate the cursor on the “Surround”
parameter, using buttons / to select the desired effect.
The options are: Off, Concert, Church, Passive and Direct.
Active Antenna
If you are using an active aerial (with amplifier) you should enable this
option to feed the respective amplifier with +5V/100mA. The feeding is
done through the selfsame coaxial cable that is connected to the RF IN
port of the receiver.
To do so, using buttons CH+ / CH- locate the cursor on parameter
“Active antenna” and with buttons / enable (on) the feed process.
If no amplifier is available, you should select the option “Off”,
otherwise the receiver may be damaged.
LCN
This option allows you to enable or disable the LCN Function (Automatic
Channel Organizing).
To do so, using buttons CH+ / CH- locate the cursor on parameter
“LCN” and with buttons / enable (on) or disable (off) this option.
Note: The enabling of this option affects the way in which the receiver
automatically organizes channels when it is carrying out a channel
search.
Area
This option enables the selection of the area or zone where the receiver
will be located.
To do this, using buttons CH+ / CH- locate the cursor on parameter
“Area”. With buttons
/ switch to the zone list, and with buttons
CH+ / CH- select the desired country. Press OK to accept.
Note: The selection of a given area determines default parameters.
Menu Lock
This option allows you to lock the access to the main menu.
To do so, place the cursor on the “Lock Menu” parameter using the CH+ /
CH- keys and activate (on) or deactivate (off) this lock using the / keys.
Note: Once this menu is activated, you will have to enter the PIN code
every time you access the main menu.
Finally, press button OK to confirm the parameters you have changed.
65
ENGLISH
JPEG Effect
This option enables you to give the picture a similar effect to that of
JPEG.
To do so, using buttons CH+ / CH- locate the cursor on parameter
“JPEG Effect”, and with buttons / enable (on) the effect.
User manual
“DTR - 7142”
12.3.4.- Time Configuration
Using this menu, you can configure the way in which the receiver manages
the Time information it receives with the signal.
Timer Mode
Using buttons CH+ / CH- locate the cursor on parameter “Timer
Mode” and using buttons / select the time setting: Automatic or
Manual.
Selecting the Automatic mode will enable you to change the parameters
“GMT Offset” and “Summer Time”.
Selecting the Manual mode will enable you to edit the values
corresponding to “Date” and “Time”.
Date
Using buttons CH+ / CH- locate the cursor on parameter “Date”.
Using buttons / you enable an emerging calendar where the date can
be updated.
Using buttons CH+ / CH- y / select the day on the calendar. If you
select a day which is outside the current month, it will change to the
previous or next month.
Using the red and yellow buttons, select the month.
With the blue and green buttons select the year.
Time
Using buttons CH+ / CH- locate the cursor on parameter “Time”.
Using buttons / the digits corresponding to the hour and minute
values are selected. Using the numerical keyboard enter the correct value
for each digit.
GMT Offset
Using this option, you will be able to indicate the time shift of the
equipment location relative to GMT.
To do so, using buttons CH+ / CH- locate the cursor on parameter
GMT Adjustment. With buttons / switch to the values list and using
buttons CH+ / CH- select the shift desired. Press OK to accept.
Summer Time
This option allows you to enable or disable the summer time function.
For the purpose, using the buttons CH+ / CH- locate the cursor on
parameter “Summer Time” and using buttons / enable (on) or disable
(off) this option.
Finally, press button OK to confirm the change in parameters.
66
User manual
“DTR - 7142”
12.3.5.- Wakeup Timer Configuration
Using this menu you can turn the receiver On/Off at a previously
programmed time.
You can program several events with different execution frequencies (once
daily, weekly, etc... )..
Timer N°
Using buttons CH+ / CH- locate the cursor on parameter “Timer N°”.
Using the buttons / switch to the timer list, and using the buttons
CH+ / CH- select one of the 8 options available. Press OK to accept.
If any one of the timers is enabled, the cursor will self-locate on the next
one available.
Timer Mode
Using buttons CH+ / CH- locate the cursor on parameter “Timer
Mode”. Using the buttons / select one of the options: OFF, Once,
Daily, Weekly or Yearly.
Wakeup Mode
Using buttons CH+ / CH- locate the cursor on parameter “Wakeup
Mode”. Using the buttons / select one of the options: Off (disabled),
Message (shows a message on screen), Program (shows the program
selected), ON (turns the receiver on without a preset turnoff time) or
Recorder (records the selected programme on the external disk or pen
drive).
Wakeup Date
Select the date for enabling the alarm clock.
To do so, using buttons CH+ / CH- locate the cursor on parameter
“Wakeup Date”. Using buttons / a calendar is enabled on which you
should indicate the day. Press OK to accept.
On Time
Indicate the time when the alarm should be activated.
To do so, using buttons CH+ / CH- locate the cursor on parameter
“On Time” and on the numerical keyboard type in the activation time.
Duration
Indicate event duration.
To do so, using buttons CH+ / CH- locate the cursor on parameter
“Duration” and on the numerical keyboard type in the duration of the
event.
Default Partition
Select the disk in which the programme indicated for the alarm clock
mode will be recorded.
Finally press button OK to confirm the change of parameters.
67
ENGLISH
Wakeup Channel
Select the message or channel that will be shown on screen when the
alarm clock is enabled. Depending on the mode set in the previous item,
a message or a channel will be displayed.
To do so, using buttons CH+ / CH- locate the cursor on parameter
“Wakeup Channel”. Then using / select the desired type.
User manual
“DTR - 7142”
12.3.6.- Parental Lock
When your receiver’s password is discovered, or you need to update it for
any reason, this menu will allow you to change your password within the
system.
This will enable you to prevent both undesired manipulation of the system
and access to inappropriate channels.
Changing your PIN Code:
- The plant default PIN Code is 0 0 0 0.
Note: Do not forget your PIN Code.
- To change the PIN code, first enter the current code.
- Then enter the new PIN code.
- Finally re-enter the new PIN code to confirm the operation.
Notes:
- The password is entered using the numerical keyboard (0 ... 9) on the
remote control.
- Parental control affects the system configuration menus and the
programs that are blocked.
- Do not forget your new password. Without it you will not be able to
access the blocked menus and/or programs.
- If you forget your password, get in touch with our technical service.
68
User manual
“DTR - 7142”
12.4.- Software Updating
Download from USB or a Memory Card (SD/MS/MMC)
If you have an updated version of the software and wish to update the
Receiver, proceed as follows.
- Copy the software onto a memory stick (pen drive).
- Connect the memory stick to the Receiver using the USB cable
supplied.
- Select the option “Software Updating” on the Digital TV menu using
buttons CH+ / CH- and press OK.
- Click OK on the option “USB Transfer”.
- Select the software file (.bin) using the buttons CH+ / CH- and press
OK.
- The update process may take a few minutes. Please wait.
Once the software is updated, the receiver will go to the “Installation
Startup” menu.
Download Channel Data
If you have a customized channel list and you want to update the receiver
with it, follow these steps.
- Copy the file onto a pen drive or a Memory Card (SD/MS/MMC).
- Connect the pen drive to the receiver.
- Select the “Software upgrade” option in the Digital TV menu using the
CH+ / CH- keys and press OK.
- Select the channeldata.bin file using the CH+ / CH- keys and press
OK.
Upload Channel Data
If you have a customized channel list in the receiver and you want to save
it, follow these steps.
- Connect a pen drive or a Memory Card (SD/MS/MMC) to the receiver.
- Select the “Software upgrade” option in the Digital TV menu using the
CH+ / CH- keys and press OK.
- Press OK on the “Upload Channel Data” option.
- The channel list will be saved as channeldata.bin in the pen drive.
69
ENGLISH
- Press OK on the “Download Channel Data” option.
User manual
“DTR - 7142”
12.5.- Factory Default
If you wish to return to plant configuration values, you may do so at any
time.
This function will allow you to return to the receiver’s parameters at the
time when it left the plant, deleting any subsequent configuration it might
have been given.
- Select the parameter “Factory Default” using the buttons CH+ / CHand press OK.
- Enter your PIN Code.
- On the emerging confirmation window, you should indicate whether
you wish to restore the plant values (Yes) or leave the current ones in
place (No). Select the desired options using buttons / and press
OK.
Note: When you perform this operation you will be shown the message
“Data base empty” until a channel search is carried out.
12.6.- Information Technology Version
This function enables you to see the software and hardware versions in the
receiver.
- Select the parameter “Version” by using the buttons CH+ / CH- and
press OK.
- You will be shown a screen with the current versions.
- Press the EXIT button to leave this menu and return to the previous
one.
70
User manual
“DTR - 7142”
13.- Movie
This menu allows you to view a video file in MPG, AVI and DivX format from
a USB memory stick or a Memory Card (SD/MS/MMC).
- Select the parameter “Movie” using the buttons CH+ / CH- and
press OK to confirm. This menu can also be accessed directly by
pressing the MOVIE key in normal viewing mode.
- Select the corresponding video file directory, once again doing this by
using the buttons CH+ / CH-. The video files should be reproduced
from the “Movie” menu.
Press OK to accept the file and EXIT to go up one level in the
directory.
- To reproduce a file, select it and press button
OK.
(TV/RADIO) or button
- During the reproduction of a video, the button LIST
allows you to
fast forward the picture, while the button ALT
allows fast picture
rewind, the button skips to the next track, the button skips back to
the previous track, the button PAUSE
pauses the image and the
REPEAT key repeats the file in different ways (one, dir., shuff., off).
- Press the LANG key to select the audio (if the file is .avi).
- Press the GOTO key to skip to a particular position in the time bar. In
the popup window you must insert the value of the time you want to
move to and press OK. This value must be included within the total
time of the file that is being played.
- To stop playing the video at any moment you can press the buttons
TEXT or EXIT.
14.- Music
This menu enables you to listen to audio files in MP3 format from a USB
memory stick, or a Memory Card (SD/MS/MMC) or an MP3 reader.
- Select the parameter “Music” by using the buttons CH+ / CH- and
press OK to confirm.
- Select the directory in which the audio file is located by pressing the
buttons CH+ / CH-. The audio files should be reproduced from the
“Music” menu.
Press OK to accept the file, and EXIT to move upward one level in the
directory.
- To play a file, select it and then press button
OK.
(TV/RADIO) or button
- During the reproduction of a track, the button LIST
will enable you
to fast forward the track, button ALT
will enable the rapid rewind of
the track, the button
skips forward one track, the button
skips
back one track, button PAUSE
halts play and the REPEAT key
repeats the file in different ways (one, dir., shuff., off).
- To stop reproduction at any time, simply press the TEXT
buttons.
71
or EXIT
ENGLISH
Note: Depending on the type of compression used, not all files in AVI and
DivX format can be played.
User manual
“DTR - 7142”
15.- Photos
This menu enables you to play video files in JPEG and BMP format from a
USB memory stick or a Memory Card (SD/MS/MMC).
- Select the parameter “Photos” using the buttons
press OK to confirm.
CH+ /
CH- and
- Select the directory in which the video files are located, for this
purpose using the buttons CH+ / CH-. The video files should be
reproduced from the “Photos” menu.
Press OK to accept the file, and EXIT to go up one of the levels in the
directory.
- In order to sequentially reproduce the files, press the button
(TV/RADIO) or the OK button.
- During image reproduction, the button
will skip to the following
image, button
skips to the previous image, buttons CH+ / CHreverse the image horizontally and vertically, and buttons / rotate
the image by 90º.
- To stop reproduction at any time, press the TEXT
or EXIT buttons.
16.- Games
On this menu, you can choose among one of the three games available on
the Receiver, namely:
- Box Man
- Tetris
- Hit Rat
- Select one of the available games by using the buttons CH+ / CHand press OK to confirm.
- To play, follow the instructions appearing on screen.
- To leave the game at any time, press button OK to stop the game,
select the option “Exit Game” and press OK again.
72
User manual
“DTR - 7142”
17.- Disk Manager
This menu allows you to control the information available in the disk or pen
drive (memory stick) or a Memory Card (SD/MS/MMC).
- Select the “Disk manager” option on the main Menu and press OK.
Then, a list with the files saved in the external disk will appear. If there
is not any file, the message “without file” will appear.
- Press the green key ( ) to select the operation you want to do
between:
Play: plays the selected file,
Delete One: deletes the selected file,
Delete All: deletes all files from the list or
Rename: allows to rename the file using the popup keyboard.
- Select the file using the CH+ / CH- keys and press the OK key to
run the selected option.
- Press the EXIT key to exit this menu.
18.- Partition-Format
In this menu you can format the disk or external disk or a Memory Card
(SD/MS/MMC) to enable them to store information.
- Select the “Partition-Format” option in the main menu and press the
OK key.
- Select the disk you want to format using the CH+ / CH- keys and
press OK to confirm.
- A popup window will ask you to confirm (YES or NO) if you want to
format the disk.
Note: All data available in the external disk will be deleted when you do
this function.
73
ENGLISH
Note: this function will only affect video files.
User manual
“DTR - 7142”
Connector Description
SCART TV out
PIN
TV
1
2
3
4
5
6
7
8
9
10
11
12
13
14
15
16
17
18
19
20
21
Audio outlet (R)
N/A
Audio outlet (L)
Grounding audio
Grounding blue
N/A
Outlet blue
Switch voltage
Grounding green
N/A
Outlet green
N/A
Grounding red
“Fast Blanking” grounding
Outlet red
“Fast Blanking” outlet
Grounding Video
Grounding Video
Outlet Video
N/A
Grounding
20
21
74
18
19
16
17
14
15
12
13
10
1
9
8
4
6
7
5
2
3
1
User manual
“DTR - 7142”
Glossary of Terminology
The following is a short and simple explanation of the meanings of some terms and acronyms used throughout this User’s
Manual.
• DVB :
Digital Video Broadcasting.
A consortium formed by different international organizations and firms whose purpose is to set
worldwide standards for the development of digital television.
• EPG :
Electronic Programme Guide
A guide that provides the user with a listing of events that will be broadcast in each of the programs, the
time when they will be aired and the description of their content.
• Fast Blanking :
A signal sent by SCART, controlling the RGB status of the TV set.
• FTA :
Free To Air
Open (non-coded) broadcast programs.
• Letterbox :
One of the display modes for 4:3 ratio TV sets of programs broadcast in 16:9 ratio.
Two black bands appear on the top and bottom of the screen to create a window with the ratio that is
needed.
• LCN :
Automatic Channel Ordering
As long as this function is enabled, the Adaptor orders the channels found according to the operator’s
pre-determined listing.
• MPEG 2 :
Family of audio-visual compression standards used by the DVB.
• OSD :
On Screen Display.
• VCR :
ENGLISH
A system of onscreen menus.
Video Casette Recorder.
A home video machine.
• COFDM :
Coded Orthogonal Frequency Division Multiplexing
COFDM modulation technology enables more reliable and robust digital transmission than its analog
predecessors, since stable transmissions are possible in urban contexts even when no direct line of
vision exists between aerials. Its basic function is the division of the digital data frame to be
transmitted among multiple narrow carriers that occupy the whole available band width, and the
increased length of transmission time for each symbol, including a safety interval.
• USB :
Universal Serial Bus
Standard for the connection of peripheral.
75
User manual
“DTR - 7142”
Menu Structure
Channel Organizer
Channel Manager
Installation
Fav, Mov, Lock, Del
Channel Sorting
Area, All, LCN
Channel Grouping
News, Science, Movie, ...
Edit Channels
Add, Edit
Delete All
TV, Radio Channels
FTA/ALL
FTA/ALL
Area Search
Start
Manual Search
Number, Frequency
Range Search
Start/End Freq, BW
LCN Setting
On/Off
Antenna Setting
On/Off
OSD
theme, time, lang ....
Digital TV
Configuration
TV
Mode, video, color ...
System Setup
EQ setup, LCN, Area, ...
Time
Mode, GMT, Summer t.
Wakeup Timer
Nº, mode, date, time ...
Parental Lock
Change password
Download from USB
Download Channel dat
Software Upgrade
Upload Channel data
Factory Default
Reset
Version
HW, SW, Data
Movie
MPG, AVI, DivX
Music
MP3
Fhoto
JPEG, BMP
Games
Box Man, Tetris, Hit Rat
Native Games
Disk Manager
Play/Delete/Rename
Partition-Format
Format
76
User manual
“DTR - 7142”
Technical Features
170...230 MHz and 470...862MHz
CEI
75 Ohms
IEC
PAL B/G, SECAM, NTSC
6, 7, 8 MHz
CODFM 2k/8k
5V/100mA
MPEG II, ISO/IEC 13818-1
Video Decoding:
Video compression
Video Standard
Image
Format
MPEG-2 Compatible MP@ML (Main profile @ main level)
PAL / NTSC
720 pixels x 576 lines / 724 pixels x 480 lines
4:3 Letterbox / 4:3 Pan Scan / 16:9 / Auto
Audio Decoding:
Compression
Audio Mode
Frequency sample
MPEG-2 Layer I & II
Dual (main/sub), Stereo
32KHz, 44.1KHz, 48KHz
Audio Parameters:
Analog Output:
Output level
Output impedance
THD
0.5 rms (nominal)
600 Ohms
>60dB (1KHz)
Video Parameters:
SCART Output
CVBS Output level
RED Output level
GREEN Output leve
BLUE Output level:
1 Vpp / 75 Ohms
0.7 Vpp / 75 Ohms
0.7 Vpp / 75 Ohms
0.7 Vpp / 75 Ohms
Tele-text:
Tele-text
Standard ETS 300 472
SCART Connector:
Output SCART TV:
CVBS and RGB
Interface:
USB type
USB port
Card reader
Mini USB
1.1/2.0
SD/MS/MMC
Mains:
Mains power:
DVB-T powering:
USB powering:
Max. power consumed:
Stand-by:
100 - 250V~ 50/60 HZ
12V (1,5A)
5V (5 W)
6,5 W
<1 W
General:
EPG
Timer
OSD Language
Temperature
Humidity
Dimensions (L x W x H):
Weight:
ENGLISH
DVB-T Receiver:
Input frequencies
Input Connector
Impedance
Output Connector
Video System
Filter
Demodulation
Aerial feed
De-Multiplexing
Current events, future events and those prior to the selected program
8 events, up to one year ahead of time
English, French, German, Italian, Spanish, Swedish, Portuguese, Finnish, Dutch, Turkish, Czech, Greek
and Danish
+15 ºC....+35 ºC
<80%
240mm x 115mm x 36mm
300 grs.
77
User manual
“DTR - 7142”
Guarantee
Televés S.A. offers a two year guarantee, beginning from the date of purchase for countries in the EU. For countries that are not part of the
EU, the legal guarantee that is in force at the time of purchase is applied. Keep the purchase invoice to determine this date.
During the guarantee period, Televés S.A. complies with the guarantee by repairing or substituting the faulty equipment.
The harm produced by improper usage, wear and tear, manipulation by a third party, catastrophes or any other cause beyond the control of
Televés S.A. is not included in the guarantee.
Disposal of Old Electrical & Electronic Equipment
(Applicable in the European Union and other European countries with separate collection systems).
This symbol on the product or on its packaging indicates that this product shall not be treated as household
waste. Instead it shall be handed over to the applicable collection point for the recycling of electrical and
electronic equipment. By ensuring this product is disposed of correctly, you will help prevent potential negative
consequences for the environment and human health, which could otherwise be caused by inappropriate waste
handling of this product. The recycling of materials will help to conserve natural resources. For more detailed
information about recycling of this product, please contact your local city office, your household waste disposal
service or the shop where you purchased the product.
78
“DTR - 7142”
79
RED COMERCIAL - COMMERCIAL NETWORK
UNITED KINGDOM
FRANCE
GERMANY
TELEVES (UK) Ltd.
11 Hill Street Industrial Estate
Cwmbran, Gwent NP44 7PG
UNITED KINGDOM
Telephone: +44 1633 875821
Fax: +44 1633 866311
EMail: [email protected]
TELEVES FRANCE Sarl
1 Rue Louis de Broglie
Parc d'Activités de l'Esplanade
77400 St. Thibault des Vignes
FRANCE
Telephone: +33 1 6035 9210
Fax: +33 1 6035 9040
EMail: [email protected]
PREISNER KOMMUNIKATIONSTECHNIK GmbH
An den Kiesgruben 6, 73240 Wendlingen
DEUTSCHLAND
Telephone: +49 7024 55358
Fax: +49 7024 6295
EMail: [email protected]
CHINA
TELEVES CHINA
Unit 207-208, Building A, No 374
Wukang Rd, Xuhui District
200031 Shanghai
CHINA (P.R.C.)
Telephone: +86 21 6126 7620
Fax: +86 21 6466 6431
EMail: [email protected]
USA
TELEVES USA LLC.
9800 Mount Pyramid Court, Suite 400
80112 Englewood, CO
USA
Telephone : +1 303 256 6767
Fax : +1 303 256 6769
EMail: [email protected]
PORTUGAL
ITALY
MIDDLE EAST
TELEVES ELECTRONICA PORTUGUESA
Via Dr. Francisco Sa Carneiro, Lote 17
Zona Ind. Maia 1 Sector X
4470 Barca-Maia-Oporto
PORTUGAL
Telephone: +351 22 94 78900
Fax: +351 22 94 78900
EMail: [email protected]
TELEVES ITALIA Srl.
Via Liguria 24
2068 Peschiera Borromeo (MI)
ITALIA
Telephone: +39 02 5165 0604
Fax: +39 02 5530 7363
EMail: [email protected]
TELEVES MIDDLE EAST FZE
P.O. Box 17199 Jebel Ali Free Zone
Dubai
UNITED ARAB EMIRATES
Telephone: +971 48 834 344
Fax: +971 48 834 644
EMail: [email protected]
Oficinas Centrales / Head Office
Delegaciones / Subsidiaries
Sucursales / Distributors
Para conocer nuestra red de sucursales en el mundo, le rogamos consulte en nuestra pagina web
Please visit Televés web site to find your nearest Official Distributor
Rúa Benéfica de Conxo, 17
15706 - Santiago de Compostela
ESPAÑA (SPAIN)
Tel: +34 981 52 22 00 - Fax: +34 981 52 22 62
[email protected] - www.televes.com
Miembro de número del
7142_000_ES-UK
Empresa
Registrada
ER 224/1/94