1
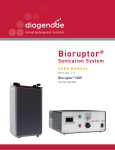
IP-Star Compact
®
Fu l ly A u tomate d S yste m for Epigenet ic A pplicat ion s
USER MANUAL
Cat. No. B03000002
Version 1 I 08.2016
Guarantee
Limited one year global warranty
Diagenode guarantees all products from any manufacturing defects as we rigorously test all products to meet strict
quality standards. Diagenode warrants that all standard components of its instruments will be free of defects in materials
and workmanship for a period of one (1) year from the date that the warranty period begins, unless the original quotation
or accompanying documentation states a different warranty period. All warranty periods begin on the date of delivery
and apply only to the first purchaser of the product. If a manufacturing defect arises and a valid claim is received within
the warranty period, Diagenode, at its discretion, will repair or replace the product in accordance with the warranty
terms and conditions stated herein. In case of repair or replacement of a product under warranty, Diagenode will cover
the expenses to return the repaired or replacement product.
This warranty covers only manufacturing defects and does not cover any damage caused by misuse, lack of compliance
to recommendations stated in the manual, neglect, accidents, abrasion, or exposure to extreme temperatures, chemical
solvents, or acids. We strongly recommend that maintenance or repairs of Diagenode’s products are performed by our
approved Diagenode service center. Improper or incorrectly performed maintenance or repairs will void the warranty.
Technical Assistance & Ordering Information
Diagenode s.a. BELGIUM | EUROPE
Diagenode Inc. USA | NORTH AMERICA
LIEGE SCIENCE PARK
400 Morris Avenue, Suite #101
Rue Bois Saint-Jean, 3
Denville, NJ 07834 - USA
4102 Seraing - Belgium
Tel: +1 862 209-4680
Tel: +32 4 364 20 50
Fax: +1 862 209-4681
Fax: +32 4 364 20 51
[email protected]
[email protected]
[email protected]
[email protected]
For a complete listing of Diagenode’s international distributors, visit:
http://www.diagenode.com/en/support/distributors.php
For the rest of the world, please contact Diagenode s.a.
DIAGENODE SX-8G COMPACT USER MANUAL
PAGE 3
Contents
User Information . . . . . . . . . . . . . . . . . . . . . . . . . . . . . . . . . . . . . . . . . . . . . . . . . . . . . . . . . . . . . . . . . . . . . . . . . . . . 4
Safety Information. . . . . . . . . . . . . . . . . . . . . . . . . . . . . . . . . . . . . . . . . . . . . . . . . . . . . . . . . . . . . . . . . . . . . . . . . . . 5
Specifications. . . . . . . . . . . . . . . . . . . . . . . . . . . . . . . . . . . . . . . . . . . . . . . . . . . . . . . . . . . . . . . . . . . . . . . . . . . . . . . 7
Features . . . . . . . . . . . . . . . . . . . . . . . . . . . . . . . . . . . . . . . . . . . . . . . . . . . . . . . . . . . . . . . . . . . . . . . . . . . . . . . . 7
Performance. . . . . . . . . . . . . . . . . . . . . . . . . . . . . . . . . . . . . . . . . . . . . . . . . . . . . . . . . . . . . . . . . . . . . . . . . . . . . 7
Size, Weight and Power Requirements. . . . . . . . . . . . . . . . . . . . . . . . . . . . . . . . . . . . . . . . . . . . . . . . . . . . . . . . 7
Storage Conditions. . . . . . . . . . . . . . . . . . . . . . . . . . . . . . . . . . . . . . . . . . . . . . . . . . . . . . . . . . . . . . . . . . . . . . . . 8
Transport Conditions. . . . . . . . . . . . . . . . . . . . . . . . . . . . . . . . . . . . . . . . . . . . . . . . . . . . . . . . . . . . . . . . . . . . . . 8
Environmental Requirements. . . . . . . . . . . . . . . . . . . . . . . . . . . . . . . . . . . . . . . . . . . . . . . . . . . . . . . . . . . . . . . 8
About Caution Labels Inside Instrument. . . . . . . . . . . . . . . . . . . . . . . . . . . . . . . . . . . . . . . . . . . . . . . . . . . . . . 9
Caution Label for High Temperature . . . . . . . . . . . . . . . . . . . . . . . . . . . . . . . . . . . . . . . . . . . . . . . . . . . . . 9
Caution Label for Biohazard . . . . . . . . . . . . . . . . . . . . . . . . . . . . . . . . . . . . . . . . . . . . . . . . . . . . . . . . . . . . 9
System Components . . . . . . . . . . . . . . . . . . . . . . . . . . . . . . . . . . . . . . . . . . . . . . . . . . . . . . . . . . . . . . . . . . . . . . . . 10
Front View. . . . . . . . . . . . . . . . . . . . . . . . . . . . . . . . . . . . . . . . . . . . . . . . . . . . . . . . . . . . . . . . . . . . . . . . . . . . . . 10
Right Side View. . . . . . . . . . . . . . . . . . . . . . . . . . . . . . . . . . . . . . . . . . . . . . . . . . . . . . . . . . . . . . . . . . . . . . . . . . 10
Internal Components. . . . . . . . . . . . . . . . . . . . . . . . . . . . . . . . . . . . . . . . . . . . . . . . . . . . . . . . . . . . . . . . . . . . . 11
Installation . . . . . . . . . . . . . . . . . . . . . . . . . . . . . . . . . . . . . . . . . . . . . . . . . . . . . . . . . . . . . . . . . . . . . . . . . . . . . . . . 13
Accessories and Disposables. . . . . . . . . . . . . . . . . . . . . . . . . . . . . . . . . . . . . . . . . . . . . . . . . . . . . . . . . . . . . . . . . 14
Accessories. . . . . . . . . . . . . . . . . . . . . . . . . . . . . . . . . . . . . . . . . . . . . . . . . . . . . . . . . . . . . . . . . . . . . . . . . . . . . 14
Disposables . . . . . . . . . . . . . . . . . . . . . . . . . . . . . . . . . . . . . . . . . . . . . . . . . . . . . . . . . . . . . . . . . . . . . . . . . . . . 15
Disposables delivered by Diagenode. . . . . . . . . . . . . . . . . . . . . . . . . . . . . . . . . . . . . . . . . . . . . . . . . . . . . 15
Reagents. . . . . . . . . . . . . . . . . . . . . . . . . . . . . . . . . . . . . . . . . . . . . . . . . . . . . . . . . . . . . . . . . . . . . . . . . . . . . . . 16
Basic for Hardware Operation. . . . . . . . . . . . . . . . . . . . . . . . . . . . . . . . . . . . . . . . . . . . . . . . . . . . . . . . . . . . . . . . 17
Front Door Operation. . . . . . . . . . . . . . . . . . . . . . . . . . . . . . . . . . . . . . . . . . . . . . . . . . . . . . . . . . . . . . . . . . . . . 17
Putting On and Taking Out Waste Tip Box . . . . . . . . . . . . . . . . . . . . . . . . . . . . . . . . . . . . . . . . . . . . . . . . . . . . 17
Setting Racks and Disposables in Place . . . . . . . . . . . . . . . . . . . . . . . . . . . . . . . . . . . . . . . . . . . . . . . . . . . . . 18
Setting PCR Plate onto Heat/Cool Unit . . . . . . . . . . . . . . . . . . . . . . . . . . . . . . . . . . . . . . . . . . . . . . . . . . . . . . 19
Basic Software Operation for Running Applications. . . . . . . . . . . . . . . . . . . . . . . . . . . . . . . . . . . . . . . . . . . . . . 20
Start Up and Shut Down Procedure. . . . . . . . . . . . . . . . . . . . . . . . . . . . . . . . . . . . . . . . . . . . . . . . . . . . . . . . . 20
Touch Panel Operation. . . . . . . . . . . . . . . . . . . . . . . . . . . . . . . . . . . . . . . . . . . . . . . . . . . . . . . . . . . . . . . . . . . . 20
Running a Protocol. . . . . . . . . . . . . . . . . . . . . . . . . . . . . . . . . . . . . . . . . . . . . . . . . . . . . . . . . . . . . . . . . . . . . . . 21
Maintenance . . . . . . . . . . . . . . . . . . . . . . . . . . . . . . . . . . . . . . . . . . . . . . . . . . . . . . . . . . . . . . . . . . . . . . . . . . . . . . . 27
Cleaning Procedure. . . . . . . . . . . . . . . . . . . . . . . . . . . . . . . . . . . . . . . . . . . . . . . . . . . . . . . . . . . . . . . . . . . . . . 27
Greasing O-rings . . . . . . . . . . . . . . . . . . . . . . . . . . . . . . . . . . . . . . . . . . . . . . . . . . . . . . . . . . . . . . . . . . . . . . . . 28
Troubleshooting. . . . . . . . . . . . . . . . . . . . . . . . . . . . . . . . . . . . . . . . . . . . . . . . . . . . . . . . . . . . . . . . . . . . . . . . . . . . 29
List of Error Codes. . . . . . . . . . . . . . . . . . . . . . . . . . . . . . . . . . . . . . . . . . . . . . . . . . . . . . . . . . . . . . . . . . . . . . . . . . 31
Ordering Information. . . . . . . . . . . . . . . . . . . . . . . . . . . . . . . . . . . . . . . . . . . . . . . . . . . . . . . . . . . . . . . . Back Cover
Diagenode Inc. North America / Phone: +1 862 209-4680 // Fax: +1 862 209-4681 // Mail: [email protected]
PAGE 4
DIAGENODE SX-8G COMPACT USER MANUAL
User Information
Thank you for your purchase of the Diagenode System SX-8G IP-Star® Compact which has been developed for the
automation of different epigenetic applications.
This book is a guide for the user to operate the instrument safety and effectively the instrument.
Please read this book thoroughly to understand the instrument before starting operation. Also keep this book nearby the
instrument a quick reference for all the operators as needed.
• Do not operate the instrument without sufficiently understanding instructions described in this book.
• Always keep this book nearby for easy reference at any time.
Below is a list of the different devices included in the Instrument Package.
No
Description
Quantity
1
SX-8G Compact Main Body
1
2
Grip of Front Door
1
3
96 Tip Rack
4
4
Reagent Reservoir Rack
1
5
Reagent Tip Rack 1
1
6
Reagent Tip Rack 2
1
7
Waste Tip Box
1
8
Waste Chute
1
9
Stylus Pen
1
10
Stylus Pen Holder
1
11
AC240V Power Cable
1
12
AC110V Power Cable
1
13
O-ring
8
14
Silicon Grease
1
15
Fuse
1
16
Users Manual (J, E)
1 ea.
17
Package Check List
1
Remarks
w/ two fixing screws
for 1.5/2.0ml tubes
For O-rings
This book
Europe Diagenode sa / LIEGE SCIENCE PARK // Rue Bois Saint-Jean, 3 // 4102 Seraing (Ougrée) // Belgium // Phone: (+32) 4 364 20 50 // Mail: [email protected]
DIAGENODE SX-8G COMPACT USER MANUAL
PAGE 5
Safety Information
Before using the SX-8G IP-Star® Compact, please read the safety instructions carefully.
Please read this manual thoroughly to understand and to get familiar with preventive maintenance procedures to avoid
any problems in instrument operation.
• Be sure that no water or liquid would get into the instrument or that the instrument does not
get wet. It would cause fire or electric shock.
• Do not attempt disassembling, modifying or repairing by yourself. It may cause malfunction of
instrument or electric shock to you. Ask us for repair or maintenance of the instrument.
Installation
• Choose an adequate place for installing the SX-8G IP-Star® Compact by avoiding :
- Places exposed to direct sunshine
- Places with vibration, high humidity or dust
- Places where strong electric or magnetic fields exist
- Places where liquid or oil could be splashed to the machine
- Places where flammable gas, corrosive gas or high heat source exist.
Damage to or malfunctions of the instrument may be caused by inadequate placement of the system.
Storage
• Unplug power cable from wall outlet when the instrument may not be used for extended period of time.
Precautions for Instrument Operation
• Possibility of biohazard from samples or extracted/purified products could not completely be eliminated in
operating the instrument. Use gloves in operating the instrument for your safety, according to the description
in this book.
• Pay close attention in handling samples with high risk of biohazard.
• When operating the instrument under low environmental temperature, keep the instrument powered on.
• Be sure no foreign materials get into the instrument from outside.
• Do not scratch or press the operation panel using knives or materials with sharp edges.
• Replacement of the fuse shall be made by field service personnel authorized by Diagenode. Contact us for fuse
replacement.
About Warranty Period
• 12 months after installation, regardless of its usage.
• This warranty excludes problems derived from inadequate storage, inadequate usage or operation, repair/
modification/maintenance of the instrument by people who are not authorized by Diagenode, though within
warranty period.
Diagenode Inc. North America / Phone: +1 862 209-4680 // Fax: +1 862 209-4681 // Mail: [email protected]
PAGE 6
DIAGENODE SX-8G COMPACT USER MANUAL
About Disposals
• Contact us when you want to disposal the instrument.
Warning
In case of an emergency
• If an emergency situation of the instrument occurs, such as extraordinary heat, smoking, abnormal smell, etc.,
immediately unplug the power cable from wall outlet to avoid fire or electric shock to you. Please contact us for
technical support.
• If foreign material or water is splashed inside the instrument, immediately unplug the power cable from wall
outlet to avoid fire or electric shock. Please contact us for technical support.
• If power cable becomes damaged (core wire exposed or broken), immediately unplug the power cable from wall
outlet to avoid fire or electric. Please contact us for technical support.
Europe Diagenode sa / LIEGE SCIENCE PARK // Rue Bois Saint-Jean, 3 // 4102 Seraing (Ougrée) // Belgium // Phone: (+32) 4 364 20 50 // Mail: [email protected]
DIAGENODE SX-8G COMPACT USER MANUAL
PAGE 7
Specifications
SX-8G IP-Star® Compact instrument employs MAGTRATION® technology to perform multiple protocols for different
epigenetic applications (i.e. ChIP, MeDIP and MethylCap).
Features
• Full automation of epigenetic applications using Magtration® technology
• Simple operation by dedicated Graphical User Interface
• Compact with minimal installation footprint
• Multiple procedures available for various type of magnetic particle reactions by using special protocol
development software
• Simultaneous processing of up to 8 samples by 8 nozzles
Performance
Instrument type...................................... Desktop
Throughput............................................. Samples --- 1-8 samples/batch
Processing time --- About 30 min./ 1-8 samples
Temperature Control............................. Two Heat/Cool Blocks --- 4-95°C
Handling Volume.................................... 5-200 µl
Dispensing Accuracy............................. 5-10 µl --- less than CV 20%
11-20 µl --- less than CV 10%
21-200 µl --- less than CV 2%
* Accuracy with distilled water at room temperature 20-25°C
Note: Processing Time depends on protocols.
Size, Weight and Power Requirement
Size......................................................... W800xD700xH675mm (disregarding prongs)
Weight..................................................... 97kg (excluding accessories and disposables)
Power Required..................................... Power Required: AC100 ~ 240V, 50/60Hz, 440VA
• Do not share power source with other instruments.
• Do not place close to instruments that emit noise or can cause a power fluctuation.
• Connect power cable to wall outlet with ground line.
Diagenode Inc. North America / Phone: +1 862 209-4680 // Fax: +1 862 209-4681 // Mail: [email protected]
PAGE 8
DIAGENODE SX-8G COMPACT USER MANUAL
Storage Conditions
Temperature........................................... +5 - +40°C
Relative Humidity................................... 15-75% Non-Condensing
Barometric Pressure............................. More than 70kPa(min)
Transport Conditions
Temperature........................................... -25 - +60°C
Relative Humidity................................... 15-75% Non-Condensing
Barometric Pressure............................. More than 70kPa(min)
Environmental Requirements
Temperature........................................... +15 - +30°C
Relative Humidity................................... 15-75% Non-Condensing
Altitude................................................... Up to 2,000 m
Space...................................................... Keep distances from walls as shown below for ventilation, maintenance
work, etc. Also keep more than 200mm space over the instrument.
Wall
More than 200 mm
Wall
More
than
200
mm
Back
SX-8G Compact
More
than
200
mm
Wall
Front
Europe Diagenode sa / LIEGE SCIENCE PARK // Rue Bois Saint-Jean, 3 // 4102 Seraing (Ougrée) // Belgium // Phone: (+32) 4 364 20 50 // Mail: [email protected]
DIAGENODE SX-8G COMPACT USER MANUAL
PAGE 9
• Place the instrument on horizontal surface.
• Do not place the instrument where it will get direct sunlight or vibration.
• When operating instrument in a cold chamber or cold room, keep the instrument power on
to avoid condensation.
About Caution Labels Inside Instrument
Caution Label for High Temperature
The part where this label is attached becomes hot. Be sure not to touch while working.
Caution Label for Biohazard
Place attached: Waste Chute
The part where this label is attached (inside cover) has the possibility of biohazard contamination
with samples or extracted/purified products. Take care to avoid contamination.
Diagenode Inc. North America / Phone: +1 862 209-4680 // Fax: +1 862 209-4681 // Mail: [email protected]
PAGE 10
DIAGENODE SX-8G COMPACT USER MANUAL
System Components
Front View
Power Lamp
Operation Touch Panel
Front Door
Waste Tip Box Access Door
Right Side View
On the right side of the instrument. The Power Switch and Communication Port Connector are located at the front and
Power Inlet Connector and Fuse Unit are located at the back.
Front
Back
Power Inlet Connector
Power Switch
Communication Port
Connector (RS-232C, for
maintenance)
Fuse Unit
Note: Replacement of the fuse shall be made by field service personnel authorized by Diagenode. Contact us for fuse
replacement.
Europe Diagenode sa / LIEGE SCIENCE PARK // Rue Bois Saint-Jean, 3 // 4102 Seraing (Ougrée) // Belgium // Phone: (+32) 4 364 20 50 // Mail: [email protected]
DIAGENODE SX-8G COMPACT USER MANUAL
PAGE 11
Internal Components
The Magtration® Unit and Stage Unit are located inside the instrument.
Magtration® Unit
Heat/Cool Unit
Rack Holder
Waste Chute
Stage
1. Magtration® Unit
• Nozzle Unit: This unit has 8 nozzles to process up to 8 samples simultaneously with accurate and rapid
aspiration/dispensing.
•
agnet: Eight magnets are aligned with 8 tips to simultaneously separate magnetic particles for up to 8
M
samples.
2. Stage
•
eat/Cool Unit
H
Two Heat/Cool Units are equipped and can hold 8 and 12 tubes-stripes. Temperature can be set for 4 to 95°C.
depending on protocols.
• Rack Holder
Racks and Disposables to be used vary by protocols. Refer to Application Manual for details.
• Waste Chute
It leads waste tips and liquid to Waste Tip Box.
Diagenode Inc. North America / Phone: +1 862 209-4680 // Fax: +1 862 209-4681 // Mail: [email protected]
PAGE 12
DIAGENODE SX-8G COMPACT USER MANUAL
Example of loading racks and disposables
Nozzle Unit
Heat/Cool Units
96 Tip Rack
Waste Chute
•
Reagent Tip Rack 1
Microplates
96 Tip Rack: Holds 8x12 pieces of DN70 Tips.
• Reagent Reservoir rack: Holds Reagent Container M or L.
•
Reagent Tip Rack 1: Holds 12 Tips (for single pipetting) and 12 Screw Capped Tubes of 1.5ml or 2.0ml.
• Reagent Tip Rack 2: Holds 8 Tips (for single pipetting), 4 Screw Capped Tubes of
1.5 ml or 2.0 ml and 4 Screw Capped Tubes of 5.0 ml.
• Microtiter Plates: Holds 96 Wells Microplates.
•
Waste Chute: Place where waste tips, etc. are discarded.
Note: The above layout is an example and it could vary depending the protocols.,
Europe Diagenode sa / LIEGE SCIENCE PARK // Rue Bois Saint-Jean, 3 // 4102 Seraing (Ougrée) // Belgium // Phone: (+32) 4 364 20 50 // Mail: [email protected]
DIAGENODE SX-8G COMPACT USER MANUAL
PAGE 13
Installation
Long screw
Short screw
1.Remove protection films attached on the instrument.
2.Open Front Door and fix Grip of Front Door by two screws supplied.
3.Remove the fixing jig for X-Axis Magtration Unit fixed by 3 screws inside instrument.
4.
Remove cushioning and desiccant agents.
5.
Open Right Side Cover by removing 2 fixing screws.
6.Remove Y-Axis fixing jig to right side base by removing 3 fixing screws. Then replace Right Side Cover and fix it by
two screws.
7.
Open Left Side Cover by removing 2 fixing screws.
8.Remove Y-Axis fixing jig to left side base by removing 4 fixing screws. Then replace Left Side Cover and fix it by two
screws.
9.Connect Power Cable to Power Inlet Connector on the right side of the instrument. Then turn Power Switch on
assuring that Front Door and Waste Tip Box Door are closed securely.
Do not use power cable other than provided to avoid issues such as temporary power failure or risk
of fire.
10. Installation completed
When transferring the instrument, make sure that all the fixing jigs for all axes are attached
securely and that cushioning is set between Magtration Unit and Stage Unit to protect nozzles from
free movement.
Diagenode Inc. North America / Phone: +1 862 209-4680 // Fax: +1 862 209-4681 // Mail: [email protected]
PAGE 14
DIAGENODE SX-8G COMPACT USER MANUAL
Accessories and Disposables
Accessories
Description
Quantity
96 Tip Rack
4
Reagent Reservoir Rack
1
Reagent Tip Rack 1
1
Reagent Tip Rack 2
1
Waste Tip Box
1
Waste Chute
1
Stylus Pen
1
Stylus Pen Holder
1
Power Cable, for AC240V
1
Power Cable, for AC110V
1
O-ring
8
Silicon Grease
1
Fuse
1
96 Tip Rack
Reagent Reservoir Rack
It holds Tips up to 8x12 pieces.
It holds up to 8 Medium Reagent
Container, or up to 4 Large Reagent
Container. (Container L is double
sized of Container M.)
It holds 12 Tips (for single pipetting)
and 12 Screw Capped Tubes of
1.5ml or 2.0ml.
Waste Tip Box
Waste Chute
It receives discarded Tips coming
down through Waste Chute.
It leads discarded Tops to Waste Tip
Box.
Reagent Tip Rack 2
(for 1.5/2.0/5.0ml tube)
It holds 8 Tips (for single pipetting),
4 Screw Capped Tubes of 1.5ml or
2.0ml and 4 Screw Capped Tubes of
5.0ml.
Reagent Tip Rack 1
(for 1.5/2.0ml tube)
Europe Diagenode sa / LIEGE SCIENCE PARK // Rue Bois Saint-Jean, 3 // 4102 Seraing (Ougrée) // Belgium // Phone: (+32) 4 364 20 50 // Mail: [email protected]
DIAGENODE SX-8G COMPACT USER MANUAL
Stylus Pen
Stylus Pen Holder
It is used to operate instrument
through Touch Panel. It could also
be used as a ballpoint pen.
It is a holder for Stylus Pen and can
be magnetically attached onto the
instrument surface.
PAGE 15
Disposables
Disposables delivered by Diagenode
Cat. No.
Product Description
Place to be Used
WA-006-0010
Medium Reagent Container for SX-8G Compact
Reagent Reservoir Rack
WA-007-0020
Large Reagent Container for SX-8G Compact
Reagent Reservoir Rack
WC-001-1000
Tips (bulk)
96 Tip Rack, Reagent Tip Rack 1,2
WC-002-0960
Tips (box)
96 Tip Rack, Reagent Tip Rack 1,2
WA-003-0010
96 well microplates
Microplates Module
WA-001-0080
200 µl tube strips (12 tubes/strip) + cap strips
Heat/Cool Units
WA-002-0120
200 µl tube strips (8 tubes/strip)
+ cap strips for SX-8G IP-Star® Compact
Heat/Cool Units
WA-008-0100
2.0 ml screew capped tube
Reagent Tip Rack 1.2
Medium Reagent Container
Large Reagent Container
Tips
Note: Disposables needed vary by application and also disposables other than listed above may be recommended in
some applications.
Diagenode Inc. North America / Phone: +1 862 209-4680 // Fax: +1 862 209-4681 // Mail: [email protected]
PAGE 16
DIAGENODE SX-8G COMPACT USER MANUAL
Reagents
Refer to each Application Manual for reagents to be used and directions for use.
• Do not reuse any disposables/reagents to avoid contamination or instrument malfunction.
• Do not use disposables/reagents other than specified to avoid instrument malfunction.
• When discarding disposables, follow the instructions defined by your facility or regional laws.
Europe Diagenode sa / LIEGE SCIENCE PARK // Rue Bois Saint-Jean, 3 // 4102 Seraing (Ougrée) // Belgium // Phone: (+32) 4 364 20 50 // Mail: [email protected]
DIAGENODE SX-8G COMPACT USER MANUAL
PAGE 17
Basic hardware operation
Front Door Operation
Front Door moves up and down, and it is held at the uppermost position when fully moved up. Hold only the Grip of the
Front Door to open or close the door to avoid fingers getting pinched. Front Door is locked during operation. Open Front
Door after it completely finished its operation.
Gently open and close the access door to avoid damage.
Putting On and Taking Out Waste Tip Box
Waste Chute
Waste Chute can be removed by taking it out from Waste Tip Discard Hole for
cleaning.
Waste Tip Box
Waste Tip Box can be removed for discarding Tips or for cleaning.
Open Front Door first and then open access door for Waste Tip box. Take out
Waste Tip Box by holding its grip.
Make sure that the access door for Waste Tip Box is closed after setting
Waste Tip Box, otherwise you cannot start a protocol run.
Gently open and close the access door to avoid damage, when removing the waste Tip Box.
Diagenode Inc. North America / Phone: +1 862 209-4680 // Fax: +1 862 209-4681 // Mail: [email protected]
DIAGENODE SX-8G COMPACT USER MANUAL
PAGE 18
Setting Racks and Disposables in Place
Setting Racks
Set Racks required by the selected application at each designated position,
taking note of positioning direction.
Be sure to place Racks inside frames completely without uplift.
96 Tip Rack
No positioning
Reagent Reservoir Rack
Position the cut to Spring
Reagent Tip Rack 1
Tubes on front side
Reagent Tip Rack 2
Tubes on front side
• When Racks are not correctly positioned, Tip pickup failure, inaccurate aspiration/dispensing or
instrument malfunction may occur.
• When Reagent Tip Racks 1or 2 are not correctly positioned, Tips will not be picked up resulting
instrument malfunction.
Setting 96 well microplates
Set Microtiter Plates in positions designated by the selected application,
taking care of positioning direction.
1,2,3,...
Cut
A,B,C,...
• When 96 well microplates are not positioned correctly, adequate aspiration/dispensing or liquid
mixing may not be performed resulting inadequate extraction/purification.
• If non-recommended microtiter plates are used, adequate aspiration/dispensing or liquid
mixing may not be performed resulting inadequate extraction/purification.
Europe Diagenode sa / LIEGE SCIENCE PARK // Rue Bois Saint-Jean, 3 // 4102 Seraing (Ougrée) // Belgium // Phone: (+32) 4 364 20 50 // Mail: [email protected]
DIAGENODE SX-8G COMPACT USER MANUAL
PAGE 19
Setting PCR Plate onto Heat/Cool Unit
1,2,3,...
Cut
A,B,C,...
Place PCR Plate on Heat/Cool Unit taking care of the positioning direction and push it down to fit completely.
• When PCR Plate is not positioned correctly, adequate aspiration/dispensing or liquid mixing
may not be performed resulting inadequate extraction/purification.
• If non-recommended PCR plate is used, adequate aspiration/dispensing or liquid mixing may
not be performed resulting inadequate extraction/purification.
Diagenode Inc. North America / Phone: +1 862 209-4680 // Fax: +1 862 209-4681 // Mail: [email protected]
PAGE 20
DIAGENODE SX-8G COMPACT USER MANUAL
Basic Software Operation for
running applications
Start Up and Shut Down Procedure
Start Up
•
lose access door for Waste Tip Box and Front Door.
C
(Refer to sections “7.2 Putting On and Taking Out Waste Tip Box” and “7.1 Front Door Operation.”)
•
Turn on Power Switch located on the right side of the instrument.
•
When the instrument is turned on, the Touch Panel screen is activated.
Shut Down
•
urn instrument power off, making sure that the instrument is not operating.
T
* If it is operating, stop operation by pressing “Protocol Stop” button.
Touch Panel Operation
Using Stylus Pen, select desired function.
• Operate Touch Panel with Stylus Pen gently without excessive force to avoid damage.
• Use only the Stylus Pen provided. Do not to damage the Touch Panel screen by using tools with
sharp edges.
Europe Diagenode sa / LIEGE SCIENCE PARK // Rue Bois Saint-Jean, 3 // 4102 Seraing (Ougrée) // Belgium // Phone: (+32) 4 364 20 50 // Mail: [email protected]
DIAGENODE SX-8G COMPACT USER MANUAL
PAGE 21
Running a protocol
Diagenode Splash Screen – A0
After the software start-up screen disappears, the Diagenode splash
screen is displayed for several seconds, and then disappears.
Start Screen – Top menu
After the Digenode splash screen disappears, the start screen is
displayed. This is the first active window; it allows the user to enter into
three different parts of the software.
USER ACTIONS:
Buttons:
•
Protocols
•
Maintenance
•
Information
Protocols screen
All available protocols are displayed on this screen.
Diagenode Inc. North America / Phone: +1 862 209-4680 // Fax: +1 862 209-4681 // Mail: [email protected]
PAGE 22
DIAGENODE SX-8G COMPACT USER MANUAL
Information screen
After the user presses the “Information” button, the “Information” screen
appears.
Buttons:
•
he user presses the “Back” button to return to the display of
T
the “Top menu” screen they came from.
Screen – [Categories Name] Protocol List
After the user presses the “[Categories Name]” button, the “[Categories
Name]” appears. When selected the protocol on the protocol list, the
“Run” button shall turn executable.
Defined protocol name lists
Buttons:
•
he user presses the “Back” button. Returns the user to the
T
display of the “Protocols” screen they came from.
•
he user presses the “Shutdown” button. Then screen shall be
T
changed to “Power Off”.
•
he user presses the “Run” button. Then screen shall be
T
changed to “Sample number”.
•
Page up the list box.
•
Page down the list box
Screen – Sample number
After the user presses the “Run” button, the “Sample number” appears.
Buttons:
•
he user presses the “Sample number” Text box. Then screen
T
will be changed to keyboard.
•
he user presses the “Back” button. Returns the user to the
T
display of the “Protocol List” screen they came from.
•
he user presses the “Next” button. Then screen shall be
T
changed to “Configuration” or “Layout information”.
Keyboard
Europe Diagenode sa / LIEGE SCIENCE PARK // Rue Bois Saint-Jean, 3 // 4102 Seraing (Ougrée) // Belgium // Phone: (+32) 4 364 20 50 // Mail: [email protected]
DIAGENODE SX-8G COMPACT USER MANUAL
PAGE 23
Screen – Configuration
After the user presses the next button from the “Sample number” screen,
the “Configuration” screen appears.
Buttons:
•
he user presses the “Back” button. Returns the user to the
T
display of the “Protocol List” screen they came from.
•
he user presses the “Next” button. Then screen shall be
T
changed to “Layout information”.
•
he user presses the “Save Parameter” button. Then screen will
T
be changed to “Save Parameter - Confirmation”.
- OK – Current parameters shown in the Display View will
be stored to the [Protocol].ptd. And, returns the user to the
display of the “Configuration” screen.
- No – Returns the user to the display of the “Configuration”
screen.
•
he user presses the Text box. Then screen will be changed to
T
Keyboard or Speed list menu.
Keyboard
Speed list menu
Diagenode Inc. North America / Phone: +1 862 209-4680 // Fax: +1 862 209-4681 // Mail: [email protected]
PAGE 24
DIAGENODE SX-8G COMPACT USER MANUAL
Screen – Layout Information
After the user presses the “next” button from “Sample number” screen or
“Configuration” screen, the “Layout Information” screen appears.
Buttons:
Layout information
•
he user presses the “Back” button. Returns the user to the
T
display of the screen they came from.
•
he user presses the “Next” button. Then screen shall be
T
changed to “Set confirmation”.
•
hen the user presses a block, that block is magnified on the
W
work surface layout background. The magnified view provides a
better display of the correct method setup for that block on the
work surface.
Block-Tip
Block-Regent Buffer
Block-Regent Tip Rack
Block-MTP
Block-PCR Tube
Save Parameter - Confirmation
Europe Diagenode sa / LIEGE SCIENCE PARK // Rue Bois Saint-Jean, 3 // 4102 Seraing (Ougrée) // Belgium // Phone: (+32) 4 364 20 50 // Mail: [email protected]
DIAGENODE SX-8G COMPACT USER MANUAL
PAGE 25
Select a Protocol name
Input value in the
“Sample Number”
Input value in the
“Configuration”
Current Temperature Value
Screen – Set confirmation
After the user presses the “next” button in the “Layout information” screen, the “Set confirmation” screen appears.
At this point, user is expected to be ready to press RUN.
Buttons:
•
The user presses the “Back” button. Returns the user to the display of the screen they came from.
•
he user presses the “Run” button. This is the expected action when user gets to this display after reviewing
T
blocks. Runs the protocol.
Protocol name
Progress Bar
Remaining time
Current Temperature Value
Screen – Running
After the user presses the “Run” button in the “Set confirmation” screen, the “Running” screen appears.
Buttons:
•
The user presses the “Stop” button. Then screen shall be changed to “Stop Dialog”.
Status screen is preferred as a progress bar that moves across the screen as the step progresses
Diagenode Inc. North America / Phone: +1 862 209-4680 // Fax: +1 862 209-4681 // Mail: [email protected]
PAGE 26
DIAGENODE SX-8G COMPACT USER MANUAL
Stop Dialog
Buttons:
•
he user presses the “Stop” button. Then screen will be
T
changed to “Finish” or “End” and stop the protocol
•
he user presses the “Back” button. Returns the user to the
T
display of the screen they came from.
Stop Dialog
Screen – Finish/End
When the protocol is complete, a window appears telling user the run
is over. The screen behind this window should be the Startup screen.
When OK is pressed, then the Startup screen appears and the user can
immediately begin to remove their sample and prepare for the next run.
At this point, user is expected to be ready to press RUN.
Buttons:
•
he user presses the “OK” button. Then screen shall be changed
T
to “[Categories Name] Protocol List”.
Europe Diagenode sa / LIEGE SCIENCE PARK // Rue Bois Saint-Jean, 3 // 4102 Seraing (Ougrée) // Belgium // Phone: (+32) 4 364 20 50 // Mail: [email protected]
DIAGENODE SX-8G COMPACT USER MANUAL
PAGE 27
Maintenance
Item
Frequency
Done by
Cleaning Stage and Racks
After every run
User
Cleaning Magtration Unit
After every run
User
Greasing O-rings
Every two weeks
User
Replacing O-rings
Every 6 months
Field Service
Maintenance
Once a year
Field Service
• Use a mask, goggles and gloves while maintaining the instrument for your safety, according to
the description in this book.
• Maintenance work shall be performed with instrument powered off.
• Pay close attention when cleaning places where caution labels are attached
Note:
• Maintenance work shall be done as indicated, otherwise the results of the protocol runs may not be accurate.
• Certain maintenance will be performed by Diagenode Field Service personnel.
• Stage and Racks should be cleaned after every run.
• Nozzles and Piercing Unit of Magtration Unit should be cleaned after every run.
Cleaning Procedure
• Stage
• Magtration Unit
• All Racks
• Waste Chute
• Waste Tip Box
In addition to the list above, the inside of the instrument and the accessories should be cleaned after each use.
Cleaning Method:
Choose cleaning liquid depending on the contamination status and wipe the contaminated surface using paper, such
as Kim Wipe®, moistened with the cleaning liquid. Use a mask, goggles and gloves when cleaning the instrument for
your safety.
• Water
• 70% Ethanol
Note: Do not use alcohol when cleaning Touch Panel or Clear Panel of Front Door. Use water for those parts.
Diagenode Inc. North America / Phone: +1 862 209-4680 // Fax: +1 862 209-4681 // Mail: [email protected]
PAGE 28
DIAGENODE SX-8G COMPACT USER MANUAL
Greasing O-rings
Grease O-rings every two weeks to maintain proper tip attachùent and avoid liquid leakage.
1. Remove old grease.
2. Wear gloves and put small
amount of Silicon Grease on the
fingertip. Then spread Silicon
Grease on fingertips by rubbing
fingertips together.
3. Put Silicon Grease on O-rings (black rubber rings) on Nozzles.
4. Place a tip on the nozzle to spread
the grease evenly around the O-ring.
Be sure not to put an excess of Silicon Grease, as it may result insufficient tip-discard.
Europe Diagenode sa / LIEGE SCIENCE PARK // Rue Bois Saint-Jean, 3 // 4102 Seraing (Ougrée) // Belgium // Phone: (+32) 4 364 20 50 // Mail: [email protected]
DIAGENODE SX-8G COMPACT USER MANUAL
PAGE 29
Troubleshooting
Error Reported During Protocol Run
Error code reported is shown in place of “xxxxx” in the above screen. And
the corresponding error message is displayed under the code.
The protocol run aborted by an error can not be restarted from the point of abortion.
• (Refer to the “List of Error Codes” for error codes.)
• The screen shown above is displayed and the instrument aborts its operation, when an error occurred during a
protocol run.
• Take appropriate countermeasures for the error, referring to List of Error Codes attached.
• Make note of the error code reported, because it is requested when contacting Diagenode for technical
support.
Note: Repeat the same countermeasure when the same error occurred in the next run of the protocol. Contact Diagenode
when countermeasure taken does not resolve the problem.
Suspending or Aborting Protocol Run
• When you want to suspend a protocol run operation, select “Suspend” button in the display to suspend instrument
operation. It may take some time before suspending its operation, depending on the process under execution.
• Select “START” button to restart and continue the protocol run.
• When you want to abort the protocol run, select “STOP” button. And “Protocol Select” screen is displayed.
The aborted protocol can not be restarted anymore.
Diagenode Inc. North America / Phone: +1 862 209-4680 // Fax: +1 862 209-4681 // Mail: [email protected]
PAGE 30
DIAGENODE SX-8G COMPACT USER MANUAL
Troubleshooting guide
Problem
Power is not supplied to
instrument
Presumable Cause
Countermeasures To Be Taken
AC Power Cable is not connected
properly.
Check connection of AC Power Cable. Be sure to use
Power Cable supplied with instrument.
* Do not use power cable other than supplied.
Fuse is burned out.
Contact Diagenode if fuse needs to be replaced.
Displayed characters are not
readable.
Light intensity is low.
Adjust light intensity properly by rotating the screw located
on the right of Display with flat-blade screwdriver.
Error code is displayed
Causes vary by error code.
Record the error code displayed and take appropriate
countermeasure, referring to List of Error Codes. If the
countermeasure taken does not eliminate the problem,
contact Diagenode for assistance.
Protocol was started with
incomplete setting of Tips or
other disposable.
-
Be sure to confirm appropriate setting of reagents and
disposables, before starting protocol run.
If you want to add disposables after protocol started,
press “STOP” to abort instrument operation. It is strongly
recommended to restart the protocol run from the
beginning after completion of adding disposables.
If you want to continue the protocol run from halted point
after adding disposables, you will be responsible for the
result.
* When Front Door is opened after halting operation,
power to the motors is shut by safeguard, resulting
displacement of stopping positions of motors.
Liquid leakage from Tip-end
or big difference in liquid level
among lanes.
O-rings are not greased enough or
O-rings are deteriorated.
Grease O-rings properly or replace O-rings.
It is recommended that replacement of O-rings is made by
an appropriately trained Field Service Personnel, to avoid
damage of the nozzles.
* If you replace O-rings by yourself, you will be responsible
for the result.
Disposables are not set properly.
Check for proper setting of Mictotiter Plates, PCR Plates,
etc.
Note that using disposables other than recommended may
cause instrument malfunction.
It is strongly recommended to use those disposables
designated for the protocol.
Europe Diagenode sa / LIEGE SCIENCE PARK // Rue Bois Saint-Jean, 3 // 4102 Seraing (Ougrée) // Belgium // Phone: (+32) 4 364 20 50 // Mail: [email protected]
DIAGENODE SX-8G COMPACT USER MANUAL
PAGE 31
List of Error Codes
Code No.
Message
Description
200007
Axis:Z bottom sensor
Z Bottom Sensor was activated.
200008
Axis:Endlimit error
Axis other than Z was moved beyond
its movable range.
200001
Axis:error
Error other than errors described
above.
Countermeasure to be taken
Check the position of the module
corresponding to the error reported
and remove the obstruction caused
the error. Then home all axes.
Protocol run shall be restarted from
the beginning, after replacing all
disposables needed.
Note:
• The errors listed above are usually caused by inadequate setting of disposables/accessories or if the door is
not shut properly. Be sure to check the placement of accessories/disposables and the door before restarting
protocol run.
• If there are error codes other than the codes listed above or the error could not be eliminated by performing the
countermeasure described, contact Diagenode with recording the error codes.
Diagenode Inc. North America / Phone: +1 862 209-4680 // Fax: +1 862 209-4681 // Mail: [email protected]
Ordering information
Description
IP-Star Compact
®
Cat. No.
Format
B03000002
1 unit
Visit us at one of Diagenode’s demo sites or discover our
Automated Systems by performing some assays with the help of
our R&D and Technical Department.
www.diagenode.com
Diagenode s.a. BELGIUM | EUROPE
LIEGE SCIENCE PARK
Rue Bois Saint-Jean, 3
4102 Seraing, Belgium
Tel: +32 4 364 20 50
Fax: +32 4 364 20 51
[email protected]
[email protected]
Diagenode Inc. USA | NORTH AMERICA
400 Morris Avenue, Suite 101
Denville, NJ 07834 USA
Tel: +1 862 209-4680
Fax: +1 862 209-4681
[email protected]
[email protected]
For a complete listing of Diagenode’s
international distributors visit:
http://www.diagenode.com/pages/distributors.html
For rest of the world, please contact Diagenode s.a.