1
USER MANUAL
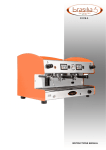
MULTICOFFEE
MULTICOFFEE
MULTICOFFEE
MULTICOFFEE
BONILLA
CAREFULLY READ THE INSTRUCTIONS
BRASILIA S.p.A. - Strada Provinciale Bressana-Salice - 27050 Retorbido (Pv) Italy
Tel.+39.0383.372011 - Fax +39.0383.374450
www.brasilia.it - [email protected]
INDEX
1. GENERAL DATA ...............................................................................................................................................................3
2. SAFETY ..............................................................................................................................................................................4
3. DEFINITION........................................................................................................................................................................4
4. PARTS IDENTIFICATION ..................................................................................................................................................5
4.a. EXTERIOR PARTS .....................................................................................................................................................5
4.b. INTERIOR PARTS - Front view.................................................................................................................................6
4.c. INTERIOR PARTS - Rear view ..................................................................................................................................7
4.d. KEYPAD DESCRIPTION...........................................................................................................................................8
5. OPERATING PROCEDURES ............................................................................................................................................9
5.a. PRODUCTS REFILL...................................................................................................................................................9
5.b. HOW TO SWITCH ON THE MACHINE......................................................................................................................9
5.c. BEVERAGES DELIVERY DESCRIPTION ...............................................................................................................10
6. CLEANING PROCEDURES.............................................................................................................................................12
6.a. DAILY CLEANING PROCEDURES .........................................................................................................................12
6.b. WEEKLY CLEANING PROCEDURES.....................................................................................................................13
6.c. SHORT MIXING CHAMBERS FLUSHING...............................................................................................................15
6.d. BASIC HYGIENE ......................................................................................................................................................15
7. TROUBLESHOOTING GUIDE.........................................................................................................................................16
8. MAINTENANCE ...............................................................................................................................................................18
9. DISMANTLING .................................................................................................................................................................19
REV.0 28/11/2007
P. 2
1. GENERAL DATA
MANUFACTURER:
BRASILIA S.p.A.
Strada Provinciale Bressana - Salice
27050 Retorbido (PV) Italy
Tel. + 39.383.372011 - Fax + 39.383.374450
www.brasilia.it - [email protected]
MODEL:
BONILLA
VERSIONS:
1000 - 1144 - 1150
SERVICE AGENT’S STAMP:
REVISIONS LIST:
Rev. N.
Date
0
28/11/2007
REV.0 28/11/2007
Notes
DOCUMENT ISSUE
P. 3
2. SAFETY
We, at BRASILIA, are committed to manufacturing safe operating and serviceable equipment. The many
built-in safety features that are part of all BRASILIA equipment are aimed at protecting operators and
trained service technicians alike.
You must follow the following rules:
• DO NOT operate machine without reading all information given in this manual. Failure to follow this instruction may
result in equipment damage, poor machine performance, health hazards, or personal injury.
• DO NOT operate the machine without complying with all local the safety regulations in force in your country of
installation as well as all the rules dictated by common sense, and ensure that routine maintenance is carried out
regularly and correctly.
• DO NOT operate machine unless it is properly grounded. Failure to follow this instruction may result in electrocution.
• DO NOT attempt any repairs. Failure to do so may result in electrocution. Contact your authorized service agent for
service.
• DO NOT replace or remove safety instructions and technical data for proper and safe installation and operation, as
affixed to machine.
• DO NOT touch dispensing spouts with unclean hands or other parts of the body.
• DO NOT touch the spouts during brewing cycle. The liquids are hot and may cause burns.
• DO NOT touch the keys during brewing cycle.
• DO NOT try to remove any mechanical parts from machine. Contact your local authorized Service Agent/technician.
• DO NOT pull electric power cord to disconnect machine from the wall socket.
• DO NOT allow machine to be used by children or incapable persons.
• DO NOT expose machine to outdoor environment (sun, rain, snow, etc.).
• DO NOT operate machine unless all service panels and access door are restrained by screws.
• DO NOT insert spoons, forks or any other utensil into beans hopper or premix canisters
• DO NOT operate machine without water supply.
• DO NOT obstruct any air intake or exhaust openings: 4” (10 cm) minimum air space behind the machine and 2” (5 cm)
space on either side.
• DO use only coffee beans, never use coffee powder.
• DO use only filtered and treated fresh water, or pure drinking water (Hardness approx. 7 french degrees).
• DO carry out recommended daily and weekly cleaning procedures.
• DO ensure maintenance procedures are done on schedule (see MAINTENANCE CHECK LIST).
• CANISTERS:
- CHECK that canisters are filled with cocoa premix, dairy whitener and tea premix.
- USE only dairy whitener, never use liquid milk.
• CLEANING:
- DO NOT use water sprayers or pressurized water jets to clean machine.
- DO NOT use detergents containing perfumes, alcohol or ammonia either directly or indirectly (damp cloth) to clean
machine.
- USE only disinfecting detergents suitable for crockery.
- Chemical-based detergents used for cleaning machine and/or the system should be used with care so as not to
deteriorate any components or cause damage to environment when discarded.
- CAUTION: Improper maintenance and cleaning, use of unfiltered water, or damage to internal parts may cause possible
blockages in water flow leading to unexpected jets of hot liquid or steam. This may cause serious injury. Use caution
while washing and servicing machine! Clean and service the machine ONLY when boiler contents are cold.
3. DEFINITION
• Fully automatic coffee and premix based beverages dispensing machine, electronically controlled by microprocessor
through printed circuit board.
• Coffee is brewed automatically. Premix powders automatically dispense as required and mix with hot water before
delivery into the cup. Beverage size (volume) and temperature are electronically adjustable.
• Three canisters for premix powders – One coffee beans hopper.
• Professional grinder with flat grindstones (Ø 64 mm).
• Boiler controls deliver hot water to an optimal temperature, preventing thermal imbalances within system.
• Heat source provided by an electric heating element in boiler.
• Water pressure held stable by a vibration pump, with an internal safety by-pass system.
REV.0 28/11/2007
P. 4
4. PARTS IDENTIFICATION
4.a. EXTERIOR PARTS
ITEMS
QTY.
FUNCTION
1 - POWER CORD
2 - LEFT PANEL
3 - COFFEE BEAN HOPPER
4 - REAR ACCESS PANEL
5 - RIGHT PANEL
1
1
1
1
1
6 - TOP CANISTERS
7 - PANEL KEYPAD
8 - FRONT DOOR
9 - SPOUT HOUSING
10 - CUP REST UNIT
1
1
1
1
1
11 - DRIP TRAY GRILL
12 - DRIP TRAY
13 - ESPRESSO CUP REST
1
1
1
CONNECTS MACHINE TO MAIN GROUNDED POWER SUPPLY.
PROVIDES LEFT ACCESS TO INTERNAL PARTS, I.E. GRINDER, BREWER.
CONTAINS COFFEE BEANS: CAPACITY ~1KG.
PROVIDES ACCESS TO MOTHERBOARD.
PROVIDES RIGHT ACCESS TO THE INTERNAL PARTS, I.E. BOILER(S) AND
ELECTRONICS.
PROVIDES ACCESS TO PREMIX CANISTERS.
BEVERAGES SELECTION AND MACHINE FUNCTION/TIMING PROGRAMMING.
PROVIDES FRONT ACCESS TO INTERNAL PARTS.
DISPENSING NOZZLE PROTECTION.
GRID WITH ROTATIONAL MOVEMENT TO POSITION DIFFERENT MEASURES OF CUPS
CORRECTLY.
TO EFFICIENCY DRAIN WATER INTO DRIP TRAY.
TO HOLD SPILLED LIQUIDS.
TO POSITION ESPRESSO CUP CORRECTLY.
FOR ITEM CODE SEE “SECT.C EXPLODED VIEW”
REV.0 28/11/2007
P. 5
4.b. INTERIOR PARTS - Front view
ITEMS
QTY.
1 - COFFEE GRINDER
2 - MECHANICAL GROUP
1
1
3 - GEAR MOTOR FOR AUGER
4 - CANISTER
5 - MIXER ASSEMBLY
MIXER ASSEMBLY
6 - WASTE DRAWER
3
3
1
1
1
FUNCTION
GRINDS COFFEE BEANS.
BREWING PROCESS FOR COFFEE.
NOTE:
• Group dia.44: Machine Types 1144
• Group dia.50: Machine Types 1150
PREMIXES METERING.
CONTAINS PREMIXES.
MIXES PREMIX POWDERS WITH HOT WATER
MIXES PREMIX POWDERS WITH HOT WATER
COFFEE WASTE RECEPTACLE
FOR ITEM CODE SEE “SECT.C EXPLODED VIEW”
REV.0 28/11/2007
P. 6
4.c. INTERIOR PARTS - Rear view
ITEMS
QTY.
FUNCTION
1 - MOTHERBOARD
1
2 - HOLES FOR FAN
2
3 - BOILER(S) MODULE LOCATION
1
4 - ON-OFF SWITCH
1
ELECTRONICS CIRCUIT BOARD CONTROLS ALL OPERATING
FUNCTIONS.
FAN: REMOVES STEAM-INDUCED HUMIDITY FROM INTERIOR
OF MACHINE.
BOILER(S): PROVIDES HOT WATER FOR COFFEE AND/OR
PREMIXES.
NOTE:
• 1 Boiler: Machine Types 1000
• 2 Boilers: Machine Types 1144 – 1150
SWITCHES MACHINE ON AND OFF.
FOR ITEM CODE SEE “SECT.C EXPLODED VIEW”
REV.0 28/11/2007
P. 7
4.d. KEYPAD DESCRIPTION
The keypad shown below is an indicative example.
DISPLAY
ESPRESSO: Push once for Espresso
AMERICANO: Push once for Americano
CAPPUCCINO: Push once for Cappuccino
MOCCACCINO: Push once for Coffee with Chocolate and Frothed milk
LATTE: Push once for Milk with Coffee
HOT CHOCOLATE: Push once for Hot Chocolate
CHOCOCINO: Push once for Coffee with Chocolate and Milk
TEA: Push once for Hot tea
MILK TEA: Push once for Hot tea with Milk
CLEANING: Push button for the automatic cleaning cycle
STOP: Push once to STOP beverage dispensing
REV.0 28/11/2007
P. 8
5. OPERATING PROCEDURES
5.a. PRODUCTS REFILL
Fill coffee hopper with coffee beans (See Pict.1), unscrew the fixing knob under the canisters covering (See arrow –
Pict.1) and fill canisters with the right premix (A label indicating the right product to fill in is stuck on each canister).
Notes:
• Before filling coffee hopper with coffee beans make sure that the coffee hopper is closed by pushing the lower gatebracket (Pict.2 – A).
Once the coffee hopper has been filled make sure to open lower gate-bracket again.
• Use only coffee beans, never use coffee powder.
• The level of beans in hopper should be maintained at the maximum, to leave minimum air gap.
Pict.2
Pict.1
A
5.b. HOW TO SWITCH ON THE MACHINE
Pict.3
Switch machine on by lifting ON/OFF switch lever, located in the lower backside
of the machine, upwards (Pict.3).
• LCD display momentarily shows software and release version: “MP0217DA
r.XXX”
• After a few seconds display shows: “Warming Wait”
• When machine reached the right temperature, display shows: “Ready”
• The machine is now ready to work.
ADVICE: One Automatic cleaning cycle, without sanitizing
recommended (See “6.A DAILY CLEANING PROCEDURES” p.17).
CAUTION! HOT LIQUID!
REV.0 28/11/2007
tablet,
is
P. 9
5.c. BEVERAGES DELIVERY DESCRIPTION
CAUTION! HOT LIQUID!
Product 1 - ESPRESSO:
a - Check that hopper contains coffee beans.
b - Place cup under delivery spout.
c - Push the button "ESPRESSO"
d – LCD display shows: “Delivery Wait”
• When delivery is completed, display shows: “Ready”
Product 2 - AMERICANO:
a - Check that hopper contains coffee beans.
b - Place cup under delivery spout.
c - Push the button "AMERICANO"
d – LCD display shows: “Delivery Wait”
• When delivery is completed, display shows: “Ready”
Product 3 - CAPPUCCINO:
a - Check that canister contains dairy whitener and that hopper contains coffee beans.
b - Place cup under delivery spout.
c - Push the button "CAPPUCCINO"
d – LCD display shows: “Delivery Wait”
• When delivery is completed, display shows: “Ready”
Product 4 - MOCCACCINO:
a - Check that canister contains cocoa premix and hopper contains coffee beans.
b - Place cup under delivery spout.
c - Push the button "MOCCACCINO"
d – LCD display shows: “Delivery Wait”
• When delivery is completed, display shows: “Ready”
Product 5 - LATTE:
a - Check that canister contains dairy whitener and that hopper contains coffee beans.
b - Place cup under delivery spout.
c - Push the button "LATTE"
d – LCD display shows: “Delivery Wait”
• When delivery is completed, display shows: “Ready”
Product 6 – HOT CHOCOLATE:
a - Check that canister contains cocoa premix.
b - Place cup under delivery spout.
c - Push the button "HOT CHOCOLATE"
d – LCD display shows: “Delivery Wait”
• When delivery is completed, display shows: “Ready”
Product 7 - CHOCOCINO:
a - Check that canisters contain cocoa premix and dairy whitener and hopper contains coffee beans.
b - Place cup under delivery spout.
c - Push the button " CHOCOCINO "
d – LCD display shows: “Delivery Wait”
• When delivery is completed, display shows: “Ready”
REV.0 28/11/2007
P. 10
Product 8 – TEA:
a - Check that canister contains tea premix.
b - Place cup under delivery spout.
c - Push the button "TEA"
d – LCD display shows: “Delivery Wait”
• When delivery is completed, display shows: “Ready”
Product 9 – MILK TEA:
a - Check that canisters contains tea premix and dairy whitener.
b - Place cup under delivery spout.
c - Push the button "MILK TEA"
d – LCD display shows: “Delivery Wait”
• When delivery is completed, display shows: “Ready”
OPTIONS:
Other products or blank buttons (Additional Products):
Choose from variants and proceed as for other beverages. Contact your authorized Service Agent to set Programming for
proper ingredients dispensing and timing cycle.
Buttons LARGE and EXTRA LARGE beverage size:
a - To deliver a large or extra large beverage, first press "LARGE" or "EXTRA LARGE" (LARGE UP TO: 250ml / 8oz EXTRA LARGE UP TO: 300ml / 10oz) before selecting the beverage key (1 / 8 above).
b – LCD display shows: “Preselection L” or “Preselection XL”
c - Push of chosen beverage key (ex."CAPPUCCINO")
d – LCD display shows: “Delivery Wait”
• When delivery is completed display will show: “Ready”
REV.0 28/11/2007
P. 11
6. CLEANING PROCEDURES
Cleaning procedures are necessary for correct operation of machine and to guarantee HIGHEST quality of dispensed
products.
6.a. DAILY CLEANING PROCEDURES
Daily cleaning must be done at the end of business hours.
• DO NOT use water sprayers or pressurized water jets to clean machine.
• DO NOT use detergents containing perfumes, alcohol or ammonia either directly or indirectly (damp cloth) to clean
machine.
• USE only descaling and disinfecting fluids suitable for crockery.
• Chemical-based detergents for cleaning cabinet or internal parts should be used with care so as not to deteriorate any
component or cause damage to environment when discarded.
Daily Cleaning includes:
1 Automatic cleaning cycle, without sanitizing tablet.
ONLY ONCE THE MACHINE IS COOLED DOWN:
2 Clean dispenser spout and brewing group.
3 Clean coffee waste drawer.
4 Empty drip tray and wash it.
STEP 1 – AUTOMATIC CLEANING CYCLE, without sanitizing tablet:
CAUTION! HOT LIQUID!
a - Press CLEANING button for more than 5 sec. until display shows: “Delivery
Wait”
The machine will perform a complete cleaning cycle of the coffee brewing group
and the premix dispensing area (approximate duration: 5 minutes).
b - Cleaning cycle is completed when LCD display shows: “Ready”
Once the automatic cleaning cycle is finished, switch the machine OFF and let it
cool down.
WARNING! PERFORM STEPS 2, 3 AND 4 ONLY WHEN MACHINE IS COLD!
IF THIS INSTRUCTION IS NOT FOLLOWED, SEVERE BURNS MAY RESULT!
Note: If the machine is NOT connected to the water mains drain, place a container
(capacity 1Lt. approx.) under the spout (See point A) to avoid overflow from the
drip tray.
A
STEP 2 – COFFEE GROUP AND DISPENSING SPOUT:
a - Open front door and clean dispensing spout with a damp non-abrasive cloth
(Pict.1).
b - Remove the coffee powder with a brush (Pict.2).
c - Close the front door.
Pict. 1
REV.0 28/11/2007
Pict. 2
P. 12
STEP 3 – COFFEE WASTE DRAWER:
a - Open front door.
b - Remove the waste drawer (Pict.3).
c - Clean with a mild, non-abrasive detergent; rinse and dry.
d - Replace drawer in original location.
Pict. 3
STEP 4 – DRIP TRAY:
a - Open front door and lift locking lever to remove drip tray (Pict.4).
b - Remove drip tray and grill (Pict.5).
c - Wash, rinse and dry.
d - Replace the components in the original location.
Pict. 4
Pict. 5
6.b. WEEKLY CLEANING PROCEDURES
In addition to the Daily Cleaning, perform the weekly procedures once a week.
Weekly cleaning must be done at the end of business hours.
• DO NOT use water sprayers or pressurized water jets to clean machine.
• DO NOT use detergents containing perfumes, alcohol or ammonia either directly or indirectly (damp cloth) to clean
machine.
• USE only descaling and disinfecting fluids suitable for crockery.
• Chemical-based detergents for cleaning cabinet or internal parts should be used with care so as not to deteriorate any
component or cause damage to environment when discarded.
Weekly Cleaning includes:
1 Automatic cleaning cycle, with sanitizing tablet.
ONLY ONCE THE MACHINE IS COOLED DOWN:
2 Wash canisters and mixing chambers.
3 Clean coffee beans hopper.
4 Clean the cabinet.
STEP 1 – AUTOMATIC CLEANING CYCLE, with sanitizing tablet:
CAUTION! HOT LIQUID!
a - Open tablet access cover (Pict.6),
b - Insert one sanitizing tablet (Pict.7) and close cover.
c - Press CLEANING button for more than 5 sec. until display shows: “Delivery
Wait”
Pict. 6
The machine will perform a complete cleaning cycle of the coffee brewing group
and the premix dispensing area (approximate duration: 5 minutes).
d - Cleaning is complete when LCD display shows: “Ready”
Pict. 7
REV.0 28/11/2007
P. 13
Once the automatic cleaning cycle is finished, switch the machine OFF and let it
cool down.
WARNING! PERFORM STEPS 2, 3 AND 4 ONLY WHEN MACHINE IS COLD! IF
THIS INSTRUCTION IS NOT FOLLOWED, SEVERE BURNS MAY RESULT!
Note: If the machine is NOT connected to the water mains drain, place a container
(capacity 1Lt. approx.) under the spout (See point A) to avoid overflow from the
drip tray.
A
STEP 2 – CANISTERS AND MIXING CHAMBERS:
a - Loosen mixing chamber funnel (Pict.8). CAUTION: Do not lose or damage
funnel gasket at rear of mixing chamber (Pict.9 – B).
b - Detach mixing chamber funnel from pipe connection (Pict.9).
c - Remove mixing chamber by twisting slightly (90°approx) clockwise (Pict.10).
d - Remove premix canisters from machine and spare all parts (Pict.11).
e - Wash all plastic parts with mild “degreasing” detergent. Hold sanitizing solution
in premix canisters for approx. five minutes.
f - Rinse and dry all parts completely to avoid moisture.
g - Clean and grease mixer O-RING (Pict.9 – B).
h - Reassemble the parts following the order indicated in Pict.12.
Pict. 8
Pict. 10
Pict. 9
B
Pict. 11
A
Pict. 12
Pict. 13
STEP 3 – COFFEE BEANS HOPPER:
a - Open the left access panel.
b - Unscrew locking knob of coffee beans hopper (Pict.13).
c - Close coffee hopper by pushing lower gate-bracket (Pict.14-A).
d - Remove coffee beans hopper; empty and wash it with mild “degreasing”
detergent; rinse thoroughly. Hold sanitizing solution in beans hopper for approx.
five minutes.
e - Dry hopper and reposition it. Refill with coffee beans and make sure to open
lower gate-bracket again.
Pict. 14
A
REV.0 28/11/2007
P. 14
STEP 4 - CABINET:
a - Use a damp non-abrasive cloth on all surfaces.
b - Never use alcohol or ammonia-containing cleaners, abrasive cleaners or
cleaning solvents which may damage the cabinet.
Pict. 15
BRASILIA S.p.A. recommends to use specific products, as:
• Kamareta cleaning tablets (Pict.15)
• Degreasing detergents (suitable for crockery)
• Lubricating alimentary grease (Paraliq GTE 703) (Pict.16).
These products can be sourced through your Authorized Service Agent.
Pict. 16
6.c. SHORT MIXING CHAMBERS FLUSHING
CAUTION! HOT LIQUID!
a – Briefly press CLEANING button (less than 3 sec.) until the display shows: “Delivery Wait”
The machine will perform a short cleaning cycle of the premix dispensing area (approximate duration: max. 25 secs.).
b - Cleaning cycle is completed when LCD display shows: “Ready”
6.d. BASIC HYGIENE
Coffee and its ingredients are sensitive products and therefore the following basic hygiene processes need to be
considered.
The following are factors which can affect finished product quality served to the customer:
• Wash hands past elbows.
• Wear rubber gloves if cuts or skin conditions exist.
• Wash hands regularly throughout the day.
• Clean all parts and components thoroughly.
• Store sanitizer in a cool, dry place. Use in accordance to instructions.
• Hold sanitizing solution in beans hopper and premix canisters for five minutes.
• Clean the tube of lubricant; after each use, always recap the tube.
• Do not neglect daily cleaning procedures: follow "CLEANING" instructions in the User Manual.
• Once product is poured into beans hopper, or powder canisters, close cover properly to prevent airborne contaminants
from entering the mix.
• Rotate stock to use older date product first (FIFO). Observe product expiry date.
Product must never be stacked outside or under direct sunlight. Check the indications on the confection.
REV.0 28/11/2007
P. 15
7. TROUBLESHOOTING GUIDE
• The authorized Service Agent (installer or maintenance technician)
must inform the manufacturer of POSSIBLE FAULTS or wear which may
affect the machine system’s original safety.
• The user should promptly notify the authorized Service Agent of any
FAULT or DEFECT. Only the authorized Service Agent may install,
repair or perform maintenance on this equipment. Failure to comply with
this instruction may void the equipment warranty or lead to serious injury.
• If an alarm stops the machine, try to reset it by switching it OFF and ON
again, to be sure that it is not simply due to a temporary system failure.
• OPTIONAL: On the brewing group covering plate (Pict.1 – B) there is a
CONTROLLER LED that allows checking that the group heating element
works correctly. This LED is normally off; if the led is on, contact
authorized Service Agent.
• If POWER CORD is damaged, it must be replaced. Contact the
authorized Service Agent to prevent all risks. Failure to follow this
instruction may result in damage to machine or electrocution.
TROUBLESHOOTING
CAUSES
Pict.1
B
SOLUTIONS
The LCD display shows
“CLEAN MIXER 1/2“ or
"CLEAN MIXER 3"
Corresponding premix delivery is not Perform short cleaning cycle by pressing CLEANING
possible until cleaning cycle is completed.
button. See § 6.c.
The LCD display shows
"COFFEE GROUP"
Motor can’t reach correct position within 10 Reset the machine by switching it OFF and ON again. If the
sec.
problem persists, contact your Service Agent.
The LCD display shows
“COFFEE RESERVE“ or
"SOLUBLE RESERVE"
Appears only at the end of the brewing This is a warning: premix or coffee beans will be lacking
cycle: coffee hopper and/or canister nearly soon. Be prepared to refill coffee hopper or canister.
empty (i.e. reserve quantity of product in
canister or coffee beans hopper is less
than 12,5% of startup value)
The LCD display shows
“FILL BEAN HOPPER“ or
"FILL SOLUBLE CONT."
Appears only at the end of brewing cycle.
• Fill coffee hopper and/or canister
Coffee hopper and/or canister(s) are • Alarm disappears by pressing/holding for at least 3 sec. a
beverage key related to the missing product:. For example:
empty.
- To reset “FILL BEAN HOPPER” press (for at least 3 sec.)
any coffee beverage key.
To reset “FILL CHOCOLATE CONT.” press (for at the least
3 sec.) Hot chocolate or Moccaccino key.
The LCD display shows
“DECOUNTER ALARM“
Appears only at the end of brewing cycle, if Contact authorized Service Agent.
beverages reverse counter D is enabled:
the reverse counter reached zero.
The LCD display shows
“REGENERATION”
Water softener filters regeneration is Reset temporarily the machine by pressing P1 and P2
required. This alarm appears only if buttons simultaneously. For the resins regeneration always
follow the original softener instructions manual.
enabled in program mode.
The LCD display shows
"DRAWER OPEN"
Appears when waste drawer is not Open front door and push waste drawer in its correct
perfectly closed or microswitch is not location.
• LCD display shows: "Ready"
engaged.
The LCD display shows
“EEPROM ERROR“
EEPROM
installed.
The LCD display shows
“EMPTY WASTE“
Appears when waste drawer is full (pre- Open front door and remove waste drawer.
programmed number of dispensed coffee • LCD display shows: "Drawer Open"
• Empty coffee drawer
beverages).
• Reposition waste drawer.
• LCD display shows: "Ready"
(if waste drawer is repositioned without emptying in less
than 3 seconds, the alarm will stay active)
REV.0 28/11/2007
alarm:
incorrect
EEPROM Contact authorized Service Agent.
P. 16
TROUBLESHOOTING
CAUSES
SOLUTIONS
The LCD display shows
“FAILURE SENSOR“
Appears when NTC circuit is unwired Contact authorized Service Agent.
or the NTC is broken.
The LCD display shows
“FLOWMETER“
a) Flowmeter gives no pulse/signal for Reset machine with ON-OFF switch.
If the alarm does not disappear,
at least 4 cc water flow in 15 sec.
authorized service Agent.
b) Problems of pump.
c) Solenoid valves do not open.
The LCD display shows
“WATER FAILURE“
a) The water main tap is closed or Contact authorized service Agent.
inlet pipe is obstructed.
b) Flowmeter gives no pulse/signal for
minimum 4 cc water flow in 15 sec.
c) Problems of pump.
d) Solenoid valves do not open.
The LCD display shows
“NO SOFTENER“
Appears if option "Booster Pump" is Reset machine with ON-OFF switch.
If the alarm does not disappear, contact your
enabled.
a) Booster pump works not properly service Agent.
or is not installed.
b) Electrical connections to booster
pump are not correct.
The LCD display shows
“VERIFY COFFEE“
Grinding control: brewing time of Reset machine with ON-OFF switch.
selected beverage is ±25% than If the alarm does not disappear,
default time for 5 consecutive authorized service Agent.
dispenses.
The LCD display shows
“WARMING WAIT“
a) Appears when machine is first Message automatically disappears when machine
switched on and is in warm-up phase. reaches standard operating temperature (after a
b) May appear after consecutive few minutes).
brewing of several hot teas or hot
chocolates.
Coffee delivery is too
fast: No crema in the
cup
Grind size is too coarse.
Contact authorized service Agent.
Coffee delivery is too
slow: No crema in the
cup
Grind size is too fine.
Contact authorized service Agent.
contact
contact
Other alarms are displayed when related component fails or circuit is overloaded.
Try to reset the machine by switching it OFF and ON again, to be sure that it is not simply due to a temporary system failure. If
the problem persists, CONTACT AUTHORIZED SERVICE AGENT.
LCD display shows “OMNIFET XX“, where XX indicates the following:
OMNIFET
1:
OMNIFET
2:
OMNIFET
3:
OMNIFET
4:
OMNIFET
5:
OMNIFET
6:
OMNIFET
7:
OMNIFET
13:
OMNIFET
14:
OMNIFET
15:
OMNIFET PUMP:
REV.0 28/11/2007
tick off pulse
hot tea solenoid
dairy whitener gear motor
coffee solenoid
milk / chocolate beverage solenoid
hot water solenoid
enabling token validator / enabling pump relay external softener
cocoa premix gear motor
tea premix gear motor
fan
pump
P. 17
8. MAINTENANCE
Technical service schedule
3 MONTHS
or after every XX approx. (numbers of deliveries)
10000
6 MONTHS 12 MONTHS 24 MONTHS
40000
80000
160000
Check or replace upper piston OR gasket (see Pict.1 - point A)
X
X
X
Replace upper and lower piston filters (see Pict.1 - point B)
X
X
X
X
X
X
X
X
X
X
X
X
Check dispensed coffee temperature
X
Check and replace lower flange “V” gasket (see Pict.1 - point C)
Manually clean and lubricate brewing group
X
X
Check grindstones or replace as necessary (see Pict.2 - point D)
Check correct function of gear-motors
X
X
X
Check group heating element
X
X
X
X
X
X
X
Check and clean suction fan
X
X
Check and clean premix canisters
X
X
X
X
Remove scale sediments in boiler unit
X
X
Replacement solenoid valves
X
X
Clean water mains connection kit
X
X
X
X
Replace brewing group’s silicone pipes
Check doses and results in the cup
X
Check mixing chamber funnel; replace gaskets
X
X
Check water hardness
X
Pict.1
X
Pict.2
• The recommended maintenance program above is
calculated for an average of 450 Kg. or more coffee
per year, i.e. 60.000 coffee deliveries per year.
Note: The above technical service frequency will not
be realized if user fails to carry out recommended
daily and weekly cleaning procedures as described
in the User Manual supplied with machine.
• Advice for coffee grinder:
Check that the letter “M”, marked on toothed
connector (Pict.3), is turned towards the motor.
Pict.3
REV.0 28/11/2007
P. 18
9. DISMANTLING
• The dismantling of the machine must be done ONLY by the authorized service agent/technician. For this purpose,
pressure from hydraulic circuit must be completely relieved, power cord must be disconnected, and substances which are
potentially harmful to the environment must be legally and properly disposed of.
• Place the machine in a suitable place, out of the reach of children or unsuitable people.
• For dismantling the machine as refuse, take it to an authorized site for the electrical and electronic equipment
recycling (*). This instruction prevents possible damages to the environment and protects human health. For
other information on recycling, contact the adherence Council offices, the domestic waste dismantling service or
the dealer.
• Do not dispose of it in the environment.
(*)
Label affixed on the machine for identification of DIRECTIVE (2002/96/EC) on Waste Electrical and
Electronic Equipment (WEEE), destined to the European market.
REV.0 28/11/2007
P. 19