1
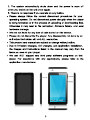
If any problems occur
please contact our techical support team at
844.400.8746
Note:
The playback times listed refer to the maximum playback times
possible, using the best power savings. The actual playback time may
differ as adjustments to screen brightness, power savings modes,
volume, etc are made.
As there are many brands of Micro SD cards in market, using different
quality and speed standards. Therefore, we are unable to guarantee
that our product will be compatible with all types or brands of Micro SD
cards, but will be compatible with those Micro SD cards with
mainstream specifications in the market, and we will constantly strive to
provide the largest selection of cards possible.
1
As parameters such as formats, bitrate, codecs, framerates, and
resolutions differ, the player will not be compatible with all listed files. If
you are experiencing issues playing your files on this player, we
recommend using a supported conversion tool to reconvert your file to
the specifications of the device.
Caution
Modifications not approved by the party responsible for compliance
could void the user’s authority to operate the equipment.
NOTE- This equipment has been tested and found to comply with the
limits for Class B Digital device, pursuant to part 15 of the FCC rules.
These limits are designed to provide reasonable protection against
harmful interference in a residential installation. This equipment
generate, uses and can radiate radio frequency energy and, if not
installed and used in accordance with the instructions, may cause
harmful interference to radio or telephone reception, which can be
determined by turning the equipment off and on, the user in encouraged
to try to correct the interference by one or more of the following
measures:
Reorient or relocate the receiving antenna.
Increase the separation between the equipment and the receiver
Connect the equipment to an outlet on a circuit different from that to
which the receiver is connected.
Consult the dealer or an experienced radio/TV technician for help.
Caution
Do not use the player in exceptionally cold or hot, dusty, damp or dry
environments.
Do not drop, strike, or throw your player. Physical damage to your
player will void ALL warranties.
Please charge your battery when:
1. Battery power icon shows an empty icon;
2
1. Basic Operations
Powering ON and OFF
Power on: Press and hold the power button for 3 seconds.
Power off: Press and hold the power button for 3 seconds.
Power monitoring and charging
You can see the battery icon
ion the upper right hand corner of
most screens and monitor battery capacity , when the power runs out,
the device will automatically turn off. When the screen shows low battery,
users can use the computer to charge
, it takes approximately 4 hours
to fully charge.
Reset
You can reset the player by pressing the reset button, located inside the
reset hole.
Connecting to your computer and loading files
Attach your USB cable to your computer, and then the player. Select
“Turn on USB storage” on the device, it will be recognized in the
“Computer” or “My Computer” section of your PC as an “ECL Tablet”
player. Simply open this drive and drag your files to the appropriate
folders.
Please note that MAC operating systems will display the drive on the
desktop and in your listed devices.
2. Touch Screen Interface
Here is a list of common touch screen icons you will see, and their
functions.
4
New email
Airplane mode
USB is connected
USB adjustment is
connected
Return icon
Downloading
Recent application
icon
Home icon
Battery volume mark
WIFI signal icon
No SD card
Alarm on
Google Search
Application icon
General Notice
Mute
Volume + and -
System Notifications
Home Screen
5
When you power your player on, you come to your home screen. You
have 5 home screens to add your applications and shortcuts to. Tap an
icon to select a file or start an application. If you hold your finger on an
icon for several seconds, you can move the icon around on the screen,
or to a different screen.
Home Screen Menu
Tapping the submenu icon briefly will bring up your home screen menu.
This menu allows you to manipulate wallpaper, manage apps and
system settings.
3. Main System Menu
Your main system menu allows you to access applications you have
downloaded, adjust the settings on your player.
Please note: We are unable to provide support for third party
applications. Please contact the software manufacturer for issues with
an application.
6
File Manager: Select this to browse images, audio files, movies,
ebook files, etc. saved on the internal memory or SD card you have
installed. Selecting one of these files will open the file in the appropriate
program.
Browser: Selecting this option will open your web browser. For
detailed instructions, please refer to the “Main Functions” section below.
Settings: This option will allow you to adjust most of your
settings, including Wi-Fi, screen brightness, etc. For detailed
instructions, please refer to the “Main Functions” section below.
4. Multi-Media
Your device supports the following media formats
Audio file formats supported:
MP3,WMA (non encrypted),MP2,OGG,M4A,MA4,FLAC,3GP,WAV
Supported video formats:
AVI H.264, DIVX, , XVID), RM, RMVB, MKV H.264, DIVX, DIVX,
XVID), WMV, MP4 H.264, MPEG, DIVX, XVID), MPEG, MPG, FLV
H.263 H.264), HD 1080P max.
Supported image formats: JPG, JPEG, GIF, BMP, PNG
4.1
Music
Your music can be divided into four types: artists, album, all music, and
play list. Choose a type to view the list. If you enter one type, continue
to narrow your selection, until the music you want to play appears. For
example, if you choose artist type, you can see the artist name from A
7
to Z, if you choose one artist, a list will display the artists’ albums and
album list.
View current play list
Random play
Cover
album
cover
of
Repeat
time
Pause
Artist
Next
song
Album
Music
Previous song
Played time
Play progress bar
Find and play music
Music
total time
1. Tap the music application.
2. Tap artist, album or play list.
3. Select any music to play.
Add music to a play list
1. Tap the music application.
2. Enter to select music.
3. Tap and hold the music you want to add.
4. Tap “Add to playlist “, and select the play list you wish to add your
files to.
OR
1. Tap “new”.
2. Input a name for your new play list.
8
3. Tap “save”.
Delete the music in a play list
1. Tap music.
2. Tap and hold the music you want to delete from the play list.
3. In the popup music setting menu, tap delete to finish.
4.2 Video
Tap the video application
1. Tap gallery or list selections.
2. The device will display all compatible video files.
3. Tap the file you want play.
4.3 Images
View images
1. Tap the image gallery application.
2. This will bring up the image gallery, tap the file or folder you want to
view and
3. Tap the image you want to view, the system will view the image in full
screen.
4. When you view images, you can zoom in and out by pinching or
sliding two fingers apart.
Edit and setting images as a contact or desktop
After opening an image, tap the image again to bring up your menu
and delete
icons. Tapping the delete icon will allow you to delete
the image.Tapping the menu icon will bring up your image submenu.
Slideshow: Tap to enable slideshow mode.
9
Edit: Tap to edit the image.
Rotate left/Rptate right: Tap to Rotate the image.
Crop: Tap allows you to crop the image.
Set picture as: Tap to set the picture as a “Contact image” or
“Wallpaper”
Detalis: Tap to display image details, such as filename, creation date,
dimensions, orientation, file size, path, etc.
5. Email
The Email application allows you to access an external POP3 or IMAP
email account provider such as Yahoo or Gmail.
Note: Before setting up your email, please ensure that you are
connected to wifi. If you do not already know your email settings
(POP3, IMAP, etc) you can obtain them from your email provider.
1.
Tap the Email app.
2.
An email setting guide to help you get your account set up,
3.
Enter your email account address and password.
4. Tap the next button, choose your email type; POP3 or IMAP.
5. Tap next button to check the email settings.
6. Enter the account name and the email sender’s (your) name, tap
finish.
7. If the mailbox is available, it will enter into your inbox.
10
Delete an email account
You can delete the set POP3 or IMAP email account from your Device.
1. Tap email.
2. Enter your inbox.
3. Touch the menu button.
4. Tap setting.
5. Select the account you wish to remove.
6. A menu list will appear, select delete account .
7. Tap OK to delete.
Sending E-mail
1. Tap Email to display your mail box.
2. Tap the inbox, it will refresh the new emails automatically; tap it to
read new email.
3. Touch the
button at the top of screen.
11
8. Select the attachment you want to send (pictures, videos)
9. Tap send button
to send the email.
6. Browser
When you select the browser icon, your browser will open. You can tap
the browser bar to bring up the virtual keyboard and input the web
address you would like to view.
The Browser will open to the last page you visited. If you have not
opened the browser yet, it will go to your homepage.
1) Set the homepage.
1. Tap the browser icon
2. Tap the menu
.
icon on the top right corner.
3. Tap the setting menu.
4. Tap General.
5. Tap Set homepage.
2) Visit webpage
1. Touch browser icon
2. Input the website you want to search on the keyboard.
3. Tap finish to go to the website.
3) Bookmark management
Setting webpage bookmark
1. Go to any webpage.
2. Tap
and select “OK” to add this website to bookmark.
Opening a bookmark
1. Tap
, and it will show bookmark list in the browser.
2. Tap the bookmark you want to open that webpage
13
7. System settings
7.1 Voice and display
Sound and volume setting
1. Tap the setting icon.
2. Tap “Sound”.
3. Tap volume to adjust the volume for music and video.
4. Or press “VOL +” or “VOL – Button” to adjust the volume.
Display setting
Adjust the brightness of your screen
1. Tap the setting icon.
2. Tap display Tap brightness, a slide bar will open. Slide this bar to
the right to increase brightness, and to the left to decrease
brightness
3. Tap OK.
14
7.2 Adjust screen standby time
1. Tap the setting icon.
2. Tap display->Tap “Sleep”, select the amount of idle time you want to
pass before the device enters standby mode to conserve power.
7.3 Setting a screen lock.
NOTE- If you set a password, PIN, or Pattern, and later forget this
item, you will be LOCKED OUT of your device. For security
purposes, we can NOT recover a lost password, PIN, or Pattern for
you.
You can set a password, PIN, or pattern to secure your device from
unauthorized access and protect your privacy.
Note: anytime the device enters standby mode (pressing the power
button briefly or due to idle time) you must enter your password, PIN, or
pattern to unlock it, if you have one set.
1. Tap the setting icon.
2. Tap Security
Screen lock Then chose the screen lock type you
want.
15
7.4 SD card and Internal memory
View SD card and MID memory available space
1. Tap the setting icon.
2. Tap memory.
3. View the available space on the SD card.
4. View internal memory space.
Safely remove the SD card.
Please follow this procedure when removing the SD card to prevent
damage to your SD card and files
1. Tap the setting icon.
2. Tap memory.
3. Tap remove SD card.
4. Pull out the SD card.
16
7.5 Date and Time
Manually adjust the date, time and time zone
1. Tap the setting icon.
2. Scroll the screen down, and tap date and time.
3. Tap time zone, and coose your zone in the list. scroll down to view
more zone information.
4. Tap choose date formats, and tap the date formats in MID.
7.6 Setting the display Language
17
1. Tap the setting icon.
2. Tap language & input.
3. Tap language, and select the language you want. There are 60
languages to choose from.
7.7. About the tablet
System update
Note- This setting is for advanced users only. If done improperly,
your device may be damaged, as well as your data erased. Please
exercise caution when updating.
8. Installing Applications
8.1
Installation
Install the third part application procedure
While the main method of loading applications involves using an
app store, if you have an individual APK file, you can use that to
install the app.
Save the APK file to your device. We recommend saving APK files to
the Downloads folder to find them easily.
1. Tap file manager; choose the application you wish to install.
2. Tap “Install”.
3. Follow the installation instructions listed on the screen.
8.2
Uninstall an app
Tap the settings icon.
1. Tap Application.
2. Select the application you want to uninstall, tap uninstall.
18
3. Tap OK to finish uninstalling the app.
9. Troubleshooting
1. It takes a long time to power up when I power on for the first
time.
The first time you power the device on, or after updating the device, it
may take a slong as 3 minutes to power on as it intitallizes files.
Subsequent power sequences should take less than a minute
2. Sometimes, the device feels warm to the touch.
When charging, or after a long period of use, it is common for the
device to feel slightly warm. This is normal as the battery charges or
discharges and is not a cause for concern.
3. My device will not connect to Wifi.
Ensure that you are in an area with a strong wifi signal.
Please make sure the password you are using is correct.
4. Cannot surf the Internet
Please make sure the distance between the device and the wireless
router is within 50 yards.
Please re-connect the WIFI.
5. Sometimes, the device runs slowly.
The more apps you have open and running, the slower the device
will run. You can enter your application setting to disable or “kill”
applications to free up processor and memory resources. In addition,
there are many “Task Killer” applications which can do this
19