1
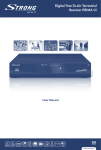
Picture similar
Digital Wireless Satellite Receiver
with Digital Recorder SRT 6300 W
Digital Wireless Satellite Receiver SRT 630 WS
User Manual
SRT 6300 W
SRT 630 WS
TABLE OF CONTENTS
1.0 INTRODUCTION
1.1 Safety Instructions
1.2 Storage
1.3 Equipment Set-up
1.4 Introduction
1.5 Features & Accessories
3
3
4
4
4
5
2.0 YOUR RECEIVER
2.1 Master SRT 6300 W Front Panel
2.2 Master SRT 6300 W Rear Panel
2.3 Slave SRT 630 WS Front Panel
2.4 Slave SRT 630 WS Rear Panel
2.5 Remote Control
6
6
6
7
8
8
3.0 INSTALLATION
3.1 Master SRT 6300 W
3.2 Slave
3.3 Wireless Network Configuration
10
11
13
15
4.0 QUICK START
17
5.0 MENU OPERATION
5.1 Main Menu
5.2 Channel Organizer
5.3 Favourite Organizer
5.4 Timer Setup
5.5 Installation
5.6 Media Base
5.7 Media Base Management
5.8 Media Base Transfer
5.9 Common Interface (Master Only)
17
17
18
19
20
21
28
29
29
30
6.0 FUNCTION GUIDE
6.1 Channel List
6.2 Information Box
6.3 EPG (Electronic Programme Guide)
6.4 Subtitle
6.5 Teletext
6.6 Sound Track
6.7 Time Shifting
6.8 Recording
31
31
31
32
32
32
32
33
33
1
6.9 Play Files
6.10 Stop
6.11 Pause
6.12 Slow Motion Playback
6.13 Fast Forwarding and Rewinding
6.14 Bookmark
6.15 Repeat
6.16 Picture In Picture (PIP, Master Only)
6.17 Keyboard
34
34
34
35
35
35
36
36
37
7.0 TURN OFF SYSTEM
7.1 Master
7.2 Slave
38
38
38
8.0 SOFTWARE UPDATE
38
9.0 SPECIFICATIONS
9.1 Master
9.2 Slave
39
39
40
10.0 TROUBLESHOOTING
42
2
1.0 INTRODUCTION
1.1 Safety Instructions
DO NOT INSTALL YOUR RECEIVER:
n In a closed or poorly ventilated cabinet; directly on top of or under any another equipment; on a
surface which might obstruct the ventilation slots
DO NOT EXPOSE THE RECEIVER OR ITS ACCESSORIES:
n To direct sunlight or near any other equipment that generates heat; to rain or intense moisture;
to intense vibration and to any shock which may cause permanent damage to your receiver or to
any magnetic objects, such as loudspeakers, transformers, etc
n Do not use a damaged power cord. It may cause a fire or an electrical shock. Do not touch a
power cord with wet hands. It may cause an electric shock
n Never open the cover. It is dangerous to touch the inside of the receiver due to high voltage currents
and possible electrical hazards. Your warranty will be void if the receiver has been opened
n When the receiver is not used for a long period of time, you should unplug the power cord from
the wall socket
n Do not use alcohol or ammonia based liquids to clean the receiver. If you wish, you may clean
your receiver with a soft lint-free cloth slightly made damp with a mild soap solution, only after
disconnecting from the mains voltage supply. Make sure no foreign objects fall through the
ventilation slots because this could cause fire or an electric shock
n Do not place any objects on top of the receiver because this might prevent proper cooling of the
components inside
n Before connecting the cables, be sure that the receiver is disconnected from the main power supply
Make sure you read this user manual before installing your receiver
It is highly recommended that you read this manual carefully to safely install your receiver and to achieve
its optimum performance.
The batteries should not be recharged, disassembled, electrically short circuited, mixed
or used with other types of batteries.
Safety Precautions
n Do not open the receiver cover, as you will be exposed to a shock hazard. It will also void your
warranty. Refer all maintenance or servicing to suitably qualified personnel
n When you are connecting the cables, be sure that the receiver is disconnected from the mains
supply voltage. Wait a few seconds after switching off the receiver before you move the receiver
or disconnect any equipment
n It is a necessity that you only use an approved extension and compatible wiring that is suitable for
the electrical power consumption of the installed equipment. Please ensure that the electrical power
supply corresponds with the voltage on the electrical identification plate at the back of the receiver
If the receiver does not operate normally even after strictly following of the instructions in this user
manual, it is recommended to consult your dealer.
Note:
3
1.2 Storage
Your receiver and its accessories are stored and delivered in a packaging designed to protect against
electric shocks and moisture. When unpacking it, make sure that all the parts are included and keep the
packaging away from children. When transporting the receiver from one place to another or if you are
returning it under warranty make sure to repack the receiver in its original packaging with its accessories.
Failing to comply with such packaging procedures could void your warranty.
1.3 Equipment Set-up
We recommend you consult a professional installer to set up your equipment. Otherwise, please follow
the instructions below:
n Refer to the user manual of your TV and your antenna.
n Make sure that the SCART cable and outdoor components are in a good condition and the
SCART connections are well shielded
This manual provides complete instructions for installing and using this receiver. The following symbols
will serve as follow.
Warning:
Indicates warning information.
Note:
MENU
Move to
Indicates any other additional important or helpful information.
Represents a button on the remote control or the receiver (Bold Character)
Represents a menu item within a window. (Italic Character)
1.4 Introduction
Thank you for choosing the SRT 6300 Wireless Home Media Network.
The SRT 6300 W System is a Wireless Home Media Network that is capable of delivering multiple video
and audio streams through out a consumer‘s household.
The SRT 6300 W System contains of a Master and Slave unit. The Slave(s) get the signal from the Master
through a wireless network connection. The SRT 6300 W system is fully compliant with the DVB-S
standard is designed to be capable of upgrading its software from a USB device.
It is highly recommended that you read this manual carefully to safely install your receiver and to achieve
its optimum performance.
4
1.5 Features & Accessories
SRT 6300 Wireless Digital Satellite Receiver with Digital Recorder
n MPEG-2 Digital and fully DVB compliant
n One Master box + two Slave boxes or one Master box + one Slave box
n For all Free To Air digital TV and Radio programmes
n 2 Common Interfaces compatible to all major Conditional Access Modules (Cryptoworks,
Viaccess, Conax, etc.)
n 5 000 channels (TV and Radio) programmable
n Channel list edit, delete, sort
n Four Favourite lists, for both TV and Radio programmes
n Favorite channel list edit, delete, sort
n Three Recording and Playback Simultaneously. (1 x on Master, 2 x on each Slave)
n Recording capacity: 88 hours for 4 Mbps stream with 160 GB HDD
n Powerful trick mode supported, include Time-loop, Fast Forwards and Back, Slow
n Forwards and Back, Pause/Resume, and Time Shift
n USB 2.0 support. USB mass storage devices using FAT file system
n MP3 (MPEG-1 Layer 3) player: browse and play MP3s stored in a storage device (USB and
internal HDD)
n JPEG Viewer: browse, edit, zoom in/out and do a slide show of JPEGs in storage devices
(USB and internal HDD)
n File manager: manages copying and deleting of files / directories in storage devices (USB and
internal HDD)
n Distribution of smooth digital TV streams to up to 3 TVs in a household through cutting edge
Wireless MIMO technology
n Highly efficient, self-dominated Intellectual Property Right Network protocol: RapidMedia Protocol
n Electronic Programme Guide provides you detailed programme information
n DVB Subtitle supported and selectable audio tracks
n Teletext via OSD
n Dual Decoding (PIP, only Master)
n S/PDIF for digital audio
n Parental Lock protects access to menu and/or programmes
n DiSEqC 1.0, 1.1, 1.2 and USALS (DiSEqC 1.3)
n Timer function can automatically record programmes daily or weekly
n Easy recorder programming by EPG, up to 7 days in advance
n User friendly menu, available in various languages; English, German and Dutch
n Automatic channel search system with selectable options
n VFD display in front panel showing programme number, time or play function
n Supports software downloading via USB stick
n 2 SCART connectors (TV, VCR)
n 3 RCA connectors (Video- and Audio out)
n S-Video output
n RF modulator (PAL I/B/G/D/K NTSC M)
5
Accessories
n User Manual
n Remote control units
n Batteries (AAA type)
n Warranty Card
Note:
The batteries should not be recharged, disassembled, electrically short-circuited or be
mixed or used with other types of batteries.
2.0 YOUR RECEIVER
2.1 Master SRT 6300 W Front Panel
1. MENU
2. STANDBY
3. OK
4. VOLUME
5. CHANNEL
6. VFD DISPLAY
Display the menu on screen.
The power button of the Master (ON / STANDBY or SERVER mode).
Display channel list on screen.
Select an item in the menu.
Change audio level.
Change the channels
During the STANDBY mode, the current time is displayed. When the
power is on, the current status is displayed.
2.2 Master SRT 6300 W Rear Panel
1. TUNER 1
2. TUNER 2
6
Connect to the satellite coax cable coming from the dish
Connect to the satellite coax cable coming from the dish
3. VCR/DVD SCART
4. ANT IN
5. SWITCH
6. VIDEO OUTPUT
7. AUDIO-RIGHT OUTPUT
8. AUDIO-LEFT OUTPUT
9. S-VIDEO OUTPUT
10. TV SCART
11. TO TV
12. S/PDIF
13. SERIAL PORT
Connect the VCR SCART to VCR / DVD recorder
Connect the TV antenna
Main power switch.
Video output (yellow)
Audio output (Red)
Audio output (White)
Connect the S-Video input of your TV
Connect the TV SCART to TV SCART input
Connect the TV RF IN (for TV without scart)
Optical output for Digital Audio
RS-232 Port
2.3 Slave SRT 630 WS Front Panel
1. STANDBY
2. MENU
3. OK
4.
5.
6.
7.
8.
VOLUME
CHANNEL
LED
LINK
RECORDING
The power button of the Master (ON / STANDBY).
Display the menu on screen.
Display channel list on screen.
Select an item in the menu.
Change audio level.
Change the channels
Display the current time or current status.
If Slave has been connected Master, the LED (Green) will be on.
If Slave is recording a programme, the LED (Blue) will be on.
7
2.4 Slave SRT 630 WS Rear Panel
1.
2.
3.
4.
5.
6.
7.
8.
AUDIO-RIGHT OUTPUT
AUDIO-LEFT OUTPUT
VIDEO OUTPUT
S-VIDEO OUTPUT
TV SCART
VCR/DVD SCART
S/PDIF
DC INPUT
Audio output (Red)
Audio output (White)
Video output (Yellow)
Connect the S-Video input of your TV
Connect the TV SCART to TV SCART input
Connect the VCR SCART to VCR / DVD recorder
Optical output for Digital Audio
DC power input
2.5 Remote Control
1. Power Button [
]
Switch the box between Operation, Standby or Server Mode.
2. MUTE Button [
]
Enable / Disable the audio output of the receiver.
3. Numerical Buttons [0 ~ 9]
Select the TV or Radio channels and menu operations
4. RECALL Button [ROTATE]
Select the previously viewed channel.
5. INFO Button [i]
Display the programme information box on the screen and remove it and show extended
EPG information
6. PIP Button [PIP]
Enable, Resize and Disable sub-picture.
7. PIP Swap Button [PIP2]
Exchange the main picture and Sub-picture at the PIP.
8. PIP List Button [PIP3]
Display the channel list of the sub-picture
9. PIP Move Button [PIP4]
Move the position of sub-picture by clockwise.
8
2
1
3
4
6
5
8
7
9
10
11
13
17
12
15
14
18
16
19
20
21
23
25
28
27
31
35
32
36
23
24
26
29
30
34
33
38
37
10. SAT Button [SAT]
Display the satellite list.
11. TV / STB Button [TV]
Change the terrestrial TV and STB mode.
12. PAGE+ Button [PAGE+]
Move the selection bar in menu
13. Audio Button [AUDIO]
Select Sound Track and LEFT / RIGHT / MONO /
STEREO sound.
14. TV / RAD Button [TV/RAD]
Select the TV / Radio mode
15. PAGE- Button [PAGE-]
Move the selection bar in menu
16. FAV Button [FAV]
Display the favourite channel list.
17. EPG Button [EPG]
Display the EPG on screen when available.
Remove EPG when EPG is displayed.
18. Teletext Button [TEXT]
Enable the Teletext
19. Subtitle Button [SUB]
Activate the subtitle selection window.
Select the subtitle language in the list.
In the Media Base menu, go to Media Base
Management menu.
In the Media Base Management menu, go to Media
Base menu.
20. CH+ Button [CH+]
Service up and move cursor up.
21. OK Button [OK]
Display Channel List on screen.
Select an item in the menu.
22. Volume- Button [VOL-]
Decrease the volume
Move cursor to left.
23. Volume+ Button [VOL+]
Increase the volume.
Move the cursor to right.
24. CH- Button [CH-]
Service down and move cursor down.
25. MENU Button [MENU]
Display the Menu on screen or return to previous menu from submenu.
9
26. EXIT Button [EXIT]
Return to the screen.
27. Play Button [RED]
Start playback with normal speed.
Return to normal speed of forward playback.
28. Pause Button [GREEN]
Pause the playback.
Start the Time Shifting.
29. Fast Rewind Button [YELLOW]
Fast rewind.
Start reverse playback.
Change the speed of reverse playback.
30. Fast Forward Button [BLUE]
Start fast forward or fast motion playback.
Change the speed of forward playback.
31. Media Button [MEDIA]
Go to the Media Base menu.
32. Record Button [=]
Start recording
33. STOP Button [STOP]
Stop time shifting, playback or recording
34. Continue Button [AROUND]
Continue playing a file.
35. Slow Rewind Button [ ]
Start reverse slow motion playback
Change the speed of slow motion playback
36. Slow Forward Button [
Start forward slow motion playback
Change the speed of slow motion playback
37. Set Bookmark Button [BOOK]
Make a bookmark while playback.
38. Go to Bookmark Button [BOOK2]
Go to the bookmarked position.
3.0 INSTALLATION
First, connect the satellite antenna cable and TV to the Master unit.
n There are some of the most common ways to connect the equipment in this manual
n There are several ways of connecting the receivers to the existing Audio/TV system. We
recommend to choose one of the following setups
n If you have problems with your connections and need help, contact your STRONG dealer
10
3.1 Master SRT 6300 W
3.1.1 Connection to TV, VCR and Hi-Fi
1. Connection to the TV with the SCART Cable
Connect one end of the SCART cable to the TV SCART socket on the Master and the other
end to a SCART socket on the TV.
2. Connection to the DVD or Video Recorder with a SCART Cable
Connect one end of the SCART cable to the VCR SCART socket on the Master and the other
end to a SCART socket on the DVD or Video Recorder.
3. Connection to the TV with the CINCH Cable
Connect one end (3 connectors) of the CINCH cable to the AUDIO-RIGHT (red), AUDIOLEFT (white) and the VIDEO output (yellow) sockets on the Master. Connect the other end (3
connectors) to the AUDIO-RIGHT (red),AUDIO-LEFT (white) and the VIDEO input (yellow)
sockets on the TV or Hi-Fi.
11
4. Connection to the TV using the RF Cable
Connect a terrestrial antenna to RF IN socket on the Master. Connect one end of the RF cable
to the RF OUT socket of the Master. Connect the other end to the ANT IN socket on the TV.
5. Connection to the TV using the S-VIDEO
Connect one end of the S-VIDEO cable to the S-VIDEO socket on Master and the other end to a
S-VIDEO socket on the TV and connect the S/PDIF output to your Digital Audio Amplifier..
3.1.2 Connection to the Satellite Dish
It is important to decide which type of connection between receiver and LNB will be used.
The simplest connection type and the one we recommend to use is Twin LNB. It will require the
installation of a TWIN LNB and two cables between LNB and receiver. The connection type SEPARATED
can be used if you have installed antennas for more than one satellite. With this connection type you can
use different antenna connections: for example, you have a fixed dish with single LNB connected to SAT
IN of TUNER 1 and a motorised dish with single LNB connected to SAT IN of TUNER 2.
1. Installing Master with two separate Satellite Dishes
The Connection Type in LNB Setup menu should be set to Separated.
12
2. Installing Master with Twin LNB in Satellite Dish
The Connection Type in LNB Setup menu should be set to Twin LNB.
3. Installing Master with two separated Twin LNB Satellite Dishes. and DiSEqC switches
The Connection Type in LNB Setup menu should be set to Separated.
3.2 Slave
3.2.1 Connection to TV, VCR and HiFi
1. Connection to the TV with the SCART Cable
Connect one end of the SCART cable to the TV SCART socket on the Slave and the other end
to a SCART socket on the TV.
13
2. Connection to the VCR with the SCART Cable
Connect one end of the SCART cable to the VCR SCART socket on the Slave and the other
end to a SCART socket on the VCR.
3. Connection to the TV with the CINCH Cable
Connect one end (3 connectors) of the CINCH cable to the AUDIO-RIGHT (red), AUDIOLEFT (white) and the VIDEO output (yellow) sockets on the Slave.
Connect the other end (3 connectors) to the AUDIO-RIGHT (red),AUDIO-LEFT (white) and
the VIDEO input (yellow) sockets on the TV or Hi-Fi.
4. Connection to the TV using the S-VIDEO
Connect one end of the S-VIDEO cable to the S-VIDEO socket on the Slave and the other end to
the S-VIDEO socket on the TV and connect the S/PDIF output to your Digital Audio Amplifier.
14
3.3 Wireless Network Configuration
Note:
If you start using Slave(s), please do the following steps to set-up wireless connection.
Otherwise you can skip the following steps.
1. First turn on the Master. If the Master is in standby mode, press the [Standby] key to switch
ON the Master.
2. During system is booting, press [OK] key to open “Wireless Network Configuration”
menu in Master.
3. If the Master is not registered with the Slaves, Master will go to search for the
Slave automatically.
4. Turn on a Slave and the TV set. The Language Selection menu will be seen next on the screen.
Choose the language and confim with OK. If the Slave is not registered to any Master, the
Slave will reboot and enter the wireless Network Configuration automatically.(In case it does
not start automatically, you can access directly after booting by pressing OK)
5. The Slave will connect and register to the Master automatically. At the same time, the Slave
will get the Master’s ID and the Master will get the Slave’s ID automatically.
6. On Slave side, the message “Registered to Master successfully!” will be shown on the TV screen.
7. On Master side, the message “Do you want to register another one?” will be shown, if you
want to register another Slave. Select YES and repeat steps 4-6 in order to register another
Slave. Select NO to go back to Wireless Network Configuration.
8. After having registered one or two Slave(s) with the Master, press Exit [GREEN] button on the
Master’s remote control. After the Master has restarted, confirm the registration also on the
Slave(s) with OK. The Slave(s) will restart and connect to the Master.
9. You can see wireless network configuration information by pressing [OK] button when system
is booting.
Note:
Please make sure the Channel, Network Name, Network Density settings are the same
for Master and Slave(s). Otherwise the Slave(s) can not connect to the Master.
Save
To save your configuration after changing the information, press the Save [RED] button.
Exit
Exit the Wireless Network configuration by pressing the Exit [GREEN] button.
Default
By pressing the Default [YELLOW] button, you will set all settings to factory default.
Note:
if you set the Master to factory default, all registered Slaves will get unregistered and
you need to register them again.
15
Unregister (Master only)
Move the cursor down to the Slave you want to unregister. Press the Unregister [BLUE] button to
unregister it.
If you want to change wireless configuration, press the [OK] button to enter Wireless Network
Configuration menu when the system is booting. In the Wireless Network Configuration menu, you can
change Channel Number, Network Name, Network Density in order to get the best quality.
n Channel Number
Auto and channels 1-11 can be chosen.
Setting this channel number appropriately provides one way to avoid sources of wireless interference.
n Network Name
You can change the network name on Master and both Slaves by locating the cursor on Network Name,
then press [OK] button to display the keyboard. The network name is limited to 32 characters.
Note: Network name can only be English letters and numbers.
Network Density
Use low network density for maximum range. Use high network density for maximum robustness of
interface protection.
n
Note:
16
If you want to change Slave’s Wireless Configuration, the Master should be in the Wireless
Network Configuration Menu as well. On Master and Slaves all parameters should be set
the same. If a Slave has been registered with another Master (you will see a Master ID,
but the circle is red), the Slave should be set to default first.
4.0 QUICK START
Press the [POWER] button to turn on the Master. Now, the Info Box will appear on the bottom of the
screen for a certain time and then disappear. By pressing [i] button, the Info Box will remain on the
screen. The display time of the Info Box can be adjusted in the Installation menu of the Menu Setting.
IMPORTANT: Before using your new receiver, some important technical settings are essential.
1. First, press the [MENU] button on the remote control, the Main Menu will appear.
2. Go to the “LNB Setup menu” in the “Installation menu” and press [OK] button.
3. Choose the right parameters for Satellite, Tuner, LNB, Type, LNB Power, LNB Frequency,
DiSEqC Switch, DiSEqC Input, DiSEqC Repeat, Switch 22kHz and Channels Setup.
4. Set the Motorized DiSEqC 1.2 and the USALS items according to your antenna, LNB and
satellite settings. If the right Satellite Name and LNB Frequency were not found in the list, call
the dealer for satellite information.
5. Then, press [OK] button at “Channel Setup” item and go to the Channel Setup menu.
6. Set the “Search Mode” to “Auto”. (Transponder or Network)
7. Move to “Start Search” item and press [OK] button.
8. The search procedure will take a while.
9. After searching has finished, press [OK] button and it will switch to LIVE programme.
10. Turn on the Slave(s)
5.0 MENU OPERATION
Now this chapter assumes that the system has been installed correctly, meaning:
The satellite antenna dish for the Master has been installed and connected to the Master and the Master and
Slave are connected to TVs. The remote control has batteries and is ready to control Master and Slaves.
If the system has not been installed or connected properly, please refer to the INSTALLATION menu on
this manual.
5.1 Main Menu
Many functions of the systems are available from the Main Menu. Press [MENU] button to open the
Main Menu.
Note:
Some functions and menus are only own by Master.
17
5.2 Channel Organizer
5.2.1 Channel Organizer (Master)
This menu can be used to sort, edit and delete TV and Radio Services.
Note:
The default menu is under TV menu, press [TV/RAD] to switch to Radio menu or switch
back to TV menu.
MENU OPERATION
Sort
Press Sort [RED] button. Than you can choose Name (by alphabet), Type (Free or Scrambled), TP
(Transpond), or Manual to sort and rearrange the channel list (by pressing different colour buttons).
Fav
You can add services to different favourite groups. Locate the cursor to desired service and press Fav
[GREEN] button. Then choose a favourite group (by pressing different colour buttons).
Edit
You can change a channel name, skip and hide a channel.
In order to change a channel name, locate the cursor to the desired channel and press Edit [YELLOW]
button. Then press [OK] button and type a name you want. After you have finished, press [OK] button.
In order to lock a channel, select the channel you want to lock, press [YELLOW] button and move the cursor
down to Lock. Then press [OK] button to prevent children from watching it. You can unlock the channel by the
same way. If a channel has been locked, you should enter the PIN code in order to enjoy it.
In order to skip a channel, mark the desired channel, press Edit [YELLOW] button. Then press [OK]
button on the skip option. The skipped channels will not be visible on the channel list.
Delete
Press Delete [BLUE] button, then there will be three buttons you can choose from:
1. Press One [RED] button to delete a channel.
2. Press All [GREEN] button to delete all the channels.
3. Press Return [BLUE] button to go back to the Channel Organizer menu
Note:
Deleted channels are permanently deleted. The only way to recover them is to perform a
new channel search.
5.2.2 Channel Organizer (Slave)
You can add services to different favourite groups. Locate the cursor to the desired service and choose a
favourite group by pressing different colour buttons.
18
5.3 Favourite Organizer
This mode is helpful in organizing your favourite channels. There are four buttons you can use: sort, next,
edit and delete.
Note:
The default menu is under TV favourite channel menu, you can press [TV/RAD] to
switch to Radio favourite channel menu or switch back to TV menu.
Sort
Press [RED] button. Here you can sort and rearrange the favourite channel list by Name, Type, TP or
Manual (by pressing different colour buttons)
Next
There are four groups: Digital, News, Sport and Music for TV and four groups for Radio, Digital, News,
POP and Jazz. The default group list is Digital. Press [GREEN] button to switch between the group list.
Edit
Press [YELLOW] button , the keyboard will appear. Type the name you want, then press [OK] button.
Delete
Locate the cursor on the desired channel. Then press [BLUE] button to delete the channel.
Note:
Deleted channels are just deleted from the Favourite group. You can still find them in
the channel list.
19
5.4 Timer Setup
Timer information can be found in menu Timer Setup.
To insert a new Timer entry, press [RED] button. Press Modify [GREEN] button to edit the entry. By
pressing Delete [YELLOW] button you delete the selected entry.
OT = One Time
D = Daily
W = Weekly
R = Record
TI = Time Interval
S = Success
F = Failed
I = Initiation
Action
Press [VOL-] [VOL+] buttons to choose Record or Start Time (TI) on Action.
Begin Date
Enter the date (mm/dd/yyyy) directly by pressing numerical buttons.
Begin Time
Select the recording duration by pressing [VOL-] [VOL+] buttons then pressing numerical buttons are available.
Duration
Select the recording duration by pressing [VOL-] [VOL+] buttons or use the numerical buttons to enter a
value directly.
Mode
By Using [VOL-] [VOL+] buttons, select One-Time, Daily and Weekly
Satellite:
Prog Type:
Prog Name:
Save To:
20
Press [OK] button to display the satellite list. Select a satellite that includes the channel
to be recorded.
Choose TV or Radio by using [VOL-] [VOL+] buttons.
Press [OK] button, the channel list will appear and then choose the one you want to
record and press [OK] again.
Press [OK] button, the folder will appear. Then choose a folder you want and press [OK] button
5.5 Installation
5.5.1 System Setup
5.5.2.1 Language
There are different languages available for the menu languages
Menu Language
It is a selection for changing the language of the main menu. Select the language then the menu
will be showing.
Note:
The supported languages can be changed without any notice.
Audio Language 1
It is a selection for changing the language of the Audio. If more than one audio language is transmitted,
you may select any one of them
Note:
The supported languages can be changed without any notice.
Audio Language 2
It is a selection for changing the language of the Audio, too. It only works when the broadcaster doesn’t
support Audio Language 1. If more than one audio language is transmitted, you may select any one of them.
Note:
The supported languages can be changed without any notice.
5.5.2.2 Connection
The STB has many connections. You have to control this screen button properly according to external
components connected to the STB. Configurations concerning audio and video can be made here.
TV Mode
Select your TV standard. For automatic PAL/NTSC selection, set it to “Multi”.
Video Output
Select the mode of Video output between CVBS and RGB.
TV Format
Select your TV screen format, 4:3, 16:9 or Auto mode.
Audio Output
It allows you configure the sound mode. Select the Stereo, Left or Right audio mode.
Aspect Ratio Mode
You can select the display format. Select the Normal, Letter Box, Pan and Scan or Combined mode.
21
SPDIF Output
You can enable or disable the S/PDIF digital output in this menu.
VCR Output
Select a VCR output Terminal or Automatic.
RF Modulator (Master Only)
When the Master is connected to the TV set with a RF cable, you may need to select the correct TV
standard. Select the PAL B/G, PAL I, PAL D/K mode by using [UP/DOWN] buttons. The default RF
modulator is PAL B/G.
RF Channel (Master Only)
Select a RF channel by using [UP/DOWN] buttons. The default channel here is 38. When you change
the RF channel number, you must also change the same value on the TV. If you do not, there will be no
picture and sound.
5.5.2.3 Menu Setting
Transparency
Adjust the OSD transparency of all menus. The available levels are from 0 to 4.
Brightness
Adjust the OSD brightness of all menus. The available levels are from 0 to 2.
Duration
Adjust the time-out of the Info Box. Set the duration time that the Info Box is displayed on screen. The
adjustable time is from 1 Sec to 6 Sec, 10 Sec, 20 Sec and 30 Sec.
5.5.2.4 Time Setting
The exact local time can be adjusted by using the GMT usage, Time zone, Adjust time, and Date sub menus.
GMT Usage
GMT is referred to the standard time of Greenwich. It can not be changed.
Time Zone
Here you can choose your time zone.
Adjust Time
You can adjust time only when GMT usage is OFF. Enter the current time by using the numeric buttons.
Date
You can type the date (mm/dd/yyyy) by using the numeric buttons, but the GMT Usage must be OFF.
Note:
22
We recommend to setup the same time for Master and Slaves(s).
5.5.2.5 System Info
You can check the System Model, Software Version, Hardware Version, Loader Version, Manufacturer, Website
and Serial Number information.
5.5.2.6 Factory Reset
All settings will be reset to factory default values.
5.5.3 LNB Setup (Master Only)
The Low Noise Block down Converter (LNB) amplifies the signal received by the satellite dish and lowers
the frequency of the signal. The signal is then fed from the LNB at the dish via cable to the Master
For the LNB setting, move the cursor to installation and press [OK] button. Then move the cursor to LNB
setting and press [OK] button.
Satellite
Press [OK] button to display the Satellite List. Select one of the pre-programmed satellites that
correspond to the direction of the antenna. If the desired satellite name is not on the list, select “Other”.
Connection Type
The default value is Twin LNB, you can change it to Separated
Note:
If you change the Connection Type all channels will be deleted.
Tuner
Select a tuner for channel searching from the selected satellite.
LNB Frequency
Select the L.O. Frequency of the used LNB. The LNB Frequency: 5150, 11300, 11450, 9750/10600,
9750/10650, 9750/10700, 9750/10750 can be selected with [VOL-/VOL+] buttons. You can enter LNB
frequency also by using Numeric keys on the remote control The most used setting are the universal LNB
settings 9750/10600.
LNB Power
Select LNB power ON to output the LNB voltage.
Switch 22 kHz
If you are using a 22 kHz tone to select different satellite dishes or bandwith to Master, make the 22 kHz
tone switch enable or disable to select dish or LNB.
Note:
If the LNB Frequency is set to Universal LNB (9750/10600 or 9750/ 10650, 9750/10700,
9750/10750), it is impossible to set 22 kHz because it is a default setting in this application.
23
DiSEqC Version
You can choose Tone Burst, DiSEqC 1.0, DiSEqC 1.1 or Disable.
Tone Burst allows two satellite dishes to be connected to the Master at the same time. DiSEqC 1.0 and
1.1 allow multiple antennas to be connected to the Master at the same time. If you are using five or more
fixed antennas or LNBs, then it is recommended using a DiSEqC 1.1 switch.
DiSEqC Port
Choose to which DiSEqC Input your selected dish is connected to. Tone Burst has two options: Tone A for
port 1 and Tone B for port 2.
DiSEqC 1.0 has four ports.
DiSEqC 1.1 has sixteen ports.
Transponder
To test your settings you can choose a transponder with a strong signal. If your settings are correct then
the level and quality banners should show a signal.
Dish Type
Choose the Dish Type you use Fixed, DiSEqC 1.2, USALS. The default value is Fixed.
If you choose DiSEqC 1.2, then press the [OK] button to enter DiSEqC 1.2 Setup menu.
If you choose USALS, then press the [OK] button to enter USALS Setup menu.
Channel Setup
To go to Channel setup menu directly from LNB setting menu press the [OK] button.
5.5.4 Channel Setup (Master Only)
Satellite
Press [OK] button to display the Satellite List. Select one of the pre-programmed satellites that
correspond to the satellite dish. If the desired satellite name is not in the list, select “Other”.
Tuner
Select a tuner for channel searching.
Search Mode
There are 3 search modes. Auto, Transponder and Network. The Auto mode enables you to search using
the information the Master has. On the other hand, you may need to know in advance the frequencies
and the symbol rates when you use transponder mode. When you use the Network mode, the NIT
(Network Information Table) is available, the Transponder’s information can be found.
Frequency
Select or enter the Transponder’s Frequency by using the numeric buttons on your remote control.
24
Polarization
Choose the type of polarisation, either the Horizontal or the Vertical.
Symbol Rate
Enter the Transponder’s Symbol Rate by using the numeric buttons on your remote control.
Scan Mode
You can select only searching free channels or all channels (included scrambling channels).
Start Search
To start the searching process, press [OK] button at “Start Search”.
To stop the searching progress on the way, press either the [MENU] button or the [EXIT] button.
This menu will be shown as long the STB is searching for channels. All channels found will be listed in
two columns on the screen with TV channels in one column and Radio channels in the other. Please note
that the search process may take a few minutes.
When the search process is completed, the screen will show how many TV and Radio channels have been
found. Press [OK] button to save the channels.
Note:
When Master finishes searching, Slave(s) will get automatically an update of the
Channel List.
LNB Setup
To go to the LNB Setup menu directly from Channel Setup menu, press the [OK] button.
25
5.5.6 DiSEqC Setup (Master Only)
Satellite
You can not change the satellite here. It is the same satellite as you choose at LNB Setup menu.
Tuner Select
You can not change the Tuner here. It is the same Tuner as you choose at LNB Setup menu.
Transponder
Select a transponder to catch a strong signal. Press [OK] to display the transponder list.
Command Mode
User mode:
The movement is adjustable by single steps.
Installer mode: The movement is adjustable by East, West commands (continuous movement).
Movement
User mode:
Installer mode:
Select how many steps you want the dish to move.
Move the dish continuously.
Motor Control
n Goto:
n Reset:
n Limit OFF:
n Limit W:
n Limit E:
n Goto Ref:
n Store:
Move the motor to the stored position of the selected satellite.
Reset all the stored positions of the motor relative to the “0” position.
Remove the limitation.
Set the limits of West position.
Set the limits of East position.
Go to reference.
Store the current position of the motor for the selected satellite.
Up One Level
Go back to the LNB setup by pressing the [OK] button.
5.5.7 USALS Setting (Master Only)
USALS is a very convenient motorized DiSEqC system that supports DiSEqC 1.3 commands and can
also get the satellite position automatically if you now your geographical location. Basically, the listed
satellites have its Longitude and therefore the angle of the satellite can be calculated without problems.
If you have USALS motorized system, then you can use the USALS as followings,
Satellite
You can not change the satellite here. It is the same satellite as you choose at LNB Setup menu.
Tuner
You can not change the Tuner here. It is the same Tuner as you choose at LNB Setup menu.
Transponder
Select a transponder to catch a strong signal. Press [OK] to display the transponder list.
26
Satellite Angle
This is the orbital position of the selected satellite. Normally this is set automatically but if you wish you
can edit it manually with the numerical buttons on the remote control. East or West will be selected with
[VOL-/VOL+] buttons.
My Longitude
It means the longitude of your location. You can select the angle, East and West with [VOL-/VOL+]
buttons or numeric buttons.
My Latitude
It means the latitude of your location. You can select the angle, South or North with [VOL-/VOL+] buttons
or numeric buttons.
Reference Position
Go to the Reference position.
Move
You can turn the antenna clockwise or counter clockwise to exact position with [VOL-/VOL+] buttons.
Goto the Position
After having set the Longitude, Latitude of your local position and the longitude of the selected satellite,
this function is used when you want to move antenna to the desired direction (position) which you have
saved before.
Up One Level
Go back to the LNB setup by pressing the [OK] button.
5.5.8 Parental Lock
You can lock or unlock the menu and change the PIN codes in this menu. The default PIN is 0000.
5.5.9 HDD Function (Master Only)
Power Save
Set the time to make Hard Disk (HD) go to save mode by itself, when the HD does not work.
The default value is 5min, but you can set it to 1min, 2min, 5min, 15min, 30min and 60min.
Format
To format the Hard Disk Drive (HDD), select this option and press the [OK] button.
Formatting the Hard Disk Drive will permanently delete all data and files stored on HDD. You can’t use
TimeShift, record files, listen to MP3s and watch pictures with an unformatted HDD.
Note:
Only Master has HDD.
27
5.5.10 Software Update
In this menu you can update your system by using a USB stick. The Slave(s) must be in the same menu
while updating the software.
5.6 Media Base
To enter this menu you can press [MEDIA] button or on the main menu move the cursor to this screen
button, then press the [OK] button. In this menu, you can watch DVR on the HDD, listen to MP3 or
watch pictures on HDD or USB storage.
You can press [VOL-/VOL+] buttons to switch between DVR/MP3/PIC tab.
DVR
Press [RED] button, you can sort files.
Press [OK] button on a file, you can start playing the file.
Note:
USB storage won’t be displayed in this TAB.
MP3
To enter this menu press [VOL-/VOL+] buttons. In this menu you can listen MP3 on HDD or USB
storage. To sort the MP3 files press [RED] button. You can show the Playlist by pressing [GREEN] button,
Press [YELLOW] button you can clear the playlist.
To add an MP3 to the playlist you can move the cursor to the file and press [BLUE] then a green small
circle will appear. If you want to remove an MP3 from the playlist you can press [BLUE] button again and
then the green small circle will disappear. Press [OK] button on a file, you can add it into the playlist and
start playing the playlist.
PIC
To enter this menu press [VOL-/VOL+] buttons. In this menu you can watch the pictures on HDD or USB
storage. Press [RED] button to sort the files.
Note:
28
Only JPG file can be displayed.
5.7 Media Base Management
Enter Media Base Management by pressing [SUB] button in Media Base menu.
You can also press [SUB] button to go back to Media base under “Media Base Management”
Press [VOL-/VOL+] buttons to switch between DVR/MP3/PIC tab.
Note:
USB storage device won’t be displayed in this menu.
In this menu you can delete a file or folder by pressing the [RED] button. If you want to delete a crypto
folder, you must enter the right PIN code. All the files or folders will be permanently deleted.
Press [GREEN] button to create a folder. You can create either public or crypto folder by choosing the
different types. If you choose to create a crypto you must enter the password.
Rename the file or folder by pressing [YELLOW] button. If you want to rename a crypto folder, you must
enter the right PIN code.
You can also move a file by pressing [BLUE] button, then a directory list will display. If you want to move
a file or a folder to a crypto folder, you must enter the right PIN code. You can’t move a file or a folder to
root directory.
Note:
If you see a file name is yellow that means this file is recording now, and you can not
delete, rename and move this file.
5.8 Media Base Transfer
The left column displays the files and folders on the HDD. The right column displays the files and folders
on the USB storage device.
MP3 files will be shown in MP3 type, a JPG file will be shown in PIC type.
Press [TV/RAD] button to change types.
Also only MP3 files and JPG files will be shown on right column. If you have plugged in more than one
USB storage device, you can press [TV/RAD] button to change different USB storage devices.
Copy a file or a folder
locate the cursor on the file or folder you want to copy, then press [RED] button. You can’t copy a file or
folder to root directory.
Delete a file or a folder
locate the cursor on the file or folder you want to delete, then press [GREEN] button. You can’t delete a
file or folder to root directory.
29
Stop USB Device
first move the cursor to the right column, then press [TV/RAD] button to choose the device you want to stop
(if you have more than one device plugged in), then press [YELLOW] button to stop the device.
Note:
If a USB storage is plugged into a Slave, you can not see the file list under the Master
and the other Slave’s Base Transfer menu. If there is an unknown device, please make
sure the partition type isn’t NTFS.
5.9 Common Interface (Master Only)
With inserted Conditional Access Module you will get information about your CAM, smart card
subscription status, manage maturity rating and PIN codes of the smart card in this menu. If the module
hasn’t been installed, the phrase “Not installed” will display. Content of the menu depend on the module
type. Please refer to the user manual of your module.
Note:
To get maximum benefit and access to open the scrambled channels it is very important
to choose the right CAM module(s) for your satellite receiver SRT 6300 W.
Please ask your local dealer to find the right CAM module for the programmes you want
to watch.
The most common modules are made to open only 1 scrambled channel. This will allow Master or Slave
to open a scrambled channel.
Using 2 modules with 2 cards allows you to open 2 scrambled channels at the same time. This means
one scrambled channel can be recorded and the other one watched on Master or Slave.
There are also CAM modules on the market which can open 2, 3 or more scrambled channels at the
same time. These modules allow you to open more scrambled channels from the same transponder /
frequency. This is a good choice to use such kinds of modules for the SRT 6300 W receiver.
Using these CAM modules it allows you to record a scrambled channel to HDD, watch another channel with
the Master and watch a third one with the Slave or even open a scrambled channel on second Slave unit.
For maximum freedom in watching scambled channels insert an extra CAM module with card. This
allows you to watch scrambled channels from different transponders / frequencies.
In order to display the module(s) and messages on screen correct, select in menu “Common Interface”
the correct capacity of the CAM module. Select between: Single/ Double/ Triple or Multi.
Note:
30
To open scrambled channels faster, set the PMT function in menu Common Interface to OFF.
6.0 FUNCTION GUIDE
6.1 Channel List
Press [OK] button to see the Channel list, when watching the live programme.
The Channel List displays the following:
n Satellite name
n Free Channels or Scrambled Channels
n Transponder an Polarization information
n [RED] button (only in Master) forcing to switch the channel
n [GREEN] button you can sort the channel list by alphabets
Note:
Only Master can switch the channels between different Transponders. Gray channels on the
Slave’s channel list mean these channels cannot be watched. If you choose Separated as
Connection Type, you see T1 (Tuner 1) or T2 (Tuner 2) beside Channel Name.
6.2 Information Box
Press [i] button on the remote control to see the programme Information. The Information Box displays
as follows:
n
n
n
n
n
n
n
n
n
Channel Number
Programme type F means Free, if the programme is scrambled, “$” sign will be displayed
If you see a “T”, it means this channel provides Teletext
If you see a “S”, it means this channel provides Subtitle
Signal Level
Signal Quality
EPG information
Current Time
Programme start time and end time
You can hide the Information Box by pressing [i] button.
Note:
If you see AC3 in the info box means this channel provides AC3 sound. If you choose
Separated as Connection Type, you will see T1 (Tuner 1) or T2 (Tuner 2) beside
Current time.
31
6.3 EPG (Electronic Programme Guide)
To display the information of current and following TV programmes, press the [EPG] button on your
remote control.
If EPG of programmes is broadcasted, you will see the detailed description of the programmes, start/end
time and programme schedules etc.
[RED] :
[GREEN] :
[YELLOW] :
[BLUE] :
[TV/RAD] :
[=]:
Display the current programme schedule and detailed description.
Display the next programme schedule and detailed description.
Display the current channel weekly schedule.
Display the reserved schedule.
Change the contends of EPG between TV and Radio services.
To reserve a programme or channel a reserved programme.
6.4 Subtitle
To watch subtitles press [SUB] button for displaying the subtitle language list and choose the language
you want. Then press the [OK] button.
If the broadcaster provides subtitles, you can see “S” symbol in the Information Box.
6.5 Teletext
If the broadcaster supports Teletext, you can see a “T” symbol in the Information Box.
Press the [TEXT] button to watch the Teletext. You can enter the page number by pressing the numerical
buttons on the remote control.
Home:
Next:
Prev:
Pause/Start:
Exit:
Go to the Home page.
Go to the next page.
Go to the previous page.
Pause or start the Teletext.
Exit the Teletext
Also you can press colour buttons for page selections.
6.6 Sound Track
You can choose a language of soundtracks by pressing [AUDIO] button when the broadcaster supports
various languages of soundtracks. Also, you can choose a mode among Stereo, Mono, Left and Right
using [VOL- / VOL+] buttons.
32
6.7 Time Shifting
1. To use Time Shifting function, press [GREEN] button to display Time Shifting progress bar
and pause the current LIVE programme. Press [RED] button or [GREEN] button once more to
continue the current LIVE programme.
2. To go to the desired playback position, press [YELLOW] or [BLUE] button. These functions
are valid while the Time Shifting progress bar is displayed.
3. To stop Time Shifting function, press [STOP] button.
4. To start Instant Time Shifting, press [AROUND] button. The start position of the playback go
10 seconds back by pressing [AROUND] button.
6.8 Recording
There are three kinds of recording: Recording LIVE Programme, Timer recording, recording by EPG.
Recording LIVE Programme
Press [=] button to record the LIVE programme you are watching. To stop the recording, press [STOP]
button. A list will be shown, then you can stop the recording.
Note:
Master or Slave(s) only can stop their own recording.
Timer Recording
Go to “Timer Setup” menu, you can add a timer by pressing [RED] button. In order to start a Timer on
the Slave, the Master shouldn’t be powered off and should use the same Transponder as the Slave when
sharing a tuner. You can check Timer status in “Timer Setup” menu.
Note:
Only 8 Timers you can add.
Recording by EPG
Press [EPG] button in the LIVE mode to display EPG. Select a service you want to record, press [=]
button and then choose Daily or Weekly record. Press [=] button once more to chancel a reservation.
Note:
you can add only 8 Timers. During recording of a programme, you can not search
channels and reorganize channels.
33
6.9 Play Files
DVR File
Playing a recorded file, the info box will be seen with the File name, Duration time and the buttons you
can use. You can enter the time to jump to the exact time by pressing the numerical keys.
Note:
Goto function only works when the info box is displayed and you can enter hour:
minute: second.
MP3 File
To remove a song from the list, locate the cursor on that song, then press [SUB] button
PIC File
If you play a JPG file, you will see the info box as the above. Press [EXIT] to go back to Media Base.
6.10 Stop
n
n
n
To stop playing a DVR video or playing MP3, press [STOP] button.
You can stop recording and stop Time Shifting by pressing [STOP] button.
In picture mode, press [STOP] button to show Display Mode list.
6.11 Pause
Pause from LIVE video
Enable Time Shifting, the LIVE picture will be changed to time-shifted playback. The video continues
from the paused image when resumed from PAUSE.
Pause from Time Shifting
The video continues from the paused image when resumed from PAUSE
Pause from DVR video
The DVR video continues from the paused image when resumed from PAUSE
Pause from Pictures
The slide show continues from the paused image when resumed from PAUSE
34
6.12 Slow Motion Playback
1.
2.
3.
4.
5.
6.
7.
To playback in slow forward motion (without sound), press the [ ] button.
The slow forward motion can be adjusted by pressing the [ ] button repeatedly.
To playback in slow rewind motion (without sound), press the [ ] button.
The slow rewind motion can be adjusted by pressing the [ ] button repeatedly.
There are two steps (0.25X, 0.5X) in slow motion playback.
Press [4] button to resume playback with normal speed.
The slow motion is only available for the playback.
Note:
Only on DVR and Time shifting you can use slow motion playback. Radio programmes
support only slow forwarding (0.25X, 0.5X).
6.13 Fast Forwarding and Rewinding
1. To go to the desired playback position, press [7] or [8] button.
2. Press [7] or [8] button repeatedly to change the speed. There are six speeds (2X, 4X, 8X,
16X, 32X, 64X).
3. Press [4] button to resume playback with normal speed.
4. When playing MP3, press [7] button to play pervious file, and press [8] button to play the
next file.
5. When watching pictures, press [7] button to go back to the pervious picture, and press [8]
button to the next picture.
Note: Only on DVR and Time-Shifting you can use fast forwarding an rewinding. Radio
programmes only support Fast forwarding (2X).
6.14 Bookmark
You can jump to a position directly by bookmarking the function in playback. Use bookmarks for
searching positions very quickly and easily.
Add a bookmark
To add bookmark, press [BOOK] button at the position you want to add it.
Go to a bookmark
Press [BOOK2] button to jump to the bookmark. Then, the DVR video starts from the bookmarked position.
Delete a bookmark
To remove a bookmark, you have to stop the DVR video first. Then press [BOOK] button.
Note:
Only DVR play has bookmark function.
35
6.15 Repeat
In Time Shifting mode
Press [AROUND] to start Instant Time Shifting. The start position of the playback go 10 seconds back by
pressing [AROUND] button.
In DVR play mode
Press [AROUND] button to repeat playing the current file. Press [AROUND] button once more to cancel
the repeated playback.
In MP3 play mode
Press [AROUND] button to repeat playing the current file. Press [AROUND] button once more to cancel
the repeated playback.
In PIC mode
Press [AROUND] button to rotate the picture.
6.16 Picture In Picture (PIP, Master Only)
1. In the LIVE mode, press [PIP] button to display PIP. Press [PIP] button repeatedly to change
the size of sub-picture or to remove the sub-picture.
2. At PIP screen, press [PIP2] button to exchange main-picture with sub-picture.
Note:
It is not possible to exchange main-picture with sub-picture during recording and Time Shift.
3. To display the service list of main-pictures, press [OK] button. Select a service in the service
list. To display the sub-picture’s service list, press [PIP3] button.
4. Press [PIP4] button to move the sub-picture’s position.
36
6.17 Keyboard
The keyboard will be displayed when you change file name, folder name, channel name and favourite
group name.
There are two keyboards you can use:
n Standard Keyboard
n
Extended Keyboard
[RED]:
[GREEN]:
[YELLOW]:
[BLUE]:
Use the Standard keyboard.
Use the Extend keyboard.
Save and exit the keyboard
Delete the last entry.
37
7.0 TURN OFF SYSTEM
7.1 Master
Press the [POWER] button on Master. There are two options you can select next:
n Power Off
Turn off Master: Next time press [POWER] button to turn on Master.
Note:
If Slaves are connected to Master (the small circle beside Slave 1 and Slave 2 is green,
otherwise, they are red), turn off the Slaves first.
n Server Mode
The Master will be in server mode and provides all services to the Slaves. If you want to leave the server
mode, press the [POWER] button, Master will work normally.
7.2 Slave
To turn off the Slave, just press [POWER].
If the Slave lost connection, you will see “Poor Wireless Signal Quality! Searching Master...” on the Slave
screen, after a few seconds, you will see the message “Connection Lost”
At this time, you can choose Reboot the or Turn off the Slave.
If the Master has been turned off, you will see Master is power off and you can reboot or power off the Slave.
Note:
If Master has been rebooted, the Slaves should be rebooted as well.
8.0 SOFTWARE UPDATE
Although the SRT 6300 W System has stable and convenient software to use, a new system software may
be released. To add or modify functions, the system software has to be updated. The latest software and
manual will be found at STRONG’s website. www.strong.tv
With this menu (only Master), you can update your firmware via USB stick.
USB Update
1. Download the update software from the website and copy the file onto a USB stick.
2. Turn on all Slave(s). Select route on Slave(s) MENU\ Installation\Software Update page. Let
them stay in this menu.
3. Plug the USB stick into the USB connector behind the flap on the front of the Master
4. Turn on the MASTER and go also to Software Update menu.
5. Press the [OK] button to enter USB and select the update file, then press Update [RED]
button to start updating.
6. After the update has finished, the Master and Slave(s) will reboot automatically.
38
9.0 SPECIFICATIONS
9.1 Master
Double Tuners
Input / Loop through Connector
Frequency Range
Signal Level input
LNB Power & Polarization
22 kHz Tone
DiSEqC
Demodulation
Input Symbol Rate
DVB-S
75 Ohm, IEC 169-24
950 ~ 2150 MHz
-10 ~ -80 dBm @ 27.5 MS/s
Vertical:
+13 V DC
Horizontal:
+18 V DC
Current:
Max 500 mA
Overload protection
22 kHz +/- 2 kHz, 0.6 Vpp +/- 0.2 V
V1.0/1.1/1.2/1.3(compatible)
QPSK
1 ~ 45 Mbps, SCPC/MCPC
MPEG Transport Stream, A/V Decoding
Transport Stream
Profile Level
Aspect Ratio
Video Resolution
Audio Decoding
MPEG-2 TS Specification (ISO/IEC 13818)
MPEG-2 MP@ML
4:3 / 16:9
720 x 576 (PAL), 720 x 480 (NTSC)
MPEG 1 Layer 1, 2, 3
Main System
Main Processor
Memory
HDD
ST I5100
Flash-ROM:
RAM:
EEPROM:
160 GB
Front Panel & RCU
7 KEYs
VFD
2 LEDs
RCU
CH-/+, VOL-/+, MENU, OK, STANDBY
Time, Service name and other info
STANDBY & POWER ON
47 keys
Conditional Access Interface
PCMCIA
8 MBytes
64 MBytes
1 kbits
2 slots
DVB common interface Standard
39
A/V & Data In/Out
TV-SCART
USB
Video CVBS/RGB/Y/C Output
Audio L/R Output
Video CVBS/RGB Output
Audio L/R Output
Video CVBS/RGB Input Bypass
Audio L/R Input Bypass
Video S-VIDEO Output
Video CVBS Output
Audio L/R Output
Digital Audio or Dolby AC-3 bitstream Output
9 pin CD-SUB type
Transfer rate 115.2 kbps
USB 2.0 Device
RF-Modulator
RF-Connector
Output Service
TV standard
75 Ohm, IEC 169-2, Female / Male
CH 21 ~ 69 (PAL/NTSC)
PAL G/I/K, NTSC selected by Menu
Power Supply
Input Voltage
Type
Power Consumption
Protection
90 ~ 240 V
AC
30 W
AC Fuse
Physical Specification
Size (W X H X D)
Weight (Net)
340 x 265 x 60 mm
3.35 kg
VCR-SCART
S-Video
RCA A/V
S/PDIF
RS-232C
9.2 Slave
MPEG Transport Stream, A/V Decoding
Profile Level
Aspect Ratio
Video Resolution
Audio Decoding
Main System
Main Processor
Memory
40
MPEG-2 MP@ML
4:3 / 16:9
720 x 576 (PAL), 720 x 480 (NTSC)
MPEG 1 Layer 1, 2, 3
ST I5100
Flash-ROM:
RAM:
EEPROM:
8 MBytes
32 MBytes
1 kbits
Front Panel & RCU
7 KEYs
4-digital 7-segment LEDs
3 LEDs
RCU
A/V & Data In/Out
TV-SCART
CH-/+, VOL-/+, MENU, OK, STANDBY
Time, Service name and other info
Link, Record, Power on/Standby
47 keys
S/PDIF
USB
Video CVBS/RGB/Y/C Output
Audio L/R Output
Video CVBS/RGB Output
Audio L/R Output
Video CVBS/RGB Input Bypass
Audio L/R Input Bypass
Video S-VIDEO Output
Video CVBS Output
Audio L/R Ouptut
Digital Audio or Dolby AC-3 Bitstream Output
USB 2.0 Device
Power Supply
Input Voltage
Type
Power Consumption
Protection
10.4 ~ 12.6 V
DC
11 W
DC Fuse
Physical Specification
ITEM Specification
Size (W X H X D)
Weight (Net)
165 x 60 x 160 mm
1.06 kg
VCR-SCART
S-Video
RCA A/V
Note:
Specification and functions may be changed for improvement without notice in
advance.
41
10.0 TROUBLESHOOTING
Occasionally the receiver may hang-up. In that case it is recommended to reset the receiver by
disconnecting it from the main power. Wait 30 seconds and connect to main power again, then see if the
unit is working as expected. If the receiver does not work properly after checking the trouble shooting
section, please contact your dealer. Do not open the receiver cover, it may cause an electric shock due to
high voltage and the warranty of your receiver will be void.
Problem
No picture and sound
Solution
Check the coax cable. Replace the cable, or connect the cable tightly
to the receiver.
Set the values of tuner parameters correctly
Check the signal strength, adjust your dish correctly
The display on front panel
does not light up
Check if the power cord is connected to the wall outlets
The receiver displays the
message “No Signal”
If it is winter, check if there is snow covering the dish
Press the SAT button on the RCU and select the correct satellite
Check the settings in LNB and Channel setup menu
Ask your dealer to check the outdoor unit and antenna cable to LNB
The remote control does not
work
Check if the batteries are inserted correctly in your remote control
Check the batteries, and if exhausted, replace them
Slave can not connect to
Master.
Check if Master is working
Check if all the parameters are same in Wireless network
configuration menu for both Master and Slave
Slave displays the message
“Poor Signal”
Adjust the direction of the antenna on the Slave or Master
Change the Network density in Wireless network configuration menu.
42
Environmental Issues
ENVIRONMENTAL ISSUES
STRONG is committed to reducing the impact of its products on the environment.
To maximise the benefits of our design enhancements, your co-operation is required.
Electronic product recycling
Do not dispose of this product with your
domestic rubbish.
At the end of its useful life, this product
contains materials which when processed
correctly can be recovered and recycled. By
participating in the responsible recycling
of this product you will be reducing the
requirement for new raw materials and
reducing the amount of material that
would otherwise end up in landfill.
When you purchase a new, similar product
your retailer may offer to take this old one
off you. Alternatively, you can take it to
your local recycling centre. Your retailer or
local municipal authority will advise you of
the collection facilities available for waste
electronically products in your area. User
of this service will be free to you.
Within the scope of the European
legislation on Waste Electrical and
Electronic Equipment (Directive 2002/96/
EC valid as of August 2005) STRONG
provides a recycling system free of charge
for consumers to returning products after
end of life. For more information about
STRONG’s environmental policy to you:
www.strong.tv - select “About us” and
“Environmental Policy“ from the submenu.
Packaging
When disposing of this
product packaging, please
ensure that it is recycled.
Packaging material is to be
depolluted in waste
separation.
Power Saving
To save power and money,
please put the product into
standby mode when not in
use. We also recommend
disconnection from mains
supply when not in use for longer
periods of time.
Batteries
Do not dispose of the batteries
from your handset with your
domestic waste.
Where they are available,
participate in your local municipal
or retailer collection schemes
for spent batteries. Batteries
discarded in landfill sites or
incinerated increases the chances
of pollutants being dispersed into
the atmosphere.
Alternations reserved 09/2009
Environmental Issues