1
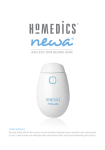
QUICK REFERENCE USER GUIDE
It is important to read the detailed user manual prior to using
the Newa device.
POWER BUTTON
POWER LEVEL SWITCH:
Led:
Steady light = Standby mode. There is no
energy delivery.
“0” = Device is OFF
“1” = Low heating level
“2” = High heating level
Blinking light = Treatment mode. Active
energy delivery. When light changes from
Blue to Green it indicates that the skin has
reached the optimal temperature range.
ELECTRODES:
The active tip and electrodes must be in full
contact with the skin during the treatment.
Please note It is recommended to start with the higher
level, but if your skin feels too warm, you
may select the lower level.
POWER SUPPLY
1. Plug the power supply into 2. Apply two “lines” of the 3. The Newa activator gel should
Newa activator gel directly on cover the active tip area.
an electrical outlet.
the electrodes
Spread an even layer of the
Newa activator gel over the
treatment area.
4. Divide your face into 6 “treatment areas”:
two on each cheek and two under the chin.
5. Move the Power Level Switch
to “2”. The LED will emit a
steady light.
6. Press and release the power 7. Once you have reached
button to start energy delivery. the optimal skin temperature
The LED will start blinking.
range the LED turns Green.
DO NOT stop the circular Keep treating the entire area
until the 4 minute treatment
movement of the device.
cycle ends.
Make sure all electrodes are
in full contacts with the skin Avibration will indicate that
the 4 minute treatment cycle
at all times.
is completed.
It is important you maintain
a reasonable movement In order to stop treatment before
speed as demonstrated in the 4 minutes end, press the
power button.
the insructional DVD.
If your skin temperature is too For best results allow for each
high, increase the size of the treatment area the full 4 minutes
treatment.
circular motion.
8. When the treatment of one
skin area is completed, apply
additional Newa activator gel on
the electrodes, and continue to
the next treatment area.
In order to complete the treatment,
repeat the procedure on all
treatment areas.
For full detailed instructions
please refer to the Newa user
manual.