1
Calibration
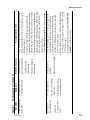
Entering a CalWord
A password may be used to add extra security to the Calibration with a
“CALWORD”. See Chapter 4, Create/Edit CalWord/PassWord/LogWord. If
turned on, a code must be entered before the user may perform a calibration.
To enter a CalWord (if activated):
1. Press and hold ↑ and ↓ for three seconds. The message “FEATURES
MODE” appears on the display and counts down from 3, and then
displays “BEGIN CAL”.
2. Press → to accept. The display reads “CAL WORD” and “* * *”. The
cursor is on the first asterisk.
3. Press ↑ or ↓ to scroll to the correct character.
4. Press → to accept. The cursor moves to the next character.
5. Repeat steps 3 and 4 until all three characters are accepted. If correct,
the next display reads “AUTOCAL”. If the CalWord is incorrect, the
display reads “BEGIN CAL” message. Begin at step 2 to start over.
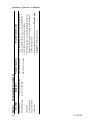
Auto Calibration (cont.)
6. Press → to accept “AUTO CAL”. The screen displays “BEGIN
AUTOCAL” alternating with “APPLY GAS” counting down from 30
seconds. If no gas is detected during this period, the screen returns to
“BEGIN CAL”.
7. Turn on the regulator and wait for the Genesis to go through the
process.
First, the display will read “CAL IN PROCESS” for the first 30
seconds. Then the screen displays “CAL TIME LEFT” (counting
down from 45 seconds) alternating with the gas readings.
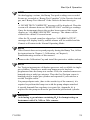
NOTE
During calibration, on datalogging versions, datalogging is disabled
but calibration events are recorded in the logged data.
8. When calibration is complete, the display reads “AUTOCAL
PASSED” and then alternates between “>ACCEPT, ABORT” and the
gas readings. The gas labels alternate with ‘PASS”. Press → to accept.
The display will show “CAL ACCEPTED”, and then alternate
between “REMOVE GAS” and the gas readings.
If you choose to abort, press ↓ to scroll to “ABORT” then → to accept
the abort option.
The display will read “CAL ABORTED” and then alternate between
“REMOVE GAS” and the gas readings.
71-0132
39