1
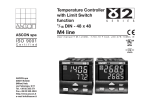
Controller - Indicator
with Limit Switch
function
1/
32 DIN - 48 x 24
ASCON spa
ISO 9001
C e r t i f i e d
C1 line
c
User manual • M.I.U.C1L-1/03.10 • Cod. J30-478-1AC1L IE
C
UL
LISTED
ASCON spa
20021 Bollate
(Milan) Italy
via Falzarego, 9/11
Tel. +39 02 333 371
Fax +39 02 350 4243
http://www.ascon.it
e-mail [email protected]
US
Controller - Indicator
with Limit Switch
function
1/
32 DIN - 48 x 24
c
C1 line
C
UL
LISTED
274.8
RST
US
Information
c
NOTES
ON ELECTRIC
SAFETY AND
ELECTROMAGNETIC
COMPATIBILITY
Please, read carefully these instructions before proceeding with
the installation of the controller.
Class II instrument, for indoor use only.
This controller has been designed with compliance to:
Regulations on electrical apparatus (appliance, systems and installations) according to the European Community directive 73/23/EEC amended by the European Comunity directive 93/68/EEC and the Regulations
on the essential protection requirements in electrical apparatus EN610101 : 93 + A2 : 95.
Regulations on Electromagnetic Compatibility according to the
European Community directive n° 89/336/EEC, amended by the European
Community directive n° 92/31/EEC, 93/68/EEC, 98/13/EEC
and the following regulations:
- Regulations on RF emissions:
EN61000-6-3: 2001
residential environments
EN61000-6-4: 2001
industrial environments
- Regulation on RF immunity:
EN61000-6-2: 2001
industrial equipment and system
It is important to understand that it’s responsibility of the installer to ensure
the compliance of the regulations on safety requirements and EMC.
Reapirs: this device has no user serviceable parts and requires special
equipment and specialised engineers. Therefore, a repair can be hardly
carried on directly by the user. For this purpose, the manufacturer provides technical assistance and the repair service for its Customers.
Please, contact your nearest Agent for further information.
All the information and warnings about safety and electromagnetic
compatibility are marked with the B sign, at the side of the note.
2
Table of contents
TABLE OF CONTENTS
1
2
3
4
5
6
INSTALLATION ...........................................................................................................................Page
ELECTRICAL CONNECTIONS.....................................................................................Page
PRODUCT CODING ..............................................................................................................Page
OPERATIONS..............................................................................................................................Page
LIMIT SWITCH FUNCTION ..........................................................................................Page
TECHNICAL SPECIFICATIONS ...................................................................................Page
Resources
4
10
15
19
30
35
Operating mode
Limit Switch
Supervisory Switch
Main universal input
OP1
IN
OP1
OP2
OP2
C1
Modbus RS485
Parameterisation
Supervision
3
1 - Installation
1
INSTALLATION
Installation must only be carried
out by qualified personnel.
1.1 GENERAL DESCRIPTION
IP 20 Terminal block
EN61010 - 1 (IEC1010 - 1)
Product code label
Before proceeding with the installation of this controller, follow the
instructions illustrated in this manual and, in particular, the installation precautions marked with the
B symbol, related to the
European Community directive on
electrical protection and electromagnetic compatibility.
Panel surface
B
To prevent hands or metal touching parts that may be electrically
live, the controllers must be
installed in an enclosure and/or in
a cubicle.
Mounting clamps
Sealing front panel gasket
Front panel
IP65 protection
EN 60529 (IEC 529)
4
1 - Installation
1.2 DIMENSIONAL DETAILS
1.2.1 Panel Mounting Models
Instrument dimensions
Panel cut-out
48 mm
1.89 in
65 mm min
2.56 in min
120 mm
4.72 in
22.2+0.3 mm
0.87+0.01 in
20 mm max.
0.79 in max.
42 mm min.
1.65 in min.
25 mm
0.99 in
45+0.6 mm
1.78+0.023 in
5
1 - Installation
1.2.2 DIN Rail Mounting Models
Instrument dimensions
56 mm
2.20 in
12 11 10 9 8 7
93 mm
3.66 in
6 5 4 3 2 1
39 mm
1.53 in
160 mm
6.30 in
6
24 mm
0.94 in
1 - Installation
B
1.3 ENVIRONMENTAL RATINGS
Operating conditions
M
T
%Rh
Altitude up to 2000 m
Temperature 0…55°C
Relative humidity 5… 95 % non-condensing
Special conditions
M
T
%Rh
P
Altitude > 2000 m
Temperature >55°C
Humidity > 95 %
Conducting atmosphere
Forbidden Conditions
C
E
Suggestions
Use 24V~ supply version
Use forced air ventilation
Warm up
Use filters
D
Corrosive atmosphere
Explosive atmosphere
7
1 - Installation
1.4 INSTRUMENT MOUNTING
1.4.1 Panel Mounting Models
Instrument insertion
Installing the locking clamps
Clamps removing
1 Prepare panel cut-out;
2 Check front panel gasket position;
3 Insert the instrument through
the cut-out.
1 Fit the mounting clamps;
2 Push the mounting clamps
towards the panel surface to
secure the instrument.
1 Insert the screwdriver in the clips
of the clamps;
2 Rotate the screwdriver.
1
1
2
3
2
UL note
[1] For Use on a Flat Surface of
a Type 2 and Type 3 ‘raintight’
Enclosure.
8
1
2
1
1 - Installation
1.4.2 DIN Rail Mounting Models
Instrument installation
Instrument removal
1 Hook the “A” portion of the instrument socket to the DIN rail.
1 Press the lower part of the DIN rail
socket; when “D” part of the socket frees from the rail, the instrument can be removed rotating the
higher part as indicated.
A
A
1.4.3 INSTRUMENT
B
UNPLUGGING
The instructions that follow are
valid for both the panel and DIN rail
mounting models.
1 Push and
2 pull to remove the instrument
1
Rotate
D
2
1
2 Press the lower part of the socket in direction “B”. As part “C”
is locked to the DIN rail, the
instrument is correctly fitted.
1MΩ
Press
C
Electrostatic discharges can damage the instrument
Before removing the instrument the
operator must discharge himself to
ground
B
9
2 - Electrical connections
2
ELECTRICAL
CONNECTIONS
RS485
2.1
7
OP2 - L
B
TERMINAL BLOCK [1]
8
9
10
11
12
Rear
terminal
cover
A
7
8
1
2
10
11
12
3
4
5
6
NO
C
9
OP1
L
N
B
0,5
Nm
RTD
b
TC
1
2
3
4
5
6
5.7 mm
0.22 in
Wire size
1 mm2 (18 AWG)
mA
mV
12 screw terminals
F50- 474 1A1C1L
Option terminals
Tightening torque 0.5 Nm
Positive screw driver PH1
Negative screw driver 0.8 x 4 mm
Recommended wire terminal leads
Pin connector q 1.4 mm - 0.055 in max.
UL note
[1] Use 60/70 °C copper (Cu)
conductor only.
10
Fork-shape AMP 165004 Ø 5.5 mm - 0.21 in
Ø
L
Stripped wire L 5.5 mm - 0.21 in
2 - Electrical connections
PRECAUTIONS
B
Despite the fact that the instrument
has been designed to work in an
harsh and noisy environmental
(level IV of the industrial standard
IEC 801-4), it is strongly recommended to follow the following
suggestions.
A
All the wiring must comply with the
local regulations.
2.2
B
SUGGESTED WIRES ROUTING
Conduit for low level sensor cables
D
7
E
8
L
1
9
10
C
11
N
12
7
IN
2
3
4
5
D
8
L
6
E
1
9
10
11
N
2
C
12
IN
3
4
5
6
The supply wiring should be routed away from the power cables.
Avoid to use electromagnetic contactors, power relays and high
power motors nearby.
Avoid power units nearby, especially if controlled in phase angle
Keep the low level sensor input
wires away from the power lines
and the output cables.
If this is not achievable, use shielded cables on the sensor input, with
the shield connected to earth.
A
B
A
B
A = Power Supply
B = Output
C = Analog input
D = Serial communications
E = SSR drive output
Conduit for supply and output cables
11
2 - Electrical connections
2.3
B
TYPICAL INSTRUMENT WIRING
RS485
Solid state relay
RX/TX
Load
V~
Supervision
7
8
9
10
11
12
OP2
PTC
[4]
Power
supply
switch
OP1
1 V~ 2
3
4
L
Supply V~
N
Fuse [5]
[6]
5
6
Pt100
B
B
Thermocouple
DC voltage
V~
Coil of the load contactor
12
A
Current
2.5 Ω external
shunt resistor
Notes:
1] Make sure that the power supply voltage is the same indicated on the
instrument.
2] Switch ON the power supply only
after that all the electrical connections have been completed.
3] In accordance with the safety regulations, the power supply switch
shall bring the identification of the
relevant instrument. The power
supply switch shall be easily
accessible from the operator.
4] The instrument is PTC protected.
In case of failure it is suggested
to return the instrument to the
manufacturer for repair.
5] To protect the contacts of the relay
output (OP1) use a 2 A~ T (250
V~) or a 4 A~ T (120 V~) fuse.
6] Relay contacts are already protected with varistors.
Only in case of 24 V~ inductive loads, use model A51-06530D7 varistors (on request)
2 - Electrical connections
2.3.1 POWER SUPPLY
B
Switching power supply with multiple isolation and internal PTC.
• Standard version:
nominal voltage:
100... 240V~ (-15... +10%),
frequency: 50/60Hz;
• Low Voltage version:
nominal voltage:
24V~ (-25... +12%),
frequency 50/60Hz
or
24V– (-15... +25%);
• Power consumption 1.6W max..
Included PTC
1
2
L
N
2.3.2 INPUT
B
• Connect the wires with the
polarity as shown;
• Use always compensation cable
of the correct type for the thermocouple used;
• The shield, if present, must be
connected to a proper earth.
For L J K S T thermocouple type
5
• If a 3 wires system is used, use
always cables of the same size
(1mm2 min.) (line 20 Ω/lead maximum resistance).
• When using a 2 wires system, use
always cables of the same size
(1,5mm2 min.) and put a jumper
between terminals 5 and 6.
A When the distance between the controller and the sensor is 15 m, using
a cable of 1.5 mm2 size, produces
an error on the measure of 1°C.
For PT100 resistance thermometer
6
Wire resistance
150Ω max.
For mA, mV and V
7
5
6
External shunt
2.5Ω
Power supply
mA
8
5
6
12 For 3 wires only.
Rj >10MΩ
Maximum line
resistance 20 Ω/line.
mV
B
b
A
13
2 - Electrical connections
For ∆T (2 x RTD Pt100) Special
Use wires of the
5
6
12 same length and
1.5 mm2 size.
Maximum line
A
B
A
resistance 20 Ω/line.
R1 R2
R1 + R2 must be
< 320Ω.
2.3.3 LIMIT SWITCH
RELAY OUTPUT
B
(OP1)
Single relay output
• NO contact for resistive load
of up to 2A/250V~ max. or
4 A~ T at 120 V~;
• Fuse: 2A~ T at 250 V~ or
4 A~ T at 120 V~ (IEC 127).
3
4
Varistor for inductive
loads 24V~ only
Fuse
Coil of the
load contactor
2.3.4 SUPERVISORY
SWITCH LOGIC
B
OUTPUT (OP2)
Logic output not isolated
• SSR drive output, not isolated
0... 5V–, ±20%, 30mA max..
Load
14
Solid state
relay
10
11
2.3.5 SERIAL
COMMUNICATIONS
B
(option)
• Galvanic isolation 500V~/1 min.;
• Compliance to the EIA RS485
standard for Modbus/Jbus.
A Please, read the user manual:
“C1 serial communications
and configuration software”
3 - Product coding
3
PRODUCT
CODING
The complete code is shown on
the instrument label. The informations about product coding are
accessible from the front panel by
means of a particular procedure
described at section 4.2.2 page 22.
Instrument label
3050
RST
P/N
: C1-3050-9000
CONF. : 2021-0200
S/N
: A0A-9809/0013
V~(L-N) : 100... 240V 50/60 Hz-1,6W
C
B
C
D
L
M
N
P
Q
R
UL
US LISTED
IND.CON.EQ
23 FA
Basic product code (hardware)
Configuration code (software)
15
3 - Product coding
3.1 LIMIT SWITCH MODEL CODE
The product code indicates the specific hardware configuration of the instrument, that can be modified by
specialized engineers only.
Line
Model: C 1
Basic
Note:
Accessories
A 0 C 0 - 9 F G H
C 1
Line
Power supply
100... 240V~ (-15... +10%)
24V~ (-25... 12%) or 24V– (-15... +25%)
A
3
5
Serial Communications
Not fitted
RS485 Modbus/Jbus protocol
C
0
5
User manual
Italian/English
French/English
German/English
Spanish/English
F
0
1
2
3
Front bezel colour
Dark grey (std)
Beige
Dark grey (std)
Beige
Mounting
Panel mounting (standard)
DIN rail mounting with display
16
0/4... 20 mA Input shunt resistor [1]
Standard resistor
Standard resistor
High accuracy resistor
High accuracy resistor
G
0
1
2
3
H
0
1
1] Standard shunt resistor without
field calibration will provide:
1.10% input accuracy for 0/4...
20mA input.
High accuracy shunt resistor
without field calibration will provide: 0.20% input accuracy for
0/4... 20mA input.
Both shunt resistors with field
calibration will provide 0.10%
input accuracy for 0/4... 20mA
input.
3 - Product coding
3.2
CONFIGURATION CODING
The configuration code consists of
7 digits that identify the operating characteristic of the controller,
as chosen by the user.
Section 4.5 at pag. 28 reports the
instructions how to set a new configuration code.
1st part of configuration code
I L M N
2021
2nd part of configuration code
P Q R
200
The configuration code can be displayed on the front panel, following the instructions at page 20 section 4.2.2.
Input type and range
TR Pt100 IEC751
TR Pt100 IEC751
TC L Fe-Const DIN43710
TC J Fe-Cu45% Ni IEC584
TC T Cu-CuNi
TC K Chromel-Alumel IEC584
TC S Pt10%Rh-Pt IEC584
DC input 0… 50 mV, linear
DC input 10… 50 mV, linear
Custom input and range
-99.9… +300.0°C
-200… +600°C
0… +600°C
0… +600°C
-200… +400°C
0… 1200°C
0… 1600°C
engineering units
engineering units
I
-99.9… +572.9°F 0
-328… +1112°F 1
32… 1112°F
2
32… 1112°F
3
-328… +752°F 4
32… 2192°F
5
32… 2912°F
6
7
8
9
Value shown on the display in operator mode
Input variable
Limit switch alarm (AL1) threshold
Supervisory switch alarm (AL2) threshold
L
0
1
2
Alarm_1 (AL1) Limiter Power-ON condition
Automatic reset
Manual reset
Status retention
M
0
1
2
AL1 Function
High limiter
Low limiter
N
0
1
17
3 - Product coding
A
Alarm_2 (AL2) type and function
Not active
Sensor break alarm
Active high
Absolute
Active low
Active high
Deviation
Active low
Active out
Band
Active in
P
0
1
2
3
4
5
6
7
it means that the controller has
not been configured yet.
AL2 action
Direct
Reverse
Q
0
1
The controller remains in stand-by
until the configuration code is set
correctly (see chapter 4.5 page 28).
AL2 reset
Auto
Manual
R
0
1
If, when the controller is
powered up for the first time,
the display shows the following
message:
RST
18
4 - Operations
4
OPERATIONS
4.1 KEYPAD COMMANDS AND DISPLAY
Alarm status
LEDs (red)
RST
Menu access and
AL2 acnowledge
• PV input or alarm
thresholds display
(operator mode)
(in engineering units)
When the measured
value is greater than
sensor high range
Values modification
Enter key for selection
and value setting
confirmation and AL1 reset
When the measured
value is less than the
sensor low range
• Code and/or value
of the Parameter
(programming mode)
The display indicates the Input Value
(IN) or the current setting for limiter
threshold (AL1) or AL2 threshold (all
in engineering units).
If the limiter is configured to indicate
the IN (configuration code L=0), during normal operation, the display
shows the IN value. Pressing the UP
or DOWN keys the AL1 threshold will
be displayed for 5 s.
19
4 - Operations
4.1.3 OPERATOR INTERFACE
The limiter can be configured to show,
on the display, the Input Value (IN) or
AL1 or AL2 threshold (configuration
code L=0 or L=1 or L=2). If the limiter is configured to show, during normal operation, the AL1 (or AL2) threshold value, pressing the UP or DOWN
keys the Input Value will be displayed
for 5 s.
Pressing the Reset key (è) in normal operating conditions has no
effect.
After an alarm event has stopped
and the temperature is within the normal operating range, pressing the
reset key will energize the OP1 limiter output relay (contact will close).
Any operator intervention other than
limiter AL1 acknowledgement (by
pressing the Reset key è), or auxiliary AL2 acknowledgement (by
pressing the Y key when AL2 is
configured), is protected by password access (except the reading of
engineering units, hardware and software code etc.).
20
By pressing the menu access key
Y and entering the correct password value, the operator can enter
the menu mode in order to set the
parameters and configure the
instrument.
When the instrument is in menu
mode, the UP (S) and DOWN
(G) keys modify the displayed
value (S: increases the value, G:
decreases the value), and pressing the Enter/Reset key (è) confirms the value during data entry and
this sets the operating parameters
and configuration codes.
4 - Operations
4.2 DISPLAY
When the display operation is selected, the controller presents automatically all the most important parameters
and configuration information.
During the operation, the parameters values cannot be modified by the user
After 2 seconds from the end of the operation, the controller returns to the normal operating conditions.
4.2.1 PROCESS DATA DISPLAY
Operator
mode
274.8
after
0.5 s
AL1
Threshold
A1s.p
275.0
Engineering
units [1]
Unit
AL2
Threshold
°C
Input
Value
A2s.p
300.0
In
274.8
Note:
[1] See table page 27
21
4 - Operations
4.2.2 CONFIGURATION CODES DISPLAY
When necessary, the operator can view the instrument main data (no changes are possible with the present
procedure).
Operator
mode
274.8
after
0.5 s
Configuration
code 1st part
(see page 17)
Conf
2021
Engineering
units [1]
Unit
Configuration
code 2nd part
(see page 18)
Con2
°C
Basic
product
code
(see page
16)
Hard
200
Software
release
number
3050
Example: C1 - 3050 - 2021 - 200 / Release 00A
22
rel.
00A
4 - Operations
4.3 PARAMETER SETTING
4.3.1 NUMERIC ENTRY
(e.g. the modification of the AL1 threshold from 275.0 to 240.0)
274.8
Operator
mode
PASS
Password entry
A15.p
AL1 threshold
Current value
275.0
—lower
33
Code entry
0000... 9999
Must be equal to
the value of the
parameter Code
(factory default 33)
—raise
240.0
OK
NO
230.0
YES
Value
modification
New value
(the displayed value is
stored by the instrument only pressing
the è key)
Press S or G momentarily to change the value of 1 unit each time the key is pressed.
Pressing the S or G key for a longer time changes the value, at rate that doubles every second. Releasing the
button the rate of change decreases.
In any case the change of the value stops when it has reached the max./min. limit set for the parameter.
23
4 - Operations
4.3.2 MNEMONIC CODES SETTING
(e.g. configuration see pages 28, 29)
Press the S or G to display the
next or previous mnemonic for the
selected parameter.
Continued pressing of S or G
will display further mnemonics at a
rate of one mnemonic every 0.5 s.
The mnemonic code displayed at
the time the next parameter is
selected pressing the è key, is
the one stored in the parameter.
24
Unit
°C
°f
Engineering
Units
none
No units
defined
Degrees
Centigrade
°f
Degrees
Fahrenheit
Degrees
Fahrenheit
Ph
Ph
4 - Operations
4.4 PARAMETER SETTING
274.8
33
Values
modification
Parameter
Modification/
menu
selection
selection
entry
A
The parameter setting procedure
has a timeout. If no keys are
pressed for, at least, 30 seconds,
the controller switches back, automatically, to the operator mode.
After having selected the parameter or the code, press S or G to
display or modify the value (see
page 23) The value is entered when
the next parameter is selected
pressing the R key.
Pressing the Y key,at any time,
the controller switches back to the
operator mode.
No
P
1
Addr
Operator
mode
0
AIs.p
PASS
RST
P
Operator mode
OK
AL1 threshold
(see page 24)
Password entry
P
0
A2s.p
Code entry
0000... 9999
Must be equal to the
parameter Code
(factory default 33)
Yes
P
AL2 threshold [1]
(see page 24)
0:5
AIhy
P
AL1 hysteresis
0.1… 10.0% of the span
0:5
A2hy
Communication
address
(if option installed)
0ff / 1… 247
AL2 hysteresis [1]
0.1… 10.0% of the span
Pnone
A2L.b
Direct access
to: Conf
AL2 Latching and
Blocking functions [2]
none/ltch/bloc/lt.bl
P Off
Notes
[1] Parameter not shown when the
supervisory switch (AL2) has been
configured “Not active“ (configuration code P = 0).
[2] When the AL2 alarm is configured
as “Sensor Break” (configuration
code P = 1) the only choices available are: None and Latching.
t.fil
P
Input filter time constant
Off/1... 30 s
0
In.sh
Input shift
Off/-60... 60 digits
Configuration instructions (pages 28 … 29)
25
4 - Operations
4.5
PARAMETERS
AL1 Limit switch
threshold
Threshold value that triggers the
Limit Switch output (OP1).
In engineering units. The Limit
Switch operates as described at
page 30.
#AIs.p
AL2 Supervisory
switch threshold
The alarm occurrences handle the
OP2 output in different ways,
according to the configured types
of alarms, as illustrated.
#A2s.p
Sensor failure (break, disconnection etc.)
Sensor
PT100
Wire A open
All other conditions
Wires A and B
in short circuit,
wire b open
Over-range
Under-range
Over-range
for a while, then
under-range
Thermocouple
All conditions
Analog input
Short circuit
between the wires
All other conditions
Over-range
Under-range
Over-range
Absolute alarm (full scale) - AL2
On Active
Off high
On
Off
Active
low
hy
T
low range
under-range
Alarm threshold
high range
Deviation alarm - AL2
AL2 threshold
If a sensor failure occours, the instrument detects and displays an overrange or under-range input condition
as specified in the following table.
AL2 threshold
On
Off
hy
full scale
Visualisation
over-range
On
Off
On Active
Off high
Active
low
hy
- low range
26
Band alarm - AL2
Alarm threshold
+ high range
hy
AL2 threshold
On Active
Off out
Active
in
full scale
Absolute alarm is referred to AL2
threshold, while deviation and band
alarms are referred to AL1 threshold.
If Direct action is selected for AL2
(configuration code Q=0), OP2 SSR
output will be activated during AL2
condition; if Reverse action is selected (configuration code Q=1), OP2
SSR output will be released during
AL2 condition. Only OP2 action can
be configured, limiter function on OP1
operates only in fail safe mode.
AL2 reset function is only effective
if latching has been selected for AL2
output.
If Auto is selected (configuration
code R=0), AL2 reset will be performed after acknowledgement
and exiting from the alarm condition. If Man is selected (configuration code R=1), acknowledgement will reset AL2 regardless to
the alarm condition.
4 - Operations
A
# Ihy
A
# 2hy
AL1 hysteresis
AL2 hysteresis
Hysteresis of the threshold of both
the alarms, that activate OP1 and
OP2 control output. It is specified
as a % of the full scale.
AL2, latching and
blocking functions
For AL2 alarm it is possible to
select the following functions:
none none
Ltch latching
bloc blocking
lt.bL both latching and blocking
#A2L.b
l
# tch
Input filter
time constant
Time constant, in seconds, of the RC
input filter applied to the IN value.
When this parameter is set to Off
the filter is bypassed.
#t.fil
Filter response
100%
63,2%
0 t.Fil
PV
Time
AL2 ACKNOWLEDGE
FUNCTION
The alarm, once occurred, is presented on the display until to the
time of acknowledge.
The acknowledge operation consists in pressing the Y key.
After this operation, the alarm
leaves the alarm state only when
the alarm condition is no longer
present.
b
# loc
AL2 START-UP
DISABLING
Ramp down (e.g.: AL2 Abs. high)
Disable
AL2 Th.
AL2 ON
AL2 OFF
Power ON
Ramp up (e.g.: AL2 Abs. low)
AL2 Th.
Disable
AL2 ON
AL2 OFF
Power ON
#In.sh
Input shift
This value is added to the measured
Input Value. Its effect is to shift the
whole Input scale of up to ±60 digits.
Controller
address
The address range is from 1 to 247
and must be unique for each controller on the communication bus
to the supervisor.
When set to Off the controller is
not communicating
A
# ddr
27
4 - Operations
4.5 CONFIGURATION
CONFIGURATION MENU
Operator mode
The configuration of the controller
is specified through a 7 digit code
that defines the type of input and
the alarms (paragraph 3.2, page17)
Other parameters specify the type
of auxiliary functions.
274.8
PASS
33
Password entry
A1s.p
Code entry
from 0000 to 9999
Must be equal to the
value of the parameter
Code
33 (factory default)
NO
RST
Values
modification
Parameter
Modification/
menu
selection
selection
entry
Press S or G to display the next
parameter or the next code and to
change its value.
The new value entered is stored
into the controller when the next
parameter is selected pressing R.
OK
prot
Communication protocol
(only if communication is
installed)
M.bu5 / jbus
sc.d.d
N° of decimals
(linear scales only)
0…3
baud
Baude rate
(only if comm. is installed)
sc.lo
Low range [2]
(linear scales only)
-999… +9999
sc.Hi
High range [2]
(linear scales only)
-999… +9999
1200/2400
4800/9600
Code
Password
0… 9999
33 (factory default)
Back to: A1s.p
28
YES
4 - Operations
[1] Table of the supported Engineering
Units.
Centigrade degrees *
Press the
key è until
“CONF” appears
Entry of digits I-L-M-N
of the configuration code
(paragraph 3.2 page 17)
I L M N
Fahrenheit degrees *
none
A
Conf
2021
Entry of digits P-Q-R
of the configuration code
(paragraph 3.2 page 17)
P Q R
Con2
If the controller has not been
configured Conf is shown on the
front panel at the power ON.
In this situation, the controller has its
outputs and input not active.
This situation ends when a correct
configuration code is entered.
mV
Volt
mA
Ampere
Bar
PSI
Rh
pH
°C
°f
none
nU
U
MA
A
bAr
psI
rh
ph
*
200
Engineering units
(see table)
Unit
For inputs from thermocouple or
resistance thermometer, the choice
is between °C and °F only.
[2] Range of min 100 digits.
[3] To return to the operator mode
press, from any position, the Y
key.
29
5 - Limit Switch function
5
LIMIT SWITCH
FUNCTION
In order to have the limit switch
function the product code digit E
must be 9 (see page 16)
For example: C1- 3050-9000
5.1
LIMIT SWITCH (AL1)
The limiter can operate as a high
limiter or low limiter. Only output
relay OP1 can be used as limit
switch.
The limiter output relay OP1 is energized (contact closed) during normal operation and is de-energized
(contact open) when the alarm is
activated or when a power failure
occurs (fail safe mode).
If “High limiter” is selected (configuration code N=0), the limiter will
go in alarm condition when the
input exceeds the alarm threshold
or when a failure of the input
occurs.
If “Low limiter” is selected (configuration code N=1), the limiter will
go in alarm condition when the
input drops below the alarm
threshold or when a failure of the
input occurs.
Then, after an alarm occurred,
when the input retur ns to a
normal value (i.e. drops below the
AL1 threshold for high limit, or
rises above AL1 threshold for low
30
limit), the OP1 relay will remain
de-energized with the contact
open until the operator manually
acknowledges the alarm by
pressing the “Enter key” (è
RST) on the front panel of the
limiter (reset).
LED1 will:
- Flash when a new non-acknowledged alarm occurs;
- Remain steady ON when AL1 is
acknowledged but still exists.
5 - Limit Switch function
The complete operation mode is detailed in the table that follows:
Limiter status
OP1 contact
Non alarm status Energized
(contact closed)
Led 1
OFF
Non-ackowledged De-energized
(contact open)
status
Flashing
Ackowledged
status
Steady ON
De-energized
(contact open)
Limiter can change status by:
Input condition
Non alarm condition AL1 condition
Remains in non
Transition to
non-acknowledged
alarm status
status
Reset
Ack
Transition to
acknowledged
status
Non-Ack
Remains in
non-acknowledged
status
Input condition
Non alarm condition AL1 condition
Returns to non
Remains in
acknowledged
alarm status
status
31
5 - Limit Switch function
The limiter has a Status Retention capability, it only applies to the Limiter AL1 and OP1 output status. If the
limiter is configured for the Status Retention and the power is switched ON, the limiter will operate as detailed
in the table that follows:
Limiter Status at previos
power OFF
Non alarm status
(normal operation)
Non Ancknowledged alarm
Ancknowledged alarm
Input AL1 condition at new
power ON
Normal operation
Alarm condition true
Normal operation
Alarm condition true
Normal operation
Alarm condition true
Limiter Status at new
power ON
Non Alarm status
Non Acnknowledged alarm
Ancknowledged alarm
OP1 Relay
LED 1
contact
Close
Steady OFF
Open
Flashing
Open
Flashing
Non Alarm status
Ancknowledged alarm
Close
Open
Steady OFF
Steady ON
If “Automatic Reset” is selected (configuration code M=0), at power ON, the limiter status will depend on
the input value (i.e.: if at power ON the input value is in the safe operating range, the limiter automatically will
enter in non-alarm status).
If “Manual reset” is selected (configuration code M=1), at power ON, the limiter status will be forced to
Non-acknowledged Alarm.
If “Status retention” is selected (configuration code M=2), at power ON, the limiter status will be forced to the
status of the limiter at previous power down time, as described in table above.
Status retention does not apply to any condition regarding AL2 (AL2 operation at power ON depends on
input value).
32
5 - Limit Switch function
5.2 SUPERVISORY SWITCH (AL2)
The OP2 relay output contact is used as a normal auxiliary alarm (AL2). AL2 operation is configurable and
independent from the operation of the limiter output OP1. Configuration allows the operator to choose the
alarm type, OP2 action, automatic reset/latching. LED 2 indicates Alarm 2 status. For OP2 no status retention mode is available (status data storing).
AL2 Reset = Auto AL2L.b = Latching or Latching + Blocking
Status
#
0
1
2
OP2
contact
Description
Non alarm
Non-ackowledged alarm
Ackowledged alarm
AL2 Reset = Man
0
1
2
OFF
ON
ON
OFF
No transition
Flashing
ON
Transition to 0
OP2
contact
AL2
LED
Description
Non alarm
Alarm
Silence
State transition
Input
Operator acknowledgment
Alarm
No
Yes
Non alarm
condition
condition
Transition to 1
No transition
Transition to 2
No transition
AL2L.b = Latching or Latching + Blocking
Status
#
AL2
LED
OFF
ON
OFF
OFF
ON
OFF
State transition
Input
Operator acknowledgment
Alarm
No
Yes
Non alarm
condition
condition
No transition
Transition to 1
No transition
Transition to 0
Transition to 2
No transition
33
5 - Limit Switch function
AL2 Reset = Man
AL2L.b = None or Blocking
Status
#
0
1
2
OP2
contact
AL2
LED
Description
Non alarm
Alarm
Silence
OFF
ON
OFF
OFF
ON
OFF
State transition
Input
Operator acknowledgment
Yes
Non alarm
Alarm
No
condition
condition
No transition
Transition to 0
Transition to 0
Transition to 1
No transition
No transition
No transition
Transition to 2
AL2 Reset = Auto AL2L.b = None or Blocking
Status
#
0
1
2
34
OP2
contact
AL2
LED
Description
Non alarm
Alarm
OFF
ON
OFF
ON
State transition
Input
Operator acknowledgment
Yes
Non alarm
Alarm
No
condition
condition
No transition
Transition to 0
Transition to 1
No transition
6 - Technical specifications
6
TECHNICAL SPECIFICATIONS
Features
(at 25°C environmental temp.) Description
Input
(input ranges are listed at
page 17)
Common
characteristics
A/D converter resolution:
50,000 points
Update measurement time:
0.2 s
Sampling time:
0.5 s
Input bias:
±60 digit
Input filter with enable/disable: 1…30 s (0 = OFF)
Accuracy
0.25% ±1 digit for temperature sensors
0.1% ±1 digits for mV
Between 100…240V~
0.1% ±1 digits +the accuracy of the external shunt the error is minimal
resistor for mA
Resistance
thermometer
(for ∆T: R1+R2
must be <320Ω)
Pt: 100Ω at 0°C
(IEC 751)
°C/°F selectable
Max. wire Res.:
20Ω max. (3 wires)
2 or 3 wires connection
Input drift: 0.35°C/10°C TEnv.
<0.35°C /10Ω Wire Res.
Thermocouple
L, J, T, K, S (IEC 584)
°C/°F selectable
Internal cold junction
compensation in °C/°F
4… 20mA, 0... 20mA with
external shunt 2.5Ω
Rj >10MΩ
10… 50mV, 0... 50mV
Rj >10MΩ
Engineering units
Conf. decimal point position
Input drift: <0.1%/20°C
Init. Sc. -999…9999
environmental temperature
Full Sc. -999…9999
(min. range of 100 digits)
DC input (current)
DC input (voltage)
Max.wire Res.:150Ω max.:
Input drift: <2µV/°C Tenv.
<5µV/10Ω Wire Resistance
35
6 - Technical specifications
Features
(at 25°C environmental temp.) Description
OP1 output
OP2 output
Serial comm. (option)
Operational safety
SPST Relay N.O.: 2 A/250 V~ for resistive load;
4 A/120 V~ for resistive load
SSR drive, not isolated: 5V–, ±10%, 30 mA max.
RS485 isolated, Modbus/Jbus protocol, 1200, 2400, 4800, 9600 bit/s, two wires
Detection of out of range, short circuit or sensor break with automatic
Measure input
activation of the safety strategies and alerts on display
Parameters
Access protection
General
characteristics
Power supply
(PTC protected)
100... 240V~ (-15... +10%) 50/60 Hz or
24V~ (-25... +12%), 50/60 Hz and 24V– (-15... +25%)
Power consumption 1,6 W max.
Electric Safety
Compliance to EN61010-1 (IEC 1010–1), installation class 2
(2500V) pollution class 2, class II instrument
Electromagnetic
compatibility
Protection
Approvals
Dimensions
36
Parameter and configuration data are stored in a non volatile memory for
an unlimited time
A password protects the instrument configuration access
Compliance to the CE standards for industrial system and equipment
(see page 2)
IP65 front panel EN60529 (IEC 529)
UL, cUL, file N° 176452; Factory Mutual Class 3545
Note: The UL label on the limit switch is for regulatory use only.
1/ DIN - 48 x 24, depth 120 mm, weight 100 g approx.
32
Warranty
1
WARRANTY
We warrant that the products will be free from
defects in material and
workmanship for 3 years
from the date of delivery.
The warranty above shall
not apply for any failure
caused by the use of the
product not in line with the
instructions reported on this
manual.
37
ASCON’S WORLDWIDE SALES NETWORK
SUBSIDIARY
FINLAND & ESTONIA
SPAIN
FRANCE
TIM-TOOL OY
Phone
+358 50 501 2000
Fax
+358 9 50 55 144
INTERBIL S.L.
Phone
+34 94 453 50 78
Fax
+34 94 453 51 45
GERMANY
BRANCH OFFICES
Phone
+34 93 311 98 11
Fax
+34 93 311 93 65
Phone
+34 91 656 04 71
Fax
+34 91 656 04 71
ASCON FRANCE
Phone
0033 1 64 30 62 62
Fax
0033 1 64 30 84 98
AGENCE SUD-EST
Phone
0033 4 74 27 82 81
Fax
0033 4 74 27 81 71
MESA INDUSTRIE ELEKTRONIK GMBH
Phone
+49 2365 915 220
Fax
+49 2365 915 225
GREECE
AGENCE RÉGION-EST
Phone
0033 3 89 76 99 89
Fax
0033 3 89 76 87 03
DISTRIBUTORS
CONTROL SYSTEM
Phone
+30 23 10 521 055-6
Fax
+30 23 10 515 495
BRANCH OFFICE
Phone
+30 1 646 6276
Fax
+30 1 646 6862
ARGENTINA
MEDITECNA S.R.L.
Phone
+5411 4585 7005
Fax
+5411 4585 3437
HOLLAND
TEMPCONTROL I.EP. B.V.
Phone
+31 70 347 64 31
Fax
+31 70 38 22 55 16
AUSTRALIA
IPA INDUSTRIAL PYROMETER
(AUST) PTY.LTD
Phone
+61 8 8352 3688
Fax
+61 8 8352 2873
38
PORTUGAL
REGIQUIPAMENTOS LDA
Phone
+351 21 989 0738
Fax
+351 21 989 0739
SWITZERLAND
CONTROLTHERM GMBH
Phone
+41 1 954 37 77
Fax
+41 1 954 37 78
TURKEY
KONTROL SISTEMLERI LTD
Phone
+90 216 527 96 15
Fax
+90 216 527 96 20
UNITED KINGDOM
EUKERO CONTROLS LTD
Phone
+44 20 8568 4664
Fax
+44 20 8568 4115