Transcript
Siren Maritime Lighting System
User’s Manual
Use these instructions to learn how to control the lights in your stateroom.
Note: There are light switches on your wall. These switches work like standard light switches. Changing a
switch from off to on will turn on the light (to full brightness). Changing the switch from on to off will
extinguish the light completely. Operating the lights by remote, or by switch will automatically override any
previous setting.
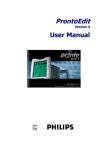
1. Locate the Phillips TSU6000 remote in your stateroom.
This remote controls the lights, as well as the Audio/Video equipment in the room.
When you pick it up, the display will light up so you can operate in the dark. In the display, there are
several options to control the equipment in your room. Which options appear will depend on the
amenities your stateroom has. To control the lights, select “Lights” by pressing that display button with
your finger. Several menu items will appear, one for each lighting zone. The name for each zone
appears inside each menu item or “button”.
2. Press the button that corresponds to the lighting zone you wish to control.
The right side of the display changes into a slider knob to control the lights.
3. Slide your thumb or finger up and down the slider area in the display.
The percentage brightness shows at the top of the slider. 0% is off. 100% is fully on.
After you are satisfied with the brightness of the selected lighting zone:
4. Press the “BACK” button to return to the list of lighting zones.
Repeat steps 2 through 4 until all the lights are adjusted to your liking.
When you’re done adjusting the lights, you can put down the remote, or save these
adjustments under a particular “mood setting”. The following instructions are for
entering “mood settings”.
5. Press the STORE button on the left side of the screen.
Several naming options list in the display:
Wake Breakfast Lunch Brunch Dinner Evening Night
Time
Number
6. Press the display button corresponding to the name you wish to give to this mood.
Using any of the preprogrammed names will store this lighting mood into that name.
Using the “Time” button will store the mood under the current time of day.
Each day at the same time, the stored mood for that time will automatically be activated.
Virtually unlimited moods can be stored in this way to create a 24-hour lighting schedule.
Using the “Number” option allows you to enter a simple number for this mood setting.
7. Recall any mood by pressing the RCL button on the left side of the display.
A list of stored moods shows up. Press the button that corresponds to the desired mood.
Feel free to enter a mood for every moment of the day.
If you’re in a hurry, don’t forget that the wall switches provide instant access to the lights.


