1
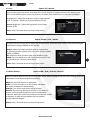
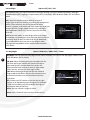
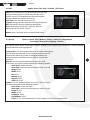
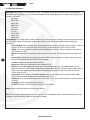
HD 960H
Professional HD 960H Box Camera
User Manual
Thank you purchasing the XC960T camera from Xvision.
Please ensure that you read and understand this User Guide before operating the camera.
Please store this User Guide in an easily accessible location.
Version 1
HD 960H
XC960T
Contents
1. Product Overview ..................................................................................
4
1.2 Package Contents ..........................................................................
4
2. Installation ............................................................................................
3. How to Operate the Camera ..................................................................
5
4. Camera Menu ........................................................................................
6
7
7
7
8
8
9
9
4.1 Lens ...............................................................................................
4.2 Exposure .......................................................................................
4.3 White Balance ...............................................................................
4.4 Backlight ........................................................................................
4.5 Day/Night ......................................................................................
4.6 DPC ................................................................................................
4.7 Special ...........................................................................................
5. Specifications ........................................................................................
2
www.xvision.com
6
11
HD 960H
XC960T
Safety Precautions
1. Do not install the equipment in an environment with too much moisture, dust or smoke dust as this
may result in fire or electric shock.
2. In the unlikely event that the equipment should malfunction and emit an abnormal smell or smoke,
please immediately stop it, shut off the power and contact your supplier.
3. Please do not place this equipment near a heat source to avoid risk of fire.
4. Please do not store, install and use this product in danger areas with inflammable or explosive
substances.
5. Please make sure the power is turned off when installing the product.
6. Please ensure that you install the camera in an area with good ventilation.
7. When installing the camera, please make sure that it does not face any objects giving out strong lights
as this will damage the CCD of the camera.
8. Please do not use the camera in an environment where temperatures exceed either -20°C to +55°C.
3
www.xvision.com
HD 960H
XC960T
ProductOverview
Overview
1.1.Product
Thank you for purchasing the HD 960H XC960T from Xvision. Please read through this manual carefully and
make sure you understand before operating the camera.
1.1 Features
•
•
•
•
•
•
•
•
•
•
•
•
Sony 960H CCD Sensor
Xvision X3K DSP
700TVL Resolution
0.003 low lux sensitivity
Day/Night (IR Sensitive)
Compatible with fixed, manual and auto iris C/CS mount lenses
Advanced Wide Dynamic Range
High Speed Digital Slow Shutter
3D Digital Noise Reduction
Programmable High Light Suppression
Can be wall or ceiling mounted using optional bracket
Can be placed outside when used with an optional weatherproof housing
1.2 Package Contents
The packaged box for the XC960T comes with the following items:
4
• XC960T Camera
• User Manual
Should any of these items be missing, please contact your local distributor.
www.xvision.com
HD 960H
XC960T
Installation
1.2.Product
Overview
The XC960T camera can be wall or ceiling mounted. To install the camera, you will need purchase an
optional bracket or if installing the camera externally, a weatherproof housing. Contact the distributor for
details on more accessories. The instructions below refer to the Xvision XV400B bracket.
1. To install the camera, firstly you will need to
remove the bracket into 3 pieces.
3. Use the base of the bracket as a stencil and
draw circles on the wall where you want to
drill the holes.
2. Screw the top of the bracket in either the
top or bottom of the camera.
4. Take the wall plugs from the accessory
pack and get the correct size drill bit.
Depending on the wall or ceiling, please
make sure to choose the appropriate drill bit.
5
5. Once the plugs are in, place the bracket
over the wall plugs and screw the base in
place. Then screw the extension bar of the
bracket back onto the base.
6. Secure the bracket head and camera in
the bar and use the screw to secure, twisting
clockwise.
7. Once the camera has been installed,
connect the lens (sold separately). An auto
iris will require you to plug into the auto
iris connector.
www.xvision.com
HD 960H
XC960T
How to Operate
the Camera
1.3.Product
Overview
BNC Socket for
video
Terminal screw
for power
To operate the camera, firstly you will need to connect the BNC and terminal screws to the BNC and DC
sockets of a power supply and DVR or Monitor.
To provide power to the camera, you will need to use DC Cable. The positive will go into the ‘+” sign and
negative into the ‘-’ sign. To do this, push the orange clip down, place the cable into the hole and release
the orange clip again. Give the cable a small pull, and you should feel the cable tighten and secure. If not
please repeat this process until cables are secure. Please note that this camera requires DC 12V.
Camera Overview
Menu
1.4.Product
Up
6
Right
Left
Menu/
confirm
Down
To access the camera menu, firstly unscrew the panel at the bottom of the camera using the allen key
(Above, left). This will expose the buttons that are used to control the camera menu. Turn the camera on
and then press the set button. When the menu has appeared, you will be presented with the following
options:
•
•
•
•
•
•
•
Lens
Exposure
White Balance
Backlight
D/N (Day/Night)
DPC
Special
www.xvision.com
HD 960H
XC960T
4.1 Lens Option: DC / Manual
Select the lens type from either DC or Manual. Use the joystick to navigate between the options and
when on the desired option, press the joystick in to select. Both options have a sub-menu as follows:
DC: Brightness - adjust the brightness of the image between
0-255. Iris Speed - adjust the iris speed between 0-255.
Manual: Brightness - adjust the brightness of the image
between 0-255.
Return: Save / End and return to the previous menu.
4.2 Exposure Option: Shutter / AGC / DWDR
The exposure menu allows you to adjust the shutter speed, Automatic Gain Control (AGC) and the Digital
Wide Dynamic Range (DWDR) on the camera.
Shutter: Adjust the shutter speed to auto or choose from
the following shutter speeds (1/25, FLK, 1/50, 1/100, 1/2000,
1/5000, 1/10000).
AGC: Adjust the AGC to either Auto, Low, Middle or High.
DWDR: Turn the DWDR on or off. If you choose to turn it on,
you can adjust the sensitivity level (0-63).
Return: Save / End and return to the previous menu.
4.3 White Balance
Option: AWB / ATW / Anti CRL / Manual
Adjust the White Balance and set the Automatic White Balance (AWB), ATW, Anti Colour Rolling (Anti CRL)
and choose to set the white balance manually.
AWB: Set the white balance to Automatic
ATW: Turns this function on so the camera will detect
the colour temperature automatically.
Anti CRL: Turn on the anti colour rolling function
Manual: Set the white balance to manual. If this option is
chosen, you will need to adjust the colour temperature.
To do this, adjust the colour temperature from Manual, Indoor
or Outdoor. In each of these options you will need to
set the blue and red gain.
Return: Save / End and return to the previous menu.
www.xvision.com
7
HD 960H
XC960T
4.4 Backlight
Option: Off / BLC / HLC
This option allows you adjust the advance backlight settings, giving the following options; Backlight
Compensation (BLC), Highlight Compensation (HLC), Day/Night, Black & White mode, EXT and Colour
Mode.
BLC: Select this option to allow objects in front of
bright lights to be seen clearer, by making the background
darker. Once selected, you will be presented with a
further 2 options; area select and state. Select the area gain
control (30-255), Height, Width (both 0-13), Left/Right
and Top/Bottom (Both 0-5). You can also turn the state
on or off.
HLC: Select this option to mask bright areas in an image,
for example, car headlights. Once selected, you can set the
sensitivity level (0-240), set HLC to All Day or Mask Skip.
If you select Mask Skip, you can set the height, width,
left/right and top/bottom of the masked areas between
0-15 values.
4.5 Day/Night
8
Option: D&N Auto / B&W / EXT / Colour
Day/Night: Set the camera to Day/Night mode. When selected, you can set the Day/Night mode to Auto,
Black and White, EXT or Colour.
D/N Auto: When choosing Auto you can adjust the lux
level from which the camera will switch from day to
night mode (0-255) and the delay from when the
camera reaches that lux level to turn to night mode
(0-30). You can also do this from night to day.
B/W: When choosing B/W you will put the cameras
image to black and white. You can also choose to turn
on the burst function, turn on the IR Smart and set
the IR level.
EXT: Choose the EXT function to set the day to night
function to be decided by external signals, for example
IR LEDs. Set the delay to (0-30 seconds) and night to
day function delay (0-30 secs).
Colour: Set the camera’s image to colour.
Return: Save / End and return to the previous menu.
www.xvision.com
HD 960H
4.6 DPC
XC960T
Option: Start / DPC View / LS Value / Diff / Area
Start: Once selected, you will be asked to cover the lens
and press the joystick in. Please note that this is for
factory use only, if initiated power the camera down
and then power the camera to back up.
DPC View: Turn the DPC View on or off.
LS Value: Set the shutter value for searching dead pixels
Diff: Set the diff. value for searching dead pixels
Area: Set the area of the DPC. There are areas to
adjust; HS, HE, VS and VE (0-255).
Return: Save / End and return to the previous menu.
4.7 Special
Option: Camera Title / Motion / Privacy / Park Line / Image Adjust
Cam Adjust / Display ID / Language / Version
The special option allows you to adjust various settings on the camera from camera title, privacy masking,
motion detection and language etc.
Camera Title: Turn the camera title on or off. When choosing on,
you will be presented with an on screen keyboard to set the
camera title. Move the joystick to navigate between the
letters/numbers and then press the joystick in to confirm
selection.
Motion: Turn the motion detection function on or off.
If set to on, you will be presented with the following options:
Area Select: Select 1-4 areas
Area State: Turns the selected motion zone on or off
Height: 0-50
Width: 0-50
Top: 0-50
Bottom: 0-50
Degree: 0-255
View: On or off
Privacy: Turn the privacy function on or off. If set to on, you
will be presented with the following options:
Area Select: Select 1-8 areas
Area State: Turns the selected privacy zone on or off
Height: 0-255
Width: 0-255
Left/Right: 0-255
Top/Bottom: 0-255
Colour: 0-15 - choose between 15 colour options to show the masked areas.
www.xvision.com
9
HD 960H
XC960T
4.7 Special Continued...
10
Park Line: Turn the park line function on or off. This feature all the user to set on-screen parking lines
for vehicle use. If turned on, you will be presented with the following options to adjust the parking lines’
position and width:
LT: 0-255
LB: 0-255
RT: 0-255
RB: 0-255
F: 0-255
N: 0-255
T: 0-15
V1: 0-255
V2: 0-255
V3: 0-255
Image Adjust: The image adjust options allows you to change various settings to create the perfect image
for your needs. When entering the image adjust option, you will be presented with the following
sub-menu.
Lense Shadow: Sets the amount of light available to the lense to provide clearer images. Turn this
function and you can alter the light level (0-255), H-centre (0-255) and V-centre (0-255).
2DNR: Turn on to activate the Dynamic Noise Reduction function. When turned on, you can set
the level from 0-255.
Mirror: Provides a mirror reflection (horizontal) of the image. This function can be turned on or
off.
Font Colour: Change the font colour for the on-screen display. When turned on you can choose
between 15 colours and the ID/Title of the camera.
Contrast: Adjust the contrast colour (0-255)
Sharpness: Adjust the sharpness of the image (0-255)
Display: Choose the display from LCD, User, CRT or Neg Image. The LCD option allows you to
adjust Gamma (0.3 - 1.0), Ped Level (0-63) and Colour Gain (0-255). The user option allows you to
adjust the same options as LCD and the CRT option allows you to adjust Ped Level (0-63) and
Colour Gain (0-255).
Com Adjust: This feature is for RS485 settings. Here you can adjust the baudrate (2400, 4800,
9600), Protocol (Pelco D, Pelco P) and the Cam ID (1-255).
Display ID: Turn the ID of the camera on or off. If set to on, you can choose the on screen position
of the ID.
Language: Set the language on the camera.
Version: View the current firmware version on the camera.
Return: Save / End and return to the previous menu.
Exit: Exit the menu and go back to camera view. You will be asked to either exit without saving,save the
settings or reset the camera back to the factory settings.
www.xvision.com
XC960T
HD 960H
Model
XC960T
Picture Type
Day/Night (B/W & Colour)
Image
1/3” SONY Super HAD II CCD 960H
Resolution
960H
Minimum Illumination
O.0003 Lux
Night Vision
Yes (Optional IR Lamp Required)
Lens
Not Supplied
Motion Detection
Yes
Mirrored Image
Yes
OSD Functions
Automatic White Balance
Automatic Gain Control
Backlight Compensation
Digital Wide Dynamic Range
Digital Noise Reduction
Power Supply
Consumption
Operation Temperature
Dimensions in mm (WxHxD)
Weight (Kg)
Weatherproof
DC 12V 300mA
200mA
-20°C ~ 55°C
78x65x148
0.48
IP66
www.xvision.com
11
Manufactured exclusively for:
HD 960H
www.xvision.com
TECHNICAL SUPPORT
For technical support, please contact your local distributor.
Alternatively, call 0871 222 1430.
LIMITED WARRANTY
This product is supplied with a 12 month warranty. The warranty excludes products
that have been misused (including accidental damage) and damage caused by
normal wear and tear. In the unlikely event that you encounter a problem with this
product, it should be returned to the place of purchase.
Xvision UK, Unit 2 Valley Point, Beddington Farm Road, Croydon, Surrey CR0 4WP
www.xvision.com