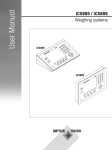
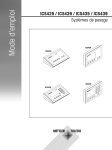
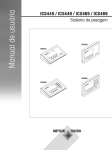
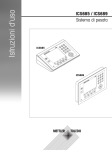
Download User Manual - Mettler Toledo
Transcript
User Manual ICS425 / ICS429 / ICS435 / ICS439 Weighing systems ICS429 ICS425 ICS439 ICS435 Congratulations on choosing the quality and precision of METTLER TOLEDO. Proper use of your new equipment according to this Manual and regular calibration and maintenance by our factory-trained service team ensures dependable and accurate operation, protecting your investment. Contact us about a service agreement tailored to your needs and budget. Further information is available at www.mt.com/service There are several important ways to ensure you maximize the performance of your investment: 1 Register your product: We invite you to register your product at www.mt.com/productregistration so we can contact you about enhancements, updates and important notifications concerning your product. 2 Contact METTLER TOLEDO for service: The value of a measurement is proportional to its accuracy – an out of specification scale can diminish quality, reduce profits and increase liability. Timely service from METTLER TOLEDO will ensure accuracy and optimize uptime and equipment life. ð Installation, Configuration, Integration and Training: Our service representatives are factorytrained, weighing equipment experts. We make certain that your weighing equipment is ready for production in a cost effective and timely fashion and that personnel are trained for success. ð Initial Calibration Documentation: The installation environment and application requirements are unique for every industrial scale so performance must be tested and certified. Our calibration services and certificates document accuracy to ensure production quality and provide a quality system record of performance. ð Periodic Calibration Maintenance: A Calibration Service Agreement provides on-going confidence in your weighing process and documentation of compliance with requirements. We offer a variety of service plans that are scheduled to meet your needs and designed to fit your budget. 3 Table of Contents 1 Introduction 1.1 1.2 1.3 Safety instructions Presentation Commissioning 7 7 8 14 Switching on/off Straight weighing Switching units Zeroing / Zero point correction Weighing with tare Displaying information Printing results Average (dynamic) weighing Working with identifications Cleaning Verification test 18 18 18 18 19 19 21 21 22 22 23 24 2 Operation 2.1 2.2 2.3 2.4 2.5 2.6 2.7 2.8 2.9 2.10 2.11 3 Settings in the menu 3.1 Menu overview 3.2 Operating the menu 3.3 Scale menu block 3.4 Application menu block 3.5 Terminal menu block 3.6 Communication menu block 3.7 Maintenance menu block 25 25 25 28 36 37 40 49 4 Event and error messages 4.1 Error conditions 4.2 Errors and warnings 4.3 Smart weighing counter / spanner icon 4.4 Service information 51 51 52 53 53 5 Technical data and accessories 5.1 Devices for dry environment 5.2 Devices for wet environment 5.3 General technical data 54 54 61 67 6 Appendix 68 68 68 69 70 6.1 6.2 6.3 6.4 Index Metrological information Table of Geo Code values Disposal Protocol printouts 71 Table of Contents 5 1 Introduction 1.1 Safety instructions General • Do not use the device in a hazardous environment. Special devices are available in our range of products for hazardous environments. • The safety of the device cannot be ensured if it is not operated in accordance with these operating instructions. • Only authorized personnel may open the device. Devices with protection level IP5x or IP65 Devices with protection level IP54 or IP65 are protected against dust and splashing of water respectively dust-tight and protected from water jets according to EN 60529. They are suitable for use in dusty environments and brief contact with liquids. • Ensure that the device is dried off after coming into contact with liquid. • Do not use the device in environments with a risk of corrosion. • Do not flood the device or submerge it in liquid. Devices with built-in power supply unit • Ensure that the power socket outlet for the device is earthed and easily accessible, so that it can be deenergized rapidly in emergencies. • Ensure that the supply voltage at the installation site lies within the range of 100 V to 240 V. • Ensure that there is a space of at least 3 cm (1.25") at the rear in order to prevent the power cable from being bent too strongly. • Check the power cable regularly for damage. If it is damaged, immediately disconnect the device from the power supply unit. Devices with built-in storage battery • Only use storage batteries from the manufacturer. • Do not use the battery charger in humid or dusty rooms or below 0 °C (32 °F) ambient temperature. • After the storage battery has been charged, the cover cap of the charging socket on the device must be closed. Compact scales / Terminal and platform combinations • Avoid falling and shock loads as well as any impact from the side. • The maximum static safe load must never be exceeded. Observe the operation limits, see technical data of the connected weighing platform. Introduction 7 1.2 Presentation 1.2.1 Type overview ICS425 / ICS429 / ICS435 / ICS439 weighing terminals vary in the following: ICS425 ICS429 ICS435 ICS439 – – x x dry wet dry wet Available as compact scale x – x – Available as terminal and platform combination x x x x Numeric keypad Environment Default equipment Each weighing terminal offers the following interfaces: • 1 serial RS232 interface • 1 scale interface Optional equipment The weighing terminals can be equipped or retrofitted with an additional interface: • RS232 • RS422/485 • USB Device • USB Host • Ethernet • WLAN • Digital I/O 8 Introduction 1.2.2 Display To meet your special requirements, different display layouts are available in the menu under Terminal –> Device –> Display –> Display layout. Straight weighing display – Default layout 1 Metrological data 2 Weight value with star, sign and stability monitor For details see following table For details see following table 3 Spanner icon: service needed 4 Battery symbol 5 Net/Gross 6 Unit 7 Bargraph 8 Auxiliary data line The contents is defined in the menu 9 Symbol and info line For details see following table For details see Event and error messages Straight weighing display – 3-line mode Straight weighing display – Big font mode Introduction 9 Straight weighing display – Bargraph The device offers a bargraph indicating the scale capacity. The bargraph indicates roughly which part of the scale capacity is already occupied and what capacity is still available. In the example above, approximately 3/4 of the scale capacity is occupied, although the applied net weight isn’t really high. The reason therefore could be a high tare weight. Metrological data line The metrological data is stored in the weighing platform. The weighing terminal only serves as indicator. In the metrological data line the following information is displayed: Symbol , , Information Remark Accuracy classes Displayed only if the scale is approved according to the Weights and Measures guidelines Weighing range information For multi range devices only and if the scale is approved according to the Weights and Measures guidelines Maximum capacity cap for NTEP only Minimum capacity Displayed only if the scale is approved according to the OIML Weights and Measures guidelines Approved resolution Displayed only if the scale is approved (OIML) Display resolution Please note for approved scales: OIML: Displayed only if d is different from e NTEP: Always displayed Approved weighing device Metrology display disabled for SICS scales, e.g., BBK422. Weights and Measures data must be indicated on a label near the weight display. , , , 10 Introduction , Weight value The weight value can be marked with the following symbols: Symbol Information Remark Calculated weight value For example for average weighing results Sign For negative weight values Stability monitor For unstable weight values Non-approved last digit with e>d For approved scales only The example shows the weight value for a scale with e=1g and d=0.1g. The last, smaller digit is not approved. Symbols and info line In the symbols and info line the following information can be displayed: Symbol Information Remark I<–>I1 Weighing range For multi range or multi interval scales only Weight below minimum weight MinWeigh must be activated in the menu Average weighing Average must be activated in the menu Automatic taring Auto Tare must be activated in the menu Automatic clearing of the tare weight AClear Tare must be activated in the menu Center of zero indication Availability depending on local Weights and Measures regulations Fact needs to be performed Fact = Fully automatic calibration test. When Fact is displayed: Ensure that the weighing platform is empty and wait until the calibration test is done automatically. For ICS4_5k-.../f compact scales only. Introduction 11 1.2.3 Keyboard Key 12 Introduction Name Function in the operating mode Function in the menu Power • Switching on and off • Cancelling editing • Cancelling editing • Exiting menu Clear • Clearing tare • Leaving info page • Clearing value • Clearing digit Switch • Switching over weight unit • Re-editing Zero • Setting scale to zero • Clearing tare – Tare • Taring scale • Clearing previous tare – Info • Activating info screen – • Proceeding to the next info line / info page • Freezing and releasing startup screen Transfer • Transferring data to a printer or computer • Confirming entry/selection 1.2.4 Connections ICS4_5 weighing terminal for dry environments 1 2 3 4 1 AC power supply or battery charging 2 Standard interface COM1 (RS232) 3 Optional interface COM2 4 Weighing platform connection SCALE1 ICS4_9 weighing terminal for wet environments 1 4 2 5 6 3 1 Weighing platform connection 2 Verification securing seal 3 Pressure compensation 4 AC power supply or battery charging 5 Standard interface COM1 (RS232) 6 Optional interface COM2 ICS4_9a-.../c 1 1 5 2 4 3 1 Optional interface COM2 2 Analog weighing platform connection 3 Pressure compensation 4 AC power supply or battery charging 5 Standard interface COM1 (RS232) The verification securing seal is applied directly on the weighing terminal. Introduction 13 1.3 Commissioning 1.3.1 Selecting the location The correct location is crucial for the accuracy of the weighing results. 1 Select a stable, vibration-free and, if possible, a horizontal location for the weighing platform. ð The ground must be able to safely bear the weight of the fully loaded weighing platform. 2 Observe the following environmental conditions: ð No direct sunlight ð No strong drafts ð No excessive temperature fluctuations 1.3.2 Levelling Levelling of weighing platforms Only weighing platforms that have been levelled precisely horizontally, provide accurate weighing results. Weights and Measures approved weighing platforms have a level bubble to simplify levelling. - Turn the adjustable feet of the weighing platform until the level bubble’s air bubble is inside the inner circle. Levelling of compact scales ICS4_5-.../f On compact scales levelling can be done in an easier way. 1 2 3 1 2 1 Turn the compact scale upside down. 2 Screw in the 2 adjustable feet (2) on the terminal side of the weighing platform. 3 Turn over the compact scale to its normal position. 4 Level the compact scale by turning the other 2 adjustable feet (1) of the weighing platform until the level bubble is inside the inner circle. 5 Screw out the feet (2) of the weighing platform until they have contact with the table. The adjustable foot (3) of the weighing terminal is screwed out for 7 mm at the factory and needs not be adjusted for levelling. 14 Introduction 1.3.3 Weighing platform connection Analog weighing platforms - Call the METTLER TOLEDO service technician to connect an analog weighing platform to the ICS4_5g / ICS4_9g weighing terminal. Weighing platforms with digital scale interface - Connect the weighing platform connector to the ICS4_5i / ICS4_9i or ICS4_5s / ICS4_9s weighing terminal. • If you have ordered an approved weighing system consisting of an ICS4_5s weighing terminal and an approved PBD555 weighing platform, the approval was done in the factory (not for the US market). • You can disconnect the weighing platform from the ICS4_5s / ICS4_9s or ICS4_5i / ICS4_9i weighing terminal of an approved weighing system without violating the approval. If another weighing platform is connected to the weighing terminal, the system is not approved. If the weighing platform of the approved system is connected again, the approval is valid again. • If you have ordered an approved weighing system consisting of an ICS4_5s / ICS4_9s weighing terminal and an approved PBK/PFK weighing platform, the approval was done in the factory (not for the US market). • If you have connected a non-approved weighing platform and want to have the system approved, call the METTLER TOLEDO service technician. 1.3.4 Power supply connection CAUTION Risk of electric shock! a) Before connecting the power supply, check whether the voltage value printed on the label corresponds to your local system voltage. b) Do not, under any circumstances, connect the device if the voltage value on the label deviates from the local system voltage. c) Make sure the weighing platform has reached room temperature before switching on the power supply. - Plug the power plug into the power socket. ð After it has been connected, the device runs a self-test. The device is ready to operate when zero appears on the display. Introduction 15 1.3.5 Handling the storage battery Battery symbol The battery symbol shows the current charging status of the storage battery. • One segment corresponds with approx. 25 % capacity. • If the symbol flashes, the storage battery has to be charged. • During charging the segments are "running" until the battery is fully charged and all segments light up continuously. Note the following when operating a device with a built-in storage battery: • Before the first operation charge the storage battery for at least 3 hours. • The operating life depends on the intensity of use, the configuration, and the connected scale. For details concerning ICS4_5, see "Operating life with battery [} 57]", or concerning ICS4_9, see "Operating life with battery [} 63]". • The charging time of the storage battery amounts to 4 to 5 hours. The storage battery is protected against overcharging. • The storage battery has a service life of 500 to 1,000 charging/discharging cycles. CAUTION Charging the storage battery below 0° C (32 °F) or above 40 °C (104 °F) is prevented by the charging electronics! a) Make sure that the temperature is within the range of 0 °C to 40 °C (32 °F to 104 °F) to charge the storage battery. CAUTION Danger of soiling because the charger for the storage battery is not protected according to IP69K! a) Do not charge the device in humid or dusty rooms. b) After the storage battery has been charged, close the cover cap of the charging socket on the device. Recommended use of the storage battery The characteristics mentioned above are only valid if the following recommendations are observed: • Change the battery as soon as the warning message "Low battery" appears and the battery symbol starts flashing. When the message appears, you still have enough time (at least 10 minutes), to complete your current task. • For optimum battery performance, operate the device with built-in storage battery at an ambient temperature range of 10 °C to 30 °C (50 °F to 86 °F). This also applies to discharging the battery. 16 Introduction Changing battery (ICS4_5 only) 2. 1. 1 Unlock the battery by moving the slider away from the battery and remove the discharged battery. 2 Insert the fully charged battery and secure it by moving the slider towards the battery. With optional IP65 protection, the battery is not accessible from the outside. Please call the METTLER TOLEDO service technician. 1.3.6 Use in hygienically sensitive areas ICS4_9 weighing terminals are easy to clean and are designed to be used in the food industry. ICS4_9 features • • • • • • • Protection degree IP68/69k Terminal housing and load plate made of stainless steel No open threads No screws with recesses Keypad made of PET with a smooth surface Reduced horizontal surfaces Continuous welding seams The standard load cell is made of aluminium. As an option, stainless steel potted and hermetically sealed load cells are available. Introduction 17 2 Operation 2.1 Switching on/off Switching on - Press . ð For a few seconds the device shows a start-up screen with device name, software version, serial number of the weighing terminal and the Geo Code value. • You can freeze the start-up screen by pressing . • When you start a compact scale, the metrology line shows whether it is approved or not. If you have ordered an approved weighing system, approval has been done in the factory already (not for the US market). • With ICS4_5k-.../f compact scales ensure that the device is at room temperature before switching on. To ensure accurate weighing results, wait 15 minutes after switching on before starting weighing operation. Switching off - Press . ð Before the display goes out, OFF appears briefly. Resetting - Press and hold for approx. 5 seconds. ð The device is switched off. 2.2 Straight weighing 1 Place weighing sample on the scale. 2 Wait until the stability monitor disappears. 3 Read the weighing result. 2.3 Switching units If an additional second weight unit is configured in the menu, it is possible to switch back and forth between the two weight units. - Press . ð The weight value is displayed in the second unit. • Possible units are g, kg, oz, lb, lb-oz, t. • When in the menu Scale –> Disp. unit & res. –> Unit roll is set to On, the weight value can be displayed in all available weight units by repeatedly pressing . 18 Operation 2.4 Zeroing / Zero point correction Zeroing corrects the influence of slight changes on the load plate or minor deviations from the zero point. Manual 1 Unload scale. 2 Press . ð Zero appears in the display. Automatic In case of non-approved scales, the automatic zero point correction can be deactivated in the menu or the zero range can be changed. Approved scales are set fixed at 0.5 d per second. • The zero function is only available within a limited weighing range. • After zeroing the scale, the whole weighing range is still available. 2.5 Weighing with tare 2.5.1 Taring - Place the empty container on the scale and press ð The zero display and the symbol appear. ð The tare weight remains stored until it is cleared. . 2.5.2 Clearing the tare - Press . ð The symbol goes out, the gross weight appears in the display. If the symbol is displayed, i.e., the tare function Auto clear tare is activated in the Scale menu, the tare weight is automatically cleared as soon as the scale is unloaded. 2.5.3 Automatic clearing the tare A tare weight is automatically cleared when the scale is unloaded. Prerequisite The symbol menu. is displayed, i.e., the tare function Auto clear tare is activated in the Scale The tare weight must be heavier than 9 scale divisions. 2.5.4 Automatic taring If you place a weight on an empty scale, the scale tares automatically and the symbol is displayed. Prerequisite The symbol is displayed, i.e., the tare function Auto tare is activated in the Scale menu. The weight to be tared automatically, e.g., packaging material, must be heavier than 9 scale divisions. Operation 19 2.5.5 Chain tare With this function it is possible to tare several times if, e.g., cardboard is placed between individual layers in a container. § The tare function Chain tare is activated in the Scale menu. 1 Place the first container or packaging material on the scale and press . ð The packaging weight is automatically saved as the tare weight, the zero display and the symbol appear. 2 Load the sample and read/print out the result. 3 Place the second container or packaging material on the scale and press again. ð The total weight on the scale is saved as the new tare weight. The zero display appears. 4 Load the sample in the second container and read/print the result. 5 Repeat steps 3 and 4 for other containers. 2.5.6 Tare preset For established container weights enter the tare weight numerically or via barcode / SICS command. Thus, you do not have to tare the empty container. The entered tare weight is valid until a new tare weight is entered or the tare weight is cleared. Tare preset with numeric entry 1 Enter the known tare weight and press to confirm. ð The weight display shows the negative tare weight and the symbol appears. 2 Place the full container on the weighing platform. ð The net weight is displayed. Tare preset with numeric entry is only available for ICS435 and ICS439. Tare preset with barcode entry § For barcode use, Tare preset is selected as destination for external input in the menu under Communication –> COMx –> External input –> Destination. 1 Enter the known tare weight via barcode. ð The weight display shows the negative tare weight and the symbol appears. 2 Place the full container on the weighing platform. ð The net weight is displayed. Tare preset with SICS command from a connected computer 1 Enter the known tare weight on the computer using the SICS command TA_Value_Unit. ð The weight display shows the negative tare weight and the symbol appears. 2 Place the full container on the weighing platform. ð The net weight is displayed. 20 Operation 2.6 Displaying information Up to 5 different items can be configured in the menu for the key. Depending on the configuration in the menu under Terminal –> Device –> Keyboard –> Info key, the following data can be assigned in any order, e.g., • Date & Time • Weight values • Identifications • Device information • Serial numbers and software versions • Network information On the second and third info page, system and contact information can be displayed. 1 Press . ð The (first) info page is displayed. 2 Press again. ð The next info screen is displayed. 3 To leave the info screens, press . An info screen is displayed until is pressed again or until is pressed. 2.7 Printing results If a printer or computer is connected, weighing results and other information can be printed out or transferred to a computer. - Press . ð The defined data is printed out or transferred to the computer. The printout content can be defined in the menu under Communication –> COMx –> Define Templates. The template has to be assigned to the printout in the Application menu. Printing without pressing a key (clever print) § In the menu Application –> Clever print –> Activate is set to On. § To initiate the next printout, the weight must drop below the set threshold. 1 Put the weighing sample on the load plate. ð When a stable weight value is reached, the result is printed automatically. 2 Remove the weighing sample from the load plate and load the next weighing sample. ð When the weight value has dropped below the set threshold, the next stable weight value is printed automatically. Operation 21 2.8 Average (dynamic) weighing With the average weighing function, it is possible to weigh moving weighing samples such as animals. If this function is activated, is displayed in the info line. With average weighing, the scale calculates the mean value from weighing operations within a certain time interval. Start via hard key § Application > Average Weighing > Mode –> Print key (factory setting), Info key or Switch key is selected in the menu. § Weighing sample heavier than 9 scale divisions. 1 Place the weighing sample on the scale. 2 Press the key defined in the menu to start average weighing. ð During average weighing, stars appear in the display, and the average result will be displayed with the symbol . 3 Unload the scale to begin a new average weighing operation. With automatic start § Application > Average > Mode –> Auto is selected in the menu. § Weighing sample heavier than 9 scale divisions. 1 Place the weighing sample on the scale. ð Average weighing starts automatically. ð During average weighing, stars appear in the display, and the average result will be displayed with the symbol . 2 Unload the scale to start a new average weighing operation. 2.9 Working with identifications Weighing series can be assigned with 3 identification numbers ID1, ID2 and ID3 with up to 40 numeric characters that are also printed out in the protocols. If, for example, a customer number and a batch number are assigned, it can be clearly seen in the protocol which batch was weighed for which customer. Barcode use (for one identification only) § ID1, ID2 or ID3 is selected as destination for external input in the menu under Communication – COMx –> External input –> Destination. § To display the identification in the auxiliary line, ID1, ID2 or ID3 has to be activated in the menu under Terminal –> Display –> Auxiliary line. - Scan the ID. ð The ID is assigned to the following weighings until a new ID is scanned. Using SICS command set (up to three identifications) § To display the identification in the auxiliary line, ID1, ID2 or ID3 has to be activated in the menu under Terminal –> Display –> Auxiliary line. - 22 Operation Send the ID command (I12, I13 or I14) from a PC. ð The ID is assigned to the following weighings until a new ID is sent. 2.10 Cleaning WARNING Risk of electric shock a) Before cleaning, unplug the power plug in order to disconnect the terminal from the power supply. b) Cover open connectors with protective caps. Cleaning of the ICS4_5 (dry environments) • Clean the optional protective cover separately. The protective cover is dishwasher-safe. • Take off the load plate and remove any dirt and foreign substances which may have collected underneath. Do not use any hard objects to prevent scratching the surface. • Do not disassemble the weighing device. • Remove any remaining detergent with a wet cloth. • Observe all existing regulations on cleaning intervals and permissible cleaning agents. • In case of a windshield, we recommend to clean it with a glass cleaner each day of usage in order to prolong the durability. Cleaning of the ICS4_9 (wet environments) These devices are designed to be used in a wet environment. Depending on the environment and the cleaning procedures, we suggest appropriate weighing platforms with different types of load cells. The following table provides a detailed overview of recommended environments and suitable cleaning procedures. IP rating Terminal Weighing platform ICS4_9 Standard Option Option aluminium potted stainless hermetically potted load cell steel load cell sealed stainless steel load cell IP68/ IP69k IP65 IP65/IP67 IP68/IP69k Short time wet (30 min / day) x x x x Part time wet (120 min/day) x – x x Permanently wet x – – x Wet wipe down x x x x Light hose down < 5 l/min, 20 kPa x x x x Light wash down < 12.5 l/min, 30 kPa x – x x Heavy wash down, high pressure water and steam jet up to 10000 kPa x – – x Mild detergents x x x x Other detergents in accordance with the manufacturer's specifications and instructions x – – x Environment Cleaning procedure Cleaning detergents Operation 23 • Clean the optional protective cover separately. The protective cover is dishwasher-safe. • Replace the protective cover regularly. • Take off the load plate and remove any dirt and foreign substances which may have collected underneath. Do not use any hard objects to prevent scratching the surface. • Do not disassemble the weighing device. • Remove any remaining detergent by rinsing with clear water. • To prolong the lifetime of the load cell, dry it with a soft lint-free cloth immediately after cleaning. • Observe all existing regulations on cleaning intervals and permissible cleaning agents. Cleaning of other weighing platforms not described in this user manual - Make sure to observe the cleaning instructions for the connected weighing platform. The weighing platform may not be designed for the environments and cleaning procedures described above! 2.11 Verification test The weighing instrument is verified if: • the accuracy class is displayed in the metrological line, • the approval readability is shown with "e = readability", • it bears an official verification mark, e.g., the green M sticker (OIML), • the validity is not expired. The weighing instrument is also verified if: • the metrological line shows "Approved scale", • labels with the metrological data are placed near the weight display, • the securing seal is not tampered with, • it bears an official verification mark, e.g., the green M sticker (OIML), • the validity is not expired. The period of validity is country-specific. It is in the responsibility of the owner to renew verification in due time. Strain gauge weighing platforms Strain gauge weighing platforms use a Geo Code to compensate gravitational influence. The manufacturer of the weighing instrument uses a defined Geo Code value for verification. 1 Check if the Geo Code in the instrument corresponds with the Geo Code value defined for your location. ð The Geo Code value is displayed when you switch on the instrument. ð The Geo Code value for your location is shown in the Appendix. 2 Call the METTLER TOLEDO service technician if the Geo Code values do not match. 24 Operation 3 Settings in the menu 3.1 Menu overview In the menu, settings can be changed and functions can be activated. This enables adaptation to individual weighing requirements. The menu consists of the following 5 main blocks containing various submenus on several levels which are described in the following sections. • Scale • Application • Terminal • Communication • Maintenance 3.2 Operating the menu 3.2.1 Calling up the menu and entering the password The menu differentiates between 2 operating levels: Operator and Supervisor. The Supervisor level can be protected by a password. When the device is delivered, both levels are accessible without a password. Operator menu 1 Press and keep it pressed until Enter code appears. 2 Press again. ð The menu item Terminal is displayed. Only parts of the submenu Device are accessible. Supervisor menu 1 Press and keep it pressed until Enter code appears. 2 Enter the password and confirm with . ð The first menu item Scale is highlighted. • By default, no password is set. Therefore, confirm the password inquiry with when you call up the menu for the first time. • As long as no supervisor password is defined, operator access will offer the complete supervisor menu. • If a password is not entered within a few seconds, the scale returns to the weighing mode. Emergency password for Supervisor access to the menu If a password has been issued for Supervisor access to the menu and you have forgotten it, you can still enter the menu: - Press three times and confirm with . Settings in the menu 25 3.2.2 Display in the menu Menu items are displayed together with their context. 3 4 1 5 2 1 Menu items; the selected menu item is highlighted 2 Scroll flag, like, e.g., the scroll bar of your PC 3 Sub-menu items 4 Menu info line, i.e., menu path of the current menu item 5 Navigation info line: use the keys below to navigate the menu as indicated Exiting the menu - 26 Press . ð Save settings? is displayed. - Press the key or OK - Press the key or ESC for further menu settings. - NO to discard changes and return to the weighing mode. Press the key Settings in the menu ü to save the menu changes and to return to the weighing mode. 3.2.3 Selecting and setting parameters in the menu Example: Setting the average weighing mode to "Automatic" 1 In the menu start screen use È to select (highlight) the Application menu. The submenus are displayed in the middle column. 2 Press 3 Press È and then press Avg. weighing submenu. Æ to enter the Application menu. Æ to open the The current setting of the highlighted menu item is displayed in the right column. 4 Press Æ to enter the Mode submenu. The possible settings of the selected menu item are displayed on the right side. 5 Press Ç to select (highlight) Auto and confirm selection with OKü . The setting of the average weighing mode has changed. Should the settings of a menu item not be displayed on one page (e.g., all the info items), use È to proceed to the hidden items. Settings in the menu 27 3.3 Scale menu block 3.3.1 Scale menu overview The Scale menu depends on the connected load cell which is indicated on the type label. Type Load cell Scale menu ICS4_5g / ICS4_9g Analog Analog scale menu [} 28] ICS4_5i / ICS4_9i IDNet IDNet scale menu block [} 33] ICS4_5s / ICS4_9s SICSpro ICS4_5k-.../f Analog scale menu [} 28] ® MonoBloc Analog scale menu [} 28] 3.3.2 Scale menu block (Analog / SICSpro) Overview Factory settings are printed in bold in the following overview. Level 1 Level 2 Level 3 Identification Serial no. scale, Scale model, Scale location, Scale ID Linear. & Calib. Last calibration Start up FACT (for ICS4_5k-.../f compact scales only) On, Off Auto print calib. On, Off Level 4 Perform calib. Disp. unit & res. Display unit 1 g, kg, oz, lb, lb-oz, t Display unit 2 g, kg, oz, lb, lb-oz, t Disp. resolution 28 Unit roll On, Off Zero AZM Off, 0.5d, 1d, 2d, 5d, 10d Tare Auto tare On, Off Chain tare On, Off Auto clear tare On, Off Restart On, Off Filter Vibration Low, Medium, High Process Universal, Dosing, Absolute Stability Fast, Standard, Precise MinWeigh MinWeigh On, Off FACT (for ICS4_5k-.../f compact scales only) Temperature Off, 1K, 2K, 3K Time Time 1, Time 2, Time 3 Days Monday ... Sunday Reset Perform reset? Settings in the menu Off, On Description Identification Displaying/setting scale identification data Serial no. scale Displaying the serial number of the weighing platform Scale model Displaying the scale type, e.g., PBD555 Available for METTLER TOLEDO scales only Scale location Entering the scale location, e.g., floor and room Scale ID Entering the scale identification, e.g., inventory number Notes • Scale location and Scale ID can be displayed in the auxiliary or info lines or printed out. • Scale location and Scale ID can consist of up to 24 alphanumerical characters. Linear. & Calib Linearization and calibration Last calibration Shows the date of the last calibration. Start up FACT When set to On, an internal calibration is performed every time the scale is switched on. It is recommended not to disable this setting if the scale will be moved to other locations. Autoprint calib. When set to On, a protocol is printed out automatically for each calibration process. Perform calib. Important: With ICS4_5k-.../f weighing terminals make sure that the scale has been switched on at least 15 minutes before performing linearization/calibration. 1 Start calibration with OKü . ð Preload is blinking. 2 Ensure that the weighing platform is empty and confirm with ð xx kg is blinking. OK ü . 3 If necessary, change the calibration weight value displayed using È / Ç . 4 Put on the indicated calibration weight on the weighing platform and confirm with OKü . ð Preload is blinking. 5 Remove the calibration weight and confirm with ð Passed is displayed briefly. Notes OK ü . • In order to achieve a particularly high precision, calibrate under full load. • The calibration process can be aborted using ESC . • This menu item is not available for verified scales. Settings in the menu 29 Disp. unit & res. Display units and resolution Display unit 1 Selecting weighing unit 1 Display unit 2 Selecting weighing unit 2, different from unit 1 Display resolution Selecting readability (resolution). The possible settings depend on the connected scale. When set to Off, only the default resolution of the weighing platform is available. Unit roll When set to On, the weight value can be displayed in all available units with . Notes • In case of verified scales, individual sub-items of the Display/ Units & Resolution menu item may not be available or only to a limited extent, depending on the respective country. • On dual-range/dual interval scales, resolutions marked with l<–>l 1/2 are divided into 2 weighing ranges/intervals, e.g., 2 x 3000 d. • On triple-range/multi interval scales, resolutions marked with l<– >l 1/2/3 are divided into 3 weighing ranges/intervals, e.g., 3 x 3000 d. Zero Automatic zero setting AZM Automatic Zero Maintenance On/Off Switching automatic zero maintenance on/off. Off; 0.5 d; 1 d; 2 d; 5 d; 10 d Selecting zeroing range in digits per second. Note On verified scales, this menu item does not appear. Tare Tare function Auto tare Switching on/off automatic taring Auto tare = On: When a load is placed on the scale and the gross weight exceeds 9 d, the weight is tared automatically. Chain tare Switching on/off chain tare Chain tare = On: It is possible to tare several times if, e.g., cardboard is placed between individual layers in a container. Auto clear tare Switching on/off automatic clearing of the tare weight Auto clear tare = On: When the load is removed and the weight drops below 9 d, the tare weight is cleared automatically. Restart Automatic saving of zero point and tare value Restart When set to On, the last zero point and the tare value are saved. After switching off/on or after a power interruption, the device continues to work with the saved zero point and tare value. 30 Settings in the menu Filter Filter settings Vibration Adaptation to ambient conditions Low Very steady and stable environment. The scale works very rapidly, but is very sensitive to external influences. Medium Normal environment. The scale operates at medium speed. High Unstable environment. The scale works more slowly, but is less sensitive to external influences. Process Adaptation to the weighing process Universal Universal setting for all weighing samples and normal weighing goods. Dosing Dispensing liquid or powdery weighing samples (only for certain weighing platforms, e.g., PBK9-series / PFK9-series). Absolute For solid bodies under extreme conditions, e.g., strong vibrations. Stability Adjusting the stability detector The slower the scale works, the greater the reproducibility of the weighing results. Fast The scale operates very fast. Standard The scale operates at medium speed. Precise The scale operates with the greatest possible reproducibility. MinWeigh MinWeigh function MinWeigh Switching MinWeigh function on/off When set to On and if the weight on the scale drops below the stored minimum weight, will appear in the symbols and info line and the display color will change. Note Before you can use this function, the METTLER TOLEDO service technician has to determine and enter a minimum weight value. FACT Fully automatic calibration test (for ICS4_5k-.../f compact scales only) Temperature Setting the temperature difference for automatic adjustment. Off Switching off automatic adjustment in case of a temperature difference. 1K, 2K, 3K Automatic adjustment in case of the selected temperature change. Time Setting up to 3 times per day for automatic adjustment. Time 1, Time 2, Time 3 Entering the times for the automatic adjustment (hours, minutes in 24 h format). To deactivate Time 2 and Time 3, set them to 00:00:00. Days Setting the days of the week for automatic adjustment. Monday ... Sunday On all days which are set to On, the automatic adjustment will be performed. Note FACT is executed under the following conditions: • No key has been pressed for 3 minutes. – and – • The displayed weight value is smaller than 30 d and stable. Settings in the menu 31 Reset Resetting the scale settings to factory settings Perform reset? - Confirm with OKü to reset the scale menu settings. For ICS4_5k-.../f compact scales only 1 Press Reset for 5 seconds. ð Reset User Calibration is displayed. 2 Confirm with 32 Settings in the menu OK ü to reset the user calibration. 3.3.3 IDNet scale menu block Overview Level 1 Level 2 Level 3 Display unit & Resolution Display unit 2 g, kg, oz, lb, t Unit roll On, Off Zero AZM Off, 0.5d, 1d, 2d, 5d, 10d Tare Auto tare On, Off Auto clear tare On, Off, 9 d Chain tare On, Off Restart On, Off Filter Vibration Stable, Normal, Unstable Process Finefill, Universal, Absolute Stability ASD = 0, 1, 2, 3, 4, 5 Update The possible settings depend on the connected scale MinWeigh Function On, Off MinWeigh value Reset Perform reset? Description Identification Displaying/setting scale identification data Serial no. scale Displaying the serial number of the weighing platform Scale model Displaying the scale type, e.g., PBD555 Available for METTLER TOLEDO scales only Scale location Entering the scale location, e.g., floor and room Scale ID Entering the scale identification, e.g., inventory number Notes • Scale location and Scale ID can be displayed in the auxiliary or info lines or printed out. • Scale location and Scale ID can consist of up to 24 alphanumerical characters. Display unit & Resolution Setting the weighing units Unit 2 Selecting weighing unit 2, different from unit 1. Unit roll When set to On, the weight value can be displayed in all available units with . Notes • In case of verified scales, individual sub-items of the Display unit & Resolution menu item may not be available or only to a limited extent, depending on the respective country. • On dual-range/dual interval scales, resolutions marked with l<–>l 1/2 are divided up into 2 weighing ranges/intervals, e.g., 2 x 3000 d. • On triple-range/multi interval scales, resolutions marked with l<– >l 1/2/3 are divided up into 3 weighing ranges/intervals, e.g., 3 x 3000 d. Settings in the menu 33 34 Zero Automatic zero setting AZM Automatic Zero Maintenance On/Off Switching automatic zero maintenance on/off. 0.5d, 1d, 2d, 5d, 10d Selecting the threshold for automatic zero setting. Notes • On verified scales, this menu item does not appear. • The effective range of the zero update mode can only be set by the METTLER TOLEDO service technician. Tare Tare function Auto tare Switching on/off automatic taring. On When a load is placed on the scale and the gross weight exceeds 9 d, the weight is tared automatically. Off No automatic taring. Auto clear tare Configuring the automatic clearing of the tare weight. On The tare weight is automatically cleared if the gross weight is 0 or below zero. Off No automatic clearing of the tare weight. 9d The tare weight is automatically cleared if the gross weight is within +/– 9 display steps. Chain tare Switching on/off chain tare. On It is possible to tare several times if, e.g., cardboard is placed between individual layers in a container. Off Taring is only possible once. Restart Automatic saving of zero point and tare value Restart When set to On, the last zero point and the tare value are saved. After switching off/on or after a power interruption, the device continues to work with the saved zero point and tare value. Settings in the menu Filter Filter settings Vibration Adaptation to ambient conditions Low Very steady and stable environment. The scale works very rapidly, but is very sensitive to external influences. Medium Normal environment. The scale operates at medium speed. High Unstable environment. The scale works more slowly, but is insensitive to external influences. Process Adaptation to the weighing process Dosing Dispensing of liquid or powdered weighing samples manually. Universal Universal setting for all weighing samples and normal weighing goods. Absolute No adaptation, to perform automated filling processes, e.g., with PLC. Stability Adjusting the stability detector The slower the scale works, the greater the reproducibility of the weighing results. ASD = 0 Stability detector switched off. Only possible for non-verified scales. ASD = 1 Rapid display, good reproducibility ... ... ASD = 4 Slow display, excellent reproducibility Update Setting the display speed of the weight display xx UPS Selecting the number of updates per second (UPS). Notes • This menu is only displayed if the Update function is supported by the connected scale. • The possible settings depend on the connected scale. MinWeigh MinWeigh function MinWeigh Switching MinWeigh function on/off When set to On and if the weight on the scale drops below the stored minimum weight, will appear in the symbols and info line and the display color will change. Note Before you can use this function, the METTLER TOLEDO service technician has to determine and enter a minimum weight value. Reset Resetting the scale settings to factory settings Perform reset? - Confirm resetting with OK ü . Settings in the menu 35 3.4 Application menu block 3.4.1 Application –> Straight weighing Printout Defining printer and template in the straight weighing application COM1, COM2 Selecting the COM port for the desired printer E.g., COM1 for printout to a PC and the optional COM2 for printout on an office (ASCII) printer Off No printout on this COM port Standard Printout with the standard template on the selected printer Template 1 ... Template 5 Assigning a customer template to the selected printer Notes • Templates 1 ... 5 can be defined under Communication –> Define templates. • This menu item is only available if a COM port is set to Print mode. • There are 5 more templates available (Template 6 ... Template 10). Please ask your METTLER TOLEDO service technician to configure these templates or create them by yourself using the DatabICS software (www.mt.com/ind-databics), if desired. 3.4.2 Application –> Average weighing Mode Selecting mode for determining the average weight for an unstable load (dynamic weighing) Auto Calculating average weight with automatic start of the weighing cycle Print key Info key Switch key Calculating average weight with manual start of the weighing cycle via the selected key: Print key , Info key , Switch key Printout Defining printer and template in the average weighing application See Application –> Straight weighing 3.4.3 Application –> Clever print Clever print Settings for printing without pressing a key Activate When set to On, the result is automatically printed when the weight between two weighings has dropped below the threshold. Threshold Enter threshold for unloading the scale between two weighings. Possible settings: 0.0 kg ... max. capacity Factory setting: 0.0 kg 3.4.4 Application –> Reset 36 Reset Resetting the application settings to factory settings Perform reset? - Settings in the menu Confirm resetting with OK ü . 3.5 Terminal menu block 3.5.1 Terminal menu overview The Terminal menu block consists of the following main subblocks, which are described in detail in the following. • Device • Access • Reset Factory settings are printed in bold in the following overview. 3.5.2 Terminal –> Device Overview Level 1 Level 2 Level 3 Region Language English, US English, Deutsch, Français, Italiano, Español, Chinese, ... Level 4 Level 5 Date format MM/DD/YY, MM/DD/YYYY, MMM/DD/YYYY, DD/MM/YY, DD/MMM/YYYY, YY/MM/DD, YYYY/MMM/DD, YYYY/MM/DD, DD/MM/YYYY Set date Set year Set month Set day Time format 24:MM, 12:MM tt, 24:MM:SS, 12:MM:SS tt Set time Set hour Set minutes Energy save Identification Backlight On, 5 seconds, 10 seconds, 15 seconds, 30 seconds Power off Off, 1 minute, 3 minutes, 5 minutes, 15 minutes, 30 minutes Terminal loc. Terminal ID Display Display layout Default, 3-lines mode, Big font mode Contrast 1 ... 5 ... 10 Brightness 1 ... 5 ... 10 Weight hold 0 (s) ... 10 (s) Auxiliary line Not used, Date & Time (for battery devices incl. remaining capacity in % and in hours), Gross, Net, Tare, High resolution (not available for approved scales), ID1, ID2, ID3, Bargraph, Temperature (for ICS4_5k-.../f only) Settings in the menu 37 Level 1 Level 2 Level 3 Level 4 Level 5 Keyboard Hard keys Power, Clear, On, Off Switch, Info, Transfer, Numeric keys Info key Page 1 Item 1 ... Item 5 Page 2 & 3 Info page 2 Off, System info, Contact info Not used, Date & Time, Highres & net (not available for approved scales), Gross, Net, Tare, ID1, ID2, ID3, Terminal ID, Terminal loc., Terminal model, SNo. Terminal, Terminal FW, SNo. Scale, Scale FW, Temperature (for ICS4_5k-.../f only), MinWeigh, IP address, Subnet mask, Gateway, USB version, Consecutive number Info page 3 Off, System info, Contact info Beeper On, Off Message time 1 s, 2 s, ... 6 s Battery Charge strategy Full, Preservation Timeout Mode Off, Rental, Rental info Set date Set year, Set month, Set day Description 38 Region Country specific settings Language Selecting the language of the operator interface. We will expand the available languages continuously. Date format Selecting the date format. Set date Entering the date in the selected format. Set month Entering the month in the selected format. Set day Entering the day in the selected format. Time format Selecting the time format. Set time Entering the time in the selected format. Set hour Entering the hour in the selected format. Set minutes Entering the minutes. Energy save (Operator access) Setting the energy saving mode Backlight Settings for switching off the backlighting On Backlight always on 5 seconds ... 30 seconds Selecting the time period after which the device switches off display and backlighting when not in use and gross weight is 0. Display and backlighting are switched on again by pressing a key or if the weight changes. Power off Settings for switching off the device Off No energy saving mode Settings in the menu Energy save (Operator access) Setting the energy saving mode 1 minute ... 30 minutes Selecting the time period after which the device switches off when not in use and gross weight is 0. After this, it must be switched on again using . Identification Setting terminal identification data Terminal location Entering the terminal location, e.g., floor and room Terminal ID Entering the terminal identification, e.g., inventory number Notes • Terminal location and terminal identification can be displayed in the auxiliary or info lines or printed out. • Terminal location and terminal identification can consist of up to 12 characters (0 ... 9 and decimal point). Display Setting the display according to your specific task Display Layout Selecting the presentation of the weight value. Contrast (Operator access) Setting the contrast of the display. This menu item is accessible with Operator access rights. Brightness (Operator access) Setting the brightness of the display. This menu item is accessible with Operator access rights. Weight hold Setting how long (in seconds) the weighing result is frozen in the display after the transfer key has been pressed or auto print was generated. Auxiliary line Selecting the contents of the auxiliary display line. Keyboard Setting the keyboard according to your specific task Hard keys Locking/unlocking keys Possible keys: Power ( ), Clear ( ), Switch / Toggle ( ), Info ( ), Transfer ( ), Numeric keys (ICS435 and ICS439 only) Info key Configuring the items to be displayed using the info key ( ) Page 1 On the first page of the info key up to 9 information items on the weighing process can be configured. 1 Select item number. 2 Assign information Page 2, Page 3 On pages 2 and 3 system and contact information will be displayed. In case of a problem, here you will find your contact data and the system information the service technician will ask for. System information is set by the manufacturer, contact information can be entered directly. Beeper When set to On, each keystroke will be confirmed by a short beep. Message time Setting how long a message is displayed 1, 2, 3, 4, 5, 6 Setting how long a message is displayed in seconds Battery Battery settings Charge strategy Setting the charging strategy. Settings in the menu 39 Battery Battery settings Full The battery will always be fully charged. Preservation Charging to prevent total discharge. Time out Setting the behaviour when no action takes place on the terminal Mode Setting the time out mode. Off No time out setting. Rental The scale can only be used until a set date, e.g., when the scale is rented for a special event like a fair or a market. After the expiration date a message is displayed: Rental expired and the scale can no longer be used. Rental info When the set date has passed, a message is displayed: Rental expired. By pressing the key , the message is cleared and the scale can be used as before. Set date Entering the expiration date. Set year Entering the year of the expiration date. Set month Entering the month of the expiration date. Set day Entering the day of the expiration date. 3.5.3 Terminal –> Access Supervisor Password for Supervisor menu access Password Enter password for Supervisor menu access. Retype password Repeat the password entry. Note The password can consist of up to 4 characters. 3.5.4 Terminal –> Reset Reset Resetting the terminal settings to factory settings Perform reset? - Confirm resetting with OK ü . 3.6 Communication menu block 3.6.1 General For detailed information on interface protocols and commands refer to the SICS Reference manual. The Communication menu block consists of the following subblocks: • • • • Overview COM1 COM2 Define templates Showing the installed interfaces. Parameter settings for the standard RS232 interface COM1. Parameter settings for the optional second interface COM2. Defining templates to be assigned to the application-specific printouts. The interfaces identify themselves. Therefore only those menu settings appear which are relevant for the individual interface. If no optional interface is installed, the COM2 menu will not appear. 40 Settings in the menu 3.6.2 Overview of the communication menu blocks Possible settings COM1 Mode Print Auto print Instand print Continuous (Dialog)* COM2 RS232 RS232 x x Dialog* RS422 / Ethernet WLAN USB RS485 Device x x x x USB Host – Factory setting External input x x x x x x x Toledo cont.-weight Digitol B Digitol G x x x x x x – Second display x x x x x – – x x x x x x – Printer External input x x x x x x x Baud (factory setting) 9600 9600 9600 – – – – Parity (factory setting) 8 none 8 none 8 none – – – – Handshake x x x – – – – RS Type Net Address Load resistor – – x – – – – DHCP IP address Subnet mask Gateway – – – x x – – TCP settings – – – x x – – Wireless settings – – – – x – – Parameter * for more information see SICS Reference manual ** only available for Toledo cont.-weight Settings in the menu 41 RS232 menu block Level 1 Level 2 Mode Print, Auto print, Instant print, Dialog, Continuous (Dialog), External input, Toledo Cont.-weight, Second display, SICS scale, X scale Printer External input Level 3 Level 4 Digitol B, Digitol G Net Gross Tare Type ASCII printer, Values only ASCII Format Line format Multiple, Single, Fixed Line length 1 ... 24 ... 100 Separator (for line format Single only) . , : ; – _ / \ Space Add line feed 0 ... 9 On, Off Preamble length Data length Postamble length Parameter Reset RS232 Termination character CR, LF, EOT, ... Destination Off, Tare preset, ID1, ID2, ID3 Baud 300, 600, ... 9600, ... 115200 baud Parity 7 none, 8 none, 7 odd, 8 odd, 7 even, 8 even Handshake Off, Xon – Xoff Checksum Off, On Perform Reset? RS422 / RS485 menu block Level 1 Level 2 Level 3 Mode Print, Auto print, Instant print, Dialog, Continuous (Dialog), External input, Toledo Cont.-weight, Second display, SICS scale, X scale, SICSpro scale Printer see RS232 External input Parameter Reset RS4xx 42 Settings in the menu Baud 300, 600, ... 9600, ... 115200 baud Parity 7 none, 8 none, 7 odd, 8 odd, 7 even, 8 even Handshake Off, Xon – Xoff RS-Type RS422, RS485 Net address 0 ... 31 Checksum Off, On Load resistor Off, On Perform Reset ? Ethernet menu block Level 1 Level 2 Mode see RS232 Level 3 Printer External input Parameter DHCP Off, On Local IP Subnet mask Gateway TCP Mode Checksum Off, On TCP Mode Server, Client, FreeWeigh Local Port 4305 Remote IP Remote port Connect timeout Disconnect timeout Reset Ethernet Perform Reset? WLAN menu block Level 1 Level 2 Mode see RS232 Level 3 Printer External input Parameter see Ethernet TCP mode see Ethernet Wireless setting SSID Encryption Off, WEP, WPA WEP settings 64 Bit, 128 Bit WEP key Key 1, Key 2, Key 3, Key 4 WPA settings WPA-TKIP, WPA2-AES Password Status Display the current status, e.g., connection status, signal strength Reset WLAN Perform Reset? A license file (RADIUS file) can be implemented via the DatabICS software (mt.com/ind-databics). Settings in the menu 43 USB Host menu block Level 1 Level 2 Level 3 USB version Keyboard / Barcode Reader Preamble length Data length Postamble length Termination char. Destination USB settings Alibi on the fly On, Off Level 1 Level 2 Level 3 Mode Continuous (Dialog), Dialog, External input, Toledo Cont.-weight, Print, Auto print, Instant print USB Device menu block Digitol B, Digitol G Reset USB Net, Gross, Tare Level 4 On, Off Perform Reset? 3.6.3 Description of the communication menu blocks Mode Operating mode of the serial interface Print Manual data output of stable results to the printer with Auto print Automatic output of stable results to the printer (e.g., for series weighing operations) Instant print Manual data output of the current weight value (either stable or not) to the printer with Dialog Bi-directional communication via MT-SICS commands, control of the device via PC Continuous (Dialog) Ongoing output of all weight values via the interface External input Input other than via terminal keypad. What the input is used for is defined in the Destination menu block. Toledo Cont.-weight TOLEDO Continuous mode Second display On the selected interface port, a second display is connected. Digital scale On the selected interface port, a digital scale is connected. Digitol B Digitol G Digitol compatible format. The gross weight is identified by "B". Digitol compatible format. The gross weight is identified by "G". Net, Gross, Tare Selecting the weight values to be transferred. Notes Printing conditions for Auto print: • The weight must be heavier than 9 display increments. • A weight change of at least 9 display increments is required to initiate the next printout. 44 Settings in the menu Printer Configuring printer and formats for the protocol printout Type ASCII printer ASCII format Values only If Values only is selected, the transmitted data does not include the name of the variable, e.g., date, gross, ID1, but the value and, if appropriate, the unit, as a separate line. This allows the label printer to fill its template with the required data. Line format Selecting line format (for ASCII printers only) Multiple Multiple lines Single Single lines Fixed Fixed (records output in single lines; every record includes the number of characters that was defined under Line length) Line length Setting line length This item is only displayed for the line formats Multiple and Fixed. Separator Selecting the separator This item is only displayed for the line format Single. Add line feed Adding line feeds External input Configuring input via barcode reader Preamble length Data length The barcode may contain additional data before the relevant data (preamble) and behind (postamble). Postamble length - Termination char. Selecting the termination character which is used by the connected barcode scanner Destination Selecting the item to be entered via barcode scanner USB Host Configuring the USB Host interface USB version Show the implemented USB version Keyboard / Barcode reader Configure the external input via keyboard or barcode Preamble length Data length The barcode may contain additional data before the relevant data (preamble) and behind (postamble). Postamble length - Termination char. Selecting the termination character which is used by the connected barcode scanner Destination Selecting the item to be entered via barcode scanner USB settings Configuring an external alibi memory Alibi on the fly When set to On and a USB stick is inserted, the records are stored on the USB stick as well. Enter the number of characters of preamble, (relevant) data and postamble. Enter the number of characters of preamble, (relevant) data and postamble. Settings in the menu 45 Connecting an USB keyboard • To connect an external keyboard via USB Host, the COM port has to be defined as External input with the termination character LF. • If a function is assigned to the external input as well, e.g., "Load article", use the Enter key to confirm the external input. The function keys of the USB keyboard correspond to the following keys on the weighing terminal: 46 F1 F8 Displayed soft key 4 F2 F9 Displayed soft key 5 (right) F3 ESC F4 Back Delete text character by character In straight weighing: print As external input: confirm Cursor keys F5 Displayed soft key 1 (left) Enter F6 F7 Displayed soft key 2 Displayed soft key 3 Cursor keys ESC in the menu Parameter Communication parameters Baud Selecting baud rate Parity Selecting parity Handshake Selecting handshake Checksum Activating/deactivating checksum byte STX Activating/deactivating STX If STX is set to On, the STX signal (0x02) is sent at the beginning of each output string that is sent via the interface. RS Type Selecting type of the optional RS422/RS485 interface: either RS422 or RS485 Net Address Assigning network address Load resistor To avoid reflections on a network, we recommend to make a defined termination. For this purpose, the load resistor within the terminal can be used. When set to On, a resistor of approx. 100 Ohm between the signal lines is enabled. DHCP If DHCP is set to On, the device will receive the IP address automatically. Then IP address, Subnet mask and Gateway are read-only fields. Local IP Displaying/entering the local IP address Subnet mask Displaying/entering subnet mask Gateway Displaying/entering gateway address Note Not all parameters are available on all serial interfaces. Refer to the overviews of the interfaces to check which parameters are avilable. Settings in the menu TCP Mode Transmission control protocol settings TCP Mode Configuring TCP mode Server Weighing terminal acting as server E.g., to execute SICS commands from a PC. To do so, the weighing terminal must be configured as Server and the PC must be configured as Client. Client Weighing terminal acting as client E.g., to print to a PC or printer. To do so, the weighing terminal must be configured as Client and the PC must be configured as Server. FreeWeigh To connect as SICS scale to freeweigh.net Local Port Displaying/entering the local port Remote IP Displaying/entering the remote IP address Remote Port Displaying/entering the remote port Connect timeout Setting timeout for connecting Disconnect timeout Setting timeout for disconnecting Settings in the menu 47 3.6.4 Digital I/Os menu block Level 1 Level 2 Level 3 Input Input pin 1 ... Input pin 4 Off, Zero, Tare, Transfer, Switch, Clear, Info Output Ready, Stable, Tare, Zero, < Min weigh, >= Min weigh, Underload, Overload, <= Setpoint 1, > Setpoint 1, <= Setpoint 2, > Setpoint 2, Star Off, Output pin 1 ... Output pin 4 Setpoints Setpoint 1, Setpoint 2 Output mode Continuous, Stable Configuring inputs 1 Select an input pin. 2 Assign an input signal to the selected input pin. Configuring outputs 1 Select an output signal. 2 Assign an output pin. Configuring setpoints - Enter values for the setpoints. Setting output mode Continuous Stable Digital outputs are updated continuously Digital outputs are updated only when the weight is stable 3.6.5 Define templates menu block Level 1 Level 2 Level 3 Template 1 ... Template 5 Line 1 ... Line 30 Not used, Header *, Date, Time, Gross, Net, Tare, High resolution, ID1, ID2, ID3, Terminal ID, Terminl loc., SNo. Terminal, SNo. Scale, Star line, New line, Form feed * The content of these items has to be entered via SICS command. Configuring templates 1 Select a template. 2 Select a line. 3 Assign an item. There are 5 more templates available (Template 6 ... Template 10). Please ask your METTLER TOLEDO service technician to configure these templates or create them by yourself using the DatabICS software (www.mt.com/ind-databics), if desired. 48 Settings in the menu 3.7 Maintenance menu block 3.7.1 Overview Level 1 Level 2 Level 3 Level 4 Scale test Scale Internal test Perform test? External test Perform test? Conf. ext. test Test weight Weight name Tolerance Auto print Keyboard test Perform test? Display test Perform test? Serial no. Serial no. Scale On, Off Serial no. Terminal terminal Print setup Print menu settings Tool comm. Port Baudrate Start Reset all Perform reset? 3.7.2 Description Scale test Testing the selected scale Internal test Testing scales with an internal test weight Perform test? - External test Testing scales without an internal test weight Perform test? 1 Press OKü to start the test. ð Preload is displayed. Press OKü to start the test. ð The deviation between test weight value and actually weighed value is displayed. 2 If applicable, load the preload, and press ð The test weight is blinking. OK ü . 3 Load the requested test weight and press OKü . ð The deviation between test weight value and actually weighed value is displayed. Conf. ext. test Configuring the external test weight Test weight Setting the test weight value Weight name Entering the test weight name Tolerance Setting the test tolerance Auto print Automatic printout When set to On, a protocol is printed for each scale test. Settings in the menu 49 Keyboard test Testing the keyboard Perform test? 1 Press OK ü to start the keyboard test. 2 Press the keys in the displayed order. ð If the key works, the device switches to the next key. ð The keyboard test is terminated by pressing . Display test Testing the display Perform test? 1 Press OKü to start the display test. ð A checkerboard pattern is displayed. 2 Press any key to invert the checkerboard pattern. 3 Press any key again. ð Completed is displayed. 4 Press 50 OK ü to leave the display test. Note The display is working properly when all fields are displayed without missing pixels. Serial number Displaying serial numbers SNo. Scale Displaying the serial number of the connected weighing platform SNo. Terminal Displaying the serial number of the weighing terminal Print setup Printout of a list of all menu settings Print menu settings - Tool communication Testing the communication Port Selecting the COM port to be tested Baudrate Setting the baudrate for testing Start Starting tool communication test Reset all Reset all settings to factory setting Perform reset? - Settings in the menu Press OK ü to start the printout. Reset all settings to factory settings with OK ü . 4 Event and error messages 4.1 Error conditions Error Cause Remedy Display dark • Backlighting set too dark - Set backlighting brighter. • No power supply - Check power supply. • Unit switched off - Switch on unit. • Power supply cable not plugged in - Plug in power supply cable. • Brief fault - Switch device off and on again. • Unstable installation location - Adjust vibration adapter. • Draft - Avoid draft. • Unstable weighing sample - Dynamic weighing. Weight display unstable Incorrect weight display • Contact between weighing pan and/or weighing sample and surrounding Remedy contact. • Power supply fault - Check power supply • Incorrect zeroing - Unload scale, set to zero and repeat weighing operation. • Incorrect tare value - Clear tare. • Contact between weighing pan and/or weighing sample and surroundings Remedy contact. • Weighing platform tilted - Level weighing platform. • Load plate not on the scale - Place load plate on the scale. • Weighing range not reached - Set to zero. • Weighing range exceeded - Unload scale. - Reduce preload. - If necessary, adjust vibration adapter. - Call METTLER TOLEDO service technician. • Result not yet stable Attention: Approval • Approval was tampered with invalid alternating with metrological data Event and error messages 51 4.2 Errors and warnings Error messages Error messages contain the following information: Overload ! 1 Remove load from load plate 2 SW01 3 4 1 Error message 2 Remedy 3 Message identifier 4 How to clear the message Warnings Warnings are displayed briefly and then disappear automatically. Data not valid 1 22013958A 2 EI01 52 3 1 Warning 2 Additional information, e.g., which data is not valid 3 Warning identifier Event and error messages 4.3 Smart weighing counter / spanner icon This weighing instrument features several control functions to monitor the condition of the device. The METTLER TOLEDO service technician can setup and enable these functions. This helps the user and the METTLER TOLEDO service technician to detemine how the device is treated and what measures are needed to keep it in a good shape. If the control functions triggers an alert, a message is shown. You can confirm the message and continue to work with the weighing instrument. The spanner icon lights up. Service required Overload problem SW14 In case of an alert we strongly recommend calling the METTLER TOLEDO service technician • to replace parts which are at the end of lifetime, • to correct wrong settings, • to educate operators about proper handling, • to perform routine service work, • to reset the alert. The control functions monitor the following conditions: • number of weighings • number of overloads • maximum weight • zero commands and zero failures • battery charging cycles • power-on time • date for the next service inspection 4.4 Service information In case you need the METTLER TOLEDO service technician, you can read the necessary system and contact information from the device. 1 Press twice. ð System information data are displayed. 2 Press again ð Your contact data are displayed. Event and error messages 53 5 Technical data and accessories 5.1 Devices for dry environment 5.1.1 Technical data for weighing terminals for dry environments ICS4_5 weighing terminals Housing Aluminium diecast Display LCD liquid crystal graphical display, with back lighting Keyboard Tactile-touch membrane keypad (PET) Scratch-resistant labelling Protection type With power supply connection IP65 With built-in storage battery IP65 With exchangeable battery IP5x Weighing platform IP5x / IP65 (option, not for 0.6XS) Net weight Weighing terminal 2.0 kg / 4.4 lb Power supply connection Direct connection to power supply (supply voltage fluctuation not exceeding ±10 % of the rated voltage) Battery operation Rated voltage 100 ... 240 V AC / 50 ... 60 Hz / 300 mA Power cord approx. 2.5 m / 8.2 ft Supply of device 12 V / 2.5 A Up to 22 hours of operation possible 9-28 VDC power supply Rated voltage 9 ... 28 V Power cord approx. 5 m / 16 ft, open ends Battery charger Ambient conditions 0 ... 40 °C / 32 ... 104 °F, dry environment Ambient conditions Application indoor use only Altitude up to 2,000 m Temperature range Class III –10 ... 40 °C / 14 ... 104 °F Temperature range Class II with PBK785 with PBK9-series / PFK9-series 10 ... 30 °C / 50 ... 86 °F 0 ... 40 °C / 32 ... 104 °F Overvoltage category II Pollution degree 2 Humidity Max. rel. humidity 85 % for temperatures up to 40 °C / 104 °F W & M approvals OIML Class II, III, IIII NTEP Class II, III Interfaces Communication interfaces 1 RS232 interface integrated 1 additional optional communication interface possible Scale interfaces 54 / max. 2.5 A Technical data and accessories 1 scale interface integrated 5.1.2 Technical data for compact scales for dry environments • The size of the weighing platform (0.6XS, 3XS, 6XS, 3SM, 6SM, 15LA, 35LA) is indicated at the end of the product name, e.g., ICS425s-3XS/f. • Other combinations of weighing range and readability can be adjusted by the METTLER TOLEDO service technician on site. • The table below indicates the factory settings of weighing range and readability. Weighing ranges and readability ICS4_5s-.../f compact scales • Approved resolution 1 x 6,000 e (OIML, NTEP) • Non-approved resolutions up to 60,000 d ICS4_5s-.../f 3SM 6SM 15LA 35LA Capacity 3 kg 6 kg 15 kg 35 kg 6 lb 12 lb 30 lb 60 lb 0.5 g 1g 2g 5g 0.001 lb 0.002 lb 0.005 lb 0.01 lb Readability Standard resolution: 6,000 d Optional resolution: 30,000 d Optional resolution: 60,000 d Approved resolution: 6,000 e Repeatability (sd) Linearity Weight 0.1 g 0.2 g 0.5 g 1g 0.0002 lb 0.0005 lb 0.001 lb 0.002 lb 0.05 g 0.1 g 0.2 g 0.5 g 0.0001 lb 0.0002 lb 0.0005 lb 0.001 lb 0.5 g 1g 2g 5g 0.001 lb 0.002 lb 0.005 lb 0.01 lb 0.05 g 0.1 g 0.2 g 0.5 g 0.0001 lb 0.0002 lb 0.0005 lb 0.001 lb 0.1 g 0.2 g 0.5 g 1g 0.0002 lb 0.0005 lb 0.001 lb 0.002 lb 5.5 kg 5.5 kg 7.7 kg 7.7 kg 12.1 lb 12.1 lb 17.0 lb 17.0 lb Technical data and accessories 55 Weighing ranges and readability ICS4_5k-.../f and ICS4_5k-.../DR/f compact scales • Approved resolution up to 61,000 e (OIML, NTEP) • Non-approved resolutions up to 610,000 d • FACT function (Fully Automatic Calibration Technology) calibrates the scale according to temperature changes thus increasing weighing accuracy ICS4_5k-.../f Capacity 0.6XS 3XS 6XS 6SM 15LA 35LA 0.61 kg 3.1 kg 6.1 kg 6.1 kg 15.1 kg 35.1 kg 1.2 lb 6 lb 12 lb 12 lb 30 lb 60 lb 0.001 g 0.01 g 0.01 g 0.1 g 0.1 g 0.1 g 0.0002 lb 0.0002 lb 0.0002 lb Readability Standard resolution 0.000002 lb 0.00002 lb 0.00002 lb Approved resolution Repeatability (sd) 0.01 g 0.1 g 0.1 g 1g 1g 1g 0.00002 lb 0.0002 lb 0.0002 lb 0.002 lb 0.002 lb 0.002 lb 0.001 g 0.01 g 0.01 g 0.1 g 0.1 g 0.1 g 0.0002 lb 0.0002 lb 0.0002 lb 0.000002 lb 0.00002 lb 0.00002 lb Linearity 0.002 g 0.02 g 0.000005 lb 0.00005 lb Weight ICS4_5k-.../DR/f 0.02 g 0.2 g 0.2 g 0.2 g 0.0005 lb 0.0005 lb 0.0005 lb 0.0005 lb 6.3 kg 5.7 kg 5.7 kg 5.7 kg 9.0 kg 9.0 kg 13.4 lb 12.6 lb 12.6 lb 12.6 lb 19.8 lb 19.8 lb 0.6XS 3XS 6XS 6SM 15LA 35LA 0.12 kg / 0.61 kg 0.6 kg / 3.1 kg 1.2 kg / 6.1 kg 1.2 kg / 6.1 kg 3 kg / 15.1 kg 3 kg / 15.1 kg Standard resolution 0.001 g / 0.01 g 0.01 g / 0.1 g 0.01 g / 0.1 g 0.1 g / 1g 0.1 g / 1g 0.1 g / 1g Approved resolution 0.01 g 0.1 g 0.1 g 1g 1g 1g Capacity Readability Max. mechanical preload without losing capacity 56 ICS4_5 3SM 6SM 15LA 35LA Preload 1.25 kg 3.25 kg 3.32 kg 13.32 kg 2.76 lb 7.17 lb 7.32 lb 29.37 lb ICS4_5 0.6XS 3XS 6XS 6SM 15LA 35LA Preload – 1.73 kg 0.73 kg 2.25 kg 20.32 kg 0.32 kg – 3.81 lb 1.61 lb 4.96 lb 44.80 lb 0.71 lb Technical data and accessories 5.1.3 Operating life with battery The operating life during battery operation varies depending on the intensity of use, the configuration and the connected scale. The following approximate values apply with standard RS232 interface and the brightness set to 5. Weighing platform Weighing terminal type Conditions Duration Strain gauge weighing platform ICS4_5g WLAN, continuous operation 16 h USB host, continuous operation 16 h MonoBloc® weighing platform ICS4_5k WLAN, continuous operation 10 h USB host, continuous operation 10 h 5.1.4 Dimensional drawings for devices for dry environments 248 mm / 9.8" 164 mm / 6.5" 33 mm / 1.3" 78 mm / 3.1" ICS4_5 weighing terminal 95 - 105 mm / 3.7" - 4.1" ICS4_5 compact scale with XS or SM weighing platform 364 mm / 14.3" 160 mm / 6.3" 247 mm / 9.7" 130 mm / 5.1" 206 mm / 8.1" Technical data and accessories 57 ICS4_5 compact scale with XS weighing platform and windshield 230.5 mm 131.5 mm 206.9 mm 186 mm 158 mm 240 mm 212.5 mm 200 mm 186 mm 97 mm 58 Technical data and accessories 110 - 120 mm / 4.3" - 4.7 404 mm / 15.9" 247 mm / 9.7" 357 mm / 14.1" 110 - 120 mm / 4.3" - 4.7 ICS4_5 compact scale with LA weighing platform 514 mm / 20.2" 5.1.5 Accessories for dry environments Accessories for ICS4_5 Order no. Printer RS-P25/01 (for Europe only) Printer RS-P26/01 (for Europe only) Printer RS-P28/01 (for Europe only) Printer APR510 Direct thermal Label Printer, 203 dpi Printer APR510 Thermal Transfer Label Printer, 203 dpi Printer APR510 Direct thermal Label Printer, 300 dpi Printer APR510 Thermal Transfer Label Printer, 300 dpi Printer APR710 Direct thermal Label Printer, 203 dpi Printer APR710 Thermal Transfer Label Printer, 203 dpi Printer APR710 Direct thermal Label Printer, 300 dpi 11 124 300 11 124 304 11 124 301 64 090 256 64 090 257 64 090 258 64 090 259 64 688 858 64 688 859 64 688 861 Protective cover for the weighing terminal, set of 5 pieces 30 032 638 Auxiliary display AD-RS-M7 (requiring cable 22 023 506) 12 122 381 Charging station for Battery pack (lithium ion) 30 093 236 Battery pack, lithium ion IP5x IP65 30 093 237 30 093 238 Windshield for ...XS weighing platforms 72 262 929 Wall bracket 30 032 637 Support for wheeled bench stand 22 023 460 Column for PBA655, PBD655 and ICS4_5 / ICS685 compact scales (requires wall bracket 30 032 637) Height 330 mm / 1.3 ft Height 660 mm / 2.6 ft 72 198 699 72 198 700 Floor stand, height 1000 mm / 3.3 ft Painted steel Stainless steel 22 023 451 22 023 503 Relaybox 4, for Digital I/O 22 011 967 Power supply for Relaybox 4 00 505 544 Technical data and accessories 59 Cables and plugs for ICS4_5 Order no. Cables Cable M12 USB Female Type A, USB Host 0.2 m / 0.7 ft 3 m / 10 ft 22 017 604 22 017 608 Cable M12 USB Male Type A, USB device, 3 m / 10 ft 22 018 967 Cable M12 RS232 Female Sub D 9 pin (crossed; used for PC) 22 017 601 Cable M12 RS232 Male Sub D 9 pin (not crossed; used for SICS scale) 22 017 602 Cable M12 RS422/485, open ends 22 017 603 Cable M12 Digital I/O, open ends 22 018 969 Cable M12 Ethernet RJ45 5 m / 16 ft 20 m / 66 ft 22 017 610 22 017 614 Cable for auxiliary display AD-RS-M7 22 023 506 RS232 extension 0.5 m / 1.6 ft, incl. 5 V and 12 V 30 035 358 RS232 SICS (cross, M12 plug male / M12 male) 3 m 22 023 528 RS422/485 extension kit 22 023 698 SICSpro extension (M12 male / M12 female) 3 m / 10 ft 10 m / 32 ft 22 023 696 30 024 759 SICSpro extension (M12 male / open end) 5 m / 16 ft 30 024 768 Cable for GA46 0.4 m / 1.4 ft 2.5 m / 8 ft 22 018 978 22 018 979 Plugs 60 RS232 Counter plug (8 pin; for compact scales, extension 30 035 358 required) 22 022 056 Ethernet Counter plug (4 pin, D; not for compact scales) 22 022 058 USB Device Counter plug (4 pin, A; not for compact scales) 22 022 059 Technical data and accessories 5.2 Devices for wet environment 5.2.1 Technical data for weighing terminals for wet environments ICS4_9 weighing terminals Housing Stainless steel 1.4301 or AISI 304 Display LCD liquid crystal graphical display, with back lighting Keyboard Tactile-touch membrane keypad (PET) Scratch-resistant labelling Protection type Terminal IP68/IP69k Standard weighing platform IP65 Weighing platform with option potted stainless steel load cell IP65/IP67 Weighing platform with option hermetically sealed stainless steel load cell IP68/IP69k Weighing terminal 2.0 kg / 4.4 lb ICS4_9g.../c 3.2 kg / 7.1 lb + weight of the weighing platform Net weight Power supply connection Battery operation Direct connection to power supply (supply voltage fluctuation not exceeding ±10 % of the rated voltage) Rated voltage 100 ... 240 V AC 50 ... 60 Hz 300 mA Supply of device 12 V / 2.5 A Up to 22 hours of operation possible 9-28 VDC power supply Rated voltage 9 ... 28 V Power cord approx. 5 m / 16 ft, open ends Battery charger Ambient conditions 0 ... 40 °C / 32 ... 104 °F dry environment Ambient conditions Application indoor use only Altitude up to 2,000 m Temperature range Class III –10 ... 40 °C / 14 ... 104 °F Temperature range Class II 0 ... 40 °C / 32 ... 104 °F Overvoltage category II Pollution degree 2 Humidity Max. rel. humidity 80 % for temperatures up to 40 °C / 104 °F W & M approvals / max. 2.5 A OIML Class II, III, IIII NTEP Class II, III Interfaces Communication interfaces 1 RS232 interface integrated 1 additional optional communication interface possible Scale interfaces 1 scale interface integrated Technical data and accessories 61 5.2.2 Technical data for terminal and platform combinations for wet environments • The size of the weighing platform (A, BB, B, QA, QB) is indicated at the end of the product name, e.g., ICS429g-QA6. • Other combinations of weighing range and readability can be adjusted by the METTLER TOLEDO service technician on site. • The table below indicates the factory settings of weighing range and readability. Weighing ranges and readability Model Weighing range Readability A3 A6 A15 BB30 BB60 B30 B60 3 kg 6 kg 15 kg 30 kg 60 kg 30 kg 60 kg 5 lb 10 lb 25 lb 50 lb 100 lb 50 lb 100 lb 1g 2g 5g 10 g 20 g 10 g 20 g 0.001 lb 0.002 lb 0.005 lb 0.01 lb 0.02 lb 0.01 lb 0.02 lb Model QA3 QA6 QB15 QB30 Weighing range 3 kg 6 kg 15 kg 30 kg 60 kg 5 lb 10 lb 25 lb 50 lb 100 lb 1g 2g 5g 10 g 20 g 0.001 lb 0.002 lb 0.005 lb 0.01 lb 0.02 lb Readability QB60 Operation limits – maximum static safe load Model a – center load b – side load c – corner load A 40 kg 30 kg 15 kg 80 lb 60 lb 30 lb BB 100 kg 70 kg 35 kg 200 lb 140 lb 70 lb B 200 kg 140 kg 75 kg 400 lb 280 lb 150 lb 40 kg 30 kg 15 kg 80 lb 60 lb 30 lb 100 kg 70 kg 35 kg 200 lb 140 lb 70 lb QA QB 62 Technical data and accessories a b c Weights, approximate values Model Standard: potted aluminium A BB B QA QB Option: potted stainless steel Option: hermetically sealed stainless steel 4.8 kg 5.5 kg 5.7 kg 10.6 lb 12.1 lb 12.6 lb 7.2 kg 7.9 kg 8.1 kg 15.9 lb 17.4 lb 17.9 lb 12.0 kg 15.0 kg 15.2 kg 16.5 lb 33.1 lb 33.5 lb 3.7 kg 4.4 kg 4.6 kg 8.2 lb 9.7 lb 10.1 lb 6.0 kg 6.7 kg 6.9 kg 13.2 lb 14.8 lb 15.2 lb Length of load cell cable for ICS4_9g-.../t Models Potted aluminum load cell Potted stainless steel load cell Hermetically sealed stainless steel load cell A, QA 1 m / 3.3 ft 3 m / 9.9 ft BB, B, QB 2 m / 6.6 ft 5.2.3 Operating life with battery The operating life during battery operation varies depending on the intensity of use, the configuration and the connected scale. The following approximate values apply with standard RS232 interface and the brightness set to 5. Weighing platform Conditions Duration With 1 strain gauge load cell, e.g., ICS429g-A15... Continuous operation 25 h With 4 strain gauge load cells, e.g., a floor scale Continuous operation 22 h With PBK98_/PFK98_ Continuous operation 14 h Technical data and accessories 63 5.2.4 Dimensional drawings for devices for wet environments ICS4_9 weighing terminal 60 ° b a c Dimension [mm] ["] a 232 9.13 b 132 5.20 c 115 4.53 Weighing platforms for ICS4_9g terminal and platform combinations Front view Side view A 64 B BB QA QB Dim. [mm] ["] [mm] ["] [mm] ["] [mm] ["] [mm] ["] a 175 6.89 235 9.25 335 13.81 163 6.41 240 9.45 b 240 9.45 300 11.81 400 15.74 228 8.97 305 12.00 c 59 2.32 76 2.99 108.5 4.27 59 2.32 76 2.99 d 97 3.81 108 4.25 134,5 5.29 97 3.81 108 4.25 e 235 9.25 335 13.81 435 17.12 163 6.41 254 10.0 f 300 11.81 400 15.74 500 19.68 228 8.97 305 12.00 g 21 0.83 18 0.70 17 0.70 21 0.83 17 0.67 h 42 1.65 42 1.65 42 1.65 42 1.65 42 1.65 Technical data and accessories ICS4_9g-.../f terminal and platform combination a A B BB QA QB Dim. [mm] ["] [mm] ["] [mm] ["] [mm] ["] [mm] ["] a 452 17.80 549 21.61 649 25.55 380 14.96 452 17.80 ICS4_9g-.../c terminal and platform combination The size of the weighing platform (A, BB, B, QA, QB) is indicated at the end of the product name, e.g., ICS429a-QA6. A B BB QA QB Dim. [mm] ["] [mm] ["] [mm] ["] [mm] ["] [mm] ["] a 452 17.80 549 21.61 649 25.55 380 14.96 452 17.80 b 386 15.20 386 15.20 386 15.20 386 15.20 386 15.20 c 13 0.51 13 0.51 13 0.51 13 0.51 13 0.51 Technical data and accessories 65 5.2.5 Accessories for wet environments Accessories for ICS4_9 Order no. GA46 printer, RS232, incl. 8-pin M12 plug cable 2.5 m / 8.2 ft cable 0.4 m / 1.3 ft 22 019 925 22 019 926 I/O accessories Relaybox 4, for Digital I/O 22 011 967 Power supply for Relaybox 4 00 505 544 Mechanical parts Protective cover for terminals ICS4_9, set of 3 pieces 22 021 109 Stand ICS4_9, for .../t version or terminal with PBA226, PBA426, PBA429 Height 120 mm / 0.4 ft Height 330 mm / 1.1 ft Height 660 mm / 2.2 ft Height 900 mm / 3.0 ft 72 219 393 72 198 702 72 198 703 72 198 704 Stand ICS4_9 for PBK, PFK, MA, MD and DB Platforms, height 330 mm / 1.1 ft 22 014 836 Bench stand ICS4_9 for scale bench 00 503 632 or 00 504 854, height 500 mm / 1.6 ft 22 014 835 Floor stand ICS4_9, height 1000 mm / 3.3 ft 22 014 834 Standbase for floor stand 22 011 982 Wall bracket ICS4_9, inclinable and swivelling 22 014 833 Desk mounting plate, for terminal and .../t version only 22 021 111 Cables and plugs for ICS4_9 Order no. Cables RS232 cable for SICS scale, 8 pin M12 <–> 9 pin sub D plug, 3 m / 10 ft 22 021 087 RS232 cable for PC, 8 pin M12 <–> 9 pin sub D receptacle, 3 m / 10 ft 22 021 088 RS422/RS485 cable, 6 pin M12 <–> open ends, 3 m / 10 ft 22 021 089 Ethernet cable, 4 pin M12 coding D <–> RJ45 5 m / 16.4 ft 20 m / 65.6 ft 22 021 090 22 021 091 Cable to connect Digital I/O option with relay box, 12 pin M12 <–> open ends, 10 m / 32.8 ft 22 021 093 USB Device cable, connection to PC, 3 m / 10 ft 22 021 092 USB Host cable, connection to scanner, keyboard or USB stick, M12 USB female type A 0.2 m / 0.7 ft 3 m / 10 ft 30 093 252 30 093 253 Plugs 66 RS232 counter plug, 8 pin M12 (for .../f versions extension 30 035 358 required) 22 022 056 Ethernet counter plug, 4 pin, coding D, M12 (not for .../f versions) 22 022 058 USB Device counter plug, 4 pin, coding A, M12 (not for .../f versions) 22 022 059 RS422/485 extension kit 22 023 698 Technical data and accessories 5.3 General technical data 5.3.1 Applications • Weighing • Average weighing 5.3.2 Analog scale interface Impedance ≥ 87.5 Ohm, e.g., 1 x 350 Ohm or 4 x 350 Ohm Excitation 3.3 V DC Sensitivity 2 to 3 mV/V Max. resolution 7,500 e (OIML) 300,000 d (non approvable) Min. verification interval 0.264 µV/e 5.3.3 Assignment of the interface connections Digital I/O RS232 RS422 RS485 USB Device Ethernet USB Host Power Pin 1 In 0 CTS TxD T/RxD +5 V * TD+ +12 V * Pin 2 In 1 TxD TxD– ¨T/RxD– D– RD+ +12 V * Pin 3 In 2 RTS RxD – GND TD– GND Pin 4 In 3 RxD +12 V * +12 V * D+ RD– GND Pin 5 In_GND +12 V * GND GND Pin 6 Out 0 +5 V * RxD– – Pin 7 Out 1 – Pin 8 Out 2 GND Pin 9 Out 3 Pin 10 Out_GND Pin 11 +12 V * Pin 12 GND Socket * max. 0.5 A Technical data and accessories 67 6 Appendix 6.1 Metrological information Scales that have been factory-calibrated have a label indicating this on the packaging. Scales with a green M on the type plate are ready for operation. Scales that are calibrated in two stages have a label indicating this on the packaging. These scales have only been calibrated in a first stage (declaration of conformity in accordance with EN 45501-8.2). The second stage of the calibration must be done on-site by authorized service personnel. Please contact your local representative. M M Medium accuracy scales that are used in commerce where certified calibration is required must be calibrated and certified. Observe the respective measurement data guidelines in your country. 6.2 Table of Geo Code values For weighing instruments verified at the manufacturer’s, the Geo Code value indicates the country or geographical zone for which the instrument is verified. The Geo Code value set in the instrument (e.g. "Geo 18") appears briefly after switching on. Table "Geo Code values 3000e" shows the Geo Code values for European countries. Table "Geo Code values 6000e/7500e" shows the Geo Code values for different gravitation zones. Geo Code values 3000 e, OIML Class III (European Countries) Country Geographical latitude Austria 46°22’ – 49°01’ Belgium Country Geographical latitude 18 Liechtenstein 47°03’ – 47°14’ 18 49°30’ – 51°30’ 21 Lithuania 53°54’ – 56°24’ 22 Bulgaria 41°41’ – 44°13’ 16 Luxemburg 49°27’ – 50°11’ 20 Croatia 42°24’ – 46°32’ 18 Netherlands 50°46’ – 53°32’ 21 Czechia 48°34’ – 51°03’ 20 Norway 57°57’ – 64°00’ 24* Denmark 54°34’ – 57°45’ 23 64°00’ – 71°11’ 26 Estonia 57°30’ – 59°40’ 24 Poland 49°00’ – 54°30’ 21 Finland 59°48’ – 64°00’ 25* Portugal 36°58’ – 42°10’ 15 64°00’ – 70°05’ 26 Romania 43°37’ – 48°15’ 18 41°20’ – 45°00’ 17 Slovakia 47°44’ – 49°46’ 19 45°00’ – 51°00’ 19* Slovenia 45°26’ – 46°35’ 18 Germany 47°00’ – 55°00’ 20 Spain 36°00’ – 43°47’ 15 Greece 34°48’ – 41°45’ 15 Sweden 55°20’ – 62°00’ 24* Hungary 45°45’ – 48°35’ 19 62°00’ – 69°04’ 26 Iceland 63°17’ – 67°09’ 26 Switzerland 45°49’ – 47°49’ 18 Ireland 51°05’ – 55°05’ 22 Turkey 35°51’ – 42°06’ 16 Italy 35°47’ – 47°05’ 17 United Kingdom 49°00’ – 55°00’ 21* Latvia 55°30’ – 58°04’ 23 55°00’ – 62°00’ 23 France * factory setting 68 Appendix Geo Code Geo Code Geo Code values 6000 e / 75000 e, OIML Class III (Altitude < 1000 m) Geographical latitude Geo Code Geographical latitude Geo Code 00°00’ – 12°44’ 18 43°26’ – 47°51’ 18 05°46’ – 17°10’ 21 45°38' – 50°06' 22 12°44’ – 20°45’ 16 47°51’ – 52°22’ 20 17°10’ – 23°54’ 18 50°06’ – 54°41’ 21 20°45’ – 26°45’ 20 52°22’ – 57°04’ 24*, 26 23°54’ – 29°25' 23 54°41’ – 59°32’ 21 26°45’ – 31°56’ 24 57°04’ – 62°09’ 15 29°25’ – 34°21’ 25*, 26 59°32’ – 64°55’ 18 31°56’ – 36°41’ 17, 19* 62°09’ – 67°57’ 19 34°21’ – 38°58’ 20 64°55’ – 71°21’ 18 36°41’ – 41°12’ 15 67°57’ – 75°24’ 15 38°58’ – 43°26’ 19 71°21’ – 80°56’ 24*, 26 41°12’ – 45°38’ 26 75°24’ – 90°00’ 18 * factory setting 6.3 Disposal In accordance with the requirements of European Directive 2002/96 EC on Waste Electrical and Electronic Equipment (WEEE), this device may not be disposed of with domestic refuse. This also applies for countries outside the EU in accordance with their respective national regulations. - Please dispose of this product in accordance with local regulations for the separate collection of waste electrical and electronic equipment. Should you have any questions, please contact the corresponding authorities or the dealer from whom this device was purchased. If this device is passed on (for example for further private or commercial/industrial use), this regulation is also to be passed on. Many thanks for your contribution to the protection of the environment. Battery disposal Batteries contain heavy metals and therefore cannot be disposed of in the normal refuse. - Observe local regulations on the disposal of materials that are hazardous to the environment. Appendix 69 6.4 Protocol printouts GA46 printouts, in English 70 Appendix Straight weighing Average weighing Printout with header (standard printout) Printout with header and identification data Index A Accessories for dry environment for wet environment Application Clever print Average weighing Operation Settings F 59 66 36 22 36 C Calibration Cleaning in dry environment in wet environment Clever print Connections Power supply Weighing platform 29 23 23 21, 36 15 15 48 57 64 9 10 50 39 11 30, 33 35 11 31 11 31, 35 G Geo code Display Values 18 68 H Hygienically sensitive areas D Digital I/Os Dimensional drawings Devices for dry environment Devices for wet environment Display 3-line mode Metrological data line Serial numbers Settings Symbols and info line Units Update Weight value Dynamic weighing Operation Settings FACT Settings Symbol Filter 17 I Identifications Scale data Terminal data Weighing data Info key Displaying information Settings Interfaces Pin assignment 29, 33 39 22 21 39 67 K Keyboard Function keys Settings 12 39 L Levelling Linearization Location 14 29 14 22 36 E Energy save Error conditions Error messages External input Entry Settings 39 51 52 22 45 Index 71 M Maintenance Menu Analog scale Application Communication Display IDNet Scale Maintenance Operation Operator menu Scale Supervisor menu Metrological data line Metrological information MinWeigh Settings Symbol T 49 28 36 40 26 33 49 25 25 28 25 10 68 31, 35 11 P Printing Clever print Printout configuration Protocol printouts 21 21 36 70 72 Index 55 62 54 61 36 48 50 50 50 49 24 W 36 50 32, 35 40 30 30, 34 S Safety instructions Service information Smart weighing counter Spanner icon Storage battery Straight weighing Supervisor menu access Switching on/off Switching units 19 19 20 19 19 30, 34 20 V Verification test R Reset Application Reset all Scale Terminal Resolution Restart Taring Automatic Automatic clearing the tare Chain tare Clearing the tare Manual Settings Tare preset Technical data Compact scales Terminal and platform combinations Weighing terminals for dry environment Weighing terminals for wet environment Templates Assigning Defining Testing Communication Display Keyboard Scale 7 53 53 9, 53 16 18, 36 40 18 18 Warning 52 Z Zeroing Automatic Manual Settings 19 19 30, 34 www.mt.com Further information Mettler-Toledo (Albstadt) GmbH D-72458 Albstadt Tel. +49 7431-14 0 Fax +49 7431-14 232 www.mt.com Subject to technical changes. © Mettler-Toledo (Albstadt) GmbH 04/2015 30243626B en *30243626*


