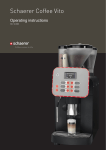
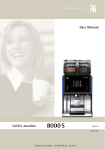
1
coffee wakes up the world User Manual Coffee machine English 01.01.001 Model Series 1800 Order number 33 2552 0010 Edition 03.2012 Congratulations on the purchase of your WMF coffee machine The WMF 1800 S coffee machine is a fully automatic single cup machine for espresso, café crème, cappuccino, milk coffee, latte macchiato, foamed milk and hot water. Options include steam dispensing and the preparation of hot Choc beverages, with two different types of Choc (Twin Choc). Each beverage is freshly brewed at the press of a button which guarantees a high quality beverage. User guidance is provided by a graphical touch-screen display on the coffee machine. Please be sure to follow the instructions in the Software w S ettings w Water hardness and Capacity, and to make the necessary settings. Please read the User Manual prior to using the coffee machine. Ensure that the staff has access to the User Manual. Important. Follow chapter 1 w User Manual Signs and Symbols, page 8. Follow Safety chapter, starting on page 55. Observe the additional instructions: Cleaning instructions 1800 S In the event of failure to comply with maintenance information (w Maintenance), no liability is accepted for any resultant damage. Similarly all guarantee / warranty obligations cease to apply in such cases. 2 User Manual WMF 1800 S Chapter 1 Introduction 1.1 6 Parts of the coffee machine 6 User Manual Signs and Symbols 8 Glossary9 Chapter 2 Operation 10 2.1 2.2 2.3 Switch on coffee machine Dispensing beverages Milk or milk foam (optional) 2.3.1 Dispense milk or milk foam . . . . . . . . . . . . . . . . . . . . . . . . . . . . . . . . . . . . . . . . . . . 2.3.2 Connect up the milk . . . . . . . . . . . . . . . . . . . . . . . . . . . . . . . . . . . . . . . . . . . . . . . . . . With WMF Cooler, WMF Cup&Cool (optional) Standard 2.4 Height adjustment of the combi spout 2.5 Bean hopper / product hopper 2.6 Twin Topping hopper / Twin Choc hopper (optional) 2.7 Manual insert (optional) / tablet insert 2.8 Grounds container 2.9 Grounds disposal through the counter (optional) 2.10 Drip tray 2.11 Switch off the coffee machine 10 10 10 10 11 11 11 12 12 12 13 14 14 15 15 Chapter 3 Software 16 An overview 16 Ready to operate 18 3.2.1 “Warm rinse” pad (optional) . . . . . . . . . . . . . . . . . . . . . . . . . . . . . . . . . . . . . . . . . . . 18 3.2.2 Barista pad (optional) . . . . . . . . . . . . . . . . . . . . . . . . . . . . . . . . . . . . . . . . . . . . . . . . 18 3.2.3Information . . . . . . . . . . . . . . . . . . . . . . . . . . . . . . . . . . . . . . . . . . . . . . . . . . . . . . . . 18 18 Service 18 Care Brew time 19 19 Journal Timer19 3.2.4 Main menu . . . . . . . . . . . . . . . . . . . . . . . . . . . . . . . . . . . . . . . . . . . . . . . . . . . . . . . . 19 3.3 Main menu 20 3.3.1 Milk and foam . . . . . . . . . . . . . . . . . . . . . . . . . . . . . . . . . . . . . . . . . . . . . . . . . . . . . . 20 Milk foam quality 20 20 Latte macchiato pause interval 3.3.2 Timer program . . . . . . . . . . . . . . . . . . . . . . . . . . . . . . . . . . . . . . . . . . . . . . . . . . . . . . 21 21 Timer state 21 Set timer 22 Copy day Timer overview 22 23 Delete timer 23 Timer information 3.1 3.2 User Manual WMF 1800 S 3 3.3.3Care . . . . . . . . . . . . . . . . . . . . . . . . . . . . . . . . . . . . . . . . . . . . . . . . . . . . . . . . . . . . . . Cleaning program Foamer cleaning Mixer rinsing Filter change Rinse filter Customer Check-up (optional) 3.3.4Settings . . . . . . . . . . . . . . . . . . . . . . . . . . . . . . . . . . . . . . . . . . . . . . . . . . . . . . . . . . . Recipes and buttons Selecting the beverage buttons when setting Adjust values Start a preparation test with the current values Save setting Cup volumes Change recipes Button allocation Select grinder for a coffee beverage Select the portioner for the Choc beverage Weigh grounds Boiler temperature Reset Time and date Display language Display contrast Water filter is fitted Water hardness Capacity Warm-up rinsing Foamer rinsing (optional) Rinsing interval Operating options Illumination (optional) Milk (optional) 3.3.5 PIN-entry display . . . . . . . . . . . . . . . . . . . . . . . . . . . . . . . . . . . . . . . . . . . . . . . . . . . 3.3.6 PIN rights, access control . . . . . . . . . . . . . . . . . . . . . . . . . . . . . . . . . . . . . . . . . . . . . . Cleaning level Setting level Accounting level Delete PIN 3.3.7 Accounting numbers of beverages . . . . . . . . . . . . . . . . . . . . . . . . . . . . . . . . . . . . . . Chapter 4 Other settings 24 24 24 25 25 25 25 26 26 26 26 26 26 28 28 29 29 29 29 29 29 29 30 30 30 31 32 32 32 32 33 33 34 35 4.1 Mechanical settings 35 4.1.1 Set grinding degree . . . . . . . . . . . . . . . . . . . . . . . . . . . . . . . . . . . . . . . . . . . . . . . . . . 35 4.2 Labelling of beverage buttons 35 4 User Manual WMF 1800 S Chapter 5 Care 5.1 5.2 5.3 5.4 5.5 36 Cleaning intervals overview For all cleaning instructions . . . . . . . . . . . . . . . . . . . . . . . . . . . . . . . . . . . . . . . . . . . Daily cleaning 5.2.1 Cleaning program . . . . . . . . . . . . . . . . . . . . . . . . . . . . . . . . . . . . . . . . . . . . . . . . . . . 5.2.2 Milk system cleaning . . . . . . . . . . . . . . . . . . . . . . . . . . . . . . . . . . . . . . . . . . . . . . . . Milk system cleaning Standard Milk system cleaning Plug&Clean 5.2.3 Mixer rinsing . . . . . . . . . . . . . . . . . . . . . . . . . . . . . . . . . . . . . . . . . . . . . . . . . . . . . . . 5.2.4 Combi spout cleaning . . . . . . . . . . . . . . . . . . . . . . . . . . . . . . . . . . . . . . . . . . . . . . . . 5.2.5 Milk container cleaning (optional) . . . . . . . . . . . . . . . . . . . . . . . . . . . . . . . . . . . . . . 5.2.6 General cleaning . . . . . . . . . . . . . . . . . . . . . . . . . . . . . . . . . . . . . . . . . . . . . . . . . . . . Weekly cleaning 5.3.1 Choc / Topping mixer cleaning (optional) . . . . . . . . . . . . . . . . . . . . . . . . . . . . . . . . Regular cleaning 5.4.1 Brewing unit cleaning . . . . . . . . . . . . . . . . . . . . . . . . . . . . . . . . . . . . . . . . . . . . . . . . 5.4.2 Bean hopper cleaning . . . . . . . . . . . . . . . . . . . . . . . . . . . . . . . . . . . . . . . . . . . . . . . . 5.4.3 Product hopper cleaning (optional). . . . . . . . . . . . . . . . . . . . . . . . . . . . . . . . . . . . . . Filter change 36 37 37 37 37 37 38 38 38 38 38 39 39 40 40 42 42 43 Chapter 6 HACCP schedule 44 Chapter 7 Maintenance 46 7.1 7.2 Coffee machine maintenance WMF Service 46 47 Chapter 8 Messages and instructions 48 8.1 8.2 8.3 48 51 54 Messages for operation Error messages and malfunctions Errors without error message Chapter 9 Safety 55 9.1 9.2 9.3 9.4 9.5 9.6 55 57 57 57 58 59 59 Hazards to the operator Hazards to the coffee machine Intended use Directives Duties of the owner / operator Warranty claims No warranty is provided: Appendix: Cleaning instructions (Standard) 60 Appendix: Technical data 61 Technical data for coffee machine Conditions for usage and installation 61 61 Appendix: Accessories and spare parts 64 Index 66 User Manual WMF 1800 S 5 Introduction Chapter 1 Introduction 1.1 Parts of the coffee machine 2 2 3 1 1 4 9 5 6 11 7 11 8 12 9 13 10 14 15 We 6 0 1 . 0 6 . 2 0 11 08:16 16 20 17 19 18 User Manual WMF 1800 S Introduction 1 Bean hopper (optional 1 or 2) 2 Tablet insert (depending on the model) 3 Choc hopper / Topping hopper / Twin Topping hopper / Twin Choc hopper (optional) 4 Beverage buttons 5 Touch-screen display 6 Side illumination 7 Left machine door 8 Height-adjustable combi spout with integrated milk foamer 9 Plug&Clean connection (optional) 10 Removable drip tray with drip grid 11 ON/OFF switch 12 Adjustable screen 13 Grounds container 14 Brewing unit 15 Timer and clock display 16 Information pad 17 Messages / error messages 18 Menu pad (opens main menu) 19 Barista pad (optional) 20 “Warm rinse” pad (optional) User Manual WMF 1800 S 7 Introduction User Manual Signs and Symbols Caution. Risk to the machine. Follow the manual. Caution. Risk to the user. Observe the Safety chapter. Caution. Hot liquid. Observe the Safety chapter. Caution. Hot surface. Observe the Safety chapter. Caution. Bruising or crushing hazard. Caution. Hot steam. Observe the Safety chapter. Observe the Safety chapter. Tip Instructions Cross reference Start position Main menu If the menu symbol is shown in this User Manual, the description starts at the main menu start position. Call up the main menu Touch the unlit display for longer than 5 seconds The “Ready to operate” display is activated and illuminated. menu pad Touch the The main menu is displayed. Main menu. There are other display options w We 0 1 . 0 6 . 2 0 11 08:16 Display with menu pad main menu Main menu 8 User Manual WMF 1800 S Introduction Glossary Term Explanation • • Listings, selection options Individual steps Text in italics Description of coffee machine state and/or explanations of automatic steps. Beverage dispensing Dispensing coffee, hot water or Choc beverages Carbonate hardness Quoted in gpg (°dKH). The water hardness is a measure of the calcium dissolved in the water. Capacity For example the capacity of the water filter in litres of water it can filter Choc Hot chocolate Grounds chute w Grounds disposal through counter, page 14 Main tap Water stop cock, angle valve Milk system Combi spout, milk nozzle and milk hose Mixer system Complete module, mixer with portion controller for Choc / Topping O-rings Seals Preinfusion Prior to brewing, coffee is briefly infused in order to ensure a more intense release of its aromatic substances. Pressing Automatic pressing of ground coffee prior to brewing. Rinsing Intermediate cleaning Self-service Self-service customer operation (SB) Topping Milk powder Twin-Topping Divided hopper for two kinds of powder, such as Choc and Topping User Manual WMF 1800 S 9 Operation Chapter 2 Operation 2.1 Switch on coffee machine Press ON/OFF switch for longer than 5 seconds Coffee machine switches on and heats up. When the coffee machine in ready to dispense beverages, the beverage buttons light up. 2.2 PIN access control w Software w Settings w Operating options page 30 w T imer program page 21 If vending machine is connected w User Manual of vending machine. Dispensing beverages Pressing the beverage button triggers dispensing of the beverage selected. • Lit up button = ready to dispense • Flashing button = beverage dispensing • Unlit button not ready to dispense / button disabled = Place a suitably sized cup below the combi spout Press the desired beverage button The desired beverage is dispensed. Caution. Hot liquids in the dispensing area. Observe the Safety chapter. Button allocation w Software w Settings w Recipes and buttons page 26 2.3 Milk or milk foam (optional) 2.3.1 Dispense milk or milk foam Press the beverage button assigned to milk or milk foam Dispensing occurs. Dispensing runs for as long as the button is held. 10 User Manual WMF 1800 S Operation 2.3.2 Connect up the milk Use a suitable milk nozzle on the combi spout. Milk nozzle • for cooled milk • for uncooled milk Caution. Health hazard. Follow the HACCP schedule. white or green caramel With WMF Cooler, WMF Cup&Cool (optional) Insert the milk nozzle for cooled milk into the milk connection on the combi spout Pull the milk container out of the cooler Push the lid of the milk container back Pour milk into the milk container Place the lid back on the container Insert the adapter on the milk hose into the connection in the milk container lid Push the milk container back in carefully Cooler milk container The milk hose is inserted into the adapter. Standard Insert the suitable milk nozzle into the milk connection on the combi spout Open the milk packaging and place on the left next to the coffee machine Open the milk cover Insert the milk hose through the opening Insert the milk hose with the beige milk nozzle into the milk pack The hose must not be under tension or bent when adjusting the height of the combi spout. Close milk cover Cooler adapter Version without cooler User Manual WMF 1800 S 11 Operation 2.4 Height adjustment of the combi spout The combi spout height is adjustable. Take hold of the spout from the front and push to the desired height Height adjustment range of the combi spout: 70 mm - 180 mm 2.5 Bean hopper / product hopper If possible, replenish product hopper in advance. Fill the hoppers no more than the amount needed for one day, in order to maintain the freshness of the products. 2.6 Coffee beans into bean hopper, Choc powder into Choc hopper, Topping powder into Topping hopper. Twin Topping hopper / Twin Choc hopper (optional) Divided hopper for two kinds of powder, such as Choc and Topping, or two different types of Choc. • Left side: Choc; right side: Topping, or • Left side: Choc 1; right side: Choc 2 12 User Manual WMF 1800 S Operation 2.7 Manual insert (optional) / tablet insert Caution. Health hazard. Follow the HACCP schedule. Coffee machines with three product hoppers have only a tablet insert. Ground coffee must not be inserted into the tablet insert. Follow the manual. Observe the Safety chapter. The manual / tablet insert is located in the centre of the coffee machine cover. Tablet insert is used: • for inserting cleaning tablets Manual insert is used: • for inserting cleaning tablets • when using an additional coffee variety, such as decaffeinated coffee • for a coffee trial Add ground coffee or cleaning tablet only when display shows a message. Tablet insert Follow the manual. Observe the Safety chapter. Preparation of ground coffee using the manual insert Open manual insert lid Insert ground coffee (max. 16 g) Close manual insert lid Press the desired beverage button For beverages on level two, touch the toggle pad before opening the manual insert lid. Manual insert User Manual WMF 1800 S 13 Operation 2.8 Grounds container The coffee grounds container receives the used coffee grounds. It has enough capacity to store coffee grounds from approx. 50 brewing cycles. The machine will inform you when the grounds container needs emptying. Beverage dispensing is blocked for as long as the grounds container is removed. Push combi spout all the way up Push up adjustable screen over coffee grounds container Remove the coffee grounds container Empty and replace grounds container Confirm process on the display If coffee grounds container cannot be replaced, check chute for coffee residues and remove. Always empty grounds container before reinserting. Replacing without emptying results in the coffee grounds container being overfilled. The coffee machine will be soiled. This may cause subsequent damage to the machine. 2.9 Caution. Bruising or crushing hazard. Observe the Safety chapter. Follow the manual. Observe the Safety chapter. Grounds disposal through the counter (optional) The coffee machine can be fitted with through-counter coffee grounds disposal. In this case, both the coffee grounds container and the coffee machine base have an opening that passes through the counter on which the machine is placed. The spent coffee grounds are collected in a large container under the counter. 14 Clean daily w Care page 36 Through-counter feature cannot be retrofitted. Clean coffee grounds chute daily w Care page 36 User Manual WMF 1800 S Operation 2.10 Drip tray Carefully pull out the drip tray for cleaning Replace carefully so that no water accidentally drips down. Care Clean drip tray daily w Caution. Hot liquids. Move the drip tray carefully. Observe the Safety chapter. 2.11 Switch off the coffee machine The coffee machine must be cleaned daily prior to switching it off. Press ON/OFF switch for longer than 5 seconds until coffee machine switches off Turn off mains water supply If this is not observed, the warranty is invalidated in the event of any resultant damage. PIN access control w Software w Settings w Operating options page 30 Follow the manual. Observe the Safety chapter. User Manual WMF 1800 S 15 Software, An overview Chapter 3 Software 3.1 An overview Ready to operate (if display is activated) We 0 1 . 0 6 . 2 0 11 08:16 Touch the unlit display for longer than 5 seconds The “Ready to operate” display is activated and illuminated. We 0 1 . 0 6 . 2 0 11 08:16 There are various options for the “Ready to operate” display. We 0 1 . 0 6 . 2 0 11 08:16 If there are errors, the relevant pad is displayed. , Descaling or Filter change are required, If Cleaning this is displayed. Other display options w S ettings w Operating options. “Ready to operate” display pads Chapter 3.2 Warm rinsing (optional) Chapter 3.2.1 Barista (strength of the coffee) (optional) Self-service and operating options w Settings page 30 Chapter 3.2.2 Main menu Chapter 3.2.4 Information Chapter 3.2.3 Error message Touching the pad calls up the error message. Care message Touching the pad leads directly to the menu. Cleaning required. 16 User Manual WMF 1800 S Software, An overview Main menu functions (pads) Chapter 3.3 Milk and foam Chapter 3.3.1 Timer program Chapter 3.3.2 Care Chapter 3.3.3 Settings Chapter 3.3.4 PIN entry Chapter 3.3.5 PIN rights, access control Chapter 3.3.6 Accounting Chapter 3.3.7 Menu control pads Save settings start continue Start or confirm a step Back to the higher menu level Cancel / leave without saving (Exit) Clear or reset Start preparation test / coffee trial Increase or reduce setting values Forward or back one step in listings User Manual WMF 1800 S 17 Software, Ready to operate 3.2 Ready to operate 3.2.1 “Warm rinse” pad (optional) Touch the “warm rinse” pad A rinse of the pipes with hot water begins. The water warms the brewing system and guarantees an optimum coffee temperature. Recommended after a longer brewing pause, especially before dispensing a cup of espresso. “Warm rinse” pad (active / inactive) w Settings w Operating options page 30 3.2.2 Barista pad (optional) weaker (-15 %) Touch the Barista pad The coffee strength will be altered for the next brew only. normal, as per setting stronger (+15 %) 3.2.3 Information Touch the Information pad on the “Ready to operate” display The Information menu appears. The main “Information” menu contains the following selection options. Service • • • • • Service location (contact details) Start-up data Next maintenance date Software version Serial number Barista pad (active / inactive) w Settings w Operating options page 30 information service customer care brewtime Care • Journal Journal log of last cleaning • Cleaning information Info on last cleaning • Descaling information Info on last / next descaling • Water filter information (optional) Remaining capacity info 18 User Manual WMF 1800 S Software, Main menu Brew time • Brew and dispensing time of last beverage dispensed Journal information • List of logged error and status messages (for telephone support) journal timer Timer • Display the timer status (ON/OFF) • Display the next switching time 3.2.4 Main menu We 0 1 . 0 6 . 2 0 11 08:16 Call up the main menu Touch the unlit display for longer than 5 seconds The “Ready to operate” display is activated and illuminated. menu pad Touch the The main menu is displayed. “Ready to operate” display We 0 1 . 0 6 . 2 0 11 08:16 ... with additional pads Delayed fade-in w Settings w Operating options page 30 User Manual WMF 1800 S 19 Software, Main menu 3.3 Main menu main menu Other illustrations of the main menu for protected levels. w PIN rights, access control page 32 3.3.1 Milk and foam Milk foam quality The milk foam quality is set here. This setting will apply to all beverages with milk foam. Compensates for variations in milk characteristics. Reduce setting value foam quality -> finer foam and lower dispensing temperature Increase setting value -> coarser foam and higher dispensing temperature Latte macchiato pause interval Latte macchiato is more successful if the interval between milk and milk foam dispensing is lengthened. Reduce setting value macch.interrupt -> shorter interval Increase setting value -> longer interval 20 User Manual WMF 1800 S Software, Timer program 3.3.2 Timer program The timer program sets the switch on and switch off times. The main “Timer program” menu contains the following selection options. • • • • • Timer state Set timer Timer overview Delete timer Timer information PIN rights, access control w Software w Settings w PIN rights, access control page 32 Timer state Touch timer status Activate/deactivate timer = ON/OFF timer status When the timer is activated, the timer symbol appears on the display. Set timer Touch timer adjustment Program the switch on and switch off times. Touch operating time The operating time display appears. Here the day, time, and desired operation are set. timer adjustment Example: Set day (Day) • 1 = Monday • 2 = Tuesday, etc. up to 7 = Sunday • 1 - 5 = Monday to Friday (weekdays) • 1 - 7 = entire week (Monday to Sunday) operating time day h min action prg Set the time (hours, minutes) in day 1 - 5 or day 1 - 7, the switching times are copied to the indicated days. Set the desired switching time (action) Select desired settings with the and . pads • Switch on time = (on display) • Switch off time = (on display) Current selection is inversely displayed. Confirm with or Delete with User Manual WMF 1800 S 21 Software, Timer program Display programmed switching times and pads under prg Touch the Programmed switching times are displayed here. Up to 16 switching times (events) per day can be programmed. Programmed times are listed chronologically. Any new switching time is sorted chronologically immediately upon input and confirmation with . pad directly accesses the timer overview. Touching the Copy day Any day may be copied to other days, complete with its switching times. Touch timer adjustment Program the switch on and switch off times. Touch operating time Touch the number pad under day The selection of the week days is displayed. Scroll through to page 4 Touch copy day The selection of the week days is displayed again. Select the day that you want to copy Touch insert day Select the day you want to copy the time settings to The day is copied. In day 1 - 5 or day 1 - 7, the switching times are copied to the indicated days. The individual days 1,2,3...7 are displayed. To check times w T imer overview Timer overview Checking the programmed switching times: Touch timer overview The switching times overview for the week is displayed graphically. Switch on times are indicated by bars. timer overview Example: timer overview operating time switching times Monday to Friday (1 - 5). On time 7 a.m. (7:00) Off time 6 p.m. (18:00) 22 User Manual WMF 1800 S Software, Timer program Delete timer Touch delete timer on page 2 of the timer main program menu Scroll to desired day and touch to select A security dialogue now appears querying whether deletion is actually intended. Confirm with The day is deleted with all its switching times. Besides individual days, “all workdays” or the entire week can also be deleted. delete timer This process cannot be undone. Timer information Touching timer info calls up a display with the next switching time and the timer state (ON/OFF). timer info timer info timer status next program operating time switch off User Manual WMF 1800 S on 18:00 23 Software, Care 3.3.3 Care Cleaning and descaling programs are started from the Care main menu. Filter change (optional) and maintenance actions are confirmed here. The main “Care” menu contains the following selection options. • • • • • Cleaning program Foamer cleaning Mixer rinsing Filter change Rinse filter In the Software chapter w Care display-guided sequences are described in detail. Physical cleaning actions are described in the Care chapter. Cleaning program Touch cleaning prog. The daily cleaning program starts. The program automatically executes foamer cleaning if milk beverages have been dispensed. Mixer rinsing follows for the WMF 1800 S with mixer system. The cleaning program sequence is described in the cleaning instructions. Prior to carrying out cleaning, please note the safety instructions in the safety chapter. Read the cleaning instructions and the Care chapter, starting on page 36. cleaning prog. Caution. Follow the manual. Observe the Safety chapter. Foamer cleaning Touch foamer cleaning Foamer cleaning starts. Optional Plug&Clean cleaning. Foamer cleaning is carried out automatically as an integral part of the full cleaning program. 24 foamer cleaning w Cleaning program Caution. Hot liquids in the dispensing area. Observe the Safety chapter. User Manual WMF 1800 S Software, Care Mixer rinsing The mixer lift must be in the top position. mixer rinsing Touch mixer rinsing Mixer rinsing starts. Mixer rinsing is performed automatically by the cleaning program when a mixer system is installed. Caution. Hot liquids in the dispensing area. Observe the Safety chapter. Filter change If the filter capacity is exceeded, there will be a message once per day that a filter change is due. The filter must be changed within one week; otherwise, the message will be displayed after every brew. Change filter Confirm filter change After filter change there is an automatic program sequence to rinse and bleed the anti-scale filter and water system. Hot water runs out of the hot water spout during this process. filter change Observe water filter instructions. Displays lead step by step through the program. Follow the instructions. Caution. Scalding hazard. Observe the Safety chapter. Rinse filter The Filter rinse option enables water system and filter rinsing and bleeding following long intervals in operation. Touch filter rinsing Hot water runs out of the hot water spout during this process. Customer Check-up (optional) filter rinsing Caution. Scalding hazard. Observe the Safety chapter. This point can be selected by trained personnel if the WMF Service function has been enabled. Question: Has customer check-up been performed? yes / no User Manual WMF 1800 S 25 Software, Settings 3.3.4 Settings Recipes and buttons Touch recipes/button The recipes/button options. • • • • recipes/button menu contains the following selection Cup volumes Change recipes Button allocation Weigh grounds Selecting the beverage buttons when setting Press the desired beverage button Adjust values Adjust values with the = more = less = exit without change and pads Start a preparation test with the current values = save the values = start test Touch The values are not saved yet. Save setting Save with 26 User Manual WMF 1800 S Software, Settings Cup volumes Cup volumes are matched to the cups used. Individual beverage ingredients are matched to the new cup volumes with no effect on composition and quality. Change recipes All beverages change recipes chociatto Ground coffee quantity / Choc powder quantity Water volume Milk beverages Change recipes display chociatto ground coffee Milk foam volume Milk volume Example: ground coffee quantity Coffee beverages chociatto quality level Quality The five available quality levels affect the coffee brew. The higher the quality level, the more intensive the release of the flavour and aromatic substances in the coffee. Quality 1 Quality 2 Quality 3 Quality 4 Quality 5 Quality 4 Quality After pressing, space is provided for the ground coffee to swell. After pressing, the coffee is brewed immediately. After pressing, a pre-infusion occurs. After pressing and a pre-infusion, a second wet pressing occurs. After pressing, a pre-infusion occurs. In addition the brew time is automatically extended. User Manual WMF 1800 S Caution. An excessively high quality level may lead to a brewing water error. 27 Software, Settings Button allocation The beverages are assigned to the beverage buttons. This button allocation is set here. Press the beverage button Select the desired recipe, for example espresso, from the list Load a new recipe: the previous settings will be overwritten by the factory standard values for the new recipe. Only adjustable recipes are indicated. Select grinder for a coffee beverage (only for 2 grinders) Press the beverage button Select recipe, for example espresso Select grinder (on the right or left) The portioner cannot be selected for the Chociatto beverage. Select the portioner for the Choc beverage (only for Twin Choc) Press the beverage button Select recipe, for example milk Choc 1 Select portioner (on the right or left) Weigh grounds Empty and replace grounds container Touch weigh grounds The process dispenses ground coffee directly into the grounds container and the grounds may then be weighed. The grind quantity is dispensed once. Boiler temperature Set desired boiler temperature (Change brewing water temperature) (Standard range of settings 80 - 100 °C) boiler temp. Reset The coffee machine software is restarted. reset 28 User Manual WMF 1800 S Software, Settings Time and date Clock time and date are set here. time / date Display language Language used in the display is set here. language Display contrast Contrast of the display is set here. (Default value is 70) contrast Water filter is fitted Whether water filter is fitted or not is entered here. This affects the descaling intervals. softener/filter Water hardness The water hardness (carbonate hardness) is set here. waterHardn. Capacity The water filter capacity is set here. The water filter capacity can be found in the water filter documentation. Filter capacity Warm-up rinsing Whether the coffee machine should rinse out the brewing unit with hot water after heating up is set here. Recommended setting: active. User Manual WMF 1800 S warm up rinsing 29 Software, Settings Foamer rinsing (optional) Whether automatic foamer rinsing should occur after the last beverage with milk components is dispensed. yes / no foamer rinsing Rinsing interval The time elapsed between the last time a beverage with milk was dispensed and a foamer rinsing. Recommended setting: 2 minutes. rinse interval Operating options The following operating options are available. • “Warm rinse” pad (active / inactive) • Barista pad (active / inactive) • 2. level (active / inactive) • ON/OFF switch (direct / via PIN) • Cancel beverage (yes / no) • Menu pad (immediate / delayed) • Error message (normal / symbol) options If customers serve themselves then some functions can be switched to inactive. The pads will not be shown on the “Ready to operate” display. “Warm rinse” pad (optional) Standard: inactive. Barista pad Standard: inactive. 2nd level / toggle pad Can only be set by WMF Service upon request. ON/OFF switch Recommendation for self-service: via PIN. If “via PIN” is set, then the PIN for the cleaning level will be queried before switching on or off. w PIN rights, access control page 32 Cancel beverage Standard: no. 30 User Manual WMF 1800 S Software, Settings Menu pad Recommendation for self-service: delayed. If “delayed” is set, the menu pad will only be shown if the display is pressed for 5 seconds. Standard: delayed. Error number Normal: all messages are shown on the display. Symbol: messages that require immediate action are shown on the display. All other messages are displayed as symbol . Touch the symbol All messages are displayed. w To the main menu page 20 With illumination (optional): messages that require immediate action are accompanied by flashing side illumination. SB mode (self-service) Default setting for the coffee machine is self-service mode. • It is not possible to interrupt the beverage dispensing cycle • Menu pad is no longer displayed • Error message Symbol • Barista pad and “warm rinse” pad not displayed (optional) Self-service mode messages • Beans empty • Milk empty (cooler milk container) • Grounds container full • Grounds container missing • Manual insert open • Clean machine • Open water supply valve • Brewing unit error • Error message with error number Individual options can be changed under the “Operating options” menu item. Illumination (optional) Set the colour values here of the LEDs for the desired illumination colour Setting examples red green blue light sequence (sequence of colours) 1 0 0 amber 25 30 0 blue 0 0 30 User Manual WMF 1800 S illumination setting illumination red green blue 31 Software, PIN-entry display Milk (optional) The empty milk message can be activated here. Touch milk Beverage lockout yes / no Beverage lockout no Beverages can be dispensed until the milk container is actually empty. Beverage lockout yes Input is requested as to how many beverages can be dispensed after the message has appeared. After this number of beverages has been dispensed, beverages with milk are blocked from further dispensing. Beverage lockout is removed when the milk container is filled. milk setting illumination milk setting milk beverage lock beverages left yes 3 3.3.5 PIN-entry display Individual authorisation levels can be protected using a PIN. For access to a PIN-protected level, the PIN must be entered via pad. Touch the pad in the main menu Numerical keyboard display appears. Enter required 4-figure PIN Confirm with Following entry of a valid PIN, the assigned functions are available. 0 1 . 0 6 . 2 0 11 PIN PIN-entry display 3.3.6 PIN rights, access control If a PIN has been assigned for a particular level, no access will be granted without a PIN. Cleaning level main menu On entering the valid PIN, access to: 32 = Care = PIN-protected ON/OFF switch Cleaning level access User Manual WMF 1800 S Software, PIN rights, access control Setting level main menu On entering the valid PIN, access to: = Setting the milk foam quality = Timer program = Care = PIN-protected ON/OFF switch = Settings (only cup volumes) Setting level access Accounting level main menu On entering the valid PIN, access to: = Setting the milk foam quality = Timer program = Care = PIN-protected ON/OFF switch = Settings (beverage, general, others) = Assign PIN rights, access control = Accounting numbers of beverages Accounting level access A PIN may be assigned to any level. The levels are hierarchical. 0 1 . 0 6 . 2 0 11 PIN PIN-entry display Example: access-control accounting Example: the PIN for the setting cleaning and setting accounting level. level is valid for levels, but not for the Touch the pad in the main menu Select desired level Example: cleaning Numerical keyboard display appears. Enter any desired 4-digit number Number entered is displayed. Confirm with This level is now PIN-protected. setting cleaning PIN entry for Cleaning level: 1234 This PIN is carried over to the higher levels. Example: access-control accounting setting cleaning PIN entry for cleaning level: 1234 setting level: 9876 accounting level: 7777 User Manual WMF 1800 S 33 Software, Accounting numbers of beverages When a PIN is assigned to a subordinate level, that PIN is automatically copied to higher levels if the latter are not already PIN-protected. Delete PIN Entering 0000 will delete access control for the given level. Deletion of one level automatically deletes the subordinate levels. 3.3.7 Accounting numbers of beverages Touch counter The counter menu displays the counter for each beverage. Read counter Touch desired beverage on the display Delete counter Touch the clear pad If no beverage is selected, on touching the clear pad a dialogue appears in the display querying whether the counter readings for all beverages should be zeroed. The “Accounting numbers of beverages” function should be protected with a PIN to prevent unauthorised access. 34 User Manual WMF 1800 S Other settings Chapter 4 Other settings 4.1 Mechanical settings 4.1.1 Set grinding degree Remove bean hoppers Preset grinding degree is now visible. Release coffee dispensing and wait until grinder starts up With grinder running, alter grinding degree as desired on the side of the machine using the multitool Multitool Grinding degree 1 g fine Grinding degree 6 g coarse Display grinding degree Bruising or crushing hazard. Never reach into the grinder mechanism with coffee machine running and product hoppers removed. 4.2 Caution. Bruising or crushing hazard. Observe the Safety chapter. Labelling of beverage buttons First switch off coffee machine in order not to trigger dispensing inadvertently. Pull out existing labelling behind front glass in a downward direction Write on label stickers as desired using the WMF template Stick on label mount and re-insert behind the front glass panel The template can be printed out on adhesive labels or paper. Stick paper to label mount using an adhesive sticker. Free download of WMF label template from www.servicecenter.wmf.com Matching adhesive labels: Zweckform-Avery No. 3659 User Manual WMF 1800 S 35 Care Chapter 5 Care Regular cleaning is essential in order to ensure problem-free operation of the coffee machine and to ensure optimum coffee quality. Prior to and after every instance that the machine is shut off for several days, perform all cleanings. If this is not observed, the warranty is invalidated in the event of any resultant damage. 5.1 Cleaning intervals overview Caution. Health hazard. Follow the HACCP schedule. Follow the manual. Observe the Safety chapter. x Optional Message Regularly Daily Weekly Care O Foamer rinsing x Cleaning program x w Cleaning instructions O Foamer cleaning x Milk system cleaning Standard x O Milk system cleaning Plug&Clean x O Mixer rinsing x O Milk container cleaning x Grounds container cleaning x Drip tray cleaning x w General cleaning Housing cleaning (x) x O Mixer cleaning x Brewing unit cleaning x Bean hopper cleaning x O Product hopper cleaning x O Filter change Daily = Daily, at least once per day and as required Weekly = Weekly cleaning w Weekly cleaning w Regular cleaning w Software w Care Regularly = Regularly as required Message = After the display shows a message Optional = Optional (depending on the model) (x) = Daily as required 36 User Manual WMF 1800 S Care For all cleaning instructions See the step for step instructions w Cleaning instructions. Follow the manual. Follow the safety instructions. 5.2 Daily cleaning 5.2.1 Cleaning program The cleaning program leads step by step through foamer cleaning, the mixer rinsing and the machine cleaning via software. Caution. Hot liquids in the dispensing area. Observe the Safety chapter. Cleaning program w Cleaning instructions 5.2.2 Milk system cleaning Milk system cleaning w Cleaning instructions. The milk system consists of: • Combi spout • Milk nozzle • Milk hose The milk system must be thoroughly cleaned and sanitized at least once a day, after no more 24 hours. For machines with Plug&Clean, this must be done as part of the machine cleaning at the end of the service day. If this Plug&Clean cleaning is not done, then the combi spout must be disassembled and cleaned manually. Milk hose should be changed at regular intervals. Caution. Hot liquids in the dispensing area. Observe the Safety chapter. Caution. Follow the hygiene instructions. See HACCP schedule. Combi spout cleaning w Cleaning instructions Milk system cleaning Standard Cleaning consists of two, or optionally three parts. • Automatic foamer rinsing after each beverage with milk or milk foam (optional) • Display-guided foamer cleaning • Once per day, place combi spout, milk hose and milk nozzles in a cleaning solution User Manual WMF 1800 S 37 Care Milk system cleaning Plug&Clean Cleaning with Plug&Clean consists of three parts. • Automatic foamer rinsing after each beverage with milk or milk foam • Display-guided Plug&Clean cleaning • Once per week, lay combi spout, milk hose and milk nozzles in a cleaning solution Plug&Clean cleaning program w Cleaning instructions 5.2.3 Mixer rinsing Mixer rinsing is an intermediate cleaning of the mixer. Mixer rinsing is an integral part of the cleaning program. The mixer lift must be in the top position. Mixer rinsing w Cleaning instructions 5.2.4 Combi spout cleaning Thorough cleaning of the milk system. The exact sequence of this manual cleaning is described in the cleaning instructions. 5.2.5 Milk container cleaning (optional) Clean the milk container thoroughly every day. 5.2.6 General cleaning Grounds container cleaning (grounds chute, optional) Empty the grounds container and rinse under running water Clean with a clean, damp cloth Drip tray, housing and front panel Clean the cold machine using a damp cloth Wipe dry using a fine woollen cloth or chamois leather Cleaning metal surfaces For cleaning metal housing parts (matte surface) we recommend WMF Purargan® cleaner. Do not clean with scouring powders or the like. There is a risk of causing scratches or scores. Do not use any sharp cleaning materials or implements. Use soft cloths for cleaning. 38 Combi spout cleaning w Cleaning instructions Caution. Follow the hygiene instructions. See HACCP schedule. Order numbers for the WMF care program w Appendix Accessories and spare parts page 64 Switch off the machine before cleaning the front panel to avoid a beverage being accidentally dispensed. Risk to the machine. Follow the manual. User Manual WMF 1800 S Care 5.3 Weekly cleaning 5.3.1 Choc / Topping mixer cleaning (optional) Choc mixer / Topping mixer Cleaning will be more frequent depending on powder consumption. Switch off coffee machine using the ON/OFF switch Disconnect mains plug Open left machine door Pull the green mixer release Slide the mixer lift downward The mixer is now accessible. Pull off mixer hose from mixer to combi spout Turn stud on bayonet fitting underneath the mixer bowl counter-clockwise Mixer bowl is released from the arrester lock. The propeller for the mixer is now visible. The propeller can be cleaned with a cloth Dismantle two-piece mixer bowl Clean both parts of mixer bowl and mixer hose under warm running water Allow all parts to dry completely Re-assemble all components Mixer release open On re-assembly, all openings must face in the same direction. Replace mixer bowl Turn stud on bayonet connector back clockwise Push mixer hose onto mixer bowl fitting again, and plug in combi spout Push mixer lift upwards until it engages in the release Close left machine door Ensure that mixer hose is replaced securely. This is important, as otherwise hot water or hot Choc / Topping beverage may escape. User Manual WMF 1800 S Ensure that the spiral guide is seated and the hose is not pinched. Caution. Scalding hazard. Observe the Safety chapter. 39 Care 5.4 Regular cleaning 5.4.1 Brewing unit cleaning The brewing unit should be cleaned as required and at regular intervals. Recommendation: weekly. Switch off coffee machine using the ON/OFF switch Disconnect mains plug Push combi spout all the way up Remove grounds container towards the front of the machine Remove the drip tray Brewing unit is now fully accessible. Caution. Bruising or crushing hazard. Risk of injury. Burn hazard. Allow brewer to cool before cleaning. Caution. Hot surfaces. Follow the manual. Hold firmly, as the brewing unit can slip downwards. Never use force. Danger of breakage. Risk to the machine. Follow the manual. With one hand, reach into the chute under the brewing unit and release the retaining catch (illustration 1) Slowly guide the brewing unit downwards, tilt and pull forward Remove brewing unit and hold firmly (illustration 2) Illustration 1 Illustration 2 40 User Manual WMF 1800 S Care Use the multitool from the accessories. Turn the thread on the brewing unit head counterclockwise (illustration 3) until the wiper is in the forward position Push the springs outwards over the edge and unlock (illustration 4) Swing the insertion chute upwards Clean the brewing filter under running water or with a cloth Remove residual coffee grounds using a paint-brush or scrubber Rinse the brewing unit under running water Never clean the brewing unit in a dishwasher and never use any cleaner additives. Illustration 3 Risk to the machine. Follow the manual. Dry the brewing unit with a cloth Allow to dry completely before reinstalling in the coffee machine. Remove coffee grounds residue from the chute. Wipe out the coffee grounds towards the front or suck out using a vacuum cleaner Illustration 4 Refit the brewing unit after it has been dried. Replace springs in insertion unit (illustration 4) Hold the pusher compressed and replace the brewing unit in the chute against rear wall Push brewing unit upwards until it engages in the lock Replace grounds container Close the adjustable screen Brewing filter If the brewing unit cannot be replaced without resistance: turn thread on the brewing unit head slightly to the left or right with the multitool until the brewing unit slides into the guide. Never use force. User Manual WMF 1800 S Risk to the machine. Follow the manual. 41 Care 5.4.2 Bean hopper cleaning The bean hoppers should be cleaned as required and at regular intervals. Recommendation: monthly. Switch off coffee machine using the ON/OFF switch Disconnect mains plug Release bean hoppers lock using multitool by turning in a clockwise direction Lift bean hoppers out Completely empty bean hoppers and wipe thoroughly with a damp cloth Allow bean hoppers to dry completely Refill and replace bean hoppers Lock with the multitool by turning counter-clockwise open Never reach into the coffee grinders. Never clean the bean hoppers in a dishwasher. close Caution. Bruising or crushing hazard. Observe the Safety chapter. 5.4.3 Product hopper cleaning (optional) Choc / Topping, Twin Topping, Twin Choc Cleaning will be more frequent depending on powder consumption. Switch off coffee machine using the ON/OFF switch Disconnect mains plug Unlock product hopper with multitool by turning counter-clockwise Lift product hopper out and empty completely Unscrew union nut at front and rear Remove the dosing auger 42 open close User Manual WMF 1800 S Care Thoroughly wipe out hopper with a damp cloth Thoroughly clean individual dosing auger components Allow product hopper and individual components to dry completely Re-assemble and insert the dosing auger and screw on union nuts Portion controller with individual parts, dosing auger Ensure correct orientation of discharge. Refill and replace product hopper Lock with the multitool by turning clockwise Special features of the Twin Choc hopper / Twin Topping hopper The Twin Choc hopper is divided in the middle and has two separate compartments for two different types of Choc or Topping. Never clean product hoppers in the dishwasher. Risk to the machine. Follow the manual. 1 2 Dismantled dosing augers 5.5 1 = Topping 2 = Choc With Twin Choc: dosing auger 2 is used twice. Filter change Follow the water filter User Manual for a filter change. After a filter change, perform a rinse as guided by the display. w Software w F ilter change page 25 Filter change message w Messages and instructions page 48 User Manual WMF 1800 S 43 HACCP schedule Chapter 6 HACCP schedule You are required by law to ensure that your customers are not subject to any health risks as a consequence of consumption of food items you serve. A HACCP schedule (Hazard Analysis Critical Control Points) for risk identification and assessment is required. You should carry out a risk analysis on your premises. The aim of the analysis is to recognize and pre-empt food hygiene hazard points. For this purpose, monitoring and, where necessary, test procedures must be established and implemented. With correct installation, care, maintenance, and cleaning, WMF coffee machines meet the requirements described above. If care of the coffee machines is not carried out properly, dispensing milk beverages will constitute a food hygiene hazard point. Please observe the following points in order to comply with the HACCP Schedule: “Food Hygiene Ordinance from 05.08.1997” Use our HACCP schedule for monitoring of regular cleaning. Sanitize the milk system daily • Follow the cleaning instructions for the milk system contained in the cleaning instructions. This will ensure that your system contains a minimum of bacteria at commencement of operation. You can call up the logs of the most recent cleaning operations via Information pad . Always commence operation with a freshly opened cooled milk pack • Original packaged UHT milk is usually free from harmful bacteria. Always open a new cooled pack at commencement of operation. • Ensure absolute cleanliness when opening the milk pack. Germs can be introduced from dirty hands or tools when opening. 44 Recommendation: only use UHT milk with a 1.5 % fat content. User Manual WMF 1800 S HACCP schedule Keep milk cool • Always have a new cooled milk pack handy. • If cooling is not used during operation, then the milk must be used up very quickly. Cool the milk occasionally if needed. • If little milk is being used, cooled milk must be placed in the refrigerator again during operation. At commencement of operation milk should be at approx. 6 - 8 °C. Depending on the setting, one litre of milk is sufficient for approx. 20 cappuccinos. WMF AG offers a range of refrigeration options (e.g., WMF countertop coolers or WMF milk coolers). Recommendation for Choc and Topping (optional) Regularly clean the product hopper. See the instructions in the Care chapter. See chocolate / topping manufacturer‘s instructions. Caution. Follow the hygiene instructions. See Care chapter. HACCP schedule Month Year Use only chilled UHT milk, to prevent health risks due to bacteria. For Choc and Topping, use only products that have not exceeded their expiration date. 3a. Clean the foamer and change out the combi spout after 4 hours of operation. (Absolutely required for low number of dispense cycles, or if milk is not chilled.) 3b. Weekly mixer cleaning and regular product hopper cleaning. (Care chapter) 4. General machine cleaning. Cleaning steps Time of day 1 2 3 Signature 4 Date Date Cleaning steps: 1. Run the cleaning program. w Cleaning instructions 2a. Foamer cleaning (combi spout) w Cleaning instructions 2b. Daily mixer cleaning w Cleaning instructions 1. 17. 2. 18. 3. 19. 4. 20. 5. 21. 6. 22. 7. 23. 8. 24. 9. 25. 10. 26. 11. 27. 12. 28. 13. 29. 14. 30. 15. 31. Cleaning steps Time of day 1 2 3 Signature 4 16. User Manual WMF 1800 S 45 Maintenance Chapter 7 Maintenance Please observe that this is a professional industrial coffee machine which needs regular maintenance and descaling. Timing of descaling is calculated by the machine and depends on the degree of hardness of the local mains water and whether or not a water filter is fitted. The maintenance schedule is based on the degree of use of the machine and is shown on the display. The coffee machine may continue to be operated after the message, but Customer Care or contract maintenance should be carried out promptly to ensure correct functioning and so as to avoid any consequent damage. 7.1 Descaling w Software w Care page 24 Coffee machine maintenance The following care or maintenance stages are provided: • Customer Check-up after the display shows a message; may be undertaken by the user / operator. Customer Check-up after the display shows a message see Customer Check-up Instructions in Customer Check-up Kit. w Appendix: Accessories and spare parts • Maintenance 1 / maintenance 2 after the display shows a message; may only be undertaken by trained personnel or by WMF Service, as in this instance components affecting safety must be replaced. Service maintenance message w Messages and instructions page 48 • Revision after the display shows a message; may only be undertaken by trained personnel or by WMF Service, as in this instance components affecting safety must be replaced. 46 For other maintenance work and repairs, please contact your local WMF Service. The telephone number can be found on the address sticker on the coffee machine and on the delivery note. User Manual WMF 1800 S Maintenance 7.2 WMF Service You can reach the WMF Service Centre if the local WMF Service is not known. User Manual WMF 1800 S 47 Messages and instructions Chapter 8 Messages and instructions 8.1 Messages for operation Error number (w S oftware w S ettings w Operating options) Normal: all messages are shown on the display. Symbol: messages that require immediate action are shown on the display. All other messages are displayed as symbol . Touch the symbol All messages are displayed. Refill beans Top up bean hopper (refer to display) Check: • Is the product hopper lock open? With illumination (optional): messages that require immediate action are accompanied by flashing side illumination. Refill beans w Care • Beans do not feed through Stir with a large spoon and confirm with Empty milk message Refill milk Refill milk Empty grounds container Empty grounds container Empty grounds cont. Grounds container missing Replace the grounds container correctly and close adjustable screen Grounds container! Grounds container emptied? Confirm that the grounds container has indeed been emptied Manual insert open Close the manual insert lid 48 Ground container really emptied? Please confirm no yes ManualInsert closed? User Manual WMF 1800 S Messages and instructions Open water supply valve Turn on water mains supply and confirm open water supply Brewing unit error Remove brewing unit Clean brewing filter Replace brewing unit and ensure that it engages correctly in the lock Remove brewing unit! Error message with error number Error number is displayed. C a u t i o n! w Error messages / malfunctions Please consult the user manual! Error message with error number Error number is displayed. Call WMF Service C a u t i o n! Change filter Change filter within one week Confirm the change in the Care menu Change filter Cleaning message - clean soon Clean the coffee machine soon The message is also displayed in the Information pad. Please clean soon Cleaning message - clean now Clean the coffee machine now The message is also displayed in the Information pad. Cleaning required. The coffee machine can only be used after the cleaning operation. Please clean now Descaling Message Call WMF Service Please desc.! Customer check-up message Carry out customer check up within one week Confirm execution in the Care menu customerCheckup Call service! Deutschland Te . 0 7 3 3 1 - 2 5 7 2 5 7 ! Follow water filter instructions. User Manual WMF 1800 S 49 Messages and instructions Maintenance message Call WMF Service serviceMainten1 Heating up Machine heats up heating up Ready to operate The display illumination can be activated. We 0 1 . 0 6 . 2 0 11 08:16 beverage dispensing We 0 1 . 0 6 . 2 0 11 08:16 Warm rinsing The machine performs a warm rinsing operation. hot rinsing Activate “Ready to operate” display Touch the unlit menu pad for longer than 5 seconds The display illumination switches on. Menu pad, Information pad, error messages and cleaning messages are displayed. w “ Ready to operate” display We Optional pads The Barista pad, “warm rinse” pad and the “toggle pad” are displayed. The various options must first be activated. Optional We 0 1 . 0 6 . 2 0 11 0 1 . 0 6 . 2 0 11 08:16 08:16 Display “warm rinse” pad and Barista pad 50 User Manual WMF 1800 S Messages and instructions 8.2 Error messages and malfunctions Basic procedure on display of error messages or malfunctions. Switch coffee machine off and then on again after a few seconds Repeat the process which led to the error In many cases, this eliminates the malfunction and you can continue working. If this is not successful: find the error message or error number in the following list and follow the sequence of actions indicated. If this does not rectify the error or if the error indicated is not listed please call WMF Service. Some messages lead to blocking of individual functions. You will notice this by the fact that the beverage button illumination goes out. The beverage buttons that are still illuminated can continue to be used. Your WMF 1800 S is provided with a diagnostics program. Any errors that occur are shown on the display. The error messages listed may also be caused by an interruption to the mains electricity supply. If there is a current error or a message to the operator, the pad is displayed. Touch Error number is displayed. User Manual WMF 1800 S 51 Messages and instructions Error number Error description Action instructions 6 Brewing unit lockup current / Brewing unit stiff Right grinder blocked Left grinder blocked Switch off the coffee machine Clean the brewing unit 26 36 w Care w Brewing unit cleaning Switch off the coffee machine Disconnect mains plug Remove bean hopper Turn grinder disk counter-clockwise using only Multitool (square button) (see illustration) Replace hopper Switch on coffee machine w Care w Bean hopper cleaning If this occurs frequently: Set grinding degree one stage coarser w Other settings w Set grinding degree 88 Boiler: over-temperature Beverage dispensing temporarily blocked. Check that mains tap is on or that the water tank is filled and inserted correctly If still not OK: Switch off the coffee machine Clean the brewing unit w Care w Brewing unit cleaning Switch on and try again (Release follows when cooled down to normal temperature). 89 Boiler: heat-up time error Water error: brewing water 161 Switch off coffee machine, allow to cool and switch on again Switch machine off and on again Between each of the following steps switch the machine off and on again. If error not remedied carry out the next step. Check that mains tap is on or that the water tank is filled and inserted correctly Clean the brewing unit w Care w Brewing unit cleaning Set grinding degree coarser w Other settings Reduce quality w Settings w Recipe 52 User Manual WMF 1800 S Messages and instructions Error number Error description Action instructions 163 Water error: warm rinsing Between each of the following steps switch the machine off and on again. If error not remedied carry out the next step. Check that mains tap is on or that the water tank is filled and inserted correctly Clean the brewing unit w Care w Brewing unit cleaning 186 188 189 Steam boiler: level Steam boiler: over-temperature Steam boiler: heat-up time error User Manual WMF 1800 S Beverage dispensing temporarily blocked. Check that grounds container is correctly inserted Switch machine off and on again Beverage dispensing temporarily blocked. After releasing, check milk foam and steam outlet Switch off the machine, allow to cool and switch on again Switch machine off and on again 53 Messages and instructions 8.3 Errors without error message Error pattern Action instructions No hot water output but water in grounds container No Choc or Topping dispensing but water in grounds container Choc or Topping hopper blocked, Choc or Topping dispensed only with water Clean hot water spout Call WMF Service (coffee dispensing possible) Do not use Choc or Topping Call WMF Service (coffee dispensing possible) Clean portioner w Care Empty powder Turn dosing auger manually until all powder is removed If necessary rinse with water (Allow to) dry completely Clean the combi spout Coffee dispensing on the w Cleaning instructions left / right differs No milk foam / milk output, Check whether the milk hose is kinked or squashed but milk in milk container Re-route tube correctly Clean the combi spout Check whether milk nozzle is blocked w Cleaning instructions Milk foam incorrect, temperature too cold or too hot Change milk nozzle - green milk nozzle for cooled milk - white milk nozzle for uncooled milk Clean the combi spout w Cleaning instructions Pump runs continuously, water in grounds container Coffee machines with water tank: assembly / disassembly stiff Choc / Topping hopper cannot be inserted 54 Switch machine off and on again If error not remedied call WMF Service Lightly smear the O-rings with WMF gasket grease w Instructions in Customer Check-up Kit. Manually turn the drive for the dosing auger at the portioner slightly in a clockwise direction User Manual WMF 1800 S Safety Chapter 9 Safety 9.1 Hazards to the operator At WMF, safety is one of the most essential product features. The effectiveness of safety devices can only be ensured if the following points are observed: • Read the User Manual carefully prior to use. • Do not touch hot machine components. • Do not use the machine if it is not working properly or if it is damaged. • Built-in safety devices must never be altered. • This device is not designed for persons (including children) with limited physical, sensory or mental capabilities or who lack the required experience and/or knowledge, unless they are supervised by a person responsible for their safety or have received instructions from them about how the device should be used. • Children should be supervised to ensure that they do not play with the device. Despite safety devices, every machine poses numerous hazards if incorrectly used. Please observe the following instructions when using the coffee machine so as to prevent injury and health hazards: Scalding hazard. When dispensing coffee, Choc / Topping, hot water and steam there is hazard of scalding. Ensure that there is always a receptacle under the spout when dispensing beverages. Caution. Failure to follow Safety warnings can result in death or serious injury. Follow the safety instructions. Caution. Hot liquids in the dispensing area. Scalding hazard. Caution. Hot steam. Burn hazard. Burn hazard. The brewing unit must be cleaned only when the machine is cold. The brewing unit can get hot. User Manual WMF 1800 S Caution. Hot surfaces. Burn hazard. 55 Safety Bruising or crushing hazard. There is a hazard of bruising or crushing when handling all moving parts. Do not reach into the bean hopper or the brewing unit opening when the coffee machine is switched on. Health hazard. The product hoppers (coffee beans / Choc / Topping) and manual insert may only be filled with materials for the use intended. Health hazard. When handling special cleaners for the milk foamer, cleaning tablets, and the descaling solution, follow the protective measures on the packaging. The special cleaners for the milk foamer and cleaning tablets are irritants. Only put in cleaning tablet or descaling solution after instructions to do so are shown on the display. Irritation and scald hazard. Never reach under the spouts while cleaning. Cleaning fluid / descaling solution runs out of the combi spout when cleaning / descaling. Slipping hazard Fluids can be discharged from the machine if used improperly or if faults occur. These fluids can cause a slipping hazard. 56 Caution. Bruising or crushing hazard. Risk of injury. Caution. Health hazard. Only use as intended. Caution. Health hazard. Follow the instructions of the label on the cleaning agents. Caution. Health hazard. Irritation and scald hazard in the dispensing area. Caution. Slipping hazard if fluids are discharged Slipping hazard User Manual WMF 1800 S Safety 9.2 Hazards to the coffee machine Please observe the following points so as to prevent problems with and damage to the coffee machine: • For water with carbonate hardness in excess of 5 °dKH, a WMF water filter must be fitted; otherwise, the coffee machine can be damaged due to build-up of scale. • For insurance reasons always ensure that, at the end of operation, the mains water supply for the water supply is turned off and the machine is unplugged. 9.3 w Cleaning instructions Intended use The WMF 1800 S is designed to dispense coffee beverages, milk beverages and/or powdered beverages (choc and topping) in various variations into cups or cans. In addition, the device can generate steam for heating milk and dispensing hot water. This device is also intended for industrial and commercial use and for use by professionals and trained users in shops in the consumer goods industry and agricultural holdings, or for the commercial use by non-professionals. The device can be used as a self-service device if it is supervised by trained personnel. 9.4 • We recommend damage prevention measures such as: - installation of a suitable water monitor in the mains water supply - installation of smoke alarms • After a company holiday we recommend running the cleaning program at least twice before reusing the machine. The use of the device is also subject to the “General Terms and Conditions” of WMF AG and this User Manual. Any other use or use that goes beyond the aforementioned is considered incorrect use. The manufacturer shall not be liable for any damage resulting from this. Under no circumstances may the WMF 1800 S be used to dispense and heat liquids other than coffee, hot water (beverages, cleaning) or milk (cooled, pasteurised, homogenised, UHT). Directives The machine fulfils the requirements of the German Food and Feed Code (LFGB), the Regulation on Commodities (BedGgstV), the EC regulation No. 10/2011 as well as the EC regulation No. 1935/2004 in the currently valid editions. User Manual WMF 1800 S When used properly, the machine does not present a hazard to health or other unjustifiable hazard. The materials and raw materials used fulfil the requirements of the Regulation on Commodities as well as the EC regulations No. 10/2011. 57 Safety The machine fulfils the requirements of all applicable regulations in the directives MD (MR) 2006/42/EC (EG), Directive 2004/108/ EC (EG), Directive 2002/95/EC (ROHS), Directive 2002/96/EC (WEEE). The EC declaration of conformity is included with the machine. The machine bears the CE mark. Any modifications that are not approved by WMF will cause this declaration to become invalid. Currently valid national rules apply in countries outside of the European Union. 9.5 This device is subject to the directive on waste electrical and electronic equipment (WEEE / EU directive) and may not be disposed of as domestic waste. For disposal, contact WMF Service. Address w Page 47 Requirements traceability pursuant to EC regulation No. 1935/2004 and Good Manufacturing Practice within the meaning of EC regulation No. 2023/2006 are ensured and guaranteed. Duties of the owner / operator The operator of such equipment must ensure regular maintenance by WMF Service technicians, their agents or other authorised persons, and checking of safety devices. Access to the service area is permitted only for persons with knowledge and practical experience with the unit, especially regarding safety and hygiene. The coffee machine must be set up by the operator such that care and maintenance can be performed without hindrance. In office / floor supply or similar self-service applications, only staff instructed in operation of the machine should supervise the machine. Trained personnel should carry out maintenance and be available for questions regarding use. The operator shall ensure that electrical equipment and operating facilities are in a fit state (e.g. to BGV A3) [German Accident Prevention Association or equivalent]. In order to ensure the operating safety of your coffee machine, it is essential to perform regular checks of the safety valves and the pressure containers, among other checks. These measures are conducted by WMF Service or by WMF authorised service personnel as part of the maintenance work. Machine cleaning must be done only using the WMF special cleaning agent intended by WMF for the machine (tablets), and for the milk system (cleaning liquid). WMF special cleaning agent, w Appendix Accessories and spare parts page 64 The manufacturer‘s specifications regarding maintenance cycles and frequency of maintenance (w Maintenance) are to be observed. 58 User Manual WMF 1800 S Safety, Warranty claims 9.6 Warranty claims During the warranty period of 12 months from transfer of risk, the purchaser has statutory warranty entitlements. The vendor should always be afforded the opportunity to rectify errors within an appropriate period. Claims that exceed the above terms, in particular damage claims as a result of consequential damage, are excluded to the extent that this is legally permissible. Material defects shall be reported to the vendor immediately and in writing. No warranty is provided: • On any parts subject to natural wear and tear. This includes seals, mixers, and brewing unit, among other items. • For malfunctions due to the effect of the weather, scale build-up, chemical, physical, electrochemical or electrical effects, unless attributable to a fault on the part of WMF. • If a water filter is not fitted even though the local water supply requires use of a water filter and malfunctions occur as a consequence. • With respect to faults which occur as a result of failure to follow handling instructions and regulations, maintenance and care of the unit (e.g. User Manual and servicing instructions). • With respect to faults which occur as the result of failure to use original WMF replacement parts or incorrect assembly by the purchaser or by third parties or by faulty or negligent treatment. • With respect to the consequences of improper modifications undertaken without our consent or by repair or reconditioning work on the part of the purchaser or by third parties. • With respect to faults caused by inappropriate or improper use. User Manual WMF 1800 S w Instructions in Customer Check-up Kit. Follow the manual. The customer is advised in the order confirmation whether or not use of a water filter is required. w Maintenance page 46 59 60 1 (Care) 6.1 2 Touch start foamer cleaning On submenu Customer Care, touch PL[HUULQVLQJ IRDPHUFOHDQLQJ FOHDQLQJSURJ FXVWRPHUFDUH Foamer cleaning 13 12.1 For water rinse, prepare 0.5 l of clear, cold water Insert milk hose Touch yes \HV 3UHSDUHGZDWHU IRUULQVLQJ" FOHDQLQJSURJ IRDPHUFOHDQLQJ Machine cleaning starts. Duration approx. 8 minutes. ,QSURJUHVV« FOHDQLQJSURJ VZLWFKLQJ2II Close the manual insert lid 9.1 Insert milk hose Touch yes \HV 3UHSDUHGZDWHU IRUULQVLQJ" FOHDQLQJSURJ VZLWFKLQJ2II Touch PDLQPHQX Open the manual insert lid Add a special WMF cleaning tablet 2SHQWDEOHWLQVHUW ,QVHUWWKH FOHDQLQJWDEOHW FOHDQLQJSURJ VZLWFKLQJ2II 9 For water rinse, prepare 0.5 l of clear, cold water 6 Touch :H Standard Cleaning Program Foamer cleaning starts. Duration approx. 30 seconds. ,QSURJUHVV« FOHDQLQJSURJ IRDPHUFOHDQLQJ Cleaning tablet inserted. Touch yes \HV &OHDQLQJWDEOHW LQVHUWHG" FOHDQLQJSURJ VZLWFKLQJ2II 10 Foamer cleaning reminder appears on display. Z Manual combi spout cleaning RN FOHDQLQJSURJ VZLWFKLQJ2II 3OHDVHVRDNWKH IRDPHULQFOHDQLQJ VROXWLRQDWOHDVW RQFHSHUGD\ 7 The submenu appears. Touch cleaning prog. PL[HUULQVLQJ IRDPHUFOHDQLQJ FOHDQLQJSURJ FXVWRPHUFDUH 3 4 5 12 On submenu Customer Care, touch mixer rinsing Touch start PL[HUULQVLQJ IRDPHUFOHDQLQJ FOHDQLQJSURJ FXVWRPHUFDUH Mixer rinsing Step 6 and 10 Only if beverages containing milk have been previously prepared. Foamer cleaning starts. Duration approx. 30 seconds. 33 2552 0010 03.2012 Mixer rinsing starts. Duration approx. 30 seconds. ,QSURJUHVV« FOHDQLQJSURJ PL[HUULQVLQJ Step 11 Only if beverages containing Choc components have been previously prepared with the optional mixer. Mixer rinsing starts. Duration approx. 30 seconds. ,QSURJUHVV« FOHDQLQJSURJ PL[HUULQVLQJ ,QSURJUHVV« 11 8.1 Touch start The cleaning program starts. VWDUW PDFKLQHFOHDQLQJ VWDUWQRZ" FOHDQLQJSURJ VZLWFKLQJ2II FOHDQLQJSURJ VZLWFKLQJ2II The mixer lift must be in the top position. Remove and empty grounds container (PSW\ J U R X Q G V F R Q W D L Q H U FOHDQLQJSURJ VZLWFKLQJ2II 8 Touch switchingOff QRVZLWFKLQJ2II FXVWRPHUFDUH FOHDQLQJSURJ VZLWFKLQJ2II Follow the overview of cleaning interval schedule in the Care chapter in the User Manual. Prior to the first cleaning, read the User Manual, Care chapter. Please refer to the User Manual. Cleaning instructions 1800 S 1 10 Plug&Clean cleaning starts. Duration approx. 2 minutes. 3 Rinse combi spout and milk hose very thoroughly with clear water C Caution! Carefully disconnect the milk hose. A 4 7 10.1 Push combi spout all the way up Remove and empty grounds container Replace grounds container (PSW\ J U R X Q G V F R Q W D L Q H U FOHDQLQJSURJ VZLWFKLQJ2II If a mixer is fitted: Rinse mixer hose very thoroughly Reassemble combi spout Replace combi spout Insert milk hose If a mixer is fitted: Insert mixer hose Pull forward the lever behind the combi spout Remove combi spout Remove milk hose from milk container and release from combi spout If a mixer is fitted: Release the mixer hose Z User Manual Mix 5 ml of WMF Special cleaner with 0.5 l of lukewarm water VWDUW Step 6 and 10: Only if beverages containing milk have been previously prepared. Step 9: Only if beverages containing Choc components have been previously prepared with the optional mixer. Close the manual insert lid Touch yes \HV &OHDQLQJWDEOHW LQVHUWHG" FOHDQLQJSURJ VZLWFKLQJ2II 8.1 Touch start The cleaning program starts. Foamer cleaning: See the flip-side under "foamer cleaning" for interim cleaning. Manual combi spout cleaning with Plug&Clean: Perform at least once per week. Manual combi spout cleaning without Plug&Clean: Perform at least once per day. After Plug&Clean cleaning: The cleaned milk hose can be stored with the adapter in the closed cooler. Instructions Dismantle combi spout Immerse one end of the milk hose in the cleaning solution B 5 PDFKLQHFOHDQLQJ VWDUWQRZ" FOHDQLQJSURJ VZLWFKLQJ2II Immerse the length of the remaining milk hose in the cleaning solution This procedure prevents air bubbles from remaining in the milk hose. Place all parts of combi spout in the cleaning solution (3 parts) All parts must be completely immersed. After 5 hours clean all parts thoroughly with a brush Machine cleaning starts. Duration approx. 8 minutes. ,QSURJUHVV« FOHDQLQJSURJ VZLWFKLQJ2II 11 Open the manual insert lid Add a special WMF cleaning tablet 2SHQWDEOHWLQVHUW ,QVHUWWKH FOHDQLQJWDEOHW FOHDQLQJSURJ VZLWFKLQJ2II 8 Touch switchingOff The submenu appears. Touch cleaning prog. PL[HUULQVLQJ QRVZLWFKLQJ2II FXVWRPHUFDUH FOHDQLQJSURJ VZLWFKLQJ2II IRDPHUFOHDQLQJ FOHDQLQJSURJ FXVWRPHUFDUH Manual combi spout cleaning Switch off using the ON/OFF switch prior to cleaning. Unplug mains plug. Mixer rinsing starts. Duration approx. 30 seconds. 3OXJ&OHDQ ,QSURJUHVV« FOHDQLQJSURJ VZLWFKLQJ2II 9 ,QSURJUHVV« (Care) 6.1 2 Turn the adapter in the socket clockwise, until it stops Touch yes Touch PDLQPHQX FOHDQLQJSURJ PL[HUULQVLQJ Insert the milk hose with the Plug&Clean adapter into the Plug&Clean socket The mixer lift must be in the top position. Do not pinch the milk hose. \HV FOHDQLQJSURJ VZLWFKLQJ2II ,VWKHPLONKRVH ORFNHGLQWRWKH 3&VRFNHW" 6 Touch :H Plug&Clean cleaning program Appendix: Cleaning instructions (Standard) Appendix: Cleaning instructions (Standard) User Manual WMF 1800 S Appendix: Technical data Appendix: Technical data Technical data for coffee machine Nominal power rating * (depending on the model) 3 kW (2.75 kW - 3.25 kW *) Recommended daily capacity espresso, café crème up to 180 cups Overall hot water output approx. 20 l/h Coffee bean hopper left and right each approx. 1,000 g middle approx. 550 g Choc / Topping hopper approx. 1,000 g Twin Choc / Topping hopper twice approx. 500 g Mains power connection * 1/N/PE 230 V 50 Hz Illumination External dimensions Weight empty LED class 1 width 326 mm height incl. bean hopper 680 mm depth 556 mm approx. 33 - 43 kg (depending on the model) Continuous sound pressure level (Lpa) ** < 70 db (A) We reserve the right to make technical modifications. * For special models see model label, values given above are for the basic model. ** A-evaluated sound pressure level Lpa (slow) and Lpa (impulses) at operating personnel workplace is under 70 db (A) in any working mode. Conditions for usage and installation Necessary preparatory work for electricity, water and drainage connections at the customer‘s premises are to be arranged by the machine owner / operator. The work must be carried out by authorised installation technicians in compliance with general, country-specific and local regulations. The WMF service engineers may only connect the machine to existing prepared connection points. WMF Service is neither authorised nor responsible for carrying out any work on-site prior to connection. User Manual WMF 1800 S 61 Appendix: Technical data Mains voltage tolerance 230 V +6 % and -10 %, range Mains voltage interruption < 50 ms: no interruption of function Water supply 3/8 inch hose connector with main valve, and filter with 0.2 to 0.25 mm mesh size, on site. Min. 0.2 MPa flow pressure at 2 l/min., max. 0.6 MPa. Water temperature max. 35 °C. The set of hoses provided with the new coffee machine and/or the new water filter must be used. Do not use old hoses. Water quality For drinking water with carbonate hardness above 5 °dKH, a WMF water filter should be installed upstream. Water drain pipe Hose a min. DN 19, minimum downward slope of 2 cm/m Ambient temperature +5 °C to max. +35 °C (empty the water line in case of frost). Maximum humidity 80 % relative humidity without condensation. Do not use unit outdoors. IP X0 Degree of protection Installing surface Installation clearances Installation dimensions of the water filter The unit must be placed on a level, flat, and sturdy surface. The unit is not intended to be located on a surface that is sprayed or cleaned with a water hose, steam jets, steam cleaner, or similar devices. For operating, service and safety reasons the machine should be installed with a clearance of not less than 50 mm at the back and sides from the building or non-WMF components. A clear height of 1,100 mm from the top of the supporting surface should be ensured. The height of the installation surface above the floor is at least 850 mm. If the machine connections are to be run downwards through the counter, please make space for the lines, which can reduce the usable space below the machine. See the User Manual for the water filter. These specifications for the electrical connection and the standards quoted apply for connecting the machine in EU countries. It may be necessary to also observe additional country-specific regulations. Outside the EU countries acceptance of the standards quoted is to be checked by the legal entity or natural person who wishes to use the machine. 62 User Manual WMF 1800 S Appendix: Technical data The local power supply must be constructed according to IEC 364. To improve safety, the coffee machine should be fitted with an FI 30 mA earth leakage current circuit breaker complying with EN 61008. Near the device or about 30 cm below the counter top there should be a shockproof socket as a single-phase connection installed locally on the rear or side wall of the counter substructure or a country-specific single-phase socket. If the mains cable for this device is damaged then it must be replaced by our service personnel or a similarly qualified person, in order to prevent hazards. A separator switch is recommended for a flexible connection. The mains cable must not come into contact with hot surfaces. The mains switch and plug top are part of the customer‘s on-site installation. The machine may not be fitted with a fixed permanent mains connection if installed on a transporting trolley (a mobile station). In order to avoid possible faults from arising on our shielded data lines due to potential equalization currents between the devices, an additional potential equalization unit should be planned for devices connected to the vending system. (See EN 60309) User Manual WMF 1800 S 63 Number Unit 64 meter Pcs Pcs 1 1 1 Pcs 33 2318 0000 Mixer bowl 1 Pcs Pcs Pcs Pcs Pcs Pcs Pcs 1 1 1 1 1 Complete bean hopper 1 Documentation / Instructions Medium bean hopper lid Medium bean hopper Closing plate Large bean hopper lid Large bean hopper Set of documents: • User Manual WMF 1800 S • Cleaning instructions WMF 1800 S Multitool Drain tube meter 1.5 Accessories / tools Angle for drain tube Pcs 1 Connecting tube for constant water supply Pcs 1 33 2854 3000 33 2854 2000 33 2265 5000 33 2806 3100 33 2851 2099 33 2552 0010 33 2323 1000 00 0048 0042 33 2165 8000 33 2292 1000 33 2292 6000 Mixer hose spring 00 0048 0064 33 2180 5000 Milk hose sleeve Mixer hose 33 0190 3000 00 0048 4948 33 2864 3300 33 2549 0000 Order No. Milk hose spring Milk hose Steam nozzle compl. with seal Ø 2.3 (2.9 KW) Single spout Designation Constant water supply, drainage 1 meter Pcs 1 0.25 Choc / Topping mixer Pcs Pcs 1 1 Complete combi spout Choc all all all all all all all all all all Choc / Topping Choc / Topping Choc / Topping all all all all Model Appendix: Accessories and spare parts Appendix: Accessories and spare parts User Manual WMF 1800 S Number Unit Designation User Manual WMF 1800 S sheet 1 Pcs Pcs Pcs Pcs Pcs 1 1 1 Pcs Pcs 1 Choc product hopper Spare cartridge for water filter Water filter Bestmax M (complete set) Customer Check-up kit Cup stop Drip grid Drip tray (when using an integrated or under-counter cooler) Drip tray (standard) Brewing unit Coffee grounds container Labels for product hopper Product hopper lid Twin Choc / Twin Topping Twin Topping product hopper Twin Choc product hopper Product hopper lid Choc / Topping Topping product hopper bottle pack Pcs Pcs tube 1 1 1 1 1 WMF gasket grease 5 grams Cleaning brush Pipe cleaner Special cleaning tablets (100 pieces) WMF Special cleaner for milk foamer Order numbers for the WMF care program Pcs 1 Scale filter / water filter 1 Customer Check-up kit Pcs 1 Drip tray / drip grid 1 Brewing unit 1 Coffee grounds container Pcs Pcs Pcs 1 1 Pcs 1 1 Pcs Pcs 1 1 Product hopper Choc / Topping 33 2179 9000 33 1521 9000 33 0350 0000 33 2332 4000 33 0683 6000 33 2426 5000 03 9331 0001 33 2861 7000 33 9394 2200 33 2465 8000 33 2254 9200 33 2254 9000 33 2823 6199 33 2272 4000 33 2315 3000 33 2806 4100 33 2845 4099 33 2845 4399 33 2806 3100 33 2845 4299 33 2845 4199 Order No. all all all all all all all all all all all all all all all Twin Topping Twin Topping Twin Topping Choc / Topping Topping Choc Model Appendix: Accessories and spare parts 65 Index Index A Access control 32 Accessories and spare parts 64 Accounting level 33 Accounting numbers of beverages 34 E Electrical connection 62 Empty grounds container 48 Empty milk message 32 Error message 16, 51 Error messages 51 Error number 49, 51 Errors without error message 54 F B Barista pad 16, 18, 30 Bean hopper 7 Bean hopper cleaning 42 Beverage buttons 26 beverage dispensing 10 Boiler temperature 28 Brewing unit cleaning 40 Brewing unit error 49 Brew time 19 Button allocation 28 Filter change 25, 43 Foamer cleaning 24 Foamer rinsing 30 G Glossary 8 Ground coffee quantity 27 Grounds container cleaning 38 Grounds container missing 48 H C Call up the main menu 8 Capacity 29 Care 18, 24, 36 Care message 16 Change recipes 27 Choc hopper 7 Choc powder quantity 27 Cleaning instructions 60 Cleaning intervals overview 36 Cleaning level 32 Cleaning metal surfaces 38 Cleaning program 24, 37 Cleaning schedule 44 Coffee machine maintenance 46 Combi spout cleaning 38 Conditions for usage and installation 61 Connect up the milk 11 Cooler adapter 11 Cool milk 11, 45 Copy day 22 Cup&Cool 11 Cup volumes 27 D Daily cleaning 37 day counter 34 Delete counter 34 Delete PIN 34 Delete timer 23 Diagnostics program 51 Dispense milk or milk foam 10 Display contrast 29 Display language 29 Display switching times 22 Drip tray 15 Drip tray, housing and front panel 38 Duties of the owner / operator 58 66 HACCP schedule 44 Hazards to the coffee machine 57 I Information 16, 18 Introduction 6 J Journal 19 L Labelling of beverage buttons 35 Latte macchiato 20 latte macchiato pause interval 20 M Main menu 16, 20 Main menu functions (pads) 17 Maintenance 46 Malfunctions 51 Manual insert 13 Mechanical settings 35 Menu control pads 17 Menu pad 31 Messages and instructions 48 Milk and foam 20 Milk container 38 Milk foam dispensing 10 Milk foam quality 20 Milk foam volume 27 Milk nozzle 11 Milk system rinsing Standard 38 Milk volume 27 Mixer cleaning 39 Mixer rinsing 25, 38 Multitool 35 User Manual WMF 1800 S Index N No warranty is provided 59 O ON/OFF switch 30 Open water supply valve 49 Operating options 30 Operation 10 Original WMF spare parts 59 Other settings 35 P Parts of the coffee machine 6 PIN entry 32 PIN rights 32 Preparation of ground coffee using the manual insert 13 Q Quality 27 R Read counter 34 Ready to operate 16, 18 “Ready to operate” display pads 16 Recipes and buttons 26 Recommendation for Choc and Topping 45 Refill beans 48 Regular cleaning 40 Reset 28 Rinse filter 25 Rinsing interval 30 S Safety devices 55 Sanitize milk system 44 SB mode 31 Scale filter is fitted 29 Second level 30 Self-service 30, 31 User Manual WMF 1800 S Service 18 Set grinding degree 35 Set timer 21 Setting level 33 Settings 26 Software 16 Switching off 15 Switch off time 21, 22 Switch on coffee machine 10 Switch on time 21, 22 T Tablet insert 7 Technical data 61 Time and date 29 Timer 19, 21 Timer information 23 Timer overview 22 Timer program 21 Timer state 21 Toggle pad 30 Topping hopper 7 To the main menu 19 Touch-screen display 7 Twin Topping 9 Twin Topping hopper 7, 12 U User Manual Signs and Symbols 8 User Manual Symbols 8 W “Warm rinse” pad 18, 30 Warm rinsing 16 Warm-up rinsing 29 Warranty claims 59 Water filter 25, 43, 46, 59 Water filter rinsing 25 Water hardness 29 Weekly cleaning 39 Weigh grounds 28 WMF Service 47 67 Your nearest WMF Service: © 2011 - 2012 WMF AG All rights reserved, in particular duplication, distribution and translation rights. No part of this manual may be reproduced in any form or processed, duplicated or distributed using electronic systems without written consent. Design and production / typesetting and print presentation: TecDoc GmbH; Geislingen, [email protected] Original User Manual. Printed in Germany. We reserve the right to make technical modifications. 11.04.2012