1
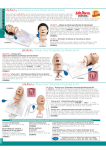
Other Available
LF00698U
LF00856U
LF00901U
LF00906U
LF00929U
LF00957U
LF00958U
LF00961U
LF00984U
LF00995U
LF00997U
LF00999U
LF01008U
LF01012U
LF01019U
LF01020U
LF01025U
LF01026U
LF01027U
LF01028U
LF01036U
LF01053U
LF01054U
LF01062U
LF01063U
LF01064U
LF01069U
LF01070U
LF01082U
LF01083U
LF01084U
LF01087U
LF01095U
LF01108U
LF01142U
LF01162U
LF03000U
LF03601U
LF03602U
LF03603U
LF03609U
Adult Injectable Arm (White)
Female Catheterization
Prostate Examination
Ostomy Care
Surgical Bandaging
Enema Administration
Pediatric Injectable Arm
Intramuscular Injection
Breast Examination
Arterial Puncture Arm
Adult Injectable Arm (Black)
Pediatric Injectable Head
Intradermal Injection Arm
Heart Catheterization (TPN)
Ear Examination
Supplementary Ear Set
Male Cath-Ed I
Female Cath-Ed II
Peritoneal Dialysis
Suture Practice Arm
Spinal Injection
Cross-Sectional Anatomy,
Torso, Head
Cross-Sectional Anatomy,
Head
Pelvic, Normal & Abnormal
Stump Bandaging, Upper
Stump Bandaging, Lower
Cervical Effacement
Birthing Station
Cricothyrotomy
Tracheostomy Care
Sigmoidoscopic
Examination
Central Venous Cannulation
Blood Pressure Arm
Intraosseous Infusion
Simulator
Auscultation Trainer
Venatech IV Trainer
CPARLENE® Series
Adult Airway Management
Trainer
Adult Airway Management
on Manikin
Adult Airway Management
Head Only
Child Airway Management
Trainer
Simulators
LF03610U Child Airway Management
Trainer Head Only
LF03611U Child Defibrillation Chest
Skin
LF03612U Child IV Arm
LF03613U Child Blood Pressure Arm
LF03614U Child Intraosseous Infusion/
Femoral Access Leg Only
LF03615U Complete Child CRiSis™
Update Kit
LF03616U Child CRiSis™ Manikin
LF03617U Deluxe Child CRiSis™
Manikin with Arrhythmia Tutor
LF03620U PALS Update Kit
LF03621U Infant Airway Management
Trainer Head Only
LF03622U Intraosseous Infusion Right
Leg
LF03623U Infant Airway Management
Trainer
LF03626U Child Femoral Access
Injection Pad Replacement
LF03632U Child Intraosseous Infusion/
Femoral Access Leg on a
Stand
LF03633U Child Airway Management
Trainer with Torso
LF03693U Basic Buddy CPR Manikin
LF03699U “Airway Larry” Airway
Management Trainer
LF03720U Baby Buddy Infant CPR Manikin
LF03953U CRiSis™ Manikin
LF03955U Deluxe CRiSis™ Manikin
LF04001U GERi™ Nursing Manikin
LF04020U KERi™ Nursing Manikin
LF04021U KERi™ Basic Manikin
LF04022U KERi™ Advanced Manikin
LF04030U GERi™ Advanced Manikin
LF04040U GERi™ Basic Manikin
Geri™ THE NURSING SKILLS
MANIKIN
LF04001U
INSTRUCTION MANUAL
Fort Atkinson
901 Janesville Avenue, P.O. Box 901
Fort Atkinson, Wisconsin 53538-0901
1-800-558-9595
www.eNASCO.com • E-mail: [email protected]
COPYRIGHT © NASCO 1998 PRINTED IN U.S.A. NP 114-93/RV 9-01
Products by NASCO
Figure 1
Congratulations for choosing Geri™, the
nursing skills manikin to teach your students patient care techniques. GERI’s™
simple design makes the manikin easy to
use and care for. Many unique features
are included with this manikin, so please
familiarize yourself with this manual
before using Geri™ with your students.
List of Components:
GERI™ Manikin
Male genitalia
Female genitalia
Wig
Hearing Aid
Fluid drainage basin
Catheter bag with fitting and pressure
sleeve
12 cc syringe
Serial number — under skin at the
back of the neck
Spray lubricant
The legs detach from the body at the hips
by bending the legs backward approximately 150° so that the feet are near the
shoulders and the keyholes are aligned
(Figure 2). Then pull outward away from
the body. Reverse this procedure to
reassemble.
Figure 2
The head may be removed by rotating it
180° backward to align the key holes,
and then pulling up. The internal stomach
reservoir will come out of the body
General Instructions For Care:
through the neck opening. Reverse this
GERI™ comes completely assembled but procedure to reassemble.
is simple to take apart if need be. Arms
can be removed by bending the elbows All other joints may be disassembled with
backward approximately 90° to align the a flat-head screwdriver. Hold the opposite
keyholes at the shoulders (Figure 1). Then end of the connector pin to prevent
pull outward away from the shoulder of unproductive rotation.
the manikin. Reverse this procedure to
reassemble.
The intramuscular injection pads located Maximum capacity of
at the shoulders, thigh, and hip may be internal reservoirs:
removed by compressing them sideways
Ileostomy
20cc
and pulling up. The eyes may be removed
Colostomy
20cc
by creasing the skin at the outside of each
Urinary
375cc
eye and rolling the eye up (Figure 3).
Rectal
775cc
Stomach
375cc
Visual Inspection Features:
Reddened skin under right breast
Moles on back — the upper center mole
is normal. The lower outer mole
shows signs of malignancy.
Sacral decubitus ulcer — stage 1
Figure 3
Pupils — left is dilated; right is constricted
The wig may be washed with cool water
and a mild shampoo. Blot with a towel
and air dry. The wig is held in place by
elastic at the front and rear of the male
hairline. Do not brush the wig when it is
wet.
Most cleaning can be done with a soft
cloth and warm water. Avoid washing the
painted areas on the manikin. Stubborn
stains can be treated by using REN cleaner and a soft rag. Stains caused by makeup, ink, and newsprint are indelible and
cannot be removed. Avoid contact with
these substances. Do not apply cosmetics
or Betadine solution to the manikin. All
internal reservoir bags may be disinfected
by rinsing with a solution of 10% bleach
and water.
Patient Care Simulations
Male Catheterization
NOTE: To avoid the possibility of leakage,
make sure you use the 16 French Foley
catheter supplied with the simulator.
The male genital insert represents an
uncircumcised adult male. To prepare for
catheterization exercises, fill the 140cc
syringe (supplied) with water. Lubricate
the end of the administration tube and
insert through the urethra at least 7"-8".
Be sure the catheter bag and fitting are
attached to the urethra behind the genital
insert. The velcro on the catheter bag
should be secured to the velcro on the
genital track. Depress the plunger of the
syringe to fill the catheter bag. The
catheter bag has a capacity of approximately 375cc.
Intramuscular Injections
Intramuscular injections may be performed in inserts at the left hip, right
thigh, and at both shoulders. Inject air
only, as these inserts cannot be drained.
To remove the injection inserts compress
them sideways and pull out.
Intravenous Injections
An optional right arm may be purchased
for IV training. This arm features realistic
soft vinyl skin and latex veins, which are
completely replaceable. The arm rotates
at the elbow for easy accessibility to the
antecubital fossa, along the forearm, and
at the back of the hand. A bony landmark
at the shoulder identifies soft tissue for
intramuscular injections. Reference
NASCO product #LF03214U.
Blood Pressure Training
An optional left arm may be purchased
for training in taking blood pressures. The
arm contains an internal speaker which
produces realistic blood pressure sounds.
The instructor can set any systolic and
diastolic rates, adjust volume, and
change the heart rate. The five Korotkoff
sounds are produced and the instructor
can select a mode for producing an auscultatory gap if desired. Reference
NASCO product #LF03204U.
Range of Motion
One of the most unique features of the
KERi™ manikin is the complete and realistic range of motion provided at all the
joints. This allows for correct patient positioning and flexibility exercises. The
manikin’s articulation includes:
Trunk — Rotation, Hyperextension
Shoulder — Abduction, Adduction,
Rotation, Hyperextension
Elbow — Extension, Flexion,
Pronation, Supination
Wrist
—
Flexion,
Hyperextension,Radial Flexion,
Ulnar Flexion
Fingers — Abduction, Adduction,
Flexion (soft, lifelike material)
Neck — Rotation, Hyperextension,
Lateral Flexion
Hip — Abduction, Adduction,
Rotation, Hyperextension
Knee — Extension, Flexion
Ankle — Eversion, Inversion,
Dorsiflexion, Plantarflexion
Toes — Abduction, Adduction, Flexion
(soft, lifelike material)
Figure 4
Place the track on the track mount located at the underside of the abdomen.
Gently slide the genital insert back to the
body. Lift and push the bottom of the genital insert into the genital opening in the
body. Push the top of the genital insert
down and in to secure the system.
The natural restrictions of the male urinary
tract have been designed into the male
genital insert, so proper manipulation of
the penis is required to achieve catheterization. Thoroughly lubricate the 16
French Foley catheter (supplied with your
simulator) prior to insertion. Insert the
catheter about 2" into the urethra until the
restriction of the mucosal fold is encountered. Withdraw the catheter slightly,
stretch the penis slightly, and then
advance the catheter past the first restriction.
Advance the catheter approximately 2
additional inches until you feel the restriction of the bulbous urethra. Elevate the
penis to about 60° and advance the
catheter past the second restriction.
The final restriction represents the sphincter muscle where the urethra joins the
bladder. Gently advance the catheter past
this point until you feel a “pop” as you
enter the bladder. Water will now flow
through the catheter into an external
drainage basin.
NOTE: Special care should be taken
when using a Foley catheter. Cuff inflation
should only be attempted when it is in the
proper position inside the bladder. Just as
in a real patient, the cuff must be completely deflated before the catheter is
removed. Improper use of a Foley catheter
can result in damage to the simulator.
Leaving a catheter in the simulator may
result in damage to the simulator.
After completion of the exercise, remove
the male genital insert by reversing the
assembly instructions (page 2).
Disconnect the catheter bag and fitting
from the insert piece. Drain the bag thoroughly. Rinse bag and the outside of the
penis to remove any residual lubricant.
Prostate Examination
The male genitalia also includes the
capability for digital rectal prostate palpation. The prostate gland represents stage
B progression of prostatic cancer. A discrete hard nodule is palpable in the upper
right quadrant, simulating a beginning
stage of carcinoma. The student must fully
lubricate his or her finger prior to insertion into the rectum. The rectum should
be rinsed with warm water after completion of the exercise. The male rectum
does not have the capacity for enema
administration.
Female Catheterization
NOTE: To avoid the possibility of leakage, make sure you use the 16 French
Foley catheter supplied with the simulator.
To prepare for female catheterization, fill
the 140cc syringe (supplied) with water.
Lubricate the end of the administration
tube and insert through the urethra at
least 7"-8". Be sure the catheter bag and
fitting are attached to the urethra behind
the genital insert. The velcro on the
catheter bag should be secured to the velcro on the genital track. Depress the
plunger of the syringe to fill the catheter
bag. The catheter bag has a capacity of
approximately 375cc.
Place the track on the track mount located at the underside of the abdomen.
Gently slide the genital insert back to the
body. Lift and push the bottom of the
genital insert into the genital opening in
the body. Push the top of the genital
insert down and in to secure the system.
Thoroughly lubricate the 16 French Foley
catheter (supplied with your simulator)
prior to insertion.
NOTE: Special care should be taken
when using a Foley catheter. Cuff inflation should only be attempted when it is
in the proper position inside the bladder.
Just as in a real patient, the cuff must be
completely deflated before the catheter is
removed. Improper use of a Foley
catheter can result in damage to the simulator. Leaving a catheter in the simulator
may result in damage to the simulator.
Enema Administration
Enema administration can be practiced
on the female genital insert only. To prepare the manikin for enema exercises, be
sure the enema reservoir is securely
attached to the inside of the rectum.
Position the manikin on its left side in the
Simm’s Position. Lubricate the applicator
liberally and gently insert through the
anus. Administer water only into the rectum. To simplify cleanup, you may
choose to leave the applicator in place
while positioning the manikin over a
drainage basin. The rectum will drain via
gravity as soon as the manikin leaves the
left Simm’s position. Be sure to have a
basin under the manikin.
and visual inspection of the vagina and
cervix may be demonstrated on Geri™
but, again, extreme care should be taken
to thoroughly lubricate any instrument of
insertion. Use the smallest possible
speculum and avoid exerting too much
pressure on the vaginal walls.
Overexertion will damage the simulator
just as it would cause tissue damage in
an actual patient. The speculum must be
thoroughly lubricated prior to insertion.
The vagina should be rinsed with warm
water after completion of the exercise to
remove any residual lubricant.
Ostomy Care
Colostomy and ileostomy care can be
practiced on Geri™, including stoma dilation, irrigation, cleaning, and ostomy bag
changing procedures. Irrigation tubes
should be well lubricated prior to insertion,
and the stomas should be rinsed with
warm water after completion of the exercise to remove any residual lubricant. The
fluid capacity of the stoma reservoirs is
20cc. Removal of the internal stoma reservoirs can be achieved by removing the
genitalia, and reaching through the genital
cavity (Figure 5). The reservoir bags are
attached directly to the underside of the
stomas. To remove, pull the reservoir fittings down and disconnect from the
stomas. Then pull the reservoir bags from
the velcro attachments. Rinse with water to
clean. Reverse the procedure to reattach
the internal stoma reservoirs.
Tracheostomy Care
The tracheostomy canal is not removable
from the body, so any water administered
to this site must be suctioned out after
completion of the exercise. Suctioning,
dressing changes, tracheostomy tube
placement, and cuff inflation may be
practiced on the manikin. The tracheostomy canal is not connected to the oronasal
system, and access is provided only
through the stoma site.
Oral Hygiene
Tooth brushing should be performed without water or any cleaning agents to avoid
leaking into the head of the manikin, and
to simplify cleanup. Denture removal is
Oral and Nasal Lavage, Gavage, accomplished by grasping the dentures,
and Suctioning
pulling forward and then down (for the
Access to the stomach is provided through upper plate), or forward and then up (for
the mouth and both nostrils.The insertion the lower plate).
of any type of tube or instrument requires
generous lubrication prior to insertion. Eye Irrigation
Only water should be used in tube feed- Both eyes may be irrigated using water
ing exercises. The internal stomach reser- only. The left pupil is dilated and the right
voir has a capacity of 375cc. The stom- pupil is constricted. To dry the eye sockets
ach may be emptied by suctioning the after completion of the irrigation exercise,
remove the eyes by creasing the skin at
contents (water).
the outside of each eye and then roll the
The stomach can be removed by rotating eye upward toward the nose. Pat the
the head 180° backward to align the key inside of the eye sockets with a soft cloth
holes in the neck, and then pulling up to remove moisture and replace the eyes
(Figure 6). The stomach reservoir will in their respective sockets.
come through the neck opening only if
less than 250cc of water is contained in Ear Care
Both ears may be irrigated using water
the stomach.
only. To drain, tilt the head sideways and
empty into a basin or onto an absorbent
cloth. Cotton swabs should be used carefully and only on the outer ear.
Rinse the anus and internal rectal reservoir to remove any residual lubricant.
Douching, Pap Smears, and
Vaginal Inspection
The female genitalia also allows for
douching, but extreme care should be
taken to lubricate the applicator thoroughly. Only water should be used as a
douching agent. Pap Smear procedures
Figure 5
When administering water to the internal
stomach reservoirs, and when the stomach reservoir contains water, the head
and upper torso should be at least slightly
elevated to prevent backflow into the
head of the manikin.
Figure 6
Bed Baths and Hair Washing
To simplify cleanup, dry bed baths and
shampoos are recommended to eliminate
the chance of water entering the inside of
the manikin. However, a soft cloth and
water can be used for bathing exercises,
and a mild shampoo and cool water can
be used for hair washing. Avoid scrubbing
any painted areas of the manikin. To dry
the wig, blot with a soft towel and air dry.
Do not brush the hair when wet and never
use a hair blower or dryer on the wig.