1
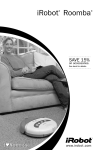
Contents
iRobot and Roomba are trademarks of iRobot Corporation.
© 2002-2003 iRobot Corporation.
All rights reserved.
Patents Pending.
Made & Printed in China.
To order extra Battery Packs, Virtual Wall Units,
Replacement Filters or the Rapid Charger, contact your
nearest Roomba retailer, or visit www.RoombaVac.com for
online purchase options and additional purchase information.
TM
Important Safety Instructions.......................2
Introducing Your Roomba FloorVac ...............3
Getting Started.................................................4
• Unpacking the Box ..........................................................
• FloorVac Description .......................................................
• Installing the Battery Pack ..............................................
• Removing the Battery Pack ..............................................
• Charging the Battery Pack ...............................................
• Battery Life Indicator .......................................................
4
5
6
6
6
7
Using Your Roomba...........................................7
• Setting Up the Room for Cleaning....................................
• Starting and Stopping Roomba .......................................
• Room Confinement (Using Your Virtual Wall Unit) ...........
• Roomba Care Hints .........................................................
7
8
9
12
Caring for Your Roomba..................................9
• Emptying the Particle Bin ................................................ 10
• Replacing the Air Filter .................................................... 11
• Cleaning the Vacuum Inlet ............................................... 11
• Cleaning the Main Brushes ............................................... 14
• Reinstalling the Main Brushes ......................................... 15
• Maintaining the Edge-Cleaning Side Brush...................... 15
Reference Information....................................16
• Troubleshooting Tips ......................................................
• Frequently Asked Questions ...........................................
• Contacting Customer Support .........................................
• Limited Warranty..............................................................
16
18
19
21
Before using your Roomba, thoroughly read the safety instructions.
TM
www.RoombaVac.com
Important Safety Instructions
Introducing Your Roomba FloorVac
CAUTION: TO REDUCE THE RISK OF ELECTRIC SHOCK, DO NOT REMOVE COVER OF ROOMBA, THE BATTERY
PACK OR THE BATTERY CHARGER. NO USER-SERVICEABLE PARTS INSIDE. REFER SERVICING TO QUALIFIED
SERVICE PERSONNEL.
Congratulations! You are now the owner of the award-winning Roomba™ Intelligent
FloorVac.
CHARGE USING STANDARD US (120V AC) OUTLET ONLY.
Your Roomba FloorVac is an automated floor-cleaning device that helps keep your
floors clean between periodic deep cleanings, without needing to be pushed or followed
around. With a vacuum and agitator brush design, this device diligently cleans common
household floor surfaces including hardwood, linoleum, tile and low- to medium-pile
carpets, with little or no human supervision.
Always be careful when using your Roomba. To reduce the risk of injury or damage, keep these
safety precautions in mind when setting up, using and maintaining your equipment.
GENERAL
•
•
•
•
•
Read all safety and operating instructions before operating Roomba.
Retain the safety and operating instructions for future reference.
Heed all warnings on Roomba, Battery Pack, Battery Charger and Owner’s Manual.
Follow all operating and use instructions.
Do not attempt to service Roomba yourself. Refer all non-routine servicing to
qualified service personnel.
ROOMBA USE
When Roomba starts cleaning it travels around the floor in a spiral pattern (see Figure 1,
below). Its Non-Marring Bumper will contact a wall, or it may try to find a wall after
spiraling for a while. Roomba follows the wall for a short period of time, using its
Spinning Side Brush to move debris away from the wall and into the Vacuum’s path.
After cleaning along a portion of the wall or other object, Roomba criss-crosses the room
in straight lines. Roomba repeats this cleaning pattern until its cleaning time has elapsed.
This pattern is designed to provide maximum coverage of the room.
• This is an indoor device only.
• Do not use Roomba on wet surfaces or where contact with or immersion in water
is a possibility.
• Before using this device, pick up objects like clothing, loose papers, pull cords for blinds
or curtains, power cords, and any fragile objects. If the device passes over a power
cord and drags it around, there is a chance an object could tumble off a table or shelf.
• Roomba is not a toy. Do not sit or stand on this device. Small children and pets
should be supervised if Roomba is in use.
• Keep loose clothing, hair, fingers, feet and all parts of the body away from
Brushes and moving parts.
• Do not use this device to pick up anything that is burning or smoking, such as
cigarettes, matches, or hot ashes.
• Do not use this device to pick up flammable or combustible liquids such as gasoline.
• Do not use this device without the Particle Bin in place. See page 9 for proper
installation of the Particle Bin.
• If the room to be cleaned contains a balcony, a physical barrier should be used to
prevent access to the balcony and ensure safe operation.
• Always remove the Battery Pack before long-term storage or transportation.
ROOMBA BATTERY PACK AND CHARGING
• Operate your Roomba only from the type of power source indicated on the marking label.
If you are not sure of the type of power supplied to your home, consult your appliance
dealer or local power company.
• Charge using standard US (120V AC) outlet only. Product may not be used with any type
of power converter. Any such use will immediately void the Warranty.
• Use only a Battery Charger supplied by the manufacturer to recharge this device.
• Do not use a Battery Charger with a damaged cord or plug.
• Charge indoors only.
• Never handle Plug, Power Cord or Battery Charger with wet hands.
• Always remove Battery Pack and disconnect Roomba from Battery Charger before
cleaning Roomba.
2
Sofa
Lamp
Table
Start
Stairs
Figure 1: A typical Roomba cleaning pattern.
Roomba Standard Charger
UL Approved
Class 2 Transformer
Input: 120VAC 60Hz 0.3A
Output: 24VDC 500mA
This device complies with Part 15 of the FCC rules.
Operation is subject to the following conditions:
(1) this device may not cause harmful interference, and
(2) this device must accept any interference received, including interference
that may cause undesired operation.
3
Getting Started
FloorVac Description
Unpacking the Box
Remove the contents of the Roomba box. You will have a Roomba Intelligent FloorVac
packed for shipping, and a styrofoam box containing the following:
1. Rechargeable NiMH Battery Pack
2. Battery Charger with AC Adapter (2 pieces)
3. Virtual Wall Unit – requires two (2) D-size batteries (not included)
4. Two (2) Replacement Filters
5. Owner’s Manual (the document you’re reading)
6. Insert sheet entitled “Roomba Care Hints” (not shown in Figure 2)
Remove your Roomba from its protective plastic bag and turn it upside down, so the
wheels are facing up. You will notice a protective cardboard sheath enclosing the
Edge-Cleaning Side Brush. Carefully disengage the cardboard sheath from the black,
flexible Side Brush, being careful to protect the side brush from damage. Turn your
Roomba back over.
Once you have unpacked your Roomba, check to make sure that you have all the
parts shown here:
Your Roomba was designed and engineered using the latest technology and includes the
following special features:
Figure 3a: Roomba Top View.
•Easy To Grab Handle
•Room Confinement Sensor
TM
•Battery Life
Indicator
•Removable
Particle Bin
•Wall Following
Adjustment
•Filter Door
located on
underside of
Particle Bin
(not viewable from top)
•Edge-Cleaning
Side Brush
Figure 2: Contents of package.
•Room Size
Selector
Buttons
TM
•Battery Charger Socket
Figure 3b: Roomba Bottom
View – Cleaning Side Up.
•Main Power Switch
•Rechargeable NiMH Battery Pack
Roomba Intelligent FloorVac
Virtual Wall Unit
Rechargeable NiMH
Battery Pack
•Brush
Release
Screw
Two Replacement Filters
•Agitator Brushes
Pick Up Large
Debris
•Wire Guards
•Vacuum Inlet Lid
•Filter Door
•Vacuum Picks Up
Fine Debris
Battery Charger with AC Adapter (two pieces)
4
5
Installing the Battery Pack
Battery Life Indicator
1. Turn Roomba’s Main Power Switch to the Off position.
2. If you have used Roomba before, make sure that the Particle Bin is empty, then
place Roomba upside down (with Cleaning Brushes showing) on a flat surface.
3. Guide the Battery Pack into the Battery Compartment using your index fingers as
shown in Figure 4.
4. The Battery Pack will click into place
when properly seated in Roomba.
5. Additional Battery Packs may be purchased.
Please visit www.RoombaVac.com to
purchase online, or for a list of retailers.
The Battery Life Indicator is functional only when Roomba’s Main Power Switch is turned on.
Turn Roomba’s Main Power Switch on to activate the Battery Life Indicator. The Indicator
will flash green in stand-by mode (battery power is not sensed) until a Room Size Button
is pressed to start Roomba in a cleaning cycle (see Starting Roomba on Page 7). Once
Roomba starts cleaning, the Battery Life indicator stops flashing, and displays battery
life according to the following chart.
Color of Battery Life Indicator Battery Status
Note that no light is
illuminated on Roomba
when it is charging.
Removing the Battery Pack
1. Repeat Steps 1 and 2 from above.
2. Place your index fingers under the Guide
Tabs on the Battery Pack, then pull upward
to release the Battery Pack.
Charging the Battery Pack
Figure 4: Installing
Please note that before first use of Roomba,
Roomba’s Battery Pack.
you must charge the Battery Pack.
1. Turn Main Power Switch to the Off position. Make sure that the Battery Pack is
inserted in Roomba (see Installing the Battery Pack, above).
2. Connect the Battery Charger to the Battery Charger AC Adapter, and insert the Battery
Charger’s Charge Plug into Roomba’s Battery Charger Socket as shown in Figure 5a.
Please note that the Charge Plug will only fully insert into the socket in the proper
orientation, as shown in figure 5b.
3. The Charge Indicator Light on the Battery Charger should illuminate. If this fails to
occur, remove and reinstall the Battery Pack. Note that no light is illuminated on
Roomba itself when it is charging.
4. The Charge Indicator Light will turn off when the Battery Pack is fully charged
(approximately twelve hours for a fully discharged Battery Pack).
Green
Fully Charged
Amber
Partially Charged
Red
Almost Discharged
Flashing Red
Fully Discharged
BATTERY LIFE NOTES:
1. Roomba can run between about 60 minutes (on medium pile carpet) to about 90
minutes (on hard floor surfaces) on one full charge. In other words, Roomba can
clean 2-3 medium-sized rooms on a single charge.
2. If cared for properly, the rechargeable Battery Pack should last for a long time.
Like all rechargeable batteries, eventually the Battery Pack will wear out and
should be replaced. When this happens, the Battery Pack may be disposed of in
the regular trash.
3. Additional Battery Packs may be purchased, and a Rapid Charger that charges
a battery in about two and a half hours is available as of February 2003. Contact your
nearest Roomba retailer or visit www.RoombaVac.com for online purchase options
and more purchase information.
Using Your Roomba
Setting Up the Room for Cleaning
1. For optimal cleaning performance, clear your floor of objects just as you would
before using a regular vacuum cleaner. Do not leave the following items on the floor:
clothing, loose papers, pull cords for blinds or curtains, power cords, or any fragile
items. In addition, because Roomba contacts walls, furniture and other objects as it
cleans, please remove any items that may be pushed and knocked over by light
contact from Roomba.
Avoid using Roomba on carpets with tassels or fringe edges.
Figure 5a: The Battery Charger is
connected to the Battery Charger AC
Adapter, and then inserted into
Roomba’s Charge Socket.
Not recommended for use on shag or deep-pile carpets.
2. Roomba is designed to clean one room at a time. Confine Roomba to the room you
want cleaned by closing all doors and use the Virtual Wall Unit to block all open door
ways. See page 9 for instructions on using the Virtual Wall Unit.
Figure 5b: The Charge Plug only
inserts completely into Roomba’s
Charge Socket in the orientation
shown. Press firmly to fully seat
Charge Plug.
6
Plug easily pushes
all the way in
Observe Roomba the first time it cleans a room to confirm it does not get
wedged under or stuck on top of uneven surfaces.
No metal
prongs exposed
Plug clicks in
Roomba automatically senses stairs and turns away from them. However, if
the room to be cleaned contains a balcony, a physical barrier should be used
to prevent access to the ledge and ensure safe operation.
7
Starting Roomba
1. Always empty the Particle Bin before use (a simple two-step process; see
Emptying the Particle Bin on Page 10).
2. Place Roomba on the floor in the middle of an open area in the room.
3. Turn on the Main Power Switch, located on the right side of the device (see Figure 3a).
4. Select your room size according to the chart. Select For Rooms Measuring Approximately
Press the S, M, or L Button (these are the
s
10' x 12'
Room Size Buttons).
Roomba will play a short start up tune and then
start cleaning. Note: Powering up Roomba off the
m
14' x 16'
l
15' x 20'
ground may prevent the unit from operating until you
place it on the ground, turn the power off, then on again.
5. Once you start Roomba, you only need to supervise it the first time it cleans a room.
Identify areas where it gets stuck, then move problem objects out of the room or modify
them or block them with the Virtual Wall Unit provided. Please refer to the
illustration entitled “Roomba Care Hints” on Pages 12-13, as well as Troubleshooting
Tips on Page 16 to help identify and easily fix problem areas. After this first use, there is
no need to supervise the device unless you are operating it around small children or pets.
6. When Roomba is finished cleaning it will stop and play a cheerful tone sequence. It will
flash its buttons and periodically beep for five minutes to remind you that it is done,
then turn itself off.
To Operate Virtual Wall Unit
1. Press the Virtual Wall Unit’s Power Button to turn the unit on. The Power Light will
illuminate.
2. Move the Range Selector Switch to the room opening size you are blocking.
The range numbers shown are in feet.
3. Place the Virtual Wall Unit on the floor at either edge of the doorway or by the wall.
Make sure that the Unit’s Beam Emitter points across the opening to ensure Roomba
does not cross the invisible beam.
4. The Virtual Wall Unit automatically turns off after an hour, or you can press the Unit’s
Power Button again to turn off.
Roomba
bouncing
off beam
13+
p to
ft.
U
Stopping Roomba
Roomba’s cleaning cycle can either be paused or stopped at any time.
1. To pause Roomba while it is cleaning, simply pick it up by its handle. The Room Size
Button previously selected will flash. To unpause Roomba and continue the current
cleaning cycle, simply press the flashing Room Size Button.
2. To stop Roomba and clear the current cleaning cycle, press any one of the Room Size
Buttons while it is cleaning, or turn Roomba’s Power Switch off and on again. Roomba is
now ready to start a fresh cleaning cycle. Press your choice of Room Size Button to start
cleaning (making sure the Particle Bin is empty).
Room Confinement (Using Your Virtual Wall Unit)
The Virtual Wall Unit keeps Roomba in the room or area you want cleaned. It blocks 13+foot-wide open doorways. Use the Virtual Wall Unit to block open doorways or clean one
portion of a large room.
Battery Installation of the Virtual Wall Unit
1. Open the Battery Door located on the bottom of the unit by first loosening the screw.
2. Insert 2 new “D” size alkaline batteries (not included) by following the “+” and “-”symbols.
Replace the Caution:
Figure 6a: Close-up of 3.
the Virtual Wall Unit. Battery Door and
To ensure proper function and avoid battery leakage:
1. Do not mix old and new batteries.
•Power Button
tighten the screw.
•Power
•Range
2. Do not mix alkaline, standard or rechargeable batteries.
Light
•Beam
Emitter
Selector
Switch
8
•Battery Door
3. Batteries should be installed by an adult.
4. Non-rechargeable batteries are not to be recharged.
5. Rechargeable batteries are to be removed from
the product before being charged.
6. Only batteries of the same or equivalent type as
recommended are to be used.
7. Batteries are to be inserted with the correct polarity.
8. Exhausted or dead batteries are to be removed from
the product.
9. The supply terminals are not to be short circuited.
10. Always use alkaline batteries.
11. Remove batteries before storing.
Shape of beam
Figure 6b: To block an opening, place the Virtual Wall Unit on the floor with
the Beam Emitter aimed across the opening. For best results, place the Virtual
Wall Unit next to doorway (as shown). Point arrow across open doorway.
Additional Virtual Wall Units can be used to block off other sections of a room,
additional doorways etc. Contact your nearest Roomba retailer for availability, or visit
www. RoombaVac.com for online purchase options, and for more purchase information.
Caring for Your Roomba
Your Roomba requires very little maintenance; however, before each use, you should
empty Roomba’s Particle Bin (2 steps). The Vacuum Inlet (see Figure 3b) and Cleaning
Brushes must also be removed and checked after every 10 floor cleanings – and,
if necessary, cleaned.
If there is pet hair or long hair in your home, you may need to remove hair and
other debris from the Cleaning brushes more frequently. If so, check the
Cleaning Brushes (including their ends, or axles) every five floor cleanings to
prevent build-up of hair, which can degrade cleaning performance. The Cleaning
Brush axles cannot be checked without removing the brushes from Roomba.
Note: Caring for the Cleaning Brushes involves completely removing them
(see instructions on pages 14-15) to examine and clean the Brush Axles, as
well as the Brushes themselves.
9
Emptying the Particle Bin
Replacing the Air Filter
Emptying Roomba’s Particle Bin is a two-step process.
Be sure to empty the Particle Bin before each use.
The Air Filter (located underneath Roomba's Particle Bin) needs to be replaced if it
becomes punctured or if you notice a decline in the cleaning performance of Roomba.
Two spare Replacement Filters are included with Roomba; additional Replacement
Filters are available for purchase in packs of three. Visit www.RoombaVac.com for
more purchase information, or contact your nearest Roomba retailer for availability.
Step 1: Emptying the Main Bin
1. Turn Roomba’s Main Power Switch to the Off position.
2. Press down on the Particle Bin’s Release Tab while simultaneously
pulling the Particle Bin straight back. (Figure 7a-b).
3. Empty the Particle Bin into a trash receptacle.
Step 2: Emptying the Particle Bin’s Filter Chamber
1. Flip the Particle Bin over to access the Filter Door.
2. Release the small Tab on the Filter Door and
pull the Filter Door upward (Figure 8).
3. Empty debris from the Filter Chamber
into a trash receptacle.
4. To reinstall the Filter Door, slide the
Filter Door into place (Figure 9a).
The Filter Door will click when it
reattaches itself to the Particle Bin
Filter Door
(Figure 9b).
5. To reinstall the Particle Bin, slide it
Figure 7a-b: Emptying Roomba’s Particle Bin.
Press the Release Tab (Figure 7a) and Pull the
back into Roomba. The Particle Bin
Particle Bin Out (Figure 7b). The Filter Door is
will click when it is properly seated.
1. Turn Roomba’s Main Power Switch to the Off position.
2. Press down on the Particle Bin’s Release Tab while simultaneously pulling
the Particle Bin straight back (see Figure 7a-b).
3. Flip the Particle Bin over to access the Filter Door.
4. Release the small Tab on the Filter Door and pull the Filter Door upward. See Figure 8.
5. Unclip the old Air Filter from the Filter Door Frame (Figure 10a).
6. Slide the new Air Filter into the grooves on the Filter Door Frame (Figure 10b).
7. Click the new Filter into the Filter Door Frame as shown in Figure 10c.
8. To reinstall the Filter Door, slide the Filter Door into place (Figure 9a).
The Filter Door will click when it reattaches itself to the Particle Bin (Figure 9b).
CLICK!
on the underside of the Particle Bin.
Figure 8: Accessing the Filter Chamber.
Open the Filter Door on the bottom of the
Particle Bin by releasing the small Tab on
the Filter Door as shown and pulling the Tab
upward. Clean the debris from this chamber
each time you empty the Particle Bin.
Figure 10a-c: Snap out old filter from Filter Door Frame (Figure 10a). Slide new
Filter into grooves on Filter Door Frame (Figure 10b). Snap new Filter into Filter
Door Frame as shown (Figure 10c).
Cleaning the Vacuum Inlet
Figure 9a-b: Reinstalling the Filter Door.
Glide the Filter Door into grooves (Figure
9a), and snap the Filter Door into place
(Figure 9b).
CLICK!
10
NOTE: Always carry Roomba by its handle and never tilt it
forward, as debris may spill out of the particle bin.
Over time, debris will accumulate in the Vacuum Inlet.
Empty the Vacuum Inlet every 10 floor cleanings at minimum
to keep air flowing through it, especially if you notice a
decline in Roomba’s cleaning performance.
1. Turn Roomba’s Main Power Switch to the Off
position.
2. Place Roomba upside down (cleaning surface
up) on a flat surface.
3. Insert finger into the Release Tab of the Vacuum Inlet
Lid and pull upward to remove the Lid (Figure 11).
4. Shake the debris into a trash receptacle.
Vacuum Inlet Lid
5. Turn the Vacuum Impeller, the fan-shaped
mechanism on the left side of the Vacuum Inlet,
with your finger to make sure that it spins freely.
6. Replace the Vacuum Inlet Lid, pressing down on all
four white circles on the Lid to ensure complete re-installation.
Figure 11: Removing
the Vacuum Inlet Lid.
11
12
13
Cleaning the Main Brushes
It is important that you regularly remove and clean the Brushes of your Roomba. Debris
can accumulate around the Brushes and the brush ends, or axles, causing a decrease in
cleaning ability and potentially damaging the unit.
In most households it’s a good idea to clean the Brushes after every ten floor cleanings.
In houses with pets or long hair, clean the Brushes after every five floor cleanings. Note that
the Cleaning Brush axles cannot be checked without removing the Brushes from Roomba. It
is a simple process that you will master quickly with a little practice.
4. Pull the Brush Coupler off the end of the Brushes, then pull the Brushes to the
right and up, free of the device (Figure 12d).
5. Clean any hair or other debris off the
Brushes.
6. Clean any debris from around the
Brush ends, or axles (Figure 13).
Figure 13: Clean and remove any debris
built up or wound around the ends and
metal axles of both Brushes.
Reassembling the Brushes
1. Put the Self-Adjusting Cleaning Deck back together by inserting the square ends of
the two Brushes into the square sockets in the Cleaning Deck.
2. Insert the other ends of the Brushes into the small holes in the Brush Coupler.
3. Lower the Brush Coupler into its slot and screw in the screw.
4. Swing the Wire Guards back in place and snap them down into their slots.
Figure 12a-b: Unlatch the Wire Guards by pushing each of the two Release Tabs
forward (away from you) while pushing down on the Wire Guards to elongate them,
swinging the Wire Guards up and over the tabs. Once the Wire Guard has been freed
from both Release Tabs, it can be swung up and away, exposing the Brushes.
1. Turn Roomba’s Main Power Switch off and place Roomba upside down
(cleaning surface up) on a flat surface, with the Front Bumper facing away from you.
2. Unlatch the Wire Guards that cover the Brushes by pushing the Release Tab backward
(see Figure 12a). Pull the rear of the hinged Wire Guards up and out of their slots, and
then swing them up toward the front of the device (Figure 12b).
Maintaining the Edge-Cleaning Side Brush
Periodically check the Edge-Cleaning Side Brush by spinning it to ensure debris has
not built up underneath it. If it seems to be obstructed, remove and clean the
Edge-Cleaning Side Brush.
1. Turn Roomba off and empty the Particle Bin. Turn Roomba over so the cleaning
surface is up. Place it on a flat surface.
2. Turn the Edge-Cleaning Side Brush so the Screw Head can be accessed (see Figure 14).
Point the screw head towards Roomba’s bumper, as shown in the image.
3. Using a small Phillips-head screwdriver, unscrew the holding screw.
Place the screw aside.
4. Pull the Side Brush up and off of Roomba.
5. Clean out any hair or other debris that may have been caught under the Brush
or on the Side Brush Shaft.
6. Push the Side Brush back onto the Side Brush Shaft. Screw the holding screw securely
into the Edge-Cleaning Side Brush, being careful not to over tighten.
Brush Coupler
• Side Brush
Figure 12c-d: Remove the screw on the Self-Adjusting Cleaning Deck and pull out
the plastic Brush Coupler and the two Brushes.
3. Unscrew the screw located on the right side of the Self-Adjusting Cleaning Deck with a
Phillips-head screwdriver (Figure 12c). Remove the screw and pull up the Brush Coupler
(see inset in Figure 12d), the component that holds the Brushes in place on the right side
of the unit. The Brushes will come up with the Brush Coupler.
14
Figure 14: Unscrew the holding screw on
the Spinning Side Brush as shown to remove it.
15
My Roomba turns on, beeps and shuts off
1. Make sure Roomba is fully charged and the Battery Pack is properly seated.
2. If Roomba is charged, then empty the Particle Bin (see Emptying the Particle Bin on
Page 10) and follow the instructions for removing and cleaning the Main Brushes (see
Cleaning the Main Brushes on Page 14). Pay special attention to the Brush ends, or axles.
My Roomba is not working or there has been a decrease in the cleaning performance.
1. Ensure that the Battery Pack is properly seated and charged.
2. Check that the Particle Bin, Filter Chamber, and Vacuum Inlet are empty, and that the
Vacuum Impeller, the fan-shaped mechanism on the left side of the Vacuum Inlet, spins
freely (see the entire section entitled Caring for Your Roomba, beginning on Page 9).
3. While you are examining the Filter Chamber, check the Air Filter (attached to the Filter
Door) to make sure it is not clogged or damaged.
4. Remove and examine the Brushes and their ends (axles) to make sure that there is
nothing wound around the Brushes (see Cleaning the Main Brushes on Page 14 as well as
Maintaining the Edge-Cleaning Side Brush on Page 15). Also check to see there is nothing
wound around the Wheels or Wheel Axles.
My Roomba Gets Stuck
Your Roomba may occasionally get stuck, especially in rooms that it has not cleaned before.
If it does get stuck, Roomba will try to free itself by turning in different directions. If it
cannot free itself Roomba will flash its Room Size Buttons and periodically beep for five
minutes to let you know it is stuck, before shutting off to conserve power.
Your Roomba might get stuck for several reasons.
1. It is wedged or pinned between or under narrowly spaced objects.
2. A cord, string, rug fringe or carpet tassel is wound around its Brushes or Wheels.
3. One of the Wheels is no longer in contact with the ground.
4. Roomba bumps into objects and repositions them in such a way that an exit path
no longer exists.
Move or block any object that Roomba gets stuck on or under. Please refer to the
illustration entitled “Roomba Care Hints” on Pages 12-13 to help identify and easily fix these
problem areas.
Once the problem areas have been amended, begin a new cleaning cycle by turning
the Main Power Switch off then on again. Select your room size to start cleaning by pressing
the S, M, or L Room Size Button.
Note that no lights will illuminate on Roomba during charging.
My Roomba moves too close to or far from my walls
1. If the Spinning Side Brush does not clean close enough to the wall, use a pen to push the
Adjustment Tab toward the rear of the Bumper (see Figure 15). This will make Roomba
follow closer to walls.
2. If the Spinning Side Brush is bumping into the wall, use a pen to push the Adjustment Tab
toward the center of the Bumper. This will make Roomba follow further away from walls.
TM
Troubleshooting Tips
Roomba Battery Pack will not charge
1. Ensure that the AC Adapter is plugged into a working outlet. Try several outlets to be sure.
2. Ensure that the AC Adapter is fully plugged into the Charger. No metal (or almost none)
should be visible once the plug is fully inserted. See Charging the Battery Pack on
Page 6 for more tips on proper insertion.
3. Ensure that the Charge Plug is fully inserted into Roomba. The Charge Plug will only fit
completely into the socket in the proper orientation (see Figure 5b).
4. Ensure that the Battery Pack is properly inserted. To be sure, remove it, inspect the
contacts both in the Battery Pack and in Roomba to make sure that they are not blocked
by dirt, and reinsert the Battery Pack. It should click into place on each side.
5. The Charge Indicator Light on the charger should illuminate. If it does not illuminate
check all the connections. The Charge Indicator Light will turn off when the Battery Pack
is fully charged.
TM
Reference Information
Figure 15: Using a pen to
adjust how close or far away
Roomba will follow walls.
I can’t find the answer to my question in the Manual.
1. Additional Troubleshooting Tips may be found by visiting the Support section of
www.Roombavac.com.
2. Send email to [email protected], or call the toll-free Customer Support Line
at 1-877-855-8593.
Part of my Roomba has broken
Please call Roomba Customer Support at 1-877-855-8593.
My Virtual Wall Unit is not working
1. Check that new batteries are installed.
2. Make sure the Beam Emitter is pointed across the opening you want to block (see Figure 6b).
3. If that does not work, turn the Virtual Wall Unit’s Range Selector Switch up to the
maximum setting for large openings.
4. Some large openings require that more than one Virtual Wall Unit be used. Purchase
extra Virtual Wall Units by going to your nearest Roomba retailer, or visiting
www.RoombaVac.com for online purchase options, and for more purchase information.
16
17
Frequently Asked Questions
Q: Why doesn’t my Roomba clean my floor in straight lines?
A: Roomba uses an algorithm-based cleaning pattern to clean your home most
efficiently. When Roomba starts cleaning it travels around the floor in a spiral pattern
(see Figure 1 on Page 3). Its Non-Marring Bumper will contact a wall, or it may try to
find a wall after spiraling for a while. Roomba follows the wall for a short period of time,
utilizing its Spinning Side Brush to move particles away from the wall and into the
Vacuum’s path. After cleaning along a portion of the wall or other object, Roomba
criss-crosses the room in straight lines. Roomba repeats this cleaning pattern until its
cleaning time has elapsed. This sophisticated navigation ensures that Roomba will clean
your whole room as thoroughly as possible.
Q: Are pets and children safe around Roomba?
A: Roomba has been designed with a number of safety features, including
automatically shutting off when it is picked up or gets stuck. Children and pets should
always be supervised around Roomba for optimum safety and cleaning performance.
Q: Does Roomba clean corners and along the walls?
A: Roomba has a Spinning Side Brush that cleans next to walls, most corners and
other tough to reach places.
Q: Will it go under kickboards, beds, and furniture?
A: Roomba has been designed to fit under the kickboards in your kitchen. If your bed
or furniture is more than 4” off the floor, Roomba will happily clean underneath.
Q: What powers Roomba?
A: Roomba is powered by a NiMH Rechargeable Battery Pack.
Q: How much suction power does Roomba have?
A: Roomba uses a unique, three-stage cleaning system. Two counter-rotating Brushes
sweep up larger particles, while a small, extremely efficient vacuum sucks up the smaller
particles. The Spinning Side Brush sweeps debris from corners and edges of the room into
Roomba’s main cleaning path. This allows Roomba to get impressive cleaning performance
using only 30 Watts, much less power than is required by traditional upright vacuums.
Q: How long will the Battery Pack’s charge last?
A: The life of a fully-charged Battery Pack is dependent on the floor surface to be
cleaned. A single charge can last from about 60 minutes (on medium pile carpet) to
about 90 minutes (on hard floor surfaces).
Q: How many rooms will Roomba clean before the Battery Pack needs to be recharged?
A: It depends on the floor surface to be cleaned. For typical operation, Roomba cleans
three 14’ x 16’ medium-size rooms.
Q: How long does it take to recharge the Battery Pack?
A: The Battery Charger that comes with Roomba takes up to 12 hours to recharge the
Battery Pack. As of February 2003, you can also purchase the Rapid Charger accessory that
recharges the Battery Pack within about two and a half hours. Contact your nearest
Roomba retailer for availability, or visit www.RoombaVac.com for online purchase options
and more purchase information.
18
Q: Where can I purchase additional Battery Packs?
A: You can purchase additional Battery Packs by contacting your nearest Roomba
retailer, or by visiting www.RoombaVac.com for online purchase options and
more purchase information.
Q: How does the Virtual Wall Unit work?
A: The Virtual Wall Unit is used to block open doorways and confine Roomba in a room.
The Unit can also be used to divide a large room and force Roomba to clean just one
side of the room. The Virtual Wall Unit sends a harmless, invisible beam across the
opening, confining Roomba to the area where you want it.
Q: Where can I purchase additional Virtual Wall Units?
A: You can purchase additional Virtual Wall Units by contacting your nearest Roomba
retailer, or by visiting www.RoombaVac.com for online purchase options and more
purchase information.
Q: Will the Particle Bin need to be emptied? Does the Filter need to be cleaned?
How often?
A: Debris from the Particle Bin (which includes the Air Filter) should be emptied after
each use. See Caring for Your Roomba on Page 9 for more information.
Q: How can I get extra Replacement Filters?
A: The Filter needs to be replaced if it becomes punctured or if you notice a decline in
the cleaning performance of Roomba. Two spare Replacement Filters are included with
Roomba; additional Replacement Filters are available for purchase in packs of three.
Visit www.RoombaVac.com for more purchase information, or contact your nearest
Roomba retailer for availability.
Q: Will Roomba clean all floor surfaces?
A: Roomba cleans hardwood, linoleum, tile, and low- to medium-pile rugs. The device is
not designed to operate on deep-pile carpets or carpets with tassels or fringe.
Q: Do I need to change the floor adjustment when changing floor surfaces?
A: Roomba’s Self-Adjusting Cleaning Head automatically traverses uneven floor
transitions as it cleans carpet, hardwood, linoleum, and tile.
Q: Will Roomba sweep water from the floor?
A: No, Roomba should not be used to pick up any liquid including water.
Q: Will Roomba fall down stairs or into a step-down room?
A: Roomba automatically senses stairs and turns away from them. However, if the room
to be cleaned contains a balcony, a physical barrier should be used to prevent access to
the balcony and ensure safe operation.
Q: If Roomba gets stuck, what should I do?
A: Help Roomba get unstuck, then press the flashing Room Size Button to restart the
Cleaning Cycle. Please refer to the illustration entitled “Roomba Care Hints” on Pages
12-13, as well as Troubleshooting Tips on Page 16 for more information.
19
Q: Is Roomba safe to use when I leave my home?
A: Roomba can operate unattended, so long as small children and pets are not present
to interfere with Roomba’s operation, and loose objects have been picked up.
Q: Does Roomba pick up pet hair?
A: Roomba picks up pet hair very effectively from carpet as well as hard surfaces. As
with most vacuums, if pet hair is an issue in your house you may need to empty the
Particle Bin and clean the Brushes more frequently to reduce the chance of clogging.
Removing and cleaning the Main Brushes after every five room cleaning is recommended in these cases. See Page 9 for instructions on Caring for Your Roomba.
HELPFUL HINT: If there is a lot of pet hair in the room (such as the first time Roomba
cleans the room), the Cleaning Head will pick up a large amount of it. If the room is
medium or large, you may want to use the "small room" setting a few times, enabling
Roomba to stop cleaning after a short period of time so you can remove the collected
pet hair. Upon completion of this process, you should be able to run Roomba on larger
room settings (i.e. for longer cleaning periods), with a reduced chance of clogging from
pet hair.
Q: Do you offer spare parts?
A: Certain spare parts are available for U.S. customers only. Please contact us with your
request. Email us at [email protected] or call toll-free 1-877-855-8593.
Q: How can I find out more about Roomba?
A: The Roomba website, www.RoombaVac.com, is full of detailed information about
the Roomba Intelligent FloorVac. You can also go to the Roomba User’s Forum to chat
with other Roomba users about their experience. To join the forum, go to:
http://groups.yahoo.com/group/roomba-users/join
Contacting Customer Support
If you cannot find the answer to your question in this Manual or on the
www.RoombaVac.com website, please send email to [email protected], or
call our toll-free Customer Support Line at 1-877-855-8593.
Limited Warranty to Original Purchaser
This Roomba brand product, as supplied and distributed by iRobot Corporation, and delivered
new, in the original carton to the original customer purchaser, is warranted by iRobot Corporation
against manufacturing defects in materials and workmanship for the qualifying limited warranty
period as follows:
NINETY (90) DAYS LABOR AND PARTS
This limited warranty begins on the original date of purchase, and is valid only on
products purchased and used in the United States, and does not include installation,
removal or reinstallation. Warranty repairs must be performed by iRobot Corporation’s
authorized service center. To receive warranty service, the original dated bill of sale
must be presented upon request as proof of purchase to iRobot Corporation’s
authorized service center. To obtain warranty service, support, or other information,
please visit our website at www.RoombaVac.com. If you do not have web access,
please call 1-877-855-8593.
iRobot Corporation will repair or replace this product, at our option and at no charge
with new or reconditioned parts, if found to be defective during the limited warranty
period specified above. To request service, the purchaser must contact iRobot
Corporation for problem determination and service procedures. iRobot Corporation
does not warrant uninterrupted or error-free operation of the product. All replaced
parts and products become the property of iRobot Corporation and must be returned
to iRobot. Replacement parts and products assume the remaining original warranty, or
sixty (60) days, whichever is longer.
This limited warranty covers manufacturing defects in materials and workmanship
encountered in normal, and, except to the extent otherwise expressly provided in this
statement, non-commercial use of this product and shall not apply to the following,
including, but not limited to: damage which occurs in shipment; applications and uses
for which this product was not intended; failures or problems which are caused by
products or equipment not supplied by iRobot Corporation; accidents, misuse, abuse,
neglect, misapplication, fire, water, lightning or other acts of nature; incorrect electrical line voltage, fluctuations or surges; damage caused by improper installation; product alteration or modification; improper or unauthorized repair; exterior finish or cosmetic damage; failure to follow operating instructions, customer adjustments, maintenance and environmental instructions that are covered and prescribed in the instruction book; use of non-iRobot or unauthorized parts, supplies, accessories or equipment which damage this product or result in service problems; failures or problems
due to incompatibility with other equipment.
THERE ARE NO EXPRESS WARRANTIES OTHER THAN THOSE LISTED AND DESCRIBED
ABOVE, AND NO WARRANTIES WHETHER EXPRESS OR IMPLIED, INCLUDING, BUT NOT
LIMITED TO, ANY IMPLIED WARRANTIES OF MERCHANTABILITY OR FITNESS FOR A
PARTICULAR PURPOSE, SHALL APPLY AFTER THE EXPRESS WARRANTY PERIOD STATED
Continued on next page…
20
21
ABOVE, AND NO OTHER EXPRESS WARRANTY OR GUARANTEE GIVEN BY ANY PERSON,
FIRM OR CORPORATION WITH RESPECT TO THIS PRODUCT SHALL BE BINDING ON
IROBOT CORPORATION. IROBOT CORPORATION SHALL NOT BE LIABLE FOR LOSS OF
REVENUE OR PROFITS, FAILURE TO REALIZE SAVINGS OR OTHER BENEFITS, OR ANY
OTHER SPECIAL, INCIDENTAL OR CONSEQUENTIAL DAMAGES CAUSED BY THE USE,
MISUSE OR INABILITY TO USE THIS PRODUCT, REGARDLESS OF THE LEGAL THEORY
ON WHICH THE CLAIM IS BASED, AND EVEN IF IROBOT HAS BEEN ADVISED OF THE
POSSIBILITY OF SUCH DAMAGES. NOR SHALL RECOVERY OF ANY KIND AGAINST
IROBOT CORPORATION BE GREATER IN AMOUNT THAN THE PURCHASE PRICE OF THE
PRODUCT SOLD BY IROBOT CORPORATION AND CAUSING THE ALLEGED DAMAGE.
WITHOUT LIMITING THE FOREGOING, PURCHASER ASSUMES ALL RISK AND LIABILITY
FOR LOSS, DAMAGE OR INJURY TO PURCHASER AND PURCHASER’S PROPERTY AND TO
OTHERS AND THEIR PROPERTY ARISING OUT OF THE USE, MISUSE OR INABILITY TO
USE THIS PRODUCT SOLD BY IROBOT CORPORATION NOT CAUSED DIRECTLY BY THE
GROSS NEGLIGENCE OF IROBOT CORPORATION. THIS LIMITED WARRANTY SHALL NOT
EXTEND TO ANYONE OTHER THAN THE ORIGINAL PURCHASER OF THIS PRODUCT, IS
NONTRANSFERABLE AND STATES YOUR EXCLUSIVE REMEDY.
Roomba Accessories
The Following Accessories are available for purchase. Contact your
nearest Roomba retailer for availability, or visit www. RoombaVac.com
for online purchase options and more purchase information.
Rapid Charger
Recharges Battery Pack in about 2.5 hours!
(Available February 2003)
Part #02004
Some states do not allow limitations on how long an implied warranty lasts, or the
exclusion or limitation of incidental or consequential damages, so the above limitations
or exclusions may not apply to you. This warranty gives you specific legal rights and you
may also have other rights which vary from state to state.
Extra Battery Pack
Keep charged Battery Packs ready to go!
Part #02002
Additional Virtual Wall Unit
Close off extra large openings, or close off
more than one opening at a time!
Part #02003
Replacement Filter 3-Pack
Part #02005
22
23