1
User manual
Contents
2Introduction
3Important safety instructions
4Before use
5Features
6Connections
8Product functions
9Remote control
10 Basic operation
11Specifications
12Others
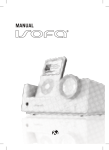
Congratulations!
Thanks for purchasing the iSofa Amplifier System. We are sure that you will enjoy all kinds of music from our
inspired quality product.
Designed and engineered by well credited team of experts, Lars&Ivan products assure to provide the best
audio quality products to our customers. So whether you like jazz, rock, hip hop, alternative,...you will find that
our products provide top quality sound. Design, quality, simplicity, and beauty are the criteria of Lars&Ivan. We
believe our designs matches perfectly with all living spaces.
The following manual contains important information about your new Lars&Ivan product. We recommend that
you read the contents of this manual before using the equipment. Please enjoy!
Your Lars&Ivan team
2
Important safety instructions
l
Read these instructions. All the safety and operating instructions should be read before this product is operated.
l
Keep these instructions. The safety and operating instructions should be retained for future reference.
l
Heed all warnings. All warnings on the appliance and in the operating instructions should be adhered to.
l
Follow all instructions. All operating and use instructions should be followed.
l
Do not use this apparatus near water. The appliance should not be used near water or moisture –for example, in a wet basement or near a swimming pool, and the like.
Clean only with dry cloth.
l
Do not block any ventilation openings. Install in accordance with the manufacture’s instructions.
l
l
Do not install near any heat sources such as radiators, heat registers, stoves, or other apparatus (including amplifiers) that produce heat.
l
Do not defeat the safety purpose of the polarized or grounding plug. A polarized plug has two blades with one wider than the other. A grounding plug has two blades and a third grounding prong. The wide blade or the third prong is provided for your safety. If the provided plug does not fit into your outlet, consult an electrician for replacement of the obsolete outlet.
Protect the power cord from being walked on or pinched particularly at the plugs, convenience receptacles, and at l
the point where they exit from the apparatus.
l
Only use attachments/accessories specified by the manufacturer.
l
Use only with the cart, stand, tripod, bracket, or table specified by the manufacturer, or sold with the apparatus. When a cart or rack is used, use caution when moving the cart/apparatus combination to avoid injury from tip-over.
l
Unplug the apparatus during lightning storms or when unused for long periods of time.
l
Refer all servicing to qualified personnel. Servicing is required when the apparatus has been damaged in any way, such as power supply cord or plug is damaged, liquid has been spilled or objects have fallen into the apparatus has been exposed to rain or moisture, does not operate normally, or has been dropped.
l
Please keep the unit in a good ventilation environment.
l
CAUTION: These servicing instructions are for use by qualified service personnel only. To reduce the risk of electric shock, do not perform any servicing other than that contained in the operating instructions unless you are qualified to do so.
l
WARNING: Please refer the information on exterior bottom enclosure for electrical and safety information before installing or operating the apparatus.
l
Protective earthing terminal. The apparatus should be connected to a mains socket outlet with a protective earthing connection.
WARNING: The battery (battery or batteries or battery pack) shall not be exposed to excessive heat such as sunshine, fire or the like.
WARNING: The mains plug is used as disconnect device, the disconnect device shall remain readily operable.
WARNING: To reduce the risk of fire or electric shock, do not expose this apparatus to rain or moisture. The apparatus shall not be exposed to dripping or splashing.
l
This lightning flash with arrowhead symbol within an equilateral triangle is intended to alert the user to the presence of non-insulated “dangerous voltage” within the product’s enclosure that may be of sufficient magnitude to constitute a risk of electric shock.
l
Warning: To reduce the risk of electric shock, do not remove cover (or back) as there are no user-serviceable parts inside. Refer servicing to qualified personnel.
l
The exclamation point within an equilateral triangle is intended to alert the user to the presence of important operating and maintenance instructions in the literature accompanying the appliance.
3
Before use
1. Equipment mains working setting
Your Lars&Ivan product has been prepared to comply with the household power and safety requirements in
your area.
l
220 - 240 V (50 Hz) for Europe.
l
240 V (50 Hz) for UK.
l
120 V (60 Hz) for North America.
For the apparatus to be used in other countries, you may need to change the fuse accordingly to the voltage
noted at the back of the unit.
2. Do not located in the following places
To ensure long-lasting use, do not located the Hybrid where:
l
Exposed to direct sunlight.
l
Near to sources of heart such as heaters.
l
Highly humid or poorly ventilated.
l
Dusty.
l
Subjected to mechanical vibrations.
l
On woobly, inclined or otherwise unstable surfaces.
l
Radiated heat is blocked such as in cramped audio racks.
3. Accessories check
Before use, check the below accessories were included in the packaging:
l
External Power supply.
l
Poser card.
l
Remote control (battery included).
l
USB cable.
l
User manual.
l
RCA cable for subwoofer out.
l
RCA cable for iPod video output.
l
3.5 mm cable for computer / mp3 player connection.
4. Warnings
l
Do not expose the equipment to rain or moisture.
l
Do not remove the cover from the equipment.
l
Do not insert anything into the equipment through the ventilation holes.
l
Do not handle the mains cord with wet hands.
l
Do not cover the ventilation with any items such as tablecloths, newspapers, curtains, etc.
l
No naked flame sources, such as lighted candles, should be placed on the equipment.
l
Make a space of about 0.2 meter around the unit.
l
No objects filled with liquids, such as vases, shall be placed on the apparatus. When the switch is in the 4
off position, the equipment is not completely switched off from mains. Back
Top
Front
Features
Big amplification in a small package
The iSofa provides 15W per channel from your iPod / MP3 player / computer. Connect your favorite speakers
to the iSofa and you will find astonishing audio quality from this small amplifier. If more bass is required, the
iSofa has a subwoofer output for all active subwoofers.
Made For iPod
The iPod Dock on top of the iSofa gives your iPod a serious base station to enjoy your music also at home. You
can also view videos from your iPod when you connect the iSofa to your television. Further it will charge your
iPod and you are even able to connect to your computer via USB for transfer data.
5
iPod compatibility
Please find below for list of iPod models that work with the iSofa.
Made for:
l
iPod touch.
l
iPod classic.
l
iPod with video.
l
iPod nano (3rd generation).
l
iPod nano (2nd generation).
l
iPod nano (1st generation).
l
iPod with color display.
l
iPod with dock connector.
l
iPod with Click Wheel.
iPod is a trademark of Apple Computer, Inc., registered in the U.S. and other countries.
Connections
6
To right speaker
To left speaker
USB connection to computer
Video Out to TV/Monitor
To Subwoofer
To AUX in
To power adapter
iPod Docking
7
Product function
D
E
B
Front panel
A
C
A. Standby button
above.
Pressing this button once switches the unit ON, and
D. Volume knob
pressing it again turns the unit to standby mode.
Turning this knob clockwise increases the volume,
B. Infrared sensor
while turning it counterclockwise decreases the
For remote control.
volume.
C. Input selector knob
E. Headphone jack
This knob selects the input source for playback. The
This jack is for connecting headphone with a
selected input source is indicated by a blue light
standard 6,3 mm stereo plug.
Back panel
F
I
J
K
L
G
F/G. Speaker output terminal
This jack is for connecting an active subwoofer.
Connect your sepeakers according the connection K. Video out jack (compatible only with iPod example.
video)
H. Power Adapter jack
This jack provides the feature to connect a TV/ This jack is for connection to power adapter
monitor to playback videos stored on your ipod.
I. 3.5 mm AUX input
L. USB jack
These jacks are for connecting to MP3 player or
Over this jack a computer can be connected for data
computer.
transfer with an iPod.
J. suB out jack
8
H
Remote control
2
1
4
3
5
6
7
8
10 12
9 11
The remote control features all main amplifier functions standby, channel select, volume and mute.
1. Standby/on button
6. Direction buttons up/down*
When the ON/OFF button is in the on position, the
Those buttons navigate through the iPod on-screen
amplifier can be switched to standby mode by
menu.
pressing the standby button on the remote control.
7. Menu button*
This will be indicated with a red light ring around the
This button will return to previous menu in the iPods
ON/OFF button. Pressing this button again will switch
menu structure (like menu button of iPod).
the amp back to on mode, indicated by a blue light.
2. Mode button
By pressing the mode button the input sources can
be selected. The selected input source is indicated
by a blue light above the input
selector knob.
3. Volume up/down button
Pressing up the volume increases, pressing down
it decreases.
4. Mute button
8. Play/pause button*
Play and pause the iPod.
9. Back/rewind button*
Pressing this button, the previous song in your
playlist will be selected. Holding the button will fast
backward your current song.
10. Next/fast forward button*
Pressing this button, the next song in your playlist will
be selected. Holding the button will fast forward
your current song.
Select this button to mute the output of the Hybrid.
11. Repeat button*
Further the remote controller can navigate through
The repeat button gives direct access to the iPod
the connected iPod on - screen menu with some extra
feature to repeat songs or playlists.
buttons, explained in detail below.
5. Enter button*
This button selects the menu items.
12. Shuffle button*
The shuffle button gives direct access to the iPod
feature to randomize playlists.
* Only iPod.
9
Basic operation
To explain how to play back input sources, representative examples are given with an CD player and an iPod.
Before starting either procedure, check the component is correctly connected to the iSofa.
Turn on iSofa
1. Press the power on/off button of the iSofa to activate power to it. Approximately 5 seconds after power has been activated, the valves are warmed up and audio output is enabled.
2. Plug your iPod into the dock on top of the iSofa.
3. Select iPod from the input selector knob.
4. Press the play/pause button on the remote control to start playback.
5. Adjust the volume level from the volume knob.
The iSofa features an universal iPod docking to connect all kind of iPod’s with 30 pin connector.
Connecting an iPod
1. Mount the iPod docking shell, provided by Apple (packaging content of your iPod) to the universal iPod docking on top of the iSofa.
2. Plug in the iPod on the dock.
3. Select the iPod by pressing the channel select button.
4. Press the play/pause button on the remote control to start playback.
Video playback
This feature is only available for iPod video.
1. Connect the video out jack to your TV video in jack.
2. Please refer to the iPod user manual for matching the output signal of the iPod with TV.
3. Please refer to the TV user manual for selecting TV video in channel.
USB data transfer
1. Plug in an iPod to the iSofa.
2. Connect the USB out jack with your computer.
3. The iPod appear in your installed iTunes software.
4. Now data transfer can be handled as if the iPod was directly connected to the computer. For more details, please check your iPod manual.
5. Before disconnecting the USB connection, please make sure to disconnected the iPod safely in 10
the iTunes software.
Specification
l
Power: Class D, 15 W x 2 Channel.
Frequency response (± 3 dB): 20 Hz ~ 22 kHz.
l
Voltage: 100 V ~ 240 V ETL / S-Mark / EU / CB approved.
l
Signal to noise: > 75 dB.
l
Max Noise: < 1 mV (under normal conditions).
l
Inputs: 3.5 mm AUX input, Apple 30 pin iPod Connector.
l
l
Outputs: 1 x speaker line output, 1 x composite video output, 1 x line output for subwoofer.
l
Distortion: < 0.1 % at 1 W / 1 % at 15 W.
l
Protections: Over temperature protection, Short circuit protection, Over current protection.
l
Remote control: iPod Controls (cursor buttons / play / pause / next song / previous song / shuffle / repeat / enter menu). Volume Control, Mute, Channel Select, On/Off (or Standby).
l
Dimensions (H x W x D): 77 x 175 x 118 mm.
l
Weight: 545 g.
11
Others
The section describes the care and maintenance tasks that must be performed to optimize the operation of
your Lars&Ivan component.
Cleaning of equipment external surfaces
The exterior finish of your unit will last indefinitely with proper care and cleaning.
Never use scouring pads, steel wool, scourging powders or harsh chemical agents (e.g., dye solution), alcohol,
thinner, benzine, insecticide or other volatile substances as these will affect the finish of the equipment.
Likewise, never use cloths containing chemical substances. If the equipment get dirty, wipe the external
surfaces with a soft, lint-free cloth.
A note about recycling
This product’s packaging materials are recyclable and can be reused.
This product and the accessories packed together are the applicable product to the directive except batteries.
Please dispose of any materials in accordance with your local recycling regulations. When discarding the unit,
comply with your local rules or regulations.
Batteries should never be thrown away or incinerated but disposed of in accordance with your local regulations
concerning chemical wastes.
Warranty
For warranty information, contact your local Lars&Ivan distributor.
Retain your purchase receipt
Your purchase receipt is your permanent record of a valuable purchase.
It should be kept in a safe place to be referred to as necessary for insurance purposes or when corresponding
with Lars&Ivan.
Important
When seeking warranty service, it is the responsibility of the consumer to establish proof and date of purchase.
Your purchase receipt or invoice is adequate for such proof.
CE marking
The iSofa is in conformity with the EMC directive and low-voltage directive.
Technical Support
Please contact your local distributor found @ http://www.lars-ivan.com
12
www.lars-ivan.com