1
Part #:
343-2460
SOLAR SHED LIGHT
USER MANUAL
THIS PRODUCT IS DESIGNED TO THE HIGHEST TECHNICAL SPECIFICATIONS AND STANDARDS. IT WILL SUPPLY YEARS OF MAINTENANCEFREE USE. PLEASE READ THESE INSTRUCTIONS THOROUGHLY PRIOR TO INSTALLATION.
KEEP THESE INSTRUCTIONS SAFE FOR FUTURE REFERENCE.
IMPORTANT INFORMATION
•
•
•
•
Avoid exposing the LED shed light to weather hazards including rain. The solar panel is weatherproof.
If using a step ladder, have a second person help install the solar panel and/or shed light.
Prior to installation, make sure all the components mentioned in the part list section (below) are present.
Never look directly into the shed light when illuminated.
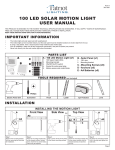
PARTS LIST
A
1
Front View
B
2
C
1
2
Back View
3
4
D
4
AA
166mm
~ 6.5 in
TOOLS REQUIRED
A - 5 LED Shed Light (x1)
1.
2.
3.
4.
Socket for solar panel plug
5 Super bright LEDs
ON/OFF Switch
Key-hole mounting slots
B - Solar Panel (x1)
1. Mounting bracket
2. 8ft. wire
C - Mounting Screws (x5)
D - AA Battery Pack (x1)
(not included)
Phillips
Electric Power Drill
Screwdriver
Pencil
Ladder
Eye Protection
Level
INSTALLATION
B
B
A
A
The solar panel (B) is fully weatherproofed and can be installed outside. Maximize sun exposure by orientating the panel towards the sun. This procedure
will optimize charging of the light’s internal battery pack. Be aware of overhanging trees or obstacles that can affect sun exposure on the panel.
The LED shed light (A) is an interior light and should only be installed in a dry area away from the effects of the weather.
Page 1
INSTALLATION (CONTINUED)
INSTALLING THE LED LIGHT
OPTION 1: INSTALLING THE LED LIGHT WITH INTEGRATED MAGNETS
Back View
A
Metallic Surface
A
166mm
~ 6.5 in
The LED shed light (A) has integrated magnets for easy and practical installation without the use of screw holes.
OPTION 2: INSTALLING THE LED LIGHT WITH MOUNTING HARDWARE
A4
Back View
Side View
A4
Wall
Wall
C
A
166mm
~ 6.5 in
A
A
Step 1
The LED shed light (A) has two pre-drilled key-hole mounting slots (A4) for permanent
installation. The two pre-drilled key-hole mounting slots are approximately 6.5 inches
apart.
Step 2
Use a power drill to drill
the holes on the chosen
mounting surface.
Step 3
Install the included screws
(C) into the chosen surface.
Step 4
Place the LED shed light (A)
over the screws, aligning the
key-hole mounting slots with
the screws. Pull downwards to
secure the light in place.
INSTALLING THE SOLAR PANEL
Front View
B
1
Side View
C
A
1
B2
B
Step 1
Step 2
Place the solar panel mounting bracket (B1) Use a power drill to drill the holes on
on the chosen surface. Using a pencil, mark the chosen mounting surface.
the three screw holes through the bracket.
Step 3
Screw the solar panel (B) to the
chosen surface with the included
screws (C).
B
A1
Step 4
You can now connect the wire (B2) from the solar panel to
the LED shed light socket (A1).
OPERATION
First Use: It is recommended that the battery pack be charged by the solar panel in direct sunlight for 14 hours before the first use.
The LED light (A) can be turned on/off by the switch (A3) located on the side. The solar shed light is now ready to be used and will run approximately
3 hours on full charge.
A
A3
Page 2
OPERATION (CONTINUED)
A
Back View
Back View
A
D
166mm
~ 6.5 in
AA
Battery
Pack
To change the battery pack in the LED light: Remove the 2 screws in the back of the light. Once the screws are removed, separate the cover from the
casing (this might have a little resistance). Once the case is removed, remove the battery pack (D) by unclipping it from the casing and replace it with
a new, fully charged battery pack. Finish by reassembling the light.
CARE AND MAINTENANCE
•
•
•
•
From time to time, ensure the plug between the solar panel and light is securely connected.
It is advisable to adjust the angle of the solar panel to optimize the exposure of the sun during the winter months.
The solar panel should be cleaned with a damp cotton cloth on a regular basis. This will ensure optimal performance and battery charging.
Utilize the same technique periodically to clean the lens of the shed light.
Never let any abrasive material come into contact with the solar panel.
TROUBLESHOOTING
PROBLEM
SOLUTIONS
Where should the solar panel be mounted?
Mount the solar panel in a position that will enable the most amount of light to be
absorbed. In the Northern Hemisphere this is usually south facing.
Does the solar panel require direct sun to charge?
The solar panel can charge the internal battery pack in direct and indirect light.
For best results, try to optimize the solar panel’s sun exposure.
Can additional or extended cable wire for the solar panel be
purchased?
At this point there are no extensions available for the cable that connects the light to the
solar panel. Any additions to the cable will void the warranty.
What type of battery does the LED shed light require to operate?
The LED shed light requires the use of a Ni-MH rechargeable AA battery pack
(made up of 3 batteries).
WARRANTY
ONE-YEAR LIMITED WARRANTY: If, during normal use, this PATRIOT LIGHTING® lighting fixture breaks or fails due to a defect in material and
workmanship within one (1) year from the date of original purchase, simply bring this lighting fixture with the original sales receipt back to your nearest
MENARDS® retail store. At its discretion, PATRIOT LIGHTING® agrees to have the product or any defective part(s) repaired or replaced with the same
or similar PATRIOT LIGHTING® product or part free of charge, within the stated warranty period, when returned by the original purchaser with original
sales receipt. This warranty; (1) excludes expendable parts including but not limited to light bulbs and batteries; (2) does not cover damage that has
resulted from abuse or misuse; and (3) does not cover any losses, labor, injuries to persons/property or costs. This warranty does give you specific legal
rights and you may have other rights, which vary from state to state.
For questions regarding this product, please call 1-888-478-6435 from Monday to Friday, 8:30 am to 5:00 pm (Eastern Standard Time).
Proof of purchase including date, and an explanation of complaint is required for warranty service.
Page 3







![[VC120-2] [MENARDS] User Guide [FINAL] 20100618](http://vs1.manualzilla.com/store/data/005701495_1-e41e7e0d778d2f045f29de9890ac0ae7-150x150.png)