1
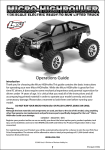
Operations Guide
Not responsible for errors. All prices subject to change without notice.
Losi, a Division of Horizon Hobby, Inc.
Introduction
Thank you for choosing the Losi LST XXL™ Monster Vehicle. This is a highly developed off-road model that features
a sophisticated computer-based radio system and does require some mechanical experience and direct adult
supervision. This guide contains the basic instructions and drawings for operating and maintaining your new LST
XXL. Please take the time to read through it completely before running the model. Your hobby dealer cannot
under any circumstances, accept a model for return or exchange that has been run.
Customer Support Contact:
Horizon Hobby, Inc.
4105 Fieldstone Road
Champaign, IL 61822
1-877-504-0233
[email protected]
Safety Precautions
THIS IS NOT A TOY! The LST XXL is a sophisticated, high-performance radio controlled model, which needs to be
operated with caution and common sense. Failure to operate this model in a safe and responsible manner could
result in personal and/or property damage. It is your responsibility to see that the instructions are followed and
precautions adhered to.
The LST XXL is not intended for use by children without direct adult supervision. Losi and Horizon Hobby shall
not be liable for any loss or damages, whether direct, indirect, special, incidental or consequential arising from the
use, misuse or abuse of this product or any product required to operate it.
* This is still a model; don’t expect it to do unrealistic stunts.
Warnings
The LST XXL is equipped with a reverse gear. Just like a real automobile you must wait for the model to
come to a complete stop before shifting between forward and reverse. Failure to do so will cause damage to
the transmission.
• Fuel is dangerous if handled carelessly. Follow all directions and precautions on the fuel container.
• Keep fuel and all chemicals out of the reach of children.
• Always keep the fuel container closed and never use around an open flame or while smoking.
• The exhaust emits poisonous carbon monoxide fumes. Always run the model in a well ventilated area and
never attempt to run it indoors.
• The top of the engine and the exhaust pipe are extremely hot during and for a time after use. Use caution not
to touch these parts, especially when refueling.
• The engine can be loud, especially when run in a confined area. If you find the noise objectionable, use ear
protection.
• This model is controlled by a radio signal that is subject to interference from sources outside your control.
Interference can cause temporary loss of control so it is advisable to always keep a safety margin in all
directions to avoid collisions.
• Always operate your model in an open area away from people and cars. The potential speed of this model can
cause injury or damage.
Required Equipment
You will need the following items to operate your new LST XXL.
• Losi® Nitrotane™ 20% Sport Fuel. (LOSF0020 or LOSF0120) This is the only fuel that supports the engine
warranty.
• Fuel bottle (LOSB5201)
• 1 C size alkaline battery for the igniter (igniter not included)
• 7.2V battery and charger for the Spin-Start (included)
• Optional: Rechargeable Glow Igniter (LOSB5221)
• Optional: Charger for receiver battery
Page 2
Tools You Will Find Handy
In addition to the tools included with the LST XXL, you will find the following both useful and in some cases
necessary.
• Small flat blade and Phillips screwdrivers
• Needle-nose pliers
• Quality .050-inch, 1/16-inch, 5/64-inch, 3/32-inch, 1.5mm and 2.5mm hex (Allen) drivers
Engine Break-In and Adjustments
Breaking in your new engine is critical for proper performance. Failure to follow the break-in procedures can cause
damage and shortened engine life. During break-in and when running, always use Losi Nitrotane 20% Sport Fuel.
Although the carburetor is preadjusted at the factory, you must be familiar with the following adjustments and
break-in procedure. If you change fuel or run in dramatically different environments (hot/cold, high/low elevation,
etc.) you will probably have to adjust at least the high-speed needle to prevent overheating and maintain proper
performance. Never, under any circumstances allow the engine to rev freely with the wheels off the ground.
Break-In Procedure
1. T he first three tanks of fuel should be run with the high and low speed needles noticeably “rich” (see
explanation below). There should be a slight sluggishness and thick smoke when accelerating with the
smoke decreasing as the model gains speed. At speed, there should still be a noticeable trail of smoke from
the exhaust pipe. Run the LST XXL on a flat surface in an oval pattern. Ease into the throttle as you accelerate
on the straight sections, easing off as you approach turns—letting the model roll through the turn before
easing back on the throttle. This will also allow you to get a feel for the steering response and handling
characteristics of the model.
2. You can also break in the engine by placing the model against a wall or fixed object and allowing the engine
to idle through two full tanks of fuel. You may have to lean the low-speed mixture (slightly) as noted below.
3. Note: The 2-speed will not shift during break-in. Do not expect the 2-speed to shift until at least the fifth or
sixth tank of fuel. If you want it to shift earlier follow the directions in “2-Speed Adjustment”.
Understanding “Rich” and “Lean” Fuel Mixture
Adjusting the carburetor is one of the most critical facets of running a nitro powered RC vehicle. The fuel mixture
is referred to as being “rich” when there is too much fuel and “lean” when there is not enough fuel for the amount
of air entering the engine. The amount of fuel entering the engine is adjusted with high- and low-speed threaded
needle valves. The low-speed needle is located in the front of the moving slide. The high-speed needle sticks
straight up at the back of the carburetor. Both feature a slotted head that is used as a reference and receptacle
for a flat blade screwdriver for adjustments. The mixture is made richer by turning the needle counterclockwise
and leaner by turning clockwise. An overly “rich” mixture will yield sluggish acceleration and performance with
thick smoke from the exhaust. A “lean” mixture can cause the engine to hesitate before accelerating or, in some
cases, to lose power momentarily after the initial acceleration. A lean mixture also makes the engine run hotter
than desired and does not provide enough lubrication for the internal engine components, causing premature
wear and damage. It is always advisable to run the engine slightly rich and never lean to avoid overheating and
possible damage.
Page 3
Base Start-up Settings from the Factory
1H
our
High-Speed Needle—23/4 turns out from bottom
Low-Speed Needle—21/2 turns out from bottom
2H
Engine Tuning
r
ou
After the engine is broken in, you can tune it for optimum performance. When
tuning, it is critical that you be cautious of overheating as severe damage and
premature wear can occur. You want to make all carburetor adjustments in
“one hour” increments.
Low-Speed Adjustment
Carb Adjustments:
The low speed adjustment affects the idle and slightly-off-idle performance.
Make all carburetor adjustments
The optimum setting allows the motor to idle for at least 8−10 seconds. The
in one-hour increments.
model should then accelerate with a slight amount of sluggishness and a
Imagine the slot in the needle is
noticeable amount of smoke. The simplest way to check this is to make sure
the hour hand on a clock. Adjust
the engine has been warmed up and let the engine idle for 8−10 seconds. If
it as though you were moving
the low-speed mixture is so far off that the engine won’t stay running that
the hour hand from one hour to
long, turn the idle stop screw clockwise, increasing the idle speed. With
the next or previous one.
the engine at idle, pinch and hold the fuel line near the carburetor, cutting
off the flow of fuel, and listen closely to the engine rpm (speed). If the lowspeed needle is set correctly, the engine speed will increase only slightly and then die. If the engine increases
several hundred rpm before stopping, the low-speed needle is too rich. Lean the mixture by turning the needle
clockwise one hour and trying again. If the engine speed does not increase but simply dies, the needle is too
lean and needs to be richened up by turning the needle counterclockwise one hour before trying again. After
you have optimized the low-speed setting, the engine will probably be idling faster. You will have to adjust the
idle stop screw counterclockwise to slow the engine idle speed down. The engine should accelerate at a constant
pace without hesitating.
Idle Speed Screw
Faster
Slower
Idle Speed
Screw
As you turn this clockwise, it
increases the carburetor opening
at idle and increases idle speed.
Turning it counterclockwise
decreases the opening and idle
speed.
Richer
Leaner
Low-Speed
Needle
High-Speed Needle
As you turn this clockwise (leaner),
less fuel enters the engine.
Turning it counterclockwise
(richer) allows more fuel to enter
the engine.
Richer
Low-Speed Needle
Leaner
As you turn this clockwise (leaner),
less fuel enters the engine.
Turning it counterclockwise
(richer) allows more fuel to enter
the engine.
High-Speed
Needle
Carb Opening
Hi-Speed Adjustment
After initial acceleration, the engine should pull at a steady rate while maintaining a two-stroke whine and a
noticeable trail of smoke. If the engine labors and is sluggish with heavy smoke, the mixture is too rich and needs
to be leaned by turning the high-speed needle clockwise in one-hour increments until it runs smoothly. If the
engine isn’t smoking or starts to die after acceleration, it is too lean and you must richen the mixture by turning
the needle counterclockwise. Don’t be confused by the sound of the engine and the actual performance. A
leaner mixture will produce an exhaust note with a higher pitch but this does not necessarily mean improved
performance, as the engine is on the verge of overheating and may incur possible damage. Ideally you want to
run the engine so that it is on the slightly rich side of optimum. This will give you the best combination of speed
and engine life. CAUTION: The engine is too lean and overheating if it accelerates rapidly with a high-pitched
scream then seems to labor, stops smoking, or loses speed. This can be caused by the terrain, atmospheric
conditions, or drastic altitude changes. To avoid permanent engine damage, immediately richen the mixture by
turning the high-speed needle counterclockwise at least “two hours” and be prepared for further adjustments
before running any more. Note: The normal operating temperature as seen on your radio screen should be in the
190 to 220° F (88 to 105° C) range.
Page 4
About Glow Plugs
The glow plug is like the ignition system in your automobile. The coiled element in the center of the plug glows
red hot when connected to a 1.5-volt battery (located in the igniter). This is what ignites the
DYN2495 Shown
fuel/air mixture when compressed in the cylinder. After the engine fires, the heat generated
by the burning fuel keeps the element hot. Common reasons for the engine not starting are
the 1.5-volt battery being weak, the glow plug being wet with fuel, or the element burned out.
Use a spare glow plug to check the igniter. If the igniter makes the element glow, remove the
plug from the engine to check it in the same manner. A wet glow plug means there is excess
fuel in the engine. To eliminate this, put a rag over the head and turn the engine over a few
seconds with your Spin-Start. Reinstall the glow plug, making sure you have the brass gasket
on it. The engine should now start.
Testing the Temperature
Although the DX3S Radio offers temperature readout, the following is a handy backup method. The ideal
operating temperature for the engine will vary with the air temperature but in general it should be in the 190 to
220° F (88 to 105° C)) range. A simple way to check the engine temperature is to put a few drops of water on the
top of the head/heat sink. It should take 3−5 seconds for the water to evaporate. If it boils away quickly the engine
is overheating and the high-speed needle needs to be richened (turned counterclockwise) at least “two hours.”
About the Radio
The Spektrum DX3S radio installed in the LST XXL is a professional level system with more than the usual features
you may find useful. Be sure to read through the included radio manual for complete instructions. The following is
a simple guide refering to items that are commonly used and/or needed to run your model.
1. Power Switch - Turns your transmitter ON and OFF
2. Steering Wheel - Controls the steering of your model
3.Steering Trim Tab - Allows you to fine-tune the neutral position
of the steering
4.Throttle Trigger - Pull back for throttle and push forward for
brakes
5.Throttle Trim Tab - Allows you to set the idle/brake of the
model
6.Transmitter Display - Digital readout shows battery voltage,
temperature, RPM/Speed and functions/settings
7.Transmitter Antenna - Transmits signal to the receiver in the
model
8.AUX - Lever for forward/reverse
Radio Operation
7
5
3
6
2
4
8
It is important that you familiarize yourself with the radio system, as
this is your direct link to the model.
• Never run your model with low receiver or transmitter batteries.
1
• Always fold the antenna to the upright position before running
your model.
• Never leave the power on or the batteries will not last long.
• Always turn the transmitter ON before turning the model ON.
• When finished running, always turn the model OFF before the transmitter.
• For best operation, it will be necessary to keep the “trims” adjusted for both the steering and throttle as noted
on the following pages.
Page 5
Steering Trim: The model should go straight without turning the steering
wheel. If not, tap the trim lever found just above and to the right of the
steering wheel in the direction needed for the model to go straight. Each
tap of the trim button will be accompanied by an audible tone indicating
a change has been made. It may take several taps to get the correct trim
setting.
Throttle Trim: The model should idle without the tires rotating when the
trigger is at its neutral position. If not, tap the trim lever found just above
and to the left of the steering wheel to reposition the throttle servo and
close the carburetor and apply more brakes. Note that additional braking
force is applied when you push the trigger forward.
Synchronizing the Steering Servos: If you remove the steering servos or
the servo savers you will probably have to make some small adjustments to ensure they are working together at
maxium capacity. With the servo savers removed and the linkaged attached,
• Turn on the radio and reset the steering trim to read “0” (which is neutral) on the radio screen.
• Loosen the setscrews securing the linkage slightly and mount the servo savers so they are timed as close as
possible like that seen in the photo.
• Use the steering trim on the transmitter to fine-tune the timing of the servo savers.
• Make sure the front tires are pointing forward and lock the steering linkage in place by tightening
the setscrews.
Telemetry Sensors
•
•
•
T he battery power of the receiver pack will automatically register on the
readout screen.
The engine temperature requires that the temperature sensor (SPM1450) be
installed around the head just above the head bolts as seen in the photo. Note:
The temperature sensor must be removed before removing the head from the
engine. There is an external plug near the radio box which will allow you to
disconnect it if you wish to remove the engine for cleaning.
The RPM/Speed sensor (SPM1452) mounts directly
below the front of the radio box. It must be kept clean
to operate correctly. There is a silver stripe on the drive
coupler (just below the sensor) that must also be kept
clean. Use only a soft brush to clean these – Do Not
Use Any Solvents at any time on these items. If the
silver stripe gets removed use one from the (SPM1512)
Telemetry RPM sticker sheet.
Maintenance
In addition to the service needs pointed out in this guide,
you should try to maintain your new LST XXL for proper performance and to prevent wear. If dirt gets in the
moving parts it can seriously hinder the performance of the model. Use compressed air, a soft paintbrush and/
or toothbrush to remove dirt and dust. Avoid using solvents, if possible, as this can acutally wash the dirt into
bearings and areas not accessible without disassembly, causing additional wear. We suggest you follow these
basic guidelines.
• Remove as much freestanding dirt and dust as noted above.
• Never leave fuel in the tank for more than a couple of hours.
• When done running for the day or longer, let the engine run out of fuel. Remove the air cleaner and pour a
little WD40 or quality after-run engine oil into the carburetor and spin the engine over a few seconds.
• If needed, clean and re-oil the air cleaner before installing it back on the model.
• Inspect the chassis for worn, broken, or binding parts and repair as necessary.
Page 6
Adjusting the Slipper
The slipper is a key component of the drivetrain that is designed to help
absorb sudden or large impacts that would otherwise stress various drivetrain
parts. You should never run the LST XXL with the slipper locked (completely
tight). The slipper can also be used as a tuning aid for extremely slick
conditions. To adjust the slipper, start by turning the 1/4-inch adjustment
nut clockwise (tighten) until it gets tight and the spring is compressed. Do
not overtighten as you will strip the nut. Now turn the adjustment nut
counterclockwise (loosen) one full turn. This should be a good overall setting.
x1
2-Speed Adjustment
Although pre-adjusted at the factory, the two-speed can be adjusted to shift
Slipper - 1 turn out
at the point that suits you best. Under normal circumstances, it should shift
slightly before the engine reaches maximum power. The actual distance traveled will vary with the gear ratio and
tune of the engine. There are two adjustment screws (see fig 1) that must be changed evenly for the two-speed
to function correctly. Turning these clockwise will make it shift later and require the engine to rev higher. Turning
them counterclockwise will make it shift earlier and require less engine speed. If you should get lost adjusting the
two-speed, start over at the factory setting by lightly bottoming out the adjustment screws and then backing
them out five full turns. The procedure for adjusting the two-speed is as follows.
• Remove the gear cover.
• Turn the spur gears until the adjustment hole is visible in the bell housing between the large and small spur
gears.
• Hold the small spur gear and, using your thumb, rotate the slipper forward until you can see the head of one
of the adjustment screws.
• Use a 5/64 Allen wrench to make your adjustment in 1/2-turn increments. Use the bent leg of the wrench as
your guide.
• Turn the slipper forward 1/2 rotation to adjust the other adjustment screw like the first.
(Remember to always adjust BOTH screws the same amount)
• Test drive the model to check the new shift point and replace the gear cover if satisfied.
• Never run your model without the gear cover, as it is dangerous and gear damage will occur!
Later
Sooner
Note:
Outer (1st) spur
gear removed for
photo
Fig 1
Always adjust BOTH adjustment screws evenly.
Turning the adjustment screws
counterclockwise makes the 2-speed
shift sooner; turning clockwise will
make it shift later.
Page 7
Replacing the 2-Speed Gears
First (Low) Gear:
After removing the outer gear cover remove the large circlip at the
outer face of the gear. Remove and replace the gear being sure to
insert the molded pins on the back of the gear with the holes in the
aluminum hub. Replace the circlip. Note: Special pliers are made that
make removal and installation of the circlip easier.
Second (High) Gear:
Remove the nut and the thrust washer assembly from
the slipper. Slide both gears off of the shaft being
careful to leave the slipper pads in the steel slipper
cage. The 2-speed clutch shoes will be inside the
bell for the high gear. Use a 1/16-inch hex wrench to
remove the three button head screws and replace
the gear. Reinstall the high gear with the clutch shoes
in the bell, the large washer, low gear assembly and
thrust washer assembly as seen in the exploded view.
Adjust per the “Adjusting the Slipper” instructions and
replace the gear cover.
Replacing the Clutch Bell
Use a 3/32” wrench (provided) to remove the
retaining screw (turn counterclockwise) while
firmly holding the flywheel with a pair of pliers.
Remove the screw, washers and clutch bell,
being careful not to lose any shims that may
be used. Remove the ball bearings and brush
any loose dirt away from the bearing faces. Put
only ONE drop of oil on the inside face (the side
facing away from the clutch shoes) near the
inner race of the bearing. Install the bearings
into the new clutch bell. Before replacing the
clutch bell, wipe out the inside with motor
spray, lacquer thinner, or a similar cleaner (do
not use fuel or oil-based solvents). Replace
the clutch bell and secure with the retaining
screw in the same manner used to remove it.
Note: do not over-tighten the screw, as it is not
necessary.
Page 8
Servicing the Differentials
The differentials should be serviced periodically. Be sure to clean and inspect all of the gears and replace if severely
worn. Always use plenty of high-quality grease (like Losi LOSA3066)on all gears. NOTE: These can also be made into
racing type viscous diffs as noted below. Always service one diff at a time and pay close attention to installing the
housing with the “TOP” marking up so it can be seen looking down on the chassis.
Fig 1.
Fig 2.
Fig 3.
Removing the Differentials
•
•
•
Remove the two screws in the bottom at the extreme end of the chassis (fig1)
Remove the four screws in the bulkhead allowing the bumper/skidplates and pin mounts to be
removed (fig 2).
Remove the diff retainers and slide the diff out (fig 3). NOTE: On the front end only you will have to remove the
lower front shock attachment screws and swing the shocks up and out of the way. On the rear end you will
need to “pop” off the rear camber links.
Differential Service
•
•
•
•
•
•
•
•
•
•
•
emove the three 5/64” cap head screws and the top of the differential
R
housing, then the diff.
Remove the four 5/64” flat head screws from the ring gear allowing it
to be removed.
Inspect the ring and pinion gears for wear; replace if necessary.
Remove the cross shafts, bevel gears, and shims for the carrier.
Clean and inspect all parts; replace as needed.
Check all ball bearings. Clean or replace as necessary.
Remove pins from outdrives. Remove outdrives, regrease and reinstall.
Lube all shafts and gears with LOSA3066 assembly grease and reassemble.
Load cross shafts with gears into the carrier with extra grease. Apply the rubber
gasket to the carrier and reinstall ring gear.
Lube ring and pinion with grease and reassemble diff into diff housing.
Reinstall into chassis with “TOP” on housing facing up.
For Viscous Differential
Instead of grease you can use silicone fluid in the differential
for a limited slip feel as desired for racing. Simply fill the diff
up to the top of the gears before replacing the ring gear.
(Be sure to reinstall the gasket). You may have to replace
the O-rings on the outdrives at the same time you change
to this type of differential if the old ones are worn. Popular
silicone fluid for your model is Losi 10,000cs (LOSA5282) and
is available from your local hobby dealer.
IMPORTANT:
Always reinstall
the thin gasket.
Page 9
Servicing the Transmission
The transmission should also be cleaned and serviced periodically. All gears and shafts should be closely
inspected for wear and replaced if necessary. Always use a high-quality grease or lubricant like LOSA99203 to
prevent premature wear and/or failure.
Removing the Transmission
1. Remove the gear cover.
2. Remove the throttle and brake linkage as well as the fwd/rev linkage.
3. Loosen the four motor mount screws (bottom of the chassis) and slide the
motor back.
4. Remove 2-speed spur gears.
5. Remove the five transmission mounting screws and lift the transmission out.
6. Remove the outdrive and ten 5/64” cap head screws. Remove the transmission
case half.
7. Regrease the gears and shafts, inspecting each for wear.
8. Replace any worn or failed gears.
14
9. Wipe out the inside of the gear case, removing any debris, old grease and
foreign matter.
10. Check all ball bearings for free movement cleaning or replacing as necessary.
11. Reinstall gears on the shafts lubing with LOSA3066 or LOSA99203 Losi Assembly Grease.
12. Reassemble the transmission lubricating liberally with LOSA3066 or similar high-grade grease.
13. Make sure the setscrews in the outdrive cups are tightened (a locking compound is highly suggested).
14. Install the transmission in the chassis; reset the gear mesh by using a small piece of paper between the
pinion and spur gears, applying pressure while retightening the engine. Reconnect all linkages and
connetions as necessary.
1
Throttle and Brake Linkage
3
5
FWD/REV Linkage
2
6
* Note:
These 4 are
*
longer
2-56 x 3/4"
Page 10
Rebuilding/Refilling the Shocks
Tools Needed
Step 1.
After removing the shock,
push up on the lower spring
cup and snap it off of the
shaft. Remove the spring.
Step 2.
Turn the shock upside down
and, using the included shock
tool, remove the black shock
cartridge/shaft assembly from
the shock body by turning it
counterclockwise.
NOTE: If you only wish to change
or fill the shock fluid, skip to step 6.
B2900
A6234
B2876
B2815
Step3.
Remove the 1/4" nut by turning it
counterclockwise. Remove the
piston and washer. Remove the
old cartridge. Put a drop of shock
oil on the shock shaft before
installing a new shock cartridge.
Be sure to
reinstall
washer
Step 4.
Install the washer onto the
shock shaft until it stops. Slide
the shock piston onto the
shaft against the washer.
Reinstall 1/4" nut and tighten
by turning it clockwise.
B2820
Hold here with needle-nose pliers
B2840
B2840
B2900
B2875
Step 5.
If you plan on completely changing
the shock fluid (suggested), dump
out the old fluid from the shock
body before reinstalling the cartridge/shaft assembly. Pull the shaft
out so that the piston is next to the
cartridge and reinstall the
assembly into the shock body;
tighten in a clockwise direction.
B2950
B2840
B2900
Step 7.
Holding the shock upright, push
the shock shaft in slowly until it
bottoms out. While holding the
shock shaft in this position,
replace the small screw and
washer in the shock top. If fluid
leaks around the threads of the
cartridge, it is probably not
tight enough.
B2900
Page 11
Step 6.
Note: If you are just refilling your
4
shocks, be sure to use
22
A5 t
S
Losi 30wt silicone
LO 30w
shock fluid (LOSA5224).
Remove the shock cap and the
small button head screw and
washer in the top of it.
Carefully fill the shock body with
fluid to the top. Move the shaft
up and down slowly to remove
bubbles. Top off with oil if needed.
Step 8.
Slide the spring over the
shock body against the
shock adjuster nut. Slide
the lower shock cup onto
the shock shaft and snap it
onto the shock end being
"
"s
app!!"
"snap!"
"snna
sure that it seats on the
mount. Reinstall the shock.
Quick Reference Guide
Initial Factory Settings
Using Nitrotane 20% Sport Fuel
Engine
x23/4
x21/2
High-Speed Needle - 23/4 turns out
Low-Speed Needle - 21/4 turns out
Transmission
x1
x5
Slipper - 1 turn out
Two-Speed - 5 turns out
Shocks
Tie Rod
2.7 in (68mm)
Steering
Losi 30wt
Shock Oil
(LOSA5224)
Page 12
M26SS Customer Support
Horizon Hobby, Inc.
4105 Fieldstone Road
Champaign, IL 61822
1-877-504-0233
Problem
Engine won't start..................................
Troubleshooting Chart
Things to Check
M26SS Customer Support
Horizon Hobby, Inc.
4105 Fieldstone Road
Champaign, IL 61822
1-877-504-0233
Remedy
Out of fuel
Spoiled or improper fuel
Glow plug not lighting
Glow igniter battery low
Engine overheated
Engine flooded
Air cleaner blocked
Exhaust blocked
Check/replace glow plug
Charge/change battery
Let cool - see "Testing the Temperature”
Clean and reoil aircleaner
Engine won't turn over.........................
Engine is flooded
Engine seized
Loosen glow plug and try again
Damaged, if will not turn over
Engine starts, then stalls.......................
Idle speed set too low
Glow plug is fouled/weak
Air bubbles in fuel line
Engine is overheated
Insufficient fuel tank pressure/blockage
See "Carburetor Adjustments"
See "About Glow Plugs"
Check for split/hole in fuel line
See "Testing the Temperature"
Clear pressure line
Engine performing poorly..................
Hi-Speed fuel mixture is too rich
Engine overheating
Leaking glow plug
Carburetor dirty or blocked
Fuel bad or contaminated
Clutch or slipper slipping
Bound up drivetrain
Engine worn out
See "Engine Tuning"
See "Engine Tuning" richen 2 hours
Replace glow plug
High-speed fuel mixture is too lean
Low-speed fuel mixture too lean
Spoiled or improper fuel
Cooling air is being blocked
Excessive load on the engine
See "Understanding Rich and Lean”
Engine overheated
High-speed mixture too lean
Low-speed mixture too rich
Air bubbles in fuel line
Glow plug fouled
See "Engine Tuning," richen 2 hours
See "Engine Tuning," richen 2 hours
See "Engine Tuning," richen 1 hour
Check fuel line for holes
Change glow plug
Glow plug fouled
High-speed mixture too rich
Low-speed mixture too lean
Change glow plug
See "Engine Tuning"
See "Engine Tuning," richen 1 hour
Fuel level is low
Idle speed set too low
Add Fuel
Increase idle speed
Low-speed mixture too rich
Low-speed mixture too lean
Idle speed too low
Clutch shoes dragging
See "Engine Tuning"
See "Engine Tuning"
Engine overheats...................................
Engine hesitates or stumbles.............
Engine stalls instantly when throttle
is fully opened from idle......................
Engine stalls while driving around
turns............................................................
Engine stalls while idling.....................
Clutch bearings failed
Engine worn out
Try fresh fuel
Clean/Adjust/Repair
Check for binds in drivetrain
Rebuild
Clean head fins
Check for binds/dirt build up
Increase idle speed
Check for broken clultch springs
Check/Clean/Replace
Rebuild
Page 13
LST XXL Parts List
SUSPENSION PARTS
LOSB2035
LOSB2102
LOSB2104
LOSB2106
LOSB2201
F/R HD Suspension Arms (pr) (XXL/LST2)......................... $12.99
Steering Bell Cranks, Shafts, & Chassis Braces (LST/2)...... $8.99
Front Spindles & Carriers (LST2/XXL).................................. $8.99
Rear Hub Carriers (LST/2/XXL)............................................ $5.99
F/R Suspension Pin Brace Set (AL) (All)............................... $7.99
CHASSIS PARTS
LOSB2250
LOSB2252
LOSB2253
LOSB2254
LOSB2257
LOSB2278
LOSB2350
LOSB2351
LOSB2361
LOSB2401
LOSB2450
SHOCKS
LOSB2815
LOSB2820
LOSB2840
LOSB2875
LOSB2876
LOSB2880
LOSB2900
LOSB2950
Chassis Side Rails - Long (XXL)..........................................$11.99
Chassis Skid Plate (LST/2)/XXL.......................................... $10.99
Top & Brace Chassis Plates (LST/2XXL)............................ $15.99
Motor Plate/Chassis Brace (LST/2/XXL)............................... $6.99
R&L Bulkheads & Hardware (LST/2/XXL)............................. $6.99
Main Chassis Plate - Long (XXL)........................................ $31.99
Radio Box & Hardware (LST/2/XXL)..................................... $8.99
Battery Mount Set (LST/2/XXL)............................................. $6.99
RPM Sensor Mount (XXL)..................................................... $2.99
F/R Bumpers & Braces (LST/2/XXL)................................... $12.99
F/R Body Mount Posts & Hardware (LST/2/XXL).................. $4.99
Shock Nut & Cap Molded (4) (LST)....................................... $9.99
Molded Shock Body (2) (AFT)..............................................$11.99
Shock Shaft (LST/2).............................................................. $5.99
Shock Cartridges & Seals (2) (LST/2)................................... $5.99
Shock Cartridge & Cap O-Rings (8) (LST/2)......................... $3.99
Assm. Molded Shock w/Spring (no oil) (AFT)..................... $22.99
Shock Hardware - All Plastic (LST/2).................................... $7.99
Shock Springs - Silver (pr) (LST/2/XXL)................................ $7.99
TRANSMISSION
LOSB3102
LOSA3103
LOSB3111
LOSB3114
LOSB3116
LOSB3117
LOSB3119
LOSB3124
LOSB3125
LOSB3127
LOSB3128
LOSB3135
LOSB3136
LOSB3138
LOSB3190
LOSB3193
LOSB4203
Transmission Case Set (LST/2).......................................... $12.99
Main Input Shaft (F/R) (LST/2/XXL)...................................... $6.99
22T Hi-only Gear & Spacer..................................................$11.99
FWD/REV Selector (LST/2/XXL)......................................... $23.99
Reverse Pinion (LST/2/XXL)............................................... $10.99
Reverse Gear (LST/2/XXL)................................................... $9.99
F/R Bevel Gear Set 16/29 (XXL)........................................... $9.99
Shift Forks (LST/2/XXL)........................................................ $3.99
Trans Drive & Selector Pin Set (LST/2)................................. $2.99
Trans Output Shaft & Spacer (LST/2)................................... $3.99
Trans Outdrive Cup Set (LST/2).......................................... $10.99
Fwd. Only Counter Shaft Set (LST/2/AFT)............................ $4.99
Fwd. Only Counter Gear 23T Ti-ni (LST/2/AFT)...................$11.99
Fwd. Only Trans Plug Set (LST/2/AFT)................................. $4.99
Gear Cover (2-Speed) (LST)................................................. $5.99
Inside Gear Cover (LST)....................................................... $6.99
FWD/REV & Brake Arms (LST/2).......................................... $3.99
CLUTCH PARTS
LOSB3301
LOSB3322
LOSB3323
LOSB3342
Flywheel, Collet & Nut (LST/2)............................................ $12.99
Clutch Spring Set (3) Silver (LST/2)...................................... $3.99
Aluminum Clutch Shoe & Spring Set (All)........................... $22.99
19T/26T One-Piece Clutch Bell-Steel (All).......................... $19.99
2-SPEED & SLIPPER PARTS
LOSB3401
LOSB3404
LOSB3410
LOSB3411
LOSB3420
LOSB3424
LOSB3450
LOSB3451
LOSB3455
2-Speed Cam & Bushings (LST/2)...................................... $19.99
2-Speed Clutch Shoes & Hardware (LST/2)......................... $3.99
2-Speed Low Gear Hub w/One-Way (LST/2/XXL).............. $26.99
2-Speed High Gear Hub w/Bearing (LST/2/XXL)................ $19.99
70T Spur (1st) Gear (LST/2/XXL).......................................... $4.99
63T Spur (2nd) Gear (LST/2/XXL)......................................... $4.99
Slipper Cage (LST/2)........................................................... $18.99
Slipper Pads & Plates (LST/2)............................................... $8.99
2-Speed/Slipper Thrust Bearing & Hardware (LST/2)........... $5.99
DRIVETRAIN PARTS
LOSB3512
LOSB3513
LOSB3520
LOSB3521
LOSB3522
LOSB3523
LOSA3532
LOSB3534
LOSB3537
LOSB3538
LOSB3539
LOSB3540
LOSB3541
LOSB3547
20mm Wheel Hex Set - Blue (4ea) (LST2/XXL).................. $19.99
Wheel Nuts for 20mm Hexes - Blue (LST2/XXL).................. $4.99
F/R Super-Duty CV Drive Shaft (pr) (LST2/XXL)................ $45.99
F/R Super-Duty CV Drive Shaft Only (LST2/XXL).............. $14.99
F/R Super-Duty CV Axle (LST2/XXL).................................... $8.99
F/R Super-Duty CV Rebuild Set (pr) (LST2/XXL)................. $8.99
Aluminum Diff Case - Blue (All)........................................... $13.99
F/R Diff Ring & Pinion Gears (All)....................................... $29.99
F/R Diff Housing (All)............................................................. $4.99
F/R Diff Bevel Gear Set (All).................................................. $8.99
F/R Diff Seal Set (2) (All)....................................................... $4.99
F/R Diff Outdrive Set (All).................................................... $10.99
F/R Diff Drive Yoke (All)......................................................... $5.99
Center CV Driveshaft Assm. - Long (XXL).......................... $16.99
LOSB3601 Brake Disks - Steel(2) (LST/2).............................................. $4.99
LOSB3603 Brake Cam (LST/2)............................................................... $3.99
LOSB3605 Brake Pads & Bracket (LST/AFT/XXL).................................. $5.99
HARDWARE
LOSA3045
LOSA4002
LOSA4003
LOSA6100
LOSA6103
LOSA6106
LOSA6107
LOSA6204
LOSA6205
LOSA6206
LOSA6210
LOSA6216
LOSA6220
LOSA6221
LOSA6227
LOSA6229
LOSA6232
LOSA6233
LOSA6234
LOSA6240
LOSA6241
LOSA6242
LOSA6244
LOSA6245
LOSA6246
LOSA6247
LOSA6250
LOSA6252
LOSA6307
LOSA6305
LOSA6321
LOSA6350
LOSA6355
LOSA6356
LOSA6907
LOSA6937
LOSA6939
LOSA6940
LOSA6941
LOSA6942
LOSA6944
LOSA8200
LOSB3951
LOSB4001
LOSB4020
LOSB4104
LOSB4111
LOSB4201
LOSB4203
LOSB4204
LOSB4250
LOSB4601
LOSB4603
Gear Cover Access Plus....................................................... $1.99
Antenna Tube & Cap............................................................. $2.99
Antenna Caps........................................................................ $1.99
1/8” E-Clips............................................................................ $1.99
3/32” E-Clips.......................................................................... $1.99
4mm E-Clips (12).................................................................. $2.99
6mm W-Clips (12).................................................................. $2.99
4-40 x 1/2” Cap Head Screw (10).......................................... $1.99
4-40 x 3/4” Cap Head Screw (10).......................................... $1.99
4-40 x 3/8 Cap Head Screw (10)........................................... $1.99
4-40 x 3/8 Flat Head Screw (10)........................................... $1.99
4-40 x 7/8” Cap Head Screw (10).......................................... $1.99
4-40 x 1/2” Flat Head screw (10)........................................... $1.99
4-40 x 5/8” Cap Head Screw (6)............................................ $1.99
4-40 Hardened Setscrew (10)............................................... $2.49
4-40 x 3/8” Button Head Screw (10)...................................... $2.49
2-56 x 1/4” Cap Head Screw (10).......................................... $4.99
4-40 x 5/8” Flat Head Screw (10).......................................... $2.99
4-40 x 1/4” Button Head Screw (10)...................................... $2.99
5-40 x 1/2” Cap Head Screw (8)............................................ $2.99
5-40 x 5/8” Cap Head Screw (8)............................................ $2.99
5-40 x 1-1/4” Cap Head Screw (4)........................................ $2.99
Kingpin Screw (LST) (8)........................................................ $2.99
4-40 x 5/16” Cap Head Screw (10)........................................ $2.99
2-56 x 5/8” Cap Head Screw (8)............................................ $3.49
2-56 x 3/4” Cap Head Screw................................................. $3.49
4 & 5mm Setscrews (4 ea).................................................... $2.99
3 x 10mm Button & Flat Head Machine Screws.................... $2.99
5-40 Muts - Lock & Hex (4 ea).............................................. $2.99
4-40 Steel Locknuts............................................................... $4.20
5mm Locknuts - R & L Thread (4 ea).................................... $4.99
#4 x 1/8” Hardened Washers................................................. $2.99
2.2 & 3.6mm Washers (6 ea)................................................. $2.49
5 & 6mm Shim Set................................................................ $2.49
5 x 8mm Shielded Ball Bearings........................................... $7.99
5 x 10mm Shielded Ball Bearings (2).................................... $5.99
6 x 10mm Shielded Ball Bearings (4).................................... $9.99
6 x 12mm Shielded Ball Bearings (4).................................... $9.99
6 x 12mm Flanged Ball Bearings (4)................................... $15.99
8 x 16mm Sealed Ball Bearings (4)....................................... $9.99
15x21x4mm Shielded Ball Bearings...................................... $7.99
Body Clips............................................................................. $1.49
Differential Shims (13mm) (LST/2/AFT)................................ $2.99
93mm Turnbuckle Set w/Ends (2) (LST)............................... $6.99
Rod Eds & Pivot Balls (8) (LST)............................................ $7.99
Pivot Pin Set (4 ea) (LST)....................................................$11.99
Spindle Bearing Spacer Set (LST/AFT)................................ $2.99
Steering Hardware Set (LST/2)............................................. $8.99
Fwd/Rev & Brake Arms (LST/2/AFT).................................... $3.99
Throttle, Brake Reverse Linkage Set (LST).......................... $6.99
Servo Saver & Mount Set (LST/2)....................................... $12.99
Tool Set (LST/AFT)................................................................ $5.99
4-Way Wrench (Steel)........................................................... $8.99
MOTOR ACCESSORIES
LOSB5002
LOSB5003
LOSB5005
LOSB5009
LOSB5020
LOSB5021
LOSB5030
LOSB5050 LOSB5051 LOSB5054
LOSB5056
LOSB5059
LOSB5100
LOSB5102
LOSB5103
LOSB5104
LOSB5105
LOSB5106
LOSB5108
LOSA9315
Page 14
Fuel Tank Hi-Volume (LST2/XXL)........................................ $18.99
Fuel Tank Lid &Spring (LST/2).............................................. $4.99
Fuel Tank Mounts & Hardware (LST/2)................................. $4.99
Fuel Filter - Heat Resistent (All)............................................ $4.99
Air Clearer w/Oil (LST/2)..................................................... $15.99
Air Cleaner Foam Set (LST/2)............................................... $7.99
Engine Mounts (LST/2)....................................................... $12.99
Exhaust Header (RE) & Springs(LST/2/XXL)...................... $19.99
Exhaust Header Seals & Springs (2) (LST/2/XXL)................ $6.99
Exhaust Pipe Seals & Springs (LST/2/XXL).......................... $6.99
Tuned Pipe Mount & Hardware (LST/2/XXL)........................ $2.99
“HT” Tuned Pipe (XXL/LST2).............................................. $44.99
Spin-Start Hand Held Starter (all)........................................ $49.99
Spin-Start Motor & Battery leads......................................... $19.99
Spin-Start Mechanics.......................................................... $26.99
Spin-Start Hex Starter Shaft.................................................. $5.99
Spin-Start Hand Strap & Pin.................................................. $5.99
Spin-Start Case & Switch Set................................................ $9.99
Spin-Start Drive Gear (Metal)................................................ $3.99
Fuel Tubing 24”..................................................................... $5.99
LST XXL Parts List
WHEELS & TIRES
LOSB7012
LOSB7202
LOSB7407
420 Series Force Chrome Wheels (All)............................... $23.99
420 Series ATX Tires w/Foam............................................. $29.99
420 Series Force Chrome Wheels w/ATX Tires.................. $48.99
MOTOR ACCESSORIES
LOSR2200
LOSB5100
LOSB5102
LOSB5103
LOSB5104
LOSB5105
LOSB5106
LOSB5108
Losi 454 Engine w/Combo PS/SS & SG Shaft.................. $249.99
Spin-Start Hand Held Starter (LST/2).................................. $49.99
Spin-Start Motor & Battery Leads (LST/2)........................... $19.99
Spin-Start Mechanics (LST/2)............................................. $26.99
Spin-Start Hex Starter Shaft (LST/2)..................................... $5.99
Spin-Start Hand Strap & Pin (LST/2)..................................... $5.99
Spin-Start Case & Switch Set (LST/2)................................... $9.99
Spin-Start Drive Gear (Metal) (LST/2)................................... $3.99
BODIES & ACCESSORIES
LOSB8022
LOSB8023
LOSB8207
XXL Body Painted Red w/Stickers...................................... $59.99
XXL Body Painted Blue w/Stickers...................................... $59.99
XXL Logo Sticker Sheet........................................................ $5.99
OPTIONAL PARTS
SUSPENSION PARTS
LOSB2221
Sway Bar Kit (LST/2)........................................................... $17.99
CHASSIS PARTS
LOSB2261
LOSB2262
LOSB2263
LOSB2264
LOSB2271
LOSB2272
LOSB2273
LOSB2274
LOSB2451
LOSB2501
SHOCKS
LOSB2801
LOSB2802
LOSB2803
LOSB2804
LOSB2805
LOSB2806
LOSB2807
LOSB2808
LOSB2811
LOSB2813
LOSB2814
LOSB2841
LOSB2879
LOSB2901
LOSB2949
LOSB2951
LOSB2952
Heavy Duty Chassis Skid Plate - Hard Ano. (LST/2)........... $29.99
Heavy Duty Chassis Top Plate - Hard Ano. (LST/2)............ $19.99
Heavy Duty Front Bottom Plate - Hard Ano. (LST/2)........... $19.99
Heavy Duty Rear Bottom Plate - Hard Ano. (LST/2)........... $21.99
Hi-Perf Aluminum Skid Plate - Hard Ano. (LST/2)............... $29.99
Hi-Perf Graphite Top Plate (LST/2)...................................... $42.99
Hi-Perf Alum Front Bottom Plate - Hard Ano. (LST/2)......... $21.99
Hi-Perf Alum Rear Bottom Plate - Hard Ano. (LST/2).......... $21.99
Extra Long Body Mounts....................................................... $5.99
Wing Mount Plastics (LST/2/AFT)....................................... $10.99
Shock Body - Blue (LST/2/AFT/XXL).................................. $13.99
Shock Cap - Blue (LST/2/AFT/XXL)...................................... $8.99
Shock Body - Red (LST/2/AFT/XXL)................................... $13.99
Shock Cap - Red (LST/2/AFT/XXL)...................................... $8.99
Shock Body - Gold (LST/2/AFT/XXL).................................. $13.99
Shock Cap - Gold (LST/2/AFT/XXL)..................................... $8.99
Shock Body & Cap Set - Red (4) (LST/2/AFT/XXL)............ $79.99
Shock Body & Cap Set - Gold (4) (LST/2/AFT/XXL)........... $79.99
Threaded Shock Body - Hard Anodized (LST/2/AFT/XXL). $14.99
Shock Adjuster Nut - Blue Aluminum (LST/2/XXL)................ $6.99
Hard Ano. Thrd. Shock Body & Adj. Set (4) (LST/2/AFT/XXL).$59.99
Titanium Nitride Shock Shaft (LST/2/AFT/XXL).................... $8.99
Assembled Threaded Shock w/Spring (Blue) (LST2).......... $39.99
Shock Pivot Balls - Hard Ano. Aluminum (4) (LST/2/AFT/XXL).$8.99
Shock Springs - White 4.0 lb Rate (pr) (LST/2/AFT/XXL)..... $7.99
Shock Springs - Black 6.0 lb Rate (pr) (LST/2/AFT/XXL)...... $7.99
Shock Springs - Yellow 7.4 lb Rate (pr) (LST/2/AFT/XXL).... $7.99
HARDWARE
LOSB4021
LOSB4102
LOSB4103
MOTOR ACCESSORIES
LOSB5031
LOSB5050
LOSB5051
LOSB5054
LOSB5056
LOSB5055
LOSB5057
LOSB5058
LOSB5060
LOSB5061
LOSB7203
LOSB7204
LOSB7205
LOSB7206
LOSB7210
LOSB80009 XXL Body Painted Body w/Stickers (Red)........................... $59.99
LOSB80010 XXL Body Painted Body w/Stickers (Blue).......................... $59.99
LOSB8207 XXL Logo Sticker Set............................................................ $5.99
RECEIVER PACK
LOSB9939
LOSB9950
LOSA99004
LOSA99104
LOSA99150
LOSA99166
LOSA99167
LOSA99168
LOSA99171 LOSA99202
LOSB5201
LOSB5221
FUEL
LOSF0020
LOSF0120
F/R Bevel Gear Set 15/30 (XXL)........................................... $9.99
Aluminum Clutch Shoe & Spring Set (LST2)....................... $22.99
Long Wear Aluminum Clutch Shoes (3) (LST/2/XXL/Aft) ... $24.99
Clutch Bell Only 2-Seed (Threaded) (LST/2)...................... $10.99
18T/25T One-Piece Clutch Bell-Steel (LST/2)..................... $22.99
18T Steel Pinion (LST/2)....................................................... $5.99
18T Steel Pinion w/Ti-Nitride (LST/2).................................. $17.99
25T Steel Pinion (LST/2)....................................................... $5.99
25T Steel Pinion w/Ti-Nitride (LST/2).................................. $17.99
2-Speed Steel. Ti-Nitride Gear Conversion (LST/2)............ $89.99
70T Steel Spur w/Ti-Nitride (1st) (LST/2)............................ $39.99
63T Steel Spur w/Ti-Nitride (2nd) (LST/2)........................... $29.99
Drive Rings for 70T Steel Spur (2)........................................ $2.99
DRIVETRAIN PARTS
LOSB3531
LOSB3535
6V 900 Ni-MH Rx Flat Pack w/Charger (LST/2/AFT).......... $24.99
5-cell 6V 1100mAh Ni-MH Receiver Pack (LST/2).............. $33.99
MISCELLANEOUS ACCESSORIES
2-SPEED & SLIPPER PARTS
LOSB3428
LOSB3429
LOSB3430
LOSB3431
420 Series Rear Paddle Tires w/Foam................................ $31.99
420 Series Front Razor (sand) Tires w/Foam..................... $31.99
420 Series Road Rash Tires w/Foam.................................. $31.99
420 Series Super Bolt-On Tires w/Foam............................. $31.99
420 Series King-Pin Tires w/Foam...................................... $29.99
BODIES & ACCESSORIES
CLUTCH PARTS
LOSB3323
LOSB3328
LOSB3340
LOSB3341
LOSB3350
LOSB3351
LOSB3356
LOSB3357
Finned Engine Mounts - Hard Ano. Aluminum (LST/2)....... $14.99
Exhaust Header (RE) & Springs (LST/2/AFT)..................... $19.99
Exhaust Header Seals & Springs (2) (LST/2/AFT)................ $6.99
Exhaust Pipe Seals & Springs (LST/2).................................. $6.99
Tuned Pipe Mount & Hardware (LST/2)................................ $2.99
Tuned Exhaust Pipe (LST).................................................. $45.99
Tuned Pipe & Header - Polished (LST/2)............................ $79.99
Tuned Pipe & Header - Hard Anodized (LST/2).................. $86.99
“HT” Tuned Pipe & Header - Polished (LST/2).................... $79.99
“HT” Tuned Pipe & Header - Hard Anodized (LST/2).......... $86.99
WHEELS & TIRES
TRANSMISSION
LOSB3118
Pivot Balls - Hard Anodized Aluminum (4) (LST/2)................ $9.99
Titanium Nitride Inner Hinge Pins (2) (LST/2)....................... $9.99
Titanium Nitride Outer Hinge Pins (2) (LST/AFT).................. $9.99
Aluminum Diff Case - Polished (LST/2/AFT)........................$11.99
Ti-Nitride F/R Ring & Pinion (LST/2/AFT)............................ $44.99
Page 15
Losi Cargo Bag.................................................................... $69.99
Losi Race Wrench Four-Piece Inch Set.............................. $49.99
Losi Nut Driver Set (Inch).................................................... $49.99
Exhaust Spring Tool............................................................. $14.99
Tuning Screwdriver.............................................................. $15.99
Clutch Shoe/Spring Tool........................................................ $7.00
Temp-Tuner Temp Gauge & Screwdriver............................ $44.99
Losi-Lok Threadlock (Blue).................................................... $4.99
Turbo Fuel Bottle (500cc)...................................................... $9.99
Aluminum Glow Driver w/Ni-CD & Charger......................... $22.99
Nitrotane 20% Sport Fuel (GAL)
Nitrotane 20% Sport Fuel (QT)
B3128
A6250
Transmission Assembly
B3601
A6206
A6206
B4203
A6248
B3605
B3125
A6940
B3603
B3113
A6356
A6941
A6107
A6939
B3135
B3103
B3127
B3136
B3119
B3125
B3125
B3119
B4203
B3125
B3127
A6941
B3124
A6107
B3115
B3114
B3117
B3116
A6941
A6939
A6250
A6940
B3128
B3102
Page 16
Drivetrain Assembly
B3342
B3547
B3547
B3547
B3547
Page 17
Chassis
B2278
B2250
B2250
Page 18
Chassis
Page 19
Front Assembly
B2035
B2035
B7407
B7012
Page 20
Rear Assembly
B2035
B7407
B7012
Page 21
LOSR2223
LOSR2225
LOSB2051
CARBURETOR
LOSR2222
Losi 454
Rear Exhaust Engine
LOSR2224
LOSR2223
LOSR2223
LOSR1037
LOSR2216
LOSR2212
LOSR1043
LOSR2223
LOSR1041
LOSR2228
LOSR1042
LOSR2228
LOSR2219
LOSR2217
LOSR2218
LOSR2210
LOSR2211
LOSR2211
LOSR2211
LOSR2222
LOSR2215
LOSR2228
LOSR2213
Page 22
Warranty Information
Warranty Period
Horizon Hobby, Inc., (Horizon) warranties that the Products purchased (the “Product”) will be free from defects in materials and
workmanship at the date of purchase by the Purchaser.
Limited Warranty
(a) This warranty is limited to the original Purchaser (“Purchaser”) and is not transferable. REPAIR OR REPLACEMENT AS PROVIDED UNDER
THIS WARRANTY IS THE EXCLUSIVE REMEDY OF THE PURCHASER. This warranty covers only those Products purchased from an authorized
Horizon dealer. Third party transactions are not covered by this warranty. Proof of purchase is required for warranty claims. Further,
Horizon reserves the right to change or modify this warranty without notice and disclaims all other warranties, express or implied.
(b) Limitations- HORIZON MAKES NO WARRANTY OR REPRESENTATION, EXPRESS OR IMPLIED, ABOUT NON-INFRINGEMENT,
MERCHANTABILITY OR FITNESS FOR A PARTICULAR PURPOSE OF THE PRODUCT. THE PURCHASER ACKNOWLEDGES THAT THEY ALONE
HAVE DETERMINED THAT THE PRODUCT WILL SUITABLY MEET THE REQUIREMENTS OF THE PURCHASER’S INTENDED USE.
(c) Purchaser Remedy- Horizon’s sole obligation hereunder shall be that Horizon will, at its option, (i) repair or (ii) replace, any Product
determined by Horizon to be defective. In the event of a defect, these are the Purchaser’s exclusive remedies. Horizon reserves the right
to inspect any and all equipment involved in a warranty claim. Repair or replacement decisions are at the sole discretion of Horizon.
This warranty does not cover cosmetic damage or damage due to acts of God, accident, misuse, abuse, negligence, commercial use, or
modification of or to any part of the Product. This warranty does not cover damage due to improper installation, operation, maintenance,
or attempted repair by anyone other than Horizon. Return of any goods by Purchaser must be approved in writing by Horizon before
shipment.
Damage Limits
HORIZON SHALL NOT BE LIABLE FOR SPECIAL, INDIRECT OR CONSEQUENTIAL DAMAGES, LOSS OF PROFITS OR PRODUCTION OR
COMMERCIAL LOSS IN ANY WAY CONNECTED WITH THE PRODUCT, WHETHER SUCH CLAIM IS BASED IN CONTRACT, WARRANTY,
NEGLIGENCE, OR STRICT LIABILITY. Further, in no event shall the liability of Horizon exceed the individual price of the Product on which
liability is asserted. As Horizon has no control over use, setup, final assembly, modification or misuse, no liability shall be assumed nor
accepted for any resulting damage or injury. By the act of use, setup or assembly, the user accepts all resulting liability.
If you as the Purchaser or user are not prepared to accept the liability associated with the use of this Product, you are advised to return
this Product immediately in new and unused condition to the place of purchase.
Law: These Terms are governed by Illinois law (without regard to conflict of law principals).
Safety Precautions
This is a sophisticated hobby Product and not a toy. It must be operated with caution and common sense and requires some basic
mechanical ability. Failure to operate this Product in a safe and responsible manner could result in injury or damage to the Product
or other property. This Product is not intended for use by children without direct adult supervision. The Product manual contains
instructions for safety, operation and maintenance. It is essential to read and follow all the instructions and warnings in the manual, prior
to assembly, setup or use, in order to operate correctly and avoid damage or injury.
Questions, Assistance, and Repairs
Your local hobby store and/or place of purchase cannot provide warranty support or repair. Once assembly, setup or use of the Product
has been started, you must contact Horizon directly. This will enable Horizon to better answer your questions and service you in the
event that you may need any assistance. For questions or assistance, please direct your email to [email protected], or
call 877.504.0233 toll free to speak to a service technician.
Inspection or Repairs
If this Product needs to be inspected or repaired, please call for a Return Merchandise Authorization (RMA). Pack the Product securely
using a shipping carton. Please note that original boxes may be included, but are not designed to withstand the rigors of shipping
without additional protection. Ship via a carrier that provides tracking and insurance for lost or damaged parcels, as Horizon is not
responsible for merchandise until it arrives and is accepted at our facility. A Service Repair Request is available at www.
horizonhobby.com on the “Support” tab. If you do not have internet access, please include a letter with your complete name, street
address, email address and phone number where you can be reached during business days, your RMA number, a list of the included
items, method of payment for any non-warranty expenses and a brief summary of the problem. Your original sales receipt must also be
included for warranty consideration. Be sure your name, address, and RMA number are clearly written on the outside of the shipping
carton.
Warranty Inspection and Repairs
To receive warranty service, you must include your original sales receipt verifying the proof-of-purchase date. Provided
warranty conditions have been met, your Product will be repaired or replaced free of charge. Repair or replacement decisions are at the
sole discretion of Horizon Hobby.
Non-Warranty Repairs
Should your repair not be covered by warranty the repair will be completed and payment will be required without
notification or estimate of the expense unless the expense exceeds 50% of the retail purchase cost. By submitting the item
for repair you are agreeing to payment of the repair without notification. Repair estimates are available upon request. You must include
this request with your repair. Non-warranty repair estimates will be billed a minimum of ½ hour of labor. In addition you will be billed for
return freight. Please advise us of your preferred method of payment. Horizon accepts money orders and cashiers checks, as well as Visa,
MasterCard, American Express, and Discover cards.
If you choose to pay by credit card, please include your credit card number and expiration date. Any repair left unpaid or unclaimed after
90 days will be considered abandoned and will be disposed of accordingly. Please note: non-warranty repair is only available on
electronics and model engines.
Page 23
United States:
Electronics and engines requiring inspection or repair should be shipped to the following address:
Horizon Service Center
4105 Fieldstone Road
Champaign, Illinois 61822
All other Products requiring warranty inspection or repair should be shipped to the following address:
Horizon Product Support
4105 Fieldstone Road
Champaign, Illinois 61822
Please call 877-504-0233 or e-mail us at
[email protected] with any questions or concerns regarding this product or warranty.
United Kingdom:
Electronics and engines requiring inspection or repair should be shipped to the following address:
Horizon Hobby UK
Units 1-4 Ployters Rd
Staple Tye
Harlow, Essex
CM18 7NS
United Kingdom
Please call +44 (0) 1279 641 097 or e-mail us at
[email protected] with any questions or concerns regarding this product or warranty.
Instructions for Disposal of WEEE by Users in the European Union
This product must not be disposed of with other waste. Instead, it is the user’s responsibility to dispose of their waste equipment by
handing it over to a designated collection point for the recycling of waste electrical and electronic equipment. The separate collection
and recycling of your waste equipment at the time of disposal will help to conserve natural resources and ensure that it is recycled in a
manner that protects human health and the environment. For more information about where you can drop off your waste equipment for
recycling, please contact your local city office, your household waste disposal service or where you purchased the product.
The associated regulatory agencies of the following countries recognize the noted certifications for this product as authorized for sale
and use:
© 2008 Horizon Hobby, Inc.
Printed 11-2008
UK
DE
DK
NO
SE
FI
EE
LV
LT
PL
CZ
SK
HU
RO
SI
AT
IT
ES
PT
IE
NL
LU
MT
CY
GR
800-0379