1
124
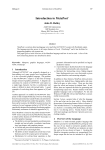
When TEX and Metafont Work Together
Bijlage V
When TEX and Metafont Work Together
Alan Hoenig
Department of Mathematics, John Jay College
Mail: 17 Bay Avenue
Huntington, NY 11743 USA
(516) 385-0736
ajhjj@cunyvm
Abstract
When TEX and Metafont communicate to each other, they can do more together than they can alone.
This presentation concentrates on two illustrations of this principal, and urges readers to come up
with more.
When TEX becomes sensitive to information passed to it from Metafont, it is possible to prepare
diagrams and figures using Metafont and then to have TEX prepare labels which can be precisely
positioned within the figure. When communication goes the other way, TEX and Metafont can prepare
special purpose fonts which (among other things) can be set along curved baselines. Illustrations of
both techniques are presented.
Keywords: TEX, Metafont, labelling figures, figures
with labels, curvilinear typesetting, special effects typesetting, typesetting special effects
ceptable deviation from Knuth’s vision, in my opinion,
and my first example will be a discussion of ways to
use TEX to label figures.
When we force TEX and MET A F O N T to talk to each
other, they can do different things and more interesting
things than when they work in isolation, and I will give
two major examples of this. For the sake of completeness, though, I will try to cover these examples in depth,
even though I am more interested in the overview than
the details. Plus, I plan to allow myself the luxury of
several major digressions whenever I feel like it.
A second issue concerns the setting of type along nonhorizontal baselines. I freely admit that this is not the
kind of thing TEX was designed for, nor is it the kind
of thing that TEX users should normally care about, unless they need to set type around a circular university
or institutional seal. Nevertheless, it’s fun (that’s definitely part of Knuth’s vision!), and it fits right in with
the context of this presentation. It will also be possible
to apply a variety of other special effects to the type for
something a bit out of the ordinary.
2
3
1
Introduction
Setting the Stage: Labelled Diagrams;
Non-standard Typesetting
If you need graphics, especially mathematical figures,
for a document, I strongly recommend Metafont. Parabolas and normal curves look like they are supposed to
look, and all elements of the picture are placed where
they are supposed to be.
But there is a great problem. Figures often need labels or tags to be positioned precisely with respect to
the figure, and this Metafont does not give us. I’ve
seen people insert graphics prepared by other programs
in their TEX documents that come with text in some
typeface completely different from the Computer Modern that’s usually used in the main text. This is an unac-
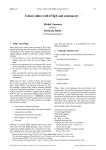
A Basic Idea
TEX and Metafont have strengths in quite different
areas. For example, Metafont is quite good at arithmetic, while TEX is not. TEX, on the other hand, is
decent at reading and writing files, while Metafont is
seriously deficient in that area.
The idea behind having TEX and Metafont work together is to have each do the things each is good at, and
communicate these results to the other.
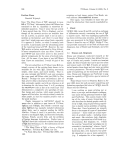
The best way to transfer information from TEX to Metafont is to ask TEX to write this information to a file using statements like figure 1. 1 TEX is good at this, and
we can do this so the information in the file conforms
to standard Metafont syntax. Then, Metafont simply
An earlier version has appeared in EuroT X ’92 conference proceedings.
E
1
Figures containing bits of text delimited by horizontal rules correspond to the slides that accompanied the oral presentation
of this paper.
Reprint MAPS#10 (93.1); May 1993
Dutch TEX Users Group (NTG), P.O. Box 394, 1740 AJ Schagen, The Netherlands
Bijlage V
When TEX and Metafont Work Together
needs to input this file to have access to the data.
Fortunately, Metafont does possess the ability to read
text files.
\newwrite\out=file.mf
..
.
\write\out{z1=(w, h); %Text for Metafont!}
Figure 1: TEX talks to Metafont.
Going the other way, from Metafont to TEX, is somewhat problematical. One way I have used is to have
Metafont create a dummy font and encode numerical
information as the numeric value of a kern between
char0 (say) and char1.
Let’s make this more precise. Suppose the result of a
Metafont calculation is 6:18 pt. Then the Metafont
statement
ligtable 0:
1 kern -6.18pt#;
(don’t forget the sharp symbol!) records this value in
the tfm file for this dummy font as the kern between
char0 and char1. Here’s how TEX can retrieve this
value.
\font\foo=dummy \newdimen\result
\setbox0=\hbox{\foo\char0 \char1}
\result=\wd0
\setbox0=\hbox{\foo\char0{}\char1}
\advance\result by-wd0
Now, \result holds the value -6.18 pt. In practice, additional hackery can strip the ‘pt’ away leaving
a pure numeric value. By the way, TEX boxes can
have negative widths, so it is possible to store negative
quantities this way.
MF:
ligtable 0:
125
positions of each label. Then, it should pass that information to TEX.
1.
2.
3.
4.
Create the figure.
Identify the anchor points.
Store the coordinates of the labels.
Have TEX typeset the figures in the usual way.
\font\fig=figfont
...
{\fig\char0}
...
Figure 3: How to label figures using TEX and Metafont.
More precisely, here’s the sequence we must follow.
1. Create the figure with Metafont as a character in a
special figure font.
2. Identify the points in the figure which will be the
anchors for the labels. In Metafont we use notation
z1 or z1 to refer to key points used for drawing;
we might use the notation lab1 or lab1 for these
anchor points. The tag “lab” refers to “labels.”
3. Metafont will store the coordinates of the labi as
kerns between char0 and successive characters of
the figure font. The components of each of the labi
measures the horizontal and vertical offsets from
the reference point (origin) of the figure.
4. TEX typesets the figures in the usual way:
\font\fig=figfont
...
{\fig\char0}
...
A set of TEX macros allows placing the labels using the trick mentioned above. One might say
\point{This is a label} and so on.
1 kern -6.18pt#;
TEX:
\font\foo=dummy \newdimen\result
\setbox0=\hbox{\foo\char0 \char1}
\result=\wd0
\setbox0=\hbox{\foo\char0{}\char1}
\advance\result by-wd0
Figure 2: Metafont talks to TEX.
In the old Metafont, we were restricted to 256 kern
pairs per font, and it’s easy to use these up in this kind
of scheme. In the new Metafont, each font may have
up to 32k kern pairs. It is hardly likely that we will run
out now, so I recommend that you upgrade your TEX
and Metafont if you haven’t done so already.
4
Figure 4: References for all pointing commands
These macros are enclosed in two sets of macros, the
so-called labtex macros (one for TEX, and one for
Metafont). labtex.tex imagines that each label is
enclosed in a rectangular box. Figure 4 shows the eleven different pointing commands for positioning the
label box with respect to the label point in the Metafont
diagram.
Labelling Figures
What would labelling a figure involve? At the time
Metafont creates the figure, it should take note of the
Dutch TEX Users Group (NTG), P.O. Box 394, 1740 AJ Schagen, The Netherlands
Reprint MAPS#10 (93.1); May 1993
126
When TEX and Metafont Work Together
\up3pt
\extradx
\down
\extrady
\tlpoint
\tpoint
\rtpoint
\rpoint
\Brpoint
\brpoint
\bpoint
\blpoint
\Blpoint
\lpoint
\cpoint
\ltpoint
Bijlage V
\right
\left
\everylabel
\trpoint
\rBpoint
\rbpoint
\lbpoint
\lBpoint
Figure 5: labtex pointing commands and “tinkering” commands.
This figure also shows how tight the labels are in
the absence of some tinkering. We can tinker either
by hand or semi-automatically. To adjust a label
placement by hand, we can use the commands \up,
\down, \right, or \left to move the label by
a certain amount. For example, instead of saying
\cpoint{A label.}, we can say
\cpoint{\down3pt\right2pt A label.}
We can also adjust all labels automatically by
means of three parameters which work in the background.
\extradx and \extrady place extra space to the right/left or above/below the label
text. A token \everylabel (akin to \everypar,
\everyhbox, \everymath, and so on) allows some
global adjustments to the labels themselves. For example, if you set
Figure 7: Developing the theory of integrals.
One of my hidden agendas in this project is to remind
people of the power and utility of Metafont as a figure
and diagram generator. With Metafont, you can do all
the things you expect in a figure—and more, now that
it is possible to anchor labels in the diagram.
Less well known is Metafont’s ability to add shading to
a drawing. Figure 7 displays a figure that was copied
from the book I learned calculus from. (Published
by Addison-Wesley, Knuth’s publisher, it seems to use
Monotype Modern 8a, the inspiration for Computer
Modern, as its text face.) There are two versions of this
figure for a reason. The larger version has labels but no
shading—standard Metafont cannot handle shading for
such large pictures. The smaller version was the largest
I could generate with the shading, but alas, there was
no room for labels in this case.
\everylabel=\ninepoint
you would get smaller labels automatically.
Figure 8: Special effects with Metafont.
Figure 6: Automatic tinkering with label placement.
Figure 6 show how these labels look using these
automatic enhancements.
Both \extradx and
\extrady have been set to 3 pt. By the way, although this particular figure could have been produced
with TEX (after all, it consists only of horizontal and
vertical line segments, which TEX can draw), it wasn’t. In particular, observe that Metafont can also draw
dotted and dashed lines.
Reprint MAPS#10 (93.1); May 1993
Figure 8 shows one way that Metafont can draw a threedimensional bowl. (If it doesn’t look sufficiently 3-D,
blame the author and not Metafont.) It’s fun generating
shading, but you quickly run up against the memory
capacity of normal Metafont, as I did in figure 7. If
the user community vocalizes a need for this kind of
Metafont work, I hope the implementer community will
respond with versions of “Really Big Metafont.”
Dutch TEX Users Group (NTG), P.O. Box 394, 1740 AJ Schagen, The Netherlands
Bijlage V
4.1
When TEX and Metafont Work Together
Digression: Applying Shading to Regions
in Metafont
I’d like to briefly digress to indicate the method I used
to shade Metafont regions. The crucial idea behind this
was suggested to me by Yannis Haralambous.
Suppose we want to apply a striped vertical pattern to
a simple rectangle, as schematically illustrated in figure 9. It’s helpful to remember that regions created by
127
Metafont are patterns of pixels. In this figure, the absence of a pixel is indicated by a period and the presence
of a single pixel by a 1. Metafont, though, can doubly,
triply, or multiply write on a pixel so that pixel values
may possess other whole number values. Pixels may
also be multiply erased, and possess negative whole
number values as well. These observations are crucial
in what follows.
Figure 9: Applying a pattern to a region in Metafont.
Dutch TEX Users Group (NTG), P.O. Box 394, 1740 AJ Schagen, The Netherlands
Reprint MAPS#10 (93.1); May 1993
128
When TEX and Metafont Work Together
Bijlage V
Figure 10: A region and some background patterns.
What happens when we add the pattern to the region?
To add two pictures together, simply add the corresponding pixel values. Consequently, figure 9 shows the
new picture. We see that some pixels now have values
of 2, and it is precisely these pixels that we wish to preserve in the final picture, as these pixels trace out the
striped pattern only in the region of the original shape
(in this case, a rectangle). But now our work is done,
for we can instruct Metafont to strip away all pixels
except those with a value of two. Once this culling is
done, we are left with the striped rectangle that we were
after, as shown finally in figure 9.
of the Computer Modern fonts has provided so many
hooks into the programs generating the fonts that very
little modification of the existing Metafont programs
was needed to generate these fonts.
A similar set of operations allows us to outline any region, but as this is treated in The Metafontbook, I will
say no more about it here.
Metafont is able to produce only three kinds of files—
gf pixel files, tfm font metric files, and the ubiquitous
log files. I used the tfm to communicate with TEX,
but he uses the log file in the following manner. The
Metafont message command displays its argument
on screen, but also records it in the log file. If we create a macro that automatically appends a flag to any
message, then a simple filter can process the log file,
collecting all this special message data. In a Unix environment, grep does this straightforwardly, but even
on other platforms, it’s simple enough to create a utility
to do that for you.
There is nothing special about stripes and rectangles;
this reasoning applies to arbitrary shapes and arbitrary
patterns. I can’t resist showing off some patterns. In
figure 10, we see a general amorphous shape on which
I have drawn an outline and patterns using these operations. Of course, we can use letterforms of a font on
which to superimpose these patterns, and you see an example of “Computer Modern Candystripe” in figure 11,
which is based on cminch (or cm-half-inch, to be
precise). Figure 14 shows some more fonts. The author
Reprint MAPS#10 (93.1); May 1993
4.2
Other Work with Labelled Figures
Returning now to my main discussion, I’d like to complete the discussion by referring to other work done in
the field of labelling figures.
First is the diagramf package developed by Alan
Jeffrey. He uses a variant method which is superior in
many respects to the one I have just outlined.
Dutch TEX Users Group (NTG), P.O. Box 394, 1740 AJ Schagen, The Netherlands
Bijlage V
When TEX and Metafont Work Together
129
Figure 11: Computer Modern Candy Stripe.
Although this dependence on grep is outside the TEXMetafont loop, its advantage is that you can pass more
than numeric data to TEX. In the method I outlined previously, it was our job to keep straight which label text
belongs to which label position. With diagramf, you
combine the text with the position data in the Metafont
file, so no further record keeping is necessary.
1.
2.
3.
4.
Using Diagramf
MF: create figure.
grep: strip log file.
TEX: run file to measure label text.
Return to beginning to resolve forward references.
There are three other packages users should be aware
of. Both allow the placement of text at positions inside
previously prepared PostScript figures. These diagrams
can be produced by other applications like Adobe Illustrator, MatLab, Fontographer, and so on. Craig Barratt
of Stanford has produced the PSFrag style for use with
LATEX, while Jean Orloff of CERN the PSBox style,
for use with either LATEX or plain TEX.
Figure 12: The steps in using diagramf.
There is a further advantage to this method. After TEX
typesets the label text, it can pass metric information
back to Metafont. As a result, Metafont can revise the
diagram to conform to the text. Figure 13 shows one
result of this in practice.
Figure 13: Cutouts fit around their labels.
Dutch TEX Users Group (NTG), P.O. Box 394, 1740 AJ Schagen, The Netherlands
Reprint MAPS#10 (93.1); May 1993
130
When TEX and Metafont Work Together
Bijlage V
Figure 14: More fun fonts.
Just recently, I became aware of another such package
that I’d like to mention. This is the mfpic macro package by Thomas Leatherum. It’s not a terribly extensive
package—the user manual TEXs out to four pages of
\magstephalf text—but its product cycle is the inverse to that of labtex and diagramf. That is, you
start with TEX code, and mfpic generates the appropriate Metafont files. I am excited about mfpic for
a simple reason. Since all the mfpic commands are
TEX commands, this package is therefore a perfect introduction to Metafont to those users who are too timid
Reprint MAPS#10 (93.1); May 1993
to tackle Metafont itself. Actually, since the pictures
are created with mfpic’s TEX commands, you fit the
labels into the picture using usual \kern commands
rather than the special sleight of hand that I or Alan
Jeffrey used. (Or so I gather from a very brief perusal
of this package.)
Dutch TEX Users Group (NTG), P.O. Box 394, 1740 AJ Schagen, The Netherlands
Bijlage V
When TEX and Metafont Work Together
Labeling Packages
labtex: ask the author
diagramf: archives such as Aston (tex.ac.uk) and
SHSU (niord.shsu.edu)
PSFrag: Aston
PSBox: Aston
mfpic: SHSU
Figure 15: Labeling packages and how to get them.
The author of mfpic makes no claim as to the completeness of his package. It is modeled on the famous
PiC-TEX macros which attempt to the same thing, but
entirely within TEX. Tom notes that mfpic is not complete, as not all of PiC-TEX’s capabilities are a part of
mfpic. He would like to see further enhancements
made to mfpic, but he has no plans himself to do this.
A final approach to the problem of combining text with
figures is a simple one: write your own implementation of a Metafont-like language to do this. That’s the
approach John Hobby took with his MetaPost system.
131
The macro packages I just mentioned appear to be freely
available for use and can be downloaded from many
good archives. I obtained diagramf from the niord
server (anonymous ftp from niord.shsu.edu in
directory diagramf) and the other two from the Aston
archives (anonymous ftp from tex.ac.uk). mfpic
is also available from niord.
5
TEX to Metafont
It’s much easier to get TEX to talk to Metafont. TEX has
many more file handling commands at its disposal, and
it’s perfectly possible to get TEX to create a file whose
contents conform to proper Metafont syntax. Later,
Metafont can read the file.
What purpose is served by having TEX talk to Metafont in this fashion? TEX can record metric information
about sequences of letters it will typeset. Then, Metafont can use this information to create a character based
upon the positions/measurements/states of characters
which came before.
Figure 16: Convex paths and non-convex paths (drawn with dashed lines).
Figure 17: Why we need a convex path.
As a first application, suppose we want to typeset along
a convex path. Informally speaking, a convex path is
one which “sheds water.” More precisely, if we start
driving along it from the left to the right, we never turn
our steering wheel to the left. See figure 16.
Figure 17 provides insight as to why we need a convex
path. We imagine that the type sits on chords connect-
ing to points of the curve. If the curve is convex, then
the problem of placing adjacent types is a problem of
the geometry of the curve. We simply butt the adjacent types at their bases, as in the left of figure 17. (The
rectangles in this figure represent the bounding boxes of
each character.) If the curve is not convex, the problem
of placing adjacent type requires us to make sure that
Dutch TEX Users Group (NTG), P.O. Box 394, 1740 AJ Schagen, The Netherlands
Reprint MAPS#10 (93.1); May 1993
132
When TEX and Metafont Work Together
the types are far enough apart so they intersect only at
their tops. How far apart shall they be? This is a much
more difficult problem in general, although I shall say
something about a special case below.
5.1
A Three-Pass Method
A three-pass method is necessary to create the special
purpose font for curvilinear typesetting. Note that the
end product is a special purpose font limited for one
use only—the typesetting of one particular message
around one particular path. This is quite different from
the normal way we use Metafont. Normally, of course,
a Metafont font is appropriate for an infinite number of
messages. Fortunately, the processes involved—TEX
and Metafont—do their jobs so swiftly that the making
of special purpose fonts is not at all onerous.
Measure.
Make.
Mount.
Figure 18: Measure—make—mount.
Bijlage V
Three passes are needed to create the special purpose
font. First we measure the type with measure.tex.
Then we make the type with macros contained in
make.mf (plus others). Finally, we mount the letters
on the page with mount.tex.
Let’s examine the steps one by one.
5.2
Step One: Measuring the Message
TEX examines the text of your curved message in the
first pass. The macros in this file, measure.tex
examines each individual character in your message
but don’t typeset it. Using the techniques of exercise 11.5 (page 67) of The TEXbook, measure
takes note of each character in the message and its
width. It prepares two files for later use by Metafont.
The file measure.wid contains width information
about the individual characters in the message, while
measure.cha contains information about the letters
and characters themselves. Both these files are created
using standard Metafont syntax. Shortly, Metafont will
read these files.
“Exercise 11.5” ) Each character )
character information file
width information file
Figure 19: Measuring the text.
5.3
Step Two: Making the Message
One underlying assumption is that we are using the
standard complement of Computer Modern fonts for
curved typesetting. In preparation for step two, it is necessary to make a few changes to the standard font files.
(Actually, such a strong assumption is not necessary. It
is sufficient to have Metafont descriptions of the fonts,
and with the appearance of utilities to convert outline
font descriptions to Metafont descriptions, this is not a
burden at all.)
The most important involves the actual program files.
Typically, these have names like romanu.mf (containing the programs for Roman, uppercase letters) or
punct.mf (with the programs for punctuation). In
romanu, the program structure is something like
cmchar "The letter A";
beginchar("A", ...
...
endchar;
and so on for the remaining character programs. We
have to change the name of this file, and adjust the remaining files to call this file rather than the standard
romanu.mf file.
Fiddling with the macros.
Measure special position.
Measure angle of rotation.
Pass the offset information to TEX.
Figure 20: Making the special letters.
where the ellipses indicate the presence of material that
is irrelevant to this discussion. We want to embed these
definitions into Metafont macros. After all, there may
be more than one ‘A’ in a curved text, and we need to be
able to create as many A’s as necessary. A series of tedious but trivial modifications transform the programs
into subroutines. The idea is to relate a letter n with a
subroutine n_ which is a function of one argument—
the angle of rotation that is necessary to rotate the letter
and keep it on the curved baseline. The code fragment
above might become
Reprint MAPS#10 (93.1); May 1993
def A_(expr n, rotation_angle)=
currenttransform:=identity rotated
rotation_angle;
def t_=transformed currenttransform enddef;
cmchar "The letter A";
beginchar(n, ...
...
endchar;
enddef;
Here are some other things we need do in the make
step of the cycle. I use Metafont to draw the path along
which the typesetting will go, and this path becomes
the first character in our new font, char0.
Dutch TEX Users Group (NTG), P.O. Box 394, 1740 AJ Schagen, The Netherlands
Bijlage V
When TEX and Metafont Work Together
133
Now for each character in the message, Metafont determines the position of this letter on the path, and records this information for subsequent retrieval by TEX.
First, suppose the point z0 marks our current position
on the curve. Then we use Metafont’s solve macro to
find the point z1 such that the length of the chord z1 z0
is the same as the width of the current character. (Plain
Metafont sets the value of solve’s tolerance to 0.1;
we need to decrease to tolerance=0.001 or even
smaller). It’s easy for Metafont to determine the angle
of the chord, and thus the angle of rotation for the letter.
(As you see, we are approximating the path by a series
of chords which inscribe the path such that each face of
the polygonal approximate path will be the exact width
of each character in the message.)
TEX will eventually need two pieces of information
about each letter in order to typeset it properly—the xand y-offsets of that letter from the previous letter. We
pass this information to TEX using kerning pairs (as we
did at the outset of this discussion to pass coordinate
pairs to TEX in order to label a Metafont diagram).
MF
=)
cmr12
!
roman.mf
Figure 21: Needed information.
The Metafont process uses so many more files than TEX
does that it’s worth examining the alterations to the normal Metafont production cycle in a slight more detail.
Normally, to produce a font of cmr12 (for example),
Metafont first reads a parameter file (cmr12.mf),
which calls the driver file (roman.mf), which finally
calls the program files (romanu.mf, romanl.mf,
romand.mf, etc.).
!
romanu.mf, romand.mf, ...
I mirror this process, except I rename the files by adding the prefix ‘sp’ (for special purpose)
MF
=)
spcmr12
!
sproman.mf
and add two new files to the process. The first is
make.mf, which contains the actual macros for analyzing and storing the curved baseline. The driver file
sproman calls this file. A second file contains the
actual definition of the path together with any special
make
"
MF
!
spromanu.mf, spromand.mf
alterations to the macros to achieve whatever special
effects you are after. You call this file whatever you
want, but don’t forget to input it in the make file. (In
the absence of such a file, make defines defaults for all
such special purpose things.)
! ??
=) spcmr12 ! sproman ! spromanu,
The ‘??’ in this figure represents the file you need to
prepare and which will contain the special definitions
pertaining to your path.
As a practical matter, all fonts are named spcmr12 in
this scheme. As with any meta-font, you have to convert the generic pixel files into packed pixel pk files,
and place it and the corresponding font metric file in the
places in your system where TEX expects to find them.
I have gotten into the habit of transferring these files
into these distant directories with new names indicative
of whatever they illustrate.
spromand
\font\rofont=spiral
..
.
\curvetype{ABCDEFG ...} % text for curved
message
Figure 22: Mounting—placing—the curved type on the
page.
5.4
Step Three: Mounting the Message
Finally, it’s TEX’s turn again. The file mount.tex
contains all the positioning macros, as well as the ma-
Dutch TEX Users Group (NTG), P.O. Box 394, 1740 AJ Schagen, The Netherlands
Reprint MAPS#10 (93.1); May 1993
134
When TEX and Metafont Work Together
chinery for extracting the position information from
the kerns. All you have to do is tell TEX the name of
the special purpose font containing your message, for
example,
\font\rofont=spiral
5.5
Bijlage V
Examples
In figure 23 you see some text typeset along a wiggly,
self-intersecting curve. Unfortunately, it doesn’t seem
to be possible to have TEX automatically make space so
it doesn’t overprint at the point of intersection.
Figure 23: Type along a wiggly curve.
Figure 24: Type along a spiral.
In figure 24, TEX typesets along a spiral. It is harder
than you think to draw a spiral in Metafont, so it is
nice to be able to print the curved type twice—with
and without the underlying path, so we can convince
ourselves that TEX and Metafont have remained true
to the curve. For some reason, certain device drivers
Reprint MAPS#10 (93.1); May 1993
choked when trying to print this bit of text.
Figure 25 was inspired by a promotional piece developed by Blue Sky Research, purveyors of TEXtures
for the Macintosh.
The radii of the ellipse are in golden
p5
1+
ratio 2 , a particularly pleasing ratio. It proved to
be straightforward to achieve the font change.
Dutch TEX Users Group (NTG), P.O. Box 394, 1740 AJ Schagen, The Netherlands
Bijlage V
When TEX and Metafont Work Together
135
Figure 25: Typesetting along a golden ellipse.
Metafont rotates the type by modifying an underlying
transformation called
currenttransform
which is a hook that Knuth provided for the purpose
of doing last minute things to letters. It is helpful of
thinking of a transformation as something that changes
the shape, position, or orientation of a curve in certain
allowable ways. You won’t be surprised to learn that
we can shift a curve up or down in position, and that
we can rotate it, but we may also do a few other things
such as
uniformly magnify a curve;
magnify a curve in the x- or y-directions separately;
skew a figure; and
perform any number of these all at once.
In the next figure, figure 28, you see what happens
when we apply a transformation that does not include a
rotation. Each letter has been skewed up or down so it
conforms to the profile of the ‘sunrise’ curve. Actually,
the base of each letter is straight, and coincides with an
inscribed chord of the curve. (Transformations which
apply curvature like that are generally not allowed in
Metafont.) As long as the individual characters are so
much smaller than the dimensions of the curve, viewers
don’t seem to mind this innocent deception.
5.6
Non-Linear Transformations in Metafont
It may be that Metafont is capable of making some
limited non-linear transformations after all. I’d like to
digress yet again to discuss this possibility.
Transformations
uniformly magnify a curve;
magnify a curve in the x- or y-directions separately;
skew a figure; and
perform any number of these all at once.
Figure 26: Legal transformations in Metafont.
As long as we are rotating letters, perhaps we can apply other of these transformations to the letters of our
text. For example, in figure 27 we have requested that
Metafont shrink each letter at the same time it applies
the rotation.
Dutch TEX Users Group (NTG), P.O. Box 394, 1740 AJ Schagen, The Netherlands
Reprint MAPS#10 (93.1); May 1993
136
When TEX and Metafont Work Together
Bijlage V
1. Prepare for examining a new column by updating
the transformation for that column.
2. Start examining the column from the bottom up.
Look for the first pixel in that column that is black.
Keep examining pixels until the pixels are clear.
At this point, we have a pair of numbers, the first
of which records the point at which the pixels are
turned on, and the second the point at which they
are turned off.
3. Find the transforms of those values. In the image
picture, turn on the pixels for that column between
these two values.
4. Continue analyzing that column.
5. Continue on to the next columns.
Figure 27: A new representation for .
A Metafont transformation is a collection of six constants which Metafont uses in specified ways to make
the transformation. In figure 30, which I’ll show
presently, I needed to specify a transformation whose
six constants were not constant but depended instead
on the horizontal distance. For any given column of
pixels, that meant that the transform was constant for
all the pixels in that column, but would change a bit
when we proceeded to the next column.
Figure 30: Nonlinear Metafont transformations.
Figure 30 shows the result of one non-linear transformation. Metafont is not happy at working at the pixel
level; it takes about five minutes to generate these images on a 386 PC. (Normally, Metafont could create
comparable text in a matter of seconds.)
If you look carefully, you’ll see that the boundaries of
the transformed letters are more jagged than you expect. This is work in progress, and I hope that this
embarrassing state of affairs can be easily corrected.
5.7
An Application for Curved Typesetting
The only real application I can think of for curvilinear
typesetting is for setting text around the circumference
of a circular university or institutional seal. Despite
the simplicity of the path—a mere circle, compared to
some of the non-standard curves we have looked at—
there are a number of interesting problems that need to
be solved in connection with this application.
Figure 28: Along a Metafont sunrise.
I stored the original, untransformed object as a Metafont picture and I made the transformations on a pixelby-pixel level. The transformed image is stored in yet
another picture variable.
1.
2.
3.
4.
5.
Update transformation for new column.
Pixel by pixel, find out where ‘ink’ starts and stops.
Find the transforms for ‘start’ and ‘stop’ values.
Continue on that column.
Next column.
Figure 29: Performing non-linear transformations.
Reprint MAPS#10 (93.1); May 1993
1. Need to center text.
2. Need to alter kern values.
3. Need to set bottom part along a concave path!
Figure 31: Problems for seals.
The text needs to be centered with respect to the circumference. That is, it must be properly positioned
along the seal.
Unlike “standard” curvilinear typesetting, we explicitly do need to include the kerns between characters. The text of the seal might not look right
otherwise. Furthermore, we may need to be able to
alter some of the kerns between characters (because
Dutch TEX Users Group (NTG), P.O. Box 394, 1740 AJ Schagen, The Netherlands
Bijlage V
When TEX and Metafont Work Together
137
after all, type may look different along a circle than
along a straight line), and we need a simple way to
make this alteration.
Text along a seal almost always comes in two parts.
The top part along the top of the seal is typeset
along a convex path, the circle itself. But there is
a bottom portion, and this is set along the inside of
a larger circle. This text must be set along a nonconvex path, and so we must address and deal with
the issue of non-convex typesetting to successfully
typeset the seal.
The centering is relatively easily done, since we can
pretend to set the type at 9:00, and measure the angle
of the ray connecting the final letter with the circle’s
origin. Half this angle is the angular offset we use to
recalibrate the rotation angles of the letters, which we
do before creating the characters.
We handle kern information by storing the kern information in a third file in the initial, measuring process. In
the second step, Metafont reads this information in and
uses it to modify the width information of the characters. Of course the kern file is just an Ascii file, and
we can edit any of the values if some fine tuning of the
kerns is needed.
Figure 32: Where to put neighboring letters on inscribed text.
Finally, we handle the typesetting of the bottom portion of the text of the seal as another application of
Metafont’s handy solve macro. Progress along any
Metafont path can be measured using a so-called time
parameter t. In any pair of characters, we imagine
drawing a line along the right edge of the left member
of the pair, and another along the left edge of the right
character. solve can find the proper value of t to use
when placing the right-hand character so the two lines
intersect at the tops of the types.
Figure 33: A possible letterhead logo?
Figure 33 shows an example of this “logo” typesetting which might be appropriate for a conference.
Dutch TEX Users Group (NTG), P.O. Box 394, 1740 AJ Schagen, The Netherlands
Reprint MAPS#10 (93.1); May 1993
138
When TEX and Metafont Work Together
Bijlage V
Figure 34: Embedding an irregular figure in text.
6
What Else?
I feel sure there are plenty.
There are three additional applications of TEX-Metafont
communication that I can think of. Are there any more?
Figure 35: Embedding the State of New-York.
The first, about which I will say very little, is an application of data display using TEX. I hope to talk about it
at a conference like this in a year or two.
The second was suggested to me in conversation with
Yannis Haralambous. I might like to embed some irregularly shaped object within text, as in figures 34 and
35. I pass to Metafont the coordinates of the outline of
the object. Metafont can measure the points at which
horizontal baselines intersect the path, and obligingly
pass that information back to TEX. TEX can use that
information in a \parshape command to create the
properly shaped paragraph.
in Korean. The bad news is that there are over 2000
“letters” in the Korean “alphabet,” far too many for
any single font. The good news is that these letters—
actually syllables—are composed from less than 30
separate components. Each component represents a
sound in the Korean language. Each component can
be coded as a Metafont macro. We are optimistic that
the source file can pass to Metafont the order in which
the sounds make up the syllable. Syllables appear to be
built up from the phonemic components in straightforward ways.
Yannis and I have begun talking about yet a third application of these principles, and that is toward typesetting
Reprint MAPS#10 (93.1); May 1993
Dutch TEX Users Group (NTG), P.O. Box 394, 1740 AJ Schagen, The Netherlands
Bijlage V
When TEX and Metafont Work Together
139
We expect, therefore, that it will take somewhere on the
order of 200 special fonts to typeset a typical novel.
7
Conclusion
I have discussed a couple of ways in which when TEX
and Metafont work together, the results are more than
either could do singly. That is the point to stress, rather
than the applications themselves. I hope listeners will
take this lesson to heart and develop their own TEXMetafont applications.
Figure 36: Creating Korean type.
Then Metafont can create a special purpose font for the
text. There is room for 256 characters in a font, which
is roughly equivalent to a page of text in a typical book.
Dutch TEX Users Group (NTG), P.O. Box 394, 1740 AJ Schagen, The Netherlands
Reprint MAPS#10 (93.1); May 1993