1
Grapevine web hosting
user manual
12 August 2005
Grapevine web hosting user manual
2
Contents
Contents............................................................................................................................ 2
Introduction ....................................................................................................................... 4
System features ................................................................................................................ 4
How it looks....................................................................................................................... 5
Main navigation ..................................................................................................................... 5
Reports ............................................................................................................................. 6
Web stats .............................................................................................................................. 7
FTP stats ............................................................................................................................... 7
Traffic and traffic history ........................................................................................................ 7
Report delivery ...................................................................................................................... 7
Customising and sending reports.......................................................................................... 7
Navigation ............................................................................................................................. 7
Services ............................................................................................................................ 8
Email...................................................................................................................................... 8
Add a new email name ......................................................................................................................9
Email tools........................................................................................................................... 10
Tasks ................................................................................................................................... 11
Add an alias address .......................................................................................................................11
Preferences .....................................................................................................................................12
Set or modify mailbox size ...............................................................................................................13
Set redirection..................................................................................................................................14
Mail group ........................................................................................................................................14
Manage groups ................................................................................................................................17
Autoresponders ...............................................................................................................................17
Spam filter........................................................................................................................................21
Edit the black list ..............................................................................................................................22
Edit the white list ..............................................................................................................................22
Webmail log in .................................................................................................................................24
Domain name server (DNS) ................................................................................................ 25
Database ............................................................................................................................. 26
Hosting administration..................................................................................................... 28
Web users ........................................................................................................................... 29
Grapevine web hosting user manual
3
Add additional users ........................................................................................................................29
Modify preferences ..........................................................................................................................30
Modify existing users .......................................................................................................................30
Subdomains ........................................................................................................................ 31
Delete existing subdomains .............................................................................................................31
Add a new subdomain .....................................................................................................................32
Password-protected directories........................................................................................... 33
Directory location .............................................................................................................................33
Create a protected directory ............................................................................................................34
Edit protected directory ....................................................................................................................34
Delete protected directories .............................................................................................................34
Log manager ....................................................................................................................... 35
Viewing a log file ..............................................................................................................................35
Save a log file on your computer .....................................................................................................36
Delete log files .................................................................................................................................36
File management................................................................................................................. 36
Browse a directory ...........................................................................................................................37
Change file or directory permissions................................................................................................37
Rename a file or directory................................................................................................................37
Copy or move a file or directory .......................................................................................................37
Adjust timestamp .............................................................................................................................37
Remove a file or directory ................................................................................................................37
Uploading and creating files.............................................................................................................38
Creating a subdirectory....................................................................................................................38
Editing a file .....................................................................................................................................38
Site preview......................................................................................................................... 38
Grapevine web hosting user manual
Introduction
This manual outlines the web-based control panel used to manage Grapevine-hosted
websites.
System features
Manage website content
Manage email accounts
Manage website databases
View website statistics
Access domain registration and management services
Manage the domain name server (DNS)
Manage subdomains
Back-up and restore data
Create, edit, and delete additional control panel users on the account
Set up file transfer (FTP) services
4
Grapevine web hosting user manual
5
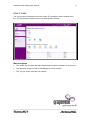
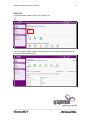
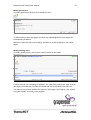
How it looks
The control panel is divided into two main areas. The navigation area is located at the
left. The right-hand area allows users to activate specific controls.
Main navigation
The “Home” link accesses the major administrative features available for the account.
The “Sessions” button is used for managing active user sessions.
The “Log out” button ends the user session.
Grapevine web hosting user manual
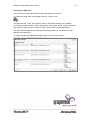
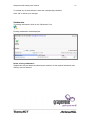
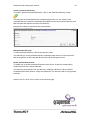
Reports
To review website reports, click on the “Report” icon:
The report page provides summary information about the website’s domain and can be
used to access different reports.
6
Grapevine web hosting user manual
7
Web stats
Select “Web Stats” to access the web statistics for the domain. This button is only
available if the “Web Statistics” option was enabled during hosting setup.
FTP stats
The “FTP Stats” button will take you to the FTP and anonymous FTP traffic statistics
page for the domain. The buttons are available if the “Web Statistics” and “Anonymous
FTP” options were enabled during hosting setup.
Traffic and traffic history
Select “Traffic” to view detailed website traffic statistics.
Select “Traffic History” to view historic website traffic statistics.
Report delivery
Select “Report Delivery” to view or alter the report delivery schedule.
Customising and sending reports
To change the way the report is presented, click “Customize”.
Click the “Print” icon for a printer-friendly version of reports:
To send the report by email, type an email address into the input box to the right and
click “Send By E-Mail”.
Navigation
Use the shortcut links such as “General” to quickly access parts of a report.
To return to the top of the report page, click on the arrow icon located to the left of
each section title:
Select “up level” to return to the previous page.
Grapevine web hosting user manual
Services
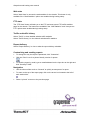
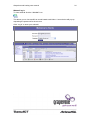
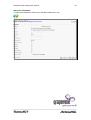
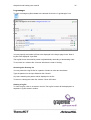
Email
For email services click on the “Mail” icon:
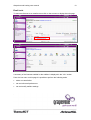
The following page will display all email accounts for the web domain.
Email accounts can be sorted by clicking on one of the filters as shown above in the red
box. The filters stand for the following sorts:
L: sort by type (mailboxes, email redirects, email groups, autoresponders)
8
Grapevine web hosting user manual
B: sort mailboxes by usage
R: sort mailboxes by redirect usage
G: sort mailboxes by email group usage
A: sort mailboxes by autoresponder usage
S: sort mailboxes by spam filter usage
AV: sort mailboxes by anti-virus filtering usage
N: sort mailbox names alphabetically
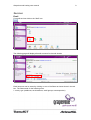
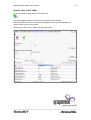
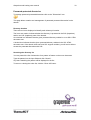
Add a new email name
Add a new email name by clicking on the “Add New Mail Name” icon:
The following page will be presented.
Enter the required data and click “OK”.
9
Grapevine web hosting user manual
10
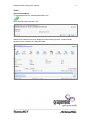
Email tools
To add extra features to an email account click on the account to display the tools page.
A summary of the features enabled for the mailbox is displayed in the “Info” section.
From the icon menu on this page it is possible to perform the following tasks:
add a new email alias
set and edit email preferences
set and modify mailbox settings.
Grapevine web hosting user manual
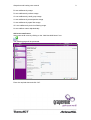
Tasks
Add an alias address
To add aliases click the “Add New Mail Alias” icon:
Enter the alias name and click “OK”.
Aliases for the email account are displayed in the following screen. A search facility
allows the user to search for a particular alias.
11
Grapevine web hosting user manual
12
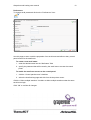
Preferences
To change email passwords click on the “Preferences” icon:
Use this page to enter or edit the properties of an email name and allow or deny control
panel access for the email user.
To create a new email name:
1. enter the desired name into the “Mail name” field
2. specify the password that will be used by the email user to access the control
panel.
To enable the email user access to the control panel:
1. click the “Control panel access” checkbox
2. select the interface language and skin from the drop-down menu.
Click the “Allow multiple sessions” checkbox to allow multiple sessions under the same
email user's login.
Click “OK” to confirm all changes.
Grapevine web hosting user manual
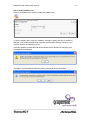
Set or modify mailbox size
Click on the mailbox icon to set or modify the mailbox size:
To set the mailbox size, select the ”Mailbox” checkbox, specify the size of mailbox in
kilobytes, and enable email filtering using the “enable spam filtering” checkbox if you
want the email to be filtered by server.
If the size entered exceeds the total size available for the domain the following error
message will be displayed:
If “Mailbox” is unchecked the following warning message will be generated:
13
Grapevine web hosting user manual
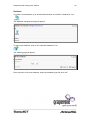
Set redirection
To set redirection for an email account click on the “Redirect” icon:
Mail group
To manage email groups click on the “Mail Group” icon:
The following page will be displayed. In this example there are no group members.
To add a new member/s click on the “Add New Member” icon:
14
Grapevine web hosting user manual
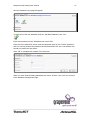
To enter several addresses in the group repeat the process above.
The group members are displayed in the “Address” section.
The group is disabled when “Mail group” is displayed with a cross:
To enable the group after all members are added click on the “Enable” icon:
15
Grapevine web hosting user manual
Once enabled “Mail group” will change to:
To add an email group member, click “Add New Member”. This will bring up the screen
used for entering the email group members.
To delete one or several group members, select them, and click “Remove Selected”.
You can sort group members by address in ascending or descending order clicking on
the “Address” column heading.
To search in the list, enter a search pattern in the search field, click “Search”. All
matching items will be displayed in form of a reduced list. Click “Show All” to revert to
displaying the whole list.
To disable the email group click on the “Disable” icon:
16
Grapevine web hosting user manual
17
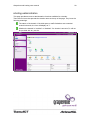
Manage groups
To manage the email groups functionality click on the “Groups” icon:
To include an email address in a particular work group simply select one of the available
groups shown in the left-hand box, highlight it and click “Add>>” and then “OK”.
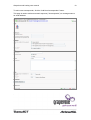
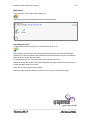
Autoresponders
To create autoresponders click on the ”Autoresponders” icon:
Grapevine web hosting user manual
18
To add a new autoresponder, click the “Add New Autoresponder” button.
This page is used to edit an automatic response ("Autoresponder") to messages sent to
an email address.
Grapevine web hosting user manual
19
To turn an autoresponder on use the “Enable” icon:
To turn an autoresponder off use the “Disable” icon:
When editing click “OK” to save changes.
Click on the “Up Level” icon in the top right corner of the page to return to the previous
page without saving changes.
Setting when an autoresponder should reply to email
You can set the autoresponder to send an automatic response when an incoming
email message contains specific text in its subject line or the body of the email.
You can also set the autoresponder to always respond, regardless of the email’s text.
Setting the autoresponder’s response message
The “Reply subject” field is used to enter the subject to be included in the response.
The “Return address” field is used to specify the return email address that will appear
in the email message, so that all replies are directed to a specified mailbox.
Otherwise replies will be directed to the autoresponder.
You may specify the autoresponder message format and encoding (UTF-8 is
recommended). If you use HTML tags in your auto-reply message, you should select
the “HTML” option. Otherwise select “Plain text”.
The “Reply with text” field is used to enter the text to be included in the response.
You can specify the frequency at which the autoresponder responds to the same
unique email address to manage how it responds when receiving multiple emails from
the same address. This is set based on the number of times you wish the
autoresponder to respond to the email address per day.
You may also set the number of these unique email addresses that the
autoresponder will store in memory and ‘remember’.
This impacts on how the system will implement the autoresponder frequency and
helps manage the load on the web server in the event of extremely high email
volumes.
Grapevine web hosting user manual
20
Forwarding messages
In the “Upon automatic response, forward request to e-mail” field, you can specify an
email address to which incoming emails should be forwarded.
Attachments
If desired, you can attach files to be sent along with the response. The “Attachments”
field lists all files currently attached to the autoresponder. To attach a new file, click
the “Add New Attachment” button. To remove a file, select the corresponding
checkbox, and click “remove selected”.
Grapevine web hosting user manual
Spam filter
To setup spam filtering, click on the “Spam Filter” icon:
Use this page to configure the spam filter.
21
Grapevine web hosting user manual
22
All the incoming email for the email address will be processed according to the following
settings:
1. Select “Use server wide settings” if you wish server level filter settings to apply
when filtering email.
2. Specify the number of hits required for a message to be marked as spam by
entering the value into the “Hits required for spam” field.
3. Check the “Modify spam mail subject” checkbox if you want the subject text of
messages recognised as spam to be appended with specific text. You can modify
this text in the field provided.
4. Click the “Set” button to save changes.
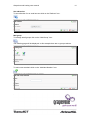
Edit the black list
All messages coming from email addresses specified in the black list will be automatically
marked as spam. Email addresses can be entered in their entirety or can be entered
partially to create patterns of email addresses to add to the black list.
The “Administrator’s black list” contains the black list email addresses added by the
administrator. The “User's black list” entries are added to the user's black list.
This allows you to have different black list settings for different email addresses.
1. To add a new pattern to the list, enter the pattern into the “E-mail pattern” field
and click the “Add” button.
2. To remove a pattern or email address from the list, select it and click the
“Remove” button.
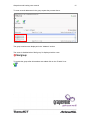
Edit the white list
All messages coming from email addresses specified in the white list will never be
marked as spam. Email addresses can be entered in their entirety or can be entered in
partial form to create patterns of email addresses to add to the white list.
The “Administrator’s white list” contains the white list email addresses added by the
administrator. The “User's white list” entries are added to the user's white list.
1. To add a new pattern to the list, enter the pattern into the “E-mail pattern” field
and click the “Add” button.
2. To remove a pattern or email address from the list, select it and click the
“Remove” button.
Grapevine web hosting user manual
23
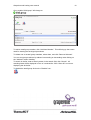
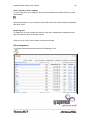
Training the spam filter
You can train the spam filter based on the actual emails you receive.
To access the spam filter training page click the “Training” icon:
This page lists the “From” and “Subject” lines for all email received in your mailbox.
You may mark each email as “spam” (bad email), “ham” (good email), “forget” (forget the
past rating of spam or ham) or “take no action”. Click “OK” to accept the settings.
The spam filter will apply these settings to future mails based on the pattern of email
address and subject line.
To clear the spam filter database and start again, use the “Clear” button.
Grapevine web hosting user manual
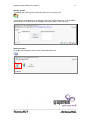
Webmail log in
To view webmail click the “WebMail” icon:
This allows you to view email from a web-based email client. A new window will pop up
requesting the password for the account.
Click “Log in” to enter your webmail.
24
Grapevine web hosting user manual
Domain name server (DNS)
To view the DNS settings click on the “DNS” icon:
This page displays domain name service information for the domain.
We recommend that you do not edit these settings as this may affect the ability for
internet users to view your website.
Click the “Up Level” icon to return to the previous page.
25
Grapevine web hosting user manual
Database
To create a new database, go to domain administration and click the “Databases” icon:
The database management page will appear.
To add a new database, click on the “Add New Database” icon:
The following page will appear.
Enter the name of the new database, select the database type and click “OK”.
26
Grapevine web hosting user manual
27
Next the database users page will appear.
To add users to the new database click the “Add New Database User “icon:
Enter the username into the “Database user name“ field.
Enter the user’s password, and re-enter the password again in the “Confirm password”
field. For security reasons the password should be between five and 14 characters and
should not contain the user name.
Click “OK” to complete the creation of the new user.
When you have finished adding databases and users, click the “Up Level” icon to return
to the database management page.
Grapevine web hosting user manual
28
Hosting administration
This page provides access to administrative functions available for a domain.
There are two icons that precede the domain name at the top of the page. They have the
following meanings.
: The status of the domain: if the disk space or traffic limitations are exceeded
under this domain, the icon will display as "!".
: Whether the domain is “enabled” or “disabled”: if a domain is turned off, it will not
be provided with any service.
Grapevine web hosting user manual
29
Web users
From the menu, click on the “Web Users” icon:
The following page will be displayed listing all existing users.
Add additional users
To add additional users click on the “Add New Web User” icon:
Enter the new user's name in the appropriate field then enter and confirm the desired
password. For security reasons the password should be between five and 14 characters
and should not contain the user name.
If a password is not set FTP access will not be granted to the user.
Specify the hard disk quota, leaving the "Unlimited" checkbox enabled if you do not wish
to limit hard disk space for the user.
Click “OK” to save the new user’s details.
When you have finished, click the “up level” icon to return to the previous page.
Grapevine web hosting user manual
30
Modify preferences
To modify preferences click on the “Preferences” icon:
To allow access to web-user pages via URLs (eg: [email protected]) select the
corresponding checkbox.
Select the “Allow the web users scripting” checkbox to enable scripting for web users'
pages.
Modify existing users
To modify existing users, click on their name in the list of web users.
If "Allow the web users scripting" is enabled in the “Web user preferences” page, then on
this page you should see a number of features that can be provided to the web user.
The features may include Apache ASP support, SSI support, PHP support, CGI support,
mod_perl support, and mod_python support.
Grapevine web hosting user manual
31
To activate any of these features, select the corresponding checkbox.
Click “OK” to submit your changes.
Subdomains
To manage subdomains click on the “Subdomain” icon:
Existing subdomains will be displayed.
Delete existing subdomains
Subdomains may be deleted by selecting the checkbox for the required subdomain and
clicking “remove selected”.
Grapevine web hosting user manual
Add a new subdomain
To add a new subdomain click on the “Add New Subdomain” icon:
32
Grapevine web hosting user manual
33
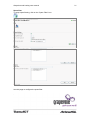
Password-protected directories
To manage password-protected directories click on the ”Directories” icon:
This page allows creation and management of password-protected directories for the
domain.
Directory location
There are two icons displayed to identify each directory's location.
The icons are used to indicate whether the directory is protected in the SSL (httpsdocs)
and/or non-SSL (httpdocs) parts of the domain.
An unlocked icon indicates that the given protected directory resides in a non-SSL HTML
document root.
A locked icon indicates that the given protected directory resides in the SSL HTML
document root. If the domain does not have SSL support enabled, you will not be able to
access the protected directories with SSL.
Searching the directory list
You may search the list of directories for a pattern of letters or other text characters.
Type the pattern into the input field and click “Search”.
Any items matching the pattern will be displayed in the list.
To return to viewing the entire list, click the “Show All” button.
Grapevine web hosting user manual
34
Create a protected directory
To create a password protected directory, click on the “Add New Directory” button:
This will open the protected directory properties page where you can create a new
protected directory, define the properties associated with the new protected directory and
add the users that will have access to this directory.
Note that the names of directories are case sensitive.
Edit protected directory
To edit a protected directory, click on the directory name.
This will take you to the protected directory properties page where you can review and
edit the properties for the protected directory as well as manage its users.
Delete protected directories
To delete one or several protected directories from the list, check the corresponding
checkboxes and click “remove selected”.
This removes the protection from the directory, making the directory and its contents
accessible without the need for a login and password. The directory itself is not physically
removed.
Click on the “Up Level” icon to return to the previous page.
Grapevine web hosting user manual
35
Log manager
To view or manage log files related to the domain click on the “Log Manager” icon:
You may specify the number of lines to be displayed in the list per page in the “lines of
log file to be displayed” input field.
The log file list can be sorted by name in alphabetically ascending or descending order.
To sort click on a column title. An arrow will show the order of sorting.
Searching the directory list
You may search the log file list for a pattern of letters or other text characters.
Type the pattern into the input field and click “Search”.
Any items matching the pattern will be displayed in the list.
To return to viewing the entire list, click the “Show All” button.
Viewing a log file
To view a log file, click on its name in the list. The log file content will be displayed in a
separate “Log files viewer” window.
Grapevine web hosting user manual
36
Save a log file on your computer
To save a log file to your computer, click on the download icon besides the file you wish
to download:
Specify the location on your computer and the file name for the log file being downloaded
then click “Save”.
Delete log files
To delete one or more log files from the list, check the corresponding checkboxes at far
right and click the “remove selected” button.
Click on the “Up Level” icon to return to the previous page.
File management
To manage files and directories click the “File Manager” icon:
Grapevine web hosting user manual
37
This page displays a directory structure allowing you to perform various operations on
files and directories.
Browse a directory
To browse a directory, click on the folder icon in the “Name” column.
Change file or directory permissions
To change permissions for a directory or a file click on the corresponding permission
set in the “Permissions” column.
The permissions settings page will open, allowing you to set permissions for all users.
Select the desired settings using the checkboxes, then click “OK” to save.
Rename a file or directory
To rename a directory or file, click on the small icon at the right of the row:
In the page that opens, type in a new name and click “OK”.
Copy or move a file or directory
To copy or move files or directories to another location, select the required files or
directories using the associated checkboxes at the far right and click “Copy/Move”.
Specify the destination for the file or directory to be copied or renamed to. Then click
“Copy” to copy, or “Move” to move it.
Adjust timestamp
You can also change a timestamp of a directory or file. To do this, click on the
“Touch” icon. The time stamp will be updated with the current local time.
Remove a file or directory
To remove a file or directory, select it using the checkbox then click “Remove
Selected”.
Grapevine web hosting user manual
38
Uploading and creating files
To upload a file to the current directory, click “Add New File” and specify its location.
Click “OK” to confirm and begin the uploading process.
To create a file, click “create file”, then type in a file name in the corresponding field,
check the "html template" box, and click “OK”.
Creating a subdirectory
To create a subdirectory in the current directory, click “Add New Directory”.
Type in the directory name in the “Directory name” field, and click “OK”.
Editing a file
To edit a file, click the “Edit” icon:
The file manager's editor window will open, allowing you to edit the file source.
After you have finished editing, click “Save” to save the file, “OK” to both save the file
and quit file editing, “Cancel” to cancel editing mode, or “Reset” to discard any
changes made.
To edit a file in the WYSIWYG editor, click the “WYSIWYG edit” icon:
Site preview
To preview a website click on the “Site Preview” icon: