1
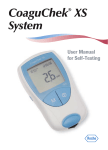
Manual CXS PST 573-34686 8J.qxp
3/29/07
2:04 PM
Page a
®
CoaguChek XS
System
User Manual
for Self-Testing
Manual CXS PST 573-34686 8J.qxp
3/29/07
2:04 PM
Page b
Table of Contents
About this Manual.......................................................................1
Symbols and Abbreviations .....................................................1
User Resources.............................................................................2
Training DVD .................................................................................2
Getting Started .............................................................................2
User Manual ..................................................................................2
Test Strip Package Inserts........................................................3
Lancet Device Package Inserts..............................................3
CoaguChek® XS System User Manual
For investigational use only. Not for use in diagnostic
procedures.
Aspects of the CoaguChek XS System (meter and test strips) and its use are
covered by one or more of the following U.S. patents: 6,662,439; 7,073,246;
6,881,378; 6,207,000; 6,645,368. Additional U.S. patents pending.
ACCU-CHEK, COAGUCHEK, and SOFTCLIX are trademarks of Roche.
All other trademarks are the property of their respective owners.
© 2007 Roche Diagnostics. All rights reserved. 04999045001-0307
The CoaguChek XS System ...................................................4
Anticoagulation Medication ....................................................4
Blood-clotting Time ....................................................................4
How the System Works .............................................................5
The CoaguChek XS Meter .......................................................6
Operating Conditions .................................................................7
Getting Started..............................................................................8
Batteries ..........................................................................................8
Installing (or Replacing) Batteries ........................................9
Meter Setup.................................................................................10
Setting the Date and Time.....................................................11
The Meter’s Display..................................................................14
Code Chip ....................................................................................14
Inserting a New Code Chip...................................................15
Integrated Quality Controls ...................................................16
Manual CXS PST 573-34686 8J.qxp
3/29/07
2:04 PM
Page d
About this Manual
Testing a Blood Sample.........................................................17
Tips for a Good Fingerstick ...................................................17
Important Notes About Blood Testing ..............................18
Always .......................................................................................18
Never..........................................................................................18
Infection Control....................................................................19
Preparing for a Test ..................................................................20
Performing a Test ......................................................................22
Very Low or Very High Test Results ...................................27
Memory...........................................................................................28
Storing Test Results in Memory ..........................................28
Reviewing Stored Test Results.............................................28
Erasing Stored Test Results ..................................................30
Cleaning the Meter..................................................................32
Cleaning the Exterior ...............................................................32
Cleaning the Test Strip Guide ..............................................33
Symbols and Abbreviations
The test strip insert, the label on the back of the meter,
the User Manual, and other packaging material may
contain the following symbols or abbreviations:
Use by/Expiration date
Lot number
For in vitro diagnostic use
This product fulfills the requirements of
Directive 98/79/EC on in vitro diagnostic
medical devices
Catalog number
Please read instructions for use
Error Messages ..........................................................................35
Caution (refer to accompanying documents).
Please refer to safety-related notes in the
manual accompanying this instrument
Other Information .....................................................................43
Product Limitations...................................................................43
Product Specifications.............................................................43
Support/Services.......................................................................44
Symbols.........................................................................................45
Manufactured by
Warranty.........................................................................................48
Store at
1
Manual CXS PST 573-34686 8J.qxp
3/29/07
2:04 PM
Page 2
User Resources
Several resources are available to help you use and
maintain the CoaguChek XS System.
Training DVD
The CoaguChek XS System DVD is for new users of the
CoaguChek XS System. This program will help you get
comfortable with the CoaguChek XS Meter and the
testing procedure.
Getting Started
Test Strip Package Inserts
Be sure to read the test strip package insert for
important updates and keep the insert from your
current test strip package for future reference.
Lancet Device Package Inserts
Be sure to read the lancet device package insert to
learn how to use the lancet device and for important
updates. Keep the insert from your current lancet
device package for future reference.
The Getting Started guide shows you how to perform
your first coagulation test on the CoaguChek XS Meter.
User Manual
This CoaguChek XS System User Manual is a
comprehensive guide to the meter and test strips.
It is designed to provide answers to your questions
about the meter’s operation and use. Read this entire
manual carefully, and refer to it as necessary.
2
3
Manual CXS PST 573-34686 8J.qxp
3/29/07
2:04 PM
Page 4
The CoaguChek XS System
The CoaguChek XS System measures blood-clotting
time (Prothrombin Time) for people who are taking
anticoagulation medications such as Coumadin® or
warfarin. The CoaguChek XS System measures bloodclotting time using blood from the fingertip.
Anticoagulation Medication
Anticoagulation medications, also known as blood
thinners, are prescribed to avoid unwanted clots. Your
blood-clotting time must be monitored to ensure that
your medication dosage is correct.
Blood-clotting Time
The rate at which blood clots is measured in units
called INR. It is very important that you stay within your
target INR range. If your INR is too low, the risk of
blood clots increases. If your INR is too high, the risk
for internal bleeding increases.
Everyone’s INR is different. Your doctor determines the
best INR range for you, depending on why you are
taking anticoagulants and how you react to them. Your
doctor also determines how often your blood should be
tested. Your doctor needs to know your blood-clotting
time in order to successfully treat you.
4
How the System Works
The CoaguChek XS System includes a meter and
CoaguChek XS PT test strips. Each box of test strips
has its own code chip that you insert into the meter.
The code chip contains important information about the
test strips such as their expiration date and lot number.
The CoaguChek XS System makes measuring bloodclotting time easy. The display on the meter guides
you through the testing process. With the code chip
inserted in the meter, you simply insert a test strip and
apply a blood sample when the meter is ready. The
meter displays the result in about a minute. The meter
automatically stores the result in memory so that you
can easily recall results.
The CoaguChek XS PT test strip contains various
ingredients. When a blood drop is applied, the meter
starts the test and the blood mixes with the ingredients
on the test strip. When the meter determines that the
blood has clotted, it stops the measurement and
calculates the result.
5
Manual CXS PST 573-34686 8J.qxp
3/29/07
2:04 PM
Page 6
The CoaguChek XS Meter
A
B
C
D
E
Display
M (Memory) Button
ON-OFF Button
Test Strip Guide Cover
Test Strip Guide
Operating Conditions
F Battery Compartment
Cover
G Code Chip Slot
H SET Button
I Data Port
A
F
B
G
C
To ensure that the CoaguChek XS Meter functions
correctly, follow these guidelines:
• Use the meter at room temperature, between 65°F
and 90°F (18°C and 32°C).
• Use the meter at a relative humidity of less than
85%, without condensation.
• When testing, keep the meter level.
• If you store the meter for a period of time, remove
the batteries.
• Do not use the meter at an altitude higher than
14,000 feet (4,300 meters).
• Do not use the meter near a strong magnetic field,
such as a microwave oven, as this may interfere with
the meter’s proper operation.
Note: The CoaguChek XS Meter automatically shuts off after
3 minutes if no buttons have been pushed.
D
E
H
I
6
7
Manual CXS PST 573-34686 8J.qxp
3/29/07
2:04 PM
Page 8
Getting Started
Refer to the Getting Started guide to learn how to set
up the meter and prepare for and run your first bloodclotting time test.
Batteries
The CoaguChek XS Meter uses 4 AAA batteries. The
recommended batteries, alkaline-manganese batteries,
should last for approximately 60 tests.
When you turn the meter on, the display
briefly shows the battery symbol. The
battery symbol is divided into 4 segments.
With new, fresh batteries in the meter, the
battery symbol shows all 4 segments.
When only 1 segment appears, replace the
batteries. When only 1 segment appears
you can still access results stored in the
meter’s memory.
If you insert new batteries within 1 minute of removing
the old batteries, the date and time settings will remain
in memory. But if you do need to reset the date and
time, refer to the Meter Setup section in this manual.
The meter saves battery power by automatically turning
off after 3 minutes, unless you press a button or insert
a test strip. Even when the batteries are removed, the
test results are saved in memory.
8
Installing (or Replacing) Batteries
Have ready 4 AAA batteries.
1. Open Battery
Compartment
With the meter turned off,
turn it over. Press the
latch gently inward and
lift the cover. Remove
the old batteries, if
necessary.
2. Insert New Batteries
Position the batteries
according to the diagram
inside the battery
compartment. Replace
the cover. Turn the meter
back over.
Whenever you put
batteries in the meter,
it automatically goes to
Setup mode.
9
Manual CXS PST 573-34686 8J.qxp
3. Turn Off
3/29/07
2:04 PM
Page 10
Turn the meter off
.
Meter Setup
The CoaguChek XS Meter is preset with the U.S. date
format (month-day-year) and U.S. time format (12-hour
as opposed to 24-hour).
Before you use the meter for the first time—or if there is
no battery power for more than 1 minute—you’ll have to
set the current date and time.
10
Setting the Date and Time
The date and time settings are important. Each time you
run a test, the meter compares its date with the test
strip’s expiration date. If the test strips are expired, the
meter displays an error message and prevents you from
running a test.
Whenever you put batteries in the meter, it
automatically goes to Setup mode (where you set the
date and time). You can also go to Setup mode at any
time by pressing the SET button (
).
To set the date and time, you’ll use these buttons:
•
to change a setting.
•
(SET) to accept a setting.
11
Manual CXS PST 573-34686 8J.qxp
1. Go to Setup Mode
3/29/07
2:04 PM
Page 12
If the meter is not already
in Setup mode, press the
SET button
.
The date format flashes
in the upper-right corner.
2. Set Today’s Date
12
Press the SET button
.
Press the M button
to change the year. Press
the SET button
.
Press the M button
to
change the month. Press
the SET button
.
Press the M button
to
change the day. Press the
SET button
.
3. Set Current Time
Press the SET button
.
Press the M button
to change the hour. Press
the SET button
.
Press the M button
to change the minutes.
Press the SET button
.
4. Turn Off
Turn the meter off .
If, in the future, you need
to change the date and
time, press the SET
button
to re-enter
Setup mode. After you
change the date and
time, just turn the meter
off . Other set-up
choices in the meter
must be set or changed
by your doctor.
13
Manual CXS PST 573-34686 8J.qxp
3/29/07
2:04 PM
Page 14
The Meter’s Display
When you turn the meter on, it briefly shows all the
display’s letters, numbers, and symbols. Regularly check
that all segments of each letter, number, and symbol
appear. Please compare your meter’s display to the
meter display shown here on this page.
You can display all
the letters, numbers, and
symbols for a longer time
to allow comparison. To do
this, turn the meter on
and then hold down the
ON-OFF button .
The full display should
appear as shown at left.
Inserting a New Code Chip
Have the correct code chip ready.
1. Remove Old Code Chip
With the meter turned off,
remove the old code chip
and throw it away.
2. Match Code Numbers
Make sure that the
3-digit code number on
the new test strip
container matches the
3-digit code number on
the new code chip.
3. Insert New Code Chip
Slide the new code chip
into the code chip slot
until it snaps into place.
Code Chip
Each box of test strips comes with its own code chip.
The code chip provides the meter with information such
as the lot number and expiration date of the test strips.
Before each test, make sure the correct code chip is in
the meter. Each time you open a new box of test strips,
replace the old code chip with the new one.
Protect the code chip from moisture and also from
equipment that produces magnetic fields, such as
a microwave oven.
14
15
Manual CXS PST 573-34686 8J.qxp
3/29/07
2:04 PM
Page 16
Testing a Blood Sample
Integrated Quality Controls
The CoaguChek XS System has built-in quality control
functions in the meter and test strips. The meter
automatically runs its own quality control test as part
of every blood test, so you never have to run quality
control tests with liquid quality controls.
When the quality control test runs, the letters QC flash
on the meter’s display. When the quality control test is
finished, a checkmark (✓) appears following the letters
QC. Then the meter continues to run the blood test.
If the quality control test fails, the
meter displays this error message.
See the Error Messages section in
this manual for an explanation of
this and other error messages and
what to do when they occur.
Tips for a Good Fingerstick
For fingerstick blood testing, increasing the blood flow
in your finger will help you get a good drop of blood.
Before you stick your finger, try the following
techniques until you see that your fingertip has
good color:
• Warm your hand by
holding it under your
arm, use a hand
warmer, and/or wash
your hand with warm
water.
• Hold your arm down
by your side, so that
your hand is below
your waist.
• Massage your finger
from its base.
If needed, immediately after
pricking, gently squeeze
your finger from the base to
encourage blood to flow.
16
17
Manual CXS PST 573-34686 8J.qxp
3/29/07
2:04 PM
Page 18
Important Notes About Blood Testing
Always
• Operate the meter at temperatures between 65°F and
90°F (18°C and 32°C).
• Refer to the test strip package insert for proper use
and handling of test strips.
• Keep the test strip guide and meter clean. See
Cleaning the Meter section in this manual for more
information.
Never
• Store the meter in extreme temperatures below 65°F
or above 90°F (below 18°C or above 32°C).
• Store the meter in damp or humid conditions (greater
than 85% humidity).
• Remove or insert the code chip while the meter is
performing a test.
• Use a code chip from a box of test strips other than
the one in use.
• Touch or remove the test strip during a test.
• Wait more than 15 seconds after sticking your
fingertip before applying the blood.
18
• Add more blood after the test has begun.
• Touch any buttons while a test is in progress.
• Perform a test with a drop of blood from a previous
fingerstick.
Infection Control
The ACCU-CHEK® Softclix lancet device is intended for
use by a single person and is not suitable for use where
testing different persons with the same device may lead
to infections.
19
Manual CXS PST 573-34686 8J.qxp
3/29/07
2:05 PM
Page 20
Preparing for a Test
1. Gather Items
Gather the following
items:
• CoaguChek XS Meter
• Container of test strips
• Test strip code chip
• ACCU-CHEK Softclix
lancet device and
lancet
3. Insert Code Chip
Make sure the meter is
turned off. With the code
number facing up, insert
the code chip into the
code chip slot until it
snaps into place.
4. Prepare Lancet Device
Pull off the cap of the
lancet device. Insert a
new lancet. Twist off the
lancet’s protective cap.
Put the cap back on the
lancet device. Line up the
notches for the cap to fit.
Select the penetration
depth.
Each box of test strips
comes with a matching
code chip. Every time you
open a new box of test
strips, you must replace the
code chip.
2. Match Code Numbers
Make sure the 3-digit
code number on the test
strip container and the
code chip match.
Press the plunger. A
yellow dot appears in
the release button.
5. Wash Hands
Wash your hands in
warm, soapy water.
Make sure your fingertip is
thoroughly dry.
20
21
Manual CXS PST 573-34686 8J.qxp
3/29/07
2:05 PM
Page 22
3. Match the Code
Numbers
Performing a Test
1. Get Ready
Take a test strip out of
the container.
Close the container
tightly.
You have 10 minutes to use
a test strip once you
remove it from the
container.
2. Insert Strip
Slide the test strip into
the test strip guide in the
direction of the arrows
until it stops.
The meter turns on. The
code number of the
inserted code chip flashes
on the display.
22
Confirm that the number
displayed matches the
number on the test strip
container, then press the
M button .
If the numbers are different,
make sure you are using the
code chip that came with
the test strips you are using.
An hourglass appears as
the meter warms up, which
takes about thirty seconds
When the meter is
warmed up a flashing test
strip appears and the meter
begins a countdown. You
have 120 seconds to apply
blood to the test strip.
23
Manual CXS PST 573-34686 8J.qxp
4. Collect the Blood
3/29/07
2:05 PM
Page 24
Massage your finger until
you see increased color in
your fingertip.
Keeping your hand down,
press the tip of the lancet
firmly against the side of
your fingertip. Press the
release button.
Gently squeeze from the
base of your finger to
develop a hanging drop
of blood.
5. Identify the Target
Area
24
Find the target area
on the test strip.
To prevent error
messages, the meter
must be on a table free
of vibrations.
6. Apply the Blood
Within 15 seconds of
sticking your fingertip,
apply the blood to the
target area of the test
strip—from the side of
the test strip.
Hold the blood drop to
the test strip until you hear
a beep. The flashing blood
drop symbol disappears.
Do not add more blood
to the test strip. Do not
touch the test strip.
The result appears
in about 1 minute.
25
Manual CXS PST 573-34686 8J.qxp
7. Record Result
8. Clean Up
3/29/07
2:05 PM
Page 26
Record the result on the
CoaguChek XS System
Prothrombin Time SelfTesting Log Book.
Call your doctor with the
test result.
Remove the lancet from
the lancet device. Place
the used test strip and
lancet in a punctureproof container with a lid.
Turn the meter off .
If the meter is dirty, wipe it
clean with a lint-free tissue
and an approved cleaning
solution. See Cleaning the
Meter section of this
manual.
26
Very Low or Very High Test Results
The CoaguChek XS PT test strips provide test results
if the INR value is between 0.8 and 8.0. If the meter
displays < (less than) 0.8 or > (greater than) 8.0,
repeat the test. If, when you repeat the test, you get
the same result (either < 0.8 or > 8.0), call the
Roche Diagnostics Technical Service Center at
1-800-428-4674.
OR
If you see Error 7, this means the meter was unable to
detect a clot. Repeat the test. Be sure to carefully follow
the steps on the previous pages. For example, make
sure the fingertip is thoroughly dry, use the meter on a
surface free of vibrations, and apply the blood drop
within 15 seconds of sticking
the fingertip. If you still get
Error 7, call your doctor
immediately to arrange for
testing using another method.
27
Manual CXS PST 573-34686 8J.qxp
3/29/07
2:05 PM
Page 28
Memory
Storing Test Results in Memory
The CoaguChek XS Meter automatically stores up
to 100 test results and their dates and times in its
memory. If the memory is full when you perform a test,
the oldest result is automatically deleted. The most
recent result is always saved.
2. View Most Recent
Result
The most recent test
result appears. The
letters mem indicate that
you are viewing a result
in memory. The time and
date of the test also
appear.
If there are no results in
memory, a 0 appears in
the display’s top-right
corner.
3. View Earlier Results
To view earlier results,
press the M button
again.
After you have viewed all
the results in the memory,
3 dashes appear.
Note: All test results remain in memory even when the meter
is without batteries.
Reviewing Stored Test Results
You can review stored test results even when the
meter’s battery power is low.
To review results in memory:
1. Access the Memory
28
Press the M button .
The meter turns on, if it is
not already on, and goes
to Memory mode.
29
Manual CXS PST 573-34686 8J.qxp
3/29/07
2:05 PM
Page 30
Erasing Stored Test Results
2. Confirm
You can erase all of the test results that are stored
in the meter’s memory. You cannot, however, erase
individual test results.
To erase all stored results:
1. Go to Erase mode.
With the meter turned off,
press and hold down
the M button . While
you are holding down the
M button, press the ONOFF button
and then
hold down both buttons
for at least 5 seconds.
The meter displays mem
(flashing) and clr. The
number of results in
memory is shown in the
top-right corner of the
display.
30
Press the M button
to
confirm that you want to
erase the entire memory.
The hourglass symbol
flashes while the test
results are being erased.
Then, the counter is set to
0 and 3 dashes appear.
Note: To exit Erase mode
without erasing the results,
press the ON-OFF button
instead.
31
Manual CXS PST 573-34686 8J.qxp
3/29/07
2:05 PM
Page 32
Cleaning the Meter
It is important to keep the meter clean. Clean the meter
whenever it looks dirty or, if you prefer a regular
schedule, clean the meter each time you open a new
box of test strips.
Use only the following products to clean the meter:
• 10% bleach solution (1 part bleach and 9 parts water)
• 70% isopropyl alcohol solution
• lint-free tissues
• cotton swabs
Caution: Do not spray any cleaning solution on the
meter. Never use a spray of any type.
Cleaning the Test Strip Guide
1. Open the Cover
With the meter turned off,
use your thumbnail
to open the cover of
the test strip guide by
pressing its front edge
upward. Move the cover
safely away from the
meter. Then rinse the
cover with water or wipe
it clean.
2. Clean the Test Strip
Guide
Clean the easily
accessible areas with
a cotton swab.
Caution: Do not insert
any objects into the
test strip guide. Doing
so could damage the
electrical contacts
behind the test strip
guide.
Cleaning the Exterior
32
1. Clean the Exterior
With the meter turned off,
wipe the meter’s exterior
clean.
2. Dry the Exterior
With a lint-free tissue,
dry the meter.
33
Manual CXS PST 573-34686 8J.qxp
3/29/07
2:05 PM
Page 34
Error Messages
3. Allow to Dry
4. Close the Cover
34
With the cover off, allow
the test strip guide to dry
for about 10 minutes.
Close the cover, and
make sure it snaps into
place.
You may see the following error messages while using
the CoaguChek XS Meter. If you see an error message,
first try to correct the problem using the solution
described below. If the problem persists, call the
Roche Diagnostics Technical Service Center at
1-800-428-4674.
Error: Test Strip
Possible causes:
• A test strip was already
inserted when the
meter was turned on.
• The meter timed out
after you inserted the
test strip.
• The test strip is
unusable.
• The test strip is not a
CoaguChek XS PT test
strip.
Solution:
Remove the test strip.
Then repeat the test with
a new CoaguChek XS PT
test strip.
35
Manual CXS PST 573-34686 8J.qxp
36
3/29/07
2:05 PM
Page 36
Error: Meter Temperature
The meter is too cold or
too warm to measure
correctly.
Solution:
Turn the meter off and
allow it to stand for
about 30 minutes at
room temperature
between 65°F and 90°F
(18°C and 32°C).
Error: Test Strip Guide
Cover
The test strip guide cover
is not properly closed.
Solution:
Close the test strip guide
cover.
Error: Battery
The battery level is too
low.
Solution:
Replace the batteries.
See the Batteries section
of this manual.
Error: Code Chip
The code chip is missing,
not properly inserted, or
damaged.
Solution:
Check to see if you
have the correct code
chip properly inserted
into the meter. For more
information, see the
Code Chip section of
this manual.
If the code chip is
damaged, call the Roche
Diagnostics Technical
Service Center at
1-800-428-4674.
37
Manual CXS PST 573-34686 8J.qxp
Error: Test Strip Expired
The test strip has expired.
Error: Test Strip
Unusable
The test strip is unusable.
38
3/29/07
2:05 PM
Page 38
Solution:
Check the meter’s date
setting. If it is not correct,
set the correct date. For
more information, see the
Meter Setup section of
this manual.
If the date is correct, turn
the meter off and remove
the code chip and the
test strip. Then use the
code chip and a test strip
from a new box of test
strips.
Solution:
Turn the meter off,
remove the test strip, and
then re-insert it. If the
error message reappears,
discard the unusable test
strip and use a new one.
Error: Time Exceeded
You did not apply blood
to the test strip within 120
seconds after the blood
drop symbol appeared.
Solution:
Turn the meter off and
remove the test strip.
Repeat the test using a
new test strip and blood
taken from a new
fingerstick from a
different finger.
Error: Blood Application
Error applying blood to
the test strip.
Solution:
Turn the meter off and
remove the test strip.
Repeat the test using a
new test strip and blood
taken from a new
fingerstick from a
different finger.
39
Manual CXS PST 573-34686 8J.qxp
40
3/29/07
2:05 PM
Page 40
Error: Test Strip
Interference
The test strip was
touched or removed
during the test.
Solution:
Turn the meter off and
remove the test strip.
Repeat the test using a
new test strip and blood
taken from a new
fingerstick from a
different finger.
Do not touch or remove
the test strip when a test
is in progress.
Error: Quality Control
Failure
The test strip failed the
internal quality control
check. The test strip is
unusable.
Solution:
Turn the meter off and
remove the test strip.
Repeat the test using a
new test strip and blood
taken from a new
fingerstick from a
different finger.
Error: Measurement
Error
Measurement error
caused by the blood
sample.
Solution:
If you see Error 7, this
means the meter was
unable to detect a clot.
Repeat the test. Be sure
to carefully follow the
steps on the previous
pages. For example,
make sure the fingertip is
thoroughly dry, use the
meter on a surface free
of vibrations, and apply
the blood drop within 15
seconds of sticking the
fingertip. If you still get
Error 7, call your doctor
immediately to arrange
for testing using another
method.
41
Manual CXS PST 573-34686 8J.qxp
3/29/07
2:05 PM
Page 42
Other Information
Error: Internal Error
An error occurred during
the internal diagnostic
test.
42
Solution:
Turn the meter off and
remove the batteries.
Wait at least 1 minute
before re-inserting the
batteries into the battery
compartment. Re-set
the date and time as
described in the Meter
Setup section of this
manual.
Caution: The date
and time must be
set correctly.
Repeat the test. If you
see the same error
message again, the
meter has a defect. Call
the Roche Diagnostics
Technical Service Center
at 1-800-428-4674.
Product Limitations
Please read the information packaged with the test
strips regarding up-to-date product specifications and
limitations.
Product Specifications
Operating Conditions
Temperature
+65°F to +90°F (+18°C to +32°C)
Relative humidity
Less than 85% (without condensation)
Maximum altitude
14,000 feet (4300 m)
Placement
Operate the meter on a level, vibration-free
surface or hold it so it is roughly
horizontal.
Measuring range
Refer to the test strip package insert.
Memory
100 test results with date and time
Interface
Infrared interface, LED/IRED Class 1
Battery operation
4 AAA batteries
Number of tests per
set of batteries
Approx. 60 tests
Safety class
III
Automatic power-off
After 3 minutes
Dimensions
5.43 x 3.07 x 1.10 in (138 x 78 x 28 mm)
Weight
4.48 oz. or 127 g (without batteries)
43
Manual CXS PST 573-34686 8J.qxp
3/29/07
2:05 PM
Page 44
Symbols
Sample Material
Sample type
Capillary whole blood or
non-anticoagulated venous whole blood.
Sample size
At least 10 µL
Interference
Refer to the test strip package insert.
The following table lists all of the display screen icons
and their meaning.
Symbol
Meaning
Test strip (without sample application area)
Non-Operating Storage and Transport Conditions
Temperature range
-13°F to +158°F (-25°C to +70°C)
Relative humidity
10 to 85% (without condensation)
Test strip (with sample application area)
Apply sample
User must wait until the meter has
completed an action.
Support/Services
Questions
Please call the Roche Diagnostics Technical Service
Center at 1-800-428-4674 if you have questions
regarding the handling of your meter, the reliability of
your results, or if you suspect the meter is defective.
Repairs
Please note that repairs, new settings or other
modifications to the meter may only be performed by
persons authorized by Roche Diagnostics.
44
24-hour time format
12-hour time format
Time between midnight and noon
(in 12-hour time format)
Time between noon and midnight
(in 12-hour time format)
Indicates the results are displayed as a
Quick percentage value.
Indicates the results are displayed in
Seconds.
Indicates the results are displayed in
INR units.
45
Manual CXS PST 573-34686 8J.qxp
Symbol
3/29/07
2:05 PM
Page 46
Meaning
Beep tone is turned on
Beep tone is turned off
Result is above the chosen therapeutic range
(only with INR as unit)
Result is below the chosen therapeutic range
(only with INR as unit)
• Results in the chosen unit
• Error numbers
Memory contains no results or no further
results
Symbol
Meaning
Battery status:
• When the batteries still have their full
charge, all segments are lit.
• Individual segments disappear one by one
as the batteries become weaker.
• When there is no segment remaining, you
can no longer perform a test. You can,
however, still access the meter’s memory.
The meter is in Memory Mode.
Automatic quality control completed
successfully
Reports an error (see Error messages)
Displays the time in HH:MM format
Displays the date in DD-MM-YY,
MM-DD-YY or YY-MM-DD format.
The monitor is in Setup Mode.
Room or meter temperature is outside the
acceptable range.
Communication is taking place via the
infrared interface
Measurement chamber cover is open.
Indicates the code number of the code chip
inserted in the meter.
Result in the chosen unit is above the
measuring range.
Result in the chosen unit is below the
measuring range.
46
47
Manual CXS PST 573-34686 8J.qxp
3/29/07
2:05 PM
Page 48
Warranty
CoaguChek XS Meter Limited (1 Year) Warranty
ROCHE DIAGNOSTICS warrants, to the original
purchaser only, that the meter shall be free from all
defects in material and workmanship for a period of
one year from the date of purchase.
Purchaser’s sole and exclusive remedy, with respect to
the CoaguChek XS meter and parts thereof, shall be the
repair and/or replacement of the meter or parts at the
option of Roche Diagnostics.
THE ABOVE WARRANTY IS EXCLUSIVE OF ALL
OTHER WARRANTIES, AND ROCHE DIAGNOSTICS
MAKES NO OTHER WARRANTIES, EXPRESS OR
IMPLIED, INCLUDING WITHOUT LIMITATION THE
IMPLIED WARRANTY OF MERCHANTABILITY OR
FITNESS FOR A PARTICULAR PURPOSE. IN NO
EVENT SHALL ROCHE DIAGNOSTICS BE LIABLE TO
THE PURCHASER OR ANY OTHER PERSON FOR ANY
INCIDENTAL, CONSEQUENTIAL, INDIRECT, SPECIAL
OR PUNITIVE DAMAGES ARISING FROM OR IN ANY
WAY CONNECTED WITH THE PURCHASE OR USE OF
THE METER. NO WARRANTY OF MERCHANTABILITY
OR FITNESS FOR A PARTICULAR PURPOSE, IF ANY IS
IMPLIED FROM THE SALE OF THE COAGUCHEK XS
METER. NO WARRANTY, EXPRESS OR IMPLIED (IF
ANY), SHALL EXTEND FOR A LONGER DURATION
THAN THE DURATION OF THE EXPRESS WARRANTY
STATED ABOVE.
48
The foregoing warranty shall not apply to a meter
which is damaged by accident or subject to alteration,
misuse, tampering, and/or abuse, including the use of
Dispatch® products. Meters which show damage
or misuse will be handled in accordance with the
non-warranty service policy of Roche Diagnostics.
The warranty of the repaired/replacement meter will
expire on the date of the original warranty expiration or
ninety (90) days after shipment of a replacement
system, whichever period is longer.
49
Manual CXS PST 573-34686 8J.qxp
50
3/29/07
2:05 PM
Page 50
Manual CXS PST 573-34686 8J.qxp
3/29/07
2:05 PM
Page 52
Roche Diagnostics
9115 Hague Road
Indianapolis, IN 46256
www.coaguchek.com