1
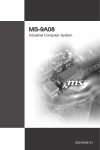
ENVOY INSTRUCTION MANUAL www.lectern.com.au INSTRUCTION MANUAL Page 2 INSTRUCTION MANUAL Quick Sheet Introduction The Envoy has been developed with the single task of improving any kind of presentation, while retaining the functionality of a normal PC. This lectern possesses a 22” wide HD screen touch monitor and an integrated PC. It is placed on a firm floor-standing foot with electric height adjustment. The system is provided with a XLR microphone socket with shock-mount and lighting next to the monitor. For users who require the usage of their own notebook, the new Envoy includes all the connections needed to switch between the lectern and a notebook for displaying any source of presentations. Combined with Sho-Q presenter support tools, the system adds confidence to the user - and productivity to meetings - with seamless execution of multiple presentations. Windows 7 and Vista users may use Sho-Q 7, which adds pen and touch interactivity also. Sho-Q 7 The Envoy comes with Sho-Q 7 presentation software. This is the newest version of the Sho-Q series which offers complete compatibility with Windows 7 and the existing MS Powerpoint versions. To start using Sho-Q, a projector or an external display has to be connected to the lectern via a VGA connection. Then the presentations can be imported, either through setting them up with sho-Q Planner, by using sho-Q presenter`s browser, or by inserting a USB memory stick with a Power Point presentation that has been prepared with Sho-Q Pre-processor. Figure 1 shows the selection window of Sho-Q 7 FIGURE 1 with various presentations set up for demonstrative purposes. The software is intuitive to learn and allows for great flexibility in maneuvering through the presentation while presenting. Switching between the different presentations uploaded in Sho-Q 7 is made easy and fast which saves time when setting up. Page 3 INSTRUCTION MANUAL Find more information about the use of Sho-Q in this User manual. For software installation see the Installation manual section. Presentation System preparation FIGURE 2 FIGURE 4 After switching on and establishing a VGA or HDMI connection with a projector or a second monitor, the lectern is ready to be used. Figure 2 shows the front side of the lectern where the power button is located and the multiple card readers. The system is equipped with the option of switching between two types of control: the internal , or if the client prefers – an external control such as a notebook, other laptop FIGURE 3 or a PC. This feature is restricted to use of the VGA connections. Multiple cable connections are provided in order to fit the specified scenario. Figure 3 illustrates the multiple connectors. The cables have to be connected to the lectern’s VGA and USB plugs on the notebook panel, as well as to the VGA and USB port which belongs to the notebook. After this is done, a single switch operates between the lectern and the external control. Note that the switch will only function when the USB cable is attached, the switcher draws its 5V from the notebook, when removed, the Iectern automatically returns to the default connection and shows the lectern PC information. Internal monitor control: The Envoy features a state-of-the-art DELL monitor with ultra wide viewing angle. 5 buttons are implemented for the screen adjustment. The lower one is a switch off and on button and the user should be careful not to switch off the monitor by mistake while using these controls. Figure 4 is a snapshot of the controls. Page 4 INSTRUCTION MANUAL Find next to the top edge of the monitor the electrical switches for lift up and down, as well as the light switch. Next to these buttons find the sockets for the microphone (with shock-mount) and for a reading light (Figure 5). FIGURE 5 Figure 6 shows the multiple card reader ports which are provided on the front panel, as well as the 4 USB inputs. Next to the USB ports, the DVD- Rom can be found with the power button at the right. FIGURE 6 The steps of using this system depend on the user and his or her presentation desires. The basics of operating with the lectern and troubleshooting can be found in the User manual. If the user is not well acquainted with the setting up, the Installation manual section will provide the necessary information. Page 5 INSTRUCTION MANUAL Specifications Details internals: Unit Brand Specification Remark CPU:supports Intel Penryn/Core 2 Duo /Celeron M processors, 800/1066MHz Front Side Busbar P7350 – 2 GHz installed System Memory:2x204-Pin DDRⅢ 800/1066MHz SO-DIMM, Maximum 8GB, 2GB installed Chipset:Intel GM45+ICH9EM I/O chip:Winbond W83627DHG-P Ethernet:Realtek 8111C, 1000Mbps,2x RJ-45 BIOS:8M-bit SPI Flash Watchdog:timer included Main board Norco State Detection:voltage, fan speed and temperature Display:support VGA,DVI,HDMI,LVDS and TV-OUT display output Support Infrared, Video card Memory:Dynamically shared 512MB system RAM Support GPIO Support BIOS Gas Resolution:CRT Maximum 2048×1536@85Hz, LCD Maximum 1920×1080@60Hz Defense Support Instant Recovery Storage:2xSATAⅡ,1xCF Support LVDS Audio:Realtek ALC888, Speak-out, Line-in Controller:Intel GM45with integrated GMA 4500MHD Working temperature:0℃~60℃ Storage Humidity:-40%~80% Working Humidity:0%~95% relative humidity, no condensation Suitable Type: laptop CPU CPU Series: Core 2 Duo P7350 installed Core Quantity: 2 Core Type:Penryn-3M Basic Frequency:2000 MHz Front Side Busbar:1066 MHz CPU Intel Execution Craft:45nm First-level code cache: 32 KB per core First-level data cache: 32 KB per core Second-level cache:3 MB (On-Die, ECC, ASC, Full-Speed) Maximum Power Cost:25w Page 6 INSTRUCTION MANUAL Package Measure:35mm*35mm All Copper Radiator, Silent Fan Cooler Cooler Master Type: DDR III Basic Frequency:1333MHz Memory Kingston Single memory Capacity:2GB Interface:SATA 3Gb/s Cache:16MB Capacity:320GB Hard Drive Seagate Size:2.5" Rotating Speed:7200 RPM Supports G-Force Protection technology Supports SmartAlign™ technology Type: slot-in Standard:Combo Optical Drive H-L Interface:SATA Cache:2MB Power Rating:250w Power delta PFC initiative Input Voltage:100-240V/47-63Hz Certification:CE、FCC、CCC etc. Panel Size:54.61 cm(21.5 inch) Aspect Ratio: widescreen (16:9) Panel Type IPS (in Plane switching) Optimum Resolution:1920 x 1080,60 Hz Contrast Ratio: 1000:1(typical),10,000:1(dynamic) Brightness:250 candela/sq.m. (typical) Display LG Response Time:8 ms (gray scale to gray scale) IPS technology, achieves color consistency in almost any viewing angle Angle of view: Vertical 178°/ horizontal 178° Color Gamut:82 %2(100 % s RGB coverage) Color Depth: 16.7 M Pixel Space:0.247 mm Voltage:100 to 240 VAC/50 or 60 Hz ± 3 Hz/1.5A(typical) Power Cost:22 W (typical) Page 7 INSTRUCTION MANUAL Details externals: general specifics of the Envoy: PC: Core2Duo PC, Intel m/b, 2GB, 320GB HDD, Windows 7, LAN hub Screen: 22” full HD 1920x1080 screen with resistive touch On the front panel: 4 USB 2.0, 1 DVD- Rom, multi-card reader, power button On top: electrical height control switches, reading light switch, XLR3 microphone socket, XLR4 Light socket, 5 control buttons for the monitor settings. Notebook panel: Built-in A-B KVM switcher to switch between the lectern and a notebook, VGA port, Audio jacks, wireless antenna, USB, spare button. Page 8 INSTRUCTIONS MANUAL User manual In this manual the basics of operating the ILS21HLand Sho-Q7are explained as well as certain troubleshooting possibilities. Controls and Connections Turning on lectern The lectern is started like any other commercially available PC. If the PC is not switching on, the power cable should be checked. There are two possible locations of the problem. The first possibility can be that the cable is not plugged either in the power socket on the ground or that the lectern itself is not receiving power from the main power cable in the pillar. For solving this, the screen platform has to be removed from the stand and the connections checked. Figure 7 demonstrates the proper connection between the lectern and the main power cable running through the pillar. FIGURE 7 Page 9 INSTRUCTION MANUAL Height control The Envoy is capable of height adjustment. The user can adjust the system according to his or her desire, using the two switch controls, which can be found next to the screen and the reading light switch. The direction of adjustment is marked under the switches. If the system is not working then the phoenix connectors, located on the back of the PC, should be checked. Figure 8 shows the location of the phoenix plug in its proper placement. FIGURE 8 FIGURE 9 Light The switch for the reading light is positioned next to the height controls. The light has to be carefully plugged in the light socket. In case the light does not work, the switch should first be checked (Figure 9). Microphone The microphone can be directly connected to an amplifier from under the PC board audio socket. In case of problems, this connection has to be checked first. Figure 10 shows the location of the XLR cable. FIGURE 10 Page 10 INSTRUCTION MANUAL Multi-card reader The Envoy is equipped to offer maximum data exchange flexibility. A wide range of industry standard SD cards can be read by the internal processor of the ILS21H. It should be noted that the card reader is not equipped with a spring lock. Therefore the card should not be pushed; it will fit in only with careful positioning. If the lectern does not recognize the hardware, the card should be reinserted again. Figure 11 shows the various card types which can be inserted. FIGURE 11 USB ports The 4 USB ports on the front panel are available for the user memory sticks at the same time. For their usage, the mode should not be changed with the ILS21-notebook switch. If the PC does not recognize the user's USB input and the device has already been checked, the internal connections inside the lectern will require inspection (Figure 12). FIGURE 12 Page 11 INSTRUCTIONS MANUAL DVD- Rom The DVD- Rom is positioned next to the power button on the front panel. The client can load his or her needed information on the ILS21HL internal computer or burn a disk with the desired files. Screen adjustments buttons The system possesses 5 adjustment buttons which control the screen settings. They can be found next to the screen. The general functions are listed below from top to bottom as shown on Figure 14: 1-Present modes 2-Screen Brightness and contrast 3-Menu 4-Exit 5-Switch on/off While using the buttons, the user should follow the new controls that the buttons will be responsible for, which will appear on the screen, next to each of them. FIGURE 14 Connecting to a projector or other display Connecting to an external display or a projector is a fast and easy task. The VGA output connector of the lectern is positioned underneath the PC next to the other output connectors. When setting up the connection it is important that the screws are tightened. Several options are available for the screen- projector/screen connection. They can be selected from the Start menu > Connect to a projector: FIGURE 15 Page 12 INSTRUCTION MANUAL It is important to understand the specifics of these connections in order for the presenter to be comfortable while presenting and to be able to distinguish between a problematic connection and an incorrect one. When the user wants to choose to duplicate (clone) the screen, the resolution of the ILS screen has to be altered according to the resolution of the receiver. This can be simply adjusted trough the screen resolution menu, which will appear after a right click on the desktop (Figure 15). Switching between main PC and a notebook For making the switch between the lectern PC and the desired control, for example a notebook, the notebook panel must be used. FIGURE 16 In order to switch between the lectern and a notebook, a VGA, audio and USB connection must be established. It should to be noted that on the panel there is a spare button with no function and it should not be mistaken with the switch. Page 13 INSTRUCTION MANUAL Setting up In order to set up the lectern properly the following steps have to be taken, which will minimize the chance of problems occurring during the procedure. The assembly process should be performed by at least 2 people. Step 1: First the side tables have to be fixed to the stand. While tightening them, it has to be made sure that they are horizontal. Then the base plate has to be mounted. All the cables have to be pulled through the cable hole. Then the plate with the tablet`s center piece and the cable guide plate have to be mounted onto the pillar. Page 14 INSTRUCTION MANUAL Step 2: The support of lectern is at angle of 12o, while the tables on each side are horizontal. For placing the head and making the wire connections, it will be easier to put a block under the stand. This will make the table for the head horizontal and will prevent the lectern itself to fall over during the set up of the wiring. Page 15 INSTRUCTION MANUAL Step 3: To fix the table for the PC on the stand, 4 M8 bolts are provided. The bolts have to be tightened firmly. For this it is suggested to not only use an electrical screwdriver, but also a manual hex key. Page 16 INSTRUCTION MANUAL Step 4: Now the head needs to be placed and connections made. First notice in the connections bay of the system where the cables go and verify that all cables are of appropriate length. Carefully place the unit on the support plate so that it exactly fits. Now take 2 ea M4 screws and screw these into the audience side corners loosely. This should allow lifting the presenter side about 10 cm to reach inside for the cabling. IF too tight than use longer screws. Place a block under the presenter side of the unit to allow making the cable connections easily. Plug the cables in the sockets at the back of the PC. Make the power and microphone connections first. Then connect the electrical height via the Phoenix plug. The next step is making the VGA connection. Make sure the screws of the VGA plug are tightened.. As a last step, the other LAN, USB and audio plugs can be connected. Now remove the block and insert all screws in the support plate and tighten them carefully. Step 5: Plug the cables into the floor box or make the connections from under the pedestal. Now fire up the systems to see if all functions work…. Enjoy the use of the Envoy Intelligent Presenter Lectern! Page 17