1
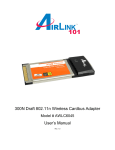
802.11g Wireless Cardbus Adapter
Model # AWLC3028
User’s Manual
Rev. 1.1
Table of Contents
1. Introduction................................................................................................................................. 3
1.1 Package Contents .................................................................................................................. 3
1.2 Features ................................................................................................................................. 3
2. Installation................................................................................................................................... 4
2.1 Install Driver & Utility.......................................................................................................... 4
2.2 Verify Driver Installation.................................................................................................... 11
3. Configuring the Adapter ........................................................................................................... 13
4. Wireless Configuration Utility.................................................................................................. 24
4.1 General................................................................................................................................ 24
4.2 Profile.................................................................................................................................. 25
4.4 Advanced ............................................................................................................................ 28
4.5 Status................................................................................................................................... 29
4.6 Statistics .............................................................................................................................. 30
Appendix A – Specifications ........................................................................................................ 39
Appendix B – Information ............................................................................................................ 40
Technical Support ......................................................................................................................... 42
2
1. Introduction
Thank you for purchasing the 802.11g Wireless Cardbus Adapter. This Cardbus
Adapter is designed to comply with IEEE 802.11g Wireless LAN standard and is
suitable for notebook computers or desktop computers with a 32-bit Cardbus slot.
This Adapter supports WiFi Protected Access (WPA2-PSK and WPA-PSK) data
encryption for higher wireless security that protects your wireless network from
eavesdropping. Client users are required to authorize before accessing the APs or AP
Routers, and the data transmitted through the network is encrypted/decrypted by a
dynamically changing secret key.
1.1 Package Contents
Before you begin the installation, please check the items of your package. The package
should include the following items:
•
Wireless Cardbus Adapter
•
•
Quick Installation Guide
Installation CD (Driver/Utility/Manual)
1.2 Features
•
•
•
•
•
•
Compatible with IEEE 802.11g high rate standard to provide wireless
transmission speeds of up to 54Mbps data rate
Maximum reliability, throughput and connectivity with automatic data rate
switching
Supports wireless security WPA2, WPA, WPA2-PSK, WPA-PSK, and 64/128-bit
WEP
Integrated microstrip dual diversity antenna for the multi-path environment
Drivers support Windows 2000, XP and Vista
Simple user setup & diagnostics utilities
3
2. Installation
2.1 Install Driver & Utility
This section provides instructions on how to install the Wireless Cardbus Adapter. The
driver is installed along with the utility.
Insert the Cardbus adapter into an available Cardbus slot and turn on your computer.
Windows 2000/XP Users: After turning on the computer, Windows will launch the
Found New Hardware Wizard. The Found New Hardware Wizard appears differently
depending on your operating system.
Click Cancel to quit the wizard and insert the Installation CD into your CD drive. Skip
ahead to Step 1
Windows Vista Users: After turning on the computer, Windows will install its built in
drivers for this card. A popup window will appear telling you that the driver was installed
correctly.
4
Once you see this message, continue to Step 1.
Step 1 The Autorun screen will pop up. Select Install Utility and Driver from the menu.
Note: If the Autorun screen doesn’t appear automatically, or if you get a blank white
screen, go to Start, Run, and type D:\Utility\Setup.exe (where D is the letter of your
CD drive) and click OK.
Windows Vista Users: At this point, you may get a warning message like the one
below. Make sure that you click Allow to continue with the installation.
5
Step 2 Click Next at the welcome screen.
Windows 2000/XP Users: Click Continue Anyway at the Windows Logo Screen. (For
Windows 2000, click Yes at the Digital Signature Not Found prompt).
6
Step 3 Click Finish to complete the installation.
Windows 2000/XP Users, skip ahead to section 2.2.
7
Windows Vista Users: Follow the instructions below to install the correct driver for
your card.
Right click on My Computer on the desktop and select Properties.
Click on the Device Manager link on the left side of the screen.
Expand the Network adapters category. Right click on the Realtek 8158 Extensible
802.11b/g Wireless Device and click on Update Driver Software.
8
Click on Browse my computer for driver software
Click on Let me pick from a list of device drivers on my computer
9
Click Install this driver software anyway
When you see the following screen, the adapter is successfully installed.
10
2.2 Verify Driver Installation
To verify if the driver has been installed successfully, please perform the following steps.
Step 1 Right-click on My Computer from your desktop and select Properties.
Step 2 If you are using Windows XP/2000 select the Hardware tab, then click on
Device Manager.
If you are using Windows Vista, click on the device manager link on the left side of the
screen.
11
Step 3 Click the “+” next to Network adapters from the list and verify that AirLink101
802.11g Wireless Cardbus Adapter is listed and no yellow question mark is beside it.
If AirLink101 802.11g Wireless Cardbus Adapter is not listed, or you see a yellow
question mark beside it, you will need to reinstall the driver.
12
3. Configuring the Adapter
3.1 Windows 2000/XP Configuration
This section describes how to connect your wireless adapter to a wireless network.
Note to Windows XP Users:
You must disable the Wireless Zero Configuration Utility in order to use the bundled
Wireless Utility. Please follow the steps below to disable XP’s wireless utility.
Double-click on the Wireless Network Connection Icon in the system tray and then
click on Properties or Advanced.
When the new wireless network connection properties window appears, go to the
Wireless Networks tab, uncheck the “Use Windows to configure my wireless
network settings” check box and click OK.
13
If there is no Wireless Networks tab, skip ahead to Step 1
Step 1 To open the utility, double click on the Wireless Configuration Utility icon in the
system tray at the bottom right-hand corner of your screen.
Step 2 Go to the Available Network tab, select the SSID (Network Name) of the
wireless network you wish to connect to, and click Add to Profile.
14
If the network you are attempting to connect to does not have encryption enabled, you
will see the following box pop up on your screen:
Click OK to connect.
If the network you are attempting to connect to is configured for encryption, the following
window will appear:
15
Enter the encryption settings for your router in the appropriate boxes and click OK to
connect.
Step 3 You should now be connected. Click on the general tab to check the status of
your connection. It should say Associated next to status, and there should be green
bars next to Signal Strength and Link Quality.
16
17
3.2 Windows Vista Configuration
Windows Vista has its own built in utility, so the AirLink101 Wireless Configuration Utility
is not used.
To connect to a network using the Windows Vista utility, right click on the networking
icon down in the bottom right hand corner. Then click on Connect to a network.
Select your network from the list and click Connect.
18
If the network you are connecting to does not have encryption enabled, you will see the
following warning:
19
Click Connect Anyway to connect to the network.
If the network you are attempting to connect to has encryption enabled, a box will
appear asking you to enter your encryption key.
20
Enter your encryption key into the box and click Connect to establish a connection. If
you do not know what your encryption key is, contact your router manufacturer for
assistance.
You should now be connected to your network.
21
To save the connection settings so that you don’t have to go through the connection
setup process each time you start your computer, check the boxes for Save this
network and Start this connection automatically, then click Close to complete the
setup.
3.3 Troubleshooting
If you are experiencing problems with the connection (unable to connect, low signal
strength, slow connection speed, not working, unstable wireless connection) you will
want to tune your router’s signal by changing channels on the router.
You do not need to change the channel on the card, it will automatically pick up the new
channel after you reboot. The only channel that you need to change is the router’s
channel.
Your router has 11 different channels to choose from. Start with channel 1 and work
your way up. Each time you change the channel on the router, make sure that you
restart the wireless computer before trying to connect again. Keep going through the
channels until you find one that gives you a stable connection.
22
For instructions on changing channels, refer to the documentation that came with your
router.
23
4. Wireless Configuration Utility
This section describes the various functions of the Wireless Configuration Utility that
you can configure, including the settings of wireless encryption.
4.1 General
The General tab provides you with the status of the current connection, including signal,
network name (SSID), IP Address and router channel.
24
4.2 Profile
The Profile tab lists current profiles and allows you to create new profiles.
Click Add to create a new profile.
Select a profile and click Edit to edit an existing profile.
Select a profile and click Set Default to activate a profile.
25
Enter a Profile Name and SSID. You can also configure your encryption settings for
the profile. Click OK to save the profile.
26
4.3 Available Network
Available network lists all of the networks that the adapter sees in your area. Clicking
Refresh will refresh the list. To connect to a network, select a network from the list and
click Add to Profile.
27
4.4 Advanced
This section contains various advanced wireless settings. These settings are for
advanced configuration ONLY. If you do not know what these settings are for, do not
change them. Selecting the wrong settings will prevent your adapter from operating
properly. If you accidentally change settings, you can click Set Defaults to undo your
changes.
28
4.5 Status
The status section provides you with a list of information about the current status of the
adapter.
29
4.6 Statistics
This section provides transmit and receive statistics.
30
4.7 Wi-Fi Protect Setup
Wi-Fi Protect Set or WPS is a new and convenient way to secure your wireless
connection. In order to use it, your wireless router must also support WPS. There are
two ways to configure WPS: PIN and PBC (Push button method).
For the PIN Method, click on PIN
31
Click Yes to select your router from the list.
Then click Select
Write down the PIN Code and enter it into your router.
32
For the push button method, click on PBC.
33
Go to your router and press the WPS button to complete the configuration.
34
4.8 Configuring Encryption
If a network requires encryption settings to be entered manually, you will see the
following box when you attempt to connect:
For WEP encryption select Shared Key from the Network Authentication box.
35
For data encryption select WEP
Enter the encryption key in the Network Key box and enter it again into the Confirm
network key box.
Click OK to save your settings.
For WPA encryption Select WPA-PSK from the Network Authentication box.
36
For data encryption select TKIP or AES
Enter the encryption key in the Network Key box and enter it again into the Confirm
network key box.
Click OK to save your settings.
37
4.9 About
The About window provides information about the Wireless Configuration Utility version
and the current driver version.
38
Appendix A – Specifications
Frequency Band
• 2.412 - 2.484 GHz ISM bandwidth
Standards
• IEEE 802.11g
• IEEE 802.11b
Channel
• USA: 11
• Europe: 13
• Japan: 14
Interface
• Cardbus Type II specification 32bit
data bus
Antenna type
• Internal dual diversity printed
antennas
Security
• 64 / 128-bit WEP encryption
• WPA-PSK, WPA2-PSK, WPA,
WPA2
Diagnostic LEDs
• Link
• ACT
Transmission Rate
• 1, 2, 5.5, 6, 11, 12, 18, 24, 36, 48,
54Mbps (auto sense)
Transmitted Power
• Minimum 15dBm@ 802.11b
• Minimum 13dBm@ 802.11g
System requirement
• Windows 2000/XP/Vista
• Available Cardbus slot
Dimensions
• 115 x 54 mm (L x W)
Weight
• 1.6oz
Environment
• Operating Temp: 0ºC to 40ºC
• Storage Temp: -10ºC to 70ºC
Warranty
• Limited 1-year warranty
Safety Approvals
• FCC and CE
39
Appendix B – Information
Federal Communication Commission Interference Statement
This equipment has been tested and found to comply with the limits for a Class B digital
device, pursuant to Part 15 of the FCC Rules. These limits are designed to provide
reasonable protection against harmful interference in a residential installation. This
equipment generates, uses and can radiate radio frequency energy and, if not installed
and used in accordance with the instructions, may cause harmful interference to radio
communications. However, there is no guarantee that interference will not occur in a
particular installation. If this equipment does cause harmful interference to radio or
television reception, which can be determined by turning the equipment off and on, the
user is encouraged to try to correct the interference by one of the following measures:
z Reorient or relocate the receiving antenna.
z Increase the separation between the equipment and receiver.
z Connect the equipment into an outlet on a circuit different from that to which the
receiver is connected.
z Consult the dealer or an experienced radio/TV technician for help.
FCC Caution: Any changes or modifications not expressly approved by the party
responsible for compliance could void the user's authority to operate this equipment.
This device complies with Part 15 of the FCC Rules. Operation is subject to the
following two conditions: (1) This device may not cause harmful interference, and (2)
this device must accept any interference received, including interference that may
cause undesired operation.
IMPORTANT NOTE:
FCC Radiation Exposure Statement:
This equipment complies with FCC radiation exposure limits set forth for an uncontrolled
environment. This equipment should be installed and operated with minimum distance
20cm between the radiator & your body.
This transmitter must not be co-located or operating in conjunction with any other
antenna or transmitter.
The availability of some specific channels and/or operational frequency bands are
country dependent and are firmware programmed at the factory to match the intended
destination. The firmware setting is not accessible by the end user.
40
European Union Notice:
Radio products with the CE marking comply with the R&TTE Directive (1999/5/EC), the
EMC Directive (89/336/EEC) and the Low Voltage Directive (73/23/EEC) issued by the
Commission of the European Community.
Compliance with these directives implies conformity to the following European Norms:
z EN 60950 Product Safety
z EN 300 328 Technical requirement for radio equipment
z EN 301 489-1/-17 General EMC requirements for radio equipment
41
Technical Support
E-mail: [email protected]
Toll Free: 1-888-746-3238
Web Site: www.airlink101.com
*Theoretical maximum wireless signal rate based on IEEE standard 802.11g specifications. Actual data throughput
will vary. Network conditions and environmental factors, including volume of network traffic, building materials and
construction, mix of wireless products used, radio frequency interference (e.g., cordless telephones and microwaves)
as well as network overhead lower actual data throughput rate. Specifications are subject to change without notice.
All products and trademarks are the property of their respective owners. Copyright ©2007 Airlink101®
42