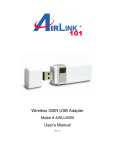
1
1-Port USB 2.0 Print Server
Model # APSUSB201
User’s Manual
Ver. 2A
Table of Contents
1 Introduction ...............................................................................................2
1.1 Package Contents...............................................................................2
1.2 System Requirements.........................................................................2
2 Hardware Installation ................................................................................3
2.1 Connecting the Print Server ................................................................3
3. Installing PS Utility ...................................................................................4
4. Configuring Network Setting ....................................................................6
5. Verifying Network Connection..................................................................8
6. Running PS Wizard................................................................................10
7. Performing Operating System Print Test ...............................................13
8. Using the PS Utility ................................................................................15
9. Using the Web Configuration Utility .......................................................16
9.1 Management .....................................................................................17
9.2 Configuration.....................................................................................20
9.3 Tools .................................................................................................26
9.4 Help...................................................................................................30
10. Printing in Mac OS ...............................................................................31
10.1 Using Rendezvous..........................................................................31
10.2 Setting AppleTalk/LPR Printing.......................................................34
11. Product Specifications..........................................................................40
12. Appendix ..............................................................................................41
Technical Support ...................................................................................41
1
1 Introduction
Congratulations on purchasing your 1-Port USB 2.0 Print Server. It is the easiest and
fastest way to deploy printers on your network.
This compact Print Server uses your network router to connect various computers and
printer together. It manages the flow of print files from computers to the connected
printer, delivering print jobs to high-performance printer much faster than a file server or
a PC acting as a print server can.
The Print Server features a Web-based Configuration Utility, which allows you to set up
the Print Server through the web browser easily and quickly. It also includes a powerful
software called, PS Utility, a user-friendly program that allows you to configure some
basic functions of the Print Server such as performing a factory reset or updating the
firmware.
1.1 Package Contents
Unpack the package and check all the items carefully, and be certain that you have:
•
•
•
•
One 1-Port USB 2.0 Print Server
One AC Power Adapter
One Quick Installation Guide
One Installation CD containing the PS Utility program and the User’s Manual
If any item contained is damaged or missing, please contact your local dealer
immediately. Also, keep the box and packaging materials in case you need to ship the
unit in the future.
1.2 System Requirements
Operating System:
• Microsoft Windows 95/98/ME/NT/2000/XP/2003
• Apple Mac OS (with Apple Talk support)
For Web Configuration:
• Java-enabled web browser, such as Microsoft® Internet Explorer 5.0 or
Netscape Navigator 6.0
2
2 Hardware Installation
2.1 Connecting the Print Server
Warning: Only a USB printer may be connected to the USB port of the Print Server.
Connecting any other USB device to the Print Server may damage the Print Server.
Note: Do not plug the power cord to the Print Server until you have reached Step 4 of
this section.
Step 1Connect one end of the Ethernet cable to the RJ-45 port of the Print Server and
attach the other end of the cable to a router.
Step 2 Make sure the printer is powered OFF, then connect one end of the USB cable
to the USB port of the Print Server and attach the other end of the cable to the USB port
of the printer.
Step 3 Power ON the printer.
Step 4 Plug one end of the power cord into the Print Server and the other end into an
electrical outlet.
3
3. Installing PS Utility
Step 1 Insert the provided CD and wait for the setup menu to appear.
Step 2 Click on PS Utility.
Note: If the setup menu does not appear automatically after you have inserted the CD,
go to Start, Run, type D:\autorun.exe (where D is the letter of your CD drive) and click
OK.
Step 3 Click Next.
4
Step 4 Click Next.
Step 5 Click Yes.
Step 6 Click Finish.
5
4. Configuring Network Setting
Before configuring the Print Server’s network setting, please take note of your
computer’s TCP/IP setting.
Step 1 Click on Start, Run, and type command (for Windows 95/98/ME) or cmd (for
Windows 2000/XP) and click OK.
Step 2 At the command prompt, type ipconfig and press Enter.
Step 3 Write down the information for the IP Address, Subnet Mask, and Default
Gateway. You will need these information later.
Step 4 Run the PS Utility by going to Start, (All) Programs, PS Utility, PS Utility v2.00.
Step 5 Make sure the Print Server is listed under the Device Name and click on
Change IP Address.
6
Step 6 In the IP Address field, enter a valid IP address, subnet mask, and default
gateway that matches your local area network.
For example: If your computer’s IP Address is 192.168.1.100, enter the same three
numbers: 192.168.1 in the corresponding fields.
Note: You can leave the last IP Address number 254 as is unless another network
device (i.e. the Default Gateway) is already using that number. If another network
device is already using 254, then change it to another number that is currently not in
use (preferably 200 - 253).
For the Subnet Mask and Default Gateway fields, enter the same number as the
TCP/IP setting of your computer.
Step 7 Click OK.
Step 8 Close the PS Utility program.
7
5. Verifying Network Connection
Step 1 Run the PS Utility by going to Start, (All) Programs, PS Utility, PS Utility v2.00.
Step 2 Make sure the Print Server is detected under the Device Name.
Step 3 Click on Show Web Setup to display the Print Server’s Web Configuration
Utility.
Step 4 Make sure the Printer Status displays On line.
8
Step 5 Click on the Tools link and select the port your printer is connected to and click
the Test button. The Print Server will perform a low-level print test, bypassing the
operating system layer.
Note: Your printer should print out a test page. If not, verify that the printer is powered
on and all cables are securely connected and try again. If the printer still fails to print a
test page, please check the printer compatibility list on our web site at
www.airlink101.com for a list of compatible printers. If your printer is not on the list, it
may not be compatible with the Print Server.
Step 6 Once the printer successfully prints out a test page, you may close the web
browser and proceed to the next section.
9
6. Running PS Wizard
Warning: Make sure you have installed the printer driver locally on every computer that
will use the print server in your network before running the PS Wizard. Otherwise, the
PS Wizard will not run properly. Be sure to run the PS Wizard on all the computers that
will use the print server in your network.
Step 1 Insert the provided CD and wait for the setup menu to appear.
Step 2 Click on PS Wizard.
Note: If the setup menu does not appear automatically after you have inserted the CD,
go to Start, Run, type D:\autorun.exe (where D is the letter of your CD drive) and click
OK.
10
Step 3 Click Next.
Step 4 Select the printer that is connected to the Print Server and click Next.
11
Step 5 Double-click on the Print Server Name, select the Printer Port Name, and click
Next.
Step 6 Click Finish and OK. (For Windows 95/98/ME, you’ll need to reboot the
computer).
Step 7 Run the PS Wizard on all the computers in your network that will use the Print
Server.
12
7. Performing Operating System Print Test
The final step in setting up the Print Server is to perform an operating system print test.
Please note that the instructions below are for Windows XP, but the steps are similar for
all the other Windows operating systems.
Step 1 Click on Start, Settings, Printers and Faxes.
Step 2 Right-click on the printer that is connected to the Print Server and select
Properties.
13
Step 3 Click on the Print Test Page button. Windows should print out a test page.
You have successfully configured the Print Server for printing.
14
8. Using the PS Utility
PS Utility is a user-friendly program that allows you to configure some basic functions
of the Print Server such as performing a factory reset or updating the firmware. To
access the complete management features of the Print Server, you’ll need to use the
Web Configuration Utility, which is described in the next section.
Note: If you haven’t installed PS Utility yet, please follow the installation instructions as
described in Section 3, Installing PS Utility.
You can start PS Utility by going to Start, (All) Programs, PS Utility, PS Utility v2.00.
Device Name: Lists any Print Server that is connected on your network.
Information: Displays the basic information for the selected Print Server.
Discover Device: Click on this button to automatically search for any Print Server that
is connected to your network.
Change IP Address: Click on this button to change the IP Address and other TCP/IP
settings for the Print Server.
Update Firmware: Click on this button to update the Print Server’s firmware.
Note: You must download the updated firmware from www.airlink101.com first.
Show Web Setup: Click on this button to display the Web Configuration Utility.
Factory Reset: Click on this button to reset the Print Server back to factory settings.
About: Click on this button to display the version number of the PS Utility.
Close: Click on this button to close PS Utility.
15
9. Using the Web Configuration Utility
The Web Configuration Utility allows you to manage the full features of the Print
Server with an easy-to-use user interface.
You can start the Web Configuration Utility in two ways:
1. Click on the Show Web Setup button in PS Utility.
or
2. Open your web browser, type in the IP address of the Print Server in the URL
address field, and press Enter. (Default IP address is 192.168.1.254).
The Web Configuration Utility will display the Management, System page.
Click on any of the links to display the corresponding page.
16
9.1 Management
System
The System page displays the status of your Print Server, printer, and network.
Click on Refresh to update the page.
17
Network
The Network page displays the status of your local area network.
Click on Refresh to update the page.
18
User
The User page displays the Users Printing-Log, which shows which users have
submitted print jobs through the Print Server.
Click on Refresh to update the page.
19
9.2 Configuration
Click on Configuration to display the Configuration page.
System
The System page allows you to configure basic settings of the Print Server.
Server Name: You can rename the Print Server to a more user-friendly name or keep
the factory default name.
Location: You can make note of where the Print Server is located (optional).
Admin Contact: Name of the administrator to contact for help (optional).
Password: You can set a password for the Web Configuration Utility so only
authorized personnel can access and change the Print Server’s configuration.
USB Port Name: You can rename the Print Server’s port name to a more user-friendly
name or keep the factory default name.
Description: Describe the printer that is attached to the Print Server (optional).
PJL Printer: Choosing Yes will enable the support for Hewlett-Packard PJL (Printer Job
Language) standard for bi-directional printing. (Default is No).
Click Save to save and activate any configuration changes. Click Cancel to cancel the
changes.
20
Network
The Network page allows you to configure various network settings of the Print Server.
TCP/IP
Manually Assign: Choose to manually assign an IP address for the Print Server
(strongly recommended), or to obtain an IP address automatically.
IP Address: Assign an IP address for the Print Server or keep the default.
Subnet Mask: Assign a Subnet Mask for the Print Server or keep the default.
Default Gateway: Assign a Default Gateway for the Print Server or keep the default.
21
DNS: Enter up to two DNS Servers’ IP Address (optional)
UPnP: Choose to Enable or Disable Universal Plug and Play.
MAC Rendezvous: Choose to Enable or Disable Mac Rendezvous.
Second HTTP Port: Choose to Enable or Disable a second http port for remote web
configuration and IPP printing. If enabled, enter the second port number.
Microsoft Network
Workgroup: Enter the name of your workgroup.
AppleTalk
AppleTalk Zone: Enter the name of your AppleTalk Zone.
USB: Enter your printer type.
PostScript Level: Select your PostScript level.
Font Group: Select your Font Group.
Click Save to save and activate any configuration changes. Click Cancel to cancel the
changes.
22
User
The User page allows you to define which users can access the Print Server.
Printing Control
By configuring the Enable User Printing Control option (Yes or No), the user in the
User List is permitted to access the print server or not. For the user(s) who is not in the
User List, you can also limit the access right by setting the Allow Undefined Users
Printing option to Yes or No.
Define Users
You can add/delete the user(s) to/from the User List. The User List at the bottom of the
screen displays the current defined user and related information for the Print Server.
Click Save to save and activate any configuration changes. Click Cancel to cancel the
changes.
23
E-mail
The E-mail page allows you to set up e-mail alerts and e-mail printing.
E-mail Account
You can assign an E-mail address to the Print Server so that your mail can be printed
out directly (ASCII text only). To enable this function, enter the E-mail account in the
Print Server E-mail Address box.
•
Incoming E-mail (POP3) Server Address: Enter the server address that is used
to receive your E-mail.
• Outgoing E-mail (SMTP) Server Address: Enter the server address that is
used to send your E-mail.
If your mail server needs to verify the user when sending E-mail, you have to input the
Account Name and Password.
E-mail Notification
You can set the Print Server to send an E-mail alert message when the printer status
changes. To enable this function, set the Enable e-mail notification for printer status
24
changing option to Yes. Then, input the administrator’s E-mail address in the Admin Email Address field.
E-mail Printing
• E-mail Printing (ASCII Text Only): Select Enable to enable the E-mail printing
function.
• Receive E-mail Interval: Enter the number in this box to set up the time (in
minutes) to check/receive E-mails regularly.
Click Save to save and activate any configuration changes. Click Cancel to cancel the
changes.
SNMP
SNMP (Simple Network Management Protocol) is a set of protocols for managing
complex networks.
Community 1/2/3: Enter a name in the Name box, and configure the Access Right by
selecting Read Only or Read/Write from the drop-down menu.
Click Save to save and activate any configuration changes. Click Cancel to cancel the
changes.
25
9.3 Tools
Click on Tools to display the Tools page.
Print Test
The Print Test page allows you to perform a low-level print test, which bypasses the
operating system layer. The test page is sent directly from the Print Server to the printer.
This allows you to test the compatibility of your printer with the Print Server.
Select the port that the printer is connected to and click on the Test button.
Your printer should print out a test page. If not, verify that the printer is powered on and
all cables are securely connected and try again. If the printer still fails to print a test
page, please check the printer compatibility list on our web site at www.airlink101.com
for a list of compatible printers. If your printer is not on the list, it may not be compatible
with the Print Server.
26
E-mail
Test E-mail Account
Click Test to send a test E-mail message to the given administrator’s E-mail address.
Receive E-mail
Click Yes to immediately check and receive E-mail, and then print out the mail when
available.
27
Reset
The Reset page lets you reset the Print Server without changing the setting back to
factory default.
Click on the Yes button to reset the Print Server.
Factory Reset
The Factory Reset page lets you reset the Print Server’s setting back to factory default.
Click on the Yes button to perform a factory reset on the Print Server.
28
Firmware Upgrade
When a new version of the firmware is available on our web site, www.airlink101.com,
you can download the new firmware and proceed to the following page to upgrade the
firmware.
1. Click Browse and browse to the location of the downloaded firmware.
2. Click Upgrade to begin the upgrade process.
Note: you may need to unzip the downloaded file first.
29
Backup
You may use the Backup feature to save the Print Server’s configuration settings.
Backup Device Configuration to File
Click Backup to backup your current configuration of the print server. The file will be
saved as Config.cfg
Restore Device Configuration from File
You can reload a configuration that you saved before. Click Browse to point to the
backup file (Config.cfg), and then click Restore.
9.4 Help
Click on Help to display the Help page.
About
The About page displays the Print Server’s firmware version number.
30
10. Printing in Mac OS
This section describes how to set up your Mac OS settings to work with the Print Server.
10.1 Using Rendezvous
Mac OS X provides a new feature called Rendezvous. Rendezvous is a networking
technology standard that lets you create an instant network of computers and devices to
share files and printers and even contact other people on the network.
For the printer connection, the Mac OS X Print Center application uses Rendezvous to
discover Rendezvous-enabled printers on the network. When you add your computer to
a network, Print Center automatically discovers any available printer. All you have to do
is select the one you want to use and then start printing. You can add a new printer to
the network and all the users on the network will see the new printer automatically
appear in their Print Center without any configuration.
The following instructions provide a common way of using Rendezvous:
Step 1 Launch Print Center. Press and hold the Option key and click the Add button.
31
Step 2 Select Rendezvous from the pop-up menu.
Step 3 A list of Rendezvous-enabled printers will appear in the list.
32
Step 4 Choose the desired printer and select Generic.
Step 5 The printer is installed into the system successfully.
33
10.2 Setting AppleTalk/LPR Printing
If you want to use AppleTalk or LPR printing instead of Rendezvous, Follow the
instructions below.
For Mac OS X
Step 1 After attaching the Print Server to your network, change the IP Address of your
Macintosh computer in order to access the Print Server’s Web Configuration Utility. The
default IP Address of the Print Server is 192.168.1.254. Change your IP Address to
192.168.1.x, where x is any number between 2 and 200.
Step 2 Open the System Preference window and click Network. In the Network
window, select the AppleTalk tab and check the Make AppleTalk Active check box.
34
Step 3 To print, open a document and select File > Print from the menu.
Step 4 Select Edit Printer List from the Printer dialog box.
Step 5 Click Add Printer and then select the desired printing protocol (AppleTalk or
LPR Printers using IP).
35
AppleTalk: After selecting AppleTalk, the Port Name of the Print Server will be
displayed. Select the Port to which the PostScript printer is connected. Then, select
the printer model from the dialog box. Click Add Printer to complete the Printer Port
configuration. Select the Printer Port just configured in the Print window. Click Print to
print your document.
LPR Printers using IP: When you select LPR Printers using IP Protocol, type the IP
Address of the Print Server into the LPR Printer’s Address field. In the Queue Name
field, type in the Print Server’s port name that the PostScript printer is connected to.
Select the printer model from the dialog box, and select the printer model from the pulldown menu. Click Add to complete the process. Close all Print Center windows and
select the Printer Port that was just selected. Then, click Print to print the document.
36
For Mac OS 9
If you use Mac OS 9, you can use the AppleTalk network protocol using the EtherTalk
transport or a proprietary low-speed LocalTalk transport. Your Print Server can be used
for network printing to PostScript printers. You can print from any Mac OS computer
connected to your Ethernet network either directly using an EtherTalk connection or
indirectly through a LocalTalk-to-EtherTalk router.
To set up the Print Server for AppleTalk printing:
Step 1 Please confirm that the AppleTalk protocol is enabled in your Macintosh
computer.
Step 2 Change the IP Address on one of the computers within your network to
192.168.1.x (where x is any number between 2 - 200).
Step 3 Type the Print Server’s IP address into the address field of your web browser.
(Default IP Address is 192.168.1.254).
Step 4 Click on Configuration and go to the AppleTalk Protocol page. If your
AppleTalk network is divided into AppleTalk zones, you have to specify which zone the
Print Server should be in. You should locate the Print Server in the same zone as most
of the users who will be using it. If your network is not divided into zones, it should
contain a single asterisk “*”.
37
To print from Mac OS Client Workstations:
Note: The actual settings of selecting a PostScript printer connected to your Print
Server may be different from the instructions provided below depending on the devices
and the software you are using.
Step 1 Select Chooser from the Apple menu to choose a printer connected to the Print
Server.
Step 2 In the left column of the Chooser window, select the desired printer. Please
confirm that AppleTalk is set to Active. A list of all networked PostScript printers will be
displayed within the right column.
Step 3 Double-click the name of the Printer Port you wish to use.
38
Step 4 If you have not previously set this printer as the default printer, your computer
will prompt you for a PostScript Printer Description file. Choose Select PPD.
Step 5 Select the appropriate printer description file for your printer. Click Open.
(If your printer is not listed, click Generic to use a generic printer description).
The selected printer will become your computer’s default printer. You may need to
choose Page Setup in any application you have opened.
39
11. Product Specifications
Printer Connection
Printer Interface: One USB port, compliant with USB 2.0 Hi-speed standard.
Network Connection
Network Interface: One 10/100 Fast Ethernet port (RJ-45 connector).
Network Data Transfer Rate: 100Mbps.
Network Protocol Support
Transport Protocols: TCP/IP, SMB, NetBEUI, and AppleTalk.
TCP/IP Protocols Support: BOOTP, SNMP, Telnet, FTP, LPD, DHCP, and IPP.
Hardware
SDRAM: 8MB.
Flash ROM: 2MB.
Operating System Support
- Windows 95/98/ME, Windows NT, Windows 2000/XP/2003;
- NetWare 5.x (NDPS LPR remote printing);
- HP-UX Unix, Sun O.S., Solaris, SCO Unix, AIX;
- Unixware and Linux;
- Mac OS, AppleTalk.
Management
Standard: SNMP
MIBs: MIB-II (RFC 1213).
Utilities: PS Utility, PS Wizard.
Environmental and Physical
Power Supply: 5VDC.
Operating Temperature: 0°C to 50°C.
Storage Temperature: -25°C to 55°C.
Humidity: 5% to 95%, non-condensing at 30°C.
EMI Compliance
FCC Class B, CE Class B, VCCI Class B
40
12. Appendix
Technical Support
E-mail: [email protected]
Toll Free: 1-888-746-3238
Web site: www.airlink101.com
Copyright © 2004 AirLink101. All rights reserved. AirLink101, the stylized AirLink101 logo, specific
product designations, and all other words and logos that are identified as trademarks and/or service
marks are, unless noted otherwise, the trademarks and service marks of AirLink101. All other product or
service names are the property of their respective holders. AirLink101 products are protected under
numerous U.S. and foreign patents and pending applications, mask work rights, and copyrights.
41