1
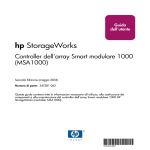
Configure EFIBoot via UEFI HII (Human Interface Infrastructure) in a UEFI 2.1 System
Note: EFIBoot is not supported on converged network adapters (CNAs) such as the
LP21000 and LP21002.
Note: If you have several adapters in your system, the UEFI system firmware or boot code
uses the highest version driver that is on one of your adapters. Adapters with older
versions of EFIBoot are managed by the more recent version, but only as long as the
adapter with the most recent version is in the system. The adapters must be updated
to actually update and not just use the most recent version available.
Start the Emulex Configuration Utility
Depending on the OEM UEFI configuration, the Emulex Configuration Utility may appear under different
setup menus in OEM system firmware or BIOS. This description applies to systems where the Emulex
Utility is found under "System Settings."
To start the Emulex Configuration utility:
1. From the System Settings screen, select Emulex Configuration Utility and press <Enter>.
Figure 67: System Settings screen
Boot Code User Manual
Page 66
2. The Emulex Configuration Utility screen appears with Emulex Configuration Setup Utility
selected. Press <Enter>.
Figure 68: Emulex Configuration Setup Utility screen
A list of all the adapters in the system is displayed. Your list may vary depending on the installed
adapters. Locate the adapter you want to configure. Use the up/down arrows on your keyboard
to select it, and press <Enter>.
Figure 69: Adapter Selection screen
Boot Code User Manual
Page 67
The Emulex Adapter Configuration Main Menu is displayed. Select the function you want and
press <Enter>.
Figure 70: Emulex Adapter Configuration Main Menu menu
Boot Code User Manual
Page 68
EFI Utility Conventions in UEFI/HII
The EFI utility has menus and configuration screens. Use the following methods to navigate them:
•
Press the up/down arrows on your keyboard to move through and select menu options or
configuration fields. When multiple adapters are listed, use the up/down arrows to scroll to the
additional adapters.
•
Press the <+>, <-> or <Enter> keys to change numeric values.
•
Press <Enter> to select a menu option, to select a row in a configuration screen, or to change a
configuration default.
•
Use the navigation entries on the page to move about the utility.
•
Select Commit to save changes. Select Discard to not save changes.
•
Ensure you select Back to Display Adapters and RECONNECT DEVICES from the Main
menu when you are finished configuring an adapter. You are returned to the adapter list.
Boot Code User Manual
Page 69
Configure EFIBoot in UEFI/HII
The EFI utility has numerous options that can be modified to provide for different behavior. Use the EFI
utility to do the following tasks:
•
Set Boot from SAN
•
Scan for Fibre Devices
•
Add and delete boot devices
•
Change boot device order
•
Configure HBA and boot parameters
•
Set adapters to their default settings
•
Display adapter information
Set Boot from SAN
To set boot from SAN:
1. From the Adapter Selection screen, select the adapter whose boot from SAN setting you want to
change and press <Enter>.
2. From the Main menu, select Boot from SAN. The current boot setting is displayed. Press
<Enter>. A Disable/Enable menu appears.
Figure 71: Main Menu, Boot from SAN Options menu
Boot Code User Manual
Page 70
3. Make your selection and press <Enter>. The utility displays the new boot from SAN setting.
Figure 72: New Boot from SAN setting
Scan for Fibre Devices
To scan for Fibre devices:
1. From the Adapter Selection screen, select the adapter that you want to scan for Fibre devices
and press <Enter>.
Boot Code User Manual
Page 71
2. From the Main menu, select Scan for Fibre Devices and press <Enter>. A list of the
discovered targets is displayed. This is only a list of discovered target devices to determine SAN
connectivity. To add or configure boot devices, see the following sections.
Figure 73: Discovered Targets screen
Add Boot Devices
To add a boot device:
1. From the Adapter Selection screen, select the adapter to which you want to add a boot device
and press <Enter>.
Boot Code User Manual
Page 72
2. From the Main menu, select Add Boot Device and press <Enter>. A screen appears displaying
the discovered targets.
Figure 74: Discovered Targets screen
3. Select the target you want and press <Enter>. A list of bootable LUNS is displayed.
Figure 75: Boot Device screen
Boot Code User Manual
Page 73
4. Select the boot device you want to add and press <Enter>. A menu appears enabling you to
commit or discard your changes.
Figure 76: Commit/Discard Changes menu screen
5. Select Commit Changes and press <Enter>.
Delete Boot Devices
To delete boot devices:
1. From the Adapter Selection screen, select the adapter from which you want to delete a boot
devices and press <Enter>.
Boot Code User Manual
Page 74
2. From the Main menu, select Delete Boot Device and press <Enter>. A list of boot devices is
displayed.
Figure 77: Boot Device screen
3. Select the boot device you want to delete and press <Space>. The device appears with an X
beside it.
Figure 78: Selected Boot device appears with an X
4. Select Commit Changes and press <Enter>.
Boot Code User Manual
Page 75
Change Boot Device Order
To change boot device order:
1. From the Adapter Selection screen, select the adapter whose boot device order you want to
change and press <Enter>.
2. From the Main menu, select Change Boot Device Order and press <Enter>. A screen
displaying the discovered targets appears.
Figure 79: Discovered Targets screen
Boot Code User Manual
Page 76
3. Select Boot Device Order and press <Enter>. A screen appears displaying the boot device
order.
Figure 80: Boot Device Order screen
4. Press <Enter>. The Boot Device Order menu screen appears.
Figure 81: Boot Device Order menu screen
Boot Code User Manual
Page 77
5. From the menu, select the device whose boot order you want to change. Use the <+> or <->
keys to change the order of the selected device and press <Enter>. A screen appears showing
the new boot device order.
6. Press <Enter> and choose Commit Changes.
Configure Adapter Parameters
The EFI utility enables you to configure the following adapter parameters:
•
Topology
•
Port login (PLOGI) retry timer
•
Link speed
To configure adapter parameters:
1. From the Adapter Selection screen, select the adapter whose parameters you want to configure
and press <Enter>.
2. From the Main menu, select Configure HBA and Boot Parameters and press <Enter>. The
Configuration menu screen appears.
Figure 82: Adapter Configuration menu screen
Boot Code User Manual
Page 78
Change the Topology
Emulex drivers support arbitrated loop and point-to-point topologies. You can configure:
•
Auto Loop first - default
•
Auto point to point first
•
Point to point
•
FCAL
To change the topology:
1. From the Adapter Selection screen, select the adapter whose topology you want to change and
press <Enter>.
2. From the Configure HBA Parameters menu, navigate to Topology Selection and press
<Enter>. The Topology menu screen appears.
Figure 83: Topology menu screen
3. Select a topology and press <Enter>. The screen is refreshed with the new value.
Note: The presence of a fabric is detected automatically.
Press <Esc> to return to the EFI utility menu.
4. Select Commit Changes and press <Enter>.
Boot Code User Manual
Page 79
Change the PLOGI Retry Timer
This option allows you to set the interval for the port login (PLOGI) retry timer. This option is especially
useful for Tachyon-based RAID arrays. Under very rare occasions, a Tachyon-based RAID array resets
itself and the port goes offline temporarily in the loop. When the port comes to life, the PLOGI retry
interval scans the loop to discover this device.
You can choose:
•
Disable - Default
•
50 Msec
•
100 Msec
•
200 Msec
To change timer values:
1. From the Adapter Selection screen, select the adapter whose PLOGI retry timer information you
want to change and press <Enter>.
2. From the Configure HBA Parameters menu, navigate to PLOGI Retry Timer and press
<Enter>. The PLOGI Retry Timer menu appears.
Figure 84: PLOGI Retry Timer menu screen
3. Select a retry timer option and press <Enter>. The screen is refreshed with the new value.
Note: Press <Esc> to return to the EFI utility menu.
4. Select Commit Changes and press <Enter>.
Boot Code User Manual
Page 80
Change the Link Speed
Use this feature to change, or force, the link speed between ports instead of auto negotiating. The
supported link speeds depend upon the adapter. The menu only displays options that are valid for the
selected adapter.
Possible link speed choices:
•
Auto negotiate - Default
•
1 Gb/s
•
2 Gb/s
•
4 Gb/s
•
8 Gb/s
To change the link speed:
1. From the Adapter Selection screen, select the adapter whose link speed you want to change
and press <Enter>.
2. From the Configure HBA Parameters menu, navigate to Force Link Speed and press <Enter>.
The Force Link Speed menu appears.
Figure 85: Force Link Speed menu screen
3. Select a link speed and press <Enter>.
Note: Emulex’s 8 G/bs adapters do not support 1 G/bs link speed.
4. The screen is refreshed with the new value.
Note: Press <Esc> to return to the EFI utility menu.
5. Select Commit Changes and press <Enter>.
Boot Code User Manual
Page 81
Configure Boot Parameters
You can change the:
•
Maximum LUNS/Targets
•
Boot Target Scan method
•
Device Discovery Delay
Change the Maximum LUNs per Target
The maximum number of LUNs represents the maximum number of LUNs that are polled during device
discovery. The minimum value is 1, the maximum value is 4096. The default is 256.
To change the maximum number of LUNs:
1. From the Adapter Selection screen, select the adapter whose maximum LUNs per target
information you want to change and press <Enter>.
2. From the Configure Boot Parameters menu, navigate to Maximum LUNs/Target and press
<Enter>. The screen becomes editable.
Figure 86: Maximum LUNs/Target screen
3. Type the maximum LUN value (between 1 and 4096) and press <Enter>. The screen is refreshed
with the new value.
Note: 256 is the default and typical maximum number of LUNs in a
target device. A higher number of maximum LUNs causes the
discovery to take more time.
4. Select Commit Changes and press <Enter>.
Boot Code User Manual
Page 82
Change Boot Target Scan Method
This option is available only if none of the eight boot entries are configured to boot from DID or WWPN.
The Configure Boot Devices menu is used to configure up to eight boot entries for fabric point-to-point,
public loop or private loop configurations. With boot scan enabled, the first device issues a Name Server
Inquiry.
The boot scan options are:
•
Boot Path from NVRAM Targets - Boot scan discovers only LUNs that are saved to the adapter’s
non-volatile random access memory (NVRAM). Select up to eight attached devices to use as
potential boot devices. Limiting discovery to a set of eight selected targets can greatly reduce
the time it takes for the EFIBoot driver to complete discovery.
•
Boot Path from Discovered Targets - Boot scan discovers all devices that are attached to the FC
port. Discovery can take a long time on large SANs if this option is used.
•
Do not create boot path.
•
Boot Scan from EFIFcScanLevel - Allows 3rd party software to toggle between Boot Path from
NVRAM and Boot Path from Discovered Targets by manipulating an EFI system NVRAM
variable. After the scan is set to EFIFcScanLevel, the scan method can be changed without
entering the EFI Boot configuration utility.
If EFIFcScanLevel is selected, the scan is determined by the value of the EFIFcScanLevel
variable maintained by the UEFI system firmware or boot code. The value of this variable can be
changed either by using the menu in the EFIBoot Configuration utility, or by using 3rd party
software.
To change the boot target scan method:
1. From the Adapter Selection screen, select the adapter whose boot target scan method you want
to change and press <Enter>.
2. From the Configure Boot Parameters menu, navigate to Boot Target Scan Method and press
<Enter>. The Boot Target Scan Method menu appears.
Figure 87: Boot Target Scan Method menu screen
Boot Code User Manual
Page 83
3. Select a boot scan setting and press <Enter>.The screen is refreshed with the new value.
Note: If you have a large SAN and set the boot path to “Boot Path Discovered Targets,”
discovery takes a long time.
Press <Esc> to return to the EFI utility menu.
4. Select Commit Changes and press <Enter>.
Change Device Discovery Delay
This parameter sets a delay to occur after an loop initialization and before a scan is initiated to discover
the target. The default is off or 0 seconds. Change the default if you have an HP MSA1000 or HP
MSA1500 RAID array and if both of the following conditions exist:
•
The MSA array is direct connected or part of an arbitrated loop (for example, daisy chained with
a JBOD).
•
The boot LUN is not reliably discovered. In this case, a delay may be necessary to allow the
array to complete a reset.
Caution: Do not change the delay device discovery time if your MSA array is connected to a
fabric switch. Setting it to any other time guarantees that the maximum delay time
is seen on every loop initialization.
If both of the above conditions exist, typically set this parameter to 20 seconds. However, the delay only
need be only enough for the array to be reliably discovered after a reset. Your value may be different.
To change the delay device discovery value:
1. From the Adapter Selection screen, select the adapter whose device discovery delay settings
you want to change and press <Enter>.
2. From the Configure Boot Parameters menu, Delay Device Discovery and press <Enter>. The
screen becomes editable.
Figure 88: Delay Device Discovery screen
Boot Code User Manual
Page 84
3. Use the +/- keys to change the delay device discovery value in increments of 10 seconds and
press <Enter>. The screen is refreshed with the new value.
4. Select Commit Changes and press <Enter>.
Reset Emulex Adapters to Default Values
The EFI utility enables you to clear the NVRAM target list and set all boot device WWNNs back to 0.
These defaults are listed in Table 9.
Table 9: Adapter Defaults
Parameter
Default
Valid Values
Enable/Disable BIOS
Disabled
AL_PA Value
PLOGI Retry Timer
0x00 Fibre
Disabled
Boot Target Scan
Boot path from
NVRAM targets
Max LUNs Setting
Topology
0256
Auto (start FC-AL)
Enabled
Disabled
See AL_PA reference table
Disabled
50 msec
100 msec
200 msec
Boot path from NVRAM targets
Boot path discovered targets
Do not create boot path
0–4096
Auto (start FC-AL)
Point-to-Point
Auto (start Point-to-Point)
FC-AL
0000–0255
<0> = Auto Select (the adapter’s speed is
selected automatically based on its
model).
<1> = 1 Gb/s
<2> = 2 Gb/s
<4> = 4 Gb/s
<8> = 8 Gb/s
Delay Device Discovery 0000
Link Speed
0 (Auto-select)
To set Emulex adapters to their default settings:
1. From the Adapter Selection screen, select the adapter whose default settings you want to
change and press <Enter>.
Boot Code User Manual
Page 85
2. From the Main menu, select Set Emulex Adapters to Default Settings and press <Enter>. A
menu screen appears enabling you to set defaults or cancel default settings.
Figure 89: Adapter Defaults menu screen
3. Select Set Adapter Defaults and press <Enter>. The Adapter Selection screen appears.
Figure 90: Adapter Selection screen
4. Select the adapter whose setting you want to return to their defaults and press <Enter>. The
Main Configuration Menu appears.
Boot Code User Manual
Page 86
5. Select Set Emulex Adapter to Default Settings and press <Enter>. The Adapter Default
Settings menu screen appears.
Figure 91: Adapter Defaults menu screen
6. Select Set Adapter Defaults and press <Enter>. The adapter is returned to its default settings.
Press <Esc> to return to the adapter list.
Display Adapter Information
The Adapter Information screen displays the following information about the selected adapter:
•
HBA status
•
Boot from SAN status
•
Link Speed
•
Topology
•
Firmware version
•
Universal Boot version
•
EFI Boot version
To display adapter information:
1. From the Adapter Selection screen, select the adapter whose information you want to view and
press <Enter>.
Boot Code User Manual
Page 87
2. From the Adapter configuration Main menu, select Display Adapter Info and press <Enter>. A
screen appears displaying information about the selected adapter.
Figure 92: Adapter Information screen
Boot Code User Manual
Page 88
Troubleshooting
There are circumstances in which your system may operate in an unexpected manner. The
Troubleshooting section explains several of these circumstances and offers one or more workarounds
for each situation.
x86 BootBIOS
The Bootup Message Does Not Appear As the System Boots
Situation: You want to access the BIOS utility, but the bootup message does not appear.
Resolution: Make sure that x86 BootBIOS has been loaded and enabled.
Retry This Adapter Message
Situation: The message "Retry This Adapter" appears during BIOS scanning.
Resolution: Check the hardware configuration or reconfigure the adapter BIOS using the BIOS utility.
Cannot Mount Root File System Message (Solaris SFS Driver)
Situation: The message “Cannot Mount Root File System” appears during bootup.
Resolution: Make sure the correct storage device is identified in the scsi_vhci.conf file. The XP128
storage array is used in the following example:
# cd /kernel/drv
# pg scsi_vhci.conf
#
# Copyright 2004 Sun Microsystems, Inc.
# Use is subject to license terms.
#
# pragma ident
"@(#)scsi_vhci.conf
#
name="scsi_vhci" class="root";
.
.
.
device-type-scsi-options-list =
"HP
OPEN-3*4", "symmetric-option";
symmetric-option = 0x1000000;
#
All rights reserved.
1.9
04/08/26 SMI"
Cannot Find UNIX Kernel Message (Solaris SFS Driver)
Situation: The message “Cannot Find UNIX Kernel” appears during bootup.
Resolution: Set up the correct LUN to boot in the BIOS utility. The correct LUN can be seen at the end
of the Device Address line when you issue a luxadm display <device> command; See the luxadm
documentation from Sun for more information.
No Such Partition Message (Solaris SFS Driver)
Situation: The message “No Such Partition” appears during bootup:
Resolution: Make sure the correct boot device is selected at the GRUB menu. See the GRUB
documentation from Sun and the /boot/grub/menu.lst for more details.
Boot Code User Manual
Page 89
OpenBoot
The System Cannot mount or fsck /etc/vfstab a FC Boot Disk (Solaris LPFC Driver)
Situation: During the boot process, the system cannot mount or fsck /etc/vfstab a FC boot disk.
Resolution: Make sure that persistent binding is implemented correctly.
A Loaded File Is Not Executable (Solaris LPFC Driver)
Situation: After entering boot disk, a message states that the file that was loaded is not executable.
Resolution: The boot block may not be installed correctly to the FC drive. See Configure Boot from SAN
on Solaris LPFC (SPARC) on page 9.
The System Hangs or Reboots After Displaying Driver Information (Solaris LPFC Driver)
Situation: The system hangs for a long time after displaying driver information, or it reboots after
displaying driver information.
Resolution: Possible incorrect topology set in the /kernel/drv/lpfc.conf file on the target disk.
FC Disk Is Not Found (Solaris LPFC Driver)
Situation: You have performed the setup tasks and the FC disk is not found when you reboot the
system.
Resolution: If the FC disk is not found when the system is rebooted, it may be necessary to do the following:
1. Type "cfgadm -a" to list the target.
2. Type "cfgadm -vc configure c1::c5t2200002037AE0091" to configure the FC target.
3. Type "cfgadm -c unconfigure c1" to remove the FC target.
It may also be necessary to add an entry for the boot drive to the sd.conf file.
The Displayed List of Emulex Adapters Ends with “fibre-channel” (Solaris LPFC Driver)
Situation: After all Emulex adapters have been enabled to boot from SAN, the system has been
rebooted, and you show all system devices, the path to an Emulex adapter ends with “fibre-channel”, for
example:
/pci@1f,2000/fibre-channel
instead of “lpfc@#”, for example:
/pci@1f,4000/lpfc@2
Resolution: The OpenBoot code is not loaded in the adapter’s firmware. You must install OpenBoot before you
can set up boot from SAN on the adapter (see page [insert cross reference]).
Boot Code User Manual
Page 90
EFIBoot Diagnostic Utility
The EFI Diagnostic Utility tests all adapters in your system.
Conventions
•
Press the up/down arrows on your keyboard to move through and highlight menu options or
configuration fields. Menus with adapter listings and information display up to eight rows at a
time. If applicable, press the up/down arrows to scroll to additional adapters.
•
Press the left/right arrows on your keyboard to scroll through pages of information.
•
Press <Enter> to select a menu option.
•
Press <Esc> to return to the previous menu.
•
Press the space bar to select or check a test data pattern. All patterns are selected by default.
•
Press <F1> to view online help for a menu item.
•
Press <F2> to clear the status (Passed, Failed or Unsupported) of each test on a data test
pattern menu. This clears the menu, but does not clear the results log.
•
Press <F3> to execute a selected test pattern.
•
Press <F4> to reset the data patterns back to the default (all checked).
•
When you view any of the Adapter Data information, press any key to return to the Diagnostic
Main menu.
Access the EFI Diagnostic Utility
Note: Before you can use the EFI utility for the first time, you must install it.
To access the main EFI utility:
1. To view Emulex driver image handle information, at the shell prompt type:
fs0:\> drivers
A list of drivers is displayed (Figure 23 on page 38.)
2. Enter this command, followed by the driver image handle for the SCSI Pass Thru driver. For
example, C2 (your driver image handle may be different:
drvdiag-s c2
3. Press <Enter>. Information similar to Figure 93 is displayed, listing all adapters in the system:
Figure 93: Adapter Listing screen
Boot Code User Manual
Page 91
4. Use the up/down arrows and to select (highlight) an adapter and press <Enter>. The Diagnostic
Main menu is displayed:
Figure 94: Diagnostic Main menu
Run Loopback Tests
Test patterns for the PCI Loopback, Internal Loopback and External Loopback tests may be selected to
be run individually. Test indicators are Passed, Failed or Unsupported. Unsupported is displayed if the
test is not supported. For example, if an unsupported link speed is selected, a test is not performed at
the unsupported speed, and a status of Unsupported is displayed in front of the link speed on the link
speed menu.
To run a single test:
1. Access the Diagnostic Main menu (Figure 94) and select <1>. Diagnostic Tests. Press <Enter>.
The Diagnostic Tests menu is displayed:
Figure 95: Diagnostic Tests menu
2. Use the up/down arrow keys to highlight a test and press the space bar. That test is checked.
3. Press <F3>. The selected test runs.
To run multiple tests from the Diagnostic Tests menu:
1. On the Diagnostic Main menu (Figure 94), select <1>. Diagnostic Tests. Press <Enter>. The
Diagnostic Tests menu is displayed (Figure 95).
2. Use the up/down arrow keys to highlight tests and press the space bar to select or deselect.
3. Highlight <5>. Execute Selected Diagnostics. Press <Enter>. The selected tests run.
Boot Code User Manual
Page 92
To run individual Loopback test patterns:
1. Access the Diagnostic Main menu (Figure 94) and select <1>. Diagnostic Tests. Press <Enter>.
The Diagnostic Tests menu is displayed (Figure 95).
2. Use the up/down arrow keys to highlight a test. Press <Enter>.
3. Another menu is displayed. Select one or more individual patterns for the diagnostic test. For
example:
Figure 96: PCI Loopback Test Data Patterns menu
4. Press <Esc> one or more times as necessary to display the Diagnostic Tests menu.
5. Use the up/down arrow keys to highlight <5>. Execute Selected Diagnostic. and press <Enter>.
The selected tests run. After tests are performed, the status of each selected pattern is
displayed. For example:
Figure 97: PCI Loopback Test Data Pattern Status menu
Diagnostic Test Specifics
PCI Loopback Test
The PCI loopback test executes the RunBuiDiag64 mailbox command once for each test pattern. The
data length for each test is 128 bytes. A loopback connector is required for this test.
Internal and External Loopback Tests
Internal and external loopback tests execute the ElsEcho FCP command to send 124 bytes from the
transmit to the receive side of an FC port. A loopback connector is required for the external loopback
test.
Boot Code User Manual
Page 93
Internal and external loopback test menus have two configurations (data patterns and link speeds). The
data test patterns are the same as the PCI Loopback patterns (Figure 96).
Figure 98: Internal Loopback Test Configuration menu
Internal and external loopback link speeds have the same three options. Link speed defaults to one Gb
for both internal and external tests.
Figure 99: Internal Loopback Link Speeds menu
As tests are performed a screen similar to the following is displayed:
Figure 100: Internal Loopback Test progress screen
Boot Code User Manual
Page 94
Test results are displayed on the Test Data Pattern menu and saved to results log.
Figure 101: Internal Loopback Test Data Pattern results screen
Run Adapter Diagnostic Tests
The Adapter Diagnostic Tests include adapter restart, display of some configuration parameters, results
of linkup and target login. These actions cannot be selected individually. If any one of these tests fail,
Failed is displayed on the Diagnostic Test menu (Figure 95).
When you run adapter diagnostic tests, a screen similar to the following is displayed:
Figure 102: Running Adapter Diagnostic Tests In progress screen
If all tests pass, “Passed” is displayed on the Diagnostic Utility menu. For example:
Figure 103: Select Diagnostic Tests - Adapter Diagnostic Tests Passed screen
If any one of these tests fail, Failed is displayed on the Select Diagnostic Tests screen.
Boot Code User Manual
Page 95
View Adapter Data
To view data for a specific adapter:
1. Access the Diagnostic Main menu (Figure 94) and select <2>. Adapter Data. Press <Enter>.
The Adapter Data menu is displayed:
Figure 104: Adapter Data menu
Examples
Figure 105: Configuration Information screen
Figure 106: Firmware Information screen
Boot Code User Manual
Page 96
Figure 107: Vendor Product Data (VPD) screen
Figure 108: Controller Information screen
Figure 109: Service Level Interface Memory (SLIM) Information screen
Boot Code User Manual
Page 97
Figure 110: Peripheral Component Interconnect (PCI) Information screen
Note: View up to 256 bytes of PCI configuration space using paging. 128 bytes are
displayed at a time. Use the <F2> key to select byte, word, or dword display.
View Device Data
The device data is stored in the results log and is displayed on the console in ASCII and hex format.
To view data for attached block devices:
1. Access the Diagnostic Main menu (Figure 94) and select <3>. Device Data. Press <Enter>. The
Device Data Target Selection menu is displayed.
Note: Up to eight devices are displayed per page. If there are more than eight devices, use
the left/right arrow keys to scroll to the previous/next page.
Figure 111: Device Data Target Selection menu
2. Use the up/down arrow keys to highlight an attached block I/O device and press <Enter>. A
screen similar to Figure 112 is displayed.
Figure 112: Device Data screen
Boot Code User Manual
Page 98
3. To read the individual block from the media, specify the logical block address (LBA) and press
<Enter>. 256 bytes of sector data display per screen. Use the left/right arrow keys to scroll
through the data. Information similar to the following is displayed:
Figure 113: LBA Data screen
View the Results Log
The results log stores diagnostic test results, adapter diagnostics and device data. The results log stores
up to 8k of data (about 1,600 rows). Once the buffer is full, no more data is logged.
Note: There is no reminder when the buffer is full.
To view the results log:
1. Access the Diagnostic Main menu (Figure 94) and select <4>. View Results Log. Press
<Enter>. A screen similar to the following is displayed:
Figure 114: Results Log screen
To scroll through the results log:
•
Use the up/down arrow keys to scroll one row at a time.
•
Use the Home/End keys to scroll one page at a time.
Note: The Page Up and Page Dn keys do not navigate the results log.
Boot Code User Manual
Page 99
To view help on the results log screen.
1. Press <F1>. Help text is displayed.
2. Press <Esc>. Log results are displayed.
To save results log information:
1. View the results log.
2. Press <F3>. The Log to File screen is displayed.
Figure 115: Log to File screen
3. Enter the directory path and press <Enter>. The Filename field is displayed.
4. Enter the filename and press <Enter>.
Note: The filename must be unique.
Once the file is successfully saved, a screen similar to the following is displayed:
Figure 116: Successful Log to File screen
To clear the log result, press <F2>. The results on the diagnostic tests are erased, and a new time and
date is written to the log.
Boot Code User Manual
Page 100